Blog

  • How to Make a Huge Frame for Cheap

    How to Make a Huge Frame for Cheap

    Have a large picture to frame, but don’t want to spend a fortune on the frame? No problem! This oversized DIY frame will only set you back about $25. You won’t need extensive woodworking skills to make this DIY large picture frame either! 

    I tried to come up with some eloquent title for this project, but really all that just fit it perfectly was what you see above. So I went with it because that’s what it is – a huge a** frame that was way cheaper to make than buying one.

    When I did our master bedroom makeover, I already had this large print poster palm art on hand which was what kinda became the jumping off point for the bedroom’s design. The print was huge – 40″ x 54″. What I didn’t have on hand was a frame for it. I searched around online for one big enough to hold it and was met by price tags starting at $150 – and that price tag was for plastic frames. Our version however, will cost about $25 to make.

    DIY Frame - Oversized Palm Art Print in frame - Rain on a Tin Roof

    DIY Large Picture Frame

    This post contains affiliate links for your shopping convenience. Click here to read my full disclosure policy.

    Tools and Supplies Needed:

    Steps

    Step 1. 

    If you haven’t already done so, cut your piece of plywood down to the size of your art print. We did this by laying the print on top of the plywood, tracing around it with a pencil and then cutting the piece of wood along the traced line with a circular saw.

    Step 2.

    Lay your plywood on the ground. Cut two pieces of 1″ x 2″ to the length of the plywood. You can cut these pieces with either the miter or circular saw – they just need to be straight edges. These will be two of your vertical pieces on the frame.

    DIY Large Picture Frame - cutting the pieces for the frame - Rain on a Tin Roof

    After you cut the long vertical pieces, lay them around the plywood. Measure the width from end to end of the long piece of 1″ x 2″ and cut two more pieces of 1″ x 2″ to that size. These newly cut pieces will be your horizontal pieces. After cutting, lay all the pieces out around the plywood and make sure they snugly fit around it.

    Step 3.

    While the 1″ x 2″ pieces are still around the plywood, nail them together at the corners of the wood with a nail gun.

    DIY Picture Frame - Assembling the frame edges - Rain on a Tin Roof

    Optional: You can also use wood glue on the edges along with the nails for a super solid joint.

    Step 4.

    Measure the long pieces of 1″ x 2″ from end to end and cut pieces of the lattice molding to that size on a 45 degree angle – you’ll have to use the miter saw for this.

    How to Make a Large Picture Frame - attaching the front edges - Rain on a Tin Roof

    Lay the pieces out along the top of the 1″ x 2″ frame with the long edge of the lattice molding flush against the outside of the 1″ x 2″. Measure the distance between each piece of vertical lattice molding you just cut from long end to long end. Cut two pieces of lattice molding to this measurement at a 45 degree angle. Lay all the pieces out along the 1″  x  2″ pieces and make sure all fit well – all the lattice molding should be flush against the outside of the 1″ x 2″ frame.

    Step 5. 

    Using the nail gun, nail the lattice molding against the 1″ x 2″ frame making sure the molding is flush against the outside edges of the 1″ x 2″.

    Optional: Again, you can use nail glue here as well if you wish.

    Step 6.

    Fill any nail holes with spackling or wood putty and paint or stain the frame. You don’t need to paint the plywood – only the actual frame. I used semi-gloss black spray paint on mine.

    Step 7.

    Mount your large art print or picture to the plywood with double sided tape, then lay it face down in the frame. The lattice molding you cut should be face-down on the floor.

    Step 8.

    Screw four corner braces along the edges of the frame. You will only need to screw the braces once to the 1″ x 2″ part of the frame as shown below.

    How to Make a Poster Frame - attaching the back brackets - Rain on a Tin Roof

    The braces should be installed to push the plywood up against the lattice molding.

    Step 9.

    Screw eye hooks into the back inside of the frame and run hanging wire through them.

    DIY Large Wood Picture Frame - Attaching the back hangers - Rain on a Tin Roof

    Hang it on the wall!

    DIY Large Picture Frame - Palm Art Print on Pink Wall - Rain on a Tin Roof

    Headboard / Bedding (similar) / Palm Print / Curtains / Light Fixture / Wall Color

    If your wood frame is as big as mine, I would try to find a stud to hang it on or use a drywall anchor – these are my go-to wall anchors.

    DIY Large Poster Print Frame - oversized palm art on pink wall - Rain on a Tin Roof

    Banana Leaf Pillows / Leopard Print Pillow

    Not too shabby for a $25 wood picture frame! I’ll take it over the $150 one any day!

    Have you made your own DIY picture frame before?

    Looking for more low-budget easy DIY projects and decorating ideas? 

    DIY Lucite Frame – Here’s an easy DIY frame to make for all you lucite lovers.

    How to Hang Heavy Art – my go-to easy, but solid way to hang heavy pieces of home decor like art and mirrors.

    Sources for Affordable Wall Art – some of my go-to places for great art at great prices.

    And you can also see the entire bedroom makeover featured in this post.

    Want to come back to this post later? Pin the image below!

    Huge DIY Frame on a Budget - Oversized Poster in Frame - Rain on a Tin Roof
    blog-signature-summer-15
    How to Make a Huge Frame on a Budget - Rain on a Tin Roof

    SaveSave

  • 6 Decorating Ideas to Distract from Popcorn Ceilings

    6 Decorating Ideas to Distract from Popcorn Ceilings

    Popcorn ceilings don’t necessarily bother me too much. I mean they aren’t the prettiest thing in the world, but they’ve never been something I’ve stomped my feet about and lost sleep over. Also, they are not fun to remove. I tried it. I learned from it.

    And I’ll never do it again.

    When we got the 70’s Landing Pad, it of course had popcorn ceilings. There weren’t many homes built during that era that didn’t sport the acne of the ceiling.

    Yes, I just referred to popcorn ceilings as acne. No, I have no idea how I come up with this stuff.

    Anywho, I did want to have the popcorn ceilings removed at the new place if it was in the budget. Not because they bothered me so much, but mainly because I really wanted to paint the ceiling in colors and even a few patterns here and there.

    I had no intention of removing the popcorn ceilings myself. As I said, been there, done that, had the gross white snot to prove it. I got a few estimates for the job and shockingly discovered that it was in fact in the budget to remove the popcorn ceilings for about $2000. Sign. Me. Up. I was confident this would be the best $2K I would ever spend.

    And then the contractors came and started to scrape and realized it had been painted over multiple times and was going to take three times as long to remove and therefore the price would now be around $6K.

    There are a lot of things I could buy with $6000. So, I called it off. The popcorn ceilings would stay.

    And guess what?

    I barely notice them anymore. 

    Here are my six best decorating ideas for distracting from those popcorn ceilings and making them practically disappear….

    6 Decorating Ideas to Distract from Popcorn Ceilings

    This post contains affiliate links for your shopping convenience. Click here to read my full disclosure policy.

    1. Lighting

    Don’t buy flush-mount lighting that focuses the light upwards. Instead, try to use flush or semi-flush mounts that direct the light downward. Chandeliers and pendant lights are an even better choice when you can use them. (I have lots of great affordable lighting options here by the way.)

    If you have popcorn ceilings and don't want to go to the trouble of removing them, this article is for you! It gives great ideas for decorating to keep the eye away from the popcorn ceiling! 6 Decorating Ideas to Distract from Popcorn Ceilings

    Bedding / Curtains / Palm Art Print / Leopard Print Pillow / Banana Leaf Pillows / Headboard / Pink Wall Color

    The light fixture in our master bedroom is a great example. It’s gorgeous, hangs down from the ceiling, not up close to it, and focuses the light downward.

    If you have popcorn ceilings and don't want to go to the trouble of removing them, this article is for you! It gives great ideas for decorating to keep the eye away from the popcorn ceiling! 6 Decorating Ideas to Distract from Popcorn Ceilings

    Rug / Floor Lamp / Ghost Chairs / Green Velvet Pillows / Lion Art / Banana Leaves Pillows / Leopard Print Pillows / Black Wall Color

    You can also use this same trick with floor lamps. The brass floor lamp in my living room arches over and down drawing the eye downward.

    If you have popcorn ceilings and don't want to go to the trouble of removing them, this article is for you! It gives great ideas for decorating to keep the eye away from the popcorn ceiling! 6 Decorating Ideas to Distract from Popcorn Ceilings

    Gallery Wall / Buffet / Sconce / David Bust (similar ones) / Brass Unicorn (similar ones) 

    Use sconces where you can. These plug-in wall sconces used to flank our television in our old living room. They helped to keep the attention on the wall and not upward on the ceiling.

    2. Huge Art

    Nothing more easily grabs the eye (and distracts from popcorn ceilings) than a huge piece of stunning art.

    If you have popcorn ceilings and don't want to go to the trouble of removing them, this article is for you! It gives great ideas for decorating to keep the eye away from the popcorn ceiling! 6 Decorating Ideas to Distract from Popcorn Ceilings

    Lion Print

    I’ve done this in three places at the 70’s Landing Pad and have not been disappointed yet. I placed this huge lion print above the bar in our living room. Not only is it gorgeous, but it commands attention.

    If you have popcorn ceilings and don't want to go to the trouble of removing them, this article is for you! It gives great ideas for decorating to keep the eye away from the popcorn ceiling! 6 Decorating Ideas to Distract from Popcorn Ceilings

    Ivy Art Print / Glass Top Dining Table (similar) / Dining Chairs (similar) / More of the Dining Room

    The same is true of this abstract art in the dining room. I also used the vintage palm print in the photo of our bedroom you saw above as a focal point in our bedroom.

    All of those prints (and many of my other favorite art pieces) came from Minted. They have a huge art selection with something for everyone. I also have other sources for affordable art here.

    3. Paint

    Paint the ceilings. Paint the walls.

    First off, if you are ready to just finally embrace those popcorn ceilings and they are a bit dingy and even stained in some places, please for the love of all things good in the world, just paint them. Yes, it does mean that if you want to remove them at some point it will be more difficult, but it will look so much better. I promise. A good coat of white ceiling paint will do the trick. Chances are that if you’ve never painted your popcorn ceilings or don’t know if they were painted, that they are more dirtier than you think.

    If you have popcorn ceilings and don't want to go to the trouble of removing them, this article is for you! It gives great ideas for decorating to keep the eye away from the popcorn ceiling! 6 Decorating Ideas to Distract from Popcorn Ceilings

    Case in point: the ceilings of our master bedroom. I had no idea how beige-y and gross they were until I went to touch up a few spots I had hit on the ceiling with the pink paint. There was no touch up for that! They had to be completely painted!

    If you really want your popcorn ceilings to blend in with everything else, paint your ceilings and walls white. The eye will be tricked into barely seeing the popcorn at all. If you aren’t ready to go all white with your walls, then perhaps paint the upper half or third of the walls white with another color below that. That would be similar to what I did in our old guest room.

    4. Crown Molding

    I know it may seem like this one would draw the eye to the ceiling. I used to think so too. Here’s the thing though and it may not be this way for everyone, but here it is. When my mother-in-law had crown installed in their house, she said that afterward she didn’t notice the popcorn ceilings as much. I thought about it, looked at it and then when she had it installed in our old house / their soon to be new house, I realized she was right. I don’t know what it is, maybe the angle of the molding or just the fact that it’s something pretty at the top of the wall, but it does seem to distract from the popcorn. I think if you went with even a bigger molding and added a smaller trim piece below the crown on the wall and painted all that white or whatever your trim color is, it would distract from your popcorn ceilings even more.

    5. Rugs

    Don’t want them to look up? Make them look down.

    If you have popcorn ceilings and don't want to go to the trouble of removing them, this article is for you! It gives great ideas for decorating to keep the eye away from the popcorn ceiling! 6 Decorating Ideas to Distract from Popcorn Ceilings

    Rug / Glass Dining Table (similar) / Cantilever Chairs (similar)

    Bring in boldly colored or patterned rugs to draw the eye down and not up. Works every time.

    If you have popcorn ceilings and don't want to go to the trouble of removing them, this article is for you! It gives great ideas for decorating to keep the eye away from the popcorn ceiling! 6 Decorating Ideas to Distract from Popcorn Ceilings

    Rug / Wall Color / Bedding / Horse Sheets (similar) / Tassel Pillow / Custom Silhouette Art / Yellow Table Color / Cowgirl Lampshade / More of My Daughter’s Room

    Personally, I’m a fan of pretty rugs anywhere. It’s just a bonus they turn those eyes away from the ceiling.

    6. Window Treatments

    Another way to distract from popcorn ceilings is with your window treatments. Go for long panels that go all the way to the floor. They don’t have to puddle, but can just barely touch the floor. This will once more help to draw the eye downward. Don’t opt for valances for sure – this will keep the eye closer to the ceiling.

    If you have popcorn ceilings and don't want to go to the trouble of removing them, this article is for you! It gives great ideas for decorating to keep the eye away from the popcorn ceiling! 6 Decorating Ideas to Distract from Popcorn Ceilings

    Curtains / More of My Office

    If you love color or bold prints, even better. Those things will distract the eye even more.

    So will you be keeping your popcorn ceilings and decorating to distract from them? Any other ideas you have to offer to distract from popcorn ceilings? 

    More helpful home decorating tips and tricks…

    How to Make a Moodboard – make design boards for your next room makeover easily using Picmonkey.

    How to Keep Rugs from Sliding– locks them in place!

    How to Accessorize a Space Without Over-Accessorizing– it can be tricky, but here are some tips to help!

    How to Decorate with Inherited Furniture Without Making Your Grandparents Roll Over in Their Graves– I know, it’s hard, but they’d want you to make it yours….

    Want to remember these popcorn ceiling decorating tips for later? Pin the image below!

    Decorating Ideas for How to Hide Popcorn Ceilings | Popcorn Ceiling Makeover | Popcorn Ceiling Cover | Popcorn Ceiling Ideas
    blog-signature-summer-15

    SaveSave

  • DIY Green Carpet Covered Wall

    DIY Green Carpet Covered Wall

    This wall has been in the making for over a year now. I had the idea to cover a wall with AstroTurf quite a while back, but just couldn’t find the perfect wall to do it to.

    When I started dreaming up the design plan for the master bedroom makeover at the 70’s Landing Pad, I realized that an astroturf wall might just work perfectly in the space. I then looked around and realized that our closet wall would also be the perfect candidate for a little carpet treatment.

    What a great idea! The carpet brings a whole other element to the space! Easy and cheap to do as well! DIY Green Carpet Covered Wall | Palm Beach Design Style | Palm Springs Design Style | Astroturf Covered Wall

    The carpet isn’t actually true AstroTurf. The real astroturf was just too shiny for the space, but this green outdoor rug was the perfect shade. It helps to create that vintage Palm Beach vibe along with the pink and black.

    I used two rugs for the wall and also bought moldings for the ceiling and around the door. The total for the whole project is roughly $50. And it was so easy. 

    DIY Carpet Covered Wall

    Affiliate links may be contained in this post.

    Tools & Supplies

    • Green Outdoor Rugs (I used two of these for a wall that was about 10′ feet wide x 8′ high. I’m not including the double closet doors in that measurement.)
    • Staple Gun (a battery powered one will make the job so much easier.)
    • Green Sharpie Paint Pen
    • Scissors
    • Moldings for around the door trim and ceiling (these are optional, but really give the project a finished look. Mine came from Home Depot.)

    Steps

    Step 1. 

    Choose one edge of your wall to start on. Unroll the carpet and first staple it to the wall at the top where it meets the ceiling. Align the edges of the carpet with the top of the wall and one of the side edges of the wall.

    What a great idea! The carpet brings a whole other element to the space! Easy and cheap to do as well! DIY Green Carpet Covered Wall | Palm Beach Design Style | Palm Springs Design Style | Astroturf Covered Wall

    You want all of the staples to be flush in the wall. If you have any that stick out, hammer them in. This was one reason why I used my battery powered stapler because it gets them all the way in the wall without hammering.

    Step 2. 

    Pull tightly on the carpet at the bottom and staple it down right along the top of baseboard in a couple of places. Trim the carpet as needed and continue to staple it down along the edge. Don’t go staple crazy. I found that one staple about every 9 or 10 inches was sufficient.

    Step 3.

    Staple the carpet down along one side edge of the wall. Once more – don’t go staple crazy.

    Step 4.

    Pull the carpet tightly against the one remaining edge that needs to be stapled down. Staple it in a few places then trim with scissors, pull tightly and staple.

    Step 5. 

    When one rug is up, continue covering the wall with another one if needed.

    Step 6.

    Use a green Sharpie paint pen to cover the staples along the edges of the carpet. You can also use trim as I did to cover them and give the wall a polished look.

    What a great idea! The carpet brings a whole other element to the space! Easy and cheap to do as well! DIY Green Carpet Covered Wall | Palm Beach Design Style | Palm Springs Design Style | Astroturf Covered Wall

    What a great idea! The carpet brings a whole other element to the space! Easy and cheap to do as well! DIY Green Carpet Covered Wall | Palm Beach Design Style | Palm Springs Design Style | Astroturf Covered Wall

    Closet Door Medallions / Chair / Leopard Print Pillow / Elephant Table (similar ones)

    I had one small place above the closet that I had to cover with a scrap of rug. I just stapled it up and covered the staples with the paint pen.

    What a great idea! The carpet brings a whole other element to the space! Easy and cheap to do as well! DIY Green Carpet Covered Wall | Palm Beach Design Style | Palm Springs Design Style | Astroturf Covered Wall

    Closet Door Medallions / Door Knobs / Bamboo Lamp (similar)

    I love the extra texture and element this wall brings to the space.

    What a great idea! The carpet brings a whole other element to the space! Easy and cheap to do as well! DIY Green Carpet Covered Wall | Palm Beach Design Style | Palm Springs Design Style | Astroturf Covered Wall

    Bamboo Lamp (similar) / Sunday Morning Print (similar) / Jewelry Box (similar)

    Ok, what do you think? Am I crazy for covering a wall with carpet?

    You can see the rest of the master bedroom makeover here.

    blog-signature-summer-15 pin-this-post-2 DIY Carpet Covered Wall | Accent Wall Ideas | DIY Feature Wall Ideas | Easy DIY Accent Wall | Astroturf Covered Wall SaveSaveSaveSaveSaveSaveSaveSaveSaveSaveSaveSaveSaveSaveSaveSaveSaveSave

  • Our DIY Hollywood Regency Headboard and New Mattress

    Our DIY Hollywood Regency Headboard and New Mattress

    So you’re ready to make your own headboard? Not just any old headboard, but one with serious style – like a Hollywood Regency headboard? You’re in the right place! This black velvet headboard will make you swoon and it’s totally DIYable.

    I have never been so stressed about a project before. Never, y’all. I swore I was not making a new headboard for the master bedroom at the 70’s Landing Pad myself. I even found some great options that were less than $300, but as I kept coming back and looking at them, they just didn’t have that “wow” factor – they didn’t make a statement.

    And we all know I prefer to make a statement in both decorating and life in general.

    So I ate my words (not for the first time) and made the king sized headboard for our bedroom.

    Black Velvet Hollywood Regency Headboard

    Our headboard wasn’t necessarily cheap, but it was significantly cheaper than if we would have purchased what I really wanted brand new. We have about $250 in the headboard, but would have easily spent $600, probably more, if I would have bought one similar to our DIY version new. This headboard is made of panels that all get screwed together in the end. The build is really pretty easy. The hardest part for me and where I stressed the most was the upholstery and that was probably because I’m such a perfectionist and wanted super smooth edges which just won’t happen when it’s not a professional upholstery job. In the end, you can’t even see the imperfections that much unless you look closely. Of course, I eyeball them constantly though because I know exactly where they are. #storyofmylife

    DIY Hollywood Regency Headboard

    This post contains affiliate links for your shopping convenience. Click here to read my full disclosure policy.

    Tools and Supplies Needed:

    *Please note that all the measurements and amounts are for a king size headboard that is approximately 85″ wide when assembled. 

    Steps

    Step 1. 

    Cut a panel of wood that is 16 3/8″ wide x 4 1/2′ long from the 4′ x 8′ sheet of plywood using a circular saw.

    DIY Retro Style Headboard
    This is an EASY DIY headboard that even beginning DIYers can make! Switch up the upholstery to your style! DIY Hollywood Regency Headboard | DIY Velvet Headboard | Black Velvet Headboard | Scalloped Headboard | Retro Headboard | Vintage Style Headboard | Palm Beach Inspired Bedroom and Headboard

    Step 2. 

    This is an EASY DIY headboard that even beginning DIYers can make! Switch up the upholstery to your style! DIY Hollywood Regency Headboard | DIY Velvet Headboard | Black Velvet Headboard | Scalloped Headboard | Retro Headboard | Vintage Style Headboard | Palm Beach Inspired Bedroom and Headboard

    Find something round that will nicely fit into the width of the plywood panel and will allow you to create a semi-circle. 

    We ended up using a footstool. You could also use a lampshade, a large bowl, basically anything round that will give you a curve. Once you find something, place it on one end of the wood panel and trace it as shown above.

    Step 3. 

    Using a jigsaw, cut along the traced line.

    This is an EASY DIY headboard that even beginning DIYers can make! Switch up the upholstery to your style! DIY Hollywood Regency Headboard | DIY Velvet Headboard | Black Velvet Headboard | Scalloped Headboard | Retro Headboard | Vintage Style Headboard | Palm Beach Inspired Bedroom and Headboard

    Step 4.

    You now have one of your headboard panels. Trace the shape of this panel onto the rest of your wood and cut out the remaining four panels.

    This is an EASY DIY headboard that even beginning DIYers can make! Switch up the upholstery to your style! DIY Hollywood Regency Headboard | DIY Velvet Headboard | Black Velvet Headboard | Scalloped Headboard | Retro Headboard | Vintage Style Headboard | Palm Beach Inspired Bedroom and Headboard

    The curve of all your panels will be the same, however, only the end panels need to be 4 1/2′ long. The remaining three panels in the middle of the headboard need to be 4′ long so that you have enough plywood.

    Step 5. 

    Roll out the Poly Foam and place your wood panels on top of it.

    This is an EASY DIY headboard that even beginning DIYers can make! Switch up the upholstery to your style! DIY Hollywood Regency Headboard | DIY Velvet Headboard | Black Velvet Headboard | Scalloped Headboard | Retro Headboard | Vintage Style Headboard | Palm Beach Inspired Bedroom and Headboard

    Trace the shape of the wood panels onto the foam with a black marker. All but two of the panels will fully fit on the foam strips. For the remaining two panels, lay them out as shown below.

    This is an EASY DIY headboard that even beginning DIYers can make! Switch up the upholstery to your style! DIY Hollywood Regency Headboard | DIY Velvet Headboard | Black Velvet Headboard | Scalloped Headboard | Retro Headboard | Vintage Style Headboard | Palm Beach Inspired Bedroom and Headboard

    Trace them and use the scrap from the remaining foam to fill in on the bottom of the panel.

    Use an electric knife to cut out the foam shapes.

    P.S. This was the first project using foam where I finally bought an electric knife to cut the foam. Every other time I used a box cutter which was the biggest pain in the you know what. Trust me, the  $14 investment for the electric knife is so worth it. I am mad at myself for not buying one sooner.

    Step 6. 

    Lay out all your wood panels with the foam on top of them, then cover each panel with two layers of batting.

    This is an EASY DIY headboard that even beginning DIYers can make! Switch up the upholstery to your style! DIY Hollywood Regency Headboard | DIY Velvet Headboard | Black Velvet Headboard | Scalloped Headboard | Retro Headboard | Vintage Style Headboard | Palm Beach Inspired Bedroom and Headboard

    Loosely staple the batting around the back edges of the panel.

    Step 7. 

    Upholster each panel with your upholstery material. I used black velvet from Hobby Lobby. For me, the toughest part was covering the panels with velvet. I found that if I first stapled the velvet to the back somewhat loose, then came back and tightened it up with a staple while smoothing it from the front, it worked best. Also, this was another case when it was so worth it to have the electric stapler. Those staples went in fast and flush.

    Step 8.

    After all the panels are upholstered, lay them face down on the floor. Move them around in the shape you want the panels to be. I opted for our panels to work it’s way up in the middle.

    This is an EASY DIY headboard that even beginning DIYers can make! Switch up the upholstery to your style! DIY Hollywood Regency Headboard | DIY Velvet Headboard | Black Velvet Headboard | Scalloped Headboard | Retro Headboard | Vintage Style Headboard | Palm Beach Inspired Bedroom and Headboard

    The two end panels are at the same height, the next two are at the same height, but higher than the two end ones and the middle panel is higher than them all. You can keep them all at the same height too if you prefer. The only thing you want to make sure of is that the bottom of the middle panel doesn’t go higher than your mattress.

    After you have the panels in position, attach the two 1″ x 2″ x 8′ furring strips across the back as shown below. You will have to cut them down some. This part is best done with two people. While one is attaching the furring strips, the other should be pushing the panels together tightly.

    Step 9.

    Once you’re done attaching the furring strips, you’re pretty much finished with the headboard. The only thing left to do is attach it to your bed frame – which we decided was optional and I’ll tell you about in just a minute.

    The mattress that comes in a box: Tuft & Needle King Size Mattress Review

    Mattress Details

    Disclosure: Tuft & Needle provided me with a new mattress, however all opinions are 100% mine.

    The mattress for our new bed came from Tuft & Needle. We didn’t have room for a king size bed at our Beloved Foreclosure, but did at the 70’s Landing Pad, so we jumped on that because both Grunt Labor and I have always wanted one. Also, it helps to have all that extra space when the Circus comes and gets in bed with us at 7 a.m. in the morning and we aren’t ready to get up just yet. 

    The mattress that comes in a box: Tuft & Needle King Size Mattress Review

    Tuft & Needle mattresses come straight to your doorstep – in a box. #mindblown Yes, that is a king size mattress in that box.

    Also, my Vanna White is hotter than your Vanna White. 😉

    The mattress that comes in a box: Tuft & Needle King Size Mattress Review

    All you do is just take the mattress out of the box and remove the plastic from it.

    The mattress that comes in a box: Tuft & Needle King Size Mattress Review

    You will immediately see it begin to expand as you do this.

    The mattress that comes in a box: Tuft & Needle King Size Mattress Review

    Lay it out on your bed frame or box springs and it will continue to fully expand.

    Tuft & Needle mattresses are made of adaptive foam in the top layer and a support layer on the bottom which is the foundation so to speak of the mattress. The adaptive foam basically conforms to anyone’s weight or size to give you the ideal amount of support. In non-fancy words, it’s really comfortable.

    The mattress that comes in a box: Tuft & Needle King Size Mattress Review

    To me, the mattress doesn’t “give” as much as our old pillow top one did, but instead it just kind of contours to your body. We’ve been sleeping on it for a little over a month now and really love it. It did take a few nights to get used to the difference from our old mattress, but now we’re out like lights every night.

    Since we were starting from scratch with this bed and headboard, we bought a SmartBase mattress foundation to put our Tuft & Needle mattress on top of.

    Mattress Foundation

    The foundation puts the mattress at standard height, but it has much more storage space under the bed. You can also use a regular box springs, slatted bed frame, etc. with Tuft & Needle mattresses.

    Back to the headboard, you can use nuts and bolts to attach it the bed frame, however after we got it in place and pushed the bed frame and mattress up against it, it stayed in place and has ever since. For now, we are leaving it like that, but may attach it to the bed frame at some point.

    This is an EASY DIY headboard that even beginning DIYers can make! Switch up the upholstery to your style! DIY Hollywood Regency Headboard | DIY Velvet Headboard | Black Velvet Headboard | Scalloped Headboard | Retro Headboard | Vintage Style Headboard | Palm Beach Inspired Bedroom and Headboard

    Apparently, the new bed is so good that Bill set up camp in our bedroom while we were away on vacation.

    This is an EASY DIY headboard that even beginning DIYers can make! Switch up the upholstery to your style! DIY Hollywood Regency Headboard | DIY Velvet Headboard | Black Velvet Headboard | Scalloped Headboard | Retro Headboard | Vintage Style Headboard | Palm Beach Inspired Bedroom and Headboard

    According to him, he went to lay down for just a minute before he was going to clean the house up on the day we got home, but fell asleep. I’ll let you guess how clean the house was when we got back… #notsomuch

    You can see more of our master bedroom here.

    This master bedroom makeover is a MUST-SEE! Who knew pink could look so good?! It's an eclectic vibe of old Hollywood glamour meets Palm Beach decorating styles! The 70's Landing Pad Home Tour, Part 2: The Master Bedroom | Palm Tree Art | DIY Scalloped Headboard

    Looking for more DIY home projects?

    How to Make a Huge Frame for Cheap – like the one you see in the picture above!

    How to Turn a Side Table into a Bench – easy and the possibilities are endless!

    Want to remember this DIY headboard for later? Just pin the image below!


    DIY Upholstered Headboard | DIY Headboard Ideas | Headboard DIY | Easy DIY Headboard | Hollywood Regency Headboard | DIY Velvet Headboard
    blog-signature-summer-15

    SaveSave

  • How to Find the Best Contractor for Your Renovation + Our Contractor Nightmare

    How to Find the Best Contractor for Your Renovation + Our Contractor Nightmare

    Disclosure: This post is sponsored by HomeAdvisor. However, all opinions and contractor nightmares are 100% mine. 

    If you have ever done a renovation, I think you will agree it is one of the most stressful things you will ever take on in your life. They are stressful, time consuming, messy and dirty. If you can make it through a renovation with your spouse, then chances are you must really love each other.

    Needless to say, the renovation at the 70’s Landing Pad was no walk in the park – not by a long shot. 

    There were many things we were able to take on ourselves. We installed a good portion of our flooring, did the hall bathroom remodel, of course we painted every wall, door and piece of trim, built a closet, painted the cabinets, etc. But then there were a few things we didn’t do ourselves – primarily drywall work and the master bathroom remodel. You know how much I despise drywall work, so I won’t go down that road again, but let’s talk about our master bathroom.

    When we bought the house, the master bathroom did not have a shower – only a jetted tub you had to climb to get into. The whole thing was just configured really oddly and it was not functional for us at all.

    The Bathroom Before - How to Choose the Right Contractor

    We wanted to get rid of that tub and replace it with a tiled shower, add a soaking tub elsewhere in the room, relocate the toilet, the doors, the vanity and a few other small things. All of that – specifically moving the plumbing, wiring, etc. was waaaaay outta our league. We knew we would have to hire someone to remodel the master bathroom. Since we hadn’t ran into this at the Beloved Foreclosure, almost everything there we had been able to do ourselves, we asked around for contractors that our friends had used.

    I called probably around 10 different contractors that came recommended by friends and their sources. I think I got calls back from maybe five of them and only four actually came out to look at the bathroom and then three only followed up with me on a price. One of those three only followed up with me on a price because I pestered the heck out of him. I just didn’t get it. If these people took the time to come out and look at it, then why in the world wouldn’t they call back with an estimate?! Was it a huge job? No. Was it a small job? No. This was a pretty good sized job that I thought someone would be interested in taking on.

    So when one of the contractors called me back with a price the next morning after he had been out that previous afternoon and it was a good price and he had came recommended by a friend, I figured he was my guy.

    We made the deal on December the 3rd. He said it would take roughly seven days to complete the job. Per the contract, he got a 1/4 of the payment up front, 1/4 of it when demo was done, 1/4 of it when tiling was complete and the rest when it was all finished.

    I scrambled around to make sure everything was here and ready for him to start as soon as he had finished demo. I picked out tile and fixtures and all that other stuff as quickly as I could. It was all here and ready to go.

    At the end of December, the bathroom looked like this:

    The Bathroom During - How to Choose the Right Contractor

    Ok, I thought, it’s December. It’s the holidays, people like to spend time with their families. He’ll get going after the new year.

    Wrong.

    This guy might come three days a week and work for 2-3 hours, four hours if I was lucky, when he was here. Now, we did ask him to do some other stuff around the house, but still he only worked for a couple hours a day, maybe a few days a week and never completed one single thing we asked him to do. He would start something, then move to something else. Mind you, he had already been paid for some of the work as well.

    This dragged on until the beginning of March. March, people! We had signed a contract at the beginning of December and he said he would be done in less than two weeks!

    And do you know what my bathroom looked like at the beginning of March?

    Exactly the same as that picture above with the exception of the toilet out and a few pieces of subfloor up and a little bit of drywall pulled off. None of the actual plumbing, electrical, not to mention tiling, etc. had taken place. At that point, we gave him a deadline (which, yes, we should have done long before) and said he had two weeks to finish everything or he was done. When we told him this, he decided he would work the following weekend. He came that Saturday, stayed for less than an hour and left. We fired him the same day.

    For someone who feels bad if she misses a deadline by 10 minutes and is constantly on the go doing something which is usually work related, this whole situation was just unbelievable to me.

    At that point, I turned to Bruce who I had found through HomeAdvisor to do some other work for me. He is the one who covered up and made new openings in the old master closet for the Circus’ playroom and also did lots of other drywall work for me around here. I told him the situation, asked if he wanted the job and if he could get me a price together. A day later he gave me the price and worked me into his schedule. (I was on a deadline because my master bedroom makeover with FrogTape had to be completed by the third week in April and I didn’t even have carpet in there yet because it couldn’t go in until the bathroom was finished.)

    Very valuable information - How to Find the Best Contractor for Your Renovation - Must read tips if you are considering a home renovation or remodel!

    Within days, he and his helper had the rest of the walls out and backer board installed and ready for tile.

    Very valuable information - How to Find the Best Contractor for Your Renovation - Must read tips if you are considering a home renovation or remodel!

    Two weeks later, he had the bathroom finished sans paint and trim, which we did to save a little money (or will do because I haven’t had a chance to finish it yet, thus why you haven’t seen the bathroom reveal yet). Had I went through HomeAdvisor and found Bruce first, this whole fiasco never would have happened.

    From all that, I learned quite a bit and here’s my take on finding a good contractor to actually get the job done:

    How to Find the Best Contractor for Your Renovation

    • Get multiple quotes.

    I used to work with a guy who I called Stan-the-Man. Stan-the-Man is a plethora of wisdom. Among other things, he told me “If it’s a $500 or less job, get three quotes. If it’s more than that, get five at least.” I think that’s pretty good advice when it comes to remodeling. You can use tools like HomeAdvisor’s True Cost Guide to find out the median price for home renovation and repair costs in your area. And also, if you have to pester a contractor to call you back with an estimate, he ain’t your guy. Call some others to come out. If you don’t have to be in a rush, then don’t be.

    • Get references. Read their reviews. Ask to see photos of their work.

    Yes, you should ask around to find out who your friends or family members have used, but don’t just trust that one reference. Use HomeAdvisor to find a local pro in your area and read their reviews from their customers. I’ve found most of the reviews to be a true reflection of the quality and dependability of the contractor. Ask them for references and ask to see photos of their work. Never be afraid to ask. You could even do all this over the phone before you have them come out to give you an estimate.

    • Just because it’s the lowest estimate doesn’t mean you should go with it.

    If you do use the True Cost Guide and someone comes in waaaaay under the median price, then there’s a good chance they won’t provide you with quality work or they may be desperate for money. Look more for bids right in the middle.

    • If the contractor is busy or booked up for a month, that probably means they are pretty good.

    My dad once took my brother and I around the entire state of Texas for vacation one year. (Yes, this does relate, just stick with me.) We had never been to Texas before so we had no idea what places were good to eat at and what wasn’t. So my dad said, “Look for the crowded places – that means they’re good.” Well just like with crowded restaurants being good, a busy contractor probably does quality work. It will most likely be worth your time to wait on them.

    • Do not pay any money up front.

    I still kick myself for ever paying that guy any money up front. I didn’t feel comfortable doing it, but I also hadn’t really worked with a contractor before so I thought that just might be how it was and I went with it. That being said, I do think that some contractors may ask for some money up front for materials if that is worked into their estimate. Once more, this is where you need to read their reviews and get references to know whether they are really going to use that money for materials or not. If you can, tell them to give you a list of what they need and you can go buy it. If you can’t transport it, most home improvement stores will deliver it for you for a fee. That fee might very well be worth it.

    • Determine a payment schedule.

    Once you pick your contractor, be sure to come up with a clear payment schedule. With Bruce, he doesn’t want any money until the job is done. Other contractors may not always be the same way though. I would say that if they are asking for a large portion of the payment up front, then they might be too shady for you.

    • Get it in writing.

    I do think that having your agreement written out with your contractor and signed is a good idea. Make sure it includes the payment schedule, the details of the project, estimated start and finish dates, proof of their insurance, and any materials you are responsible for purchasing for the job. For example, Bruce, our bathroom savior, included all the basic building materials in his quote – drywall, backer board, electrical wiring, etc. However, we were responsible for getting the tile, sinks, faucets, etc. which of course we already had on hand.

    • Check up on them during the work.

    If you’re living in the house where work is being completed this doesn’t really apply to you, but if you’re not, it does. Stop by the workplace at least 2-4 times a week. You don’t want to be in their way, but you do want them to know you’re around and keeping an eye on the work they are doing.

    • If they did good work, recommend them. Give honest reviews.

    After the job is done, give an honest review of the contractor’s work on HomeAdvisor. This will help others during their contractor hunt process and most likely, your contractor will see it and be grateful for the review – if they were good that is.

    Do you have any other tips to add for finding the best contractor for a renovation? Or perhaps horror stories to help me feel a little better about mine? 😉

    You might want to see this too…

    Three Things That Could Cut Your Electric Bill In Half

    Three Things That Could Cut Your Electric Bill In Half

    blog-signature-summer-15

    pin-this-post-2How to Find the Best Contractor | How to Work with a Contractor | Home Renovation Tips | Home Remodeling Tips, Tips for Finding a Contractor

    Disclosure: This post was sponsored by HomeAdvisor, however all opinions and contractor nightmares are 100% mine. 

  • Something Will Always Go Wrong: The Hall Bathroom Remodel

    Something Will Always Go Wrong: The Hall Bathroom Remodel

    Affiliate links may be contained in this post.

    As if the whole moving in process and everything breaking didn’t prove to you that the remodel at the 70’s Landing Pad was no piece of cake, then this bathroom remodel will. Wait, the master bathroom remodel will as well. So really, both bathroom remodels at the 70’s Landing Pad prove that during a renovation something will always go wrong. And it will most likely go wrong during the bathroom remodel.

    Because I’m not quite ready to relive the horror of our master bathroom remodel, and also because it’s not quite finished just yet, let’s just talk about the hall bathroom remodel. We started with this:

    The Hall Bathroom Remodel Before

    The Hall Bathroom Remodel Before

    This is where we ended up…

    Such an adorable bathroom for a kid, but also stylish for adults! The 70's Landing Pad Hall Bathroom Remodel | Gray Walls / Black and White Decor / Kid's Bathroom / Purple Bathroom Vanity / Gray Rectangle Floor Tiles

    Mind you, where we ended up is not where we meant to go. It’s not even close to the original design plan I whipped up with the exception of the shower curtain and that’s only because we already had that shower curtain and damn it if I was spending all this money on a renovation I was not going to spend another $20 on a shower curtain when I had a perfectly good one I could use.

    Sidenote: I’m still recovering from what I call the hemorrhaging of money due to the renovation. I’ll try to keep the rants at a minimum. Just know, the LaFevor family is in the full-on tightwad stage right now because Mama said the hemorrhaging must stop before all we have is a pretty house and nothing to eat in it. 

    If you remember from the original plans for this bathroom, we were going to have a black and white porcelain mosaic tile on the floor with black grout, a coral vanity and probably white walls. Well let me tell you one thing, never, let me reiterate the never part, attempt to do a white mosaic floor tile with black grout unless you are a professional or are paying a professional to do it. It will be next to impossible to keep your grout lines even and it will be so very obvious they aren’t even because of the black grout. So if you catch my drift, our tile floor looked awful. Like I saw the finished product and wanted to cry. Ok, maybe I even did.

    The good thing was that we had about $100 bucks in the floor. While I don’t toss around Ben Franklins like candy, in the grand scheme of the renovation, $100 was a small price to pay for a mistake. We talked to Nick’s dad about the floor (he’s like a renovating guru) and he said we could just go over our botched tile job with the new tile, so we picked out new tile and installed it right over the ugly tile.

    Hall Bath Retile

    And that just so happened to raise the floor level evenly with the hall, which kind of made it seem like we were supposed to make that mistake or something. So there’s that.

    It kind of sounds simple, but the actual task of picking out new tile after I had already designed a whole bathroom with one tile was very daunting. I essentially took up the entire tile aisle at the Home Depot one night laying out tiles and moving back and forth between the paint department to get paint chips to test against the tiles. Grunt Labor was so over me and my indecisiveness that night and I was just ready to crawl in a corner and say “I give up!”

    Such an adorable bathroom for a kid, but also stylish for adults! The 70's Landing Pad Hall Bathroom Remodel | Gray Walls / Black and White Decor / Kid's Bathroom / Purple Bathroom Vanity / Gray Rectangle Floor Tiles

    Floor Tile / Vanity Color / Wall Color

    Once I picked the gray floor tiles, we decided a purple vanity would work well with the tile. Since this is the Circus’ bathroom as well, we wanted it to be fun and colorful for her. I gave her three purple color choices and she chose the deep purple, Artistic License by Behr. With the bold purple vanity I knew the walls needed to be relatively neutral, so we opted for a medium toned gray, Iron Mountain by Behr.

    Such an adorable bathroom for a kid, but also stylish for adults! The 70's Landing Pad Hall Bathroom Remodel | Gray Walls / Kid's Bathroom / Purple Bathroom Vanity / Chrome Hardware

    Vanity Color / Beverly Knob / Beverly Pull

    The vanity is the original one that was in the bathroom. I just painted it and replaced the hardware and counter. I stuck with chrome hardware and fixtures throughout this bathroom for a classic, but polished feel. The cabinet knobs and pulls are from the Beverly collection and are part of the Beverly collection. They have a sleek, but touch of vintage feel to me and that goes perfectly with the bathroom and rest of the house. If you need cabinetry or furniture hardware, check D. Lawless first, they truly have a huge selection and the best prices online. They did provide me with the hardware for this cabinet, but honestly I would have bought from them anyway because their prices are so great.

    Such an adorable bathroom for a kid, but also stylish for adults! The 70's Landing Pad Hall Bathroom Remodel | Gray Walls / Black and White Decor / Kid's Bathroom / Purple Bathroom Vanity / Curvy Black Round Mirror / Retro Pendant Lights

    Yellow Hand Towel / Chrome Towel Holder / Soap Pump

    We replaced the vanity counter with white quartz. I was originally just going to get a new pre-fab counter from a big box store, but it was nearly $200 there and for $200 more, I could get quartz. Once more, in the grand scheme of things, that seemed like the right choice since it was prettier and even more durable. It’s also white, so it will stand the test of the Circus’ style changes. Yellow is also becoming one of the Circus’ favorite colors, so we popped in some of that with the hand towel.

    Such an adorable bathroom for a kid, but also stylish for adults! The 70's Landing Pad Hall Bathroom Remodel | Gray Walls / Black and White Decor / Kid's Bathroom / Delta Vero Chrome Faucet

    Faucet

    The faucet is also chrome and has a very modern feel. It’s simple for her to use with the one knob. A note on the faucet though – it does seem to splash more than other faucets. I think this is due to how the stream comes out. I’ve found that if you turn it only halfway on, you still have plenty of water pressure and less splashing.

    Such an adorable bathroom for a kid, but also stylish for adults! The 70's Landing Pad Hall Bathroom Remodel | Gray Walls / Black and White Decor / Kid's Bathroom / Curvy Black Round Mirror / Retro Pendant Lights

    The mirror and pendant light fixtures are two of my favorite pieces in the room. Both came from Lamps Plus. Seriously, how fun are those lights? The lights help to keep that 70’s vibe going in the bathroom that is throughout the rest of the house. One note of warning on these lights though – see how the globes are chrome about 2/3 of the way down? That means that the light is focused downward when you turn them on. That’s good for right around the mirror, but there isn’t as much light elsewhere from them in the bathroom, so make sure you have either a fan with an overhead light or just another overhead light as well. P.S. They are also one of the first light fixtures I’ve ever heard Grunt Labor say “I love those!”

    Such an adorable bathroom for a kid, but also stylish for adults! The 70's Landing Pad Hall Bathroom Remodel | Gray Walls / Black and White Decor / Kid's Bathroom / Curvy Black Round Mirror / Retro Pendant Lights

    I love the mirror because of it’s curvy edges. It adds just the right amount of texture and could easily change with the Circus’ style as she grows. It also comes in a slew of different colors. Lamps Plus did provide us with the pendants and mirror, but as with the hardware, I would have bought them anyway.

    Such an adorable bathroom for a kid, but also stylish for adults! The 70's Landing Pad Hall Bathroom Remodel | Gray Walls / Black and White Decor / Kid's Bathroom / Gray Rectangle Floor Tiles

    Shower Curtain

    Like I said, the shower curtain from our previous hall bath went to this one. It’s black and white and went perfectly in the space.

    Such an adorable bathroom for a kid, but also stylish for adults! The 70's Landing Pad Hall Bathroom Remodel | Gray Walls / Black and White Decor / Kid's Bathroom / Brass Rocking Horse

    Bonkers Art / Brass Rocking Horse

    I added a couple more “kid” touches for the Circus with the Bonkers print which I already had on hand, a brass rocking horse I found for $12 and a couple little Golden Books – because what child doesn’t need a slew of little golden books? 

    Even though the original plan for the bathroom didn’t pan out, I have to say, I think I like this outcome better. Some mistakes are just meant to be. 😉

    What do you think of the bathroom remodel?

    Shop the bathroom…

    [show_shopthepost_widget id=”1866939″]

    Tour more of the 70’s Landing Pad:

    The 70's Landing Pad Home Tour, Part 1

    Living Room, Dining Room & Office

    Bedrooms Tour

    The Circus’ Room and Master Bedroom

    blog-signature-summer-15

    pin-this-post-2

    70's House Bathroom Remodel | Gray Bathroom Remodel | Kid's Bathroom Ideas | DIY Bathroom Renovation | Bathroom Ideas

    Disclosure: Lamps Plus provided me with the lighting and mirror for this remodel and D. Lawless Hardware provided me with the cabinet knobs and pulls. However, all those products are ones I would have purchased anyway and all opinions in this post are 100% mine. 

    SaveSave

  • Summer Home Tours: The 70’s Landing Pad Home Tour, Part 2

    Summer Home Tours: The 70’s Landing Pad Home Tour, Part 2

    It’s official.

    I’m not Superwoman.

    Sometime last week though, I thought I was.

    You see, I thought that after showing you the first part of my home tour last week, I would be able to show you the rest of the house today. This would have entailed me finishing out all the trim painting in the master bathroom as well as staining the vanity, cleaning and decorating the den, same with the Circus’ room and then photographing it all.

    I have no idea what I was thinking, but around noon on Saturday as I was staining the vanity two hours before my daughter’s dance recital, it occurred to me that the doors wouldn’t be able to go back on for at least five days so the topcoat could fully cure. At that point, I decided that you would understand and that giving you a tour of our master bedroom and the Circus’ bedroom would be good enough because that’s the best I could do given that I didn’t wake up with those superpowers I’d been praying for.

    So if you are one of my regular freaks around here, I realize you’ve already seen our master and the only thing new will be the Circus’ room. But I know you understand. If you’re new here and hopping over from Marty at A Stroll Thru Life (our hostess with the mostest) or Alicia at Thrifty and Chic, then I hope you’ll enjoy the tour and come back for the rest of the room reveals later. You can also see the first part of my home tour – the living room, dining room, hall bathroom and my office – here. Also, be sure to visit the rest of the stops on the tour today at the bottom of this post!

    Affiliate links may be contained in this post.

    Master Bedroom

    This master bedroom makeover is a MUST-SEE! Who knew pink could look so good?! It's an eclectic vibe of old Hollywood glamour meets Palm Beach decorating styles! The 70's Landing Pad Home Tour, Part 2: The Master Bedroom | Palm Tree Art | DIY Scalloped Headboard

    Master Bedroom Details / Pink Wall Color / Black Trim Color

    I have to say, I fall a little more in love with our master bedroom everyday.

    This master bedroom makeover is a MUST-SEE! Who knew pink could look so good?! It's an eclectic vibe of old Hollywood glamour meets Palm Beach decorating styles! The 70's Landing Pad Home Tour, Part 2: The Master Bedroom | Palm Tree Art | DIY Scalloped Headboard

    Green Curtains / Bedding / Palm Print Pillow / Leopard Print Pillow

    It has quickly become our escape, which I know is extremely cliche to say, but we never had that before at our previous home.

    This master bedroom makeover is a MUST-SEE! Who knew pink could look so good?! It's an eclectic vibe of old Hollywood glamour meets Palm Beach decorating styles! The 70's Landing Pad Home Tour, Part 2: The Master Bedroom | Palm Tree Art | DIY Scalloped Headboard

    Chandelier / Green Curtains

    This room was actually the very first room to get completely redone at the 70’s Landing Pad. I call it the Well Traveled Master Bedroom.

    This master bedroom makeover is a MUST-SEE! Who knew pink could look so good?! It's an eclectic vibe of old Hollywood glamour meets Palm Beach decorating styles! The 70's Landing Pad Home Tour, Part 2: The Master Bedroom | Palm Tree Art

    Palm Print Art

    It’s a mix of Palm Beach meets Hollywood Glamour.

    This master bedroom makeover is a MUST-SEE! Who knew pink could look so good?! It's an eclectic vibe of old Hollywood glamour meets Palm Beach decorating styles! The 70's Landing Pad Home Tour, Part 2: The Master Bedroom | DIY Black and White Accent Wall | Mix of Modern and Vintage Design Styles

    And a dose of bold black and white.

    This master bedroom makeover is a MUST-SEE! Who knew pink could look so good?! It's an eclectic vibe of old Hollywood glamour meets Palm Beach decorating styles! The 70's Landing Pad Home Tour, Part 2: The Master Bedroom | DIY Black and White Accent Wall | Mix of Modern and Vintage Design Styles

    Mirror (I painted mine.) / Pink Lamp (similar) / Banana Leaves Art / Design Sponge Book 

    And where modern meets vintage.

    This master bedroom makeover is a MUST-SEE! Who knew pink could look so good?! It's an eclectic vibe of old Hollywood glamour meets Palm Beach decorating styles! The 70's Landing Pad Home Tour, Part 2: The Master Bedroom | DIY Carpet Covered Wall

    Also, a green carpet covered wall fits in just right as well.

    This master bedroom makeover is a MUST-SEE! Who knew pink could look so good?! It's an eclectic vibe of old Hollywood glamour meets Palm Beach decorating styles! The 70's Landing Pad Home Tour, Part 2: The Master Bedroom | DIY Carpet Covered Wall

    Bamboo Lamp (similar) / Closet Medallions 

    You can also see more of the master bedroom makeover including before and after shots here.

    The Circus’ Room

    Such a perfect kid's room - not too babyish, but not too grown up. Will grow well with the child! LOVE all the color! A must-see! The 70's Landing Pad Home Tour, Part 2: The Circus' Room | Kid's Bedroom Ideas | Love the mix of colors and patterns in this child's room.

    Wall Color / Bedding / Horse Sheets (similar) / Tassel Pillow

    If you’re new here, the Circus is my four-year-old daughter.

    Such a perfect kid's room - not too babyish, but not too grown up. Will grow well with the child! LOVE all the color! A must-see! The 70's Landing Pad Home Tour, Part 2: The Circus' Room | Kid's Bedroom Ideas | Vintage Brass Bed | Pops of Color in the Decor

    Rug

    We call her that because she could truly be a three-ring circus all by her little thirty-pound self.

    Such a perfect kid's room - not too babyish, but not too grown up. Will grow well with the child! LOVE all the color! A must-see! The 70's Landing Pad Home Tour, Part 2: The Circus' Room | Kid's Bedroom Ideas | Silhouette Art

    Custom Silhouette Art / Tassel Pillow

    When it was time to plan out her new room, I got her input on just about everything.

    Such a perfect kid's room - not too babyish, but not too grown up. Will grow well with the child! LOVE all the color! A must-see! The 70's Landing Pad Home Tour, Part 2: The Circus' Room | Kid's Bedroom Ideas

    Yellow Table Color / Cowgirl Lampshade

    It was clear that blue, horses and other animals were a must.

    Such a perfect kid's room - not too babyish, but not too grown up. Will grow well with the child! LOVE all the color! A must-see! The 70's Landing Pad Home Tour, Part 2: The Circus' Room | Kid's Bedroom Ideas | Vintage Cowboy Blanket paired with Modern Rug

    She also decided yellow was a pretty good idea as well and a touch of purple.

    Such a perfect kid's room - not too babyish, but not too grown up. Will grow well with the child! LOVE all the color! A must-see! The 70's Landing Pad Home Tour, Part 2: The Circus' Room | Kid's Bedroom Ideas

    White trim and accents helped to balance it all.

    Such a perfect kid's room - not too babyish, but not too grown up. Will grow well with the child! LOVE all the color! A must-see! The 70's Landing Pad Home Tour, Part 2: The Circus' Room | Kid's Bedroom Ideas

     Mirror (similar)

    Such a perfect kid's room - not too babyish, but not too grown up. Will grow well with the child! LOVE all the color! A must-see! The 70's Landing Pad Home Tour, Part 2: The Circus' Room | Kid's Bedroom Ideas | DIY Headband Holder | DIY Sunglasses Holder

    DIY Sunglasses Holder / DIY Headband Holder

    Such a perfect kid's room - not too babyish, but not too grown up. Will grow well with the child! LOVE all the color! A must-see! The 70's Landing Pad Home Tour, Part 2: The Circus' Room | Kid's Bedroom Ideas

    Rhino (similar) / Horse (similar) / Dog

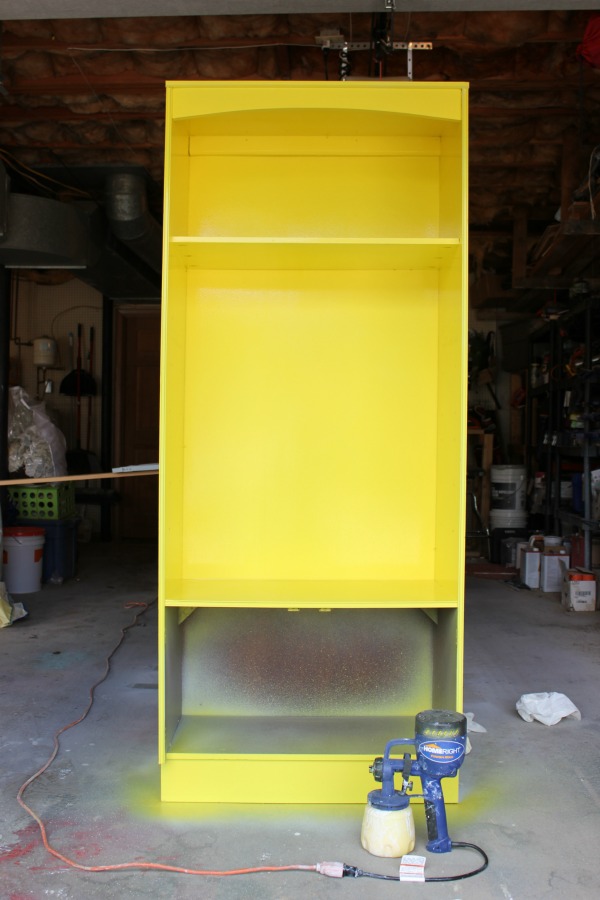
    Such a perfect kid's room - not too babyish, but not too grown up. Will grow well with the child! LOVE all the color! A must-see! The 70's Landing Pad Home Tour, Part 2: The Circus' Room | Kid's Bedroom Ideas | Yellow Bookshelf

    Yellow Bookshelf Makeover

    And there’s a touch of brass and chrome here and there because as she said, “I like the shiny things, mama.”

    Such a perfect kid's room - not too babyish, but not too grown up. Will grow well with the child! LOVE all the color! A must-see! The 70's Landing Pad Home Tour, Part 2: The Circus' Room | Kid's Bedroom Ideas | Yellow Bookshelf

    It just further proved she was mine.

    Such a perfect kid's room - not too babyish, but not too grown up. Will grow well with the child! LOVE all the color! A must-see! The 70's Landing Pad Home Tour, Part 2: The Circus' Room | Kid's Bedroom Ideas | Donkey Art | Faux Cowhide Bench

    Donkey Art

    Such a perfect kid's room - not too babyish, but not too grown up. Will grow well with the child! LOVE all the color! A must-see! The 70's Landing Pad Home Tour, Part 2: The Circus' Room | Kid's Bedroom Ideas | Faux Cowhide Bench | Horse Pillow

    Horse Pillow

    She’s one cool cat.

    Such a perfect kid's room - not too babyish, but not too grown up. Will grow well with the child! LOVE all the color! A must-see! The 70's Landing Pad Home Tour, Part 2: The Circus' Room | Kid's Bedroom Ideas

    …and really loves her new room.

    You can tour the living room, dining room, hall bath and office here.

    Shop the home tour…

    [show_shopthepost_widget id=”1866967″]

    The 70's Landing Pad Home Tour, Part 1

    The 70’s Landing Pad Home Tour, Part 1

    The next stop on the summer home tours is Laura from Duke Manor Farm – it might be one of my favorite tours just because there’s a chicken on top of a donkey! I’m not kidding!

    SaveSave

  • Eclectic Home Tours: The 70’s Landing Pad Home Tour, Part 1

    Eclectic Home Tours: The 70’s Landing Pad Home Tour, Part 1

    I cannot believe I actually just typed that title, y’all.

    We just moved into the 70’s Landing Pad about three weeks ago. By no stretch is the house completed, but the fact that I can actually share a home tour with y’all that doesn’t include a three inch thick layer of dust on the floors is a huge accomplishment for me. There still aren’t curtains in the living room and dining room and things aren’t exactly the way I want them just yet, but that takes time and it is what it is. #reallife #itaintalwayspretty

    Today, I’ll share the living room, dining room, hall bathroom and my office as part of the Eclectic Home Tours. Next week, I’ll have the Circus’ bedroom, the master bath and the den for you, so stay tuned. I’ve already revealed the Well Traveled Master Bedroom and if you haven’t seen it yet, it’s here.  Don’t miss the rest of the tours in the Eclectic Home Tours either – links are at the end of this post – I promise you won’t be disappointed.

    I’m not going to do much talking in this one. Instead, I’ll come back over the next few weeks and share all the details of each space separately and what all we did to each room along with before shots of the rooms when we bought the house. Also there’s the fact that this post is supposed to be published along with everyone else’s on the tour today at 8am EST and I’m just now writing the post at 7:48 AM EST. #storyofmylife

    Without further ado, I present to you the semi-finished 70’s Landing Pad.

    Affiliate links may be contained in this post.

    Living Room

    JAW DROPPING! The 70's Landing Pad Living Room Tour: Full of vintage finds paired with modern pieces and pops of color. Living Room Design | Black and White Interior Decorating | Vintage Decor | Retro Decor

    Snakeskin Print Rug / Ghost Chairs / Lion Print / Brass Floor Lamp

    *Ignore the hideous chandelier behind the couch – that will be replaced soon!

    JAW DROPPING! The 70's Landing Pad Living Room Tour: Full of vintage finds paired with modern pieces and pops of color. Living Room Design | Black and White Interior Decorating | Vintage Decor | Retro Decor

    Leopard Print Pillow / Palm Print Pillow

    JAW DROPPING! The 70's Landing Pad Living Room Tour: Full of vintage finds paired with modern pieces and pops of color. Living Room Design | Black and White Interior Decorating | Vintage Decor | Retro Decor | Snakeskin Print Rug

    Gold Sphere / Snakeskin Rug / Acrylic Napkin Holder Coasters

    P.S. Notice the leg of my tripod in the photo above. #mybad

    JAW DROPPING! The 70's Landing Pad Living Room Tour: Full of vintage finds paired with modern pieces and pops of color. Living Room Design | Black and White Interior Decorating | Vintage Decor | Retro Decor | Ghost Chairs

    Lion Print / Ghost Chairs

    JAW DROPPING! The 70's Landing Pad Living Room Tour: Full of vintage finds paired with modern pieces and pops of color. Living Room Design | Black and White Interior Decorating | Vintage Decor | Retro Decor

    Brass Unicorn (similar ones)

    JAW DROPPING! The 70's Landing Pad Living Room Tour: Full of vintage finds paired with modern pieces and pops of color. Living Room Design | Black and White Interior Decorating | Vintage Decor | Retro Decor | Ghost Chairs

    Green Velvet Pillow / Ghost Chair / Acrylic Napkin Coasters

    JAW DROPPING! The 70's Landing Pad Living Room Tour: Full of vintage finds paired with modern pieces and pops of color. Living Room Design | Black and White Interior Decorating | Vintage Decor | Retro Decor

    JAW DROPPING! The 70's Landing Pad Living Room Tour: Full of vintage finds paired with modern pieces and pops of color. Living Room Design | Black and White Interior Decorating | Vintage Decor | Retro Decor

    To The Night Art Print

    JAW DROPPING! The 70's Landing Pad Living Room Tour: Full of vintage finds paired with modern pieces and pops of color. Living Room Design | Black and White Interior Decorating | Vintage Decor | Retro Decor

    Rolling Stone 70’s Book / Elvis Book

    JAW DROPPING! The 70's Landing Pad Living Room Tour: Full of vintage finds paired with modern pieces and pops of color. Living Room Design | Black and White Interior Decorating | Vintage Decor | Retro Decor

    Elvis Bust (similar ones)

    JAW DROPPING! The 70's Landing Pad Living Room Tour: Full of vintage finds paired with modern pieces and pops of color. Living Room Design | Black and White Interior Decorating | Vintage Decor | Retro Decor | WTF Pillow

    I know – isn’t that pillow epic?

    Dining Room

    A STUNNING HOME! The 70's Landing Pad Home Tour: The Dining Room | Black and White Decor / Moody Interior Design / Vintage Interior Design / Glass Dining Table / Vintage Brass Chandelier / Vintage Round Cantilever Chairs

    Rug / Glass Dining Table (similar) / Cantilever Chairs (similar) 

    A STUNNING HOME! The 70's Landing Pad Home Tour: The Dining Room | Black and White Decor / Moody Interior Design / Vintage Interior Design / Glass Dining Table / Vintage Brass Chandelier / Vintage Round Cantilever Chairs

    A STUNNING HOME! The 70's Landing Pad Home Tour: The Dining Room | Black and White Decor / Moody Interior Design / Vintage Interior Design / Minted Art Print, Ivy / Glass Dining Table

    Ivy Art Print

    Hall Bathroom

    Such an adorable bathroom for a kid, but also stylish for adults! The 70's Landing Pad Hall Bathroom | Gray Walls / Black and White Decor / Kid's Bathroom / Purple Bathroom Vanity / Gray Rectangle Floor Tiles

    Shower Curtain / Yellow Hand Towel

    Such an adorable bathroom for a kid, but also stylish for adults! The 70's Landing Pad Hall Bathroom | Gray Walls / Black and White Decor / Kid's Bathroom

    Bonkers Art

    Such an adorable bathroom for a kid, but also stylish for adults! The 70's Landing Pad Hall Bathroom | Gray Walls / Black and White Decor / Kid's Bathroom / Purple Bathroom Vanity / Gray Rectangle Floor Tiles

    Faucet / Cabinet Pulls / Cabinet Knobs

    Such an adorable bathroom for a kid, but also stylish for adults! The 70's Landing Pad Hall Bathroom | Gray Walls / Black and White Decor / Kid's Bathroom / Round Black Mirror / Vintage Style Globe Pendant Lights

    My Office

    Great ideas for incorporating family trinkets and treasures into your decor! The 70's Landing Pad Office Tour: Full of family treasures and trinkets, but decorated tastefully and with a touch of flair.

    Curtains

    Great ideas for incorporating family trinkets and treasures into your decor! The 70's Landing Pad Office Tour: Full of family treasures and trinkets, but decorated tastefully and with a touch of flair.

    Great ideas for incorporating family trinkets and treasures into your decor! The 70's Landing Pad Office Tour: Full of family treasures and trinkets, but decorated tastefully and with a touch of flair.

    Gemstones Print / Dream Big Hustle Hard Print

    Great ideas for incorporating family trinkets and treasures into your decor! The 70's Landing Pad Office Tour: Full of family treasures and trinkets, but decorated tastefully and with a touch of flair.

    Great ideas for incorporating family trinkets and treasures into your decor! The 70's Landing Pad Office Tour: Full of family treasures and trinkets, but decorated tastefully and with a touch of flair. | Black and White Painted Closet Doors

    DIY Painted Pattern Closet Doors

    Great ideas for incorporating family trinkets and treasures into your decor! The 70's Landing Pad Office Tour: Full of family treasures and trinkets, but decorated tastefully and with a touch of flair.

    Curtains

    Great ideas for incorporating family trinkets and treasures into your decor! The 70's Landing Pad Office Tour: Full of family treasures and trinkets, but decorated tastefully and with a touch of flair. | Malachite Credenza

    Malachite Credenza / Design Sponge Book / Sarah Richardson Style Book / Modern Mix Book 

    What do you think? How’s the 70’s Landing Pad coming along so far?

    Shop the Home Tour…

    [show_shopthepost_widget id=”1867007″]

    Don’t miss these other stops in the Eclectic Home Tours today…

    SaveSave

  • Why We Opted for NuCore Flooring and How It’s Holding Up

    Why We Opted for NuCore Flooring and How It’s Holding Up

    Let me just say that when I first wrote about the new flooring we would be installing in the main living area and kitchen at the 70’s Landing Pad, I was not ready for you. I thought I had done enough research on the flooring we chose, but you guys brought the questions and had me saying multiple times, “Why didn’t I think to ask that?” You brought your A-game.

    If you don’t remember, we went for NuCore flooring from Floor & Decor which is an engineered floor that has luxury vinyl on top of a waterproof core. It also has a cork backing which was supposed to give better noise resistance than traditional vinyl planks or wood laminates. There are more details on the flooring and how we installed it in this post. Floor & Decor did provide me with the NuCore flooring, however it was the top contender in the flooring department after we researched various types and we would have bought it for the renovation anyway. While they did provide me the flooring, all these opinions are mine.

    Why We Opted for NuCore Flooring: a luxury vinyl flooring that is waterproof and can be installed over many existing floors. It's also a flooring that is easily installed.

    There were a few reasons that NuCore stood out to us:

    • Installation

    We were able to install NuCore ourselves. It’s a tongue and groove installation that snaps together. We were on a budget and having someone else install the flooring wasn’t much of an option. Grunt Labor had installed our traditional hardwood at the Beloved Foreclosure, but literally every piece had to be nailed down and it was a back breaking task. He didn’t want to go through that again and I didn’t want him to either. Now of course, we did have to think things through a bit in the beginning,  but once we got going, it was relatively smooth sailing. The video below shows how to install the NuCore Flooring.

    [adthrive-in-post-video-player video-id=”EmAIvJzB” upload-date=”Wed Jun 29 2016 14:23:39 GMT+0000 (Coordinated Universal Time)” name=”Rain on a Tin Roof – How to Install NuCore Flooring” description=”How to Install NuCore Flooring by Rain on a Tin Roof”]

    You can read more about the installation here.

    • Waterproof

    NuCore is waterproof. We have a four year old and a dog. That in itself should be enough to warrant waterproof flooring for us. Honestly, until I started researching, I didn’t know there were any wood look waterproof floorings available that weren’t straight sheet vinyl. When I found out NuCore was, it was a game changer.

    • Look & Feel

    Of course, when you are putting new flooring in such a large space in your house, you want it to look good. We knew for the 70’s Landing Pad, we wanted wider planks and maybe even a little more texture to the flooring. We wanted to stick with a darker stain as well. The Cocoa Oak shade of NuCore fit the bill.

    Why We Opted for NuCore Flooring: a luxury vinyl flooring that is waterproof and can be installed over many existing floors. It's also a flooring that is easily installed.

    The photo above was taken just after I had cleaned the floors, thus the oily look, however it’s also the best way for me to show you in pictures the texture of the flooring. You can see the hand-scraped texture in each plank. The texture isn’t so much to where it’s hard to clean or bothers you when walking on it. It’s just enough to add a little depth.

    Why We Opted for NuCore Flooring: a luxury vinyl flooring that is waterproof and can be installed over many existing floors. It's also a flooring that is easily installed.

    This image best shows the color of the floor up close. It’s dark, but not too dark. To me, the color seems to somewhat have a 70’s vibe going on and that of course, fit perfectly for the house.

    We installed NuCore in January of this year, so we’ve had it for about five months. Since then, the following things have happened:

    • The flooring got covered in at least a 2 inch layer of dust.

    Okay, maybe not 2 inches, but pretty close. Either way, it was disgusting, but cleaned up perfectly well.

    • It also took it’s fair share of paint splatters and tile mortar splotches from us working on the house. 

    Once more, those also cleaned up just fine with the help of a regular kitchen sponge scrubber.

    • The dog has peed on it – multiple times. 

    And the pee just sat there. The flooring didn’t absorb it, there wasn’t a stain, and it wiped right up.

    • The dishwasher leaked.

    When I say the dishwasher leaked, I mean that water was pouring out of the sides like no tomorrow. The NuCore didn’t let it go anywhere though.

    • We moved in. 

    While I was certain that moving in would cause at least a few dents / dings /scratches on the flooring, I was wrong. Even the three piece cabinet unit that Grunt Labor and Nicky refer to as the three steel boxes I bought didn’t hurt the flooring. The only place where we got scratches on the floor was when the kitchen oven had to be moved in and out while we were working on the cabinetry. I think most of that was due to the fact that Grunt Labor was doing it alone and therefore couldn’t really lift it like it needed to be lifted to be moved.

    Like I said earlier, there were many questions you guys posed that I didn’t think to ask when I went with this flooring. I tried to get you the best answer I could by asking the people at Floor & Decor if I didn’t know and responding to your questions in the comments of the first post or email. There were also some questions I had asked, but forgot to include in the first post about the flooring, so I thought I would take this time to answer questions most frequently asked here:

    Q: This flooring has joints. How can it be waterproof? 

    I’m assuming since this is a tongue and groove flooring that when those snap together, they form a waterproof seal. Now, that isn’t to say that some tiny amount of water wouldn’t get in those joints, but I don’t think it would be enough to damage the flooring as long as it was installed properly.

    Q: Does it feel like vinyl? Does it feel cheap or plastic-y? 

    I am not a great one to ask this because my experience with wood look vinyl flooring is minimal. I had it in one other house and I can tell you that that flooring did feel cheap to me. That was also nearly 10 years ago and things in the vinyl department have greatly improved since then. I often associate vinyl flooring with being really shiny – like sheet vinyl we all used to have in our kitchens. This flooring doesn’t look or feel like that to me. It does feel different than traditional hardwood flooring because obviously it isn’t hardwood flooring and isn’t as thick or hard like hardwood. I’ll have to pay more attention to how my feet feel and sound on it when I’m walking and come back to this one again.

    Q: How long did it take to install? 

    Like I said earlier, once you get the hang of installing it, it goes pretty fast. Grunt Labor worked on the flooring for about 2-3 hours each day after work. He was probably able to complete one room every 2-3 days.

    Q: Did you lay down a barrier or put it straight on the floor? 

    No, we did not lay down a barrier. NuCore has a cork backing which helps as a sound barrier. NuCore can be installed over many existing floors. We went right over the old laminate flooring in the den area with NuCore. Of course, we pulled up the carpet in the living room and dining room before installing it there and put it on top of the subfloor. Most people would also be able to take it right over vinyl flooring in their kitchens, but we had some issues in our kitchen where previous owners had remodeled and the kitchen actually had two subfloors, so we had to rip some of that out first before installing NuCore in there.

    Q: Does it scratch easily? 

    Like I said above, the only problem we had with it scratching was right around the oven.

    Q: How do you install it on stairs? 

    They make stair noses that fit over the front edge of the steps and then you would do regular installation on the rest of the step.

    Q: We have 700+ square feet of tile in the kitchen, laundry room, bathroom, etc that’s gonna cost $7000 to demo and re-tile, so I’m trying to see if there’s a cheaper DIY alternative. I assume you can install this on top of existing tile? But how thin is it? The issue I see there is a dropoff when transitioning into other rooms.

    I do believe you could install it over existing tile if your tile is level for the most part. I’m pretty sure that each color of NuCore has various accessories in that same shade you can purchase. I know they have transitions you could use for the variation in floor levels. The flooring is thin, so it shouldn’t add too much height. We installed this on our landing which actually had tile previously. We could have went right over the tile, but the problem we ran into was that the tile was really thick and we would have had a really large transition which I didn’t feel too comfortable with. I was worried it would be so much that someone might trip over it.

    Q: This flooring is thin. I’m worried it won’t hold up and will snap. 

    Dude. This was my biggest concern when we were considering this flooring. The flooring is 6.5 mm thick. According to Google, that translates to 0.255906 inches. It’s tough though. One of the first things I did was get a piece out and try to bend it in half to break it. It didn’t crack at all. The only way to cut it is with of course with a saw or score it with a utility knife and then snap it while holding one half of the piece on a solid surface and bending the other half. I won’t lie – this thinness still freaks me out a little, but time will tell….

    Q) How does this stuff stay in place without gluing it down? My concern would be if there is a slightly uneven place in the floor then this could shift or not rest flush.

    The way I understand it, the tongue and groove locks it all together. Once it’s all locked together it’s pretty heavy enough that it stays in place. Most people will need to go back around the edges where the flooring meets the baseboard and add quarter round, which will hold it in place even more.

    If you’ve got any other questions, send ’em my way! I’ll do my best to answer them or get the answer for you.

    UPDATE: I did a review of our NuCore Flooring one year later. You can read about it here.

    You can also get more information about the install of NuCore including a video here. 

    blog-signature-summer-15
    pin-this-post-2
    NuCore Flooring Review | Luxury Vinyl Wood Flooring | Luxury Vinyl Flooring | Luxury Laminate Flooring | Luxury Vinyl Plank Flooring

    Disclosure: Floor and Decor provided me with NuCore flooring. However, all opinions and roughness that our family and this renovation gave our floors are 100% mine.

  • The Well Traveled Master Bedroom Makeover Reveal

    The Well Traveled Master Bedroom Makeover Reveal

    Not even gonna lie, this room design took me out of my comfort zone more than any other. As I’ve said before, I was stressed during most of the whole process about the pink walls not working out as well as they were in my head. But on top of that, I also doubted my headboard project, the window treatments and multiple other things. On multiple occasions, Grunt Labor had to bring me back from the dark side with “It’s just paint, Jenna,” or “We can easily switch the curtains if we need to.” In all honesty, I think he had more faith in this design than I did and that is just baffling considering a huge part of it included pink. Go figure.

    Today is the day though for you to be the judge.

    This post is sponsored by FrogTape, however all opinions are 100% mine. Affiliate links may be contained in this post.

    Right after I applied the final coats of paint, I removed the FrogTape®…

    Well Traveled Master Bedroom Makeover Reveal - removing the tape

    Don’t wait for your paint to dry – remove the tape while it’s still wet! I had painted three walls pink and all the trim was black. After I removed the tape from the trim, I was feeling pretty confident about the pink and black color scheme.

    I moved on to the accent wall which would be pink and black as well, but of course with lots more pattern.

    Well Traveled Master Bedroom Makeover Reveal - removing the tape

    I removed the tape.

    Well Traveled Master Bedroom Makeover Reveal - removing the tape

    I was feeling pretty confident about the pink and black color scheme here too since it looked so good on the other walls. But….after I got all the tape off the feature wall, I wasn’t loving the pink and black together there.

    Well Traveled Master Bedroom Makeover Reveal - changing the color scheme

    While the black trim and plain pink walls worked well on the other two walls, it just seemed too much on the feature wall. So as I like to say – I had to back up and punt. I opted to change the pink on the feature wall to white. Instead of mapping out my entire design again, I just used FrogTape® Delicate Surface and taped off around the black parts of the wall and painted the white in-between. And after two coats of white paint and removing more tape…

    Well Traveled Master Bedroom Makeover Reveal - DO NOT miss this master bedroom! It combines bold black and white, a touch of green, pink and a dash of Palm Beach! STUNNING! Lots of great DIY project ideas for bedrooms in this article! DIY Accent Wall / DIY Painted Patterned Accent Wall / DIY Feature Wall / Black and White Interior Decorating / Black and White Design

    I made quite the home run if I do say so myself….

    Well Traveled Master Bedroom Makeover Reveal - DO NOT miss this master bedroom! It combines bold black and white, a touch of green, pink and a dash of Palm Beach! STUNNING! Lots of great DIY project ideas for bedrooms in this article! DIY Accent Wall / DIY Painted Patterned Accent Wall / DIY Feature Wall / Black and White Interior Decorating / Black and White Design

    Since I had nixed the pink on this wall, I knew I needed to pull some of it back over to connect the whole room, so I did that with the pink lamp – which was a $5 Goodwill find I’ve had for about six months waiting for it’s perfect spot.

    Well Traveled Master Bedroom Makeover Reveal - DO NOT miss this master bedroom! It combines bold black and white, a touch of green, pink and a dash of Palm Beach! STUNNING! Lots of great DIY project ideas for bedrooms in this article! DIY Accent Wall / DIY Painted Patterned Accent Wall / DIY Feature Wall / Black and White Interior Decorating / Black and White Design

    Mirror (similar) / Banana Leaves Print / Lamp (similar)

    There’s a lot of musical furniture going on at the new house. I had purchased this dresser for the Circus’ room before I knew we were moving. As it turns out, it works better in our new master bedroom than hers, so she got our old dresser and we got this one. I think it has that great “Well Traveled” vibe we were going for in here. The mirror in our old dining room is making it’s new home in our bedroom as well and I jacked the banana leaves print from our old gallery wall.

    Well Traveled Master Bedroom Makeover Reveal - DO NOT miss this master bedroom! It combines bold black and white, a touch of green, pink and a dash of Palm Beach! STUNNING! Lots of great DIY project ideas for bedrooms in this article! DIY Accent Wall / DIY Painted Patterned Accent Wall / DIY Feature Wall / Black and White Interior Decorating / Black and White Design

    My dad gave me the big green bottle thing quite a while back as well. It was a great aunt’s and he didn’t want it anymore, but as we all know, I am the taker of all family junk no one else wants, so it came to me and finally found a new perfect home.

    And remember how we were building a headboard?

    Well Traveled Master Bedroom Makeover Reveal - DO NOT miss this master bedroom! It combines bold black and white, a touch of green, pink and a dash of Palm Beach! STUNNING! Lots of great DIY project ideas for bedrooms in this article! DIY Headboard / DIY Huge Ass Picture Frame / Palm Beach Design / Kelly Green Curtains / Palm Leaves Decor / Banana Leaves Decor / Velvet Upholstered Headboard
    Pink Wall Color
    / Black Trim Color / Bedding / Green Drapes / Palm Print / DIY Headboard

    It’s velvet. And luscious. And pretty. And actually not too hard at all to make – the tutorial for it is right here.

    Well Traveled Master Bedroom Makeover Reveal - DO NOT miss this master bedroom! It combines bold black and white, a touch of green, pink and a dash of Palm Beach! STUNNING! Lots of great DIY project ideas for bedrooms in this article! DIY Headboard / DIY Huge Ass Picture Frame / Palm Beach Design / Kelly Green Curtains / Palm Leaves Decor / Banana Leaves Decor / Velvet Upholstered Headboard

    Kelly Green Drapes / Bedding / Banana Leaf Pillows / Leopard Print Pillow / Headboard

    You may have also spied those lucite curtain rods – another DIY project. I tried to save as much money as possible on this makeover by reusing items we already had either in our old master bedroom or in other places at our old house. The green curtains used to be in our living room and wouldn’t work for our new living room, but were perfect for our Well Traveled Bedroom. The snakeskin lamps also used to reside in our dining room. Bringing in the snakeskin prints, leopard prints and banana leaf prints was another way I kept the “Well Traveled” theme going. I felt like all those types of prints and patterns combined with the detailed feature wall worked perfectly into the theme. The nightstands are new to us, however they didn’t cost a dime. A friend gave them to us and I just painted them.

    Well Traveled Master Bedroom Makeover Reveal - DO NOT miss this master bedroom! It combines bold black and white, a touch of green, pink and a dash of Palm Beach! STUNNING! Lots of great DIY project ideas for bedrooms in this article! DIY Headboard / DIY Huge Ass Picture Frame / Palm Beach Design / Kelly Green Curtains / Palm Leaves Decor / Banana Leaves Decor / Velvet Upholstered Headboard

    Green Drapes

    The light fixture added a touch of glam and also helped to pull the lucite curtain rods together.

    Well Traveled Master Bedroom Makeover Reveal - DO NOT miss this master bedroom! It combines bold black and white, a touch of green, pink and a dash of Palm Beach! STUNNING! Lots of great DIY project ideas for bedrooms in this article! DIY Huge Ass Picture Frame / Palm Beach Design / Palm Leaves Decor / Banana Leaves Decor / Huge Palm Tree Art

    Palm Print / Leopard Print Pillow / Banana Leaf Pillow / DIY Huge Picture Frame

    As I told you in my design plan post for this room, we already had the palm tree print on hand, however it didn’t have a frame. Let me just tell you – frames that are almost as big as you are ain’t cheap. Grunt Labor and I made our own for about $25. Purchasing one already made would have been about $150. The tutorial for the frame can be found here.

    Well Traveled Master Bedroom Makeover Reveal - DO NOT miss this master bedroom! It combines bold black and white, a touch of green, pink and a dash of Palm Beach! STUNNING! Lots of great DIY project ideas for bedrooms in this article! Features DIY Lucite / Acrylic curtain rods and lots of other great DIY project ideas for bedrooms!

    Moving across from the bed is a small sitting area.

    Well Traveled Master Bedroom Makeover Reveal - DO NOT miss this master bedroom! It combines bold black and white, a touch of green, pink and a dash of Palm Beach! STUNNING! Lots of great DIY project ideas for bedrooms in this article!

    Accent Chair / Elephant Table (similar ones) / Leopard Print Pillow / Date Art

    Once more with the exception of the leopard print pillow, I already had all of this on hand. The chair had been in our old master bedroom. I bought the elephant table awhile back having no idea where it would go, but who can pass up an elephant table for $20? Exactly. No one. The date art is our wedding anniversary. Considering that both myself and Grunt Labor have forgotten our anniversary before, I figure it’s a good way to remind us. The gold mirror is literally like gold to me – it was my great aunt’s, then it hung in my grandparent’s living room and then I took it when they died. It had to stay in storage for quite some time until I had the perfect place for it.

    Well Traveled Master Bedroom Makeover Reveal - DO NOT miss this master bedroom! It combines bold black and white, a touch of green, pink and a dash of Palm Beach! STUNNING! This wall is CARPETED! It looks gorgeous! Lots of great DIY project ideas for bedrooms in this article!

    And did I mention I covered a wall with carpet? For about the last year, I’ve been dying to cover a wall with AstroTurf. The wall that leads into our master bedroom closet seemed to be the perfect candidate. However, after looking at the Astroturf more, it was just too shiny and bright. Instead, I used darker green outdoor rugs to cover the wall. I love the added dimension it gives.

    Well Traveled Master Bedroom Makeover Reveal - DO NOT miss this master bedroom! It combines bold black and white, a touch of green, pink and a dash of Palm Beach! STUNNING! This wall is CARPETED! It looks gorgeous! Lots of great DIY project ideas for bedrooms in this article!

    DIY Carpet Covered Wall / Closet Door Medallions / Gold Door Knobs

    The marble top table used to be a nightstand in our old master bedroom. Mama graciously loaned me her bamboo lamp for the space, because really, how can you have a Well Traveled Master Bedroom without a bamboo lamp? The Easy Like Sunday Morning print was another print that used to hang on the gallery wall in our old living room. I also jazzed up the closet doors with medallions.

    Remember, this makeover was part of FrogTape’s® Paintover Challenge. They gave myself and five other bloggers a box of painting supplies and $1,000 to makeover our rooms.

    Here’s the budget breakdown for my room:

    Paint – $100

    Light Fixture – $124

    Headboard (velvet upholstery, foam, batting, wood, etc.) – $243

    Bedding – $240

    Accent Pillows & Inserts (I had some inserts on hand already) – $98

    DIY Art Frame – $20

    Lucite Curtain Rods – $206

    Closet Door Medallions & Knobs – $27

    Rugs for Closet Wall & Moldings – $30 (I had store credit for part of this.)

    Grand Total: $1,088

    I did go over budget by $88. The main reason for that was that it ended up taking three coats of pink paint and therefore I had to buy another $50 gallon of the paint. The headboard also took more foam than I expected which was about another $30 cost.

    There were also parts of this room that were factored into our whole house renovation. That included the carpet, construction of the new closet, and closing up the openings to the old closet, which became the Circus’ playroom. Those were things that were planned out long before this room design was dreamed up, so I didn’t factor those into the actual makeover budget.

    What do you think? Is it “Well Traveled” to you?

    pin-this-post-2

    Well Traveled Master Bedroom Makeover Reveal - DO NOT miss this master bedroom! It combines bold black and white, a touch of green, pink and a dash of Palm Beach! STUNNING! Lots of great DIY project ideas for bedrooms in this article!

    blog-signature-summer-15

    SaveSave

  • Easy Front Door Makeover

    Easy Front Door Makeover

    This is a sponsored post written by me on behalf of At Home. All opinions are 100% mine.

    I’m partial to lions.

    I find it hard to walk away from just about anything lion decor related.

    I have good reason for this though.

    Grunt Labor and I met while we were both teachers. Our school’s mascot was the lion. Grunt Labor has always coached the lions. The Circus knew how to say “Go Lions!” before she left the womb. She had her one year old pictures taken on the lion paw prints surrounding that same school’s football field. Bill played for the lions.

    So I’m partial to lions. 

    I have wanted a lion statue to go outside of our front door longer than I can remember. However, finding a good sized lion statue for a reasonable price was not as easy as I thought it would be. I had kind of quit looking.

    But it was when I quit looking that I found my perfect lion. 

    Lion Statues at At Home

    I was in At Home a few weeks ago for no particular reason other than to take a much needed break from the renovation at the 70’s Landing Pad. It was then, while wandering through the endless Outdoor Decor Collections aisles, that I found my lion. He was white, of good size, and only $30. I could hardly contain my excitement and having no one else with me to celebrate with, I pulled that lion right off the shelf and gave him a hug. Given that I’d been searching for him for years, I felt this was completely reasonable.

    Once I found my lion, my trip to At Home suddenly became a quest to whip the front door entry into shape at the 70’s Landing Pad.

    I decided the lion would go on one side of the front door, but I would need something of similar size to the lion to even out the other side of the door.

    At Home Outdoor Decor

    I went through shelves full of At Home Patio and Outdoor Entertaining items and tried out no less than 15 different plant stands, garden stools and small tables right there in the store. I’m sure people hate to turn down the aisles I’m on, because I tend to take up half of it testing out what works together and what doesn’t.

    After I found a garden stool that worked, I then did the same thing with flower pots.

    At Home Flower Pots

    And before I left, I figured I might as well get a new door mat while I’m at it.

    Here’s what the front door space looked like before:

    Front Door Before

    Now friends, you know I love me some green. But that shade of green with those bricks just wasn’t doing it for me. And so to really make my new lion feel at home and shine, I painted the front door and trim for him.

    Front Door Makeover

    I went for a wine colored front door and opted for black trim because we have a lot of black in the house and that seemed to tie in well with the brick color and the front door color as well.

    Front Door Makeover

    Of course, Mr. Lion is taking up residence on one side of the door. By the way, he also has a solar light built into him – that’s what the light and black thing are on his base! The new doormat also brought some of the black down to the porch floor.

    Front Door Makeover

    On the other side of the door is a black and white planter on top of a garden stool I finally settled on at At Home to give it a bit more height and even out each side of the door.

    Front Door Makeover

    I think Mr. Lion likes his new home – especially when the Circus makes him a crown out of rocks. 

  • Renovate for You.

    Renovate for You.

    Disclosure: This post is sponsored by Regions Bank, however all opinions and proclaiming my belief of renovating for you are 100% mine.

    When Grunt Labor and I realized that the new construction home wasn’t for us, we put it on the market and started house hunting. We were pretty open when it came to houses – we weren’t scared of having to do a little work. We were picky when it came to location though. A good sized yard was a must and a “real” neighborhood would be nice.

    We looked at countless houses. No, I’m serious. Countless. Lucky for us our realtor also happens to be a good friend and he was a great sport about showing us just about anything and everything under the sun.

    There was the house that sat right across from a would-be neighbor who owned a school bus and parked it right on the street every day as if it were a lawn street ornament.

    There was the house that had a dead bird in the shower.

    There was the one with a creepy downstairs that I ran out of faster than should have been naturally possible.

    After hunting for probably a month with no contenders, we were ready to just sell the new construction, put most of our things in storage and live in an apartment until we found the right place.

    And then our realtor called and said, “Have you looked at the house in my neighborhood?” Oh, you mean the neighborhood we consider the perfect neighborhood and dream about every night? Nope, we didn’t let ourselves look there because we knew it was too far out of our league. But our realtor said there was a foreclosure on the market in his neighborhood. And it was in our price range.

    We went to see it – with flashlights as there was no electricity or even running water turned on.

    And before we even looked at the downstairs level, we knew. We knew that this was our home. Well, I knew. Grunt Labor had to have a bit of coaxing.

    There was just a problem or two, well besides not knowing if the water or electricity even worked. It needed some renovations. We knew that even if it took us a year to finish all the work that it was worth it to get into this neighborhood though.

    And so we bought the beloved foreclosure. We closed on the house one day after our summer vacation started (both Grunt and I were teachers at the time), moved in enough furniture to get by and renovated 90% of the house that summer.

    Renovate for YOU! Lots of great ideas in this article about home renovating and great resources too! Renovated living room - wall was removed. Living Room Design / Living Room Decor / Eclectic Decor

    Living Room

    We took out a wall between the living room, dining room and kitchen.

    Renovate for YOU! Lots of great ideas in this article about home renovating and great resources too! Kitchen Renovation / Kitchen Remodel / Budget Kitchen Makeover / Navy and White Kitchen

    First Kitchen Remodel / Current Kitchen Design

    We painted the cabinets, got new appliances, eventually built an island and switched out the countertops.

    Renovate for YOU! Lots of great ideas in this article about home renovating and great resources too! Bathroom before and after renovation / Budget Bathroom Renovation / Bathroom Remodel

    First Bathroom Remodel / Current Bathroom Design

    We laid new tile, ripped out the old vanity and installed a new one in the hall bathroom.

    We painted every. single. wall. We bought all new trim and doors and painted every. single. one. of. those too.

    We installed hardwood flooring throughout the main living area and carpet in the bedrooms.

    We renovated our house for us. Yes, we did do it on a budget, but we also didn’t think twice on the things we really wanted for our home. I heard my in-laws say once that everything they had done to their house had been for them – because they liked it or had always wanted it. I thought that was a pretty good take on it, so we kept this in mind as we renovated the Beloved Foreclosure. And now, we’re sticking with it once more as we renovate the 70’s Landing Pad. If you’ve always dreamed of living in your house and making it a home, I suggest you give it a try. A home you love does the heart good. Why yes, I did just come up with that cheesy (but true) line all on my own.

    If you’re ready to renovate your house or buy your own beloved foreclosure, Regions Bank has a wealth of information about home buying and renovating on their Facebook page. They even have information about all the “non-pretty” but money related things like should you take out a home equity loan, how to navigate mortgage disclosures, how to be more energy efficient and ways to reduce your property taxes. Regions has resources for both first-time and seasoned home buyers as well and are always looking to provide you with financial solutions that are perfect for you and your budget.

    So let’s have you weigh in – How would you renovate and make it yours?

    Remodeling Ideas on a Budget | Renovated Ranch House | Kitchen Remodeling Ideas | Home Remodeling Ideas | House Renovation Ideas

  • The Best Yard Sale Tips So You Can Pawn Your Junk Off On Someone Else

    The Best Yard Sale Tips So You Can Pawn Your Junk Off On Someone Else

    Affiliate links may be contained in this post.

    At some point during my adult lifetime, I feel I’ve become a professional yard saler in both having yard sales and going to them. Of course, I hit up yard sales almost any weekend I can, but I also usually have a yard sale or garage sale at least two times a year if not three. After having so many yard sales for the past ten years or so, I’ve figured out what works best to get rid of as much of your crap as you possibly can.

    My Best Yard Sale Tips

    1. Hold yard sales and/or garage sales in groups.

    Just about anytime I have a yard sale, I do it with two or three of my friends. My house usually gets the most yard sale traffic so we often do it there. Having more people means you can advertise it as a multiple family yard sale and you’ll usually get more customers that way. It’s also helpful to have extra hands when you get really busy or if someone needs a potty break or has to make a beer run. I mean lunch run.

    2. Advertise, advertise, advertise.

    Advertising your garage sale hugely determines it success.

    • Make awesome signs for your yard sale.

    My friend Brittany had the stellar idea to make humorous signs for our previous yard sale.

    The BEST Yard Sale and Garage Sale Tips: Have stellar yard sale signs!

    We had so many people who came and were like, “I wasn’t going to stop, but couldn’t resist those signs!” We even had some that pulled up and said, “I saw those signs and knew you were my soul sisters.” They were a hit and so much fun to make

    • Advertise in your local newspaper.

    Anytime I don’t put an ad in the paper for my yard sales, I don’t make as much money or have as many customers.

    • Advertise on Craigslist.

    Lots of people look on Craigslist for yard sales. They have a category dedicated just for that.

    • Advertise in local Facebook yard sale groups.

    Search Facebook for yard sale groups in your area. (I talked more about Facebook yard sale groups here.) On the day of your yard sale, post pictures of your sale with the address and other information needed.

    • Advertise on your own personal Facebook page.

    Every time we do a yard sale, we each always put a post on our personal Facebook pages so local friends will know about it.

    3. Organize as much of your crap as you can.

    • Don’t leave everything in boxes.

    Put as much of it out on tables grouped together as best you can. Put all your home decor items together, baby items together, tech-y stuff together, etc.

    • Hang up any clothing items you are selling – especially adult clothing.

    With baby and toddler clothing, I typically group them by size in Rubbermaid totes and label accordingly. However, adult clothing sells so much better when you can actually hang it up somewhere. You can use a rolling clothes rack to do this or if you are having your yard sale near a garage, consider hanging a dowel rod temporarily where one of the garage doors is. You could install the closet rod holders on either side of the garage door opening, hang the dowel rod and just remove the dowel rod after the sale. The rod holders could stay there for your next sale and won’t really be noticed.

    4. Price your items.

    I am a person who while attending other people’s yard sales will ask what the price is if it isn’t marked, however I find that some people don’t like to do this and I always end up selling more stuff when I have prices on my items rather than when I don’t. You can use garage sale price stickers that already have prices on them to easily price your items. Here are my best tips for garage sale pricing:

    • Price your items just a tad bit higher than what you would take for them.

    Many people will always try to negotiate your price down a bit, so be prepared for that by pricing it slightly higher and being willing to negotiate.

    • Don’t overprice your items though. 

    Remember that while you may have paid $50 for that shirt, it’s not worth that much or even half of that anymore. If you price your items too high, you won’t sell as much and you’ll be left with a bunch of crap you don’t need. Think of it this way: would you rather sell 100 items for $1 each or 10 items for $10 each? Obviously, you won’t price everything at $1 or $10, but you get the idea.

    • Tell people if they buy more, you’ll cut them a deal. 

    If you see someone eyeing something and they’ve already got a couple things in their hands to buy, tell them you’ll cut them a deal if they buy it all.

    • General Pricing Guidelines

    I am in the south and I think we tend to have lower yard sale prices than many other areas. Here are some general price points for how I price items though:

    Clothing: $1 – $3 per piece depending on brand, condition, etc. Shoes are typically $3 – $5 per pair depending on brand and condition. All my baby and toddler clothes, I mark at $1 per piece.

    Small Home Accessories: $1 – $5 per piece. This would include things like photo frames, wall frames, small knick-knacks, etc.

    Medium – Larger Home Accessories: $5 – $20 per piece. This would include stuff like lamps, large wall clocks, and maybe even vintage items that are popular right now.

    Furniture: Unless I’m selling a piece of furniture that is in really nice condition and paid a whole lot of money for it, I don’t typically price any piece of furniture over $100 at a yard sale. Small side tables, end tables, etc. are usually priced between $10 – $20. Chairs may be around $50. Larger pieces, $100. I typically make more money off of furniture by listing them on Craigslist and Facebook yard sale pages. I always give that a try first before putting it in my yard sale. Once more, there’s more info about selling through those outlets here.

    • Cut prices in half after noon.

    We generally start our yard sales around 8 a.m. Around noon, I will usually cut my prices in half to get rid of anything I still have.

    5. Be nice. Greet your customers.

    Anytime I go to a yard sale, I am usually more apt to buy something I like when the sellers are friendly. We always try to say “Hello” or “Good Morning” as people stop by our sale. Also, this is the perfect time to tell them you’re willing to make a deal and all prices are negotiable.

    6. Have plenty of change.

    You would think that someone going yard saleing would have plenty of ones, rather than a twenty or even fifty dollar bill. However, that’s not always the case. Make sure you have plenty of change as soon as your yard sale starts – lots of ones and quarters are best.

    What are your best yard sale or garage sale tips?


    If you liked this post, you might wanna see these too…

    DIY Clothes Rack and Free Printable Size Dividers - great for yard sales or organizing babies closets.

    DIY Clothes Rack and Free Printable Size Dividers for Your Next Yard Sale

    How to Sell Your Used Items via Facebook, Craigslist, Yard Sales and More.

    How I Made $2K+ in Two Months Selling Our Clutter

    A real life guide to banishing clutter in your house! 15 Days to a Clutter-Free Home and some extra cash...

    15 Days to a Clutter-Free Home and Some Extra Cash

    pin-this-post-2

    The Best Yard Sale Tips | Yard Sale Ideas | Best Yard Sale Signs | Yard Sale Pricing | Garage Sale Tips | Garage Sale Ideas

    blog-signature-summer-15

    SaveSave

  • DIY Black & White Diamond Feature Wall

    DIY Black & White Diamond Feature Wall

    This post is sponsored by FrogTape, however all opinions are 100% mine. Affiliate links may be contained in this post.

    Last week I left you with a design board that included visions of palms, pink, black and green dancing in your my head. The master bedroom makeover’s theme is Well Traveled – one of FrogTape’s 2016 design trends.

    This week’s master bedroom makeover update is about the prep – creating a pattern on your wall with FrogTape® to make a kick-butt and take names accent wall.

    If you remember from my design board, I wanted to do a variation of the pattern I painted on my office closet doors and also on a larger scale.

    Stunning - AND she did it with paint and FrogTape! DIY Painted and Patterned Doors / Black and White Design / Black and White Decor / Interior Design

    And that’s exactly what I did. First though, I had to get the walls painted.

    Create an accent wall with FrogTape and paint!

    To start with, I taped off all the trim in the room with FrogTape® Delicate Surface. I had actually sprayed my trim with my paint sprayer just a couple days prior to painting the walls and before new carpet went in, so I used the Delicate Surface since the paint was still fresh.

    After painting all the walls pink, I turned my attention to the one wall that would be my accent wall. First I measured it’s length, which was 196″. To get the design I wanted, I needed to create multiple even sections across the wall. I played with the 196″ and found that if I divided 196″ by 7, I would get seven 28″ sections across the wall. At that point, I went across my wall and made a mark at every 28 inches.

    Create an accent wall with FrogTape and paint!

    After making my marks, I used a level to draw a line vertically down from each mark.

    After that, I ran strips of FrogTape® vertically right over those marks. I had let my paint dry for nearly a week, so I went with the FrogTape® Multi-Surface on this wall.

    Create an accent wall with FrogTape and paint!

    Obviously, the tape width is larger than the line (I used the 1.41″ width), so I just eyeballed the line under the tape and kept it in the middle of the tape as I ran it down the wall.

    Create an accent wall with FrogTape and paint!

    Next, I used a yardstick and marked 6″ and 18″ down from the ceiling on every other strip of tape.

    On the other strips of tape, make marks 12″ down from the ceiling.

    Measurement Marks

    Next, run pieces of FrogTape® diagonally from the 6″ and 18″ marks to the 12″ marks to create diamonds.

    Create an accent wall with FrogTape and paint!

    Continue this down the wall.

    Create an accent wall with FrogTape and paint!

    You will also want to run strips of tape on both edges / corners of the wall as well as seen in the photo above.

    I wanted to add in one more “layer” of pattern underneath this one. To do this, I got back out my yardstick and made a mark 30″ down from the ceiling on the strips of tape that had originally gotten the 6″ and 18″ marks. On the strips of tape that had originally gotten the 12″ marks, I made marks 24″ and 36″ down from the ceiling.

    Measurement Marks

    Next, I ran diagonal tape strips from the 24″ and 36″ marks to the 30″ marks to make more diamonds.

    Create an accent wall with FrogTape and paint!

    Use an X-Acto knife to even up your tape edges and to remove the strips of tape in the middle of the diamonds as shown below.

    Create an accent wall with FrogTape and paint!

    Use a credit card or your fingertips and firmly push down along all the tape edges to seal it.

    Create an accent wall with FrogTape and paint!

    After all the tape was secured down, I painted over the wall with black paint.

    Black Paint over Taped Wall to create a feature wall!

    I did two coats of the black. I could have probably gotten by with one coat, but did two just for good measure. I used FrogTape® Multi-Surface for the accent wall. I had waited about a week between painting the wall and doing the taping and painting of the design, so using regular FrogTape® would be just fine for this part of the project.

    Immediately after applying your last coat of paint, remove the FrogTape.

    Well Traveled Master Bedroom Makeover Reveal - removing the tape

    I had been feeling pretty good about the pink and black color scheme. But, when I got all the tape off the feature wall, I wasn’t loving the pink and black together there.

    Well Traveled Master Bedroom Makeover Reveal - changing the color scheme

    While the black trim and plain pink walls worked well on the other two walls in this room, it just seemed too much on the feature wall. So as I like to say – I had to back up and punt. I opted to change the pink on the feature wall to white. Instead of mapping out my entire design again, I just used FrogTape® Delicate Surface and taped off around the black parts of the wall and painted the white in-between. And after two coats of white paint and removing more tape…

    DIY Black and White Diamond Feature Wall - just stunning!

    I got exactly the product I’d been looking for.

    DIY Black and White Diamond Feature Wall - just stunning!

    This wall is by far one of my favorite feature walls I’ve done to date. What do you think about it?

    blog-signature-summer-15

    pin-this-post-2

    Black & White Diamond Feature Wall | DIY Accent Wall Designs | Feature Wall Ideas | Accent Wall Ideas | Accent Wall Bedroom

    Disclosure: This post is sponsored by FrogTape®, however all opinions and love of diamond patterned walls are 100% mine.

    SaveSave

  • How To Keep Rugs From Sliding

    How To Keep Rugs From Sliding

    Nearly broken your neck or a limb before because a rug slid right out from under you? My hand is raised over here! When a heavy piece of furniture is on your rugs, then you’re in good shape. Runners through your hallway though, kitchen rugs, rugs in your entryway – those are the ones that can be a pain to keep in place. I have found the solution though for how to keep rugs from sliding on hardwood floors, tile floors, linoleum and other hard surfaces. Read on to see how easy it is!

    This post is sponsored by RugLock, however all opinions are 100% mine. Affiliate links may be contained in this post.

    I switched out the rugs in my dining room a while back. I had Grunt Labor and Nicky move one we had downstairs upstairs under the dining room table. I could have done this myself, but when you have free labor around, you should take advantage of it, no?

    Both Grunt Labor and Nicky said, this rug is too light (in terms of weight), it’s going to slide around up here on the hardwood. I said they were wrong. The table would keep it in place.

    Well, I realized I was the wrong one after about 10 minutes of having the rug in place.

    Yes, those words did just taste like vinegar.

    The table kept the rug in place where the four legs stood, but other than that, when you took one step on it, the rug went another way.

    We put a rug pad under it which helped some, but not completely.

    Now, let’s fast forward to my office at the 70’s Landing Pad.

    How to Keep Rugs from Sliding on Hardwood Floors and Other Surfaces

    This is one of two rooms in the whole house that didn’t get new floors. It already had the hardwood and while the finish is coming off right in the middle (you can see around the edges of the rug where the finish is wearing away), I just couldn’t justify the money to refinish the floors (it was going to be $500 just for this small space) when it was just that one area. So, I opted to cover most of it with a snazzy leopard print rug I found at a yard sale for $2.

    The problem: The rug was sliding all around the room like the floor was it’s own personal slip n’ slide.

    And that’s when I heard about RugLock.

    How to Keep Rugs from Slipping

    RugLock actually tweeted me and said they were in the Chattanooga area too, told me about their product and ask if I wanted to try it out. Yep, I have the perfect place to do just that.

    RugLock is a spray that creates a permanent non-slip rug backing which grips to your floor.

    Here’s how to use it…

    How to Keep Rugs From Slipping

    You’ll Need: 

    • RugLock
    • Painter’s Tape
    • Drop cloth

    You can buy RugLock by itself or purchase it with a kit which includes the painter’s tape and drop cloth for $5 more. You can find it on RugLock’s site or on Amazon.

    Step 1: 

    Lay out your drop cloth and place your rug upside down on the drop cloth.

    How to Keep a Rug in Place

    If there’s any dirt or junk on the bottom of the rug, clean that off. A lint roller works well for that.

    Step 2: 

    Run painter’s tape along the edges of the rug to protect the banding or any fringe the rug may have.

    How to Keep Rug from Sliding on Hardwood Floors

    Step 3: 

    Shake the can of RugLock, hold it at knee height and spray it back and forth working your way down the rug.

    How to Keep a Rug from Sliding on Tile Floors

    It should look like snow falling on the rug.

    How to Keep a Rug from Sliding on Linoleum Floors

    Cover the entire rug with RugLock and let it dry for 8-12 hours.

    How to Keep Rugs from Sliding: Spray on this stuff and they won't budge a bit!

    Step 4: 

    I let my rug dry overnight, then came back and removed the tape. The back side of the rug will be tacky. This is how it’s supposed to feel. Place your rug where you want it and lock it in place by applying pressure to it.

    How to Keep Rugs from Sliding: Spray on this stuff and they won't budge a bit!

    I walked all around on mine. Yes, I know I have sexy supermodel legs. 😉

    You can move the rug at any time. If any of the RugLock sticks to the floor, it can be rubbed off by hand or with a damp cloth. If the rug starts to slide over time, just flip it over and wipe down the backing with a damp cloth, let it dry and the tackiness will return.

    Now obviously it’s hard to tell that the rug is really locked into place with just pictures. So I made a quick little video of me pulling, jumping, etc. on the rug. I had to hold the phone myself because no one is ever around to video this stuff for me.
    [adthrive-in-post-video-player video-id=”B3SMuhgT” upload-date=”Wed Jul 20 2016 13:33:20 GMT+0000 (Coordinated Universal Time)” name=”Rain on a Tin Roof – How to Keep Rugs From Sliding” description=”How to Keep Rugs From Sliding by Rain on a Tin Roof”]

    I was seriously impressed by this stuff and can’t wait to try it out on a couple other rugs. So far, this has been the best way I’ve found to keep a rug in place.

    RugLock will most likely work best to keep rugs from sliding on hardwood floors, tile floors, laminate floors and linoleum flooring. Since the spray on backing is tacky, I wouldn’t recommend it for carpet.

    You can find RugLock here and on Amazon. 

    pin-this-post-2How to Keep Rugs from Sliding | Rug Slipping Fix | How to Keep Rugs in Place | DIY Rug Idea | How to Keep Rugs from Slippingblog-signature-summer-15

    Disclosure: This post was sponsored by RugLock, however all opinions and love of $2 leopard print rugs are 100% mine. 

    SaveSaveSaveSaveSaveSaveSaveSave

  • How to Accessorize a Space without Over-Accessorizing

    How to Accessorize a Space without Over-Accessorizing

    I have a thing for smalls. Not Smalls from The Sandlot (although I do love The Sandlot), but smalls as in home accessories. I actually have a whole big cabinet dedicated to smalls I don’t always use but never know when I might need them. There are brass horses, giraffes and multiple other varieties of brass accessories, trays, decorative vessels and lots of other little “smalls” that I just find pretty and have picked up at yard sales, thrift stores and T.J. Maxx for a few bucks.

    At one time, I would have insisted on having every one of those smalls out on display. And while I had all these pretty things out, decorating with them, I could never figure out why it didn’t look that great. It was just ok. And then one day, I started clearing off surfaces, putting some of those smalls away. And I’ll be damned if the new vignettes / decorating moments / whatever you want to call them didn’t look 101 times better. Not to be a cliche, but sometimes less really is more.

    How to Accessorize a Space Without Over-Accessorizing

    Affiliate links may be contained in this post.

    I have two general rules for accessorizing without over-accessorizing. Yep, two. So don’t say you can’t do this.

    1. Try to decorate in threes.

    Choose three accessories, preferably one small, one medium, one large but all generally comparable in size and use those for one space – a nightstand, the end of a buffet, etc. Now, there are many times, I may only use two things or more than three, but you have to play with it a little more to get it to work.

    2. Arrange the three accessories in a triangle formation. 

    It doesn’t have to be your typical triangle – it can be sideways or a right triangle or whatever. Just try to arrange them in a triangle formation.

    Here are my favorite “small” decorating moments I’ve done. I think I can show you how to accessorize a space without over-accessorizing better than tell you. Practice what I preach, right? What’s up with the cliches in this post?? 

    How to Accessorize a Space Without Over-Accessorizing - gives great guidelines and suggestions for using just the right amount of home accessories to make a big decorating impact! Good living room decorating ideas.

    Black and White Gallery Wall / Living Room Tour / White Bust (similar) / Brass Unicorn (similar ones)

    Take a look at the edge of this buffet. My threes are the potted succulent, the bust and the unicorn. I really liked the look of the succulent behind the bust and unicorn, but the pot was short, so I actually propped it on top of a decorative box that you really can’t see too much. And notice how I created the triangle with it too?

    How to Accessorize a Space Without Over-Accessorizing - gives great guidelines and suggestions for using just the right amount of home accessories to make a big decorating impact! You can also learn how to make those lamp tassels! Love how random, but pretty this decorating vignette is!

    Wall Sconce / DIY Lamp Tassels / Gnome (similar one) / Brass Unicorn (similar ones)

    Recently, I used that same brass unicorn in another vignette on the opposite side of the buffet as shown below. This time though, I kind of used my lamp tassel and lamp as one of the smalls. Again, I propped the gnome up on the box because he was too short.

    How to Accessorize a Space Without Over-Accessorizing - gives great guidelines and suggestions for using just the right amount of home accessories to make a big decorating impact! This is faux jadeite!

    DIY Faux Jadeite

    This is like the perfect rule of three and triangle right here. These are three pieces of faux jadeite I made. You’ve got three different sizes and all placed in a triangle formation. I added in a bracelet and old match books for a bit more interest.

    How to Accessorize a Space Without Over-Accessorizing - gives great guidelines and suggestions for using just the right amount of home accessories to make a big decorating impact! Great idea for decorating with trays.

    Giraffe Tray / Bull Planter (similar ones) / Wing Tray (similar) / Brass Key (similar ones) 

    This is one of my favorite vignettes, mainly because of the bull planter. Trays are great for containing items and making it look less cluttered. I don’t necessarily count the tray as one of my three or small decorating items, but more of a base. I count the wing tray, bull planter and books as my three. If they were all just arranged on the table without the tray, they wouldn’t look as put together. The tray helps to anchor them.

    How to Accessorize a Space Without Over-Accessorizing - gives great guidelines and suggestions for using just the right amount of home accessories to make a big decorating impact! Entryway decorating

    Confetti Wall / Green Pillow / Black and White Pillow

    Of course, you already know this is my most favorite here. Yes, there are more than three things on the bench, but notice how they all work together in a triangle. Sometimes when you have something that’s a larger scale surface, like the bench, you need to use more than three things.

    How to Accessorize a Space Without Over-Accessorizing - gives great guidelines and suggestions for using just the right amount of home accessories to make a big decorating impact! That accent wall if awesome!! And the Elvis and Gone with the Wind quote!!

    Circles Accent Wall / Elvis Bust (similar ones) / Free Gone with The Wind Printable & DIY Lucite Frame

    In this one, I only used two items because the random circles accent wall behind the print and Elvis bust was quite busy and kind of worked as an accessory all on its own.

    How to Accessorize a Space Without Over-Accessorizing - gives great guidelines and suggestions for using just the right amount of home accessories to make a big decorating impact! Such a pretty vignette in a small space.

    Liquor Cabinet / Brass Bowl (similar ones) / Vintage Travel Clock (similar ones) / Glass Case (similar ones)

    This one is an oldie, but a goodie. Before I moved and made over the liquor cabinet, I had this setup in the narrow space between the upper and lower cabinets. My three main accessories are the hat (my great-grandfather’s), the brass bowl (which I put on top of books to raise it) and the vintage clock in the glass case. They all still make a triangle, but a lower one.

    How to Accessorize a Space Without Over-Accessorizing - gives great guidelines and suggestions for using just the right amount of home accessories to make a big decorating impact! Love this nightstand vignette.

    Leopard Wall / Parrot Lamp (similar) / DIY Art / Arrow Bookends / Vase (similar)

    This one has a bit more going on, but I still think it works well because the surface of the nightstand was larger than usual. The lamp, art, books and bookend and vase all still make up a triangle. Looking back now, I should have removed that black and white box though to make it a little less cluttered.

     See, it’s easy when you break it down! Now go edit your accessories and put ’em in triangles and I promise they’ll shine even more! Tuck away the ones you edit out that you still really love though.

    Do you have any tips to share for accessorizing without over-accessorizing?

    You might just want to see these too…

    Best Coffee Table Books | Coffee Table Photo Books | Coffee Table Books Decor

    The Best Coffee Table Books

    Living Room Ideas / Living Room Decorating / Living Room Decor Ideas / Real Life Living Rooms

    20+ Living Room Ideas

    pin-this-post-2

    How to Accessorize Your Home | Decorating Ideas for the Home | Decorating on a Budget | How to Accessorize Your Living Room | DIY Decorating

    blog-signature-summer-15

    SaveSave

  • My Best Tips and Tricks for Painting Furniture

    My Best Tips and Tricks for Painting Furniture

    I started painting furniture 10 years ago. I had no “how-to” guide and my internet was still dial-up, so needless to say, that wasn’t much help. I had no clue exactly what I was doing, but I dove in anyway. Needless to say, those first few pieces didn’t turn out so great. But, I kept going. I’ve learned a lot since that first piece and today, I’d like to share with you my best tips and tricks for how to paint furniture. 

    When I painted my first piece of furniture nearly 10 years ago, I would have never dreamed painting furniture would become “all the rage” in the DIY world. Now, you can’t get on Pinterest without something about painting furniture popping up within five minutes.

    In all honesty, I had no idea what I was doing when I first painted furniture. I do remember using a black Sharpie to mark up the piece, then painting over it, then sanding where the Sharpie marks were to distress it. See – I had no clue. Distressed furniture isn’t my style too much anymore, but in the last decade, I have learned some best practices for painting furniture.

    Tips and Tricks for Painting Furniture

    Prepping Furniture to Paint: When to Sand, When to Degloss, When to Prime

    How to Paint Furniture | Tips and Tricks - Prepwork

    Prepping Furniture to Paint

    First things first – prep work. No, you cannot simply just start painting furniture without the proper prep work! Read this article to determine what prep work you need to complete first before painting.

    Best Paint for Furniture

    Best Paint for Furniture

    What kind of paint do I use on that? 

    Having trouble figuring out what type of paint you should use on a certain surface? This article will guides you through the various types of paint and what kind of surface you can use each one on.

    Best Top Coats for Painted Furniture

    Painting Furniture - Top coats for painted furniture.

    Painting 101: Topcoats and When to Use Them

    Topcoats used to elude me. I had no clue what kind of topcoat to use when. This post breaks each topcoat down and gives examples of what topcoat to use when.

    Peeling Paint on Furniture?

    Furniture Painting Tips and Tricks - Peeling Paint

    Why is my Paint Peeling?

    This had to happen to me a few times before I figured out what I was doing wrong. Have you had paint peel on a piece of furniture you painted? Is it not one of the most frustrating feelings in the world?! This post helps fix that little problem.

    FAQ: Painting Furniture

    FAQ: Painting Furniture | Every question you have about painting furniture answered in one place! Great information for beginner furniture painters!

    FAQ: Painting Furniture

    I get questions often about painting furniture. To make it helpful to everyone, I started putting all those Q & A’s in one place.

    Best Painting Tools and Supplies for Furniture

    The BEST tips for painting furniture - 12 must have tools and supplies for getting painted furniture right the first time!

    12 Must Have Tools and Supplies for Painting Furniture

    There are a few tools and supplies for painting furniture that I’ve become partial to. They haven’t let me down yet.

    How to Use a Paint Sprayer for Painting Furniture

    This post has THE best tips for not only how to use a paint sprayer but also how to paint furniture in general. If you're a furniture rehabber, don't miss it!

    Power Tools 101: The Ultimate Guide to Using a Paint Sprayer

    For bigger furniture painting projects, I tend to use my paint sprayer. I’ll be the first to say, I used to detest paint sprayers. The problem though was that I hadn’t found the right one. After I finally did find the right one, I fell in love.

    Furniture Painting Techniques

    The No Priming, No Topcoat Way to Paint

    Furniture Painting Techniques

    The No Priming, No Topcoat Way to Paint

    If you’re looking for the easiest way out when painting furniture, then you need to read this one.

    How to Get a Beachy Colored Look when Painting Furniture

    Oh my goodness! If you love the beachy washed out look in home decor, then you have to see this! It's so easy! How to Create a Beachy Colored Look with Paint | Beach Decorating | Nautical Decor | Ocean Living | Beach Living | Aqua | Furniture Makeover

    How to Create a Beachy Colored Look

    If you’re a fan of a washed-out “beachy” look, then you will definitely want to see how easy it is to create a beachy colored look with paint and glaze.

    How to Make Colored Stain

    Did you know you can make COLORED stain?! How about trying this instead of painting furniture the next time?! Lots of other great furniture painting tips here too!

    How to Make Colored Stain

    Colored stain definitely isn’t for everyone, but it’s a fun technique to use on smaller pieces. It’s also really easy to make.

    How to Make Furniture Glaze in Any Color

    Instead of using antique glaze, make your own COLORED glaze! How fun would this be for a beach house or a kid's room?! There are lots of other great tips for painting furniture in this article too!

    How to Make Furniture Glaze in ANY Color

    Another type of thing that isn’t for everyone, but fun and easy to make. You can make furniture glaze in any color and then layer it on top of your paint. I really like the way most colors look layered on top of white – it has a beachy feel to it.

    How to Strip & Restain Furniture

    The least messiest way to strip furniture and then restain it. How to Strip Furniture and Restain It

    How to Strip and Stain Furniture

    Sometimes you might want to stain a piece, rather than painting it. This post will walk you through how to strip furniture to restain it.

    Caribbean Blue Layered Furniture Painting Technique

    Easy furniture painting technique - create a Caribbean Blue finish by layering colored glazes.

    How to Get a Layered Color Look

    This technique uses three different colors to achieve a layered look when painting furniture.

    Aged Pink Look on Furniture

    Gorgeous rich color! And no priming required with this paint! Glamorous Dresser Makeover

    Aged Pink Furniture Painting Method

    Use this tutorial to achieve an aged pink look on furniture. It helps to calm down those ultra bright hues, like fuchsia a bit.

    Painting Designs on Furniture

    How to Paint a Plaid Pattern

    Painting designs on furniture

    How to Paint a Plaid Pattern

     The best thing about this painting design is that no measuring is required to get those perfect lines!

    Tuxedo Bar Front Design

    DIY Tuxedo Bar | Learn how to paint a bar front or any piece of furniture with a mostly flat front to look like a tuxedo jacket. Awesome idea for a furniture makeover!

    DIY Tuxedo Front Bar

    This was such a fun painted design to do on a bar front – it wasn’t too hard either!

    Polka Dot Furniture Painting Pattern

    Simple Polka Dot Chair Makeover - She used Velvet Finishes to paint the chair and upholstery! So adorable and very Kate Spade inspired!

    Simple Polka Dot Painting Technique

    Painting polka dots on furniture is a piece of cake!!

    Do you have any great tips for painting furniture? Please share with the rest of us in the comments!

    You're going to want to see this too...

    Wall Painting Ideas and Paint Designs ANYONE Can Do! This article is FULL of DIY painting ideas including wall painting techniques, wall painting designs and other painting ideas!

    Wall Painting Ideas & Paint Designs Anyone Can Do

    pin-this-post-2 Tips for Painting Furniture | How to Paint Furniture | Furniture Painting Techniques | Furniture Painting Ideas | Furniture Makeover Ideas blog-signature-summer-15

  • How to Decorate with Inherited Furniture without Making Your Grandparents Roll Over in Their Graves

    How to Decorate with Inherited Furniture without Making Your Grandparents Roll Over in Their Graves

    My family is not a family who easily gets rid of things. When cars of those gone before us stop running, we park them on family land to serve as a sort of monument, a reminder of the soul before us who drove that truck and caused millions of tiny burn holes in the seat from his cigarettes.

    We don’t sell their houses. Grunt Labor often jokes that our family owns more houses than it has families to live in them. He’s right. We don’t hold estate sales when loved ones pass. Whatever items of theirs are not taken when things are divided up, get put into a basement or attic or garage for storage until a member of the family decides they really want that old chaise lounge from the 40’s.

    My people find it hard to let go. Some might call us hoarders, but that wouldn’t be true because it is in fact possible to navigate easily through each of our houses. Perhaps pack rats is a better term and I won’t deny that one. However, my preference is to think of us as collectors and keepers of the family history.

    The person who has the most issues with letting go is me. Everyone knows that if no one else wants it, but they just don’t have the heart to give it to Goodwill because it was a gift from so & so to so & so on their wedding day yada yada yada, then by God, give it to Jenna because she’ll hold onto it till the end of time whether or not she actually has a place or need for it. She’ll also be able to give the next generation a mostly accurate work-up of it’s history in the family.

    Here’s the thing though. Not all of those inherited pieces always fit in perfectly with my decorating style. You’ve ran into that problem too, huh? When I first realized this, I just kind of lived with it. I thought it would be a sin to paint something or repurpose it to make it more “me.” Well, that was just damn stupid, y’all. I’m here to tell you that your grandparents will in fact not disown you from the grave if you paint their kitchen table you spent countless hours with them at and turn it into your desk. In fact, I think they might be damn proud of your ability to repurpose items and love the fact that it’s like you still have coffee with a little piece of them every morning.

    So here’s where I give you all the “It’s ok to….” lines. Just imagine it’s your grandmother saying it. I do this all the time. The only time I got in trouble for it was when I turned my great-grandmother’s china cabinet into a liquor cabinet and I’m pretty sure I heard her sigh, throw her hands in the air from beyond the grave and say, “Whatever,” somewhere in the distance. She still loves me though and I did name my kid after her so I figure that got me back in her good graces.

    1. It’s ok to paint it.

    You see that buffet? It was my great Aunt Treva’s. I never met her, but my uncle, her brother, used to tell me I was a lot like her. He said she was a lot of fun, so I’ll take that. When I got the buffet it wore its original stain. Eventually it went to a periwinkle hue. Then red. And now, it’s stained once more, but not the same shade as before. The same is true of the matching dining room table that goes with the buffet. It was stained to begin with, now white, but will soon be stripped and stained again. Now, you can’t tell me my Aunt Treva doesn’t think her buffet looks killer in front of my black and and white gallery wall.

    My great Aunt Lee gave me this chest of hers about 10 years ago now. On the inside lid, it has the emblem of her college. I used it as as storage chest for quite a while, but when the Circus started amassing a huge collection of toys, I decided to paint the chest, add little birdies and make it her toy chest.

    When I was a little girl, that bookshelf was filled with 30+ years of yearbooks from my grandmother’s days as a teacher. I could probably still look through one and tell you the names of people just by looking at their faces – I looked at those yearbooks that much. Sitting criss-cross in the floor in front of that bookshelf with a yearbook in my lap is one of my most vivid memories. The bookshelf was stained then, but that wouldn’t work in my daughter’s nursery, so I painted it for her. She has a new bookshelf for her room at the 70’s Landing Pad, so this one will be getting another makeover for my office.

    2. It’s ok to repurpose it too.

    This one makes my heart smile every time. That desk is the one I’m sitting at now typing this post. It’s also the kitchen table I sat at over 15 years ago while my Pap and I stared at far too many grapes my father sent over and told us to do something with and we finally figured out how to make grape jelly. It’s the kitchen table where I sat on top of on my first birthday and drank from a mustard bottle my grannie filled with milk while my uncle put icing from my cake on my nose. It’s where my Pap waited for me to arrive every morning during the summer of 2001. That table has a history. I took the side leaves off it (but kept them in case I want to put them back on again) and added a hutch on top to make it my workstation. It’s served me well my whole life.

    And this is the one where my great-grandmother would have probably liked to come up from the grave and give me a swift kick in my rear end. This was her china cabinet. I had never really considered using it as anything else, but when Grunt Labor saw it for the first time, he stood in front of it in silent thought for about five minutes, then proclaimed it was meant to be a liquor cabinet. And I agreed with him. He and Nick knocked out a couple of shelves to make it work and Nicky nearly peed his pants when I told him mid-hammer swing that it was my great-grandmother’s china cabinet. But in the end, it does work better for us this way. I still remember it painted black in the corner of my great-grandparent’s house, but now it has lots of new memories as well.

    Apparently, I have a thing with bars. This vintage radio was my great-grandfather’s and while I didn’t necessarily want to paint it, it’s stained finish was simply too far gone. The radio didn’t work either, so I turned it into a bar cabinet for Grunt Labor’s man cave.

    3. It’s ok to mix and match.

    When my great uncle died, my uncle who inherited his things gave us a bedroom set from his house. We really needed the dresser and chest of drawers for our master bedroom, but the bed was too small for us. We split the set up and put the bed in the guest bedroom and the chest and dresser in our bedroom.

    4. It’s ok to embrace them just the way they are.

    There are some things you won’t be able to change – things that have too much of a stronghold on your heart that you can’t bear to see them any other way than the way you saw them growing up. This lamp was one of those things. My pap made it. Many might consider it out of style. I don’t give a damn. I love it. It works perfectly in our living room. For me – painting this was unthinkable. However, it’s finish was in bad condition, but I found a way to fix it.

    The same is true of this marble topped table. The finish is no longer shiny on it’s base, but I love this table just the way it is.

    5. It’s ok to pull out the little things.

    I carried my grandmother’s guitar around in its case from three different houses before it finally dawned on me to get the thing out and decorate with it for all to see. It was actually Bill who saw it out one day after the Circus had been “playing” it and said, “I like how that looks over there.” And he was right – it fit in perfectly. Don’t leave the small heirlooms tucked away. Get them out – let them breathe. I guarantee you they will make you smile when you pass by them.

    This one right here – it’s one of my favorites. My dad and uncle’s old cowboy blanket paired with my pap’s cowboy hat, my boots and a random confetti wall. I once told someone that if you threw me up on the wall, this is what it would look like. That’s about right.


    Now, repeat after me.
    It’s ok to make my grandparent’s pieces my own.
    They’ll still hold the memories, but now they’re ready to make even more.
    How do you decorate with your inherited pieces?

  • Latest Good Reads No. 1

    Latest Good Reads No. 1

    While I realize this blog is predominantly about home decor and DIY, I love that it’s turned into it’s own little beast where I can also write about anything from my ridiculous stories to the latest books I’ve read and we still have good conversations about all the topics equally.

    That’s why you’re my people. My Freak People.

    A couple weeks back, we went to the beach – me, Grunt, the Circus, and my in-laws. While we all go to the actual beach of course while we’re there, everyone of us will have a book in hand at just about any spare moment we’re not on the beach playing with the kid. We bring lots of books and make sure we’re stocked up for the week. To run out of books during a beach week would be a damn bad deal.

    If you were to walk in on us while we’re not at the beach, you may think we’re a family of nerds because we would all have our noses in a book.

    And that would be just fine with us.

    You would also think Grunt Labor is the head nerd because he reads all these really smart non-fiction books. I love a good non-fiction book, but he reads this stuff about how people learn and leadership and all that other jazz. He’s a multifaceted gem, isn’t he?

    This post contains affiliate links for your shopping convenience. Click here to read my full disclosure policy.

    Normally, I have the latest Greg Iles book to take up most of my time at the beach. Unfortunately, Mr. Iles has not yet released his third book in the Natchez Burning series. Come on, Greg. I’m dying over here. Therefore, I went through about four different books this vacation. Here’s some goodies to add to your reading list…

    Pat Conroy, South of Broad - a gripping novel about love, friendship, and Charleston. I call it the southern version of "The Big Chill."

     South of Broad by Pat Conroy

    In one post about my favorite southern books, there were quite a few of you who kept saying, “You have to read Pat Conroy!” Well damn, why didn’t y’all tell me that sooner? South of Broad is the first Conroy book I’ve read and it has already made my list of top five favorite books. I would describe it as similar to The Big Chill, but southern style and much more riveting and gripping. It’s a tale of family tragedy and how strong friendship can be. I could never do this book justice with a summary. Get it. Read it. You will thank me later. I’ll also be picking up quite a few more Pat Conroy books to dive into.

    Doll-baby. Set in New Orleans. Ibby is sent to live with her grandmother and eventually learns there's more than a few family secrets.

    Doll-baby by Laura Lane McNeal

    If it’s set in New Orleans, there’s a good chance I’m going to read it. As you all know, NOLA and I are madly in love. Doll-baby is set in New Orleans during the 1960’s. Ibby’s father dies unexpectedly when she is 12 and her mother sends her to live with her grandmother, Fannie, whom she has never met before. Fannie has a slew of family tragedies and secrets that only her and a handful of people including her cook, Queenie and Queenie’s daughter, Doll-baby know about. Ibby soon falls in love with her wild grandmother, Queenie, and Doll-baby and eventually unravels the family secrets. Doll-baby has been compared to The Help and I’d say that’s a pretty good comparison – if you loved The Help, you’ll love Doll-baby. Hell, if you love wild, eccentric grandmothers, you’ll love it.

    The House We Grew Up In - one family's tale of loss, estrangement and their hoarding mother.

    The House We Grew Up In, by Lisa Jewell

    After Doll-baby, I started The House We Grew Up In. This book was probably my least favorite of the ones I read over vacation, but none the less, it was still good. It’s set in England and follows a family over decades of tragedy, betrayal and estrangement. The whole family is terribly troubled over a tragedy that happened one Easter. After their mother, a full-fledged hoarder, dies, they finally discover more details about the tragedy.

    What She Left Behind - a tale of a teenager whose mother was sent to prison for killing her father. The teenager doesn't realize the real reason why her mother did what she did.

    What She Left Behind by Ellen Marie Wiseman

    This one was so good. What She Left Behind combines tragedy with a touch of mystery. Izzy’s mother was sent to prison years ago for killing her father. After Izzy’s grandmother dies, she bounces around foster parents. She finally ends up with a couple who is loving and unlike any other foster parents she’s had. They are working to preserve the history of a long closed insane asylum. While helping them, Izzy finds the trunk of Clara who was never actually mentally ill, but still held in the asylum against her will. Izzy works to find out more about Clara and what happened to her and in the process finds out more about herself and why her mother did what she did. What She Left Behind is another favorite of mine.

    The Tradd Street Series - set in Charleston, each book is about the tale of a ghost whose history must be determined. Some of my favorite "ghost" stories by far.

    The Tradd Street Series by Karen White

    I had already finished The Tradd Street Series by the time vacation rolled around, but wanted to follow-up on them since we’d talked about the series in the last book post. Y’all, this whole series is just awesome. Each book is set in Charleston and centers around Melanie Middleton, who can see ghosts. The main ghosts in each book have dark histories or have somehow been wronged. Melanie and her friend, Jack have to work to uncover the history of each ghost and right the wrongs. My least favorite of the series was The Strangers on Montagu Street, but still it was good. If you love ghosts, Charleston or both, read The Tradd Street Series. Start with The House on Tradd Street. I’ve also heard Karen White is coming out with a new book in this series which makes my whole damn day.

    Ok, your turn to tell me what should be next on my reading list!

    What’s your latest and greatest read, y’all?

    You’re a bookworm too? You’ll want to see these then…

    The Best Southern Books - A list of books about or set in the south that every lover of the south should read! Really great book recommendations!

    The Best Southern Books

    Favorite Southern Books: List of amazing books based in the south with unforgettable characters and plots!

    More Favorite Southern Books


    You know you don’t wanna miss any of this crazy. Sign up to get my posts delivered to your inbox. It’s free, of course.


    blog-signature-summer-15

    SaveSave

  • Wall Paint Design Ideas with Tape that Will Completley Transform a Room

    Wall Paint Design Ideas with Tape that Will Completley Transform a Room

    Get huge bang for your buck using these wall paint design ideas with tape. These tutorials use paint and painter’s tape to create gorgeous patterns on your walls and furniture that you can do yourself and will leave guests in awe!

    My mind works in mysterious ways. It thinks in shapes and patterns and then says, “Can I paint that pattern on the wall with painting tape?“

    More than once, I have jumped up from the sofa and yelled for Grunt Labor to pause the television show so I can take a picture of some pattern/door/wall/what-the-freak-ever that I’ve seen and am sure I can replicate with paint and FrogTape. I’m not even kidding. I’m a freak. #freakflagflyer

    I have found patterns to replicate from doors on Scandal, wall art from Vinyl and floors from How to Get Away with Murder.

    I’m not right. But if it’s wrong, I don’t want to be right.

    I haven’t tried out all my ideas just yet, but here are my favorite wall painting ideas and painting designs that I’m convinced anyone can make because if I can do it, anyone damn well can. You just need painter’s tape, paint and in some cases, a ruler (but not all, because I’m terrible at measuring).

    Painters Tape Wall Designs

    This post contains affiliate links for your shopping convenience. Click here to read my full disclosure policy.

    I’ve included both wall designs with tape that I’ve created and tape and paint designs I’ve done on furniture. Both could be used on any surface of your choosing!

    Chic Diamond Patterned Black and White Closet Doors

    Wall Paint Design Ideas with Tape - black and white diamond pattern on closet doors.

    Painting Closet Doors with a Pattern

    The closet doors in the office at our 70’s Landing Pad have become a fast favorite of mine. I love, love, love this paint design. In fact, I did a very similar version of it in our master bedroom…

    Diamond Feature Wall

    Painters Tape Wall Designs - black and white diamond wall

    Black and White Feature Wall

    This wall steals the show in our master bedroom. I love the drama it adds to the space, while also lending a vintage vibe.

    Washed Out Stripes Wall

    Wall designs with tape - blue and white stripes in a bathroom

    Striped Bathroom Accent Wall

    Guess how much this bathroom wall cost me. Seriously, go on and guess.

    A roll of painter’s tape and a sample pot of paint! That’s right! And it was easy too!

    Cane Inspired Wall Paint Design

    Painting Designs for Your Walls - green and white lattice wall in a bathroom

    Cane Inspired Accent Wall for $25 or Less

    If bright green isn’t your thing, you can easily switch out that hue for another one of your liking. This paint technique is cane inspired and I only needed a quart of paint for it.

    Black and White Gallery Wall

    Wall Paint Designs - black and white gallery wall in a living room

    Black and White Gallery Wall

    Who knew dark colors could be so chic? Here’s another favorite. This one is such a simple wall painting idea. Essentially all I did was create a frame on my wall to showcase the art. Notice how that TV just fades away too?

    Confetti Painter’s Tape Design

    Painter's Tape Wall Designs - gold confetti wall in an entryway

    Gold Accent Wall Paint Design

    If you don’t want to worry about measuring a thing and want a dose of fun, this painter’s tape design is for you. I call it the confetti wall.

    Criss-Cross Wall Paint Design

    Wall Painting Ideas and Paint Designs ANYONE Can Do! This article is FULL of DIY painting ideas including wall painting techniques, wall painting designs and other painting ideas like this dramatic criss-cross accent wall!

    Criss-Cross Accent Wall

    The criss-cross accent wall was one of the first bigger wall art with tape and paint projects I did. In all honesty, I was shocked when it actually turned out like I envisioned it in my head.

    Plaid Pattern Painter’s Tape Design

    Painter's Tape Designs - black, white, red and gray plaid painted side table

    How to Paint Plaid

    Don’t be scared – this plaid painted table is one of the easiest painting designs around. You need a ruler – but you won’t use it the way you think you will…

    Half and Half Wall Paint Designs

    Wall Painting Ideas and Paint Designs ANYONE Can Do! This article is FULL of DIY painting ideas including wall painting techniques, wall painting designs and other painting ideas like this half black-half white wall!

    Masculine Bedroom Makeover

    The guest room room is still one of my favorite spaces we’ve made over. The half-black half-white walls are easy to pull off.

    Modern Design Flower Pots

    Wall Painting Ideas and Paint Designs ANYONE Can Do! This article is FULL of DIY painting ideas including wall painting techniques, wall painting designs and other painting ideas like these DIY painted planters!

    Painted Planters

    The modern paint designs on these planter pots can be replicated on anything you wish.

    Triangle Paint Design


    Wall Painting Ideas and Paint Designs ANYONE Can Do! This article is FULL of DIY painting ideas including wall painting techniques, wall painting designs and other painting ideas like these easy triangles!

    Easy Painted Triangles

    Another project from the guest room, this vintage laundry hamper makeover got a dose of upside-down triangles – another really simple painting idea using painter’s tape.

    Painted and Striped Rug

    Wall paint design ideas with tape - painted stripes on astroturf

    Painting Artificial Grass

    Slowly, but surely we are getting closer to summer. This painted astroturf rug is great for your porch or patio and helps to add a pop of color.

    Share any wall design ideas you have in the comments below!

    Looking for more painting and wall inspiration? See these then!

    9 Accent Walls for $30 or Less – serious bang for your buck!

    Object and Text Feature Wall – such a fun way to jazz up a room and perfect for kids!

    DIY Indoor Lattice Wall – YES! You can put lattice on walls inside your home and it’s gorgeous!

    7 Wall Treatments that Aren’t Shiplap – for the rest of my ‘not on the shiplap train’ folks!

    Want to easily come back to these designs later? Just pin the image below!

    Wall Art with Tape and Paint Ideas

    Follow us on social for more painting inspiration!

    Facebook | Instagram | Pinterest | Twitter

    blog-signature-summer-15
    Wall Painting Ideas and Paint Designs
  • Pink lemonade spills are my favorite…

    This post is sponsored by Mr. Clean Magic Erasers, however all opinions are 100% my own. Affiliate links may be contained in this post.

    One Sunday a month, we make a pilgrimage to the Costco. It usually ends in me being quite frazzled because there were too many people there, Grunt Labor wanted to buy too much junk and we spent too much money. Don’t get me wrong, I love the Costco, but it can be stressful.

    One Sunday however, as I was picking up our monthly supply of paper towels and toilet paper, I spotted something magical just across the aisle – a jumbo variety pack of Mr. Clean Magic Erasers. And they were on a special. It included three each of the extra power Magic Eraser, the bathroom Magic Eraser and the kitchen Magic Eraser. I felt like busting out in song and dance in the aisle, but managed to refrain.

    This was also one of those moments in my life when I realized there truly was no turning back from this thing called adulthood. Getting excited over cleaning items most definitely crossed the point of no return.

    I grabbed one and went to grab another because I knew how much Mama also revered the power of the Mr. Clean Magic Eraser and knew she would want one. But alas, the limit was one. She came down for a visit a week or so later and saw my variety pack of magic. She was so glad to see them. Apparently, the Sam’s Club also had them on special but the limit was one and so she couldn’t get one for me. Great minds, y’all.

    We all know magic erasers are great for getting scuff marks off the walls and regular everyday countertop cleaning, but I wanted to share a few of the ways I use Mr. Clean Magic Erasers that you might not know about.

    Uses for Mr. Clean Magic Erasers

    Uses for Mr. Clean Magic Erasers | Cleaning Tips

    This post is in partnership with Mr. Clean Magic Eraser. However, all opinions are my own.

    1. Remove paint – dried and undried.

    If I’m painting and get a little splatter on the floor, I often use my magic eraser to wipe it up. However, did you know it can also remove dried paint in some cases? The Circus had this play doll bed that I painted for her and then added her monogram with craft paint on the head of the doll bed as well. Since she’s had it for the past few years, she has played with it approximately 1.5 times. I decided this piece would not make the move to the 70’s Landing Pad, but knew it would be hard to sell with the monogram on it. I didn’t want to repaint the whole thing so I got out my magic eraser and tried to remove the monogram – and it worked.

    2. The Bathtub

    Every time I’ve painted the bathroom, I always stick my step ladder inside the bathtub to paint around the top of it. And every time I do that, I always scuff up the bathtub to kingdom come with the ladder feet. The magic eraser removes the scuffs.

    3. Remove dried glue. 

    We had a few extra bunnies left over from the bunny vases we made a few weeks ago. I let the Circus Mod Podge and glitter them up. By herself. With a not-so-tiny paintbrush. At the dining room table. Needless to say, the dining room table was sporting some dried-on glue complete with pink and blue glitter in a few places. The magic eraser cleaned it up though.

    4. Outdoor Furniture

    We’ve had some nice weather lately, so we’ve been spending more time outside. However, our outdoor furniture wasn’t quite ready for that. It was gross and grimy. I used the magic eraser to give it a quick once-over.

    5. Remove Stains on Leather

    Before you try this one, test it out in an inconspicuous spot. You see, I have a weakness. Ok, I have a few. But one specifically is Kate Spade handbags. I only allow myself one per year – or two if it’s a really good sale. Anywho, I don’t have many and of course with a three year old, they often get questionable stains on them. I’ve used a magic eraser to remove most of the stains.

    But my favorite way to use the Mr. Clean Magic Eraser….

    To clean up pink lemonade spills made by a little Circus who loves to make her some pink lemonade.

    Uses for Mr. Clean Magic Erasers | Cleaning Tips

    As a warning, make sure your own circus doesn’t try to wring the eraser back out into the lemonade pitcher. Let’s just say, we made another round of pink lemonade….

    You can get more Mr. Clean tips from Jillian Harris by watching this video where she shares some of her dirty little secrets.

    5 Ways to Use a Mr. Clean Magic Eraser you didn't know about | Cleaning Tips

    blog-signature-summer-15

    Disclosure: This post was a collaboration with Mr. Clean, however all opinions and love of pink lemonade messes are 100% mine.

    SaveSave

  • How to Make Lamp Tassels in Five Minutes. BOOM.

    How to Make Lamp Tassels in Five Minutes. BOOM.

    BOOM.

    That is literally what I said after I made one of these lamp tassels and attached it to a sconce in my living room.

    It was so easy – it should have been a sin.

    Not to mention, it’s pretty sexy too, so that should have made it even more of a sin.

    #hubbahubba

    Also, I am aware that I just referred to a lamp tassel as sexy. I fully realize I’m not right, y’all.

    How to Make Lamp Tassels in Five Minutes

    Affiliate links may be contained in this post.

    Tools & Supplies

    These are GORGEOUS! And I had no clue they were SO simple to make! How to Make Lamp Tassels in Five Minutes | Easy Crafts | Easy Home Decor Projects | DIY Home Accessories | DIY Tassels

    • Two Keychains – preferably one that is a large tassel like the black one pictured above (it came from Michael’s) and one that is something else like the jaguar one pictured above (it came from Loft Outlet). Here are some other ones I found online which could also work…

    Keychains for Lamp Tassels

    Unicorn / Fleur de Lis / Eiffel Tower / Peacock / Elephant / Leopard / Wine Glass / Lips

    Steps

    Step 1

    Remove the keychain ring from the large tassel keychain. Connect the large tassel keychain and other large keychain together as shown below.

    These are GORGEOUS! And I had no clue they were SO simple to make! How to Make Lamp Tassels in Five Minutes | Easy Crafts | Easy Home Decor Projects | DIY Home Accessories | DIY Tassels

    Step 2

    Add 1-3 of the chain jump rings and one lobster clasp to two of the smaller tassels as shown below.

    These are GORGEOUS! And I had no clue they were SO simple to make! How to Make Lamp Tassels in Five Minutes | Easy Crafts | Easy Home Decor Projects | DIY Home Accessories | DIY Tassels

    Step 3

    Attach the smaller tassels to the other two keychains you’ve already put together.

    These are GORGEOUS! And I had no clue they were SO simple to make! How to Make Lamp Tassels in Five Minutes | Easy Crafts | Easy Home Decor Projects | DIY Home Accessories | DIY Tassels

    Step 4

    Attach a chain jump ring and lobster clasp to the large tassel and attach it to the rest of the tassel behind the other items as shown below.

    These are GORGEOUS! And I had no clue they were SO simple to make! How to Make Lamp Tassels in Five Minutes | Easy Crafts | Easy Home Decor Projects | DIY Home Accessories | DIY Tassels

    Step 5

    Attach the finished lamp tassel to a lamp by first attaching 1-2 jump rings to the switch on the lamp and then attaching the lobster clasp at the top of the tassel to the jump rings.

    These are GORGEOUS! And I had no clue they were SO simple to make! How to Make Lamp Tassels in Five Minutes | Easy Crafts | Easy Home Decor Projects | DIY Home Accessories | DIY Tassels

    Once you get it on your lamp, you might want to adjust how high/low some of the tassels hang. Just add on or take away jump rings as needed. I ended up removing the actual keyring from the jaguar as well once I had it on my lamp.

    These are GORGEOUS! And I had no clue they were SO simple to make! How to Make Lamp Tassels in Five Minutes | Easy Crafts | Easy Home Decor Projects | DIY Home Accessories | DIY Tassels

    Isn’t he sexy?

    These are GORGEOUS! And I had no clue they were SO simple to make! How to Make Lamp Tassels in Five Minutes | Easy Crafts | Easy Home Decor Projects | DIY Home Accessories | DIY Tassels

    Of course, gnomes are always suggested to add a little sexy flair – ha!

    Any lamp tassels in your future?

    You are probably going to want to see this too...

    DIY Agate Slice Lamp Finials: GORGEOUS - and simple to make! / DIY Projects / Crafts / Home Decor Projects

    DIY Agate Slice Lamp Finial

    You can literally turn ANY fabric into a lampshade! Think of all the possibilities! How to Make a Lampshade & Finial via RainonaTinRoof.com

    How to Make Your Own Lampshade and Finial

    pin-this-post-2

    How to Make Lamp Tassels | Easy DIY Tassels for Lamps and Furniture | Easy Craft Ideas | How to Make Tassels | Easy Tassels for Purses

    SaveSave

  • Spring Home Tour: The Evolution of Style

    Spring Home Tour: The Evolution of Style

    If you have been around with me from the beginning, you know that my style has changed dramatically since the start of this blog – and I mean dramatically. It evolved from something more rustic and a touch Pottery Barn-ish to not-a-distressed-piece-in-sight, bold and unapologetic.

    And I really love the latter.

    It took a while, but I figured out what is truly my style. I don’t think I could even put a definite name on it and I’m ok with that. It’s bold, sometimes random, always fun, usually full of memories and as I said – unapologetic. I won’t apologize for not sticking to the “decorating rules” by mixing cowboys hats with a gold confetti wall or decorating with a styrofoam mohawk sucker holder I made.

    For this spring home tour round, since we are moving soon, I don’t really have any new stuff to show you, so I thought it would be fun to see the evolution of the spaces in my home. I won’t go all the way back with photos of when we first got the Beloved Foreclosure (you can click through on the links to see those), but you will see the “finished spaces” – as they’ve been “finished” multiple times.

    As always, thanks to the wonderful Marty from A Stroll Thru Life who puts together these home tours just about every season. She’s a sweetheart and has a wonderful style all her own. Be sure to check out her home tour along with others at the end of this post.

    The Evolution of Style

    Affiliate links may be contained in this post.

    The Entryway

    Spring Home Tour: The Evolution of Style | Neutral Entryway

    DIY Bottle Lamp / Green Tray

    Spring Home Tour: The Evolution of Style | Rich Navy Entryway

    Navy Accent Wall / DIY Cowhide Lampshade

    Spring Home Tour: The Evolution of Style | Gold Confetti Accent Wall

    Confetti Accent Wall / Leopard Art / Elephant Art 

    Spring Home Tour: The Evolution of Style | Gold Confetti Entryway with Cowboy Boots and Hats | Kelly Green Pillow | Vintage Cowboy Blanket

    Green Pillow / Black and White Pillow

    The Stairwell

    Spring Home Tour: The Evolution of Style | Abstract Circles Accent Wall | Black and White Decorating

    Abstract Circles Accent Wall / Lip PrintSpring Home Tour: The Evolution of Style | Abstract Circles Accent Wall | Elvis Bust | Gone with the Wind Quote Art (Free Printable)

    Elvis Bust / Gone with the Wind Printable + DIY Lucite Frame

    The Living Room

    Spring Home Tour: The Evolution of Style | Cottage Style Living Room

    1st Living Room Tour

    Spring Home Tour: The Evolution of Style | Living Room | Red Buffet | Eclectic Decorating

    Red Buffet / DIY Cowhide Rug

    Spring Home Tour: The Evolution of Style | Modern Living Room | Kelly Green Curtains | Coral Decorating Ideas

    Coral and White Console Table / Green Drapes

    Spring Home Tour: The Evolution of Style | Modern Eclectic Living Room

    Most Recent Living Room Tour / Black and White Gallery Wall / Stripped & Stained Buffet

    Spring Home Tour: The Evolution of Style | Living Room Tour

    Navy End Table / Kate Spade Coffee Table Book

    Spring Home Tour: The Evolution of Style | Modern Living Room | DIY Lamp Tassels

    Brass Unicorn (similar ones) / Gnome (similar ones) / Lamp Tassel Tutorial

    The Kitchen

    Spring Home Tour: The Evolution of Style | Kitchen Remodel | White Kitchens | DIY Kitchen Island

    Kitchen Renovation 

    Spring Home Tour: The Evolution of Style | Kitchen Makeover | Navy and White Cabinets | Brass Hardware | DIY Kitchen Island | Green Barstools

    Navy & White Kitchen Makeover / Green Barstools / DIY Kitchen Island

    Spring Home Tour: The Evolution of Style | Navy and White Kitchen | Brass Hardware | Coffee Station

    Cabinet Knobs / Cabinet Pulls / Coffee Station & Other Kitchen Ideas

    Spring Home Tour: The Evolution of Style | Navy and White Kitchen | Open Shelving Styling

    Mohawk Lollipop Holder / Scales of Justice (similar ones) /  Red Glasses (similar)

    The Dining Room

    Spring Home Tour: The Evolution of Style | Dining Room Decorating Ideas

    1st Home Tour including Dining Room 

    Spring Home Tour: The Evolution of Style | Dining Room Decorating Ideas | Criss-Cross Accent Wall | Black and White Decor

    Current Dining Room Tour / Ghost Chair

    Spring Home Tour: The Evolution of Style | Dining Room Decorating Ideas | Criss-Cross Accent Wall | Black and White Decor | Snakeskin Lamps \ Navy, White, and Gold Buffet

    DIY Criss-Cross Accent Wall / Blue, White & Gold Buffet Makeover

    The Bathroom

    Spring Home Tour: The Evolution of Style | Gray & White Bathroom Makeover

    Bathroom Renovation

    Spring Home Tour: The Evolution of Style | White Bathroom Makeover with a Pop of Green | Cane Inspired Accent Wall

    Cane Inspired Accent Wall

    Spring Home Tour: The Evolution of Style | White Bathroom Makeover with a Pop of Green | Black and White Bathroom

    Shower Curtain / Free Printable Banana Leaves Watercolor Print

    White Built-in Bookshelves over Toilet - can make for about $25 |Spring Home Tour: The Evolution of Style | White Bathroom Makeover with a Pop of Green

    DIY Built-in Bathroom Shelving / Vogue Art & Printable

    The Circus’ Room

    Spring Home Tour: The Evolution of Style | Vintage Inspired Nursery | Coral Buffet turned Dresser and Changing Table

    Vintage Inspired Nursery

    P.S. – this room doesn’t look like this at all anymore- it’s way messier and there’s been some serious furniture rearrangements – just haven’t had time to take pictures. #slackermom #andblogger

    The Master Bedroom

    Spring Home Tour: The Evolution of Style | Neutral Master Bedroom

    1st Master Bedroom Makeover

    Spring Home Tour: The Evolution of Style | Navy and Coral Master Bedroom

    2nd Master Bedroom Makeover

    Spring Home Tour: The Evolution of Style | Navy and Coral Master Bedroom | Traditional Master Bedroom | Classic Master Bedroom

    Spring Home Tour: The Evolution of Style | Navy and Coral Master Bedroom

    Guest Bedroom / My Office

    Spring Home Tour: The Evolution of Style | The Guest Bedroom | Leopard Print Wall

    1st Guest Bedroom Makeover / Leopard Print Wall

    Spring Home Tour: The Evolution of Style | Masculine Bedroom

    2nd Makeover

    Spring Home Tour: The Evolution of Style | Masculine Bedroom Makeover | Vintage Dresser | Black Walls

    Spring Home Tour: The Evolution of Style | Masculine Bedroom | DIY Bookshelf | Black Walls

    DIY Bookshelf

    Masculine Bedroom + Office Makeover Full Source List / Black and White Bedroom / Black and White Interior Design / Vintage Inspired Interior Design / Office Space / Comfortable but Stylish Office Chair

    Desk from a Table & Hutch / Desk Chair

    The Man Cave

    Spring Home Tour: The Evolution of Style | The Man Cave Built-Ins

    Man Cave Built-Ins

    Spring Home Tour: The Evolution of Style | The Man Cave Built-Ins

    Spring Home Tour: The Evolution of Style | The Man Cave | How to make laminate countertops look like stone for $15

    How to Make Laminate Countertops Look Like Stone

    I’m exhausted now just reliving all that through pictures.

    Here’s to the evolution of style and finally finding mine.

    SaveSave

  • The Circus’ Yellow Bookshelf Makeover

    The Circus’ Yellow Bookshelf Makeover

    This project was sponsored by HomeRight, however all opinions are 100% mine. 

    About a year ago, a friend and I went out one Saturday morning thrifting. We got to the first stop, but it was wasn’t opened yet. However, outside was a bookshelf. A bookshelf that wasn’t anything to write home about – except for the doors and the hardware.

    She used a paint sprayer to paint this piece of furniture and it looks so simple! Yellow Bookshelf Makeover | Furniture Makeover | Furniture Painting

    The bookshelf had a price tag of $40. I had no need for a bookshelf – but those doors…and that hardware.

    We drove down to another thrift store until the other one opened. Upon returning to the thrift store with the bookshelf, there was a woman eyeing my the bookshelf. The store still hadn’t opened yet. The woman was eyeing the bookshelf quite intensely. As the store doors opened, I decided I couldn’t let this bookshelf go. So I did what anyone else would do in my situation. I did a quick side shuffle or two and ran through the doors as soon as the owner opened them and proclaimed I would be buying the bookshelf – probably a bit louder than necessary.

    And then the bookshelf sat in my garage for the better part of a year and I kind of started to feel a little bad for stealing it away from the other lady when I hadn’t even figured out to do with it.

    I got over that real quick though after I realized it would be perfect in the Circus’ new room.

    She used a paint sprayer to paint this piece of furniture and it looks so simple! Yellow Bookshelf Makeover | Furniture Makeover | Furniture Painting

    This was such a simple makeover, but some serious BAM as well with that bold yellow.

    Simple Bookshelf Makeover

    This post contains affiliate links for your shopping convenience. Click here to read my full disclosure policy.

    Tools & Supplies

    Steps

    Step 1:

    Before painting anything, I cleaned this bad boy up. I sprayed Ready, a liquid spray primer, on the piece to remove dust, dirt and dead bugs that the bookshelf had housed in the garage.

    Step 2:

    This bookshelf had some laminate in some places. To make sure my paint stuck to those spots well, I gave the entire bookshelf a coat of Kilz Primer before painting the piece yellow.

    yellow-bookshelf-makeover-8

    It’s important to strain the paint before putting it in your sprayer.

    She used a paint sprayer to paint this piece of furniture and it looks so simple! Yellow Bookshelf Makeover | Furniture Makeover | Furniture Painting

    Even if it is brand new paint, I suggest straining it. I just picked up a cheap strainer at TJMaxx and use it as my paint strainer. After straining the paint, add water to thin it. The Finish Max comes with an instruction manual that tells you how to thin your paint. It also comes with a handy little tool to use so you know when it’s thinned enough.

    How to thin paint with the HomeRight Finish Max Paint Sprayer

    I’m borrowing this image from a previous post as I neglected to take a picture of me using my handy little tool during this project.

    After adding water to the paint and mixing, simply dip the viscosity cup into the paint and count how many seconds it takes the paint to run out of the cup. For latex paints, properly thinned paints should run out in 25-40 seconds. If you’re in that timeframe, you’re good. If you’re not, add more water.

    After thinning your paint properly, spray the paint onto your piece standing about 5-10 inches away from the piece you are painting. (If you’ve never used a paint sprayer before, there’s a complete how-to here.) Clean out your paint sprayer afterwards.

    Step 3:

    After letting the primer dry, load your paint sprayer up with your choice of paint color. Once more, remember to strain and thin the paint. Step back and spray the paint onto your furniture.

    She used a paint sprayer to paint this piece of furniture and it looks so simple! Yellow Bookshelf Makeover | Furniture Makeover | Furniture Painting

    I did two coats of yellow.

    She used a paint sprayer to paint this piece of furniture and it looks so simple! Yellow Bookshelf Makeover | Furniture Makeover | Furniture Painting

    I laid out my actual shelves and doors on sawhorses and tables to paint them.

    Step 4:

    After your piece is dry, I suggest following up with a topcoat to help protect the finish. I used a semi-gloss polycrylic, which actually doesn’t have to be thinned, but should be strained before putting it into your paint sprayer. I did one coat of the topcoat.

    She used a paint sprayer to paint this piece of furniture and it looks so simple! Yellow Bookshelf Makeover | Furniture Makeover | Furniture Painting

    Isn’t it adorable? Of course, I haven’t filled it with all her books yet, I just wanted a few on there for now to give you an idea of how it would look.

    She used a paint sprayer to paint this piece of furniture and it looks so simple! Yellow Bookshelf Makeover | Furniture Makeover | Furniture Painting

    I do like the idea of mixing in the stuffed animals with the books – makes it a little more decorative.

    I can’t believe I just referred to stuffed animals as decorative. I guess that’s what happens when your kid owns more of them than an actual zoo has animals.

    She used a paint sprayer to paint this piece of furniture and it looks so simple! Yellow Bookshelf Makeover | Furniture Makeover | Furniture Painting

    I used Bar Keepers Friend to clean up the hardware.

    What do you think of the yellow? Is it too bold for you?

    You might also want to see…

    The Ultimate Guide for How to Use a Paint Sprayer - from set-up to thinning the paint to an easy clean-up, its all here!

    How to Use a Paint Sprayer

    SO adorable! She used a paint sprayer to paint this piece of furniture and it looks so simple! Yellow Bookshelf Makeover | Furniture Makeover | Furniture Painting

    Disclosure: This post was a collaboration with HomeRight, however all opinions and running ahead of people to buy something I want is 100% mine.

    SaveSave