Want to kick your wood finishing techniques up a notch? Try making your own bright colored wood stains then! With this tutorial, you’ll learn how to make custom stain colors easily.
After the amazing-out-of-this-world-discovery-that-changes-everything a few weeks ago (when I found out how to make furniture glazes in any color – ok. maybe I’m being a bit dramatic. Just a little bit though.)
I wanted to see if it would work as a wood stain too – on unfinished wood.
It did…
So now you will not only know how to make glazes in any color, but you’ll now know how to make colored stain too.
I KNOW.
AMAZING.

Disclosure: This post is a collaboration with Velvet Finishes. All opinions and color craziness is 100% mine. This post contains affiliate links for your shopping convenience. Click here to read my full disclosure policy.
How to Make Colored Wood Stain
Supplies Needed:
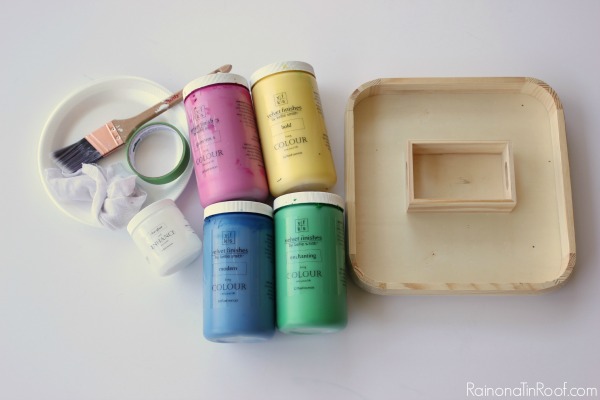
- Velvet Finishes Enhance Clear Glaze
- Velvet Finishes Colour of Your Choice
- Unfinished Wood (I picked up that cute tray and box at Hobby Lobby.)
- Paint brush
- Lint Free Cloth
- Paper Cup or Plate
Steps
Step 1:
You mix up the stain the same way you mix up the glaze, because, well its the same stuff. The difference is in how you apply it.
Pour a small amount of clear glaze into your cup or plate. Dip your paintbrush into the paint you want to turn into your stain color. You don’t want much at all – then mix the glaze and paint together.

If you are worried about getting too much paint, then start with just a little bit, then add more if needed. The consistency should be pretty watery – similar to a stain. This is a water based stain.
If the stain seems too thick or too saturated with color, you can add water to it.
Step 2.
Using your paintbrush, brush the stain onto the wood. Unlike with painted wood, the unfinished wood will absorb the stain super quickly, so do light coats so you don’t get more color than you want.
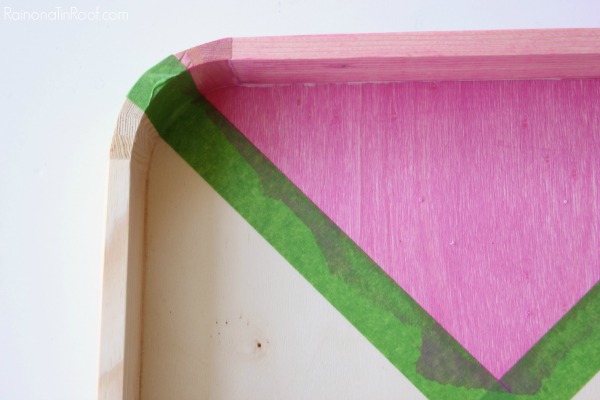
If you want more color, do more coats. Wipe off any excess with a lint free cloth.
Take note: Different types of wood and wood grain will yield different results.
Step 3:
Let it dry. Since there isn’t much paint in the stain, I would suggest a coat of Protect or finishing wax to keep your piece pretty.
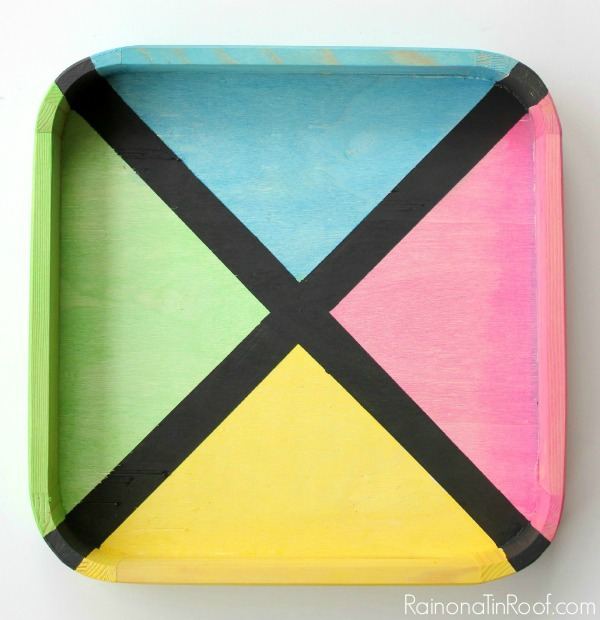
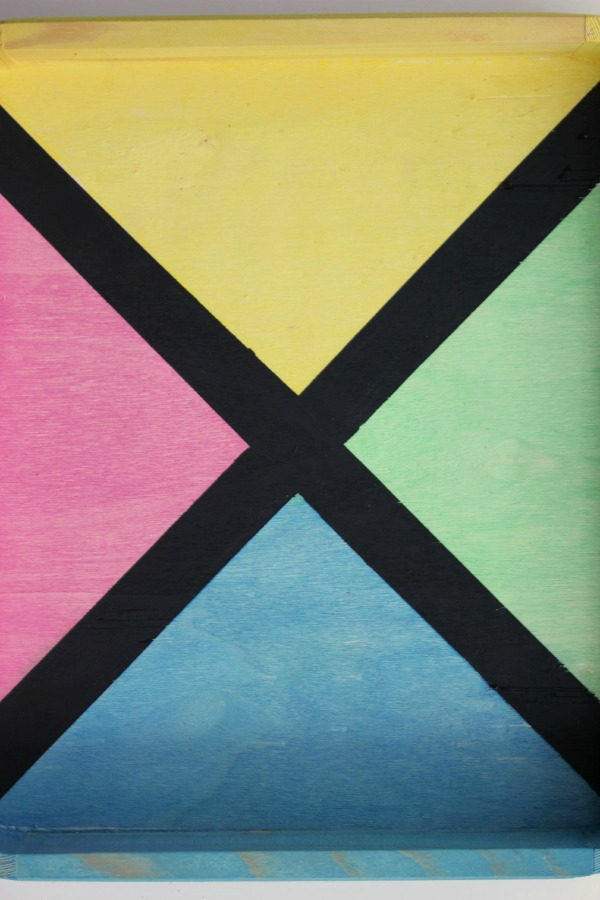
I created colored stains using the Clear Glaze and:
Enchanting (Green)
Modern (Blue)
Glamorous (Pink)
Bold (Yellow)
You can see with the yellow that I put a bit too much paint in the glaze. You can’t see a lot of the woodgrain.
I think this cute little tray may end up in the circus’s big girl room. Its colorful – like her.
What would you use colored stain on?
Are you a color lover? Here’s more colorful furniture makeover ideas…
DIY Ottoman Coffee Table – a gorgeous deep teal blue hue paired with upholstery full of color.
DIY Side Table Makeover Ideas – nine colorful ideas for making over a side table.
How to Create a Beachy Color with Paint – give furniture a washed-out beach feel with this tutorial.
Polka Dot Chair Makeover with Painted Upholstery – navy, pink and white polka dots collide in this fun makeover!
Want to remember this colored stain recipe for later? Just pin the image below!

Follow on social for more colorful ideas!
Pinterest / Facebook / Twitter / Instagram


Kellie Smith says
I. LOVE. THIS. What a great idea!!! This will look so good in your little girls room! Thank you Jenna!
Jenna @ Rain on a Tin Roof says
Thanks, Kellie! I think she will love it, she was gawking over all the colors! haha!
Hope Williams says
Ok, UNCLE……
I love how versatile this paint is.
Here is an idea YOU have to try.
Will this work on glass? I need to know if we can make a stained glass effect with this product?
I love this tray, it would look great on old windows yes???
Well done!
Jenna @ Rain on a Tin Roof says
I have heard that it will adhere to glass, Hope, but I have not tried it myself yet!
Melanie says
Okay, now this is awesome! Love the look of all the bright colored stain!
Jenna @ Rain on a Tin Roof says
Thanks, Melanie!
chris aka monkey says
amazeaballs xx
Jenna @ Rain on a Tin Roof says
Thanks, Chris!
Patty says
I have a wonderful picnic table with benches that my neighbor made for me several years ago it is as sturdy as the day he made it, but is in need of cosmetic work.(like me) This will be perfect for what I want to do with the table top. Thanks so much for sharing, I knew what I wanted to do, I just didn’t know what to use.
Jenna @ Rain on a Tin Roof says
That’s awesome, Patty! A word of caution though – Velvet Finishes cannot get wet. If you keep the picnic table in a covered space, you should be fine. However, if you don’t, I would use the colored stain and then seal it with a good, clear outdoor sealant. Maybe even test it out on wood you can leave outside for a little while to see how it holds up.
Michele @ The Scrap Shoppe says
Oh my gosh, that looks awesome!! I will have to try this for sure! 🙂
Jenna @ Rain on a Tin Roof says
Thanks, Michele! Its so easy!
Krista @ the happy housie says
Awesome! You think you could do a glaze like this over top of another paint colour, too? I have seen that done before but never tried it myself… you?
Jenna @ Rain on a Tin Roof says
Yep, I think you could definitely do that, Krista!
Rose who's busy being creative at FineCraftGuild.com says
I love the pastels with the black contrast. It’s fun and it looks beautiful!! I’d like to invite you to link it up at our SHARE IT party. That would be terrific! ~ Rose
Jenna @ Rain on a Tin Roof says
Thanks so much, Rose!
Diana Rambles says
I wonder how this would be on furniture?! We are building a bed.
Jenna @ Rain on a Tin Roof says
As long as you have raw wood, Diana, it should work. I would just be sure to give it a protective coat of poly!
Eloquence says
Ooh, this will be so useful! Thanks for sharing. 🙂
Ariel says
What a fun idea!
Jenna @ Rain on a Tin Roof says
Thanks, Ariel!
Mother of 3 says
Very pretty colors! Thank you so much for sharing with us at Encouraging Hearts and Home. Pinned.
Sylvia | Grace for a Gypsy says
Love the bright colors! Great information!
Rhonda Gales says
I loved how the tray turned out. The colors are soft and pretty. Thanks for sharing on Sunday’s Best.