This post is sponsored by Velvet Finishes, however all opinions are 100% mine.
I’m ashamed to tell you how long I’ve had this chair sitting in the garage ready to be made over. I’ll say it’s been the better part of a year at the least. It was one of those purchases that went like this:
It’s $10! I can’t pass it up for $10!
But you don’t need it Jenna.
I know that. But it’s $10!!!
You don’t need it.
$10.
Make a smart decision, Jenna.
Ok. I’m buying it.
Said conversation was between myself and myself of course.
So since I really had no clue what to do with it or where I would put it, it just sat for a while. And then one day, I got a wild hair and decided I would attempt to paint the upholstery on this piece rather than re-upholstering it since I’d never tried painting it before. I only had $10 to lose. Here’s how it turned out…

Not half bad! I didn’t set out for it to turn out so preppy / Kate Spade-ish, but I think it works with the chair pretty well. Here’s what I did…
Polka Dot Chair Makeover
Affiliate links may be contained in this post.
What I Used:
- Velvet Finishes Handsome
- Velvet Finishes Glamorous
- Velvet Finishes Minimalistic
- Medium Sized Pouncer
- Good Paintbrush
- FrogTape
- Fine Grit Sandpaper
Step 1
The upholstery of this piece was not in great condition. It looked like a cat had maybe clawed around the edges a bit, so I cleaned up that with some scissors first.

After that, I actually got out my shop vac and vacuumed really well in all the nooks and crannies of the upholstery since I knew I was going to paint it.
Step 2
After vacuuming, I painted the wood portions of the chair with Velvet Finishes Handsome.

Handsome is the same color I used on my kitchen cabinets. It’s a classic navy shade. I just used my paintbrush and painted right onto the wood. If you have a really shiny finish to begin with, you can prime your piece with Ready, which is a simple to use spray primer, before painting it. If you don’t have a shiny finish, then you usually won’t need a primer with Velvet Finishes. I did two coats of Handsome.
Step 3
I let the Handsome dry overnight, then the next day, I tackled the upholstery. First, I taped off around the woodwork so I wouldn’t get any paint there, then I just slapped on some Glamorous with my paintbrush.

It took about four coats of paint on the upholstery, which I expected since I knew the upholstery would absorb so much of the paint.
Step 4
After the upholstery dried it was a little bit “tough” so to speak. Kellie had told me that sanding it with a fine grit sandpaper would loosen it up.

So that’s what I did. I lightly sanded over all the upholstery with about a 150 grit sandpaper. It made the upholstery feel less “tough” and more like a faux leather type upholstery.
Step 5
After sanding, I thought the chair was a little boring – it needed some pattern or something to make it pop, so I added in polka dots.
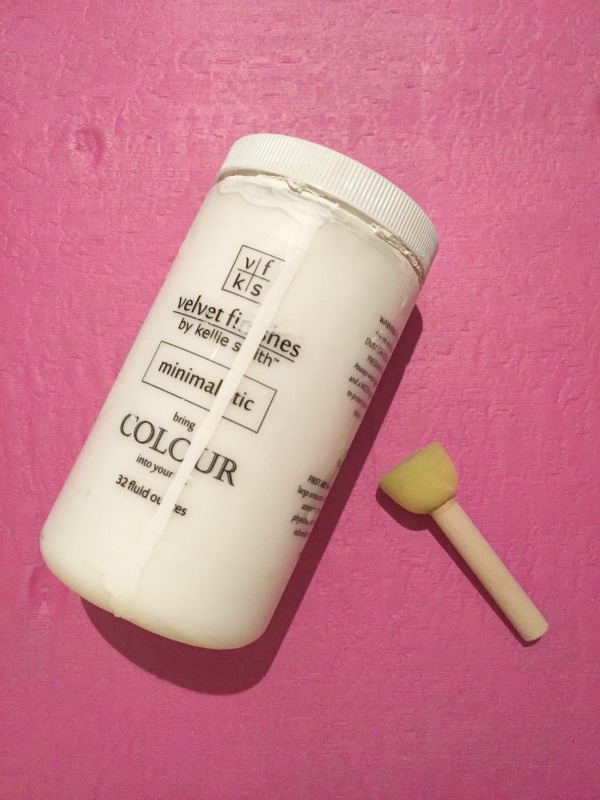
I just used a medium sized pouncer and Minimalistic and randomly placed polka dots all over the upholstery.

And all of a sudden, it became an incredibly cute chair.
You can still see some of the upholstery’s pattern through the paint, but unless you are painting plain fabric, I think that’s gonna happen.

The pillow is from Target – it’s the first purchase for the Circus’ new room at the 70’s Landing Pad. It went with the chair perfectly, so I couldn’t resist not using it in the photos.
What do you think of the preppy polka dotted chair?


You know you don’t wanna miss any of this crazy.
Sign up to get my posts delivered to your inbox here.
Stalk Me Here:
Pinterest / Facebook / Twitter / Instagram
Disclosure: This post was a collaboration with Velvet Finishes, however all opinions and hoarding of chairs I don’t need are 100% mine.

Dharma says
So freakin cute!
Jenna @ Rain on a Tin Roof says
I know, right?! Thanks!
Meg @ Green With Decor says
I love this!
Jenna @ Rain on a Tin Roof says
Thanks, Meg!
Julie says
OMG how AWESOME! You are one CREATIVE/RESOURCEFUL chick! =)
Jenna @ Rain on a Tin Roof says
Thanks, Julie!! I don’t know about all that – I didn’t really know what exactly I was doing! haha!
Lisa A. says
OMG! I picked up TWO of those Cain barrel chairs at Goodwill not too long ago for $6.99 each! They have been in the garage and my husband brought them into my family room with the price tags still on them and told me I was forbidden to buy one more piece of furniture and sneak it in the garage because the cars will not fit in there soon! I walk past them every day and think….I need to get to those….which I really do! I am feeling a little more motivated after reading your post.
Lisa A. says
Cane!
Jenna @ Rain on a Tin Roof says
haha!! There have been MANY times when we haven’t been able to fit the cars in the garage!!
Michelle Wilson says
I’ve been itching to try painting upholstery, but haven’t found a cheap chair that is in good enough condition. I’m happy to see this. I might be brave enough now. Thanks.
Jenna @ Rain on a Tin Roof says
Just go for it! In the end, you can always rip off the upholstery and just re-upholster it if needed!
~M~ says
What is it like to actually sit on it? Or is it just a show piece?
Jenna @ Rain on a Tin Roof says
This isn’t a chair I intend on sitting in a lot. If you were going to sit on something a lot, I wouldn’t recommend painting it. Like I said though, it feels kind of like that faux leather – I think it’s called pleather??
Helen Holley says
Too cute!
And hey! There’s nothing with Kate Spade….
Haven’t tried this yet but am going to pin this for future reference.
Thanks for sharing,
Helen H
Jenna @ Rain on a Tin Roof says
Thanks, Helen!! It was a fun project!
Amy says
So adorable! I have the ugliest green bucket chair I picked up for $2 at a yard sale. This seems like a great alternative to upholstering an entire chair, but I bet I would go through TONS of paint if I tried it. I love it when you try something like this and it totally works. I love it!
Jenna @ Rain on a Tin Roof says
It did take more paint on the upholstery than the wood obviously since it absorbs more paint. I was pleasantly surprised with the outcome though!
Sharon H says
This makes me wanna go hunt for some chairs……and I don’t have anywhere to put another chair! good job….
Jenna @ Rain on a Tin Roof says
hahaha!!! I NEVER have anywhere to put another chair – hasn’t stopped me yet!
Susan the Farm Quilter says
LOVE the chair!!! I’m not really seeing the pattern of the original fabric so much as I’m seeing a bit of texture – totally fabulous!!! I originally thought you recovered the chair – painting it was brilliant! The blue and pink really play so well together and the polka dots are so whimsical that the chair just looks adorable! Without the polka dots, it would look like someone spilled the Pepto! As usual, you made the perfect choice – the smart choice 🙂
Jenna @ Rain on a Tin Roof says
You’re right, Susan, the fabric is more texture-y than patterned. Isn’t the pink and blue fun together?! I thought so too.
Kellie Smith says
Love it as always Jenna!! this turned out “f-ing damn adorable”, if I may quote you! xxoo
Jenna @ Rain on a Tin Roof says
So f-ing adorable!! haha! Thanks!
Samantha says
Super cute Jenna. Love how it turned out.
Jenna @ Rain on a Tin Roof says
Thanks, Samantha!
Joyce De Vere says
Looks Great Jenna!!! I love the Idea, I have some old chairs like that around. I was wondering what to do with them
NOW I KNOW!!! Thank you!!! All of mine has had all the upholstering ripped so I will have use the fabric I just bought ( I wondered at the time why I bought it) I will use that I have four of then so that will be a great project for nasty cold days!!! Thank you again for the great idea!!!
Jenna @ Rain on a Tin Roof says
You are welcome, Joyce!! So glad you like it!! Thank you!
Jennifer says
Oh my gosh! I am LOVING all of this! You did an awesome job!
Jenna @ Rain on a Tin Roof says
Thanks, Jennifer!
Lacie says
Jenna, the chair turned out so cute! When I saw the picture on Instagram I thought you had reupholstered the cushion. I never would have thought it was paint! Once again you surprise and amaze!
Jenna @ Rain on a Tin Roof says
Thanks, Lacie!! I can’t believe how well it turned out!!
Jessica says
So cute! From the pic, I never would have guessed the upholstery was just painted. LOVE IT. and that pillow. #hearteyes for all of it.
Jenna @ Rain on a Tin Roof says
Thanks, Jessica!! I can’t believe how adorable it turned out!
BeckyKay says
Really cute! What a great color combination. I can’t get over that the upholstery is painted!
Jenna @ Rain on a Tin Roof says
Thanks, Becky! I just love that color combo too!
Pam S says
Is there anything you can’t do??? A ratty old chair turned adorable! Love it:-)
Jenna @ Rain on a Tin Roof says
Oh honey, there is SO much I can’t do!! haha!
Terry says
WOW! What a fun chair! I love that you painted the upholstery! I have not been so brave as to try that yet but your chair is certainly encouraging! Well done! If you feel like linking up to one more party I host Making Broken Beautiful every Thursday thru Sunday. It is a furniture and home decor party and I’d be honored if you would come inspire! I hope you are having a great week!
Smiles!
Terry
http://thecuratorscollection.wordpress.com
Jenna @ Rain on a Tin Roof says
Thanks, Terry! It was a fun little project!
Debrashoppeno5 says
I just love this chair. I keep showing the picture of it to all of my DIY friends because these chairs seem to be in so many thrift stores around here. It is so cute.
Jenna @ Rain on a Tin Roof says
Thanks, Debra! I think it might just be one of my most favorite (and cutest!) makeovers to date!!
Rebecca Lopez says
Love the transformation, so cute!
Jenna @ Rain on a Tin Roof says
Thanks, Rebecca!