Tag: painting

  • What kind of paint do I use on that? Types of Paint and When to Use Them

    What kind of paint do I use on that? Types of Paint and When to Use Them

    A trip to your local hardware store to select paint can often become overwhelming. There are lots of different types of paint out there and knowing which type of paint to choose for a project can get confusing. Use this guide to learn about the different types of paint and which would be the best paint for furniture, wood, plastic, metal and laminate surfaces.

    I really thought that all the information to know about painting furniture was out there in internet land for everyone to see and no one needed to hear anymore from me besides the occasional furniture makeover, on the subject. However, I get questions all the time asking what kind of paint for certain kinds of furniture, when to sand / when not to sand pieces, when to prime / when not to prime, and so on. Apparently, people still have questions on this topic and I’m cool with that. It gives me something to write about that I love writing about. So to answer one of those questions, this post is all about what kind of paint to use on what surface.

    Types of Paint

    This post contains affiliate links for your shopping convenience. Click here to read my full disclosure policy.

    Best Paint for Wood

    Generally, you can use just about any kind of paint on wood surfaces, whether it’s wood furniture, wood trim or other wood surfaces.

    Best Paint for Wood

    Navy End Table painted with Velvet Finishes / Coral End Table painted with Latex Paint

    Oil-Based Paint

    Oil-based paint is great for furniture makeovers in terms of durability over time. However, it’s not as easy to deal with as latex and other specialty furniture paints are. With an oil-based paint, you absolutely must make sure you use a high-quality paint brush that will work with oil-based paint. Generally, it just works better to brush oil-based paint on, rather than rolling it. Oil-based paint is also known to have fewer brush strokes as well. Clean-up for oil-based paint is not a picnic. You have to use mineral spirits or paint thinner to clean your brushes and any paint off you as well. Most oil-based paints won’t require an additional topcoat though.

    Types of Paint: Oil Based Paint

    One really important thing to note with oil-based paint is that it should not be painted directly over latex paints. If you really want to use oil-based paint over latex, then first sand it, prime it with a water-based primer and then use your oil-based paint.

    Latex Paint
    Types of Paint: Latex Based Paint

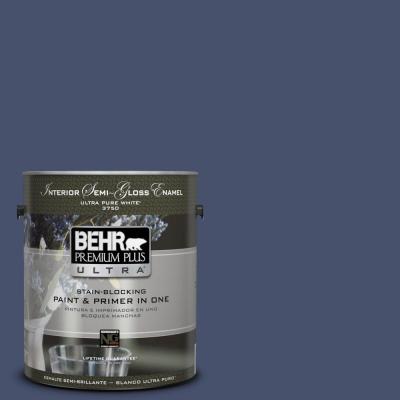
    Your basic latex paint that you can find at local home improvement stores is also fine to paint wood surfaces with. Generally, it is much easier to work with than oil-based paints, however the durability over time isn’t as great, but it’s not bad by any means. If you paint something with a semi-gloss or gloss sheen, then you may not need an additional polycrylic topcoat depending on much use your surface will get. If you paint something with a latex paint that has a flat, eggshell or satin sheen, I would definitely finish up with a polycrylic topcoat for added protection. If you’re looking for low sheen, go with the satin polycrylic. Latex paint can be cleaned up with soap and water. One thing to note with latex paint is that brush strokes are more likely. To minimize these as much as possible always use a good, high quality paintbrush and mix in a little Floetrol – it’s like magic in a bottle for eliminating brush strokes.

    Best Paint for Wood Furniture: Speciality Paints

    Specialty Paints

    Since furniture painting has become such a big deal, there have been a number of specialty paints created specifically for painting furniture. Many of these make furniture painting easier in some way or another that oil-based and latex paints don’t always offer.

    Velvet Finishes Paint

    It’s no secret around here that I often use Velvet Finishes for my furniture projects.

    Best Paint for Furniture

    Velvet Finishes has a built-in topcoat and usually does not require sanding or priming unless the piece has a shiny or glossy finish on it before painting. If your piece is glossy, you can use their Ready product on it before painting, which is a spray primer that you just spray on, let it sit, then wipe off.

    Chalk Paint

    Many people love chalk paint. I’m not one of those people. I don’t detest it, but it’s just not my cup of tea. Most chalk paints don’t require you to prime or sand your piece before painting, which is great. Most chalk paints do require you to give it some sort of topcoat though. Many people use wax to seal it.

    Milk Paint

    I’ve never personally used milk paint, so I certainly can’t speak to how well it works myself, but I have heard good things about it from others. I think most people go with milk paint when they are looking to achieve a farmhouse effect on their furniture.

    Types of Paint for Laminate Surfaces

    Painting laminate furniture and surfaces is a whole other beast. It can be done, but not super easily. To paint laminate furniture, I think you should always prime the piece first. I’ve used Zinnser Primers for this and have had good results.

    Types of Paint: Zinsser Primer

    I have painted laminate pieces before without priming them first and it didn’t turn out so hot.

    Latex Paints

    After priming your piece, you can follow up with at least two coats of latex paint. Just like I noted above, use a good brush and Floetrol to prevent brush strokes.

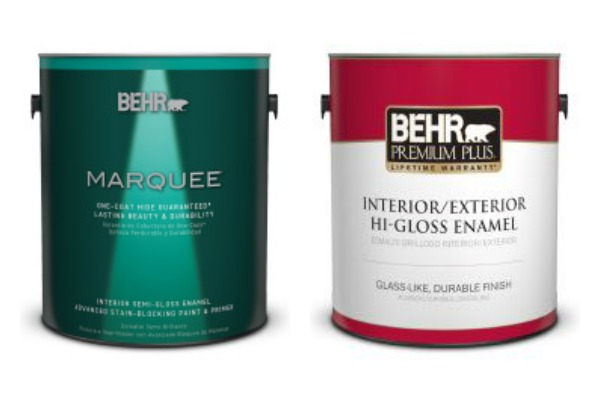
    My personal pick for latex paint that you can buy at your local home improvement store is Behr paint. I’ve always gotten good results with it and while it is a little more expensive than other brands, I think it’s well worth it.

    Oil Based Paints

    You can also use oil-based paints over laminate if you first prime it. Using an Oil Based paint would provide more durability over the long run.

    Velvet Finishes

    I have used Velvet Finishes over laminate furniture before and it did pretty well. I still suggest using a good primer on it first though.

    Topcoat It

    With laminate furniture, I highly suggest giving it some extra protection. Give it a couple coats of Polycrylic after you finish painting it to really try and protect that surface.

    Types of Paint: Polycrylic Topcoats

    Even if you follow all these steps, there will most likely come a time down the road when your painted piece of laminate furniture will chip or the paint may start to peel away. This is just the nature of painting laminate furniture.

    Types of Paint for Plastic Surfaces

    Types of Paint: Spray Paint for Plastic Surfaces

    Plastic Planters Spray Painted with Geometric Designs

    Spray Paint

    Hands-down, anytime I have something plastic to paint, I head for the spray paint. It’s the easiest way to get the paint on there without brush strokes and gives pretty good adhesion on plastic pieces. Prime the piece first with a spray paint primer (especially if it’s really shiny) and then follow up with a few coats of spray paint. I’ve used Rust-Oleum, Krylon and Design Masters spray paint and have been pleased with all of them.

    Types of Paint for Metal Surfaces

    I generally go with one of two paints when it comes to metal surfaces: Oil-Based Paint or Spray Paint. If it’s a big metal piece that I’m painting, I’ll go with oil-based paint like I did with my metal handrail. If it’s something metal that’s smaller, I’ll go with spray paint.

    Types of Paint for Metal Surfaces

    Metal Stair Railings painted with Oil-Based Paint / Spray Painted Metal Laundry Hamper 

    Oil-Based Paint

    Oil-Based paints bond really well to metal surfaces. You can use it in a paint sprayer if you want to or brush it on, which is what I tend to do. Just remember, and I know I’ve said this like 2.1 million times now, always use a good, high quality paintbrush! It really does make a world of difference when painting. One thing to remember when you are painting something with oil-based paint that’s bigger in scale is to work in sections. You can’t easily go back over places to touch them up after you’ve already put one coat of paint on. While oil-based paint takes longer to dry, that also means your finish gets messed up if you try to go back over a part that is partially dried. My personal pick for oil-based paint is Behr’s.

    Spray Paint

    If you’ve got something smaller that’s metal, let’s say a lamp or something, then I would head for the spray paint aisle. It’s just easier to work with and will still provide great adhesion and durability. I used spray paint on that metal laundry hamper you saw above.

    Types of Paint for Upholstered Surfaces

    So you’ve been considering painting some upholstery, eh? This is a topic that many people seem to have mixed feelings on. I have painted an upholstered chair before, however it was a chair that wasn’t going to get a whole lot of use, therefore I wasn’t too worried about the comfort of it.

    Types of Paint for Upholstered Surfaces

    Chair Upholstery painted with Velvet Finishes Paint

    In that one instance, I used Velvet Finishes paint for the upholstery. I think it took about three coats to fully cover the upholstery. Upholstery does suck up a lot of paint, so be prepared to paint on multiple coats.

    Those are my picks for the best types of paints for wood, laminate, metal, plastic and upholstery surfaces.

    Do you have any favorites or other questions?

    Now that you’ve read all the nitty-gritty details, you might find it useful to have a one-page guide on what kind of paint can be used on what kind of surface – lucky for you, I’ve made one just for you! Click below to get access to it! 

    Types of Paint Quick Reference Guide

    If you’ve got any other painting questions at all, please leave your questions in the comments!

    Need more painting help?

    Click on any of the links below to get my opinion. (Which by no means is a professional opinion. I’ve only painted, oh, say 2.4 million pieces of furniture. Ok, that’s stretching it a bit.)

    Types of Paint to Use on Kitchen Cabinets – I’ve painted cabinets five times now. Here’s my take on which paints to use.

    Painting 101: Topcoats and When to Use Them – topcoats can be confusing, right? This guide breaks them all down.

    Must-Have Tools and Supplies for Painting Furniture – my tried and true tools of the trade.

    My Best Tips and Tricks for Painting Furniture – from over 10+ years of painting.

    FAQ: Painting Furniture – all the questions I’ve ever been asked about painting in one.

    blog-signature-summer-15
    pin-this-post-2
    Types of Paint - Best Paint for Wood Furniture

    SaveSave

  • Best Paint for Cabinets

    Best Paint for Cabinets

    Ready to give your kitchen cabinets a coat of paint? That’s great! It can be stressful determining what kind of paint to use on cabinets though, right? This guide lays out the best paint for cabinets and the pros and cons of each, as well as my personal experience with each.

    I get multiple painting questions every week. I thought I had covered most all painting topics with my Complete Guide to Painting Anything, but getting those questions tells me that I haven’t. And that’s totally ok! That’s what I’m here for – to answer as many of your DIY questions as I can or be helpful in other ways.

    I’ve had quite a few questions about painting cabinetry – both kitchen cabinets and bathroom vanity cabinets, so I thought I would go over the different types of paint you can use for painting cabinets.

    As I always say with posts like this, I am not a professional painter. While I have painted more things than I could ever possibly count, I don’t have a piece of paper that certifies I have a degree in painting. 😉 I have painted around 10 sets of kitchen cabinets, bathroom vanities, etc. though with multiple different types of paints so I have learned a little bit.

    This post contains affiliate links for your shopping convenience. Click here to read my full disclosure policy.

    What Kind of Paint to Use on Kitchen Cabinets

    There are various types of paint that can be used on kitchen cabinets, bathroom cabinets, etc. The main ones being:

    Oil-Based Paint

    Latex Paint

    Alkyd Paint

    Cabinet Painting Kits

    I’ve used each of these, as well as others, when painting cabinets in the past. Here’s my experience with each.

    Best Paint for Kitchen Cabinets

    Let’s start with the first time I painted cabinets…

    Rust-Oleum Cabinet Transformations Kit

    Best Paint for Cabinets - White Rustic Kitchen - Rain on a Tin Roof

    When we bought the Beloved Foreclosure, I didn’t really have much knowledge about painting cabinetry at all. However, our kitchen cabinets there were in great need of a makeover. Since I was such a novice and since this was before the days of Pinterest and I had no idea people actually wrote blogs about painting cabinets, I felt better about having a kit that would guide me step-by-step along the way. I used a Rust-Oleum Cabinet Transformations Kit to paint all the cabinets in the kitchen. The kit walked me through everything and it was easy to do, yet time consuming. The kit even came with a deglosser to use for priming the cabinets to paint.

    Pros:

    Walks you through everything step-by-step, usually no sanding required, everything you need sans the paintbrush is in the box. Easy cleanup.

    Cons: 

    There were brush strokes in the finish. More expensive than just buying each product in the kit individually.

    Durability:

    Pretty good. If I remember correctly, this finish stayed on the cabinets for about 2 years before I decided that I wanted a different look. I don’t remember lots of scratches or the paint peeling off.

    Would I use the kit again? 

    Yes, if I still didn’t have much knowledge about painting cabinetry, but since I know everything about painting that I do now, I wouldn’t spend my money on the kit, instead I would just buy the paint, deglosser, and whatever else I needed separately as it would be cheaper and just the same.

    You can read more about this kitchen remodel here.

    Velvet Finishes Paint

    What Kind of Paint to Use on Kitchen Cabinets - Navy and White Kitchen - Rain on a Tin Roof

    When I decided I wanted a different look for our kitchen cabinets at the Beloved Foreclosure, I used Velvet Finishes paint on them. At that point, I had used Velvet Finishes on lots of furniture pieces and wanted to give it a whirl on my cabinets. Before painting the cabinets, we removed the shiny finish with Ready (a spray on primer/deglosser), then painted the cabinets and finally finished them off with a topcoat of Protect.

    Pros: 

    Definitely one of the easiest paints to use, good variety of colors to choose from. Easy cleanup of brushes / paint supplies.

    Cons: 

    This paint is more expensive than regular paint you get from a local hardware store. There were some brushstrokes in the finish, but that could have been due to the fact that the previous finish had brushstrokes.

    Durability:

    Good. Before we moved out of that house, there were a few scratches in the paint here and there on our cabinets. I will say that we are tough on our house, so some of that could be due to us.

    Would I use it again?

    Yes, but I think I am more partial to it for furniture rather than larger projects like cabinets.

    You can read more about my kitchen cabinet painting experience with Velvet Finishes here.

    Latex Paint (Satin, Semi-Gloss, Gloss Finishes)

    What Kind of Paint to Use on Cabinets - Purple Bathroom Vanity - Rain on a Tin Roof

    I have used regular latex paint on bathroom vanities multiple times. I tend to lean toward semi-gloss and gloss finishes for the paint as it holds up better to wear and tear and you don’t always have to use a topcoat with it. If you use a satin finish latex paint, then I suggest giving it a topcoat of polycrylic as well for added protection. When priming your surface before using this kind of paint, you’ll want a shine-free surface. You can sand to get this or use a deglosser. I also like to give cabinets a coat of primer, such as KILZ or Zinnser after sanding/deglossing and before painting when using latex paints. I think it helps to give the paint a better grip on the cabinets.

    Pros: 

    Definitely the cheapest route, but do choose a good quality latex paint. My go-to is usually Behr. Can use Floetrol with the paint to prevent brush strokes. Easy clean-up. Can usually wipe any spills right off the cabinet with a wet cloth.

    Cons: 

    Latex paints are more prone to scratching and peeling off more so than other paints. There are more steps involved with priming and top coating as well.

    Durability:

    Ok, if you aren’t going to be giving the cabinetry super hard use. The durability is even better if you top it with a polycrylic topcoat.

    Would I use it again?

    Yes. I actually opted to use Behr Premium Plus Semi-Gloss Latex paint on the cabinets I installed in my office.

    You can read more about the bathroom makeover that includes the vanity pictured above here.

    Alkyd Paint

    What Type of Paint for Kitchen Cabinets - Black Cabinets in Kitchen - Rain on a Tin Roof

    When we bought the 70’s Landing Pad, it was obvious the kitchen cabinets needed a new paint job. Honestly, they really need to be replaced, but that wasn’t in the budget then and still isn’t quite yet. A paint job had to work for now. I did a lot of research and had heard about an Alkyd paint called Benjamin Moore Advance that was supposed to be great for cabinets. I decided to give it a whirl. It’s durability is supposed to be like that of an oil-based paint, but it goes on like a latex paint. Before painting the cabinets, I still had to degloss them all before painting. No topcoat is needed with this paint though.

    Pros:

    Easy cleanup. No topcoat needed. No brush strokes.

    Cons:

    More expensive than regular latex paint. Smelly, but not as much as oil-based paint.

    Durability:

    I do think this paint is more durable than regular latex paints, but I don’t think it is as durable as oil-based paint. We don’t have any big scratches in the finish or anything like that on our cabinets that are painted with it, but there are some spots around the cabinet knobs where the paint is wearing off.

    Would I use it again?

    Yes. Behr has actually came out with an Alkyd paint now as well and I used it on my daughter’s playroom stage here.

    You can read about our kitchen remodel where I used this paint here.

    Oil-Based Paint

    Best Paint for Kitchen Cabinet - Oil Based Paint on Cabinets - Rain on a Tin Roof

    I used oil-based paint on the bathroom vanity cabinet in our guest bathroom. This was the first time I ever used oil-based paint on cabinetry and I have to say – I was impressed.

    No, oil-based paint is not the easiest paint to work with, it’s smelly and the clean-up afterward isn’t super fun either, but it’s hard to beat the durability of oil-based paint. This paint dries to a hard finish that’s hard to scratch off. If you need to wipe up any dirt or marks, just use a damp cloth. On top of that, oil-based paint leaves virtually no brush strokes.

    I have also used oil-based paint on my office desk and it has held up wonderfully. My desk works hard and I’m not always nice to it, but the paint has stood strong.

    Pros: 

    Most durable. No brush marks. Usually takes fewer coats than other paints.

    Cons: 

    Smelly, clean-up.

    Durability:

    Very.

    Would I use it again?

    Absolutely.

    You can see more of this bathroom makeover where I used oil-based paint on the vanity cabinet here.

    Stain + Polyurethane

    Types of Paint for Cabinets - Stain on Bathroom Vanity Cabinet - Rain on a Tin Roof

    If you’re looking to go with the wood grain look instead of the painted look, then you’re probably going to be using stain. I have stained cabinets before and have been very happy with the results. I stained the vanity in our master bathroom and it has held up extremely well. Of course, if you want to stain your cabinets, they will either need to be already unfinished cabinets or be stripped. You can read more about stripping pieces here. If you stain something, you will want to topcoat it with a polyurethane to keep it from fading and protect the piece. Stains themselves don’t have much protection in them.

    Pros:

    Probably a little cheaper than using some of the more expensive paints. No brush stokes.

    Cons: 

    If you have to strip your pieces, it’s going to take some time and might be more difficult depending on how much you have to strip off.

    Durability:

    Pretty durable.

    Would I use it again?

    Yep.

    One thing to keep in mind when painting cabinets is that any paint is going to chip over time. That is just the nature of the beast. The key is choosing the best paint for your project and yourself that will keep that from happening as long as possible.

    If you’ve got any other cabinet painting questions or anything you can add from personal experience, please drop it in the comments below!

    What type of paint for kitchen cabinets have you used before?

    Looking for more painting help or DIY kitchen ideas?

    Painting 101: The Complete Guide to Painting Anything – all your questions answered.

    DIY Kitchen Island – we made this out of old barn wood and salvaged porch posts.

    If you’d like to refer to this post in the future, pin it below!

    Kinds of Paint to Use on Cabinets - paint for kitchen and bathroom cabinets - Rain on a Tin Roof

    Gift Ideas Signature


    SaveSave

  • How to Paint Baseboards

    How to Paint Baseboards

    Painting baseboards and all trim in general can be a tedious, time consuming task. After remodeling four homes, I’ve learned a few tips for all that tedious trim painting. Here are my tried and true methods for how to paint baseboards quickly. 

    When you decide to renovate a house, you pretty much know that the renovation will include painting just about every single room.

    But when you see that house the first couple of times, you are too caught up in the potential to realize just how much painting there is to do – and not just painting of walls, but also of ceilings. And baseboards. And basically all trim. And all doors. Oh and then all cabinets.

    And that’s when you want to go in a corner and cry and hide and ask yourself why, why, why did we do this to ourselves??? 

    Oh ok, that’s just me. 

    No it’s not. Admit it. You’ve been there or at least been in a similar situation. 

    Every single room, every single door, cabinet, baseboard and piece of trim have to be painted in the 70’s Landing Pad.

    Now, I wasn’t too concerned about how much time it would take to paint the walls – rolling doesn’t take too long. The same was true of the doors and cabinets – I would be able to spray a good portion of those with my paint sprayer.

    All the trim though – particularly all the miles and miles and miles of baseboards were causing a touch of anxiety.

    But get this – in the end, it took me about 30 minutes (minus drying time) to paint all the baseboards in the living room, dining room, and hallway of the 70’s Landing Pad. Let me give you an idea of how much baseboard that is:

    Living Room

    Painting Baseboards

    Dining Room

    How to Paint Baseboards Fast

    HallwayPainting Baseboards Fast

    That’s a heck of a whole lot of baseboards to paint. What I did in this case may not be ideal for everyone. Don’t worry though – I’m going to give you a few different methods for painting baseboards and you can determine which is best for you and your home.

    How to Paint Baseboards With a Paint Sprayer

    If you only have one small room to paint baseboards in or if you’re painting trim in a room full of carpet and furniture, then a paint brush is going to be your best option. Go on and skip ahead to method #2. If you have a ton of baseboards to paint though and you’re also ripping up carpet, then this might be for you. This method works best when you also have to paint the walls in the room as well.

    Supplies:

    Steps

    Step 1: Prep Work

    For us, we are having to replace all the flooring in the 70’s Landing Pad. When we pulled up the old flooring, we realized that when the house was built, the baseboards had been put right on top of the subfloor, instead of putting them about 1/4″ above the subfloor to allow room to slide new flooring under. Since this was the case, we carefully pulled off all the old baseboards, then put it right back on the wall, but 1/4″ higher. We actually used a scrap piece of our new flooring to place under the baseboard for measurement, then tacked it on to the wall.

    If you are not replacing your flooring, but still have miles and miles and miles of baseboard to paint, then you could take off your baseboards, mark where each one goes on the back and cover that with a piece of painter’s tape. Then, take the baseboards outside and use a paint sprayer to spray them (I’ll get to the specifics of that in a bit.)

    Fill any nail holes with wood putty, let dry and sand smooth (there’s a tutorial here for filling holes). If you have a gap between the top of your baseboard and the wall, fill it with caulk, smooth it and let it dry.

    Take all outlet covers off and tape over the outlets.

    Vacuum up any dust, dirt or debris that is surrounding the baseboards.

    Step 2: Get your paint and paint sprayer ready.

    Painting Baseboards with a Paint Sprayer

    The best paint for baseboards are ones with a semi-gloss or gloss finish. These are the most durable and scrubbable. These areas tend to get beat up quite easily and semi-gloss is easier to clean than flat, satin or eggshell sheens. Get out your paint sprayer and fill up the cup about 1/2 – 3/4 full, then thin your paint down to the correct consistency. There’s a guide here for thinning your paint.

    Adjust the spray pattern to be vertical by turning the air cap on the front of the sprayer as shown below.

    How to Paint Baseboards with a Paint Sprayer

    When the “wings” as I call them are horizontal, the paint will spray in a vertical pattern.

    Step 3: Paint the baseboards.

    Plug in the sprayer. Hold the Finish Max about 10 inches away from the baseboard.

    Tips for Painting Baseboards

    Pull the trigger and start painting. Stay in constant motion, but moving slowly across the baseboard. Don’t stay in one place for too long.

    How to Paint Baseboards Fast with a Paint Sprayer

    You can see how the paint will get on the wall and floor as well. This is why I said if you aren’t replacing the flooring or painting the wall, to pull the baseboards off and spray them outside. When you put them back up, fill the nail holes and touch up those spots with a brush. It will still save you loads of time if you have a lot of baseboard to paint.

    Let the paint fully dry before doing another coat. I did two coats total.

    If you did get some drips from staying in one place too long, then simply run your paintbrush over those before it dries.

    Tips for Painting Baseboards Fast

    I plan on using this method again in the master bedroom before laying the new carpet and in multiple rooms downstairs as well.

    How to Paint Baseboards with a Brush

    If you aren’t in the middle of a big home remodel and painting baseboards with a sprayer isn’t ideal for you, then you can still get a great finish on your baseboards with a good ol’ paintbrush.

    Supplies:

    Steps

    Step 1: Prep Work

    Fill nail holes with wood putty if needed, then let dry and sand smooth.

    If you have a gap or any cracks between the top of your baseboard and the wall, fill it with caulk, smooth it and let it dry. Do the same in corners where the baseboards meet.

    Wipe down all the baseboards with a wet cloth to remove any dust and dirt.

    Tape off the wall just above the baseboard and the carpet below the baseboard. You can also put plastic down on the ground if you’re worried you might get paint on your flooring.

    Step 2: Prepare your paint. 

    Mix the Floetrol with your paint as the instructions say to on the bottle. The Floetrol is excellent for reducing brush strokes in your paint finish after it dries. If this isn’t something you’re worried about, you may skip this step.

    Step 3: Paint the baseboards.

    Dip your paintbrush only about 2/3s of the way up the brush into the paint. Remove excess paint from the brush by gently wiping the brush along the sides of the paint tray or container.

    Brush the paint onto the baseboards in long even strokes. Do not go back and forth. Go in one direction.

    Step 4: Repeat.

    After the first coat is dry, give the baseboards a second coat if needed. After the final coat of paint, immediately remove the tape from the wall and floor to prevent the new paint from peeling off the baseboards.

    Have any tips or tricks you can add for painting baseboards?

    You might also want to see…

    How to Paint Trim and Doors: A step-by-step guide for painting trim and doors including what kind of paint to use, what the best tools are and how to get a professional paint job.

    How to Paint Doors and Trim

    pin-this-post-2

    Painting Baseboards

    blog-signature-summer-15

    You know you don’t wanna miss any of this crazy.

    Sign up to get my posts delivered to your inbox here.

    Stalk Me Here:

    Pinterest / Facebook / Twitter /  Instagram

    Disclosure: This post was a collaboration with HomeRight. However, all opinions and baseboard painting hacks are 100% mine.

  • How to Paint Trim and Doors | Painting 101

    How to Paint Trim and Doors | Painting 101

    Have a lot of trim and interior door painting to do? This guide will walk you step-by-step through the entire process for how to paint trim and doors. We’ll cover what kind of paint to use on trim and doors, the tools you’ll need and what to tackle first.

    Some painting questions I’ve been asked more recently pertain to painting trim and doors – what kind of paint to use on them, how to patch holes, etc.

    In the past 13 years, I have painted more trim and doors than I want to think about. Like three full houses of trim and doors worth. It makes me a little sick just thinking about it. In my early days of painting trim, I actually thought that just slapping the paint on there would magically fill any nail holes in the trim.

    I was an idiot.

    Needless to say, paint does not magically fill those nail holes.

    Here’s what I’ve learned over the years about painting trim and doors. Hopefully, you can learn from my stupidity and save yourselves a few tired arms.

    This post contains affiliate links for your shopping convenience. Click here to read my full disclosure policy.

    Best Paint for Trim and Doors and Tools

    Interior Door and Trim Paint

    First off, let’s talk about what kind of paint to use on trim and doors. Do not, I repeat, do not use flat or eggshell paint on trim or doors. Especially not flat. Guess who made another idiotic move in her early days of painting and used flat on trim. This girl right here. Big mistake. Flat and eggshell paints don’t clean up as easily as semi-gloss and gloss sheens do. If you get dirt and grime on flat paint, you might as well go on and get your paint brush out to paint over it. With semi-gloss and gloss sheens, you can grab a wet cloth and usually wipe away any dirt or grime.

    How to Paint Trim and Doors: Best Paint for Trim and Doors

    I’ve used four different colors on doors and trim: Behr’s standard semi-gloss white that you just pick up right off the shelf, Behr’s Bit of Sugar (a white-white), Behr’s Limousine Leather (black) and Crumb Cookie by Valspar (more of a creamy white). The Bit of Sugar and Limousine Leather were used in various places throughout the 70’s Landing Pad and the Crumb Cookie was used in the Beloved Foreclosure, if you want to see those colors in action.

    Brushes and Rollers

    When it comes to painting tools, such as brushes and rollers, this is not the time to buy the cheapest one you can find. You don’t want to end up with trim and doors that sport fuzz from the roller and hairs from the brush. If you buy the cheap ones, that is exactly what you will get.

    How to Paint Trim and Doors: Always use a good paintbrush.

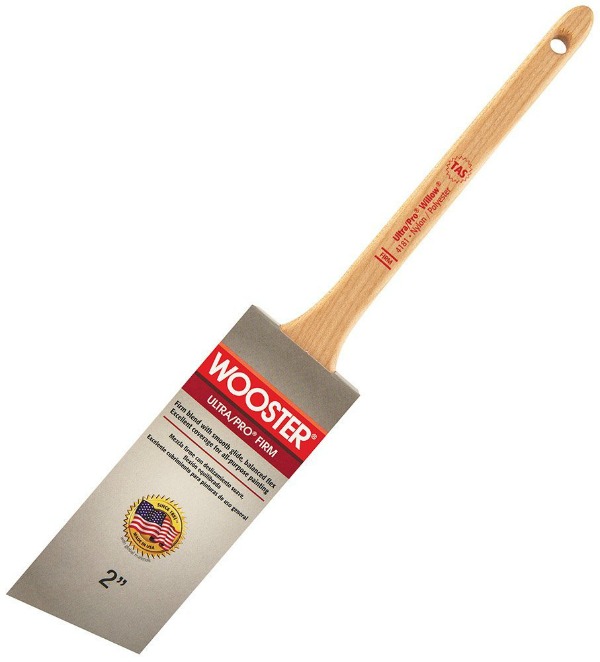
    During all the painting of the 70’s Landing Pad, I found that my favorite brush for painting trim and edging in along walls as well was an angled 2″ Wooster paintbrush. Purdy is another good paintbrush brand as well.

    How to Paint Trim and Doors: Use good rollers.

    As far as your paint roller covers go, you’re probably going to want a smaller sized roller for painting doors (I’ve found that for the most part using a brush is easier than using a roller on trim). My personal pick for those smaller sized roller covers are the Purdy brand ones. As far as the actual roller frame, just about any of those will work no matter the brand. Just choose one that feels good in your hand and fits the size of your roller cover.

    Paint Trays and Pails

    A paint tray is a paint tray. Unless you just have a certain preference, this is where you can usually buy the cheapest one. One little gem that I have found very helpful when painting trim though is the Handy Paint Pail. It has a nice little handle that easily fits over your hand and also a magnet inside the pail so that you don’t lose your brush.

    Wood Filler and/or Spackling

    If you have any holes to fill in your trim or doors, you will want to fill those before painting. I’ll go over how to do that in just a minute, but in terms of what to buy, you can either go with a wood filler or spackling. Now, I used to be a wood filler girl for any holes in woodwork that needed to be filled. However, a contractor who did some work for us suggested I try using spackling instead, which is used to fill holes in drywall.

    How to Paint Trim and Doors: Use spackling to fill holes.

    I tried spackling once and was sold. It’s much easier to use than wood filler and often doesn’t even require sanding.

    P.S. Isn’t spackling like a super funny word? Who came up with that one? 

    Caulk

    If you have any gaps between the wall and trim, you’ll want to fill those gaps with caulk to get a finished look. For this you’ll need caulk and a caulk gun. For caulk, I like to use DAP’s Premium Molding and Trim Sealant. You can use a regular caulk as well, but it will be more likely to crack over time. A basic caulk gun will be just fine.

    Tape and Dropcloths

    Once more, don’t buy just cheap masking tape to tape off the walls and floor alongside your doors and trim. There really is a difference in tape. Masking tape isn’t made to seal out paint, therefore you are bound to get some paint bleed. Some tapes may also not be made to go on walls, therefore you could risk pulling paint off your walls. Always use an actual painter’s tape.

    How to Paint Trim and Doors: Use a real painter's tape, not masking tape.

    I use FrogTape for all my taping off on walls and floors. I also use it to tape off trim when I’m painting walls. If you are applying tape to a freshly painted wall, then use their Delicate Surface version which is made specifically for newly painted surfaces. Use their Multi-Surface tape for cured painted surfaces and if you have textured walls, they have a textured surface tape you can use for that.

    Make sure you also pick up a drop cloth to put over the floor in the area you will be painting as well.

    How to Paint Trim and Doors

    Do I paint trim or walls first?

    If both your trim and walls need to be painted, then you might be wondering what you should paint first – the trim or the walls. For me personally, I find it best to paint the trim first, then the walls. Most people prefer to paint their trim white and oftentimes, your wall color is not white and usually darker than white. So, if you accidentally get your wall color on your trim, it’s going to take more coats of white trim paint to cover it. For this reason, I paint my trim first, let it fully cure for at least 24 hours, tape it off, then paint my walls.

    Prep

    Before you can actually paint your trim and doors, you’ll need to prep it.

    Fill Holes

    The first thing you will want to do is fill holes with either the wood putty I noted above or the spackling. My personal preference is the spackling.

    How to Paint Trim and Doors: Fill nail holes with spackling.

    To fill the holes, just take a bit of spackling on your index finger, gently push it into the hole, then rub your finger back and forth gently over the hole to smooth out the spackling. If you smooth it out enough with your finger, you most likely won’t have to sand any of the spackling after it dries. Let the spackling dry (it’ll take less than an hour probably unless you had some big holes to fill), then look at it to determine if you need to sand any to make it smooth or if you need another coat of spackling. Most smaller holes only require one coat of spackling. If you need another coat, just repeat the steps above. If you have to sand it smooth, use a fine grit sandpaper.

    Caulk

    If you have any gaps between the wall and your trim, then caulk those gaps with your caulk and caulk gun. Apply a small, but even amount of pressure on the gun and then use your finger to smooth the caulk out.

    How to Paint Trim and Doors: Caulk any gaps.

    Tape

    After the caulk has dried, tape off around any walls or flooring that the trim is attached to. Be sure to run your finger or fingernail firmly along the edges of the tape to seal it and prevent paint bleed.

    Finally, lay a drop cloth down in the area where you will be painting.

    Painting Interior Doors and Trim

    Brush first.

    Anytime you’re painting something, a general rule of thumb is to brush all the places that need to be painted with the paintbrush first, rather than rolling first.

    I’ve found that trim such as baseboards and molding around doors usually just need to be brushed anyway and not rolled. Don’t go back and forth with your brush, make long strokes and as soon as you see your brush is running out of paint, get more on it. By making long strokes rather than going back and forth, you will hopefully only have to do 1-2 coats.

    If you are painting doors that are not flat, then brush the detailed places on the door first, then come back with the roller for the flat places.

    How to Paint Interior Doors

    With my front door, I used a paintbrush on all the trim/detail work on the door and then used a roller on the flat parts.

    Roll second.

    After using the paint and paintbrush as needed, go back over the flat or smooth areas of your trim or doors with the roller. Once more, as soon as you see your roller starting to run out of paint, load it back up.

    All the interior bathroom, bedroom and closet doors in our house are flat, so I was able to completely roll them, with the exception of using the brush around the doorknobs and hinges.

    Remove the tape.

    As soon as you have rolled or brushed on your final coat of paint, remove the painter’s tape. Pull it off slowly at a 45 degree angle. If you let the paint dry before removing the tape, you have two options:

    1. Go back over the spots right where the tape is with a little more paint and the paintbrush, then remove the tape immediately.
    2. Use a utility knife to score along the tape and paint, then pull the tape up.

    Whew, that was a lot! I don’t think I realized how much actually goes into painting trim and doors. I’m off to drink a cheap beer – leave your tips and questions in the comments and I’ll be sure to answer them!

    You might find these other painting tips helpful too:

    Types of Paint to Use on Cabinets – I’ve painted cabinets five different times and this is what I’ve learned.

    What kind of paint do I use on that? – A guide to what kind of paint you can use on various types of surfaces.

    Topcoats and When to Use Them – Every kind of topcoat and when you need to use them.

    My Best Tips and Tricks for Painting Furniture – All my tips in one place.

    Want to remember these painting tips for later? Just pin the image below:

    A step-by-step guide for how to paint trim and doors including what kind of paint to use, what the best tools are and how to get a professional paint job.
    blog-signature-summer-15

    SaveSave

  • FAQ: Painting Furniture

    FAQ: Painting Furniture

    I feel like I should preface posts where I give tons of information like this with “I’m not a professional!” I don’t have a degree in painting furniture, interior design or anything like that. What I do have is nearly a decade’s worth of painting furniture, decorating and things of that nature under my belt. So while I don’t own a piece of paper stating that I know what the hell I’m talking about, I do have a hell of a lot of experience. 😉

    Besides writing about tons of furniture makeovers I’ve completed, I’ve also written multiple posts pertaining to painting in general: my favorite tools for painting, what kind of topcoats to use with what kind of paint and on what kind of furniture, my best painting tips, how to use a paint sprayer for furniture makeovers, and what kind of paint to use on what surface. As I said in one of those more recent articles though, there are always still questions. I’m totally not complaining about that! I love answering your painting questions to the best of my ability because painting furniture, walls and essentially my entire body in the process is something I enjoy.

    These painting questions are ones I get pretty regularly. I thought it might help to put them all in one place. And if you have a question that isn’t answered here, please leave it in the comments and I will respond to you as well as add it in this post. Let’s do this thang!

    This post contains affiliate links for your shopping convenience. Click here to read my full disclosure policy.

    FAQ: Painting Furniture

    Q: Can I use oil-based paint in a paint sprayer?

    A: With the paint sprayer I use, a HomeRight Finish Max, you can use oil-based paint in it. You just need to follow the instructions on the paint can as to how to thin the paint. Also, I have tutorial here on how to use a paint sprayer.

    Q: Can I paint over oil-based paint with a latex-based paint?

    A: Based from my experience, I wouldn’t do it. I’ve tried this before and it has just never ended well. I’ve heard of some people having success with sanding the finish, priming it, then going over it with latex-based, but I’ve never had much success with it. If you really want to try it, I would suggest doing it in a small spot first and seeing how that goes.

    Q: What type of topcoat/sealer should I put on my kitchen cabinets?

    A: If they are stained or painted a dark color, go with a polyurethane. If they aren’t stained, go with a polycrylic. Polyurethanes have a tendency to yellow over time and polycrylics don’t. It should be said though that polyurethanes are tougher in terms of protection than polycrylics. Also, here is a guide for determining what kind of topcoat to use on what.

    Q: Do I need a topcoat on top of a satin or eggshell paint?

    A: Yes. Unless you used a semi-gloss paint, you usually always need a topcoat with flat, satin or eggshell finishes. You can use a polycrylic in a satin finish to keep the piece from having too much shine.

    Q: I painted my piece of furniture and put a topcoat on it. I put it back in use and a few days later, I grabbed a magazine off it I had placed there and it seemed like the magazine had to be “peeled” off the furniture. It even left a little of the ink from the magazine on the table. What happened?

    A: The paint and/or topcoat didn’t have enough time to fully cure. Some paint jobs can take weeks to fully cure, especially if you are in a high humidity area. After your paint and topcoat have dried to the touch, you can move it back into place. I suggest letting it sit “undecorated” though for at least a week. If it has drawers or doors, leave those slightly open as well to let them fully cure. After a week, lay a magazine on top of the piece for a few hours and close the doors/drawers. If after a few hours, everything is removed and opened without sticking, you should be good to go, if not, let it cure longer. I’m in Tennessee and if I makeover a piece of furniture during the summer, I tend to wait as long as possible before decorating and fully closing the doors and drawers on it. I will wait usually at least two weeks.

    Q: After painting my piece, I noticed little tiny bumps in my finish. What happened?

    A: Those little bumps are little bits of dust and dirt most likely. Before applying paint to your piece, always be sure to wipe it down well with a tack cloth. Paint your furniture in places where there isn’t much dust flying around as well. If you have a shopvac, then it’s a really good idea to vacuum the piece after sanding it, then going back over it with a tack cloth and finally painting it.

    Q: What can I put over a piece of furniture if I want to add photos to the top of it?

    A: Mod Podge works well for this. First, apply Mod Podge to the surface where the photos will be placed, then put the photos on top of that and finally put another coat of Mod Podge over the photos. I would suggest doing at least two light coats of Mod Podge on top of the photos to really protect them.

    Q: What kind of paint do I use for trim? And what color(s) do you use or have you used?

    A: Always use a semi-gloss or gloss for trim. They will be much more durable and easier to wipe clean than flat, satin, or eggshell finishes. In the 70’s Landing Pad, I’ve used Limousine Leather and Bit of Sugar, both by Behr and both in semi-gloss finishes on the trim. In our Beloved Foreclosure, I used Crumb Cookie by Valspar, but had it mixed in Behr paint.

    Q: What kind of paint would I use on a brass/metal fireplace surround?

    A: Once more, I’ve never done this, but I know that Rust-Oleum makes a high-heat spray paint that I think would work well for this. Just be sure to keep the paint out of the actual fireplace.

    Have more questions about painting? Please leave them in the comments below and I’ll respond to them there and add them to this post.

    You might also find these posts helpful:

    What kind of paint do I use on that? | A guide to what types of paint you can use on various surfaces. Good information for anyone who is new to furniture painting or doesn't know what paints can be used on what surfaces.

    What Kind of Paint Do I Use on That: A guide to the types of paint you can use on various surfaces.

    Lists lots of different topcoats, what to use each one on and how to do it. Painting 101: Topcoats and when to use them

    Topcoats and When to Use Them

    The ULTIMATE LIST of the best products to use for painting furniture! 12 Must Have Tools and Supplies for Painting Furniture

    Must-Have Tools and Supplies for Painting Furniture

    Are you a furniture painter or want to learn how to paint furniture? Then DO NOT miss this article - it's filled with the best tips for painting furniture!

    My Best Tips & Tricks for Painting Furniture

    blog-signature-summer-15

    pin-this-post-2

    All your questions about painting furniture answered in one place. Great guide for beginners and a great reference for more experienced furniture painters.

    SaveSave

  • DIY Painted and Patterned Doors

    DIY Painted and Patterned Doors

    This post is sponsored by FrogTape, however all opinions are 100% mine. Affiliate links may be contained in this post.

    After you complete a project and you look at it and say, “Hello, lover,” you know it’s good.

    For example, “Hello, lover” doesn’t exactly fit with removing popcorn ceilings or ripping out tile. But it does fit perfectly for closet doors…when they look like these…

    Sliding Closet Doors Makeover | Painted Closet Door Ideas | Painted Doors Ideas | Interior Door Ideas | Interior Doors Painted

    Hello, lover…

    You just said it, didn’t you? I knew you would. They are totally Carrie Bradshaw / Sex and the City worthy.

    So these doors are the closet doors in my office at the 70’s Landing Pad. Yes, I said this is the 70’s Landing Pad and yes, there is a rug on the floor and a semi-styled bar cart. This is the one room that, sans furniture (besides a bar cart turned craft cart and rug), is finished.

    Did you just feel me across the world jumping up and down with glee? Because I did.

    While most of this room is all white because I’ll be using it quite a bit for photos and white backgrounds never fail me for those, I needed something to be a wow factor in here – enter flat front closet doors.

    Stunning - AND she did it with paint and FrogTape! DIY Painted and Patterned Doors / Black and White Design / Black and White Decor / Interior Design

    You could practically feel the sadness radiating from them. So I fixed that.

    DIY Painted and Patterned Doors

    Materials Needed:

    Step 1

    Run FrogTape® all along the edges of each door.

    Stunning - AND she did it with paint and FrogTape! DIY Painted and Patterned Doors / Black and White Design / Black and White Decor / Interior Design

    Since this is a set of sliding closet doors, part of the door on the back is behind the front door. I just acted like that part didn’t even exist and ran the FrogTape on that door right along where the front door met the back door as shown in the photo below.

    Stunning - AND she did it with paint and FrogTape! DIY Painted and Patterned Doors / Black and White Design / Black and White Decor / Interior Design

    Step 2

    Find the center of each door and run a piece of FrogTape® right down the center.

    Step 3

    On the center piece of tape, come down 8″ and mark with a pencil. From the 8″ mark, come down 11.5″ and mark with a pencil.

    On the outer pieces of FrogTape, come down 14″ and mark with a pencil.

    Stunning - AND she did it with paint and FrogTape! DIY Painted and Patterned Doors / Black and White Design / Black and White Decor / Interior Design

    Run pieces of tape diagonally as shown in the image above to make a diamond. As long as your diagonal pieces are meeting on the marks you made, they should be even.

    With the second door, the one that is slightly behind the front door, since the length of the doors didn’t change any with the measurements, only the width, I still made my vertical 8″, 11.5″ and 14″ marks. The tape strips that make up the diamonds, the 11.5″ strips, will only be slightly shorter, but you shouldn’t have to actually measure those as long as you meet up the strips on your vertical marks.

    Step 4

    Use a craft knife and ruler or other straight edge to remove the excess tape as shown on the right door below.

    Stunning - AND she did it with paint and FrogTape! DIY Painted and Patterned Doors / Black and White Design / Black and White Decor / Interior Design

    Your doors will look like this when you are finished removing the excess tape:

    Stunning - AND she did it with paint and FrogTape! DIY Painted and Patterned Doors / Black and White Design / Black and White Decor / Interior Design

    Step 5

    Firmly press along all edges of the FrogTape® to seal the tape against paint bleed.

    Stunning - AND she did it with paint and FrogTape! DIY Painted and Patterned Doors / Black and White Design / Black and White Decor / Interior Design

    Step 6

    Paint over the doors with a small paint roller.

    Stunning - AND she did it with paint and FrogTape! DIY Painted and Patterned Doors / Black and White Design / Black and White Decor / Interior Design

    I used a small paintbrush to paint around the handles.

    Step 7

    Remove the FrogTape® immediately after you paint the last coat. Do not wait for it to dry.

    Stunning - AND she did it with paint and FrogTape! DIY Painted and Patterned Doors / Black and White Design / Black and White Decor / Interior Design

    Step back, and in your best Carrie Bradshaw voice say, “Hello, lover.”

    Stunning - AND she did it with paint and FrogTape! DIY Painted and Patterned Doors / Black and White Design / Black and White Decor / Interior Design

    Well done, my friend, well done.

    Stunning - AND she did it with paint and FrogTape! DIY Painted and Patterned Doors / Black and White Design / Black and White Decor / Interior Design

    By far, these babies are one of my most favorite painted pattern projects. P.S. I also seem to like alliteration. 

    What do you think? 


    Are you a painted pattern fiend too? You might want to see these then…

    Criss-Cross Accent Wall for $30 or Less via RainonaTinRoof.com #diy

    Criss-Cross Accent Wall

    STUNNING Black and White Gallery Wall! Simple to do - such a great accent wall!

    Black & White Gallery Wall

    DIY Cane Inspired Accent Wall done for around $25. Gorgeous kelly green wall treatment in this bathroom.

    Cane Inspired Accent Wall

    Super easy to make and fun! Easy Confetti Accent Wall

    Easy Confetti Accent Wall

    pin-this-post-2

    Sliding Closet Doors Makeover | Painted Closet Door Ideas | Painted Doors Ideas | Interior Door Ideas | Interior Doors Painted

    blog-signature-summer-15

    You know you don’t wanna miss any of this crazy.

    Sign up to get my posts delivered to your inbox here.

    Stalk Me Here:

    Pinterest / Facebook / Twitter / Instagram

    Disclosure: This post was a collaboration with FrogTape®. However, all opinions and mentions of Sex and the City quotes are 100% mine.

  • How to Coordinate Paint Colors Throughout Your House

    How to Coordinate Paint Colors Throughout Your House

    I can’t begin to tell you how many times I’ve attempted to select a paint color and it has ended in either tears, drinking or both.

    Usually both.

    Throwing of hands in the air, slamming of fists on tables and/or walls is typical as well.

    Obviously, buying sample pots of paint and testing those out on your walls is the way to go, but if I bought a sample pot of paint for every color I thought may work, I would have a closet full of sample paint pots.

    One of my biggest challenges is often coordinating paint colors throughout my house – thus why there is a lot of black and white in my home. However, a few months back I went to a meet-up at the Behr paint headquarters in Atlanta and had an ‘Ah ha’ moment.

    Also, Behr isn’t paying me to tell you this, I just think that everyone in America should know this so we don’t all spend a combined $1 trillion dollars on paint samples and/or doctor’s bills that resulted from hitting walls after still not being able to find a paint color after 20 freakin’ samples.

    How to Coordinate Paint Colors

    This post contains affiliate links for your shopping convenience. Click here to read my full disclosure policy.

    Seriously, you’re gonna love me for all time after I tell you this.

    Ok, this is the Behr color center at Home Depot.

    how-to-coordinate-paint-colors-behr-color-center

    The color center is broken down into eight horizontal rows.

    How to Coordinate Paint Colors Throughout Your House - oh my goodness, I SO wish I would have known about this trick sooner!! It would have saved me so much time and paint samples!

    Rumor has it that every paint color within rows one and two coordinate with each other. The same is true of rows three and four, rows five and six and rows seven and eight.

    How to Coordinate Paint Colors Throughout Your House - oh my goodness, I SO wish I would have known about this trick sooner!! It would have saved me so much time and paint samples!

    Therefore, if you select paint colors from within the same row group (i.e. rows 1 & 2 or row 3 & 4 or row 5 & 6 or row 7 & 8), then all those colors will coordinate or harmonize well throughout your house.

    I know, right, mind blown. Or at least mine was.

    So I tested their theory. I went to Home Depot and randomly grabbed paint chips from the various rows, noting what rows they came from. These are all paint chips from rows one and two:

    How to Coordinate Paint Colors Throughout Your House - oh my goodness, I SO wish I would have known about this trick sooner!! It would have saved me so much time and paint samples!

    Y’all. They weren’t lying. The top picture consists of all the color cards I got from those two rows and the bottom images are just cards I pulled out to show that the theory really is true.

    Now, not everyone loves that much color. Here are paint chips from rows five and six – more muted tones:

    How to Coordinate Paint Colors Throughout Your House - oh my goodness, I SO wish I would have known about this trick sooner!! It would have saved me so much time and paint samples!

    Once more, they all harmonize well together.

    I also grabbed some color cards from rows seven and eight:

    How to Coordinate Paint Colors Throughout Your House - oh my goodness, I SO wish I would have known about this trick sooner!! It would have saved me so much time and paint samples!

    And those worked too! As you work your way down the color center, the colors tend to get less bright. I failed to get color cards from rows three and four as the employees started looking at me a little funny, so I just took what paint chips I had and ran.

    Isn’t that so cool? While I will always love a good black and white paint combination, I am so glad to know this little trick because it will come in handy at the 70’s Landing Pad since I haven’t figured out all the paint colors there just yet.

    Did you know about this? Please don’t tell me I’ve been living under a rock for the last 10+ years of my painting life!

    Here are more home decorating posts you’ll find helpful too…

    How to Make a Moodboard for Room Designs – making these boards are easy and they are great for helping you determine what will and won’t work in your design!

    Decorating on a Budget – 5 Ways for Decorating Your Entire Home on a Tiny Budget!

    6 Decorating Ideas to Distract from Popcorn Ceilings – before you make a mess and go scraping them off, read this first!

    Free Printable Project Planner – a printable planner that will help you plot out your next room makeover and stay on budget.

    blog-signature-summer-15

    You know you don’t wanna miss any of this crazy.

    Sign up to get my posts delivered to your inbox here.

    Stalk Me Here:

    Pinterest / Facebook / Twitter /Instagram

    pin-this-post-2

    Coordinate Paint Colors Throughout Your Home | Home Painting Ideas | Home Paint Colors | Home Paint Schemes | Paint Colors for Home

    SaveSave

  • Show Me Your Grain…Your Wood Grain.

    Show Me Your Grain…Your Wood Grain.

    This post is sponsored by HomeRight, however all opinions are 100% mine. Affiliate links may be contained in this post.

    I won’t lie.

    The sight of a beautifully bold painted piece of furniture (preferably either kelly green, navy blue or a bold red) makes my heart soar.

    Not as much as Grunt Labor makes my heart soar, but pretty close.

    However, I have come to really appreciate a good grain…a good wood grain that is, because chocolate isn’t a grain yet, is it? I’m still waiting for chocolate to be classified as “good” for me.

    Here are a few of my favorite stained and painted furniture makeovers…

    Painted & Stained Furniture Projects with a HomeRight Finish Max / Furniture Makeovers / DIY File Cabinet Table / Cobalt Blue and Stain

    Stacy Risenmay is a lucky girl. Because all I want to do is steal her bedside table. The cobalt blue and stain combo is beautiful.

    Painted & Stained Furniture Projects with a HomeRight Finish Max / Furniture Makeovers / Hall Tree

    This is another shade of blue paired with stain that I think is stunning. Gail from My Repurposed Life made a hall tree from a door and sewing table. I’m usually not a big aged paint effect person, but I do love the depth the aging has on this shade of navy. She used her HomeRight Finish Max on this project.

    Painted & Stained Furniture Projects with a HomeRight Finish Max / Furniture Makeovers / Midcentury Modern Dresser Makeover

    A never fail combo is stain and white – especially on mid-century modern pieces like this one from While They Snooze.

    Painted & Stained Furniture Projects with a HomeRight Finish Max / DIY Pegboard

    Addicted 2 DIY made this stained pegboard organizer using her paint sprayer. She also has some good tips here for using stain in a paint sprayer.

    Painted & Stained Furniture Projects with a HomeRight Finish Max / Furniture Makeovers / Stripped and Stained Buffet Makeover

    My stripped and re-stained buffet makeover is one of my most favorite makeovers ever. I was actually a little worried about going back to stain after the piece had been a bold red, but it was totally the right decision. I used my HomeRight Heat Gun to strip it easily.

    Painted & Stained Furniture Projects with a HomeRight Finish Max / Furniture Makeovers / DIY Platform Bed

    Lauren from The Thinking Closet opted for a beach-y hued stain for her bed.

    Painted & Stained Furniture Projects with a HomeRight Finish Max / Kitchen Table Makeover / Furniture Makeover

    Ask Anna actually stripped and re-stained the top of this table, as well as painting the bottom of it. If you need tips on cleaning your paint sprayer after using stain in it, she’s your girl.

    Painted & Stained Furniture Projects with a HomeRight Finish Max / Furniture Makeovers / Dresser turned Home Gym

    This idea from HomeJelly is nothing short of genius. She took an old dresser and turned it into a home gym. She stained the top and feet, but painted the rest with her Finish Max. Now, as much as I would like to think this piece would actually motivate me to work out, I’m probably wrong. The idea is still genius though. 😉

    Are you a fan of stained and painted combination pieces?

    pin-this-post-2

    Painted and Stained Furniture Ideas | Furniture Makeover DIY | Furniture Makeover Ideas | Stained Furniture Ideas | Stained Furniture DIY | Painted Furniture Ideas

    Disclosure: This post was a collaboration with HomeRight. However, all opinions and corny post titles are 100% mine.

    SaveSave

  • Cane Inspired Accent Wall for $25

    Cane Inspired Accent Wall for $25

    This post is sponsored by FrogTape, however all opinions are 100% mine. This post contains affiliate links. 

    Sometimes I try to make things more complicated than they really are.

    Not on purpose of course.

    I just don’t think sometimes. Its like my mind sometimes turns off its “common sense” mode.

    That’s also when I end up saying things I shouldn’t to people. 

    Whoops. 

    That common sense mode of my brain shut down when I started to do this accent wall.

    You see I love caned pieces. Caned chairs, caned tables, caned light fixtures. I’m crazy over the pattern.

    And I have a pillow with a caned pattern on it.

    And I was determined to get that pattern on my wall. I knew I could. It was just straight lines strategically placed.

    But I was overthinking it.

    And it took Grunt Labor coming up to me, turning the pillow diagonally and saying, “Its just squares, Jenna,” for me to figure it out.

    He was right.

    But I didn’t say that because I’m not too keen on how saying he’s right tastes.

    Like vinegar, I tell ya.

    And once this revelation was made, I figured out how to make my own cane inspired accent wall.

    DIY Cane Inspired Accent Wall

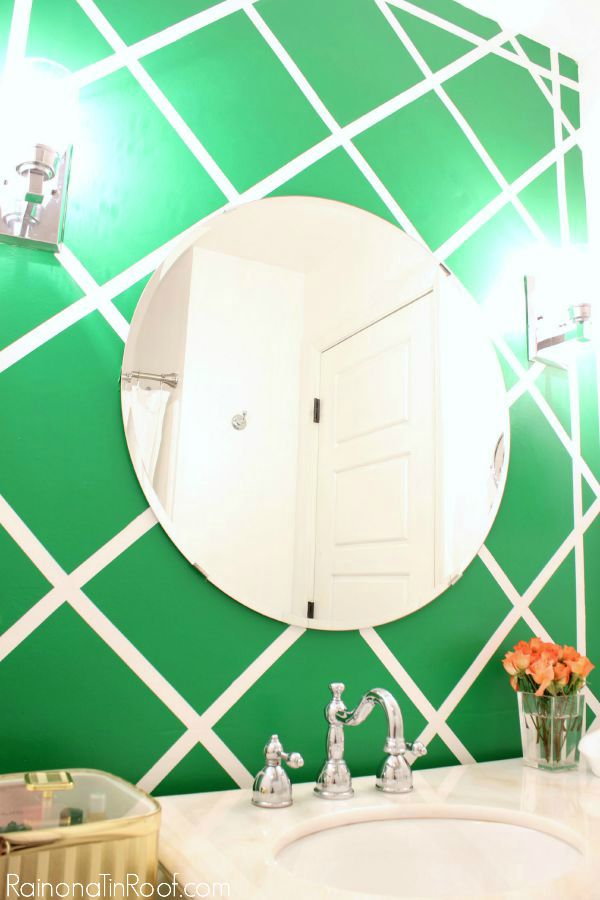
    DIY Cane Inspired Accent Wall done for around $25. Gorgeous kelly green wall treatment in this bathroom.

    It might look complex, but it really wasn’t.

    After I used common sense and all.

    Here’s what you’ll need:

    Step 1:

    My wall was already painted white which was what I wanted to use for one of my colors. However, if you want to use a different color than what your wall is already painted, you will need to paint the entire wall first. Keep in mind this will be the color that will be the pattern (lines) on your wall in the end.

    Step 2: 

    Find the center of your wall at the very top and mark it. Place one corner of your 12 x 12 piece of cardboard or cardstock (I used cardstock) on the mark. Trace the piece of cardstock on all four edges. Next, move the cardstock to either side of the diamond you just traced, match up the edges and trace again. Continue doing this until you have worked your way all the way across and down the wall.

    How to make a cane inspired accent wall.

    Step 3:

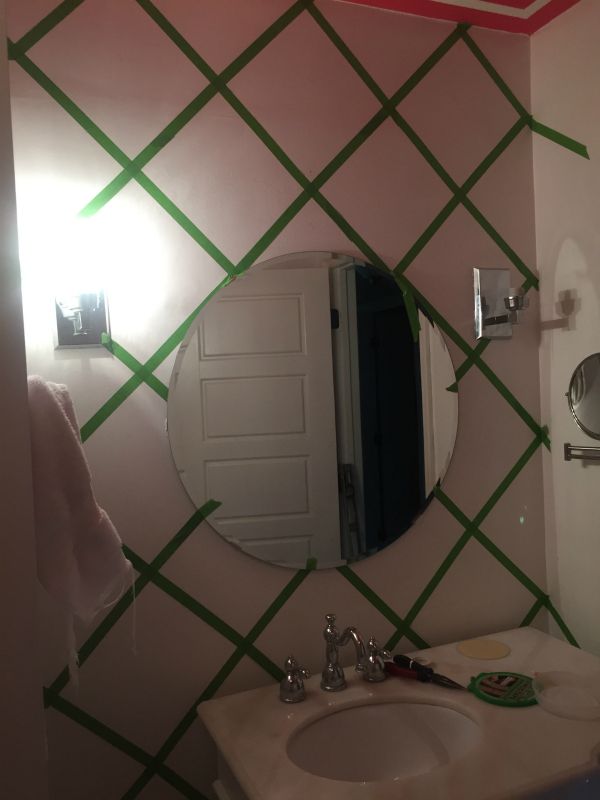
    Using the smaller width FrogTape, run the tape all along the inside edges of each square you traced. Your wall should look like this when you are finished:

    How to make a cane inspired accent wall with paint and FrogTape.

    Step 4:

    At this point, I was going to do two horizontal lines across the top and bottom of each square, just like a caned pattern. However, as I started to run the tape across the wall, I realized that I had some very uneven and shoddy drywall work at the top of the wall and it was throwing off the pattern. So, I opted to forgo those lines.

    I still wanted a little extra pop though, so I “framed” in the pattern along the edges. Do this by coming 2 1/2″ in from the wall edges on all sides.

    How to make a cane inspired accent wall.

    Run tick marks along the edges at the correct measurement and then run more of the smaller width FrogTape along the tick marks. This is what it should look like when you are finished:

    How to make a cane inspired accent wall with paint and FrogTape.

    Step 5:

    Use the larger width FrogTape along the edges of any walls that butt up to your accent wall, ceiling, and any other fixtures.

    How to make a cane inspired accent wall with paint and FrogTape.

    Step 6:

    To ensure crisp, clean paint lines, run your fingernail or a credit card along the edges of all the tape that you have applied to the wall.

    Step 7:

    Roll and brush on a paint color of your choice. It took about three coats of this bold green hue for me.

    Step 8: 

    Remove the FrogTape as soon as you have applied the final coat of paint while it is still wet.

    DIY Cane Inspired Accent Wall done for around $25. Gorgeous kelly green wall treatment in this bathroom.

    And commence the swooning.

    DIY Cane Inspired Accent Wall done for around $25. Gorgeous kelly green wall treatment in this bathroom.

    If you only need a quart of paint, you’ll end up having about $25 or less in the wall. Not too shabby, eh?

    Are you an accent wall fiend?

    You might also like these then...

    Super easy to make and fun! Easy Confetti Accent Wall

    9 Accent Walls for $30 or Less via RainonaTinRoof.com #homedecor

    pin-this-post-2

    DIY Cane Pattern Accent Wall | Patterned Accent Wall DIY | Accent Wall Ideas | Accent Wall Bathroom | Feature Wall Ideas

    I did end up painting the pink ceiling in the bathroom white. It was just clashing way too much with the green.

    You know you don't wanna miss any of this crazy.

    Sign up to get my posts delivered to your inbox here.

    Stalk Me Here:

    Bloglovin / Pinterest / Facebook / Twitter / Google+ / Instagram

    blog-signature-summer-15

    frogtape-disclosure

    SaveSave

  • 9 Simple and Easy Bed Makeovers and Hacks

    9 Simple and Easy Bed Makeovers and Hacks

    I can’t tell you how many times I’ve ran across DIY headboards on Pinterest.

    I’m confident DIY headboards could run Pinterest all by themselves.

    Now, I’m not bashing on DIY headboards at all.

    If you have patience and an insane amount of upholstery and tufting skills, then by all means make your own headboard.

    However, I don’t.

    I’m in favor of using what I’ve got.

    This could also mean that I’m cheap. That’s cool too. I’ll own it.

    I can paint a headboard faster than I can build one and cheaper too.

    No, it might not look as chic as a velvet upholstered one would, but if it looks like any of these bed makeovers, I wouldn’t turn my nose up at it.

    This post is sponsored by HomeRight, however all opinions are 100% mine. This post contains affiliate links for your shopping convenience. Click here to read my full disclosure policy.

    Simple and Easy Bed Makeovers and Hacks

    Americana style, anyone?

    Headboard Makeovers - Patriotic Shades, Red and Blue. Painted with the HomeRight Finish Max paint sprayer - gives a flawless finish and easy to use.

    That red. Oh my. Makely Home killed it with this bold red headboard. Gail from My Repurposed Life went with a classic navy for this twin headboard makeover. Navy is always a good pick – it will never fail you. Both of them used their HomeRight Finish Max Sprayers to makeover the beds.

    Shades of Green

    Headboard Makeovers: Shades of Green - Awesome furniture makeovers!

    I love the lines of Refresh Restyle’s headboard makeover, but I am also totally digging the bolder green hue on Jesse Coulter’s makeover.

    I know. Jenna likes the green. Imagine that.

    Play It Safe White

    Bed Makeovers: Shades of White

    Play it safe with a classic white like Finding Silver Pennies and 11 Magnolia Lane did.

    When in doubt, go for polka dots.

    Bed Makeovers: Easy to do polka dot bed.

    I’ve never been able to resist a good (and really easy to paint!) polka dot. After I sprayed this bed with my Finish Max, I popped on a few polka dots.

    And if you just have to make your own headboard…

    You can use these ideas to repurpose your old bed.

    Bed Hacks: Turn old headboards and footboards into benches and coat racks!

    Domestically Speaking made a charming bench from an old bed and My Repurposed Life made simple coat racks. So clever! They both used their paint sprayers to get in the nooks and crannies with ease.

    So are you a bed makeover or a DIY bed kinda person?

    pin-this-post-2

    Bed Makeover Ideas | Bed Makeover Paint | How to Paint a Bed Frame | Bed Makeover DIY | Bed Makeover DIY Head Boards

    You know you don’t wanna miss any of this crazy.

    Sign up to get my posts delivered to your inbox here.

    Stalk Me Here:

    Pinterest / Facebook / Twitter / Instagram

    blog-signature-summer-15

  • Make Wood Stain in Any Color

    Make Wood Stain in Any Color

    Want to kick your wood finishing techniques up a notch? Try making your own bright colored wood stains then! With this tutorial, you’ll learn how to make custom stain colors easily.

    After the amazing-out-of-this-world-discovery-that-changes-everything a few weeks ago (when I found out how to make furniture glazes in any color – ok. maybe I’m being a bit dramatic. Just a little bit though.)

    I wanted to see if it would work as a wood stain too – on unfinished wood.

    It did…

    So now you will not only know how to make glazes in any color, but you’ll now know how to make colored stain too.

    I KNOW.

    AMAZING.

    How to Make Bright Colored Wood Stains in Any Color - colored stains on a tray

    Disclosure: This post is a collaboration with Velvet Finishes. All opinions and color craziness is 100% mine. This post contains affiliate links for your shopping convenience. Click here to read my full disclosure policy.

    How to Make Colored Wood Stain

    Supplies Needed:

    How to Make Colored Wood Stain materials - velvet finishes paint and clear glaze

    Steps

    Step 1:

    You mix up the stain the same way you mix up the glaze, because, well its the same stuff. The difference is in how you apply it.

    Pour a small amount of clear glaze into your cup or plate. Dip your paintbrush into the paint you want to turn into your stain color. You don’t want much at all – then mix the glaze and paint together.

    Water Based Colored Wood Stains created with Velvet Finishes - creating a pink wood stain

    If you are worried about getting too much paint, then start with just a little bit, then add more if needed. The consistency should be pretty watery – similar to a stain. This is a water based stain.

    If the stain seems too thick or too saturated with color, you can add water to it.

     Step 2.

    Using your paintbrush, brush the stain onto the wood. Unlike with painted wood, the unfinished wood will absorb the stain super quickly, so do light coats so you don’t get more color than you want.

    Applying DIY pink colored stain.

    If you want more color, do more coats. Wipe off any excess with a lint free cloth.

    Take note: Different types of wood and wood grain will yield different results.

     Step 3: 

    Let it dry. Since there isn’t much paint in the stain, I would suggest a coat of Protect or finishing wax to keep your piece pretty.

    DIY Colored Wood Stains on a Tray

    I created colored stains using the Clear Glaze and:

    Enchanting (Green)
    Modern (Blue)
    Glamorous (Pink)
    Bold (Yellow)

    You can see with the yellow that I put a bit too much paint in the glaze. You can’t see a lot of the woodgrain.

    Using Colored Wood Stains on Unfinished Wood

    I think this cute little tray may end up in the circus’s big girl room. Its colorful – like her.

    What would you use colored stain on? 

    Are you a color lover? Here’s more colorful furniture makeover ideas…

    DIY Ottoman Coffee Table – a gorgeous deep teal blue hue paired with upholstery full of color.

    DIY Side Table Makeover Ideas – nine colorful ideas for making over a side table.

    How to Create a Beachy Color with Paint – give furniture a washed-out beach feel with this tutorial.

    Polka Dot Chair Makeover with Painted Upholstery – navy, pink and white polka dots collide in this fun makeover!

    Want to remember this colored stain recipe for later? Just pin the image below!

    DIY Bright Colored Wood Stains on a Tray

    Follow on social for more colorful ideas!

    Pinterest / Facebook / Twitter / Instagram

    Making your own colored stains.
  • How to Make Furniture Glaze in ANY Color

    How to Make Furniture Glaze in ANY Color

    Up until last October, I wasn’t a big glazed furniture kind of gal.

    Glazed donut kind of gal…abso-freakin-lutely….glazed furniture…not so much. 

    But then this happened.

    The glaze on this piece also functions as a topcoat. Painting 101: Topcoats and when to use them

    That would be the IKEA Tarva drink bar that I used Baroque and Enhance Dark Glaze on.

    At that point, dark glaze and I started to become friends.

    We experimented. We plotted makeovers.

    We worked together on a dresser…

    Gorgeous rich color! And no priming required with this paint! Glamorous Dresser Makeover

    That’s the glamorous dresser….

    Dark glaze and I were skipping happily along off into the sunset….

    And then I met clear glaze….

    And he swept me off my feet….because he can turn any color into a glaze….

    DIY Furniture Glaze Recipe in any color! Furniture Glaze Technique | Furniture Glaze Colors | Furniture Makeover Ideas

    Disclosure: This post is a collaboration with Velvet Finishes. All opinions and references to having an affair with furniture glazes are 100% mine. This post contains affiliate links for your shopping convenience. Click here to read my full disclosure policy.

    Before you ask me, no I was not drinking during the writing of this post. That’s shocking, I know, especially seeing how I just wrote about having a love affair with furniture glaze paint and then cheating on it with another one.

    I’m a special person.  

    But…

    Its true.

    You can make furniture glaze in any color – I like to call it color glaze.

    And its so easy. 

    How To Make Furniture Glaze In Any Color

    Supplies Needed: 

    How to make furniture glaze in any color

    Steps

    Step 1. 

    Combine a little clear glaze with a little paint.

    Make furniture glaze in any color!

    I mixed mine up on a styrofoam plate to show you the process better, but it would be easier to use a cup. You want more glaze than you do paint. I poured out about 1/8 – 1/4 of a cup of glaze and just dipped my paintbrush into the paint.

    Step 2.

    Mix it together.

    How to make furniture glazes in any color

    Just mix the two together until all the glaze is tinted with your color.

    Step 3.

    Brush it on.

    Color Glaze Paint - Make furniture glaze in any color!

    Brush the glaze on, let it sit for a minute or so, and then wipe off the excess with a lint free cloth. Repeat this process if you would like more color on your piece.

    The video below shows a turquoise colored glaze being made and then painted onto a piece painted white to get a beachy colored vibe.

    [adthrive-in-post-video-player video-id=”EyicUR72″ upload-date=”Fri Jul 22 2016 19:16:29 GMT+0000 (Coordinated Universal Time)” name=”Rain On A Tin Roof – How To Create A Beachy Look With Paint” description=”Learn how to create a beachy colored look with paint! Use any color you want!”]

    Step 4.

    Bask in the new-found possibilities.

    DIY Furniture Glaze Recipe in any color! Furniture Glaze Technique | Furniture Glaze Colors | Furniture Makeover Ideas

    The Modern glaze has a great beachy vibe. I think it would look great “washed” over white patio furniture if you are into that beachy look.

    I was planning to use the modern glaze above on an actual piece of furniture, but got so excited about all the color possibilities, I just pulled out more paint and started making glazes in all different colors to show you.

    A.K.A. my ADHD took over. 

    DIY Furniture Glaze Recipe in any color! Furniture Glaze Technique | Furniture Glaze Colors | Furniture Makeover Ideas

    I love the Glamorous glaze – I think it would be so fun in a little girl’s room. Enchanting glaze is bright and seems very boyish.

    DIY Furniture Glaze Recipe in any color! Furniture Glaze Technique | Furniture Glaze Colors | Furniture Makeover Ideas

    The Vivid glaze reminds me of faded lipstick – which I like the look of – I know – I’m weird. The Exotic glaze is pretty light – I think it has a beachy feel too.

    I’m dying to try these glazes out on some glass jars too.

    What do you think they would be good for? 

    What glaze colors would you make? 

    P.S. Velvet Finishes Glaze also doubles as a protectant topcoat!

    More colorful furniture makeovers to get you inspired…

    How to Get a Layered Caribbean Blue Look – a gorgeous layered look for furniture makeovers.

    How to Make Colored Wood Stain– yep, in any color too!

    How to Create a Beachy Colored Look (with Video Tutorial) – a washed out beachy feel on furniture makeovers.

    Want to remember this furniture glaze paint recipe for later? Just pin the image below!

    DIY Furniture Glaze Recipe in any color! Furniture Glaze Technique | Furniture Glaze Colors | Furniture Makeover Ideas

    You know you don’t wanna miss any of this crazy.

    Stalk Me Here:

    Pinterest / Facebook / Twitter / Instagram

  • Painting 101: Topcoats and when to use them

    Painting 101: Topcoats and when to use them

    Wondering what top coat to put over paint? Specifically what kind of top coat for painted furniture? Consider this guide the holy grail for just that. It will walk you through all the different types of top coats and when to use each.

    The first few pieces of painted furniture I did, I had no idea what a topcoat was or that I was supposed to use them to seal and protect furniture.

    I quickly learned that if you paint a piece with a flat sheen of paint, you will eventually wind up with a bruised and scratched up piece of furniture – that ain’t pretty.

    You live. You learn.

    And then get Luvs.

    Not really, those diapers were never great for us.

    It took a few more tries, but I finally realized the benefit of a topcoat and when to use one.

    This post contains affiliate links for your shopping convenience. Click here to read my full disclosure policy.

    Lists different topcoats for furniture makeovers, what to use each one on and how to do it. | Furniture Top Coat | Furniture Makeover Ideas

    Topcoats and When to Use Them

    Painting Topcoats and When to Use Them

    Polyurethane

    Polyurethane - use on wood. Painting 101: Topcoats and when to use them

    Polyurethane is most typically used on stained wood and gives a very durable finish. I don’t recommend polyurethane for painted furniture, because it tends to yellow the paint over time. Its also oil based, which works best on top of stained wood and other oil based paints. I do use Minwax Polyurethane to protect stained pieces like the inside of my front door. I typically brush on a light coat with a high quality paintbrush, followed by a light sanding, another light coat, light sanding, then a final light coat. I haven’t tried the wipe-on poly, but I have heard good things about it. I usually go with a satin polyurethane because the gloss is pretty glossy. If you don’t use the fast drying version, it usually takes a few days for your piece to fully cure.

    Velvet Finishes Protect

    Velvet Finishes Protect - use on painted furniture. Non-yellowing. Painting 101: Topcoats and when to use them

    Its no secret that my new favorite furniture paint is Velvet Finishes. Velvet Finishes paint already has a topcoat built into the paint. However, if you are painting something that will get a lot of use, like a tabletop, dresser, end table, etc., you should still use a topcoat on it. Velvet Finishes topcoat is called Protect. Its a polyurethane, but unlike Minwax, it is non-yellowing and water based, which is why I love it. Its gives great protection, without the yellowing. With this one, I brush on one light coat and let it dry- that’s it.

    Vintage Radio turned Drink Bar

    The vintage radio turned drink bar got a coat of Velvet Finishes Protect after it was painted.

    Furniture Wax

    Wax - use on furniture pieces. Painting 101: Topcoats and when to use them

    There are many people that are crazy about furniture wax. I am not one of those people. In fact, this is my least favorite way to protect furniture, but I still do it on occasion when necessary. Wax gives furniture more of a flat finish, but still protects the piece. Most people will rub it on with a cloth, let it sit and then buff it. However, I have a much easier method to waxing furniture when I have to. Anytime I have waxed a piece, I have used Minwax Paste Finishing Wax.

    NO WAY! So easy and you may even have the supplies laying around your house! How to make Laminate Countertops look like Faux Stone for only $15

    When I made our laminate counters look like stone, I used wax to finish them because it gave the flat stone like finish I was looking for.

    Polycrylic

    Polycrylic - gives a more protective finish than wax. Use on furniture. Painting 101: Topcoats and when to use them

    Where many polyurethanes (except Protect) are oil based and go on stained wood and oil painted furniture, polycrylic is water based and can go on wood or paint. It can be applied the same as polyurethane – brush on, light sanding, brush on, light sanding, brush on. However, polycrylic can also be sprayed on with a paint sprayer. This is what I typically do, because it takes a lot less time and I usually only need one coat with my sprayer. I use my HomeRight Finish Max to do this.

    diy-coffee-table-industrial

    I used polycrylic on this DIY Industrial coffee table over the stained wood.

    Clear Topcoat Spray

    Spray Topcoat - use on spray painted pieces. Painting 101: Topcoats and when to use them

    I only recommend using spray topcoats over spray painted pieces. Most of the time, spray painted pieces don’t need any extra protection. If you are spraying something that is decorative and not going to get a lot of hands-on action, then I wouldn’t worry with top coating it. That being said, if you spray paint something and want to make it really glossy, you can spray a clear gloss topcoat on it to achieve the look. Spray a gloss topcoat or any other spray topcoat on in light coats. Fair warning – it can be tough to get semi-gloss and gloss spray topcoats even on large pieces. This is why you do multiple light coats, otherwise you could end up with streaks. I have always used Rust-Oleum spray topcoats when I needed a spray topcoat.

    Kitchen Tour {rainonatinroof.com} #kitchen

    After I spray painted my barstools, I knew they would be getting a lot of use, so I gave them a couple coats of clear spray topcoat.

    Some Glazes

    These glazes also function as a topcoat. Painting 101: Topcoats and when to use them

    This is a new one to me. When I found Velvet Finishes, I learned that their glazes also function as topcoats for added protection to your furniture – which is pretty sweet. They have two glazes, a dark and clear. The dark is great for aging furniture and you can make any color of glaze you want with the clear glaze. I actually have a post on that coming up soon. To apply the glaze, you brush on a small amount and then wipe off any excess. You can see how-to photos of this from this recent dresser makeover.

    The glaze on this piece also functions as a topcoat. Painting 101: Topcoats and when to use them

    I used a dark glaze on this IKEA Tarva Dresser turned Drink Bar.

    There are some cases in which you may not need a topcoat, like: 

    •Pieces painted with high-gloss or semi-gloss paint. These sheens are pretty durable and are easily wiped clean.

    •Spray painted pieces such as lamps, photo frames, wall decor (things that don’t see a lot of hands-on use)

    •Accent chairs / tables that don’t get a whole lot of use.

    Do you have any tips or tricks about topcoats and when to use them? 

    Looking for more painting help?

    What kind of paint do I use on that?  – A guide to different types of paint and what kinds of surfaces each can be used on.

    Why is my paint peeling? – Tips & Tricks to Keep Your Paint from Peeling & Scratching Off Your Furniture.

    Prepping Furniture to Paint – when to sand, when to prime, when to degloss and when you can skip it.

    How to Paint Walls – how to do it in less time with less mess.

    And here’s everything you’ve ever wanted to know about painting just about anything.

    Want to keep this list of best top coats for painted furniture handy for later? Just pin the image below!

    Lists different topcoats for furniture makeovers, what to use each one on and how to do it. | Furniture Top Coat | Furniture Makeover Ideas

    You know you don’t wanna miss any of this crazy.

    Stalk Me Here:

    Pinterest / Facebook / Twitter / Instagram

    SaveSave

  • Easy Confetti Accent Wall

    Easy Confetti Accent Wall

    Have you been introduced to my new favorite wall?

    Its shiny, its gold, its fun, and it was so easy to make.

    My favorite thing about it? There’s no way you can screw it up.

    Meet my Confetti Accent Wall.

    Super easy to make and fun! Easy Confetti Accent Wall

    This post contains affiliate links for your shopping convenience. Click here to read my full disclosure policy.

    frogtape-disclosure

    This baby made its debut in my recent entryway makeover – ya know – the makeover that was totally unplanned and random?

    I have done quite a few accent walls in my time and I have to say that this one was by far the easiest I’ve ever done. There’s no measuring needed and bonus – it only cost me about $25 to do this wall.

    Easy Confetti Accent Wall

    Materials Needed: 

    Steps

    Step 1:

    Before the confetti wall, this wall was a very dark navy. Since I was going with a much lighter color on the wall, I first needed to prime the entire wall. Using the wider width of FrogTape® Multi-Surface, tape off your edges and trim, then prime.

    Step 2:

    Using a small foam roller, roll on random strips of your “confetti” color. I opted to do gold.

    Step 3: 

    After the confetti color has dried, place strips of the smaller width of FrogTape® Multi-Surface onto the confetti color.

    Easy Confetti Accent Wall

    Use a credit card or something similar to burnish the edges of the tape.

    Step 4: 

    Paint your desired wall color over the entire wall.

    Step 5: 

    After your final coat of paint, remove the FrogTape® Multi-Surface, while the paint is still wet.

    Remove tape carefully - Easy Confetti Accent Wall

    Let the wall completely dry before you put anything on it or near it.

    Super easy to make and fun! Easy Confetti Accent Wall

     I love having this wall in our entryway – it lets guests know that we are fun and easygoing – or at least I hope that’s what they think about us…..

    Do you have a fun accent wall in your house?

    Looking for more great accent wall ideas? That’s kind of my thing…

    Cane Inspired Accent Wall for $25 or Less – gorgeous, not too hard and a classic design.

    Black & White Gallery Wall – a simple accent wall that disguises your television!

    Criss-Cross Accent Wall – another classic design, but on a larger scale.

    9 Accent Walls for $30 or Less – high on style, but low on budget.

    7 Wall Treatments that Aren’t Shiplap – please, simmer down on the shiplap, ya’ll.

    You know you don’t wanna miss any of this crazy.

    Sign up to get my posts delivered to your inbox here.

    Stalk Me Here:

    Pinterest / Facebook / Twitter / Instagram

    pin-this-postSuper easy to make and fun! Easy Confetti Accent Wall

    SaveSave

  • Painting 101: How to Paint Walls In Less Time With Less Mess

    Painting 101: How to Paint Walls In Less Time With Less Mess

    No one ever taught me how to paint walls.

    I learned how to paint completely by trial and error after my Pap died and I had to paint every wall and ceiling in his house with two coats of primer and two coats of paint.

    My uncle handed me a five gallon bucket of primer, a five gallon bucket of paint, some rollers and left.

    I called in reinforcements.

    My friends and I painted Pap’s entire house over the course of a couple months all while wearing his XXL overalls that we duck taped in the back to hold them up on us.

    That’s one of my favorite memories and a couple pairs of those overalls are safely tucked away now.

    Needless to say, after all that painting and all the painting I’ve done in my other homes, I’ve learned pretty quickly how to paint walls – and how to do it in less time with less mess.

    How to Paint Walls | Painting Walls Tips | Painting Walls Techniques | How to Paint Walls Quickly | How to Paint Walls Fast

    Disclosure: This post was a collaboration with HomeRight. All opinions and self taught stellar painting skills are 100% mine. This post contains affiliate links for your shopping convenience. Click here to read my full disclosure policy.

    Now, as we all know good and well around here, I tend to not always do things the “professional” way.

    I prefer the Jenna method.

    Therefore, others may critique my methods, but this is what I do and what works for me.

    How to Paint Walls

    Step 1.

    Tape off around any trim as needed.

    Step by step breakdown of painting walls. Painting 101: How to Paint Walls

    I typically only tape off around my baseboards. I can usually edge pretty easily around door casings and the ceiling. When I don’t tape the baseboards, it never fails that I end up accidentally running the paint roller over them a few times.

    Also, lay out an old sheet or blanket to protect against any paint splatter. I am a cheater and don’t always do this because I’m impatient and just want to get started. If you don’t put down a blanket and do get some splatter, either wipe the paint up immediately with a wet paper towel or wait for it to dry and then just scrape it up with your fingernail, it comes right off. However, that method only works on tile and hardwood floor, so ALWAYS put down a cover over carpet.

    Step 2. 

    Edge. Always edge before rolling. Edge around your ceiling, doorways, trim, and in your corners. If you have done a lot of painting or after you get some good practice, you might be able to edge pretty good with a regular paintbrush. I am pretty good edging with just a paintbrush, but I also like to use my HomeRight Quick Painter for edging too.

    Step by step breakdown of painting walls. Painting 101: How to Paint Walls

    The quick painter basically eliminates the need for you to tape off around your trim as much if any. The trigger releases paint and the pull handle sucks paint into the tube, like so:

    Step by step breakdown of painting walls. Painting 101: How to Paint Walls

    First, you remove the painting pad, dip the tip of the tube into the paint can and pull back on the handle. This draws paint into the tube. Place the paint pad back on and squeeze the trigger to get paint on the pad. Then edge away! The quick painter is really great for people who have trouble edging with a regular paintbrush – it can also save a lot of time. You aren’t constantly going back to your paint can for more paint.

    Step 3: 

    Roll on your paint. Since I first used the HomeRight EZ Twist Paint Stick last year, it has been my go-to tool for painting walls.

    Step by step breakdown of painting walls. Painting 101: How to Paint Walls

     The paint stick comes with a tube that you place over your paint can. You stick the nozzle on the underside of the paint stick onto the tube, pull back on the paint stick handle and paint is pulled into the tube. To release the paint into the roller, you just push up on the stick and start rolling.

    Once more, this saves a lot of time because you aren’t running back and forth to the paint tray. You can also easily paint ceilings or tall walls without a ladder since the paint stick is longer than a regular roller.

    Some people roll their paint on in a “W” or a “V” pattern. I don’t. I usually start rolling at the top, and just work my way down the wall rolling.

    You can see how I first used the EZ Twist on my living room walls here.

    Step 4: 

    After you have rolled on a coat of paint, go back and do another coat of edging and another coat of rolling, repeating as many times as needed.

    Remember to pull up your painter’s tape as soon as you paint on your last coat of paint – do not wait for the paint to dry before removing the tape. This increases the risk of some of your paint peeling off when you remove the tape.

    Do you have any tips or tricks for painting walls? 

    Need more Painting 101 help? 

    How to Paint Trim and Doors – everything you need to know about painting all types of trim and doors in your home.

    What Kind of Paint Do I Use on That? – a guide to all different types of paint and what surfaces to use on each.

    Painting 101: Everything you need to know about painting anything – from kitchen cabinets to furniture and more, it’s all here.

    You know you don’t wanna miss any of this crazy.

    Sign up to get my posts delivered to your inbox here.

    Stalk Me Here:

    Pinterest / Facebook / Twitter / Instagram

    pin-this-post

    How to Paint Walls | Painting Walls Tips | Painting Walls Techniques | How to Paint Walls Quickly | How to Paint Walls Fast

    SaveSave

  • Painting 101: Why is my paint peeling? Tips and tricks to keep paint from peeling and scratching off your furniture.

    Painting 101: Why is my paint peeling? Tips and tricks to keep paint from peeling and scratching off your furniture.

    If you read the longest blog post in history (a.k.a. the reader survey results), you know that there were some questions about furniture painting – what finish to use, why is the paint peeling, etc.

    Since I am a woman for the people and cannot let my people down, I decided to start a little Painting 101 series with basic tips and tricks for painting furniture.

    The first thing we are going to chat about is:

    Why is my paint peeling?

    Tips and tricks to keep paint from peeling and scratching off your furniture. 

    This post contains affiliate links for your shopping convenience. Click here to read my full disclosure policy.

    Tips and tricks to keep your painted furniture from peeling and scratching. Paint Peeling Fix | Peeling Paint Repair | Peeling Paint Fix

    Usually the reason paint ends up peeling off a surface, is because it didn’t fully adhere to the surface as it was supposed to do.

    There are a couple reasons why it may not have adhered correctly:

    Reason 1. The surface wasn’t clean.

    Anytime you paint something, it is so important to clean it first. You don’t have to do soap and water (unless its really nasty), usually just a wet cloth will do the trick. With any piece of furniture I paint, I always wipe it down first with a wet cloth to remove any dust and dirt. If the piece is really gross, like has been sitting in my garage for months, I will pull out the shop vac and run that over it first, then come back with the wet cloth.

    After you have wiped down the surface with a wet cloth, you need to go back over it with a tack cloth. A tack cloth is literally just that, a tacky cloth that feels a little sticky. You just wipe it over your piece and it will pick up any remaining dirt and dust.

    The basics and tips and tricks to keep your painted furniture from peeling and scratching. Why is my paint peeling?

    Mint + Coral Nightstand Makeover

    Reason 2. The surface had a topcoat or finish that kept the paint from adhering as it should have.

    There are some paints out there that you can paint directly onto just about any surface. One of those is Velvet Finishes, which if you’ve been around here for the last few months, you know that’s my new favorite furniture paint. Depending on what type of surface you are painting though, you may still need a primer with that paint and you will most likely need it if you are painting with regular latex paint. If the furniture you are painting has one of these types of finishes, you will need to sand and/or prime it before painting:

    • A thick waxy finish
    • A shiny, glossy finish
    • Laminate
    • A polyurethaned finish

    I recommend doing a quick sanding if the piece has any uneven spots or if its just really super shiny. Does that make sense? You won’t need to sand it down to the bare wood, just rough it up a bit. After you have sanded, run the tack cloth over the piece and apply a primer.

    If you are painting a piece of unfinished furniture, there is no need for sanding. However, depending on the paint you are using, you may need to prime it. If you are using a regular latex paint, you will definitely want to prime it with something like Zinnser or Kilz primer. All you will need is one coat. It will just keep the furniture from soaking up your paint and taking coat after coat after coat of paint. If you are using a paint that requires no priming first, you can skip that part.

    The basics and tips and tricks to keep your painted furniture from peeling and scratching. Why is my paint peeling?

    Vintage Radio turned Bar Cabinet

    After you’ve prepped your piece as needed, its important to remember a couple of other things when you get ready to paint:

    3. Apply Thin Coats of Paint.

    I’m guilty of it too – trying to put on thick coats to minimize my work time and because I’m just plain lazy. You will get the best protection and finish on your furniture if you apply thin coats of paint. To speed up the process, I will often use my HomeRight Finish Max Paint Sprayer when the weather permits. If I can’t spray a piece, I use a high quality paintbrush and/or roller.

    The basics and tips and tricks to keep your painted furniture from peeling and scratching. Why is my paint peeling?

    IKEA Tarva Dresser turned Drink Bar

    4. Protect It. 

    Some paints already have a topcoat built in, such as the Velvet Finishes paint that I mentioned before. High gloss paints are usually pretty tough too, but not everyone likes that super shiny look. If your piece is going to be seeing a lot of use, you need to put a good topcoat on it. I like to use Protect or a Polycrylic. With this step you can also use a paint sprayer or a high quality paint brush. A good topcoat will make your paint job stronger and hold up against little circuses that may be roaming around.

    The basics and tips and tricks to keep your painted furniture from peeling and scratching. Why is my paint peeling?

    5. Let It Cure.

    Just because the paint or the topcoat is dry to the touch doesn’t mean that its fully cured.  It can take paint and/or a topcoat up to three weeks to fully cure sometimes – this is especially true when its really hot and humid. Typically, once a piece is dry to the touch I will move it to its “spot,” however I try not to put anything on it until 2-3 weeks later – especially no magazines and papers, they will easily stick to paint that isn’t fully cured and leave some of their ink on the piece.

    Do you have any tips and tricks to keep paint from peeling or on protecting painted furniture pieces? 

    Need more painting tips and tricks? 

    Painting 101: Topcoats and when to use them– a guide to topcoats and when they should be used.

    FAQ: Painting Furniture – questions I’ve been asked over and over again about furniture painting and then some.

    A Guide on What Types of Paints to Use on Various Surfaces – all the different types of paints and what surfaces they work best on.

    How to Paint Walls in less time with less mess – a great little tip for getting your walls painted in less time.

    And you can see all of my furniture makeovers here. 

    If you want to come back to these painting tips easily later, just pin the image below!

    Tips and tricks to keep your painted furniture from peeling and scratching. Paint Peeling Fix | Peeling Paint Repair | Peeling Paint Fix

    You know you don’t wanna miss any of this crazy.

    Stalk Me Here:

    Pinterest / Facebook / Twitter / Instagram

    SaveSave

  • 5 Knock-Your-Socks-Off IKEA Tarva Hacks

    5 Knock-Your-Socks-Off IKEA Tarva Hacks

    Remember when I turned that IKEA Tarva three drawer dresser into an awesome drink bar?

    And remember how I mentioned it was part of a challenge presented by HomeRight to five of their bloggers?

    Guess what?

    All five of us ROCKED this challenge.

    If I do say so myself.

    Here are all of our IKEA Tarva Hacks:

    IKEA Tarva Hack: Turn It Into a Drink Bar via RainonaTinRoof.com

    IKEA Tarva Hack turned Drink Bar from Rain on a Tin Roof

    My Repurposed Life IKEA Tarva Hack

    IKEA Tarva Dresser turned Hutch from My Repurposed LifeSimply Designing IKEA Tarva Hack

    IKEA Tarva Honeycomb Dresser from Simply DesigningAddicted 2 DIY IKEA Tarva Hack

    IKEA Tarva Dresser turned Bar Cabinet from Addicted 2 DIY

    11 Magnolia Lane IKEA Tarva Hack

    Gold & White Greek Key Dresser from 11 Magnolia Lane

    Aren’t they all amazing??

    Looking for more great furniture makeovers and flips?

    Unique DIY Side Table Ideas – bet you haven’t seen all of these before.

    The Bold and the Beautiful Furniture Makeovers – better than the soap opera. 😉

    Turn a Bookcase into a Dress Up Station – an easy furniture hack that will occupy your little one for a loooong time.

    You know you don’t wanna miss any of this crazy.

    Sign up to get my posts delivered to your inbox here.

    Stalk Me Here:

    Pinterest / Facebook / Twitter / Instagram

    pin-this-post

    WOW!! These are awesome! I had no clue you could do so much with an IKEA Tarva Dresser! Five Knock-Your-Socks-Off IKEA Tarva Hacks via RainonaTinRoof.com

  • The No Priming, No Topcoat, Way to Paint (Seriously, I’m not even kidding.)

    The No Priming, No Topcoat, Way to Paint (Seriously, I’m not even kidding.)

    Let’s be honest about a couple things:

    1. I’m lazy on occasion.

    2. I’m impatient.

    How does this effect my furniture makeovers?

    I hate having to prime a piece before I can put some glorious color on it.

    Hate it. 

    I need instant gratification.

    Anyone else?

    And when the color is finally on, I can barely wait to get the piece back in its place.

    Oh, but wait….it needs a topcoat.

    That means I have to wait more.

    Did I mention I was impatient?

    Did I also mention I found a solution for this problem?

    Well, not a solution for being lazy and impatient, but a solution for the priming and top coating.

    There is a way to paint that requires no priming and no top coating.

    Boom.

    World altered. 

    Painting Furniture Without Sanding, Stripping or Priming, Painting Furniture DIY | Painting Furniture for Beginners | DIY Furniture Painting

    Disclosure: This post is sponsored by Velvet Finishes. However, all opinions and hatred of priming are 100% mine. This post contains affiliate links for your shopping convenience. Click here to read my full disclosure policy.

    So how can you paint without having to prime or give your piece a top coat?

    There aren’t any special tools involved. Just one thing.

    Paint.

    Velvet Finishes Paint. 

    Must try this paint! It looks amazing and has beautiful results! The No Priming, No Topcoat, Way to Paint (Seriously, I'm not even kidding.) via RainonaTinRoof.com

    Velvet Finishes paint was created by Kellie Smith who just so happens to live about 45 minutes from me. How we didn’t find each sooner I don’t know, but I’m so glad it finally happened. Anyway, she couldn’t find the finish and color palette she wanted while working on a client’s project so she just decided to invent her own paint.

    How cool is that?

    And can we just talk about the colors for just a minute?

    Must try this paint! It looks amazing and has beautiful results! The No Priming, No Topcoat, Way to Paint (Seriously, I'm not even kidding.) via RainonaTinRoof.com

    They are all gorgeous. There are 21 colors and not a one of them that I don’t like.

    I went to her studio a few weeks back and got to see a lot of the colors on real life pieces and y’all the colors were even more jaw-dropping then.

    The darker colors are a little thicker than the lighter colors, so you can thin them if you want to. I actually did that on the IKEA Tarva Hack turned Drink Bar that I just posted about. I used Baroque and the Dark Glaze on that piece. I just thinned the Baroque and sprayed it right through my paint sprayer.

    Let’s talk about how this works.

    Like I said, I got to visit Kellie’s studio and actually painted a piece with her, but I really wanted to put this stuff to the test.

    I decided to paint over a side table I used in our master bedroom beside our little reading nook chair.

    The No Priming, No Topcoat, Way to Paint (Seriously, I'm not even kidding.) via RainonaTinRoof.com

    I had spray painted this side table metallic gold when I first got it.

    Have you tried to paint over something with regular paint that has been spray painted?

    Kind of bubbles up on ya and takes coat after coat after coat after coat, right?

    The No Priming, No Topcoat, Way to Paint (Seriously, I'm not even kidding.) via RainonaTinRoof.com

    This didn’t.

    Velvet Finishes laughed in the face of spray paint.

    HAHAHAHAHAHAHAHHA.

    Ok, I’m also a little over dramatic.

    I didn’t prime the table, I didn’t sand it, I didn’t do anything to it.

    Well, I did wipe it down with a dust rag because well, ummm…..its been a week or eight since I’ve dusted our bedroom.

    The paint went on perfectly.

    If you do have a piece with a very shiny surface, you can use another Velvet Finishes product called Ready before painting the piece. It comes in a spray bottle and all you do is spray it on the piece, let it sit for 10 minutes or so, then wipe it down with a soft cloth.

    After three light coats of Velvet Finishes in the Exotic color, I had this beauty.

    The No Priming, No Topcoat, Way to Paint (Seriously, I'm not even kidding.) via RainonaTinRoof.com

    I kept little touches of the gold for some contrast by cutting pieces of FrogTape down in width a bit, placing them on the table and then just painting right over the tape.

    The No Priming, No Topcoat, Way to Paint (Seriously, I'm not even kidding.) via RainonaTinRoof.com

    I didn’t do any type of topcoat! This paint already has a topcoat built in!

    How freakin’ cool is that?

    Its finish is like a low matte sheen.

    The No Priming, No Topcoat, Way to Paint (Seriously, I'm not even kidding.) via RainonaTinRoof.com

    If you were painting something that is going to get a lot of use, like a kitchen table or coffee table, it is recommended that you use Protect on the piece. Its just a non-yellowing polyurethane.

    You can find more information on the Velvet Finishes website.

    Need more great furniture makeovers? 

    Love color? Then see these 11 Colorful Furniture Makeovers.

    Find out how easy it is to make your own colored furniture glaze.

    Learn how to get a beachy washed out color look on furniture here.

    You know you don’t wanna miss any of this crazy.

    Sign up to get my posts delivered to your inbox here.

    Stalk Me Here:

    Pinterest / Facebook / Twitter / Instagram

    pin-this-post

     Painting Furniture Without Sanding, Stripping or Priming, Painting Furniture DIY | Painting Furniture for Beginners | DIY Furniture Painting

  • IKEA Tarva Hack: Drink Bar

    IKEA Tarva Hack: Drink Bar

    If you follow me on Facebook, you may remember a month or so back when I posted this picture.

    IKEA Tarva turned Bar Cabinet

    Disclosure: This post is sponsored by HomeRight. However, all opinions and love of the color green is 100% mine. This post contains affiliate links for your shopping convenience. Click here to read my full disclosure policy.

    HomeRight offered a challenge to their brand ambassadors.

    They offered to send us one of the IKEA Tarva 3 drawer chests and then have at it – An IKEA Tarva Hack. 

    There are three things I have never passed up in life:

    1. A Good Challenge

    2. Free Furniture

    3. Cheap Beer

    My fingers and toes and arms and legs were crossed in hopes that I would be one of the five chosen ambassadors drawn from a hat for this challenge.

    And I was.

    *Insert 7th grade girl squeal here, along with fist bumps.*

    So what did I turn my chest into?

    A drink bar.

    A green one.

    With pretty gold accents.

    Bar Cabinet from an IKEA Tarva Chest
    To say that I’m happy with this piece is an understatement.

    I am still bouncing off the ceiling, throwing confetti, fist bumping the air excited about this piece.

    IKEA Tarva turned Bar Cabinet

    Steps

    #1: Put the “frame” together

    First off, I put the piece all together just as the directions from IKEA said to with the exception of the drawer slides. I just skipped that part. When the directions started telling me to put together the drawers, I stopped and had this:

    IKEA Tarva Hack: Turn It Into a Drink Bar via RainonaTinRoof.com

    #2: Construct the doors

    The second thing I did was construct the doors. I wanted to use as much of the wood as I possibly could from this piece so I used the drawer fronts to make the two doors.

    IKEA Tarva Hack: Turn It Into a Drink Bar via RainonaTinRoof.com

    I made the doors by first lining up all three of the drawer fronts and clamping them together. I measured to the middle of the top drawer front, then used our miter saw to cut right down the middle of all three drawer fronts. This left me with six pieces – three for each door. (#1 in the photo above.)

    Next, I found some pieces of wood that could be used to hold all three pieces of wood together to make a door. I used two drawer sides (that came with the Tarva) for each door and some scrap pieces I had laying around. (#2 in the photo above.)

    After I laid out the wood pieces to hold the backs of my doors together, I put glue on the pieces and clamped them down to the door front. (#3 in the photo above.)

    Finally, I ran some glue along the backside seams of the door as well (where the old drawer fronts meet). (#4 in the photo above.)

    I let the glue fully cure for one day, then I flipped the doors over and filled in the gaps of what were the drawer fronts with wood putty. I also filled the holes that had been pre-drilled for the hardware as well. After the putty was dry, I sanded it smooth.

    IKEA Tarva Hack: Turn It Into a Drink Bar via RainonaTinRoof.com

    #3: Construct the Shelves 

    The bottom shelf is pretty easy. All you do is measure the inside bottom of the frame and cut out a piece of MDF to that size. Leave about a 1/2 inch of clearance in the front so that those wood pieces (I’m sure there is a technical word for those, but you know I don’t do technical) on the back of your doors will have room. After you have your piece cut, run wood glue along the bottom inside edges of the chest and place your piece of wood on top.

    IKEA Tarva Hack: Turn It Into a Drink Bar via RainonaTinRoof.com

    The photo above doesn’t show it, but you will need to put some weight on the shelf to make sure it gets a good grip with the wood glue and the chest’s frame. I did this with the super technical resourceful method of stealing landscape bricks from my yard and placing a few around the edges.

    For the top shelf: 

    Take two of the remaining drawer sides that came with the chest and cut 3/4″ off the short sides. I once more clamped them together and did this with my miter saw. (#1 and #2 in the photo below.)

    IKEA Tarva Hack: Turn It Into a Drink Bar via RainonaTinRoof.com

    After they were cut, I measured 8 3/4″ down from the inside top of the chest and put the pieces there. Apply wood glue to the back of the pieces first, then clamp them to the chest’s frame making certain they are level. Use small screws to attach them to the frame and then remove the clamps. (#3 and #4 in the photo above.) Do this on both sides.

    Make the top shelf the same way you made the bottom one by measuring the inside of the chest. Apply wood glue to the wood pieces on the edges and then place your shelf on top and weight it down for a little while.

     IKEA Tarva Hack: Turn It Into a Drink Bar via RainonaTinRoof.com

    #4: Paint It, Baby! 

    Here’s the fun and easy part – paint it!

    IKEA Tarva Hack: Turn It Into a Drink Bar via RainonaTinRoof.com

    I used my HomeRight FinishMax Pro (which as you can see in the photo above works overtime for me) to paint this piece. The paint I used is a new find for me. It is called Velvet Finishes and requires no priming or topcoat. I used the Baroque color in my sprayer and gave the chest three light coats. The paint worked just fine in the sprayer – just needs watering down a bit. The sprayer gave the paint a flawless finish. After the paint dried, I used a dark glaze over the entire piece to give it a bit more dimension.

    #5: Attach the Doors

    I Grunt Labor did this with simple utility hinges that I picked up at our local hardware store. Screw them onto your doors first and then onto the edges of the chest that are facing you. (Make sense?)

    *I must pause here and give a big thank you to Grunt Labor and Bill. Remember how I said the easy part was painting the chest? It totally was. Making the doors and shelves were pretty easy too. However, for me the hardest thing was lining up the hinges correctly to make sure the doors were even. Grunt Labor and Bill swooped in and saved me from an imminent meltdown on that one. Thank you, guys.

    #6: Add the Hardware

    I used two of the knobs that came with the chest, but I gave them what I’m proclaiming to be a “gold nugget” look with my HomeRight Heat Gun. I’ll post the tutorial for those soon. I also added flat L corner braces to the corners of each of the doors.

    And the result is…

    IKEA Tarva Three Drawer Chest Hack

    Gorgeousness.

    Sheer gorgeousness.

    IKEA Tarva Hack: Turn It Into a Drink Bar via RainonaTinRoof.com

    See those gold nugget beauties?

    IKEA Tarva Hack: Turn It Into a Drink Bar via RainonaTinRoof.com

    I added a towel hook on the back of one door for easy towel access and (more importantly) easy bottle opener access.

    I also spiced up the back interior of the cabinet with black and gold polka dotted wrapping paper.

    IKEA Tarva Hack: Turn It Into a Drink Bar via RainonaTinRoof.com

    Love a great home decor hack? 

    Be sure to see how I turned this bookcase into a dress up closet for my kiddo.

    Don’t miss these 14+ painted rug hacks either.

    And here are five more IKEA Tarva hacks!

    IKEA Tarva Hack | IKEA Hack | Furniture Makeover DIY | Furniture Makeover Ideas | DIY Drink Bar | DIY Bar | Furniture Makeover Before and After

    Stalk Me Here:

    Pinterest / Facebook / Twitter /Instagram

    SaveSave

  • DIY Painted AstroTurf Rug

    DIY Painted AstroTurf Rug

    It all started with Nancy Drew.

    The Hidden Staircase to be exact.

    After reading the book as a middle schooler, and being a lover of all ghost stories and mysteries, I became convinced that a secret staircase was nearby.

    Under my grandparent’s screened-in porch.

    As I was walking around my grandparent’s house one sunny spring day collecting old glass I found buried in the ground (convinced it held a secret meant for only me), I stumbled onto their screened-in porch and began to examine it.

    The porch was a simple square structure that came off their dining room. It wasn’t above their basement though, as the rest of the house was. It was supported by four sturdy walls of brick.

    There had to be something under that porch, and there had to be a staircase that led to whatever was under there.

    I immediately rushed up to the porch and started stomping my feet on the AstroTurf covered floor to find a hollow spot where a door leading to the staircase might be.

    My feet were met by the sound of concrete.

    I persisted, making my way to the outer edges of the porch where the AstroTurf carpeting ended.

    I attempted to pull it up, but discovered it was securely glued down.

    Darn the AstroTurf.

    The secrets of the porch were never uncovered.

    However, I’m now coming to love AstroTurf very very much.

    Seriously, what other 6 ft. x 8 ft. rug can you find for $20?

    Only AstroTurf baby. 

    DIY Painted AstroTurf Rug Tutorial via RainonaTinRoof.com #diy #rug #homedecor #outdoordecor

    This post contains affiliate links for your shopping convenience. Click here to read my full disclosure policy.

    DIY Painted AstroTurf Rug Tutorial

    This is picture heavy, but stick with me.

    Materials Needed

    AstroTurf Rug

    1 – 2 quarts of gloss exterior paint depending on how intense you want your colors. I used two quarts.

    Paint Roller and Tray

    FrogTape

    Steps

    Step 1

    Roll out the rug and begin marking your border off with FrogTape.

    DIY Painted AstroTurf Rug Tutorial via RainonaTinRoof.com #diy #rug #homedecor #outdoordecor

    As you can see, I was super technical with measurements and used tape as my guide. I started on the very edge of the rug and placed three small strips of tape that would remain AstroTurf underneath, then two strips that would be painted white, then another strip for Astroturf. You want to paint inside of the tape marked Astroturf. See the photo above.

    Step 2

    Finish taping the rest of your border around the edges of the rug.

    DIY Painted AstroTurf Rug Tutorial via RainonaTinRoof.com #diy #rug #homedecor #outdoordecor

    See photo above. You want to repeat this on each side of the rug, using the same “tape measurements.”

    Step 3

    You will have some overlap that needs to be cut out on the corners where the tapes meet.

    DIY Painted AstroTurf Rug Tutorial via RainonaTinRoof.com #diy #rug #homedecor #outdoordecor

    Cut out the small pieces of tape that would keep your border from being continuous as shown above.

    After cutting out the small pieces, your rug should look like this:

    DIY Painted AstroTurf Rug Tutorial via RainonaTinRoof.com #diy #rug #homedecor #outdoordecor

    Step 4

    Paint your border.

    DIY Painted AstroTurf Rug Tutorial via RainonaTinRoof.com #diy #rug #homedecor #outdoordecor

    I found the best way to paint AstroTurf is with a roller. I did three coats and went in different directions with each coat to get every side of the AstroTurf fiber.

    Step 5

    Remove the tape around your border after your final coat. I didn’t wait for it to dry, however if you put the paint on pretty heavy, you may want to wait a bit to make sure you don’t get leakage.

    Begin taping off the stripes for the inside of your border.

    DIY Painted AstroTurf Rug Tutorial via RainonaTinRoof.com #diy #rug #homedecor #outdoordecor

    I just chose a spot in the middle of the rug to start a diagonal line with tape and went with it. Once more, I used tape as my measuring guides as you can see above.

    Step 6

    DIY Painted AstroTurf Rug Tutorial via RainonaTinRoof.com #diy #rug #homedecor #outdoordecor

    Continue with your diagonal stripes in the middle of the rug until it is covered.

    It should look similar to this when its done:

    DIY Painted AstroTurf Rug Tutorial via RainonaTinRoof.com #diy #rug #homedecor #outdoordecor

    Be sure to run tape along the white edges where your diagonal stripes meet it.

    Step 7

    Paint your diagonal stripes using the same method as with the border, then remove the tape.

    The finished product: 

    DIY Painted AstroTurf Rug Tutorial via RainonaTinRoof.com #diy #rug #homedecor #outdoordecor

    I love how fun this rug is. I put it on the screened-in porch for photos, but am planning on moving it to the front porch when the floor out there is finished.

    DIY Painted AstroTurf Rug Tutorial via RainonaTinRoof.com #diy #rug #homedecor #outdoordecor

    I did somehow mess up my “tape measurements” at one point. You can see where some of my diagonal lines are skinnier than others. No biggie – nothing’s perfect around here.

    DIY Painted AstroTurf Rug Tutorial via RainonaTinRoof.com #diy #rug #homedecor #outdoordecor

    I love the Juicy Passionfruit and stark white against the green. Its a fun, unexpected element.

    DIY Painted AstroTurf Rug Tutorial via RainonaTinRoof.com #diy #rug #homedecor #outdoordecor

    What do you think?

    Too tacky?

    If its not a little tacky, its no fun, right?!

    How can you jazz up an AstroTurf rug?

    Want more great ideas for rugs? Then don’t miss these 14 painted rug hacks!

    Love a great cowhide rug? Here’s how I made a faux cowhide rug for about $15.

    Oh, and here’s my little trick for keeping rugs from sliding on your floors.

    You know you don’t wanna miss any of this crazy.

    Sign up to get my posts delivered to your inbox here. 

    Stalk Me Here:

    Pinterest / Facebook / Twitter / Instagram

    SaveSave

  • How to Paint a Refrigerator (It’s actually easy!)

    How to Paint a Refrigerator (It’s actually easy!)

    So, can you paint a refrigerator? The answer is a big YES! When you don’t have the budget to upgrade that dated fridge, just give a good ol’ DIY paint job. Find out how to paint a refrigerator below – it’s actually not that hard at all!
     
    Hi! My name is Madalyn and I nest over at Home Hearted where I share my latest crafting, homemaking and diy projects. My husband and I just bought our first house and since it took most of our resources to get it I have been trying to do what I can to restore and utilize what we already have. First on my list was to take our rusty old refrigerator that we inherited from our rental house and make it into something a little more pretty.
     
    I had grand ideas, but my dad who is a painter talked me out of them and into restoring my fridge to its former glory, a simple white. And to compromise on the chalkboard he suggested I paint a large magnet in chalkboard paint and put it on the fridge.
     
    How to Paint a Refrigerator Easily

    DIY Refrigerator Paint Job

    This post contains affiliate links for your shopping convenience. Click here to read my full disclosure policy.
     
    Let’s start out with a good before and after shot, shall we?
     
    Can You Paint a Refrigerator
     
    As you can see, we also switched the door handle to function better in our new kitchen. The above picture doesn’t do the before any justice. It was so rusted and gross as you can clearly see in these pictures below.
     
    Refrigerator Paint DIY
     
    This refrigerator was obviously in need of some major loving!
     
    Materials and Supplies Needed:
    Steps
     
    Step 1
     
    If you have rusted areas on your refrigerator, you’ll want to take care of those first.
     
    Start by lightly sanding the rusted areas, wiping them clean with a tack cloth and then applying two coats of Loctite Extend Rust Neutralizer. See image below for step-by-step shots.
     
    Step 2
     
    After the rust neutralizer is completely dry, apply Rust-Oleum’s Protective Enamel in Gloss White or another appliance paint color of your choice.
     
    Because the rust was so bad on the front of my fridge and thus where I applied the rust treatment, I had to apply two coats of the paint here. The rest of the fridge was fine with a light sanding and one coat of paint. Remember to always wipe the entire surface clean with a tack cloth after sanding to get a smooth finish in the end.
     
    I used a small roller for most all of the painting. I used a small artists paint brush for one tiny area that I couldn’t get to with the roller. 
     
    How to Paint a Fridge
     
    Step 3
     
    To top off this little home improvement project, I also spray painted the bottom vent on the refrigerator a nice black. That really cleaned things up and adds to the “brand new” look.
     
    Can You Paint a Fridge
     
    While I was at it I also took the time to clean up the inside of the refrigerator as the etched glass had received a stain at some point. I love the liner, it keeps things very simple as you can just pull it out and wash it, keeps things cleaner and easier!
    DIY Painting a Refrigerator
    DIY Refrigerator Painting
     
    When all was said and done I spent a total of $36.83 which includes the magnet, fabric rollers, paint and spray paint.
     
    I hope you enjoyed this post and if you have any questions about painting a refrigerator, please leave a comment!
     
    Need more DIY kitchen project ideas?
     
    See how I made my laminate countertops look like stone here!
     
    Need DIY kitchen island ideas? See these!
     
    Want more countertop makeover ideas? There are nine here!
     
    And finally, get 10+ ideas for decorating, organizing and storage in your kitchen here!
     
    Want to come back to this post later? Just pin the picture below! 
    DIY Refrigerator Paint Job

    Sign up to get my posts delivered to your inbox here. 

    Stalk Me Here:

    Pinterest / Facebook / Twitter / Instagram

     
  • Top Furniture Makeovers at Rain on a Tin Roof

    Top Furniture Makeovers at Rain on a Tin Roof

    You guys know I love a good furniture makeover.

    There are furniture makeovers I’ve done that I haven’t even posted about.

    There is so much furniture waiting for a makeover in my garage, that I can’t park in there.

    And sometimes Grunt Labor can’t park in there either.

    And he does not like that.

    But, he grins and bears it.

    Here’s a re-cap of the top furniture makeovers here at Rain on a Tin Roof:

    Best Furniture Makeovers | Furniture Makeover DIY | Furniture Makeover Ideas | Furniture Makeover Before and After

    Top Furniture Makeovers {rainonatinroof.com} #makeover

     Toy Chest Makeover

    I was totally shocked at how much you guys liked this little toy chest! I thought it was cute, but you guys seemed to love it! Totally made my day!

    Top Furniture Makeovers {rainonatinroof.com} #makeover

    Restored Rocking Chair

    Same thing with this 100 year old rocking chair! Have you ever read why I paid someone $400 to help me save it?

    Top Furniture Makeovers {rainonatinroof.com} #makeover

    Ralph Lauren Inspired Barstools

    Ahhh, my barstools. They speak for themselves.

    Top Furniture Makeovers {rainonatinroof.com} #makeover

    Wrapping Paper Topped Table

    What does Jenna do when she can’t fix a tabletop? She puts wrapping paper on it!

    Top Furniture Makeovers {rainonatinroof.com} #makeover

    Burlap Entry Bench from Chairs

    Cut the backs off chairs and create stools – put two together to form a bench!

    Top Furniture Makeovers {rainonatinroof.com} #makeover

    Wrapping Paper Lined Cabinet

    The $0.50 liquor cabinet makeover. Priceless.

    It was once my great-grandmother’s china cabinet. And I turned it into a liquor cabinet. That too, is priceless.

    Top Furniture Makeovers {rainonatinroof.com} #makeover

    French Country Dresser Makeover

    Such a beauty…

    Top Furniture Makeovers {rainonatinroof.com} #makeover

    French Country Chair Makeover

    This chair turned out beautifully, thanks to a simple combination of white paint and green velvet upholstery.

    Top Furniture Makeovers {rainonatinroof.com} #makeover

     How to Upholster a Cane Chair

    The Jonathan Adler inspired cane chair.

    One word: LOVE.

    Like what you see?

    Follow along:
  • French Country Dresser Makeover {DIY Chalk Paint}

    French Country Dresser Makeover {DIY Chalk Paint}

    Like furniture makeovers? You may want to sign up for my free email subscription here. 
    Just another Craigslist furniture makeover….
    A French country dresser makeover…
    French Country Dresser Makeover
    Isn’t she a beauty? I love love love the gray and white contrast. She had humble beginnings: