This post is sponsored by Velvet Finishes, however all opinions are 100% mine. Affiliate links may be contained in this post.
There once lived a man.
He was a farmer who wore Liberty overalls.
And he was a wood worker too.
He made lamps and a baby cradle when his first granddaughter was born.
The granddaughter slept in the cradle and her daughter slept in the cradle.
And the granddaughter doesn’t remember a time when a lamp her pap made wasn’t in her grandparent’s den.
They were floor lamps with a small table halfway up – nothing anyone would probably consider in style.
Except her.
A few months ago when the granddaughter went back home, she found her grandfather’s lamps in an outbuilding.
And that just wouldn’t do.
So along with a huge gold mirror and some old farm equipment that she just couldn’t let get thrown away, she brought the lamps home.

The base and the poles were ok, but the table part, it was rough.
But she was ready to make them shine again….
How to Refinish Wood Furniture and Cover Stains without Sanding or Stripping
Supplies & Materials Needed:

- Velvet Finishes Ready (if the piece has a glossy/shiny finish)
- Velvet Finishes Dark Brown Stain Restore
- Tack Cloth
- Latex Gloves
Step 1:
If the piece you are working on has a glossy or shiny finish, spray it down with Ready, let it sit for a few minutes, then wipe the piece down with paper towels until its no longer shiny.
Whether you used Ready or not, use a tack cloth to clean up any dust or dirt that might be on the piece.
Step 2:
Put on the gloves (this will stain your hands if you don’t!) and pour a little Stain Restore onto a paper plate.

Use the stain pad (it comes with the Stain Restore) and soak up some stain restore.
Spread it onto the surface you are restoring.
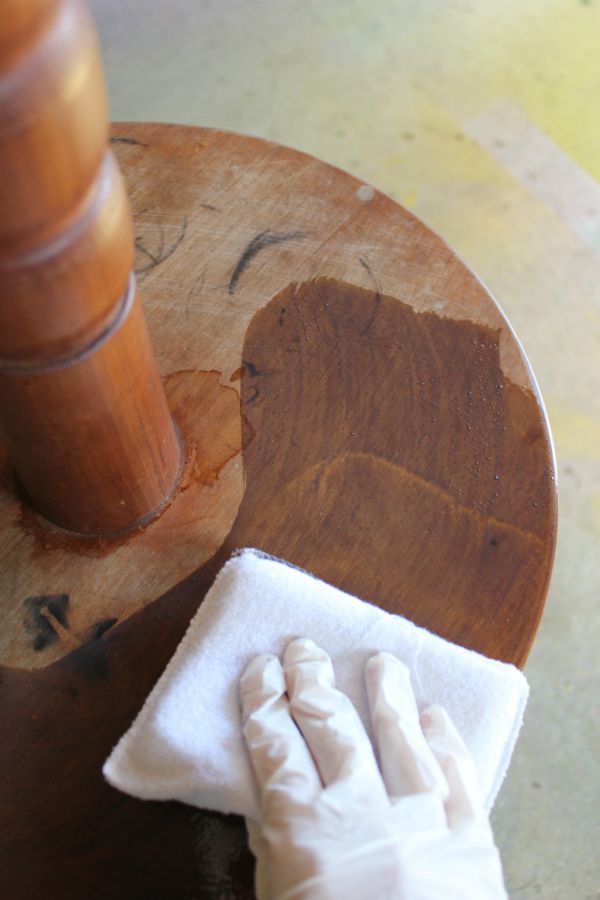
You can spread it around however you want to, but make sure your final swipes are in the direction of the wood grain.
Step 3:
Let the Stain Restore dry and repeat as many times as needed or to get the color you want. I did four coats of the Stain Restore to cover my lamp.

You can just barely see the rings that were there in the beginning. I could have done another coat or two and covered them completely, but I didn’t want to go any darker with the lamp.

Stain Restore dries to a shiny, polyurethane type finish. You can add on a topcoat of Protect for more protection.

It may be considered out of style, but this girl is happy to have her Pap’s lamp in her living room.
And she thinks it looks just right.
Do you have any family heirlooms that need to be restored?


You know you don’t wanna miss any of this crazy.
Sign up to get my posts delivered to your inbox here.
Stalk Me Here:
Bloglovin / Pinterest / Facebook / Twitter / Google+ / Instagram

Disclosure: This post was a collaboration with Velvet Finishes. However, all opinions and love of my Pap’s lamps are 100% mine.
Leave a Reply