
Not even gonna lie, this room design took me out of my comfort zone more than any other. As I’ve said before, I was stressed during most of the whole process about the pink walls not working out as well as they were in my head. But on top of that, I also doubted my headboard project, the window treatments and multiple other things. On multiple occasions, Grunt Labor had to bring me back from the dark side with “It’s just paint, Jenna,” or “We can easily switch the curtains if we need to.” In all honesty, I think he had more faith in this design than I did and that is just baffling considering a huge part of it included pink. Go figure.
Today is the day though for you to be the judge.
This post is sponsored by FrogTape, however all opinions are 100% mine. Affiliate links may be contained in this post.
Right after I applied the final coats of paint, I removed the FrogTape®…

Don’t wait for your paint to dry – remove the tape while it’s still wet! I had painted three walls pink and all the trim was black. After I removed the tape from the trim, I was feeling pretty confident about the pink and black color scheme.
I moved on to the accent wall which would be pink and black as well, but of course with lots more pattern.

I removed the tape.

I was feeling pretty confident about the pink and black color scheme here too since it looked so good on the other walls. But….after I got all the tape off the feature wall, I wasn’t loving the pink and black together there.

While the black trim and plain pink walls worked well on the other two walls, it just seemed too much on the feature wall. So as I like to say – I had to back up and punt. I opted to change the pink on the feature wall to white. Instead of mapping out my entire design again, I just used FrogTape® Delicate Surface and taped off around the black parts of the wall and painted the white in-between. And after two coats of white paint and removing more tape…

I made quite the home run if I do say so myself….

Since I had nixed the pink on this wall, I knew I needed to pull some of it back over to connect the whole room, so I did that with the pink lamp – which was a $5 Goodwill find I’ve had for about six months waiting for it’s perfect spot.

Mirror (similar) / Banana Leaves Print / Lamp (similar)
There’s a lot of musical furniture going on at the new house. I had purchased this dresser for the Circus’ room before I knew we were moving. As it turns out, it works better in our new master bedroom than hers, so she got our old dresser and we got this one. I think it has that great “Well Traveled” vibe we were going for in here. The mirror in our old dining room is making it’s new home in our bedroom as well and I jacked the banana leaves print from our old gallery wall.
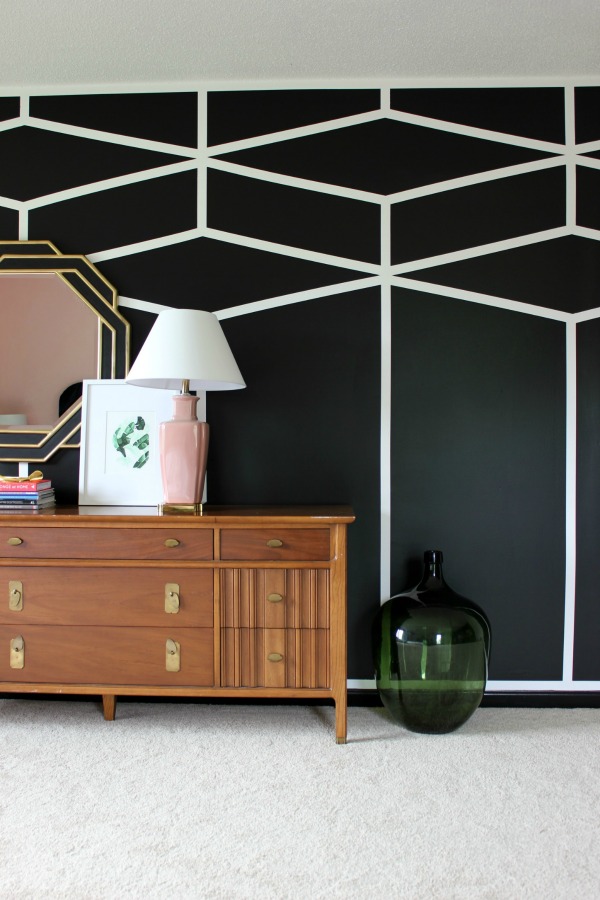
My dad gave me the big green bottle thing quite a while back as well. It was a great aunt’s and he didn’t want it anymore, but as we all know, I am the taker of all family junk no one else wants, so it came to me and finally found a new perfect home.
And remember how we were building a headboard?

Pink Wall Color / Black Trim Color
/ Bedding / Green Drapes / Palm Print / DIY Headboard
It’s velvet. And luscious. And pretty. And actually not too hard at all to make – the tutorial for it is right here.
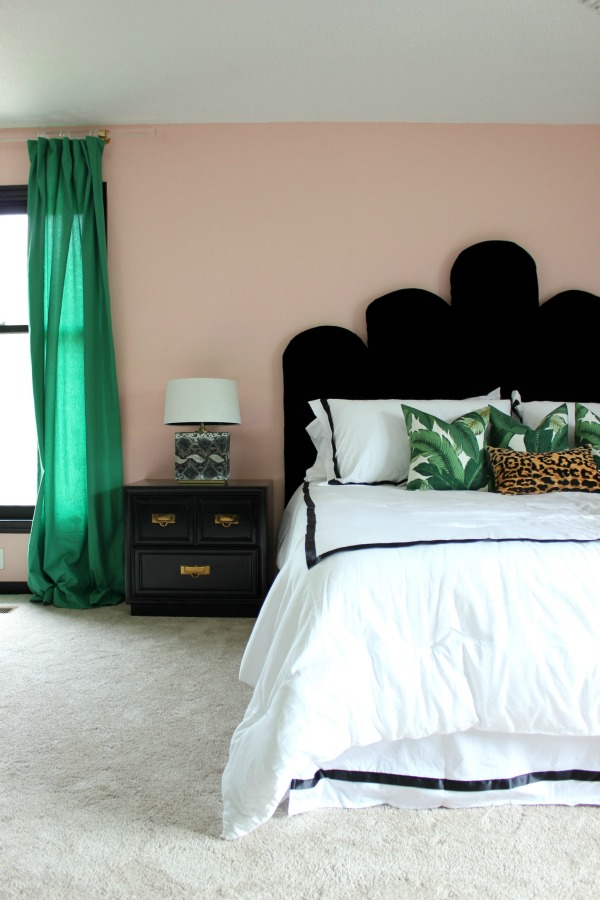
Kelly Green Drapes / Bedding / Banana Leaf Pillows / Leopard Print Pillow / Headboard
You may have also spied those lucite curtain rods – another DIY project. I tried to save as much money as possible on this makeover by reusing items we already had either in our old master bedroom or in other places at our old house. The green curtains used to be in our living room and wouldn’t work for our new living room, but were perfect for our Well Traveled Bedroom. The snakeskin lamps also used to reside in our dining room. Bringing in the snakeskin prints, leopard prints and banana leaf prints was another way I kept the “Well Traveled” theme going. I felt like all those types of prints and patterns combined with the detailed feature wall worked perfectly into the theme. The nightstands are new to us, however they didn’t cost a dime. A friend gave them to us and I just painted them.

The light fixture added a touch of glam and also helped to pull the lucite curtain rods together.

Palm Print / Leopard Print Pillow / Banana Leaf Pillow / DIY Huge Picture Frame
As I told you in my design plan post for this room, we already had the palm tree print on hand, however it didn’t have a frame. Let me just tell you – frames that are almost as big as you are ain’t cheap. Grunt Labor and I made our own for about $25. Purchasing one already made would have been about $150. The tutorial for the frame can be found here.

Moving across from the bed is a small sitting area.

Accent Chair / Elephant Table (similar ones) / Leopard Print Pillow / Date Art
Once more with the exception of the leopard print pillow, I already had all of this on hand. The chair had been in our old master bedroom. I bought the elephant table awhile back having no idea where it would go, but who can pass up an elephant table for $20? Exactly. No one. The date art is our wedding anniversary. Considering that both myself and Grunt Labor have forgotten our anniversary before, I figure it’s a good way to remind us. The gold mirror is literally like gold to me – it was my great aunt’s, then it hung in my grandparent’s living room and then I took it when they died. It had to stay in storage for quite some time until I had the perfect place for it.

And did I mention I covered a wall with carpet? For about the last year, I’ve been dying to cover a wall with AstroTurf. The wall that leads into our master bedroom closet seemed to be the perfect candidate. However, after looking at the Astroturf more, it was just too shiny and bright. Instead, I used darker green outdoor rugs to cover the wall. I love the added dimension it gives.

DIY Carpet Covered Wall / Closet Door Medallions / Gold Door Knobs
The marble top table used to be a nightstand in our old master bedroom. Mama graciously loaned me her bamboo lamp for the space, because really, how can you have a Well Traveled Master Bedroom without a bamboo lamp? The Easy Like Sunday Morning print was another print that used to hang on the gallery wall in our old living room. I also jazzed up the closet doors with medallions.
Remember, this makeover was part of FrogTape’s® Paintover Challenge. They gave myself and five other bloggers a box of painting supplies and $1,000 to makeover our rooms.
Here’s the budget breakdown for my room:
Paint – $100
Light Fixture – $124
Headboard (velvet upholstery, foam, batting, wood, etc.) – $243
Bedding – $240
Accent Pillows & Inserts (I had some inserts on hand already) – $98
DIY Art Frame – $20
Lucite Curtain Rods – $206
Closet Door Medallions & Knobs – $27
Rugs for Closet Wall & Moldings – $30 (I had store credit for part of this.)
Grand Total: $1,088
I did go over budget by $88. The main reason for that was that it ended up taking three coats of pink paint and therefore I had to buy another $50 gallon of the paint. The headboard also took more foam than I expected which was about another $30 cost.
There were also parts of this room that were factored into our whole house renovation. That included the carpet, construction of the new closet, and closing up the openings to the old closet, which became the Circus’ playroom. Those were things that were planned out long before this room design was dreamed up, so I didn’t factor those into the actual makeover budget.
What do you think? Is it “Well Traveled” to you?


Leave a Reply