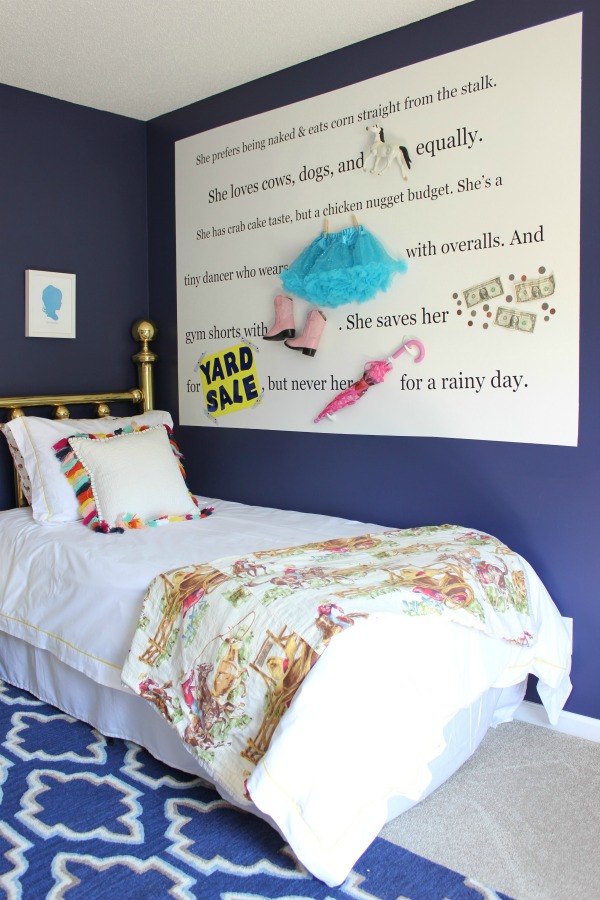
Man, this wall has been nearly a year in the making. When I found out we were moving and started plotting out the Circus’ room, I knew this wall was a must. I really wanted a way to convey the Circus’ unique personality and I think this object and text feature wall was the perfect way to do it.

You may have seen a wall similar to this in a Kate Spade store. I’m not sure if every store has them, but I know the one that I have been in does have one and it’s what inspired this wall. Of course, the Kate Spade version doesn’t mention yard sales or tutus, but that’s their loss. 😉
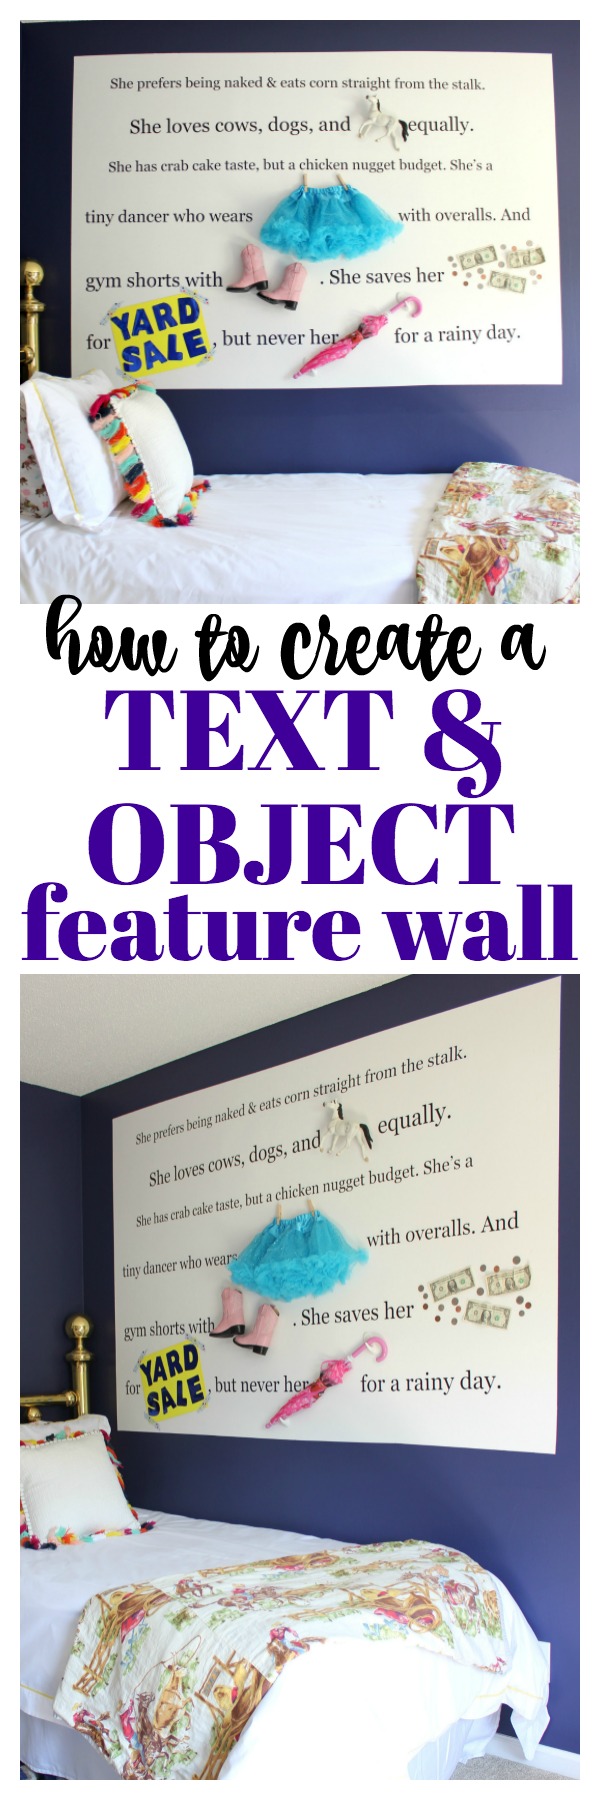
How to Create an Object and Text Feature Wall
![]()
- Custom Wall Decal (I got mine from Wall Quotes – I’m going to show you how I made it. Disclosure: They gave me my decal to use in this post, but I had planned on buying one anyway.)
- Objects (to add into the wall and take the place of some words)
- Paint and FrogTape (if you want to change the color of your wall where the decal will go)
- Command Strips and Command Hooks to hang the objects
![]()
Step 1.
The first thing you’ll want to do is come up with your text. If you’re doing it for a person, make a list of things they really love or that describe them and then work those into sentences. After you’ve done this, go back through and make note of words that you could actually replace with objects. We did this with the words horse, tutu, cowboy boots, money, yard sale and umbrella.
Step 2.
Now you’re ready to make your decal. I made my decal through the Design Your Own feature at Wall Quotes. The design center walks you through all the steps, but I also made a video to show you specifically how I made mine.
When you make your decal in the design center, I think the biggest thing is making sure you have the dimensions of the wall area set correctly. The spaces in the sentences didn’t really matter that much while making the decal because I had to cut some sentences into two pieces to make room for the objects anyway. Also, make sure to take into account your wall color. I knew I was painting this section of the wall white, thus why I set it to white when making the decal.
Next, try to wait patiently for your decal to arrive! 😉
Step 3.
If you’re planning to paint the area of the wall where the decal is going, go ahead and do so. I didn’t realize that the wall needed to be painted at least three weeks prior to the decal going on until I got my decal, so that slowed my project up a bit. I just rolled some bright white paint (Bit of Sugar), onto the wall.
Step 4.
When your decal arrives, pull it out of the box and unroll it.

When I unrolled mine, I realized I was definitely going to have to cut the sentences into strips for it to feel the space I wanted it to on the wall.

That wasn’t a big deal at all – it didn’t affect the text in any way.
Tape your strips onto the wall and move them around until you get them where you want them.

Once I got the strips where I wanted them, I tested out the objects in their spaces and ended up cutting most of the sentences where the objects would go so I would have room for the actual object.
Step 5.
Once you have all the strips in place where you want them, it’s time to start actually applying the decal to the wall. Instructions and an application tool are included with Wall Quotes decals. It’s really simple though.

Just apply tape to the top portion of the strips (as shown in that top sentence of mine), carefully pull the backing from the strip, then smooth the top portion onto the wall. Use the application tool to fully smooth and apply the decal onto the wall, then pull back the top portion.

Add in your objects as you go so that you can move strips if you need to.
Step 6.
If you painted the area where you put the decal and objects, then use FrogTape to straighten up the edges and go back over the outside with your wall color.

I used Command Strips to keep the horse and boots on the wall. The tutu is held up by clothespins that are hot-glued to the wall. The dollar bills are just taped and the coins are hot-glued. The yard sale sign is taped and the umbrella is hung on Command Hooks.

I really love this little sneak preview you get of the wall when looking into her room.
The Circus can still easily get the umbrella and tutu down to play with. The cowboy boots are actually too small for her, so she’s ok with them being on the wall. She was a little upset when I went to put one of her horses on the wall, but when I pulled out the 50 other ones she had, she forgot about that one real quick.
Only a couple more projects to go in her room!
What do you think about the new wall?!
You can make your own custom decal at Wall Quotes.
You might also want to see these…

IKEA Bookcase turned Dress-Up Closet

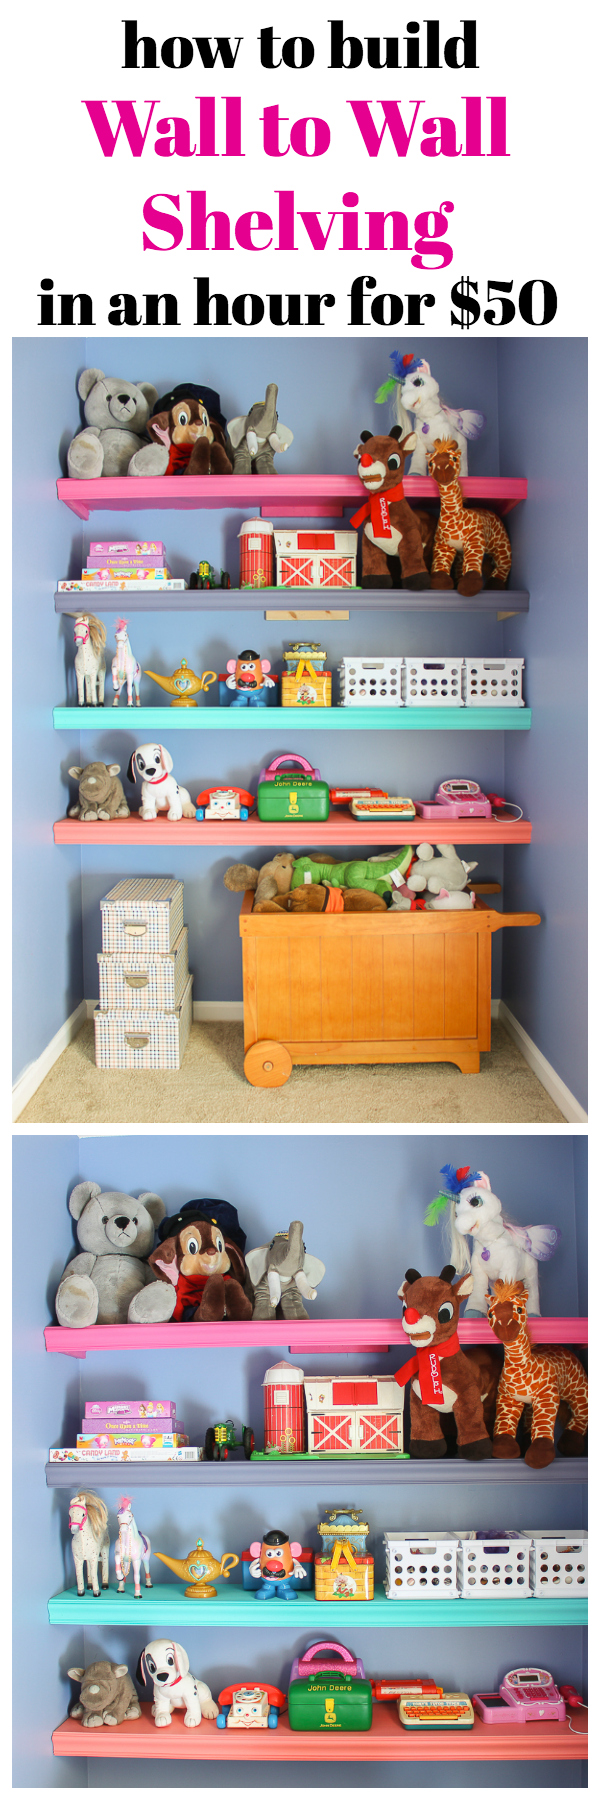
How to Build Wall to Wall Shelving Easily


Dad says
Sweet!
Jenna @ Rain on a Tin Roof says
Thanks, Dad!
Donna says
So Cute!
Jenna @ Rain on a Tin Roof says
Thank you, Donna!
Marty@A Stroll Thru Life says
Oh how fun is this for her room. I love this idea. It makes her space to personal to her.
Jenna @ Rain on a Tin Roof says
I think so too, Marty! I’m thrilled it turned out so well! Thank you!
Karen says
THE cutest!
Jenna @ Rain on a Tin Roof says
Thanks, Karen!! We kind of think so too. 🙂
Kimberly says
Wow! Just wow!
Jenna @ Rain on a Tin Roof says
Thank you, Kimberly!!
Lisa A. says
Oh Jenna, it is fabulous! My circus is all grown up, wish she was little so I could make her a wall. This would have been a project right up my alley.
Jenna @ Rain on a Tin Roof says
Thanks, Lisa! Well maybe you’ll have grandchildren one day and you can make them a wall! 🙂
Beth says
You’re such a good Mom! Great Job!
Jenna @ Rain on a Tin Roof says
Oh Beth, you might be the only one to have ever said that!! haha! Thank you!
Meg @ Green With Decor says
Ooh this is such a cute idea!
Jenna @ Rain on a Tin Roof says
Thank you, Meg!
Patty says
This wall is so adorable and so the circus. It makes me wish I had a little girl to do this for (not) haha, but if I did have one I would do this.
You put so much thought and heart into your projects and it shows with everything you do in your home. I’m sure the circus loves her wall.
.
Jenna @ Rain on a Tin Roof says
Oh thank you, Patty! She does love it – now anyways! haha! She wasn’t so sure at first!
jeannee taylor says
How unique, personal and creative ! That wall rocks!
Jeannee
Jenna @ Rain on a Tin Roof says
Thanks so much, Jeannee!
Debra Bartels says
I think the Circus has a very creative mom. Lucky little girl.
Jenna @ Rain on a Tin Roof says
Thanks, Debra! 🙂
Anne-Marie says
It’s fabulous – love it!!!
Jenna @ Rain on a Tin Roof says
Thank you, Anne-Marie!
Sally says
That wall looks amazing, so personalized. I love that picture of the Circus standing on her bed with her hands on her hips. I would have loved to see the look on her face! What a hoot!
Jenna @ Rain on a Tin Roof says
Oh she was very questioning, Sally! She was not happy either when she saw the big white rectangle painted on her wall for no obvious reason either! haha!
Sheryl Tommila says
Oh my gosh! (Does anyone even say that anymore?) I love this idea and your execution of the whole idea! Luckly little gal, she is!
Jenna @ Rain on a Tin Roof says
Thank you, Sheryl! And I say “Oh my gosh” all the time! 🙂
Marian@CMShawStudios says
That is a great project! Did she decide she likes the final result? I sense some control issues there.
The Other Marian
Jenna @ Rain on a Tin Roof says
She does!! hahaha – oh yes, she definitely has control issues!
Pam S says
This one’s definitely an A+!! Hope you’re not getting anymore stink eye! LOL
Jenna @ Rain on a Tin Roof says
Thanks! Nope, no more stink eye – she loves it! I do have to take the umbrella off the hooks when she goes to bed though because she was playing with it. Should have had better foresight on that one…
Shani Newton says
I’m totally in love with that yellow cane table!
Jenna @ Rain on a Tin Roof says
Thank you, Shani! I love that piece as well! It’s painted in Bold by Velvet Finishes.
Stephanie S. says
Jenna that is the coolest object you have done in her room. How fun down the road having this around. Her pose is perfect. How did you get that picture. Keep up the good work. Love it.
Jenna @ Rain on a Tin Roof says
Thanks, Stephanie! Funny enough, she makes that pose all the time!! It’s hilarious!
creativejewishmom/sara says
Really fabulous! and great to meet you on craft schooling Sunday!
Jenna @ Rain on a Tin Roof says
Thanks so much!
Maria says
Wow! What a feature wall, indeed. This is a great way to add a feature wall and some texture into a room! Clever and genius all at once. Thanks so much for sharing this with us on #shinebloghop this week. So glad you were able to join us!
Jenna @ Rain on a Tin Roof says
Thank you, Maria!
Haley says
Love love LOVE this idea!! It came out incredible! The tutu and little cowboy boots are just too cute!
Jenna @ Rain on a Tin Roof says
Thank you, Haley! I’m thrilled with how it turned out as well!
Lisa Silfwerbrand says
Jenna this is awesome! I love the combo of the text and the objects <3 Thanks you so much for linking this up to the Inspiration Galore Project Party last week. You are one of my Features tomorrow over at http://www.recreateddesigns.com. Pinned and shared. Have a lovely weekend!
Jenna @ Rain on a Tin Roof says
Hi Lisa! Thank you so much for the feature! I’m thrilled you like it!
Crystal says
This idea is super creative…I’m pondering on where I can create one of my own!! #homemattersparty
Jenna @ Rain on a Tin Roof says
Thanks, Crystal! It was a really fun project to do!