I had a revelation the other day.
A hold-the-phone-shut-the-front-door-smack-myself-on-the-head revelation.
I realized that for two years I’ve been showing you all these awesome (if I do say so myself) furniture makeovers that I’ve completed with my paint sprayer, but never once have I actually told you how to use the paint sprayer from start to finish.
See why I smacked myself on the head?
So here it is. The ultimate guide for how to use a paint sprayer from set-up to cleaning.
Sorry for the two year delay.
This post is sponsored by HomeRight, however all opinions are 100% mine. Affiliate links may be contained in this post.

This post contains affiliate links for your shopping convenience. Click here to read my full disclosure policy.
How to Use a Paint Sprayer
First off, let me say that the directions and tips in this post only pertain to the HomeRight Finish Max paint sprayer – the sprayer that I have used for the past two years. While other paint sprayers, may operate similar to this one, I can’t give exact instructions for those as I can this one. And yes, I am a HomeRight Brand Ambassador, but even if I weren’t, I would still use and sing the praises of the Finish Max. You are talking to the girl who tried three paint sprayers prior to finding the Finish Max and every single one of them went back to the store and she swore off paint sprayers forever.
And then she ate her words.
But it was worth it.
Before you get out your paint, first setup your painting area.

The Spray Shelter is a little big gem. While there isn’t as much overspray as I’ve seen with other sprayers, there is still some with the Finish Max and this baby helps to contain it. Setup is easy and takes less than 10 minutes. The spray shelter doesn’t have a “bottom” so to speak, so if you are concerned about getting paint on your floor, you’ll want to put a tarp down under the shelter. As you can see, I don’t worry with that. A rainbow garage floor never bothered me.
Also, if the piece I’m painting is smaller, I will set it up on sawhorses so I don’t break my back bending over.
Now, let’s get down to business.
Step 1:
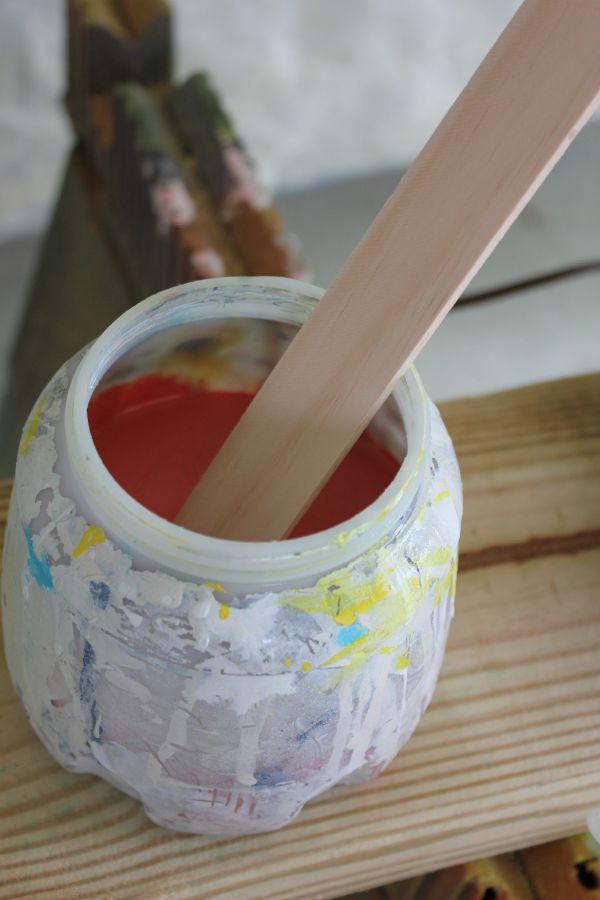
Unscrew the paint container from the sprayer and fill it with paint. If your paint is old (like a month or more), you will want to strain it.

Once paint has been opened, it can sometimes get lumps that dry up in it and if not strained, those lumps will clog your sprayer. To strain my paint, I just use a cheap $3 strainer that I found at Target, I think.
Fill the container about 1/2 to 3/4 full depending on the size of your project.
Step 2:
Thin the paint.
To thin the paint, all you need to do is add water. I usually try to have a cup of water nearby. Add a little at a time. Start with about 1/4 of a cup of water for thinner paints and 1/2 cup for thicker paints – you can always add more. Stir as you add water.
The big question is always, “How do I know if I’ve thinned my paint enough?” Ya know what? That used to be my question too! One more reason I love this paint sprayer is because it takes the guesswork out of thinning.

The Finish Max comes with a little tool called a viscosity cup. Once you’ve added water to your paint and mixed, dip the viscosity cup in the paint cup and time how long it takes the paint to run out of the cup. If you’re using a basic enamel paint, the paint is thinned enough if it all runs out of the viscosity cup in 25-40 seconds. If the paint doesn’t run out of the cup within that time frame, add more water, mix and test it again. Repeat until your paint is thinned properly.
Let me stop here and talk about other materials you can use in the paint sprayer and whether or not you should thin them.
You can use:
Oil Based or Latex Based Paint – Needs to be thinned, 25 – 40 seconds run-out time.
Clear Sealer (Polycrylic) – No thinning required.
Polyurethane – No thinning required.
Primer – Needs to be thinned, 30 – 45 seconds run-out time.
Stain – No thinning required.
Varnish – Needs to be thinned, 20 – 50 seconds run-out time.
Its also important to note that many oil based paints recommend thinning with something besides water. Be sure to check the material’s label to see what it says about thinning the paint.
Step 3:
Adjust your spray pattern.
To adjust the spray pattern, turn the air cap on the front of the sprayer that has the “wings” as I like to call them.

Turning the wings horizontally will give you a vertical spray pattern and turning them vertically will give you a horizontal spray pattern. If I intend on spraying something up and down as I spray, I use a horizontal spray. If I intend on spraying something from side to side, I use a vertical spray.
You can also turn the wings at a 45 degree angle and spray horizontal or vertically, but honestly, I don’t think I’ve ever used that method.
Step 4:
Plug in the sprayer and paint.
Another one of my favorite features of the sprayer is that it doesn’t need an air tank – just an extension cord.

When you start spraying, hold the sprayer about 5-10 inches away from the piece you are painting. Pull the trigger and start painting. You want to move your entire arm – not just your hand – as you spray, and keep your arm in constant motion. Don’t stay in one place for too long.

The sprayer won’t magically cover the entire piece in one coat. Typically, I have to do 2-3 light coats, but it takes far less time to spray those coats than hand paint them. There will probably be some small spots that don’t have paint on them the first go around – that’s ok – you’ll get them next time. You can tilt the sprayer to get into hard to reach places, just try not to tip it anymore than 45 degrees. Let the paint dry between each coat. You can protect your paint job with a topcoat (see thinning instructions above), using the sprayer exactly the same way.
Step 5:
Clean-Up.
After you are done painting, first clean out the paint container cup and the paint pick-up tube. If you did any tilting of the sprayer, you’ll also want to clean out the area where the container cup gets screwed on. Set the cup aside, but re-attach the paint pick-up tube. To clean the rest of the sprayer, attach the black faucet attachment end of the Rapid Clean to your water hose and the tube end to the pick-up tube. Clamp both ends.
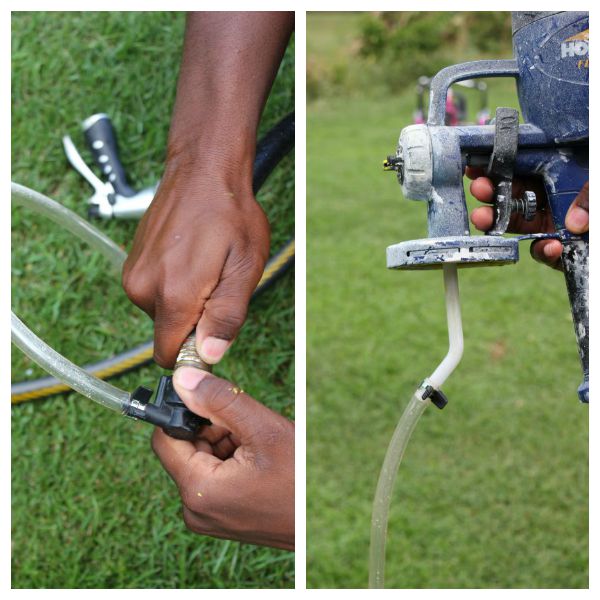
Turn on the water, pull the trigger and let the water run through the sprayer until it runs clear.

And that’s it – the Rapid Clean makes cleaning the sprayer so easy.
Have any of you used a Finish Max paint sprayer before? Any tips or tricks you can share with us?
Want to come back to this paint sprayer guide later? Just pin the image below!
