This post is sponsored by Velvet Finishes, however all opinions are 100% mine.
You guys. You guys. You guys.
No. Really. You guys.
I did something.
I did something I wasn’t sure I could do at all. I was sure it would be an utter failure. I held my breath with each brushstroke and removal of FrogTape.
But it wasn’t a failure.
It. Was. A. WIN.

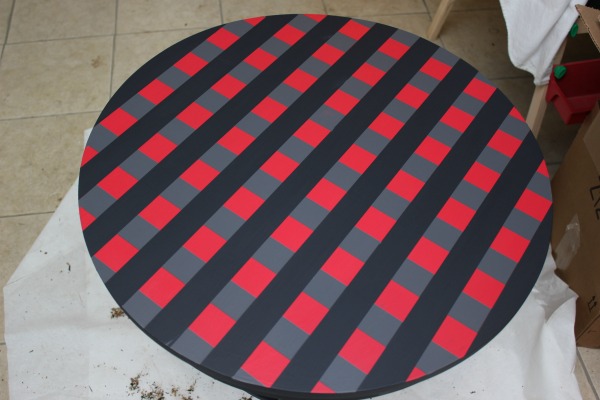
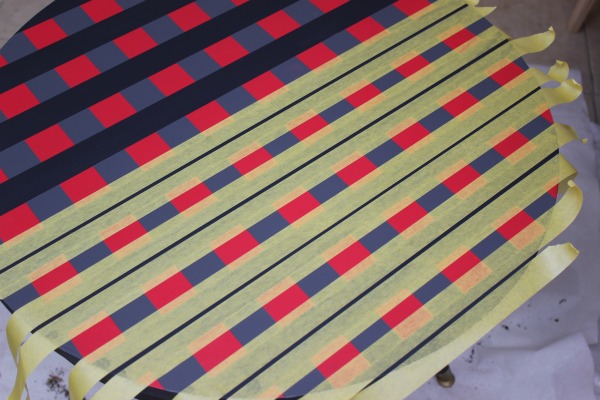
You see that plaid beauty? I painted it. It’s not a stencil, it’s not contact paper, it’s paint!
And I didn’t measure one iota of a thing to do it….because I’m lazy…and bad at math.
How to Paint a Plaid Pattern Without Measuring
Affiliate links may be contained in this post.
Materials & Supplies:
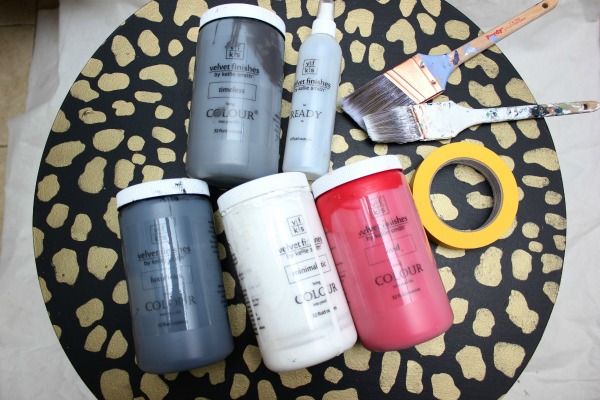
- A surface to be painted, of course. 😉
- Ready Primer
- Velvet Finishes Vivid
- Velvet Finishes Luxurious
- Velvet Finishes Timeless
- Velvet Finishes Minimalistic
- 1″ Delicate Surface FrogTape
- 1.5″ Delicate Surface FrogTape
- A Yardstick (preferably one from the Home Depot – you’ll see why in a minute – or one that is approximately 1.5″ wide)
- Protect
- Paintbrush
Step 1:
Prep your painting surface. My little table had a leopard print I stenciled on it a couple years back. It had resided on the screened-in porch, but never really got used all that often. I didn’t want to part with the table as I really liked it’s bones, so I opted to re-do it with a plaid print. First, I used Ready to prime the table.

Just spray it on, let it sit for a few minutes, then wipe down the surface. Ready will remove any shine the previous finish may have had and any dust or dirt as well.
Step 2:
Give the surface a few coats of Vivid.
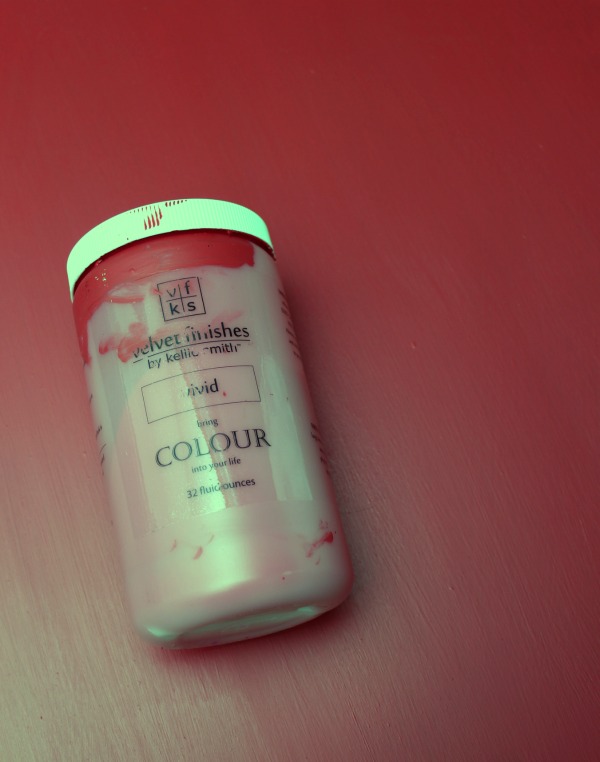
Reds are always hard to even out in color, so it might take a few more coats than with other colors. It took three for my table. Let the final coat dry overnight.
Step 3:
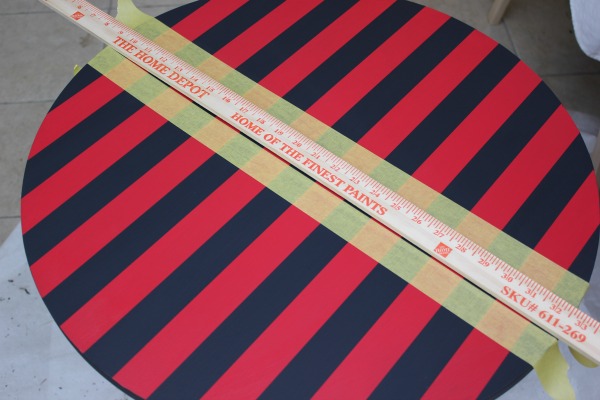
Place your yardstick in the middle of the table. It doesn’t have to be perfect – I eyeballed mine. On each side of the yardstick run a piece of 1.5″ Delicate Surface FrogTape along the length of the table. The yardstick I have from Home Depot is almost the exact same size as the 1.5″ FrogTape, thus why I suggested it – it makes the spaces between your tape and the tape almost identical in size, thus no measuring!
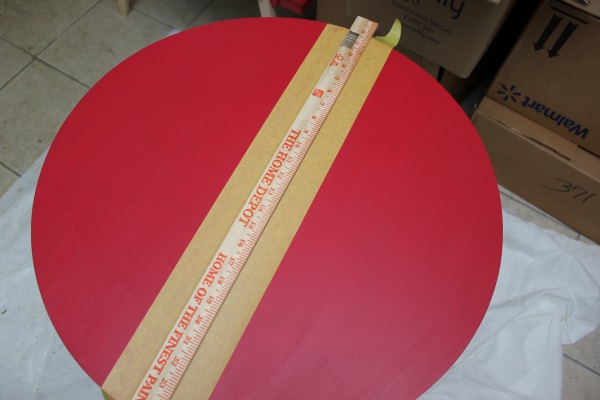
You do want to make sure you use Delicate Surface tape as this paint is still relatively fresh. Delicate Surface tape is made for painted surfaces that are just a few days old.
After running two pieces of FrogTape along each side of the yardstick, remove the yardstick and place it on one side of either piece of tape, then run another piece of tape along the side of the yardstick that doesn’t have tape.

Continue moving your yardstick and running your tape until your table has strips of tape all across it as shown above.
After all your tape has been ran, firmly run your finger or a credit card edge along the edges of the FrogTape to seal it. Do not skip this step! If you don’t do this, you risk having the paint bleed through the tape.
Step 4:
Paint two coats of Luxurious in between the tape pieces on your surface.
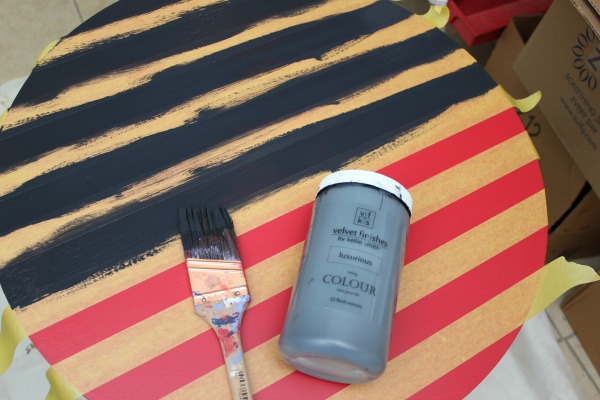
Remove the FrogTape immediately after brushing on your final coat. Let dry overnight.
Step 5:
Place your yardstick in the center of the surface perpendicular to the black stripes you painted. Once more, run two pieces of 1.5″ Delicate Surface FrogTape along both sides of the yardstick.
Just like you did before, move the yardstick to one side of a tape strip and then place another tape strip along the other edge of the yardstick. Repeat this over the entire surface until your surface resembles the image shown below.

Remember to firmly press down along the edges of the FrogTape after you have applied it to seal the edges.
Step 6:
Using the 1″ Delicate Surface FrogTape, cover the black stripes on your surface.
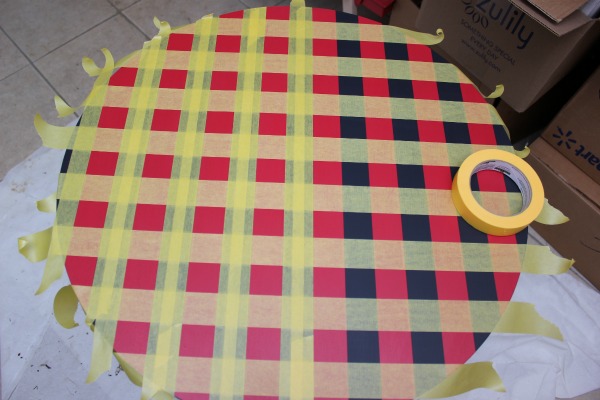
The easiest way I found to do this was to take a piece of the 1″ FrogTape and run it along on edge of the black and then run another piece of tape along the other edge of the black. The tape will overlap in the middle. Repeat this until your Luxurious stripes are covered and you have lots of little squares. Once more, remember to firmly push down on the edges of the FrogTape to seal it.
Step 7:
Within the squares you created with the tape, paint a couple coats of Timeless.
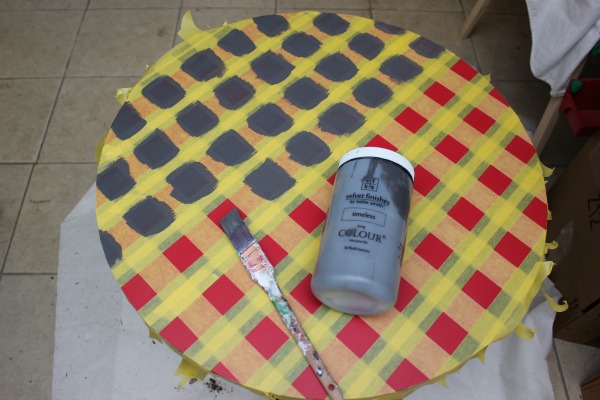
Remove the FrogTape immediately after applying your final coat. Your surface should look similar to the image below after you remove the tape.
Let dry overnight.
Step 8:
Using the 1″ Delicate Surface FrogTape, run strips of tape just a little outside each black edge. This should create small lines of black within the tape as shown below. Once more, I didn’t measure this at all – I just eyeballed it.
Firmly seal the edges of the tape with your finger or the edge of a credit card.
Step 9:
Brush on a couple coats of Minimalistic between the tape where the black is.
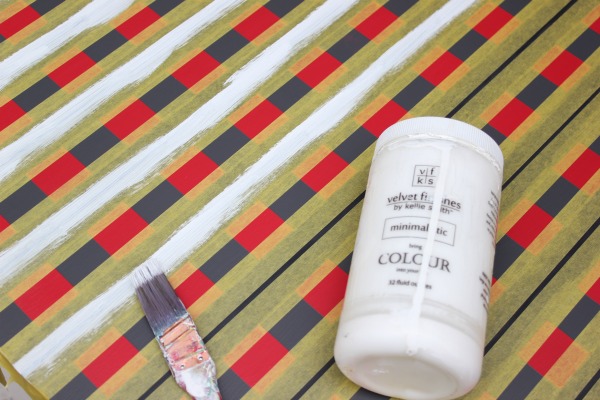
Immediately remove the tape after your final coat. Let it dry overnight.
Step 10:
Repeat the previous two steps above, except this time on the gray areas on your surface.

Paint Minimalistic between the pieces of tape. Remove the tape after your final coat. Let dry overnight.
Step 11:
Velvet Finishes paint does not always require an additional topcoat as there is already a topcoat built into the paint. However, if you have painted something that is going to get a lot of action and use, then an additional topcoat is suggested. I plan on this going into either the den/man cave or Bill’s room as a side table or night stand at the 70’s Landing Pad, so I opted for the extra protection.
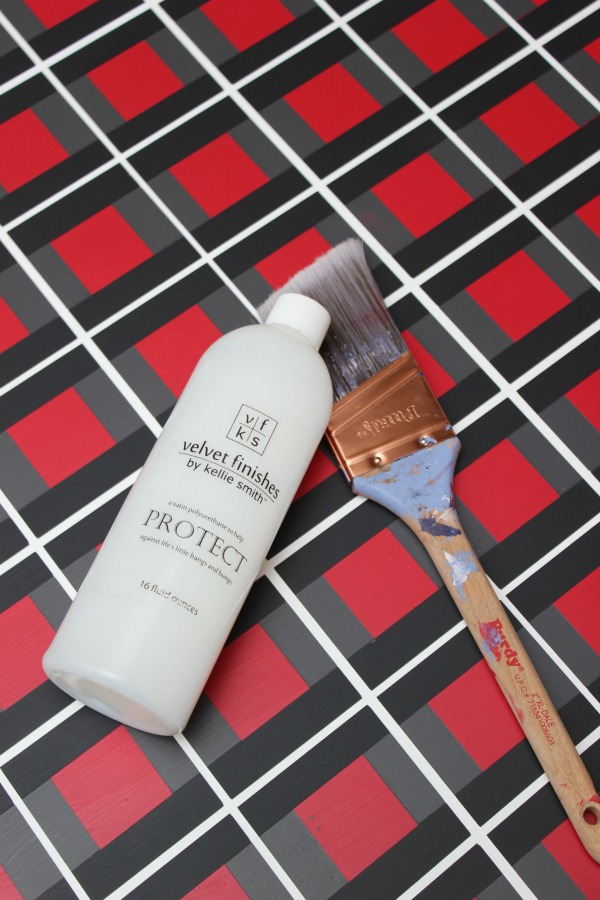
I just brushed on one coat of Protect to give the surface more protection and even a bit of shine.

This table turned out more awesome than I ever dreamed. I fully realize that sounds corny and I fully don’t give a damn.

Ok, what are you going to plaid up?
You might also want to see…

How to Make Furniture Glaze in Any Color


Disclosure: This post was a collaboration with Velvet Finishes, however all opinions and over-excitement about painting a plaid pattern all by myself are 100% mine.
Jennifer says
This is fantastic! Love this!
Jenna @ Rain on a Tin Roof says
Thank you, Jennifer!
Shannon H says
YOU are a genius with absolute SKILL! Gorgeous!!
Jenna @ Rain on a Tin Roof says
Thanks, Shannon! Seriously, it was easy once I broke it down!
Julie says
OMG! How totally awesome Jenna! Three cheers and a beer for you! ha
Jenna @ Rain on a Tin Roof says
Oooo, I like the addition of beer to the cheers! 😉 Thanks!
Liz says
I LOVE this. Soooo different and creative. You always make things look so easy
Jenna @ Rain on a Tin Roof says
Seriously, Liz – this WAS easy. I really thought I would screw it up, but as long as you seal those tape edges, you are golden!
Jillian says
That is gorgeous!!!! Totally Pinning
Jenna @ Rain on a Tin Roof says
Thank you, Jillian!! I just love it!
Pam Scott says
Amazing! Awesome! ….and in the last pics, tell us about the matching lamp!! How DO you do that??
Jenna @ Rain on a Tin Roof says
It’s real simple, Pam. I put the plaid table beside the black chair. I realized the table needed something on it. I looked around. I saw the lamp on the table opposite the plaid table. I threw it on the plaid table. Shockingly, it worked! haha! There is ZERO method to my madness – it’s all pure luck!
Pam S says
Sweet! A while back, I bought a pair of chairs at an estate sale….thought they’d work in my den. Got ’em home…they’re in the living room. Just what it needed & a designer couldn’t have done better – HA HA!! Pure luck ~ yep, that’s my style!
Sally says
Wow! I almost peed my pants when I read that you painted this!! What a woman!
Jenna @ Rain on a Tin Roof says
haha!!! I surprised myself!
Marcia Banach says
Ok, you just totally.nailed. it. BOOM! Absolutely gorgeous. Well done! #PerfectPlaid
Jenna @ Rain on a Tin Roof says
Thanks! I’m digging the #PerfectPlaid hashtag!
Shirley says
Jenna this is amazing! It looks 3D. You go girl!!! You are Mrs Frog Tape.
Jenna @ Rain on a Tin Roof says
haha! Mrs. FrogTape!
Jan B says
Wow!!! that is amazing and you make it looks so simple!
Can you do mine please! 😉
Thanks so much for your awesome instruction!
Jenna @ Rain on a Tin Roof says
I promise, Jan – it really is that simple!!!
Meg @ Green With Decor says
I love this! What a fun makeover!
Jenna @ Rain on a Tin Roof says
Thanks so much, Meg!
Amy Villicano says
LOVE THIS! I want to go find some furniture and repaint it all now!! we live in a travel trailer out in the country with plans to build a house within the next couple of years, and i am definitely coming back here when i’m ready to decorate!
Jenna @ Rain on a Tin Roof says
Thanks, Amy!! Your life sounds so cool!
Skaie Knox says
Hi Jenna!
Okay…so…I just totally LOVE this tutorial! I will definitely let you know how I use this technique! Hopefully soon, cuz it’s just too darn darling!
Awesome, girl!
Jenna @ Rain on a Tin Roof says
Awesome!!! Yes, let me see what you make!!!
Angie says
OH my gosh, that’s crazy cool!! Gotta find something to try it on!
Jenna @ Rain on a Tin Roof says
Thanks, Angie! I know – I want to plaid everything now!!
Patty says
Jenna, Jenna you flat out wore me down with all that taping. Then I get to come back and do it all again how many days in a row, Kidding this is so awesome I can’t believe how simple you make it seem.
Isn’t it amazing how that little skinny white stripe adds so much depth and brightness.
I went through my house looking for something I could practice on (you know something that belongs to my husband that I just hate,haha) not kidding.
I really do love this and I am going to try it, I think it would be so pretty in an office, den, man cave or in a male bedroom, or change the colors up a little and it could be cute in a little girls room.
you could use hot pink, pale pink, lilac, purple, white. I’m thinking of a table that would look good in anyone’s bedroom, periwinkle, turquoise, yellow, lime green, white. There are so many great color combos to go with any style age or sex.
Jenna @ Rain on a Tin Roof says
Ya know what, I almost didn’t add that white stripe – I am SO glad I did though. It really did add the perfect touch! Can’t wait to hear about how you use it – I do love the idea of using the pink and purples – that might be perfect for the Circus’ room!
Terri Hughes says
Beautiful job……I love it!
Jenna @ Rain on a Tin Roof says
Thanks, Terri!
nancy says
Can’t wait to try!! THANKS I hate to measure and always give up in frustration!
Jenna @ Rain on a Tin Roof says
Girl, me too! If it’s a lot of measuring, I usually end up having to call in the hubs.
DebraShoppeno5 says
This turned out fantastic.
Jenna @ Rain on a Tin Roof says
Thanks, Debra!!! I’m so happy with how well it worked out!
Wendy says
Jenna, You’re a genius! Your tutorial makes this look so easy, I can’t wait to try it!!!
Jenna @ Rain on a Tin Roof says
It really is that easy, Wendy! I couldn’t believe it myself!
Brigitte says
BRILLIANT!
Jenna @ Rain on a Tin Roof says
Thanks, Brigitte!
Kellie Smith says
Holy Mother of all thing Good and Plaid. You absolutely killed it with this. Wow! I love this!! Thanks Jenna!!
Jenna @ Rain on a Tin Roof says
Thanks, Kellie!! It’s one of my most favorites EVER!
Cindy diy beautify says
I’m a no-measure gal myself and this is a home run!
Jenna @ Rain on a Tin Roof says
Awesome, Cindy! No measure gals unite!
Beth says
Love this project! Your tutorial is excellent and does seem to be simple and straight forward. Thank you for sharing!
Jenna @ Rain on a Tin Roof says
It really is that simple, Beth!
creativejewishmom/sara says
Great job, looks amazing! thanks for sharing on craft schooling Sunday!
Jenna @ Rain on a Tin Roof says
Thank you!
sherry cole says
Hi Jenna! Your plaid pattern is my chosen feature for Totally Terrific Tuesday! This is so clever!
Jenna @ Rain on a Tin Roof says
That is just awesome! Thanks so much, Sherry!
Shirley Wood says
Something in my house is about to get plaided up! Great tutorial and I am so glad you shared it with us at Merry Monday!
Debrashoppeno5 says
This looks so fantastic. You have me eyeing a little table I have to make it plaid.
Shirley Wood says
We love your creativity! This post is a Feature at the Merry Monday party! Sharing on our channels.
Kippi says
That plaid project turned out perfect!!! Great results.
Laura says
I am planning on painting a mismatched assortment of wooden chairs & rockers for my Sun porch. All the chairs will be different patterns in Gray & white. Now my new favorite pattern will be PLAID! I think will be awesome with my other stripes & polka dots – what about cool idea, thank you so much for sharing!
Marilyn McCormick says
I had no idea there was such a thing as delicate surface frog tape. Thanks for that tip. You must be equal right-brain/left-brain operative to have planned this out and executed it so perfectly. I’d be worried about screwing it up on the last step and having to cover it all up with a final coat of black!