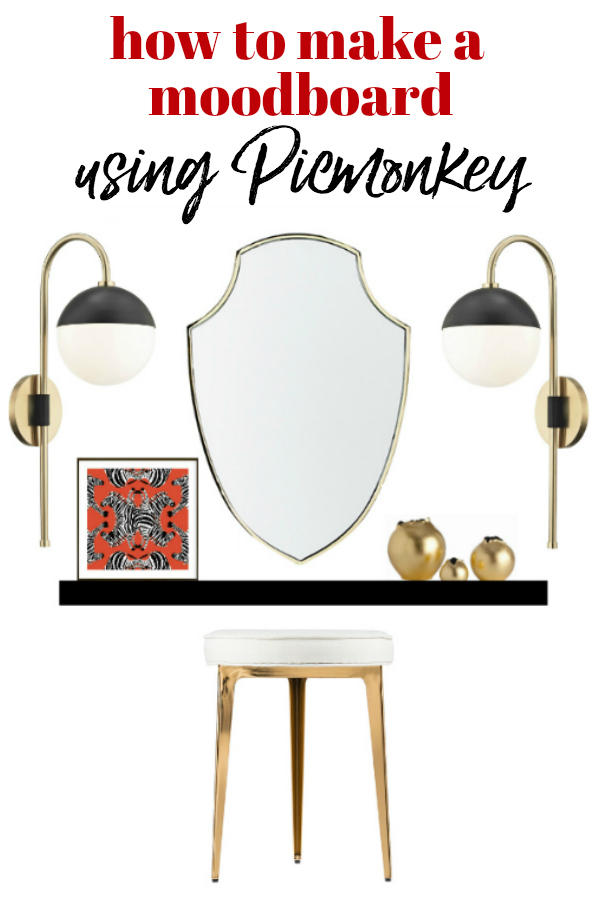
If you’re ready to get started on your next room makeover, then start with an inspiration board! Learn how to make a moodboard for your space below using Picmonkey – it’s so easy!
When I first shared the design plans for our master closet makeover, I got asked multiple times about how I created the moodboards / design boards for the space…

Like that one….

…and this one.
I had actually written a post a couple years back about making inspiration boards for room designs, but the online tool I used to use to create those boards is no more. Not a problem though – I had been using Picmonkey to make the boards before so I just went back to Picmonkey.
It’s really pretty simple to make these boards.
How to Create a Mood Board
This post contains affiliate links for your shopping convenience. Click here to read my full disclosure policy.
I find that tutorials like this are often easier to follow with a video. So, I made a video below that walks you through how to make a design board using Picmonkey. If you’re a still image tutorial kind of person though, I’ve also got step-by-step instructions with screenshots below the video.
You will need a Picmonkey account to make the mood boards. Accounts start at $8 a month and that basic plan is all you need!
Step 1
Before starting anything, pull all the product images you are considering for your space into a folder on your desktop.
Step 2
Go to Picmonkey. If you don’t already have a Picmonkey account, you will have to sign up for one. Unfortunately, it isn’t free, but it is only $8 a month. I have the $8 a month plan and it is plenty for me. I use Picmonkey all the time, not only for moodboards, but also for basic photo editing, creating collages, making the Circus’ birthday invitations and more.
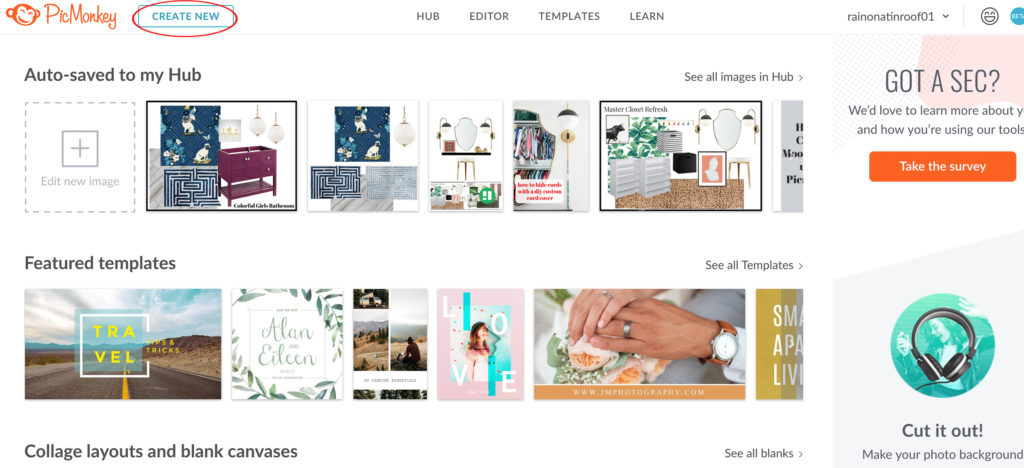
Click “Create New.”
Select “Blank Canvas,” then select a size. I typically go with a large horizontal size, like the 7 x 5 inch.

When prompted, title your image as desired.
Step 3
Click “Add an Image” then “Computer”.
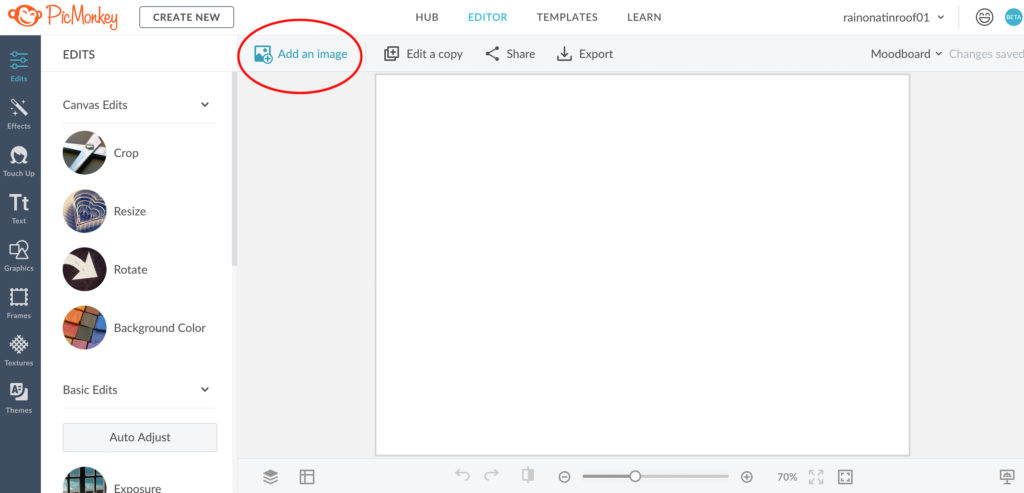
Select one of the products from your products folder.

Step 4
Move and resize the image as needed by dragging the corners on the image.
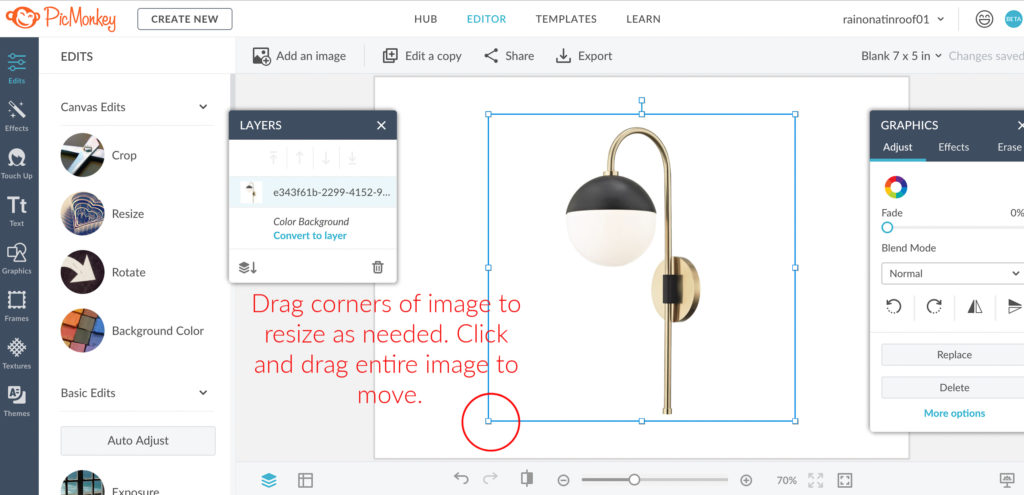
Add the rest of your product images by repeating Step 3 and 4 as many times as needed.
Step 5
Arrange the products as you wish. Click “Export” near the top to save your moodboard.
Helpful Tips
To remove backgrounds from an image, click on the image you wish to remove the background from.
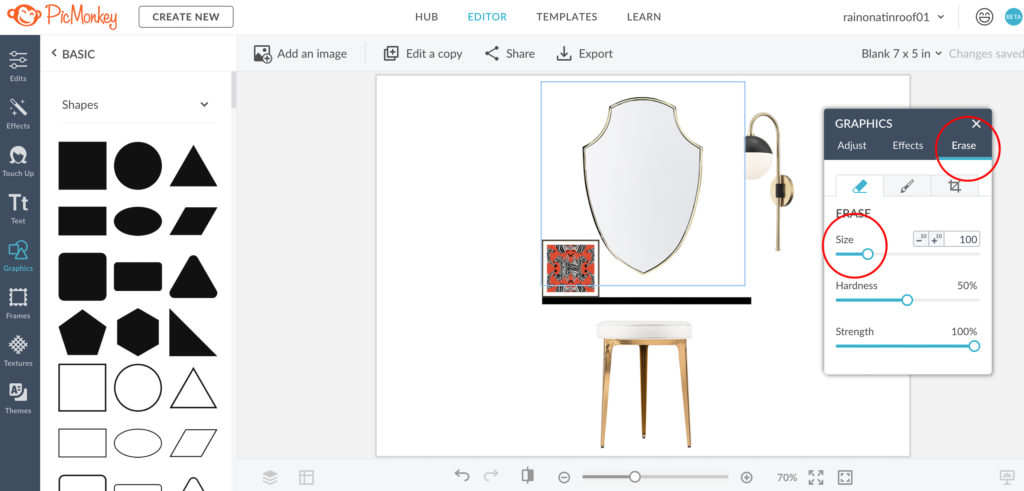
In the Graphics box that pops up, select “Erase.” Change the size as you wish. Drag the circle eraser over the image to erase the background as needed.

To duplicate images, click on the image you wish to duplicate. On the “Layers” box, click on the three little dots to the right of the image you want to duplicate, then select “Duplicate Layer” from the menu.

To flip images, click on the image you wish to flip. On the “Graphics” box, click the little graphic with two triangles.
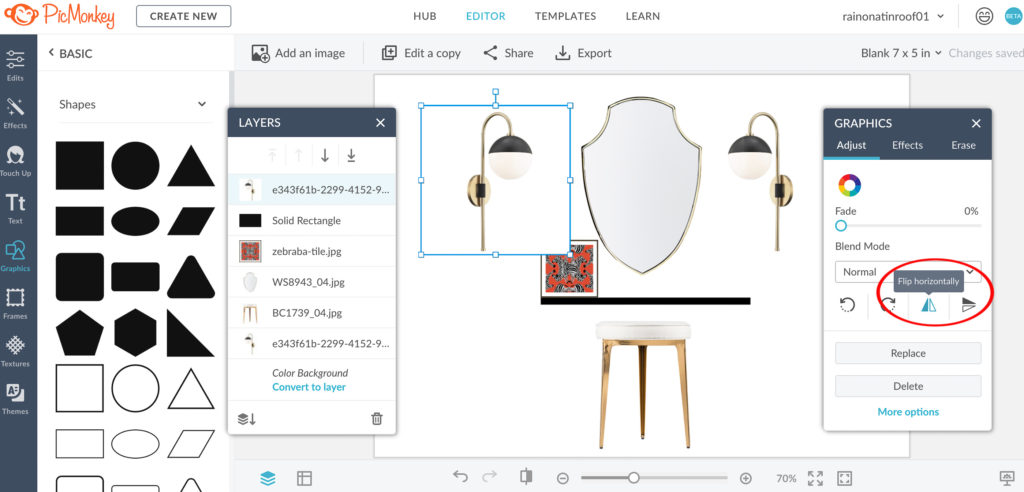
To move images forward and backward, use the two right arrows on the “Layers” box to move images back and forth as you wish after clicking on the image you want to move in the layers box.

That’s it! It’s really simple to do and once you start making your own moodboard, you’ll easily catch on.
Here are a few mood boards I’ve done if you need a little inspiration…
Colorful Girls Bathroom Design Board
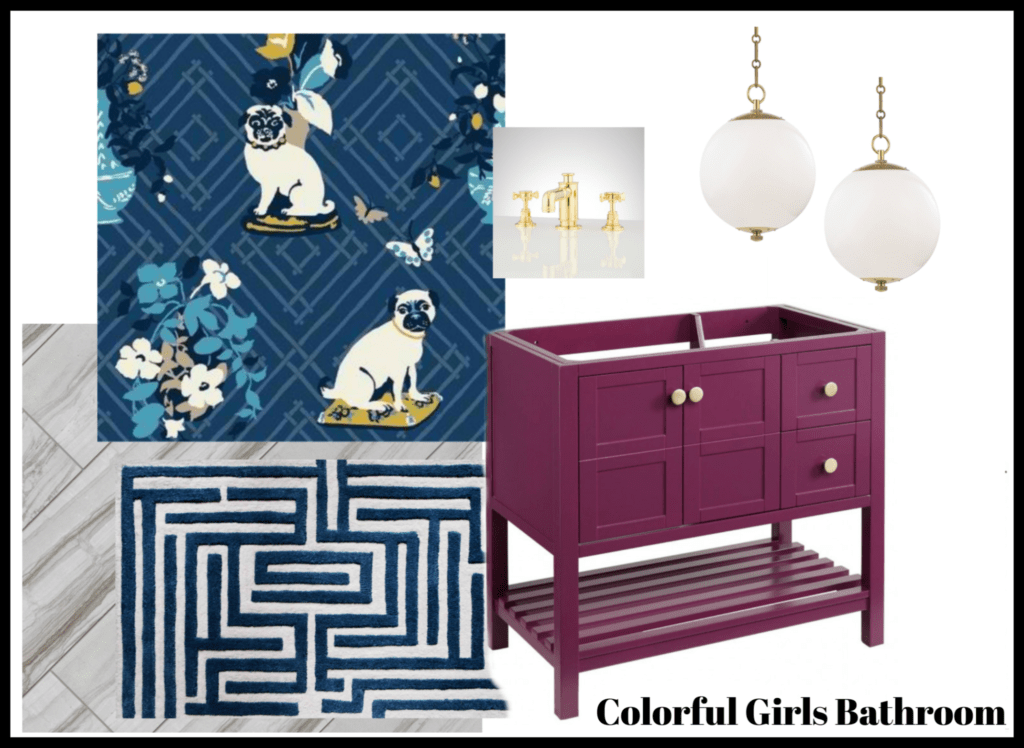
Tile / Wallpaper / Rug / Vanity / Faucet / Lighting
The Circus’ bathroom is on the list for a makeover! So far, this is what we have come up with. She picked out the wallpaper and colors and I’ve been working to bring it all together.
Traditional Modern Dining Room Mood Board
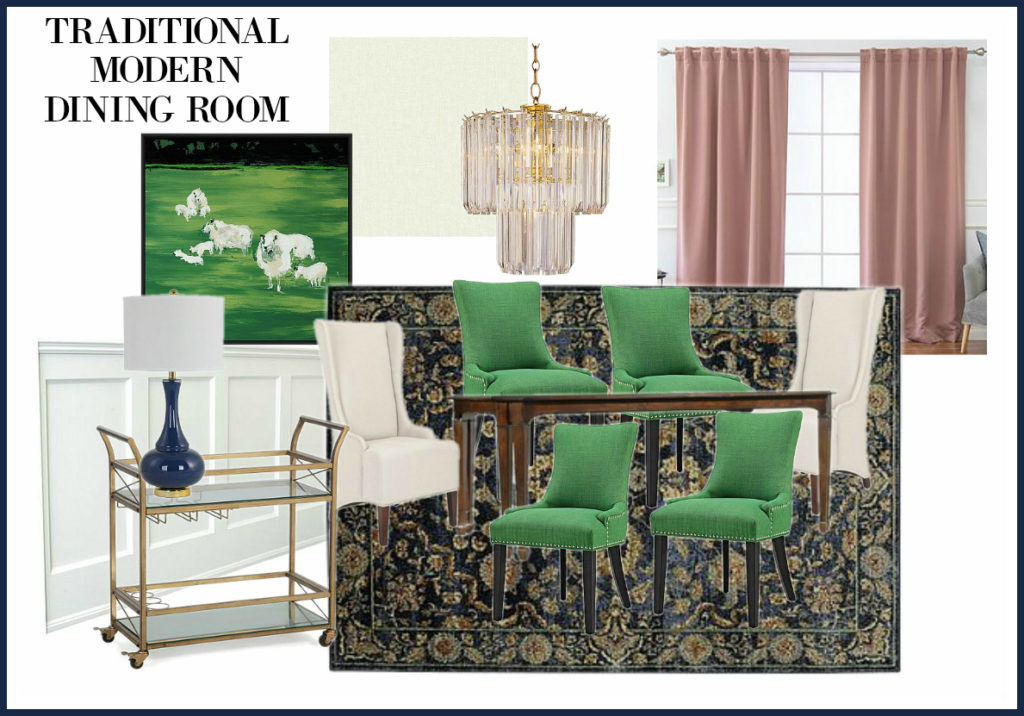
Rug / Green Dining Chairs / Beige Host Chairs / Table / Chandelier / Bar Cart
This is kind of what I have in mind for the dining room at the farm – traditional, but with a good pop of color.
Traditional Casual Living Room Inspiration Board

Rug / Ottoman (similar) / Sofa / Wingback Chairs
I made this inspiration board for our living room at the farm a couple years back. You can see how it turned out in real life HERE!
Traditional Casual Master Bedroom Moodboard

Headboard / Solid Navy Pillows / Dragon Pillows / Chandelier / Rug / Morning Mist Wall Art / Ivory Curtain Panels / Mirror / Lamp / Dresser
Another one from our farmhouse that’s still a work in progress – a look for our master bedroom.
What space will you be making a moodboard for?
If this post was helpful, you might want to see these too…
Free Printable Project Planner for Room Makeovers – this will help keep you on track!
How to Coordinate Paint Colors Throughout Your House – it’s actually really simple with this little trick!
How to Find the Best Contractor for Your Renovation – learn what to look for and what to ask for and don’t let the same thing happen to you that happened to us!
How I Buy Fabric Online Without Seeing It in Person First – buying fabrics online can often be much cheaper, but is a little less stressful since you can’t see them in person. Here’s my trick for buying fabric online without the stress!
Join us on social media:
Facebook | Instagram | Pinterest | Twitter

Amy says
Am I missing the video or is the video missing? Thanks for sharing your talents!
Jenna says
The video is a couple paragraphs under the “How to Create a Mood Board” heading. If you have an ad blocker, you’ll have to turn it off to see the video. Let me know if that doesn’t work!