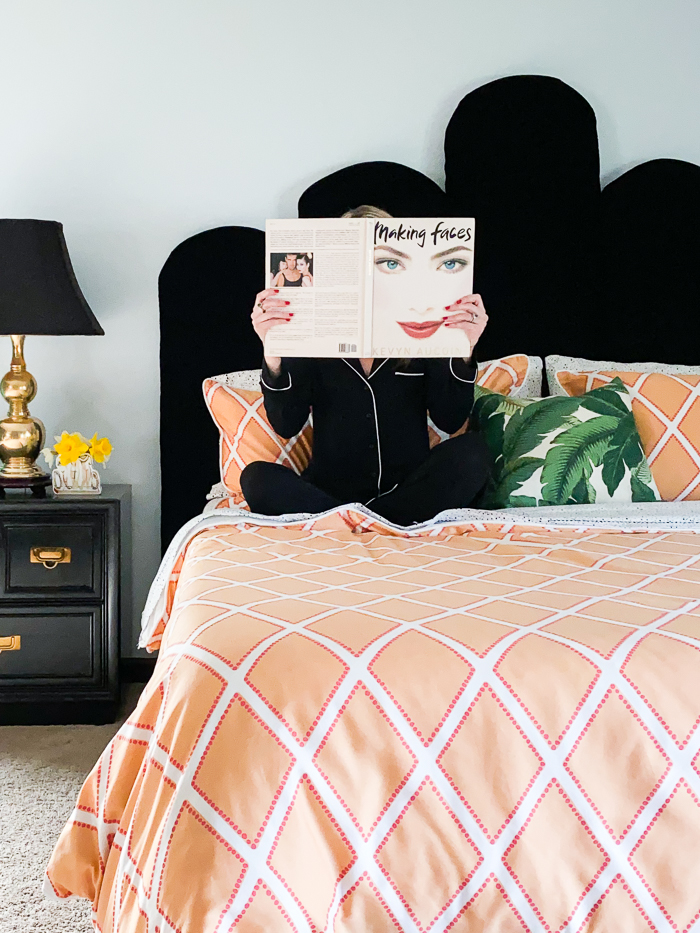
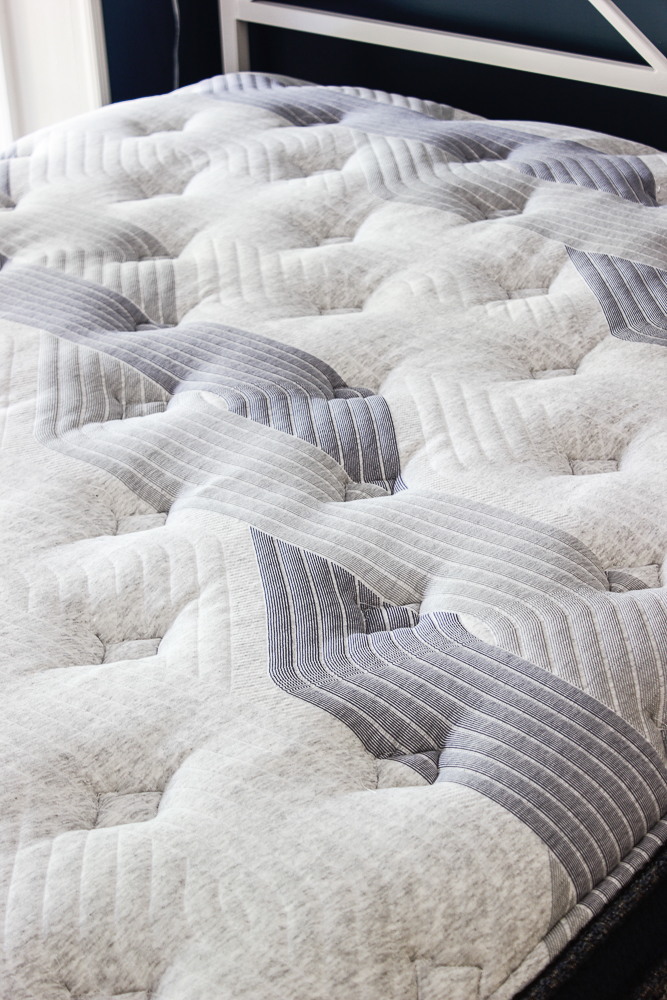
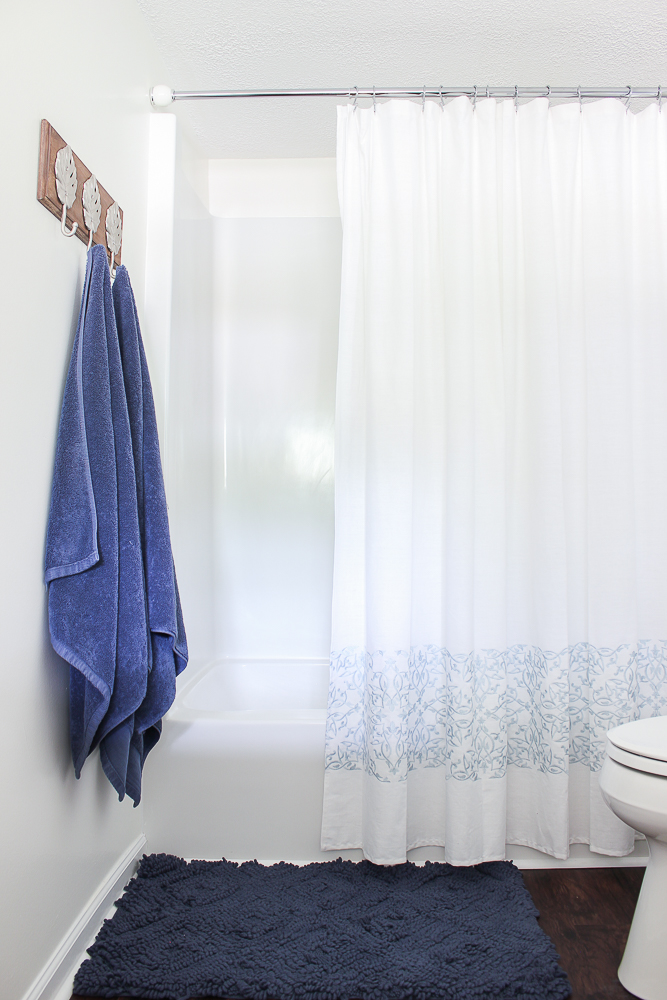
Last year, when I gave our master bedroom a refresh, the Circus fell in love with our new bedding. She absolutely loved how soft and cozy it was. Anytime she could, she curled up in our bed to watch T.V.
Needless to say, when we started chatting about her room makeover, she asked for bedding like mine.
And while she didn’t get the same design and color as my bedding, it did come from the same place and she loves it just as much as mine – and probably more since it’s all hers!
Disclosure: Crane and Canopy provided the bedding for this space. However, all opinions are 100% mine.
The berry color coordinated well with the purple color in her confetti wall as well as other splashes of purple throughout her room. It also worked with the pink color on her other three bedroom walls too.
The duvet cover is perfect for kiddos because it comes right off the comforter for easy washes. It has interior corner ties as well though to keep the comforter in place while it’s in use – no more comforter going to the bottom of the duvet cover!
I think the tiger approves as well, but I’m not sure if he’s cool with the party hat yet. Isn’t that little confetti pillow the sweetest? One of the vendors at my store made it for the Circus when she found out she was doing a confetti wall in her room. It’s the perfect way for bringing the confetti wall and bedding together!
Want to break away from the usual wall decor and stay on budget? These wall decor ideas are super affordable – you’ve probably already got a few laying around your house!
Monday was a sad day in our house. Well, a sad day for Mama but a happy one for the Circus. We said goodbye to the adorable little text and object wall in her room.
She’s been talking about a room makeover for the better part of a year now and it’s finally coming to fruition for her. Alas, the vision she has for her new room doesn’t include a wall all about her. Instead, she envisions a confetti wall there.
While the wall is here no more, it will always be one of my favorite projects and one of the most unique ones I’ve done as well. Planning her room makeover and the design for The Loft at Local Depot has had me thinking out of the box for wall decor. Here’s a few of my favorites I’ve done in the past. The great part about these wall decor ideas is that you probably already have what you need for some of these laying around your house – so they are going to be especially unique to you and cheap too!
8 Unusual Wall Decor Ideas
Text & Object Wall
Since we’re in mourning this week over the loss of this wall, let’s start with it…
This wall was made up of vinyl lettering and objects. In the place of some words, I replaced the word with the actual object – like a horse or tutu. The whole wall was about the kiddo and her little personality. The complete how-to for the object and text feature wall is here.
Special Mementos
In the den at the farm, I used quite a few special little things to decorate the walls.
I have the center piece from my Pap’s truck steering wheel mounted in a frame and his belt below it.
On the opposite wall, I hung Grunt’s grandpa’s service hats.
The kitchen wall at the farmhouse is full of treasures – one of my favorites though is this paddle that my Grannie got when she retired. See more of the farmhouse here – it’s filled with lots of treasures.
Things they’ve outgrown…
Our laundry room also doubles as a mudroom / pool room, so we went with a swimmer theme and bright colors in here. I framed my daughter’s first swimsuit for this space and it’s one of my favorite things in here!
Hang Baskets on the Wall
Another trick I use in my laundry room / mudroom – vintage metal locker baskets on the wall! These are perfect for corralling sunscreens and pool toys and look good while doing it. There are lots of other laundry room – mudroom ideas here. I also used baskets just like this once to create wall storage for cookbooks in my kitchen.
Travel Souvenirs
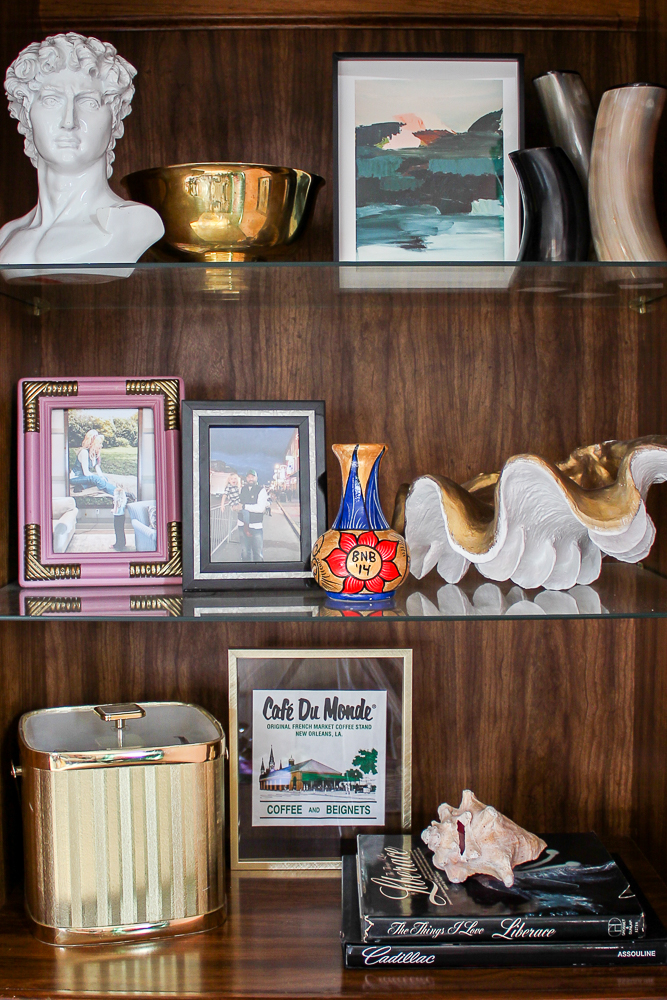
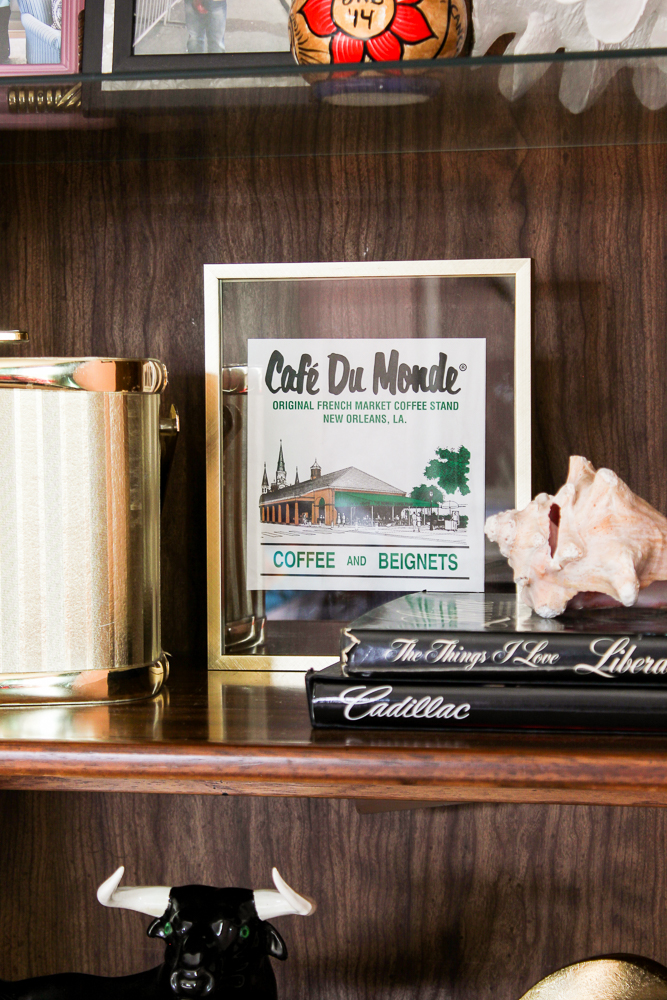
Y’all know part of my heart is in New Orleans. One time when we visited, I got an extra bag from Cafe du Monde and framed it – super cheap and it always reminds me of good memories made in NOLA.
When I redid my office, I really wanted a special reminder of my Pap in there. Something I could look up at when I was stressed or ready to give up that would remind me to pull it together and saddle up. I pulled out some cards he had given me and scanned in his signature and where he had written my name, then printed them out for wall art. You can also see more of my budget-friendly office makeover here.
What kind of unique wall decor have you guys done before? I’m off to continue work on a colorful confetti wall!
Look at me with another new post this week! I’m trying hard to get on a regular schedule. Crazy enough, I think the kid being all virtual right now with school is actually helping me get some posts written. While she’s doing her zooms, I’m working on my computer in the other room. Now, getting physical hands-on projects done, well………..that’s another story.
I’m so excited to tell y’all about this new project of mine! If you didn’t know, my store, Local Depot, is in a two story building. I bought the building and while the first floor has been working hard this past year housing the store (if you’ve been in, you know that I utilize just about every square inch of that floor space!) , the upstairs has just been there…
Don’t be fooled – it wasn’t looking like this most recently. It had become a catchall for extra inventory, display pieces, etc. The image above though is what it looked like when I first bought the building.
We threw around multiple different ideas for this space. It’s one big open space with a bathroom and plumbed for a kitchen. Making it an event space was a big contender, however the only way to access this space is by stairs (which is a big flight of stairs) and ultimately, I felt those stairs would rule this space out for a whole lot of events due to the fact that it’s not handicap accessible.
Creating an AirBnB up here kept coming to the front of my mind though – so that’s what we’re doing!
And because I’m apparently a huge alliteration fan, we’re calling it The Loft at Local Depot. Ready to hear all the plans for it?
The Loft at Local Depot: The Plan
This post contains affiliate links for your shopping convenience. Click here to read my full disclosure policy.
The general design is a mashup of Industrial elements, with splashes of red and blue Americana touches and a smidgen of Mid Century. It may sound like I have no idea what I’m doing (and one could argue that I usually don’t have any clue I’m doing….) but in my head, I do see all this coming together to form a unique space that folks will hopefully love to stay at over and over again.
The loft is one big open space, with the exception of the bathroom. You saw one end of the space above and here’s a shot of the other end of the space…
That end you see will eventually have a kitchen on the left and then the bathroom is there on the right. So let’s talk design details….
Flooring
Probably the biggest change coming to this space with the exception of the kitchen, is the flooring. This place was clad in some not-so-lovely commercial carpet in a lovely shade of, I suppose I could refer to it as dreary day gray. Originally, I had just planned to rip up the carpet, sand the plywood subfloor below and stain it. But like divine intervention, Select Surfaces who I worked with on my mudroom makeover last year, reached out and asked if I had any place where I could use their new line of SpillDefense Laminate flooring. Well, what kind of flooring could be better for an AirBnB than SpillDefense?! On top of that though, we have been so pleased with the Select Surfaces flooring we put down in our mudroom. Grunt Labor sings its praises to anyone who asks him about flooring.
After ripping up the carpet that was glued to the carpet pad and then the carpet pad that was glued to the floor (which took days and days and days), we were good to lay the flooring. We went with the Cocoa Walnut in the SpillDefense. It has a gorgeous hand-scraped finish and color variations to make it look like the real stuff, but with that durable spill protection! Install went fast. The whole 2000 sq ft. was laid in just a couple of days. The flooring was able to be installed right on top of the plywood subfloor and was a simple tongue and groove click together install. I’ll have another post coming up with more details about the install.
Walls, Trim and Color Scheme
There’s a whole lot of wall space up here. With the exception of one small accent wall, which is painted gray, everything else is painted white. And it doesn’t really need a paint job at the moment. So rather than paint 16 ft. tall walls, we’re going to embrace the white and dress it up by focusing on accent colors and patterns. The whole space needs new baseboards so we’re going to bring a punch of color to the space with those by painting them navy. The stairs will get the same navy hue – I’m super excited to see how that plays out!
As you can tell from the design board, we’re bringing in lots of red, blues and green – a touch of Americana, but not too 4th of July even if it is my favorite day of the entire year. I think it should all work well with that Industrial vibe we’ve got going too.
Sleeping and Living Spaces
Like I said earlier, this is one big open studio style space. I do plan on bringing in some unique room dividers to divide up the spaces. There will be a master bedroom area with a queen size bed and two sets of bunk beds – plenty of space for a whole family to stay or for a few friends to enjoy a weekend together.
I’m still trying to find a good sofa and side chairs to work for this space. I have come across some that could work, but they didn’t scream YES!, so I’m still on the hunt. I have been really lucky in finding some great decor accessories (like vintage automobile prints similar to those above!), coffee and side tables and even a bar with barstools in my thrifting trips!
Then of course, there’s the kitchen. I have some ideas and some great industrial pieces for creating a really unique kitchen vibe – I just have to sit down and do some measuring and planning – stay tuned for more details on that as well!
Last Thursday my computer screen kicked the bucket. It decided to taste the rainbow and become a series of colored stripes going all down my screen. For someone who works from home, this was of course, a bad thing. For someone who works from home with already high anxiety issues, now has her husband working from home too and her kid being homeschooled now as well, it was the tipping point.
It had already been a stressful week and that screen sent me into the inevitable downward spiral that I knew was only a matter of time.
I think many of us might find ourselves in a similar situation during this weird time, right? None of this is normal. Most of us have never been through something like this before. It’s stressful. We literally have no idea when this thing could be over.
So I took that broken computer screen as a sign and checked out. I cleaned out a few closets, the kid and I resurrected her old playhouse, I binge watched some TV, and perused Pinterest for pretty spaces.
$600 and one week later when my computer screen was fixed, work was still there waiting on me. But nothing was as daunting as it had been because I had taken my cue and gave myself a little grace for a while.
So friends, if you need a break, take the damn break. It’s certainly ok to be completely non-productive for a day, three days, a week if you need it! This is new territory and there are no “rules” for how to cope with it. Do what works for you.
All that being said, when you feel like you need to take a break and maybe see a few happy spaces, I’ve got a list of ten fabulous bloggers for you to get to know during this somewhat of a “staycation.”
10 Bloggers to Fall in Love With
The Aspiring Home
Joy, the voice behind The Aspiring Home, has always been a big believer in family and home. She makes gorgeous spaces happen with budget in mind. Her blog is based on a simple truth, that a house becomes a home when it has roots and a family thrives if it’s members have wings and freedom to live out their purpose. Joy aims to help her readers make a home that is both a haven and a launching pad which reflects their own passions and interests in a bright, bold and beautiful way.
A few of Joy’s gorgeous spaces: Eclectic Modern Studio Apartment Design: I’m usually not a big fan of lots of modern design, but I love how Joy pulled in color to even out the modern here.
Backyard Pool Makeover: Personally, I think Joy should have us all over for a pool party after this whole pandemic is behind us. You will too after you see her backyard!
Nick and Bethany Sy are the creative free-spirits behind DIY/Lifestyle blog, Reality Daydream. They recently purchased a historic mansion (yep, for realz and you won’t believe it!) and have been documenting the ups and downs of renovation and making this home their own… all while sharing tips and tutorials along the way! When they found themselves in the trenches of infertility, they started a journey that would prove to be their most important DIY project ever, and have 3 beautiful girls to show for it.
A few personal favorites of mine from Nick and Bethany: Living Wall Vertical Planner: A super creative way to go vertical with plants indoors!
The New House Story: Do not miss this one, folks! I love watching them transform this home.
Stained Art: These two are incredibly talented at staining. And by staining, I mean taking wood stain and a piece of unfinished wood and turning it into a true work of art. You won’t believe this one.
Craftivity Designs
Lora, of Craftivity Designs, seeks to create a home that is simple, functional, and beautiful. As a busy mom, she knows that creating a beautiful home isn’t just about looks. Rather, a home is created by the stories of its homeowners and the families who raised them. A home should tell those stories, and be practical for everyday life.
Don’t you just love Lora’s thoughts on home? Here’s some of her best work: Modern Cottage Home Tour: Again, I’m not usually a huge modern fan, but I love how Lora has done it in this cottage.
Vintage Laundry Room: You must see these drop dead gorgeous green cabinets in here.
German Schmear Brick: I love this technique for making over brick and Lora did a killer job on her fireplace – it’s such a huge transformation.
Birdz of a Feather
Birdz of a Feather is the nesting place that brings together hands-on DIY home and garden renos, crafts and gluten free recipes. Sara’s on a mission, along with her husband (her ‘partner in grime’) to encourage you to feather the nest, one room at a time! A few years ago, Sara challenged herself to lead a more sustainable life by reusing items – whether thrifted, repurposed or kicked to the curb – in new and innovative ways. She never turned back. While some people eat tuna for lunch and recycle the tin, she’s dreaming up ways to turn those tins into a swing out storage tower!
A few of Sara’s best upcycles and hacks: Old Sewing Machine Makeover: You will love the colorful spin Sara put on this!
Guitar Planter: They should have these on every corner in Nashville! So gorgeous and so creative!
Blue Jean Planter: This girl is a whiz at planters and this one is the cutest one yet!
Dimples and Tangles
Many of you may remember Jennifer of Dimples and Tangles from when I’ve joined in on home tours she’s hosted. I’ve always admired her style and her talent for mixing patterns and colors. She has always said that her home is her hobby. She enjoys sharing whatever current project she’s working on with her readers, whether it’s a DIY project, tablescape, room makeover, recipe, travel report, or her latest favorite fashion find. She finds value in inspiring others to be creative in their own homes and to try new things. Her style is grounded in traditional elements but livened up with a strong dose of bold color and mixed patterns and she loves to transform thrifted and second hand pieces to make them her own.
Some of my favorite posts from Jennifer: Jack and Jill Bathroom Reveal: She just posted this a short while back and I am still drooling over it! The prints and colors she chose are stunning!
Dining Room Makeover: If you want to see unexpected colors and prints mixed beautifully, then don’t miss this room.
Tag and Tibby
Julia is the designer and founder of Tag & Tibby: a website dedicated to DIY home projects, organization ideas, paint colors, and home related craft projects. She enjoys inspiring readers to improve their home on a small budget. Her style is a eclectic with a blend of vintage, mid century, modern, and global.
Jess is the fearless interior designer & mama behind Jessica Welling Interiors. She loves to create fun, family-friendly spaces on a budget. Her modern, colorful, plant-lovin’ style comes through in everything she does- from letting her kids help draw the faux wallpaper in their bedroom, to stenciling her fireplace tiles.
Some of Jess’s most killer projects: How to Paint a Mural: This mural that Jess did in her bathroom is so pretty!
Outdoor Living Room Reveal: ‘Tis the season to start sprucing up those outdoor spaces. I love the coziness this outdoor living room has.
Jennifer Rizzo is a Design/DIY/Lifestyle blogger who also loves also throwing in a bit of crafting and gardening. She believes in decorating your home with a mix of handmade, vintage, upcycled finds, and family heirlooms so your home reflects you. She loves mixing old and new and will paint just about anything. She hopes to inspire you to create your home, and craft your life to design a home you’ll love.
Jennifer has been around the blogging world for a while, so it’s hard to decide what her best projects are – her site is a gold mine really! Here are a few favorites though: Free Abstract Art Printable: Jennifer makes beautiful art and she is giving this one away for free. I adore it.
Corinna is the the author and creator behind The Boho Abode where she loves creating beautiful bohemian interiors designed for living in. She is a free spirited, nature loving, eco friendly products, globally sourced goods admirer and advocate for fair trade kind of gal. She hopes to inspire others to create change in their life through decorating ideas, life tips, and recipes for a life of wellness.
Corinna’s style truly embodies that colorful boho style. Here are a few of my favorites from her: 15 Simple Ways to Enjoy Being Home: We need this one right now, eh?
Boho Bedroom: love the punches of color she added to this space.
Casa Watkins Living
Stephanie is the owner and author behind the home and lifestyle website, Casa Watkins Living. Stephanie loves to create spaces and crafts that are full of color, have a modern bohemian inspiration infused with global flair, and have a plant or two….. or more! Her appreciation for worldly cultures drives her design and inspires unique spaces that show global style with respect to the culture. This creativeholic hopes to inspire you to create spaces and complete diy projects to make your home they way you’ve always wanted.
Stephanie kills it on the global style front. I am always in awe of her work. Here’s a few faves: Modern White Bohemian Kitchen: You will not believe the drastic difference between this before and after! It’s stunning.
How about a little bright and cheery amid all this madness, huh?
I’m usually not much of a Facebook scroller, but over this past week or so, I found myself on there a whole lot more. And let me tell ya, it just wasn’t healthy. Upon coming to that realization, I got off Facebook and started perusing Pinterest more than I have before. The beautiful rooms and creative ideas there were a much needed distraction.
And so today, myself along with lots of other bloggers are bringing you some pretty distractions of our own!
If you’re popping over from Pender and Peony, welcome! Katherine’s Grandmillenial style is quite colorful and beautiful. And if you don’t know what grandmillenial means, don’t feel bad, I didn’t either. I had to look it up! Essentially though, Katherine’s blog is grandmillenial at its finest.
In the interest of keeping everything bright and cheery, for my tour today I’m sharing images from some of my most colorful spaces. While I love my moody black living room and dining room, I wanted to keep things brighter today.
Pink and Green Mudroom
It’s a little Palm Beach. It’s a little Eclectic. It’s a whole lot of colorful.
I just gave my master bedroom a much needed refresh! I fell in love with this citrus bedding and was intent on keeping those kelly green curtains in the space. The conundrum was what wall color to use with the two colors – baby blue to the rescue!
This is my daughter’s bathroom that we recently remodeled last fall. It went from gray and drab to a boho eclectic wonderland perfectly fit for my girl.
Our laundry room is actually one of the most fun rooms in our house. It works overtime in the summer; it’s the main point of entry and exit to and from the pool. Thus why swimmers simply had to be included here.
I’ll leave you with the one and only Dolly. You might want to add these songs of her’s to your playlist. They are pretty great at brightening up a dreary day and getting you through any rough patches:
Light of a Clear Blue Morning Better Get to Livin’ Two Doors Down Eagle When She Flies Red Shoes
The next tour in the lineup today is Diana Rose Spier – you will love her colorful take on classic style! I certainly do! See the full tour lineup below.
Follow on social for more colorful decorating ideas:
Now is a great time to be super productive at home, right? You’ve got unexpected time there and rather than worry constantly or veg out on Netflix all day, why not use that time wisely and even try to have fun with it?
No doubt, everyone’s biggest concern right now should be their own health and the health of others. As I said in my post on Tuesday, we can combat that most effectively and do the most good right now when we stay at home.
Keeping all that in mind, I’ve created a list of crafts, DIY projects, decorating ideas, curb appeal projects and even a couple cleaning tips to fill your time at home right now.
The materials needed for these projects can all be ordered online and delivered straight to your door! However, I’m willing to bet many of you already have lots of these project supplies on hand already. Like electrical tape, construction paper, scrap fabric and other similar items. I’m right, aren’t I? I knew y’all were craft supply hoarders like me. 😉
Crafts and Home Projects to Beat the Boredom
This post contains affiliate links for your shopping convenience. Click here to read my full disclosure policy.
Get Crafty
Some of these are perfect for kids!!
Have the kids help with these Easter Bunny Vases. Guess what? Easter isn’t canceled! Everything to make these cute little simple bunny vases can be ordered online – I’m willing to bet you also have most of the supplies on hand though! Follow that link above for the supply list and tutorial.
Use electrical tape for nothing it was ever intended for. I’m willing to bet you’ve already got a roll of electrical tape lurking around in your garage, toolbox or maybe a junk drawer. Am I wrong? Here are seven simple, cute crafts that use electrical tape. The kids will have fun with some of these too!
Duck Tape Crafts. Speaking of tape, every American should have a roll or two of duck tape stashed away, right? Here are 20+ duck tape crafts for adults and kids to do.
Hide wall sconce cords in style. If you’ve got even just a piece of pretty scrapbook paper, wrapping paper or wall paper hanging around and a touch of Mod Podge, the only thing you’ll have to order to disguise cords in style is this basic cord cover which is the base for this project. Here’s the tutorial for how to hide cords in style.
Make beautiful silhouettes of your family. What better time than now to make silhouette portraits of your kiddos? If you’ve got black construction paper on hand, you’re ready to go! If you don’t, order some here, then use this tutorial for DIY silhouettes. This one would be fun for the kids too – let them make your silhouettes!
Make faux crystals. And then turn them into magnets, lamp finials and more! The faux crystal tutorial is here and links to everything you need!
Make mason jar lanterns. Another fun one for the kids to get in on here. I made glitter mason jar lanterns, but you could also use craft paint for yours! And they don’t have to be lanterns, they can be vases, pencil holders or fill them with citronella in the summer for bug repellant!
Make pretty finials for your lamps. These agate slice lamp finials are incredibly easy to make and in my opinion are the icing on the lamp.
Make a bottle lamp. If you have a cool old bottle lying around (or say you polish off a bottle of Jack during this time 😉), you can easily turn it into a lamp with a bottle lamp kit you can order online. Follow this tutorial for how to make a lamp out of a bottle to put it all together.
Makeover a piece of furniture. Have the paint shipped straight to you! My favorite furniture paint, Velvet Finishes will ship their paint and other furniture painting supplies straight to you. Velvet Finishes is also a small business so you’re helping to support them during this tough time. If you’re a newbie to the world of painting furniture, I’ve got lots of tips, tricks and info for ya on my Painting 101 page. If you’re an old pro at painting furniture, maybe one of my previous furniture makeovers here might inspire your next project!
Paint an accent wall. For this accent wall, all you need is a sample pot of paint. Did you know that you can order sample pots online, but I’m willing to bet lots of you will already have a sample pot or two just hanging around.
Switch out your handrail. Ditch the dated handrail for a glam and modern lucite handrail. You can order everything you need, rail included, and have it delivered straight to you. Bonus – the acrylic rod for the handrail comes from a small business!
Give your countertops a makeover. Order a can of chalkboard paint and you’re halfway to creating faux stone countertops.
Refresh and Update Home Decor
Refresh Your Bedding. Did you catch my recent bedroom refresh? The pink walls are gone, replaced by blue and the bedding is begging for spring weather to arrive!
Update and/or Add in Color with Runners. Bring a little more interest and pattern to your flooring by throwing down one of these cheap runner rugs. All are less than $30.
Switch out your pillows. Freshen up your throw pillows with one of these affordable pillow covers. Available in all sorts of colors, patterns and prints. P.S. That list links to lots of pillow covers on Etsy which equates to supporting more small businesses!
Make a design plan. Once you’ve got those fabrics chosen, here’s how to make a moodboard to plot out your entire design.
Have fun accessorizing. Not with your daily outfit, but with your home decor! Trade out accessories in rooms, pull out treasures you’ve had stashed away. Mix it up and have fun! Here are my tips for accessorizing a space without over accessorizing.
Work on Your Home’s Curb Appeal
Install or replace old dated shutters on your home. Simply measure and order online. These are the ones we put on our house a couple years back. Here’s a guide for how to hang shutters on brick.
Did you know today is National Sleep Day? I didn’t know there was such a thing until my friend Camila said, “Hey, wanna do a sleep day blog hop?” Yes, girl! And so here we are. Fourteen of us are sharing our bedrooms all refreshed for spring and ready for national sleep day – in hopes we’ll actually get some extra sleep today. 😉
I knew the pink couldn’t stay forever.
Let’s be honest, there aren’t a whole lot of guys out there who would prefer a bedroom with pink painted walls. Heck, there aren’t many guys out there who would let their wives even think about painting their bedroom walls pink.
I’m pretty damn lucky folks. I really hope you’re that damn lucky too.
All that being said, I did know the pink walls in my master bedroom wouldn’t stay forever. I knew Grunt wasn’t crazy about it, but it was just something I guess I needed to do to prove to myself I could paint a wall pink and make it work. When the opportunity to join this bedroom blog hop for National Sleep Day presented itself, I knew it was a good time to freshen up the bedroom and paint over the pink.
Thanks to Crane and Canopy for providing product for this bedroom refresh. All opinions are 100% mine.
This post contains affiliate links for your shopping convenience. Click here to read my full disclosure policy.
Ok, the citrus may not be all that masculine, but it’s balanced out by the blue walls, green curtains and black accents, no? Just say yes, folks. Just. Say. Yes.
The only things I changed in here were the paint, bedding and lampshades.
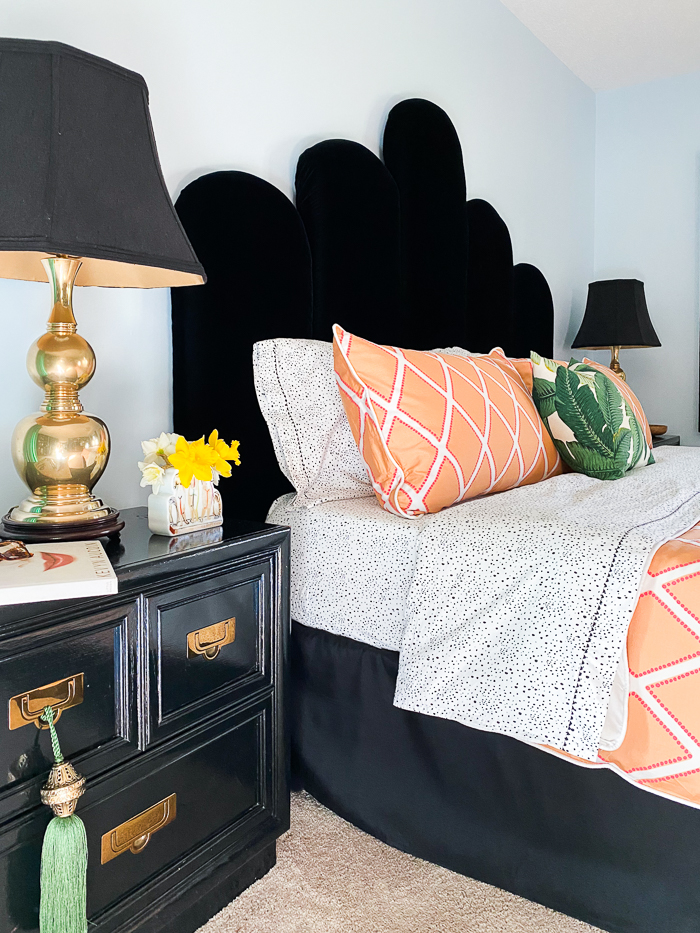
I chose the bedding first; it’s The Avery Citrus from Crane and Canopy. To be honest, I’m not usually much of an orange person. But I was looking for bedding that would still work well with my black velvet headboard and when I came across this set, I was like, ‘hmmm…what if…’ and then I showed it to Grunt and much to my surprise, he was like ‘ok, I can do this.’
It’s a duvet cover, so it can easily be taken right off and tossed in the wash. I love the bright pop of color it brings to the room and the classic diamond pattern will quickly date.
I got in on a little more pattern play with the black and white dotted sheets. Grunt did doubt me on these at first, but once we tried them against the other two solid options, he was sold on the dots.
I switched out the bedskirt as well. I opted for a black one to go better with the headboard and to also contrast and keep the bedding popping over the whole bed. For less than $9, the bedskirt packed some bang for my buck.
Same nightstands as before – I love these and have no plans of quitting them anytime soon. I just embellished one the drawers with a green tassel that pulls a bit of that green from the drapes over into this space.
We’ve had the lamps for a couple of years now. They were Grunt’s grandparents and I absolutely adore these lamps. They polish up beautifully. As luck would have it, I happened upon those great black shades at a thrift store last week and snagged them. I wasn’t sure if they would work better in here than the previous beige ones, but I think they do and Grunt said he likes them better as well.
I actually had no idea what color I would paint the room until the bedding got here. I was holding paint chips against it, the curtains and the headboard. All I knew was that I didn’t want to go gray or white on the walls. I had a wild thought to try blue and it worked! The exact color is Permafrost with 220 drops of white added to make it a touch lighter.
The oversized palm art print still worked perfectly for this space. We made that huge diy frame for it for about $20.
I think I actually fell in love with this light fixture all over again after painting the walls. Maybe it’s the fixture paired with the blue, but I think I love it even more than before.
On the wall opposite the bed, I was a bit worried as to how well the blue would butt up against the black and white diamond accent wall. However, I think it turned out great and I now have a new love for a baby blue, black and white combination. In fact, it might be a new favorite triple threat.
Of course, it’s always best to celebrate National Sleep Day with a new pair of cozy pajamas, no?
This Layla Pajama Sleep Set from Crane and Canopy might be the comfiest pair of pajamas I’ve ever owned. And Grunt will tell you, I own a lot of pjs. These are the absolute softest pajamas ever. You can even get them monogrammed if you want. I had a great aunt I never knew, Treva, who I’m told lived in fancy pjs by day and furs by night. They say I’m a lot like her. I think Aunt Treva would approve of these pjs. 😉
You won’t have to compromise on style to stay on budget with these runners. Here are 18 (gorgeous!) cheap runner rugs to choose from that are all less than $30!
I think rugs are a great way to not only bring style and pattern to a space, but to also cozy up a room. Whether you’re layering a rug on top of hardwood floors or a solid carpeted room, it instantly makes it feel a little more like home to me.
The problem, as many of you may well know is that rugs can be expensive. Sure, we all expect larger area rugs to be more expensive, but when I went looking for a runner rug or two to go in my kitchen and hallway, I was baffled by how expensive some of them were. The thing with runner rugs is that they are often placed in high traffic areas – like my kitchen and hallway I just mentioned. And so, they often get dirty faster than larger area rugs. Who wants to spend $100 or more on a rug that is going to see that much foot traffic? Not me!
Therefore, I made it my personal mission to find affordable runner rugs.
I’ve gathered eighteen runners in all styles and colors and they are all under $30.
Full disclaimer now, each of these was $30 or less at the time of me writing this post. Don’t go blaming me if they’ve increased by $5 or $10. While I wish I could control the pricing of such items, I am but a girl with absolutely zero connections to that industry. 😂 I will try to update this post as needed to reflect new affordable rugs.
This post contains affiliate links for your shopping convenience. Click here to read my full disclosure policy.
Cheap Hallway Runners
Many of these come in multiple different colors, so if you like the style, but not the color, click over and see what else they have. If you’re in the market for an area rug for your living room or even kitchen / dining area, many also come in larger sizes as well and are still affordable.
I bought this runner for our guest bedroom. It’s simple, but classic pattern works well in there and it’s thin enough that I can throw it in the washer.
I love this green rug – such a beautiful color. Not sure I’d like it in a big area rug, but I love it for a runner. More saturated colors available too.
A bright and colorful DIY mudroom makeover that brings the outside in!Featuring gorgeous lattice walls, bird wallpaper, pink and green hues and more!
While J. Lo worked her scantily clad 50 year old rockin’ body during the Super Bowl halftime, my 34 year old body, clothed in dirty sweats and embellished with numerous traces of paint, was sprawled out on the sofa engorging myself on chocolate ice cream.
Nope, not even J. Lo’s miraculous self-preservation could inspire me to put the ice cream down. It probably should have inspired me to not give myself such large scoops at least, but there was cause to celebrate.
And it wasn’t the game on television.
It was the completed mudroom…
This post contains affiliate links for your shopping convenience. Click here to read my full disclosure policy.
Y’all, it has been a crazy last couple of weeks. With all the delays I had on items getting here, Grunt and I worked nearly round the clock over the last week to get everything done in here on time. There is NO way this space would have ever been completed without him helping me out. He stepped in and installed the flooring, then took it upon himself to take on the moldings after that, went round and round with a light fixture and more. Thanks boo. ❤️
If you don’t remember what this space looked like before, here’s a little reminder.
One of the first things we did was install flooring in this space. We used Select Surfaces engineered vinyl plank flooring throughout the room. Getting rid of that old linoleum and putting this in laid the groundwork (literally!) for a fresh new space that can hold up to all our family’s shenanigans as well. Read more on the flooring and how we installed it here.
The cabinets got a huge makeover. You may have noticed in the before image that these cabinet doors had funky little holes in them. Well, that “design” has made me frown ever since we moved in here. I had the centers of the cabinet doors cut out, gave them all a fresh coat of Bit of Sugar, then installed fabric to the backs of the doors to cover the openings. I used this bamboo trellis fabric from Spoonflower to do the job. It coordinates nicely with the wallpaper and packs a fun punch of pattern and color.
All the cabinets got new knobs and hinges as well. I wanted to go with a clean, polished finish for this space so I opted for polished nickel finishes. I used these acrylic cabinet knobs to compliment the bamboo fabric on the doors. To keep everything on this side from being too green, I hung one of SmithHonig’s gorgeous silk tassels on one knob.
This side also got a fun little addition in the form of a window reading seat for the Circus! This little area has always been here, but before we would just use it as storage for our grocery bags and things like that. When I had some of the bamboo fabric leftover, it hit me that this would make the perfect little window seat for my best girl. She thinks it’s super cool to climb up there away from the rest of the house. We also installed this bamboo roman shade here as well. It’s a simple pull down-push up shade, so the Circus can easily operate it herself.
As you may remember from last week, we installed a new, solid door in this space, which was much needed. I opted to give the door a pop of color, Bubble Shell by Behr to be exact. I found the Chinese symbol at a thrift store a while back. It means “long life.” I thought it was a nice little compliment to the door.
New lighting! These sure beat the bare bulb fixtures we were working with, eh? I wanted lights in here that were shiny and pretty, but that also wouldn’t take away from the gorgeous wallpaper and other patterns I was putting in this space. These semi-flush mounts were the perfect answer and they give us loads more light in here than the old ones did! Now I can actually see in my cabinets when I’m rummaging through them looking for something!
Speaking of wallpaper, what do you think of it? Sometimes I think I can actually hear the birds just singing off the walls. haha! This wallpaper from Milton & King was the jumping off point for the entire space. I fell for it first and then worked everything else around it. Its beautiful bird pattern brings the outside in and always makes for a sunny day inside even if it’s raining out. While the install for wallpaper does take time, it’s well worth it for the outcome you get!
Ahhh, the controversial lattice walls. Did you see my Facebook post about this? You either love it, hate it, or you’re really worried about cleaning it. 😂 While this was not the original plan, I LOVE that we did it! We used vinyl lattice panels for this project and I have to say, it’s one of the more easier wall treatments I’ve ever done. The full tutorial for the lattice walls is here. P.S. I’m not that worried about cleaning it. Since it’s vinyl rather than wood, it’s a lot thinner than traditional lattice. My Swiffer dust easily gets in those nooks and crannies.
Along this wall, we also added in a few of these polished nickel wall hooks for easy hanging storage. No mudroom is complete without a few hooks for hanging coats and bags, right?
I’ve got my felt tote bag from SmithHonig hanging on one now. This tote is great for just about everything. It has great little compartments inside to keep everything organized as well – no more digging around!
On the opposite end of the door is this little area. This space was originally the garage before previous owners added on. Thus, part of our heating unit and water heater are located in this room. I used this room divider to hide those, but still make them easily accessible if need be.
I took an old credenza I had and made it into a bench. It offers more storage and a place to sit down and put on / take off shoes. I wanted to keep some of the stained wood look on this piece to coordinate with the roman shades in the space, so instead of painting the entire thing I just painted parts of it in this light green hue from Velvet Finishes – so easy to do, only took a couple coats and I was done! I upholstered a piece of plywood with this pink trellis fabric from Spoonflower to create the bench top.
Turning the corner from the long lattice wall is this little nook. I wanted to have a drop zone for mail, keys, etc., so this little wall was prime real estate for a small console table to do just that. Seeing as how there’s lots of pattern and color going on in the space, this simple white one with clean lines worked perfectly. I did add the knobs to give it a glam little touch.
Do you recognize that mirror? It used to hang in the Circus’ bathroom before she got an upgrade. I always liked the look of it, so I hung onto it. I gave it a glossy coat of red spray paint and I love how it works in here. Hubba hubba!
I found this brass bowl at a yard sale for $3 and it’s going to be perfect for mail!
On the opposite end of the table, I mixed in a little blue and white decor along with a touch of brass and another SmithHonig tassel in Courtyard – these kick anything up a notch!
And last but not least, to give this space even more of an outside feel, I added in a faux fiddle leaf fig in a pretty blue and white fishbowl planter. My last two fiddle leaf figs haven’t fared too well so I decided to invest in a good lookin’ faux one.
And that’s a wrap for this space! Tell me what you think about it in the comments below!
Don’t miss the rest of the gorgeous room reveals today!
While my 2020 vision board was completed this past week (see it here!), the realization of my vision for the mudroom is slow going. Womp womp womp.
I spent much of last week finalizing the plans for it including hardware finishes, light fixtures and more. There are always those little details that end up taking more time than I ever anticipate.
Things have started arriving for the challenge though!
This post contains affiliate links for your shopping convenience. Click here to read my full disclosure policy.
After finding the wallpaper for this space, I pulled colors from it to work into the rest of the room. I adore this wallpaper. The attention to detail on this wallpaper pattern is just stunning. It has a slightly vintage feel to me as well, but still with classic design roots, so I don’t think it will be “out of style” anytime soon. Then again, when have we ever worried about something being out of style around here? You’re talking to the girl who just a month ago ordered the big set of shoulder pads she could find to get the full-on Dynasty effect. 😉
In terms of actual progress…the room has been cleaned out and the cabinet doors have been taken off.
And there’s my mess for the whole world to see.
Remember how the cabinet doors had the funky little holes on them, well those are gone and we now have open centers.
I did not cut out the centers myself. I could have, but this was one of those jobs where I really wanted to leave it to a professional woodworker. I wanted the lines clean, straight and even and it would have taken me forever to get all 20 doors cut out. I handed them off to Jeremy, who’d done cabinetry work for me before at the Beloved Foreclosure. He had them all done within a week and did a great job for a very reasonable price. Local Chattanooga friends, if you need cabinetry work done of any kind, I highly recommend checking him out – his Facebook business page is right here!
After the cabinet frames and doors get a good coat of white paint, the green bamboo fabric will be stapled to the back of each door to cover the opening. This was the most affordable solution I could come up with for getting rid of the weird holes on the doors, but still hiding my treasures in the cabinets.
I have also worked on the credenza-bench makeover a little as well.
This piece has been sitting in our garage for a couple of years now. It’s just such a great storage piece that I wasn’t quite ready to part with it. I’m glad I didn’t now! Everything that is black on it (sans the top) will get the Velvet Finishes Cosmopolitan treatment.
It’s hard to tell from this picture with the bright light coming in, but this is a light mint green hue. This is by far one of the easiest projects in the space – Velvet Finishesdoesn’t require you to prime the surface before painting! I just wiped the piece down with a wet cloth to remove the dust and cobwebs from it being in the garage and then started painting. Bonus – you oftentimes won’t need a topcoat either with this paint! I’ve used this brand on countless furniture makeovers HERE!
I’m hoping the stained drawers will work with the design. On my mood board for the space, they do, but real life can often be different. If the stain on the front doesn’t work, I’ll paint them in the Cosmopolitan hue as well. Either way, this pink trellis fabric will be made into an upholstered cushion for the top.
Looking for mudroom design ideas rooted in classic design, but still functional? And maybe there’s a pop of color here and there? You’re in the right place!
Happy New Year, freaks!
I hope each of you has had a wonderful holiday season! Our crew certainly did – in fact, I think it was one of my favorites to date. I felt like we all really slowed down and took time to enjoy every second we could of the season. We were also able to work in a couple of little trips – one including a tour of Goodwills around the state with my best girl. I completely lucked out on the whole kid thing. When she’s cool going thrift store shopping for an entire day, there isn’t much else you can ask for! haha!
To kick off the new year, the incredibly talented Stephanie of Casa Watkins Living has asked me to join in on the New Year New Room Refresh Challenge….
Myself and all those other talented folks you see above will be refresh one room in our homes throughout the month of January. You’ll be able to check in on our progress at each of our blog’s each Tuesday during the month. We’ll also be sharing lots on Instagram stories, so be sure to follow there!
What room am I making over? THE ONE ROOM IN MY HOUSE YOU’VE NEVER SEEN BEFORE….
This funky little space right here, folks:
So what kind of room is that? It’s a little space you walk into from our garage and through to get to our den. It also buts up to the guest bedroom. At one point, before the previous owners added an addition to the house, this space would have been part of the garage.
I’ve never really known what to do with this little L-shaped room. Yes, those built-in cabinets have been wonderful for storage, but did you notice the ugly little holes drilled into them for ventilation?
Those could be prettier, right?
I’m sure the blue all over the walls, trim and cabinetry didn’t sneak by you either. And there’s also that big eyesore of a heating unit in this space.
Over the past year, it has quickly became apparent to me how best to utilize this space: we need a true mudroom.
We have our laundry room-mudroom that I got into shape a couple summers ago and it’s perfect for the summer when we’re going to the backyard all the time, but we need a space now for throughout the year where we can come in and drop backpacks, riding gear, dance bags, hang coats, etc. And that’s just what this space is going to become…
DIY Mudroom Makeover
Overall, the mudroom design has a colorful classic feel. There are only two small windows in this space so I’m bringing in lots of white with a few pops of color.
Mudroom Plans
Have centers of cabinet doors cut out to remove ugly holes. Paint all the cabinetry white. Cover the now open door centers with this gorgeous Osaka Bamboo Trellis fabric. Replace cabinet hardware – currently thinking these beauties. I’m really excited to kick this storage area up a notch.
A couple of tassels go a long way when it comes to adding color and personality to a space. I’ll be tossing a couple of SmithHonig’s silk tassels around in the space.
The wall opposite the cabinetry and wrapping around the corner will be get a board and batten wall treatment and on top of that, this gorgeous Hawthorn wallpaper from Milton + King. I love the classic decor feel this paper has, but also the character added by the colorful birds. Also topping off the board and batten wall, will be a handful of these wall hooks, which will be great for not only hats and coats, but also a great tote.
In terms of flooring, we’ll be pulling up the old sheet vinyl flooring and installing Select Surfaces Engineered Vinyl Plank Flooring in Chocolate Oak. This flooring is waterproof, which was a must for this space since it’s partially below ground and it’s also an easy DIY install. To lighten up the flooring a bit and add some texture, I’ll top it off with a classic navy and beige rug from Mohawk Home. There will also be a pretty blue and white umbrella holder hanging around somewhere, which was my first purchase for this space months ago and the jumping off point for the design.
Finally, I’ll be bringing in a DIY mudroom bench by way of an old credenza. You may remember this credenza makeover from a few years back. I used it in my office for a while and always loved it. Even after I redid my office and there was no longer a need for it in there, I held onto it just in case. Well, “just in case” is here! Parts of this credenza will get a lightening up makeover with a coat of Velvet Finishes Cosmopolitan. I’ll be adding an upholstered top that sports this beautiful trellis pattern in coral. The top will also have a couple more decorative touches by way of two pillows – one in this pattern and another in this one. The bench will also add additional storage space to the mudroom since it has nice deep drawers on the base.
A huge thank you to all our sponsors for this challenge!
This girl has a lot of stuff to get done this month! Be sure to see what everyone else is up to with their room refresh:
Tile, vanity, hardware, plumbing fixtures. It all adds up and it all adds up fast! These nine bathroom remodel ideas on a budget will help you save some serious dough! The best part? No compromising on style!
Bathrooms and kitchens. The two rooms that will make or break your house when it comes selling time and that also tend to cost the most when it comes to renovations.
If you’ve got the budget for an out-of-this-world bathroom renovation, then go for it! There isn’t a doubt in my mind, you’ll enjoy that bathroom for years and years to come.
If, however, your bathroom remodel budget is closer to non-existent than anything else, no worries! I’ve got nine different ideas for you here that can help you save some serious dough on your bathroom remodel, without compromising style.
Local Chattanooga folks – I’ll be teaching a workshop about remodeling your bathroom on a budget in November – more details here!
Bathroom Remodel on a Budget
Have your bathtub/shower painted instead of replacing it.
When we redid the guest bathroom, we were on both a tight budget and a tight timeframe, however the shower needed some cosmetic help for sure. The door needed to go and that beige color was awful. We didn’t want to rip out the entire unit because it wasn’t in bad condition and this was the guest bathroom – we don’t have guests every weekend. And of course, because $$$. After some research, I discovered you could have your bathtub unit professionally painted. I called around and got some estimates and it only ended up being around $500 to have our unit painted. The finish is very similar to what they use in the factory. Our guy even removed the doors, filled those holes and you can’t even tell where the shower door was! He even custom matched the white to the white on the toilet so that the two whites didn’t stand out against one another! Huge savings on not ripping out the old unit and we didn’t have to deal with the mess from ripping it out!
Ask for remnants or “scratch n’ dent” countertops.
The vanity in the guest bathroom needed a paint job, but other than that and the hideous countertop, it was still a pretty solid vanity. The countertop was awful though. We visited a local countertop store and asked to see remnant pieces of countertop options left over from bigger jobs so we wouldn’t be paying as much. We found one that worked, but as it turned out there was a scratch on the countertop. But, it didn’t affect the stability of the counter and it was in the corner. Since I had planned to put a tray on the countertop anyway in that spot, it didn’t bother me a bit. We were able to get an extra $100 knocked off the cost of the counter because of the scratch. On top of all that, the scratch isn’t really even noticeable when the tray isn’t there, you really have to hunt for it. Top the new countertop off with a shiny new sink faucet and it will only look like you spent a million bucks. 🙂
Instead of tile on the walls, go with a custom painted wall treatment.
When I started planning the guest bathroom makeover, I found an image of a bathroom online that had this beautiful tile on the wall in horizontal narrow rows. Again though, this was the guest bathroom – not the master or any other bathroom that gets a lot of traffic, so I wasn’t going to spend hundreds of dollars on tile for the wall. I mimicked the tile look with paint though and I love how it turned out! And can you believe all I used to create the washed-out blue stripes was a roll of Frogtape and just a sample pot of paint?! See how I did this wall HERE!
If you prefer to make a bigger statement in the room, go with a bolder pattern and color…
This is an accent wall I did in one of the bathrooms at our previous house. I wanted a bold pop of color in here and a pattern that mimicked cane like you would see on the back of a chair. All it took was a little time to tape off the pattern and then a couple coats of paint. See how I did this cane inspired wall HERE!
Put snap together flooring over your old tile flooring.
Apparently, the guest bathroom is like the poster child for quick fixes on a budget. This space had to be turned around fast and ripping up the tile and putting down new wasn’t an option. Instead, we installed this snap together laminate flooring directly over the old tile. I love how it looks like wood flooring, but it’s not! There are loads of gorgeous vinyl flooring options out there these days! You can see how this space looked before HERE!
Stalk discount stores for mirrors.
I’m not a big fan of the matchy-matchy mirrors that come with vanities from big box stores these days. I’m also not a fan of the plain Jane frameless mirrors that many bathrooms sport. I’d rather have something with a little more character that adds to the space instead of just being there to take up space. So, I always check out places like Home Goods, TJ Maxx, Marshall’s and Ross for mirrors that would be great above vanities. The mirror you see above was only $30 at Home Goods!
Damaged walls? Cover with luan or beadboard.
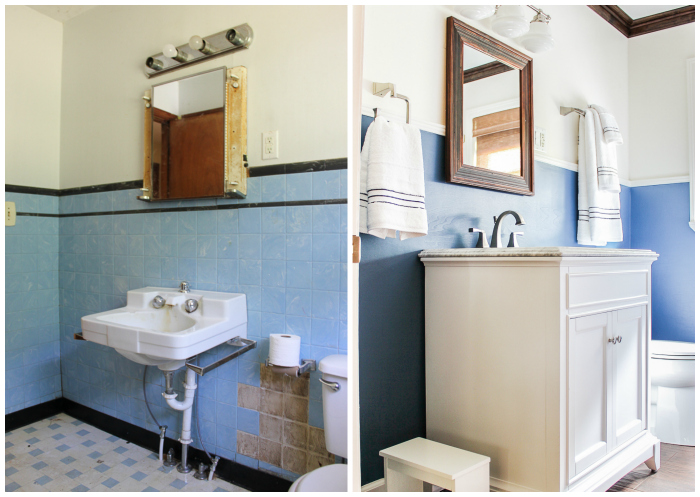
When we started working on the farmhouse, it was obvious something was going to have to be done about about the walls in the bathroom. The whole bathroom actually had to be nearly gutted. The tile on the walls were actually plastic tiles and lots of them were falling off. Again, no budget for retiling walls here! We pulled all the tile off, but the walls were still damaged underneath where the tile had been glued. For a fast and budget friendly fix, we covered the walls where the tile had been with luan panels and topped it with a chair rail. If you would prefer more detail, you could do this with beadboard panels instead.
Go for timeless finishes that tend to cost less.
Trendier finishes on faucets and hardware are usually going to cost more. If you want to save some money and keep your bathroom from dating too easily, go for finishes that will stand the test of time – like chrome. Chrome will always be in style and it tends to be cheaper.
That being said, if you absolutely love whatever the latest finish trend may be, then go for it. I have Champagne Bronze in my master bathroom and I still adore the finish just as much as I did when we first put it in there.
Paint the existing vanity and replace the hardware.
I’m sure you’ve heard this one a few times – paint your vanity instead of replacing it. As long as your vanity is in pretty good shape, go for it! If it’s falling apart though or has water damage for some reason, I’d seriously look at replacing it. The vanity in our guest bathroom was solid and had good classic lines, so I just gave it a couple coats of oil-based paint and new hardware – it made a world of difference!
Add in wall-to-wall shelving for extra storage and decor space.
If you’re tight on storage space in your bathroom, build you some shelves! The photo you see above is about the 3rd time I’ve built shelves like these – they are so easy! Find out how to HERE!
Any budget bathroom remodeling ideas you can share with us?
We’ve all been there – what we want isn’t what our pocketbook will allow. Bummer, right? Well these knock off decor DIY projects will give your home that high end look you love, without hurting your wallet.
Just about anytime I find something for my home that I love but has a steep price tag, I always ask myself, “Can I make that somehow?”
More often than not, the answer is, “No, silly girl.”
But sometimes, every once in a while, the answer is, “Girl, yes!”
And so I do.
Here are some of my best knock-off decor projects that saved me a wad of cash but gave me the look I wanted.
This post contains affiliate links for your shopping convenience. Click here to read my full disclosure policy.
Knock Off DIY Building Projects
Why spend a fortune buying it when you can build it (simply!) and for a lot less?!
A couple years back, there were some gorgeous gold snake home accessories out there – alas, they were out of my budget. My solution? A trip to the Dollar Tree’s toy aisle…
Another project made possible with the help of the Dollar Tree toy aisle – and of course, a little spray paint. This bowl is a perfect catch-all for around the house.
Did you see these at Pottery Barn? Upwards of $100 per shade! Mine though? It just costs about $15 or so!
Knock Off Crystal Projects
I love using crystals in my home decor. In fact, I love them so much that I found a way to make my own faux crystals and then I used them to embellish all sorts of things around the house.
Never in this life would anyone have expected me to have dog wallpaper in my house.
I’m just not a dog person. I never really have been. I was never the kid who wanted to cuddle with a dog. I hate when dogs jump on me. A dog lick disgusts me. I can’t stand the feeling.
That being said, I did come to love Grunt’s dogs that came with him as part of the “package” and got attached. After Zoe died though, I decided that was it for me. We have another dog, but as both my husband and daughter will tell you – it’s their dog, not mine.
So, when my child came out of the womb and subsequently fell in love with just about every dog that came her way and laid on the dog’s bed right there in the middle of them, you can imagine how many times I cringed.
The Circus loves dogs. Loves all animals really. And it’s all good, I think that’s great – she won’t get the side eye like the lot of ya’ll are all probably giving me right now since I’ve now said I’m not a dog person.
Needless to say when she picked out the fancy pug dog wallpaper for her bathroom, it was most definitely not the direction I would have went in. But alas, here we are.
While photographing the bathroom on Monday, this non-dog lover even decided if the Circus didn’t like her new bathroom, then I would happily take it – pug dogs and all.
She liked it though. 🙂
If you haven’t been following this whole bathroom makeover series, here’s what we started with…
Total 180, right? Here’s everything we did…
This post contains affiliate links for your shopping convenience. Click here to read my full disclosure policy.
The lower 2/3s or so of the bathroom walls got beautiful new moldings all around. I didn’t want to cover all the wall space with the wallpaper as this isn’t a huge bathroom so I didn’t want it to take over the space. Installing the moldings and painting it all white really opened up the space and added some gorgeous architectural interest. I used these prefab moldings all along the walls, then installed a chair rail and thicker baseboard.
After the trim, I hung the pug dog wallpaper. It’s traditional pre-pasted wallpaper, which I find much easier to hang than the temporary sticker-type wallpaper. The only snag I ran into here was realizing I was going to run out about halfway through and then discovering the wallpaper was out of stock when I went to order a new roll. #leaveittome Luckily though, I was able to piece together some strips in a couple of inconspicuous spots.
The tile didn’t change. We had just replaced that a few years back and it worked well with everything in the space.
The old vanity got replaced with a slightly smaller one from Signature Hardware with both good hidden storage and good open storage on the bottom.
The vanity is the Everett Console Vanity in Elderberry from Signature Hardware and it gave this space so much more of an open feel. It’s extremely well made and even comes with soft close doors and drawers. We went with the solid white quartz countertop for the vanity. It was the safe bet for not clashing with the floors and other elements of the space. And isn’t that purple color fun? I love the extra color it brought into the space.
The white and yellow oversized vase is a thrift store find! I hauled it back from my thrifting adventures while we were at the beach. $7 for it and I love how perfectly it fit in here. I filled it with some faux tropical leaves and birds of paradise flowers for an extra punch of color and texture.
Throughout the bathroom, we went with brass in terms of the faucet and fixtures. This was the Circus’ choice, although I am very glad she wanted gold. She is her mama’s child in some ways. 🙂 We used the Kohler Devonshire line from Build.com for the faucet, towel hooks, toilet paper holder, toothbrush holder, etc.
The fixtures have classic curves that work well with the trim throughout the space.
Since she is a southern girl and loves a good monogram just as much as I do, I had a monogrammed hand towel made for the space as well. Isn’t it pretty?
Continuing with the feminine curves in this space, we went with a curvy mirror and pendant lights.
Hands down, this mirror from Build.com is one of the best mirrors I’ve ever had. Obviously, it’s a beauty, but y’all, this mirror came with a paper hanging template that makes hanging the mirror a breeze. And if that isn’t enough, the hardware that it comes with for hanging is easily adjustable in case you need to level out the mirror any once it’s up!
The pendant lights have an “I Dream of Jeannie” kind of feel to me. They let plenty of light through without being completely clear, which I like b because then you can’t really tell when the globes have fingerprints all over them! ha!
They are also real beauties when they’re all lit up.
When we first started talking about this makeover, I hadn’t planned on switching out the toilet in here, but the more the design came together, I realized just how great a curvy, pretty toilet would look in here. This toilet is also from the Devonshire collection by Kohler at Build.com and we absolutely love it. It was also pretty simple to install. We topped it off with the coordinating brass toilet lever.
Did you catch the vertical toilet paper holder? When I went to install it, it wasn’t going to fit very well over the wall moldings, so I tried it vertically and it worked perfect. I love the different look it gives too.
I’m sure you already spied this beauty in the mirror reflection. I can’t tell you how much in love both myself and the Circus are with this shower curtain! It’s the Gingko shower curtain from Signature Hardware and the colors in it are gorgeous. To really bring out the yellows in the curtain and throughout the room, I had a gold tassel trim sewn around the edges.
The Circus has been a little jealous of my palm step stool I made for our master closet ever since I made it. In fact, she’s tried to jack it a time or two. I told her I would make her a custom step stool for her bathroom and so she picked out the paper for this step stool – she’s having a moment with pineapples. This is a super simple DIY project and completely transforms basic step stools into gorgeous and still useful decorative items. Here’s how to makeover your own step stool.
The colorful rug brought together every single color (and then some!) in the space and also added some much needed color to the floor. 🙂
Y’all know I’m a big fan of adding a more personal piece of art to a space when I can. The Circus loves music from Mamma Mia (therefore she loves ABBA – winning!) and Super Trouper is one of her favorite songs, so I whipped up this little piece of art for her bathroom.
I had another piece of art to go in here too, but once the wallpaper was up and all the fixtures in place, there really wasn’t a place for it. I don’t think this bathroom is lacking though.
Neither does the kid. 🙂
What do you think?
Now go see what all the other Primp and Pamper gals did with their bathrooms! Y’all are going to be filled with loads of bathroom makeover inspiration after you see all this!
Unfortunately, I haven’t gotten as much done in the bathroom this past week as I would have liked to. Womp womp womp.
There have been a few unexpected things that got added to my list, some things taking longer than expected and as I told my paint guy yesterday – “If I could actually get everything I need here the first time, instead of too much of one thing and not enough of another, I’d already be done.” So there’s also been numerous supply runs.
If you’re catching up and missed the before pictures and plan for this space, read this post first!
A big thanks to our official sponsors of the Primp and Pamper Bathroom Makeover, Build.com and Signature Hardware.
Here’s this week’s progress pictures…
So molding is all on the wall. There’s one coat of edging done around all the molding and the glorious elderberry vanity has been dry fitted for the space. Big thanks to Wayne for coming over and helping me rework some plumbing to make everything fit nicely within the vanity back. If you don’t have a Wayne in your life, you need to get one. He’s saved my butt on home projects more times than I can count.
Here’s the look we’re going for…
The molding and paint are what is taking a big ol’ chunk of time. It’s one of those projects where there is no fast way out – you just have to be patient and take your time. And have a six pack on hand – but only for painting and not the actual molding install. Don’t nobody want to see crooked trim. 😉
I’m really excited to get that vanity permanently in place, the new toilet set and all the fabulous brass fixtures installed for this space.
As I said last week, the kid had a say in everything that’s going into the space.
This will add a great pop of color to the bottom half of the room against all the white moldings. I’m really impressed with how well this vanity is made. It’s constructed of solid wood (heavy wood!) and has soft close hardware for the doors and drawers – which if you have kids, that’s definitely something you need!
If you’re in the market for a pop of color vanity, then do take a gander at these options from Signature Hardware – I’m quite partial to the Emerald Green and Ruby Red finishes. In fact, I could very easily plot out a whole master bathroom makeover around either of those gorgeous colors. Hubba hubba.
A new toilet for this bathroom wasn’t necessarily on the list when we set out to do this makeover. However, the more glam the Circus got with this bathroom, the more I was like, a pretty toilet would look fantastic in here. I always like to opt for good reliable brands when it comes to bathroom fixtures like this. Our toilet came from Build.com. Build has an impressive selection of home improvement products in every category from top brands – like this beauty. And yes, I just called a toilet beautiful.
All of the plumbing fixtures, towel holders, toilet paper holders, etc. are from Build as well. I am a stickler for having coordinating styles throughout a space when it comes to these things and Build offers just about any bathroom accessory you could need in countless brands and collections.
I was never really crazy about the pendants we put up when we switched them out the first time. Needless to say, I’m super pumped to get these in the space. They have a kind of retro vibe to me and remind me of I Dream of Jeannie. The curves on the mirror are a nice compliment to the curves on the toilet as well. These came from Build as well – they literally have everything for your entire home improvement project.
This shower curtain from Signature Hardware is going to add more color to the room opposite the vanity. The gingko leaves are a purple/deep blue color which will coordinate nicely with the vanity and wallpaper. I’m adding the tassel around the edges to bring out the yellow in the shower curtain more and also the yellow in the wallpaper.
Tessera Rug
And finally, this rug will help to bridge everything together. The gray tiles on the floor are staying which do help to anchor all the color, but there still needs to be something there so the floor doesn’t stick out like a sore thumb. This rug sports colors from everything in the space!
The To-Do List Update
As I said, I haven’t gotten near as much done as I’d planned on getting done this past week. The good news is though that I have put a big dent in one of the most time-consuming projects within the space – the wall moldings are up, holes filled, edges caulked and almost one full coat of paint on them.
• Remove old vanity and toilet.
• Install chair rail, wall moldings, etc.
• Paint from chair rail down – in progress!
• Hang wallpaper above chair rail.
• Switch out pendant lights.
• Install new vanity, faucet, toilet, etc.
• Hang new mirror.
• Add trim to shower curtain – I’ve dropped this off with my seamstress! Can’t wait to get it back; it looked so pretty when I laid it all out!
• Install new shower curtain rod and hang new shower curtain.
• Gussy Up the Step Stool
• Revamp and Hang Art
Check back next week for the final stretch!
Be sure to see what everyone else is up to as well!
Sometimes living in black and white isn’t so boring and this black and white dining room proves it! You just need a few shots of color to add into the mix! Don’t miss the decorating ideas in this glam dining room!
When I showed you the new room dividers between my dining and living room, you may have noticed that the whole room got a bit of an update.
The dividers led to some reshuffling of furniture, which led to adding a few things in, taking a few things out and in the end, me being much more pleased with how our dining room looks.
Remember last week when I shared the plan for the Circus’ bathroom makeover and how I told you that I felt like we just got rooms finished ok enough when we remodeled? Well, the dining room was one of those spaces.
I basically threw paint on the walls, my stuff in there and called it a day.
Let’s all be honest – it was lacking.
I did love the bones and some of the larger things though like the black paint, the oversized art, my chandelier, curtains, rug. Those things. But there wasn’t much else in ways of personality in here.
It’s better now though.
This post contains affiliate links for your shopping convenience. Click here to read my full disclosure policy.
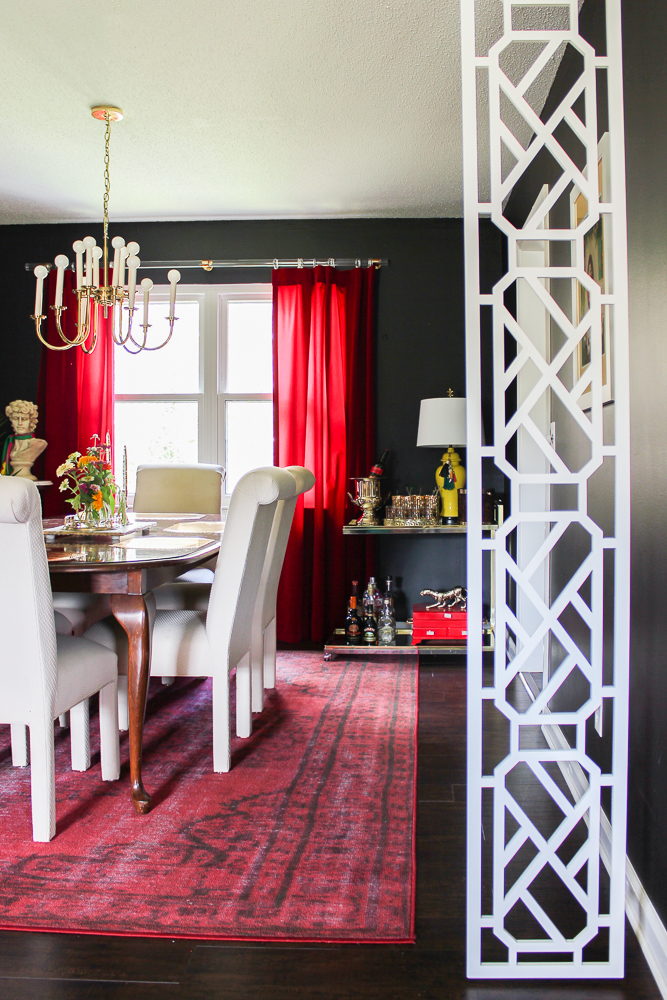
The dining area is still primarily black and white, but filled with pops of color and wonderful textures and character. Obviously, a big part of that is owed to the room dividers.
The really great thing about this little mini-makeover/falling in love with my dining room thing though is that, with the exception of the room dividers and the plants, I hardly spent any money on this space. I shopped my house and closets for most of the “new” things and then landed a couple great secondhand finds.
I had actually switched out both my dining room table and chairs a while back. I really loved my glass dining room table, but it started to freak me out a little. The Circus has obviously grown since we first got the table and as she bounced and moved around more while eating, if she pushed against it, the glass top would slide some. Going from zero to 100 as I always do, I could just see the top sliding off and hurting someone. So when the bestie was selling a wood dining room table at our last yard sale for $25, I grabbed it.
I also didn’t dislike my old dining room chairs. But they were low and I felt like I wanted chairs with more of a presence in the room. My friend Carol didn’t want these anymore, so I happily took them off her hands. I may recover them at some point, but I’m good with the off white they are right now.
When I hung the divider on the left side of the dining room, it made the bar cart that was here feel way too squished in. Thus prompting a small furniture shuffle. I moved the lamp that had been in the corner over here and switched out the lampshade. Funny enough, I was thisclose to ditching this lamp altogether because I just never felt like it looked “right.” Well, after shopping my own house and giving that lamp shade a whirl, I fell in love with that lamp.
The leopard was my first world’s longest yard sale purchase this year. After seeing him from the car, I made a quick turnaround and practically ran down the street to get to him. He was only $10!
I left the small art piece I already had in the space right where it was. I’ve always loved this piece and I think it works well here. A palm plant added the perfect touch of color and texture to this little area too.
The bar cart moved to one of the back corners of the dining room.
I wanted to work some more color into the space beside just the reds in the curtains and rug and this lamp did the job beautifully. I had bought it as part of a set at a rummage sale last spring. I think I paid $5 for the set, maybe? I just know it was a hell of a deal, because I practically bounced away from that sale. The other one is in my office. I also crowned this beauty with one of my lamps tassels for an extra touch of color and fun.
My recently remade silverware chest finally found it’s home on the bottom of the bar cart. After its makeover, the chest still didn’t have a home and I hated it because I loved it so much. Even Grunt felt bad for it having come such a long way and no place to rest. haha. It’s happy now though.
Moving to the other side of the room, I kept my oversized artwork on the wall. I still love this print as much as when I first got it and it does a great job of covering lots of wall space and adding more interest to the dining space.
I moved the high marble top table over to this corner. I’ve always loved this table – it’s a family hand me down – but it always looked lonely by itself before or overpowered whatever I put on it. I decided to try out one of my larger busts on it and that worked out perfectly. Then, I just layered in another palm for more color and texture and finally my little elephant table that needed a new home since it had to leave my office to make space for my Roomba.
What do you think of the dining room’s new look?
I’ll leave you with this shot of flowers from my cut flower garden. This is probably the last good bunch to come from it this year. We’ve been through a heat wave here and have had very little rain on top of that – needless to say, the garden isn’t doing so good right now.
Want more easy decorating ideas that don’t break the bank?
Knotty Pine Walls Decorating Ideas – before you reach for that paintbrush to paint over it, look at these ideas for decorating with your knotty pine! You might just fall in love with it!
Want to hang on to these dining room decorating ideas for later? Just pin the image below!
When we bought the 70’s Landing Pad, we were very much focused on getting it remodeled as quickly as possible and getting in.
While waiting to close, I remember having grand design plans for nearly every space in the house, but when we finally closed and as we worked on replacing flooring, gutting bathrooms, etc., those designs kind of dwindled down to the basics and not the full vision I had seen in my mind.
Budget can also have a way of dwindling those plans and we spent far more on the house in that initial remodeling phase than we had planned on doing – and we spent it far faster too.
After months of working on the house, we were tired and ready to get in the house and have a break.
And so, things got “done enough.” Rooms were “complete” but, in my opinion, some were just a little “ok.”
My daughter’s bathroom was one of those just “ok” rooms.
I’m happy to say though, that I’ll be re-doing this “ok” room over the next few weeks along with some other fantastic gals who are making over their own bathrooms.
The Before
As I said, this is my daughter’s bathroom, who I refer to as “The Circus.” As many of you who have been around here for a while know, that nickname fits her well.
What does not fit her well is her current bathroom situation.
Sure, there’s a colorful vanity but there’s not much else in here that reflects her personality.
I included the Circus in every decision of this bathroom design. Now that being said, there were some things where I gave her two options rather than endless ones. I mean, I’d like to have this thing done in the allotted timeframe and not in 10 years.
Also, the one stipulation of this makeover was that the tile floor stay. I do like the tile and we had just retiled this room a few years ago when we moved in. If it ain’t broke – and in this case, if it still looks good – don’t fix it.
The jumping off point was the wallpaper. The first thing I asked her was what she wanted in her bathroom and she said dogs. So I pulled up loads of different dog wallpaper and let her choose one.
From there, I would pull things I thought would work well in the space and then let her make the decision on which color, design, product, finish, etc. to go with.
The Source List
A big thanks to our official sponsors of the Primp and Pamper Bathroom Makeover, Build.com and Signature Hardware.
Just about everything for this bathroom came from Build.com or Signature Hardware. I was thrilled to find so many great (and colorful!) options from both places.
Bellevue Natural Brass Pendants – the Circus was insistent about using gold/brass tones throughout the space. She might be her Mama’s child after all. 😂
Quoizel Gold Monarch Mirror – when this mirror got here, I opened it up to make sure it had shipped ok, and y’all, it comes with a template for hanging it on the wall. How come all mirrors don’t come with that?
VitaElegante Tile – this is the tile we installed a few years back. It’s a good neutral tile that has a bit of a modern feel.
Ginkgo Leaf Shower Curtain – this shower curtain is even more gorgeous in person. The bits of yellow you see are much more noticeable and bright when you get your hands on it.
Ashford Wall Moldings – I didn’t want to go floor to ceiling with the wallpaper in here for a few reasons. 1. It’s a small space and I didn’t want to overwhelm it all with wallpaper. 2. My kid is rough and tumble so I didn’t want to risk papering the lower half of the walls and then she somehow ripping or tearing it at some point. So I’ll be adding moldings to the lower 2/3s or so of the bathroom.
Signature Hardware Everett Console Sink in Elderberry – another star of the show here. We love this vanity for both it’s great organized storage and of course, it’s playful color. I’m so happy to see Signature Hardware stepping up to the plate with gorgeous color on their very well made vanities!
The To-Do List
If you follow me on Instagram and watched my stories, you might have seen that I’ve already gotten a bit of a start on the bathroom.
• Remove old vanity and toilet.
• Install chair rail, wall moldings, etc.
• Paint from chair rail down – can’t decide if I just go solid white here, y’all or paint it this Dandelion Wish color that is the same mustardy yellow in the wallpaper. What do y’all think?
• Hang wallpaper above chair rail.
• Switch out pendant lights.
• Install new vanity, faucet, toilet, etc.
• Hang new mirror.
• Add trim to shower curtain – adding a fun tassel trim to the shower curtain.
• Install new shower curtain rod and hang new shower curtain.
• Revamp and Hang art – I’ve found some great secondhand art pieces for this space; just have to switch out some mats and paint some frames.
Heaven help, I’m tired just typing all that. Ok, I have to get to work, so y’all go see what plans these other talented ladies have and be sure to check back next week for our progress!
If you’re ready to get started on your next room makeover, then start with an inspiration board! Learn how to make a moodboard for your space below using Picmonkey – it’s so easy!
When I first shared the design plans for our master closet makeover, I got asked multiple times about how I created the moodboards / design boards for the space…
Like that one….
…and this one.
I had actually written a post a couple years back about making inspiration boards for room designs, but the online tool I used to use to create those boards is no more. Not a problem though – I had been using Picmonkey to make the boards before so I just went back to Picmonkey.
It’s really pretty simple to make these boards.
How to Create a Mood Board
This post contains affiliate links for your shopping convenience. Click here to read my full disclosure policy.
I find that tutorials like this are often easier to follow with a video. So, I made a video below that walks you through how to make a design board using Picmonkey. If you’re a still image tutorial kind of person though, I’ve also got step-by-step instructions with screenshots below the video.
You will need a Picmonkey account to make the mood boards. Accounts start at $8 a month and that basic plan is all you need!
[adthrive-in-post-video-player video-id=”ntKk7OAS” upload-date=”2019-04-24T10:00:00.000Z” name=”How to Make a Moodboard using Picmonkey” description=”Learn how easy it is to make a moodboard using Picmonkey. This is perfect when determining what direction to go in for your next room design. “]
Step 1
Before starting anything, pull all the product images you are considering for your space into a folder on your desktop.
Step 2
Go to Picmonkey. If you don’t already have a Picmonkey account, you will have to sign up for one. Unfortunately, it isn’t free, but it is only $8 a month. I have the $8 a month plan and it is plenty for me. I use Picmonkey all the time, not only for moodboards, but also for basic photo editing, creating collages, making the Circus’ birthday invitations and more.
Click “Create New.”
Select “Blank Canvas,” then select a size. I typically go with a large horizontal size, like the 7 x 5 inch.
When prompted, title your image as desired.
Step 3
Click “Add an Image” then “Computer”.
Select one of the products from your products folder.
Step 4
Move and resize the image as needed by dragging the corners on the image.
Add the rest of your product images by repeating Step 3 and 4 as many times as needed.
Step 5
Arrange the products as you wish. Click “Export” near the top to save your moodboard.
Helpful Tips
To remove backgrounds from an image, click on the image you wish to remove the background from.
In the Graphics box that pops up, select “Erase.” Change the size as you wish. Drag the circle eraser over the image to erase the background as needed.
To duplicate images, click on the image you wish to duplicate. On the “Layers” box, click on the three little dots to the right of the image you want to duplicate, then select “Duplicate Layer” from the menu.
To flip images, click on the image you wish to flip. On the “Graphics” box, click the little graphic with two triangles.
To move images forward and backward, use the two right arrows on the “Layers” box to move images back and forth as you wish after clicking on the image you want to move in the layers box.
That’s it! It’s really simple to do and once you start making your own moodboard, you’ll easily catch on.
Here are a few mood boards I’ve done if you need a little inspiration…
The Circus’ bathroom is on the list for a makeover! So far, this is what we have come up with. She picked out the wallpaper and colors and I’ve been working to bring it all together.
How I Buy Fabric Online Without Seeing It in Person First – buying fabrics online can often be much cheaper, but is a little less stressful since you can’t see them in person. Here’s my trick for buying fabric online without the stress!
It’s been a very busy two weeks, y’all! When I was trying to decide what space to do for the Choose Your Own Adventure Room Refresh hosted by Jeweled Interiors, one of the reasons I opted to go with my closet (besides the fact that it desperately needed a makeover) was because I thought it might be a little easier time-wise and project wise than taking on a larger room. This space still ended up being demanding on both fronts. Of course, part of that was due to me critiquing every little thing.
This post contains affiliate links for your shopping convenience. Click here to read my full disclosure policy.
Thanks to Hudson Valley Lighting, Minted and SEI for providing products for this makeover!
I’m so glad we gave this closet a makeover though, y’all. It has given us a load more of functional space and it’s a true testament to how readymade plain Jane store bought products and DIY projects can come together to create a beautiful, organized and super functional space.
I was already pretty pleased with the closet exterior, so I didn’t do too much here. I did a bit of sprucing up though by editing, adding art and styling.
I’m still a big fan of the color and texture the carpet wall adds to the space and how this table and details like the closet door medallions, the lamp, rattan basket and other items give it a “traveled and collected” feel.
I wanted to add in more of that traveled feel and color with some art though. I went with Toro, Fonte Mourisca and Rome or Bust from Minted. Minted offers custom framing with all their art prints and you can choose from a wide variety of frame styles and sizes. I wanted the art to stand out and needed to keep the frames neutral since they were going on a very bold wall, so I opted for thin black metal frames. This way, they will also work with just about any other decor style if we ever change it up.
I got Toro in a larger size since he was a good neutral and he also adds some masculinity to the rest of our bedroom, which sports pink walls. He was also approved by Grunt, so brownie points there.
The bookshelf on the other side of the closet doors desperately needed some styling help. I had scored the bookshelf for $10 at a thrift store a while back, but had never really worked to make it “pretty”. I kept the travel vibe going here as well.
These shelves hold lots of mementos from our trips – a seashell Grunt found on the beach the day we got married, a nod to my favorite city, pictures from our trips, a vase we made during our Booze No Baby trip 😉 and more.
I found this guy at a thrift store and he fit perfectly in here too – guess we also have a bull theme going. ?
I added in another art piece from Minted here as well called Curaco. It pulls in a lot of colors from the space and of course continues the traveled feel.
The Closet Interior
Here’s where we really put in some work…
And yes, one closet door edge is black and one is white. Of course, it’s by design. 😉
This is just your basic closet system we bought at Home Depot when we moved in about three years ago. It’s nothing fancy, but I feel like we were able to make it fancy (and functional at the same time!) by partnering it with pretty storage bins.
That leopard print rug helps out a little too, doesn’t it? Can you believe that bad boy was only $15?!
The top of our closet system wasn’t really all that functional before. You couldn’t tell, but the shelves didn’t go all the way to the back of the wall. There was a pretty good sized gap between the back wall and the shelf’s back edge. And they also bowed in the middle. We were just so tired of renovating when we finally moved in, we just used a lot of what we had and called it a day. Grunt switched all those out this time around though and they are much more functional now. The green bins hold handbags, seasonal items, work clothes, etc. – things that you don’t need on an everyday basis. That cute little step stool makes it easy for us folks with short girl problems to get to the top shelf. 😉
Isn’t it darling? It was a super fun and really easy little makeover I did with a stool I found on clearance at Home Goods – tutorial for it is here!
I did do the one thing I had said I wouldn’t do – switch out my coat hangers. I am so glad I did though, y’all. These take up less space and they truly do keep those slippy sliding tops on the hangers. Switching out the coat hangers also made me realize how many pieces of clothing I had! I did some serious editing!
Putting the bins in were a game changer for this space. Doing this allowed us to move all the things that were in the chest of drawers in the closet and move that big piece of furniture out that was taking up one corner of the closet.
If you read my first post about the plans for this space, I told you that I actually do my makeup in here because surprisingly it has the best lighting in our house for that. Previously though, I would be sitting in the floor in front of the mirror on the back of the closet door putting my makeup on. Not anymore though! Now I’m sitting getting pretty at this dressing table.
This wall mounted table was a really easy build (tutorial for it is HERE!) and the front even drops down to reveal storage inside. The Circus had a ball organizing all my makeup into the containers, although she was upset I wasn’t ready to let go of more and give it to her.
I was going for a bit of a Studio 54 vibe in this area of the closet. Y’all know I’m enthralled with all that. The stool, mirror and sconces all help to create that and when I’m getting gussied up now, I can easily channel my inner Jerry Hall or Divine – depending on what the day calls for of course.
When the sconces are lit up, I can really feel the disco vibe coming on. 🙂 They are from the Mitzi collection at Hudson Valley lighting and I love everything about them. They are plug-in, so no hard wiring required. I didn’t want the cords just flopping along the wall though so I customized some cord channels to keep them in place while adding a little color at the same time.
I love both the jewelry and hat storage solutions because now I can see everything that I have right in front of me – no digging for what I’m looking for! To top it off, I added in this Zebra art above it all. I’ve been eyeing that art for years and finally decided this was the space to put it.
Opposite “my” side of the closet is our area for shoe storage and Grunt’s nook. He gets a nook, I get a side. Seems fair, right?
As I told you in the progress post, I had a grand idea for elaborate shoe shelves in this area and as it turns out, DIY wasn’t the way to go there. We ended up buying readymade shoe shelves and stacking them on top of one another. They actually ended up giving us more shoe storage than we would have had with my not so brilliant idea and it was much easier as well. Sometimes, it is just easier and more effective to not DIY!
Halfway through this makeover Grunt asked for a bench or stool of his own to sit down and put on his shoes. I told him sure, but don’t count on it before this whole thing is done. Mama had a list a mile long to get through! On Sunday, he mentioned the stool again. I went and got this one I had bought at a thrift store a couple years back and handed it to him. I told him I thought I had some leftover cowhide print fabric in my closet. He took it upon himself to find the fabric and reupholster the seat himself. I don’t know if I’ve ever been more proud of him in my life. haha! He had already picked out the Not Just a Number art from Minted, so it fit perfectly over the stool. I bought quite a few of the brass wall hooks to add in throughout the closet as needed. These work perfectly in his space to hang his clothes for the next day and other odds and ends.
That’s it for me! What do you think of the new space?
A big thank you to Hudson Valley who supplied the lighting for the Choose Your Own Adventure Refresh and Minted who supplied the art.
A special thanks also to SEI who provided me with the mirror and stool for this space.
Be sure to see what everyone else did during the Choose Your Own Adventure Refresh…
It’s midway point in the Choose Your Own Adventure Refresh hosted by Jeweled Interiors. I’m refreshing my closet (see the plan HERE!). Time to check in and see how far I have (or haven’t) come….
This post contains affiliate links for your shopping convenience. Click here to read my full disclosure policy.
Thanks to Hudson Valley Lighting, Minted and SEI for providing products for this refresh!
With every space I decorate, it becomes more clear that I am one hell of an overthinker.
This master closet makeover has been no exception.
It’s like I’m wired to automatically come up with some complicated plan (that truly didn’t seem that complicated in my head), when in reality, the solution to the problem is actually a pretty simple fix.
Overthinking Exhibit #1: The Shoe Shelves
If you remember from the “before” photos I shared with you last week, we had a serious shoe storage problem. We had some basic shoe shelves, but it wasn’t near enough to hold all our shoes and some of my heels didn’t even come close to fitting in the shelves without laying on their sides.
Now, when I first started plotting this makeover, I envisioned “L” shaped corner shoe shelves in a corner of the closet. Brass brackets would support the shelves and we could vary the height between the shelves as needed to accommodate all heights of shoes.
That was the seemingly un-complicated plan in my head that really turned into a pain in the you know what one Saturday afternoon. As it turns out, the brackets weren’t big enough to keep the shelves from bowing and the shelves themselves were just too heavy to be supported by brackets alone.
After overthinking it some more, throwing my hands in the air, drowning my overthinking in booze and then finally doing an Amazon search for shoe storage, I came up with a truly simple and better idea for shoe storage.
Buy readymade shoe shelves and stack them on top of one another.
On some of the units, we left shelves out here and there to accommodate for taller shoes. And by we, I mean Grunt. All I did was find the shelves and suggest we stack them on top of one another. He assembled them all, played around with the shelf spacing countless times, anchored them to the wall – everything. He gets the gold medal on this one.
I have some upholstery material ordered to use to cover that left side of the shelves. I’m not crazy about all the little bumps there on it from the screw covers. I was going to do it with the wallpaper I had included in my original closet plans, but as it turns out that won’t be here in time.
Overthinking Exhibit #2: The Dressing Table
In the corner opposite the shoe shelves, is where I planned to create a built-in dressing table coming out from the corner. Remember, it was going to look something like this…
Yep, the original plan didn’t work out. No worries though, I have come up with another solution and yes, it is a bit more simple than my original plan. Imagine that. The sconces are due to arrive tomorrow – so excited to get my hands on those! As you can see, the mirror and stool are already here and they are fabulous! I’m terrified of messing up the mirror before it goes on the wall, so the plastic is staying on it until then!
Grunt switched out our old hanging rods that were bowing for heavy duty ones. Why didn’t we do that before?! He replaced the also bowing shelving on top for new shelves – so much better! I’ve gotten all of the things that were in the chest of drawers in here into bins. I’ve even edited down quite a bit of my clothes and really probably need to give it one more round of editing.
I wanted to pull more color in here so I added this tassel trim to the black and white bins. I can’t decide if I like how the tassel trim looks on the solid black bins, so I’m still playing around with those.
I got a few new pieces of art up from Minted – Toro, Rome or Bust and Fonte Mourisca. I love the extra touches of color and interest they add to this wall – I think it was definitely needed here! I’m also planning to update some of these picture frames as well.
Still on the To-Do List:
• Cut, install and paint baseboard in missing spots.
• Paint backs of closet doors and trim.
• Install Dressing Table
• Hang Mirror and Sconces
• Switch out coat hangers for these (I said I wasn’t going to do this when I started this project, but the more I thought about it, I decided to just do it all now and be really happy with it instead of wishing I’d done this)
• Hang hooks, brackets and other small storage hardware in closet.
• Upholster side of shoe shelves with this fabric and maybe use elsewhere in closet too?
• Tassels or some kind of decor for black bins – they look so sad with the fun tassels on the black and white striped bins. 🙁
Still quite a few things to do, but the big projects are done – the paint is drying on the dressing table as I type! Lord willin’ and the creek don’t rise, I’ll have the full reveal for you next week!
Literally on that creek not rising – we have loads of rain coming down in our neck of the woods and have been under a flood watch for a couple of days now!
A big thank you to Hudson Valley who is supplying lighting for the Choose Your Own Adventure Refresh and Minted who is supplying art.
A special thanks also to SEI who has provided me with the mirror and stool for this space.
Be sure to see how it’s going with the rest of the Choose Your Own Adventure Participants…
I don’t think that a closet is ever the first thing on anyone’s list to “fix up” when you move into a house. It certainly wasn’t the first item on mine and Grunt’s list when we moved in here.
However, I think the older you get, the more you come to appreciate a functional, well laid out space even if it is just a closet – it seems to make life a little bit less hectic. Our closet is not functional or well laid out, despite it being a good sized walk-in closet. When we moved in here, we bought one of the basic closet systems from the Home Depot for one wall, some shoe shelves for another wall (that have never even came close to holding all our shoes), drug a chest of drawers in on one wall and called it done.
We’ve been tripping on shoes ever since.
And then the amazingly talented Jewel from Jeweled Interiors asked if I wanted to join in on a Choose Your Own Adventure Room Refresh. I threw my hand up like a kindergartener and screamed “Yes, yes!”
This post contains affiliate links for your shopping convenience. Click here to read my full disclosure policy.
Today, each of us participating in the Adventure Refresh are sharing the plans for our spaces; next week we’ll share the progress and on February 28th, we’ll all be sharing our finished spaces.
I’m betting you’ve already figured out that I’m refreshing our closet. 😉
I went through all the spaces in the house that could use a little refresh and decided that while it would be fun to freshen up the dining room or our actual master bedroom a bit, the master closet was the space in our house that needed the most help and had the most potential to add a little more sanity to our lives.
Master Closet Refresh Plans
Thanks to Hudson Valley Lighting, Minted and SEI for providing products for this refresh!
It is a closet, so I’m not going overboard on the design, but I am aiming to create a space that functions better for us and is a place I actually wouldn’t mind spending some time in.
The To-Do List…
Add Art + Lighten Up Exterior
On the outside of the closet. I’m planning to do just a little refreshing here – I still love my carpet wall, no matter what anyone else thinks. I’m going to add some different art to the left of the doors there above the marble table. I’m going to do three different pieces I think – Toro, Rome or Bust and Fonte Mourisca. I’m also debating on whether or not to lighten up the back of that bookcase with some fabric or wallpaper – thoughts?
Make the Current Closet System More Functional + ReZone Items
There it is y’all, the hot mess in all its glory.
We’ll be leaving in the closet system we put in a few years back, but we’ll be doing lots of re-organizing and re-zoning of items. I’m planning to add storage bins along the top and storage bins in the vertical shelves as well. The shoes will be getting a new home.
Better Shoe Storage
This is to the left of the closet. There is way too much wasted space here that has a lot of potential. The plan here is to get all the stuff that’s currently in the dresser into the bins that will be in the vertical closet shelves. Then, we’ll put in some of those shoe shelves you saw in the design board above. They’ll be stacked on top of one another. I’m thinking of adding that fiddle leaf fig wallpaper onto the sides of the shoe shelves to add a little color and interest there.
Built-In Dressing Table + Hook Storage
This is the wall opposite the one you just saw. Again, more wasted space. The shoes will all go into the new shoe storage I just told you about. From there, I’ll be adding lots of different hook storage in here for various things and then I’m planning to build a dressing table into this space.
Funny enough, the closet actually has the best lighting for makeup. I realize this makes no sense at all. The overhead lighting in there is very bright and mimics daylight and since the closet is painted all white, that light just bounces off the walls. I put my makeup on in here (when I actually wear makeup) in the floor in front of the mirror that is attached to the back of one of the closet doors. Real fancy, right now, ya’ll. Looking to change that by creating a built-in dressing table with that gorgeous Harper Blvd mirror above it and flanked by those fabulous sconces from Hudson Valley Lighting. I’ve been eyeing this zebra art from Minted forever now and I finally think I’ve found the perfect place to put it here. And finally, this stool from SEI should take care of seating at the dressing table without taking up too much space.
Those are the big to-do’s right now! I’ll have a progress update for ya next Thursday. You can also follow along on my Instagram stories for updates too!
A big thank you to Hudson Valley who is supplying lighting for the Choose Your Own Adventure Refresh and Minted who is supplying art.
A special thanks also to SEI who has provided me with the mirror and stool for this space.
Be sure to see what the rest of the Choose Your Own Adventure Participants are tackling over the next couple of weeks…
Switching out the bathroom faucet and shower head in our guest bathroom with Peerless Faucets not only helped to update the look of the space but made cleaning up even easier!
This post is sponsored by Peerless, however, all opinions are my own.
As you’ve already seen from the guest bathroom makeover reveal, we switched out both the sink faucet and the showerhead in here.
The entire vanity/countertop/sink/faucet was well past due for an update. If you don’t remember, this is how it looked before…
Well past it’s prime…Am I right or am I right?
The vanity itself got a new paint job, the countertop and sink got replaced and a new faucet was installed.
Peerless Bathroom Sink Faucet
We put in a quartz countertop paired with an under mount sink. To whoever created the under mount sink, I bow down in your presence. Any of you gals out there who’ve ever had to clean up after a guy trimming their bread can attest to how much easier it is to just wipe all those whiskers into an under mount sink as opposed to a traditional drop-in one. ?
For the faucet and all the other hardware in the bathroom, we opted to go with a chrome finish. Personally, I feel like polished chrome finishes never date. They are always classic and can work with just about any decor style. Also, chrome finishes tend to be less pricey and more timeless than some of the other finish options. ?
Our faucet is the Xander Single Handle Bathroom Faucet from Peerless. I love single handle faucets because, again, how easy it is to clean up around a single handle faucet rather than a two handled one. There’s only one thing to work around on the countertop as opposed to two handles to scrub between. In addition to the ease of use and cleaning, the Xander Faucet is sleek and modern, and serves as a nice focal point for the room.
The Xander has a clean, modern feel, but with rounded edges to soften it a bit. It was a good option for something to contrast nicely against the rest of the classic style bathroom. The Xander faucet can also work with a three hole faucet installation if that’s what you currently have. It comes with an escutcheon you can use to cover up those other two holes.
Peerless SideKick Shower System
The shower/tub combo also got quite the makeover. As with the vanity, the before was very dated…
We removed the doors and had the entire tub unit professionally sprayed with a new finish.
This shower system is truly a sidekick. Obviously, you can use it as a traditional shower head, but the detachable spray wand is a three-in-one little gem.
The spray wand has a traditional spray pattern that is great for cleaning off dirty hands and feet that have just been digging in the dirt. When I come in from gardening, I always head for the bathtub to scrub my hands and arms because keeping all the mud and dirt contained in a bathtub is much easier than in a small bathroom sink.
The spray wand also has a waterfall function that mimics water being poured out of a cup, which is perfect for bath time for babies and kids.
Last, but definitely not least, the SideKick Shower System also comes with a cleaning pad attachment.
Now this is where this shower system sealed the deal for me. Yes, my friends, no more grody bathtub brushes. Just spray on some bathtub cleaner, attach the cleaning pad, turn on your water and go to town. Cleaning a bathtub is so much easier with this thing. The guest bathroom is the only full bathroom downstairs so we often use it for cleaning up after working in the yard instead of tracking dirt through the whole house. This bathtub might not get used a whole lot, but when it does, it gets some pretty dirty people in it. ? That cleaning pad makes clean up a breeze.
If you have pets, there is also a pet attachment that can go right on top of the spray wand.
This attachment has finger-like scrubbers that get into your pet’s fur easier than just a regular spray would, making them cleaner than ever.
When the spray wand isn’t in use, you can opt to dock it with the shower head as you saw above, or you can place it elsewhere on the tub with the included suction holder for easy access.
And if you’re worried about installation, don’t be. Installing the SideKick Shower System is pretty easy – you install it just like you would any other showerhead.
It’s so nice to have a guest bathroom that is both beautiful and welcoming for guests, but also functional for us!
What do you think about the Peerless SideKick Shower System?
It was far past time for our guest bedroom to get a makeover. Now that it’s nearly done, I’m considering taking it over for myself because of one thing – the mattress. This Serta iComfort Hybrid mattress from Sears is the real deal.
This post is sponsored by Sears. While this was a sponsored opportunity, all content and opinions are all my own. Affiliate links are included in this post.
The Guest Bedroom.
It’s often a room that’s overlooked. It tends to get the hand-me-downs. It’s always the last on the list.
Well, I’m here today to take a stand for the guest bedroom.
It’s time that the guest bedrooms of the world get a little special treatment.
Now, let me first say that I too was one of those people who neglected their guest bedroom.
We’ve had this house for nearly three years and the guest bedroom just now got a (much needed) new look.
That’s how it looked when we first bought the 70’s Landing Pad. See, I told you. It desperately needed help. Just like the laundry room, it was sporting all blue walls and trim. We had a spare mattress and box springs in here (no bed frame, it was just on the floor), a random chair and nightstand. It was pitiful, y’all. I would literally apologize to guests as I took them in here. Luckily, they’ve always been family and close friends so they understood, but it never lessened my embarrassment of the space.
This summer, I finally found some inspiration for the guest bedroom and even the guest bathroom (but that’s another post!) and we’ve totally transformed both spaces. While the guest bedroom isn’t 100% finished yet, the main part of the guest bedroom, the bed area, is….
I’m happy to report that it’s now light and airy and, I think anyway, very welcoming. It might also not be what you would have expected from me. While the rest of the 70’s Landing Pad sports some moody tones and multiple nods to the 70’s and Studio54, the guest bedroom does not. I totally get that not everyone wants to sleep in a pink bedroom with one wall that’s covered with faux grass, like our master. Some people may not prefer to sip a cocktail below an oversized piece of lion art surrounded by black walls. Although, I don’t know why anyone wouldn’t accept a free cocktail just about anywhere. ? I wanted to keep the guest bedroom more neutral, so to speak. I wanted it to be a place where anyone would be comfortable in it. Grunt Labor said this space has a bed and breakfast vibe going on and that suits me just fine – hopefully that means our guests will be very comfortable here.
Grunt also informed me that I was making this room so good that we just might move into it.
Well, I totally brushed that off – until the new mattress we got for the guest bedroom arrived.
Oh. My. Stars. Ya’ll.
The mattress and box spring set that had been in there was a hand-me-down set from Nick. It wasn’t bad, but it was old and we knew we needed to replace it. Sometimes, it’s hard for me to sleep when I’m not in my own bed, so I’m betting some of our guests have the same issue. We wanted to have a super comfortable mattress to help alleviate that problem as much as possible.
Well, if they can’t sleep on this mattress, then I’ll put them on another bed and I’ll happily sleep on this mattress.
Serta iComfort Review
The mattress we received from Sears was the Serta iComfort Hybrid. We ordered it from Sears.com as they had a good selection of top mattress brands.
The only other type of mattress we’ve ever purchased online before was a mattress in a box, so I was a little skeptical about ordering a traditional mattress online. However, Sears has a 180 night comfort guarantee, so I knew we would have plenty of time to try it out and return it if we didn’t like it.
The delivery of the mattress was a breeze. Since it is a traditional mattress, it has to be delivered by a special delivery service. They call to set up a convenient delivery time for you and then come set it all up for you. Typically, it takes 5-7 days to have your mattress delivered from the time the order is placed and they will even haul away your old mattress for a small fee.
Why did we choose the Serta iComfort Hybrid?
The Serta iComfort Hybrid is the only mattress that combines both cooling memory foam with Serta’s newest and most advanced coil support system. So, you get a cooler mattress, good support and that soft cradle like feel in one mattress. Also, we knew that Serta had a great reputation for producing high quality mattresses.
The real question though of course is, is it really all those things?
Yes, my friends, it is.
As soon as it was delivered, I laid down on it to make sure it was good enough for guests.
I didn’t move for an hour.
It was so comfortable that I just decided to take a break from work and lay there and watch television for a while.
And when Grunt Labor got home, I had him lay on it and I’ll be damned if he didn’t lay down and do the same thing.
We also slept on it a few nights as well just to make sure that it really had enough support for two people – we already knew it was comfy. We had opted to buy a bed frame that didn’t require a box springs, thus why we also needed a mattress with good support as well as comfort. We wanted to make sure that the mattress would really work on a bed without a box spring.
And it did.
We slept so well and we were even on a queen size bed instead of our usual king. Honestly, it’s taking everything I have to not steal this mattress for our bed at the farmhouse that’s also a queen size. It is so comfortable, ya’ll.
If you are looking for a new mattress right now that has both great support and great comfort, I highly suggest this one. If you also need a new box spring, you can even score one of those for free at Sears with the purchase of a Serta iComfort Mattress or Serta iComfort Hybrid Mattress through September 10th.
Now, for all the pretty details…
Like I said, the guest room isn’t 100% completed yet, but here’s what we’ve got so far…
As I said, we bought a new bed for in here as we had the mattress and box spring just laying on the floor before. I wanted to get a bed that was more open and airy and I didn’t want to deal with a bedskirt either. Of course, it had to be affordable as well. We ended up going with this one and it was only $175. So far, we are really pleased with it. It seems to be pretty sturdy and has a style that won’t easily date and will work with many different design aesthetics if we ever want to move it somewhere else.
I actually hijacked the side table from the sitting area in our bedroom. It worked too well here not to! Plus, I had another side table that easily worked in our sitting area where this one had been. I bought some faux greenery to add a little more color here and also accessorized with some brass accent pieces I found at a thrift store. I mean, who can pass up a brass alligator that’s only one dollar!? Also, pineapples are a sign of hospitality, so that was a no-brainer!
I opted for classic, crisp white bedding and then added the lemon pillow for a punch of color and I thought, a touch of freshness to the bedding.
One wall in the guest bedroom had this little recess and it turned out to be the perfect size for fitting the bed into. We painted the recess in a classic navy color to add a little more interest and color to the space.
The Isle of Palms art was what started the whole makeover of this space. I happened upon it one day and knew that it would be the perfect jumping off point for the guest bedroom. That’s our favorite beach spot and where we vacation every year.
Because there was only room for one nightstand here and to keep that space open for guests to put their things if needed, I installed a plug in wall sconce on either side above the bed. I love the touch of shine they add to the space, without it feeling too fancy.
Besides giving the entire room a fresh coat of paint, all the trim and doors also got a fresh coat of paint. The morning sun comes straight through these doors, so I put up these room darkening panels for French doors. They were only $6 each, so I was really skeptical about them, but they truly do knock out nearly all the morning light in there when they are down and then they easily roll right up. I also bought a classic navy and white striped runner for in front of this door.
Hoping to have this room fully completed by the end of September, so check back later to see the rest of it!
I think blue and white is a timeless decorating combination that doesn’t easily date. This blue and white bathroom makeover is full of budget remodeling and decorating ideas for your own bathroom.
Three months ago, this bathroom wasn’t even on my makeover radar. I knew it needed to be remodeled (knew it since we bought the house nearly three years ago ?) but it was definitely at the bottom of the list. However, just like I’ve said about the guest bedroom, when I showed guests where their bedroom and bathroom was, it was quickly followed by apologies for how bad each space looked. Granted, they were clean, but neither was pretty.
I was finally spurred into action to makeover both the guest bedroom and bathroom when I found a piece of art that was the perfect jumping off point for the bedroom. I figured, “Jenna, you really can’t have a great looking bedroom and then crap for a bathroom.”
The Bathroom Before:
Told you it was bad.
And the bathroom now…
I love this space now. I think it’s pretty and timeless and would be welcoming to any guests.
Affiliate links included in this post.
Blue and White Bathroom Decorating Ideas
The guest bedroom sports a blue and white color scheme, so I decided to carry that over to the guest bathroom as well, but with lighter tones of blue. When it comes to timeless, classic, never-fail color schemes, I don’t think you can go wrong with blue and white.
It’s also probably not exactly what you might expect from me. You might expect something like this at the farmhouse, but not the 70’s Landing Pad. The thing is that I really wanted whoever was staying here to feel comfortable and enjoy staying in the space. So, I opted for a more classic, neutral type design that just about anyone could relax in. You’ll see the same approach in the guest bedroom.
And I really do love this space, y’all. It’s nothing like our master bathroom, but I just love the classic feel it has.
So what all did we do? Well, we did quite a few things in here to really change the look of the entire space but without any big budget-busting changes.
Starting from the bottom up, we put down new flooring. We went with vinyl hardwood look planks that snapped together and installed over the old tile floor.
We kept the old vanity. I painted the entire thing and switched out the hardware though.
As soon as I found those gorgeous ring pulls, I knew they were the ones. They were such a steal too – only $25 for five of them. They make a big impact for not a lot of money. For the drawers, I went with simple oval chrome knobs. These complimented the ring pulls well but without taking away from them.
We got a new quartz countertop for the vanity as well as an under mount sink and new faucet.
The old countertop was just well past its prime. I tried to think of ways that I could incorporate it into the bathroom’s new design, but there just wasn’t much of a way to work with it. On top of that, the old sink/faucet that had been there also had five holes – three for the actual faucet, one for a sprayer and one for a soap dispenser. Trying to find a replacement faucet to work with all that was not something I wanted to deal with.
We did a single handle chrome faucet for in here. I’m all about the single handle because they are so much easier to clean around. I love chrome too because I always feel like it adds a touch of shine and dresses up a space nicely. I don’t think it dates easily either.
The mirror was a Home Goods find – only $30! It’s light gray wood finish is a nice compliment to all the white and blue on the wall.
Just about anytime I see one of these brass bamboo trays at a thrift store, I buy it and stash it away until I find a place for it somewhere. These are so gorgeous when they’re cleaned up and compliment just about any decor. This one worked perfectly on one side of the counter nestling together some hydrangeas, a thrift store elephant and a glass canister holding travel sized toiletries for guests if they need any.
One of the best deals I found for this bathroom was this white bamboo roman shade for only $20! They have other sizes and colors too and they are all on sale.
I continued the chrome fixtures with the hand towel holder as well. The large cabinet door just above it is actually the access to our electrical panel. To blend it in, I gave it a fresh coat of white paint like the vanity and also put one of the ring pulls on it as well.
The walls got a fresh coat of paint and a washed-out stripe treatment on one wall.
I wanted to create stripes that were pearl-like and sort of washed out. I love how they turned out and I think they add just the right amount of blue and interest to this wall. I’ll have a tutorial up on it soon.
I do kind of feel like every space needs a little touch of green somewhere – doesn’t necessarily have to be a real plant. ? I opted for this Ginger Jar + Fern Art Print. It kept with the blue and white theme and I think it has that classic, timeless feel like much of the bathroom does.
I went with navy for the towels and bathmat to keep with the blue and white, but to add a little more interest. We also had the bathtub professionally coated with a new finish to get rid of that yucky beige color it had been sporting.
I went with this towel holder because it had a touch of silver and the leaves were a fun addition to the space. The wood also went nicely with the mirror frame and frame the art is in. I don’t think it necessarily is a towel holder, but it worked perfectly for this space for just that.
So what do you think? Do you like my take on blue and white bathroom decor?
Looking for more budget diy and decorating ideas? You might also want to see…