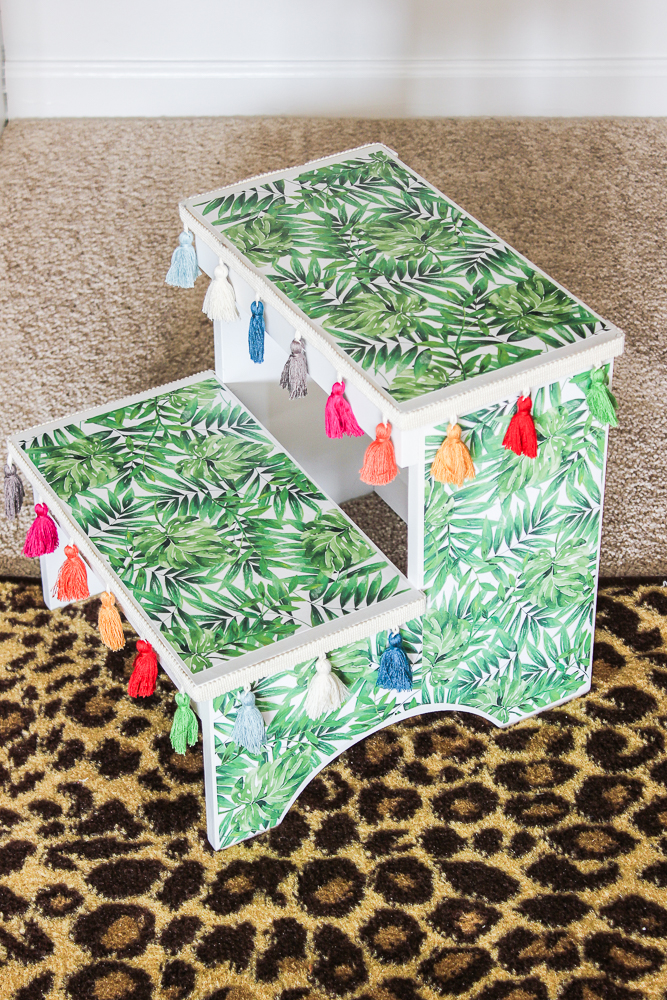
Banish those basic step stools in just an hour or two with this idea for an easy step stool makeover using scrapbook paper and Mod Podge! You’ll make a huge difference for little effort and money!
Making our closet more functional by adding more storage along the top of the closet system came with a little problem for this short girl.
This post contains affiliate links for your shopping convenience. Click here to read my full disclosure policy.

Green Velvet Baskets / Black and White Bins / Tassel Trim / Black Bins / Leopard Print Rug / Closet System / Velvet Hangers
I was going to need a step stool to get to those baskets on top that I would occasionally need. I didn’t just want any basic step stool though – this was a great opportunity to add a little color, pattern and personality to the closet!
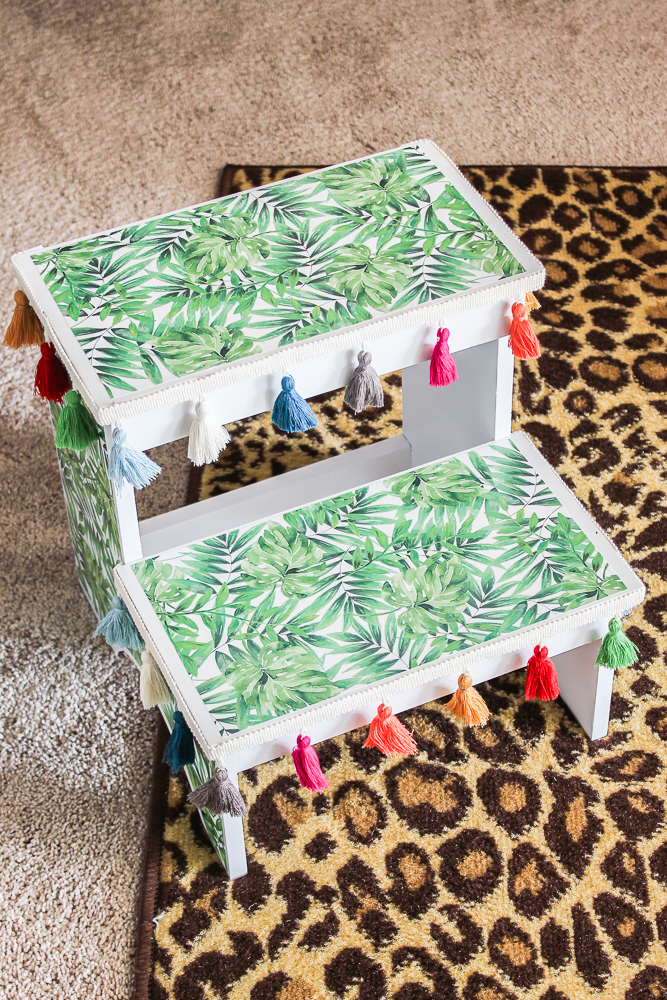
I found a step stool on clearance and turned it into this beauty. This little step stool makeover was one of the most fun projects I’ve ever done. It was super easy too. 🙂
Colorful DIY Step Stool Makeover
Supplies and Materials Needed:
- Step Stool – I found mine on clearance at Home Goods.
- Spray Paint (if you need to paint your step stool first.)
- About six pieces of scrapbook paper in your choice of pattern or color – I used this tropical leaves print.
- X-Acto Knife and Self Healing Cutting Mat
- Ruler
- Satin Mod Podge
- Small Paint Brush
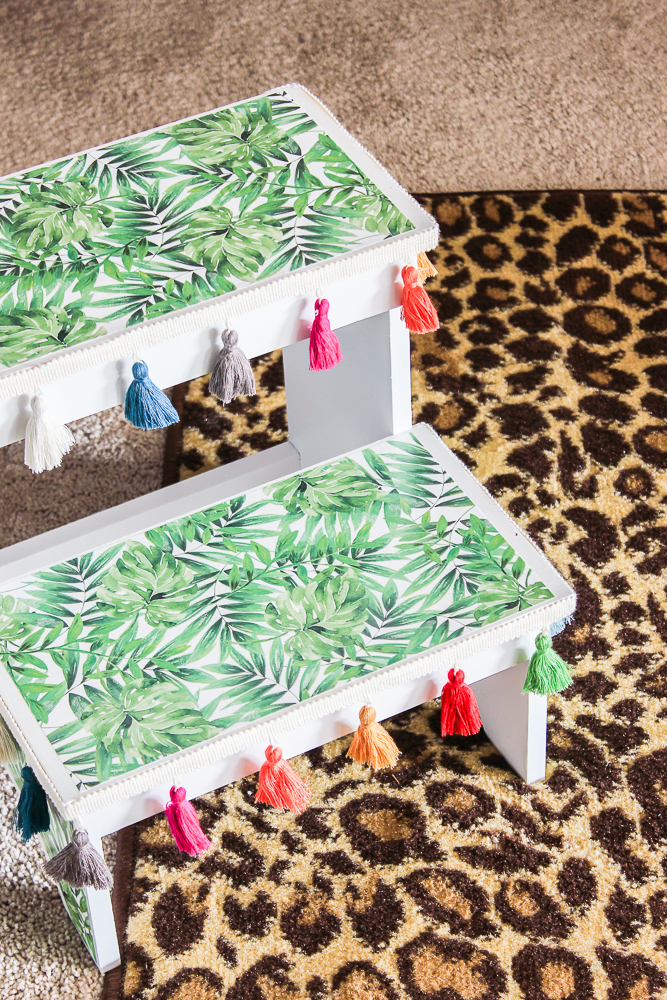
- Upholstery Trim of your choice – I used this colorful tassel trim.
- Hot Glue Gun
Step 1
If needed, spray paint your step stool first.
Mine started out looking like this and that most definitely would not work for my closet. 🙂 The entire stool won’t be covered with scrapbook paper; you’re going to have some of the edges showing, so pick a color that works well with your scrapbook paper.

I gave my stool a couple coats of semi-gloss white spray paint as I knew that would be a safe bet to go with my tropical leaves paper.
Step 2
After the paint has dried, lay out one piece of your scrapbook paper along one of the steps.

Fold the paper over the step front to create a crease.
Put the paper on the cutting mat and place the ruler a little ways in from the crease.
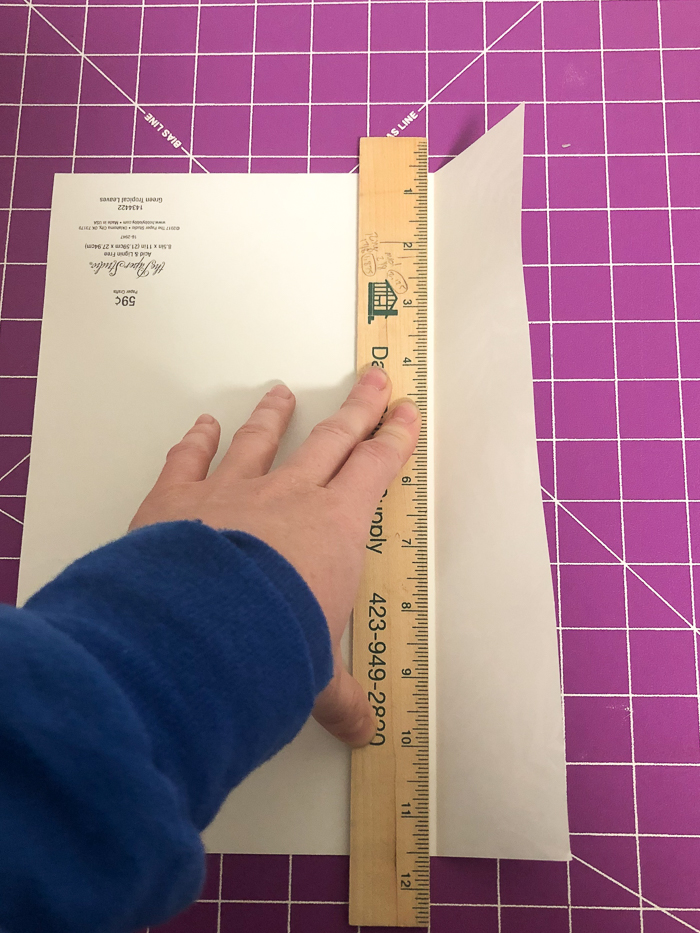
Cut along the edge of the ruler. You want to leave a little space between the ruler and the crease to have a border of the white on the stool around the paper. To me, doing this just makes it look more finished.
Step 3
Put a coat of Mod Podge on the step you just cut the paper for.
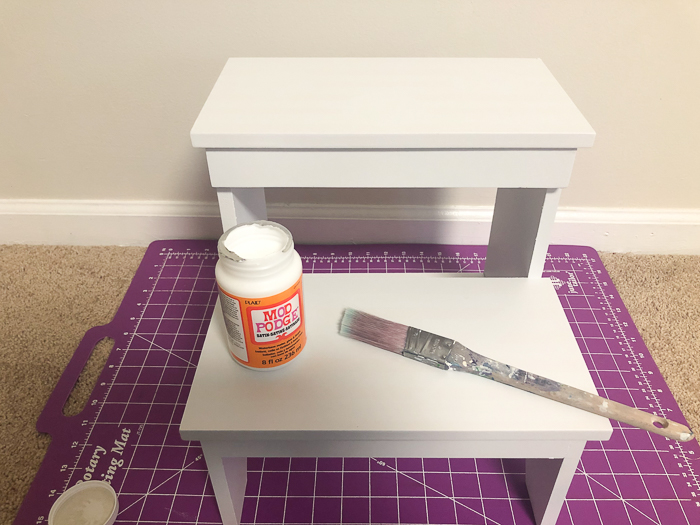
Apply the paper to the step and put a coat of Mod Podge on top of the paper as well.

Step 4
After the Mod Podge has dried, apply one more coat over the paper.
Step 5
Repeat the above process on each step and the sides of the step stool.
For the sides of the step stool, I had to use two sheets of paper as shown below.

Again, remember to cut the paper slightly smaller than your creases to allow for a white border around the paper.
Step 6
Once you’ve applied all the paper, coats of Mod Podge and everything has dried, you’re ready to apply the upholstery trim.
To do this, simply run a small bead of hot glue around the edges of your step stool, then apply the upholstery trim.
Leopard Print Rug Here – only $15!
Isn’t this the happiest little stool you ever did see?
See the full closet makeover HERE!
Want more great, but simple DIY projects?
DIY Agate Slice Lamp Finials – you won’t believe how gorgeous these are, but how simple they are to make!
Duck Tape Fringe Pillow – add fringe to anything on the cheap by making it with duck tape!


Join the Freak Show On…

Erin says
So glad you did this post. I an shocked to know that you used scrapbook paper. Cool.
Jenna says
Glad it was helpful, Erin! Honestly, I was shocked at how well the scrapbook paper worked out myself!
Susan the Farm Quilter says
Such an elegant stool, Jenna!! My dear, what did you cut your pretty paper with? I am horrible at cutting anything straight, except when using my rulers and rotary cutter when I’m making a quilt! The next time you are in Joann’s or Michael’s, check out their rotary cutters and the rulers that go with them. You may find it to be less dangerous than cutting with a box knife or craft knife and easier to keep straight than scissors. Definitely use a coupon because they can get spendy!! I love your cutting mat!!!
Jenna says
Thanks, Susan! I know – I have got to get myself a rotary cutter. I’ve had that on my mental “to-buy” list for years now and of course, I only think of it when I have to pull out my X-Acto knife to cut something with! And I found that cutting mat at a yard sale for a couple bucks – Score!!
Pam S says
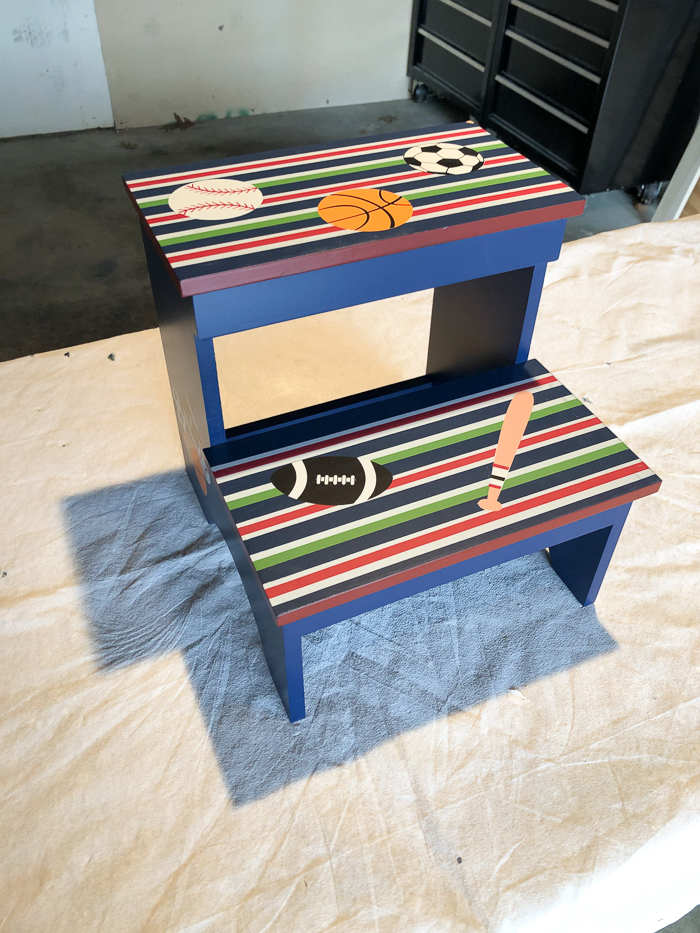
As a matter of fact, that IS the happiest little stool I’ve ever seen! I did the very same stools for my Grandson and G-Niece years back for Christmas….except with stencils/paint. Forgive me if I don’t recall details. They were both just wee little people. And my Grandson just turned 16! But I love the grown-up style you’ve done!! Just might want to replace my folding step stool in our closet…. As long as I don’t fall off and break a hip!! LOL
Jenna says
Thanks, Pam! I bet your stools were adorable! I actually thought about using a leopard print stencil I have for this stool, but figured I needed some contrast with the leopard print rug that was already in the space. 🙂
Stephanie S says
Awesome stool and fun fun. I guess you guys are loving it now in control.
Jenna says
Thanks, Stephanie! YES!!! I am so happy to finally have an organized, functional closet!
Jenny says
What a great makeover! Scrapbook paper and mod podge make a huge difference on the stool. Thanks for sharing at Merry Monday
Jenna says
Thanks, Jenny!
Mother of 3 says
Such a cute makeover! I have tons of scrapbooking paper and I’m always looking for new ways to use it. Thanks so much for sharing with us at Encouraging Hearts and Home. Pinned.
Donna @ Modern on Monticello says
The tassels just make this stool the best little makeover. I’m sure it makes you smile when you walk in to your closet. Thanks for sharing at #HomeMattersParty
Jenna says
Thanks, Donna! I just love those tassels too!