A drill is one of the most versatile power tools a person can own. The best thing about it? Learning how to use a drill isn’t hard at all. Besides it being versatile, using a drill is pretty easy.
About a month and a half back, I was chatting with Gina from The Shabby Creek Cottage and attempting to bribe my child to be quiet with a popsicle so I could actually hear what Gina was telling me. I finally figured out we were troubleshooting what she should hang on a blank wall in her living room.
One thing led to another and before we knew it, we were planning a Power Tools 101 series.
Why?
Because we’re bad asses like that.
And we are ADHD.
Ok, that’s not really the reason.
The real reason is because we think that every woman (and all 3 men who read my blog, but don’t need this post – Hi Dad, Dad, and Grunt Labor) should know the basics of power tools.
Why should you know the basics?
Because you are a bad ass.
And every bad ass knows their way around power tools.

Once a month, Gina and I are each going to cover a different power tool. We are going to show you the basics of how the tool works and what it can do.
This month, I am giving you the basics on cordless drills and Gina is sharing the how-to for a jigsaw.

This post contains affiliate links for your shopping convenience. Click here to read my full disclosure policy.
Please use all appropriate and proper safety precautions when using tools and attempting projects. All projects and tool usage are attempted at the reader’s own risk.
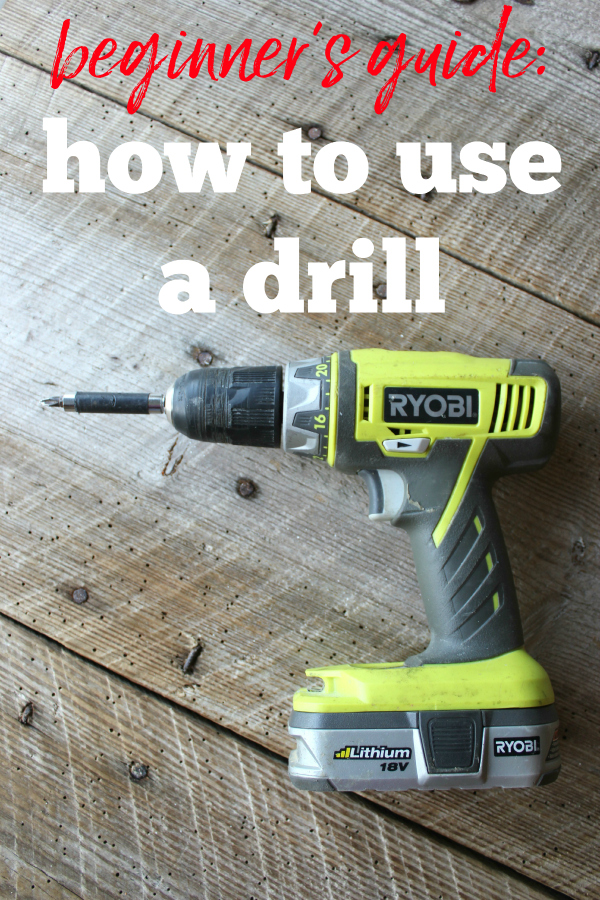
First off, the photo above is of the actual drill that we have – a Ryobi One Plus 18V. So far, it has worked really well for us.
Using a Drill
Parts of a Drill
I’m sure I don’t have to tell you where the trigger is or that it makes the drill “go,” but just in case, here ya go…

There is a button on each side with an arrow. You push it back and forth and it controls which direction the drill drives – reverse (counter clockwise) or forward (clockwise). You can also think of it as going inward (clockwise) when drilling into wood or attaching screws or outward (counter clockwise) when pulling a drill bit back out of wood or removing a screw.

Our drill has a dial on top that controls the torque (power / force) that the drill drives with. The lower the number, the less torque and vice versa. Typically, I keep the drill on the lowest number, unless I am drilling into something pretty hard that I need more power with.
What a Drill Can Do
Driving Screws with a Drill
When you are driving a screw, you will want to use a screwdriver bit in the end of your drill that matches the type of screw you are driving. Most likely, you will need to use a straight or a phillips head drill bit.

And here are what some screwdriver bits look like:

This is one set of screwdriver bits we have – a 45 piece set from DeWalt – it has just about any shape or size you could need.
To insert a bit into your drill. Hold your hand firmly around the front part of your drill keeping it still while running the drill in reverse (#1 below). The opening will get larger as you continue to go in reverse (#2) and smaller as you go forward (#3).

When the opening is big enough for your bit to fit in, but small enough for it not to fall too far in the hole, place your bit in the opening, hold your drill firmly as you did before and run the drill in the forward (inward) motion until the bit is securely in the drill (#4).
You can also twist the front part of your drill to release and tighten bits into the drill.
As a side note, Grunt Labor and I have a screw guide that we keep on our drill just about all the time. You put it in and remove it the same way you do a regular drill bit.
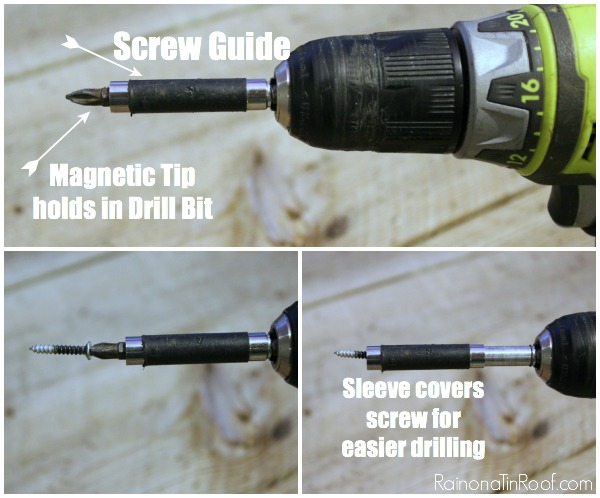
Once you place a screw on the bit, you pull the sleeve over the screw and it helps to keep it stable while you are drilling the screw. The cover moves itself back as the screw goes into your surface. A screw guide isn’t necessary, but is super helpful with getting your screws in straight and not having the screw fall off the bit a million times – especially with long screws.
Ok, now that we have a screwdriver bit in the drill, let’s put the screw into the wood. Hold the drill straight (the picture below is not a good example of this because I was taking photos with one hand and using the drill with the other), firmly push down on the drill and pull the trigger at a slow and steady pace.

To remove screws, simply place the screwdriver bit into the screw you are removing, push the button on the side of the drill to make the drill go in the counterclockwise direction and pull the trigger.
How to Use a Drill Bit
Drilling Pilot Holes
Sometimes, you may want to drill a pilot hole before placing your screw directly into the wood. Pilot holes keep your wood from splitting. You will do this with regular drill bits that make holes.

The above set is one that belonged to Grunt Labor’s grandpa and it is great. This set would also be a good option that has just about any size you would ever need.
To drill a pilot hole, select a drill bit that is a little smaller than the tip of your screw. Place the bit in your drill using the same method you used for putting the screwdriver drill bit in place. One more, firmly press down straight onto your drill, while pulling the trigger with a firm and steady motion to start drilling and create your pilot hole (#1 below).

After your pilot hole is drilled, reattach your screwdriver bit and drill the screw in. If you want to really look like a pro, before putting the screw back in, you can take a larger drill bit, the size of the screw’s head (#2 above) and drill out just a tad bit more where your pilot hole is (#3 above). You just want to drill out enough to where the screw’s head will sink into the wood (called counter-sinking). Once you have done this, drill your screw in and place wood putty on top of the screw – you won’t even be able to tell the screw is there (#4 above).
More Useful Drill Bits
There are other fun and useful bits you can use with a drill, like a spade drill bit.

Drilling a hole with a spade drill bit cuts out circles in wood. You can also get hole saw bits which cut out much larger circles – you can use them for things like cutting out drink holders in a swing.
And if you need to mix up something large, you can use a mixing bit.

Mixing drill bits are super handy for mixing grout, paint, and huge batches of cookies.
Well, I haven’t tried the cookie thing, but I’m pretty sure it would work.
Not too hard, huh?
Seriously, anyone can use a drill. Anyone.
Just don’t let your two year old play with it…. you may end up with a few holes in the wall….not like that’s ever happened to me or anything…
Head over to The Shabby Creek Cottage for a crash course in using a jigsaw – now you get to cut stuff!
Got any tips on how to use a power drill?
Share them in the comments!
Looking for more power tool 101 how-to’s?
How to Use a Circular Saw – a must have tool for any DIYer.
How to Use a Miter Saw – probably my favorite power tool.
How to Use a Heat Gun and 15 Things to Do With It – you won’t believe just what all a heat gun can really do!
How to Use a Sander – a must for furniture makeovers!
Need tool suggestions? Here are the best tools for DIYers at any level.
Want to come back here later? Just pin the image below.
You know you don’t wanna miss any of this crazy.
Sign up to get my posts delivered to your inbox here.
Stalk Me Here:
Pinterest / Facebook / Twitter / Instagram

SaveSave





 I suggest printing them out in a matte finish – it will help keep that watercolor look.









 Not only are they decorative, but I love big baskets like the ones above to put extra blankets in and store away essential items that aren’t so pretty. Yes, I like big baskets and I cannot lie.


