These little gems are the perfect fall place card holders – they’ll carry you through the entire season! And they are super affordable – you can make these pumpkin place card holders with items from the Dollar Tree!
I would like to thank the Dollar Tree for two things.
1. Having an abundant supply of plastic toys for me to spray paint.
2. Having cheap pumpkins that make fabulous place card holders.
I know, I said I wasn’t doing any more fall crafts, but really how can I turn down $1 pumpkins that can be made into fabulous pumpkin place card holders?
I thought you’d agree.
They are also really for my Thanksgiving tablescape coming up tomorrow, so that doesn’t really qualify as a fall craft…
Disclosure: This post was a collaboration with Velvet Finishes. All opinions and love of Dollar Tree pumpkins are 100% mine. This post contains affiliate links for your shopping convenience. Click here to read my full disclosure policy.
I really really really wanted to paint these green.
Imagine that.
But, I had just done the green pumpkins for my other fall decor and I did want these to look a bit harvest-y. So, I opted for a deep red. I also made some “aged” pumpkins for the centerpiece that I’ll show you too.
Dollar Tree Place Card Holders
Materials & Supplies Needed:
- Dollar Tree Pumpkins
- Velvet Finishes Paint in Rococo, Vivid, Luxurious, and Soulful.
- Velvet Finishes Enhance Dark Glaze
- Paint Brushes
- Mod Podge
- Gold Glitter
- Old Lint Free Rag
Materials & Supplies for the Name Cards:
- Cardstock
- Silhouette cutouts (I made mine on my Silhouette Cutting Machine, but you could probably find some at a craft store, Etsy or just print some and then cut them out.)
- Glue
- Metallic Gold Paint Pen
- Craft Feathers
- String or twine
Steps
Step 1:
To get the deep red that I used on the pumpkins, I mixed together Vivid & Luxurious.
I started with three parts vivid and one part luxurious. Easy peasy. After I mixed up my concoction, I wanted a bit more red, so I added just a large dollop of red to the mix and mixed again.
Then, I painted it on the pumpkins with a plain old non-fancy chip brush.
I did two coats on each pumpkin.
Step 2:
After the pumpkins dried, I applied Mod Podge to the stem and then sprinkled on gold glitter.
Step 3:
To make the name cards, I just used the same method I did on my DIY Silhouette Gift Tags last Christmas. I cut out the actual tag and silhouette on my Silhouette Cutting Machine and then glued down the silhouette to the tag. With these, I ran some Mod Podge along the edges and then poured glitter on top. I wrote the name with a gold Sharpie paint pen.
Step 4:
To attach the feather and card together, simply tie a few feathers together, and then tie them onto the place card. I just put a piece of tape on the back of the card to attach it to the pumpkin.
I also made these super cute little pumpkins as part of the centerpiece you’ll see tomorrow.
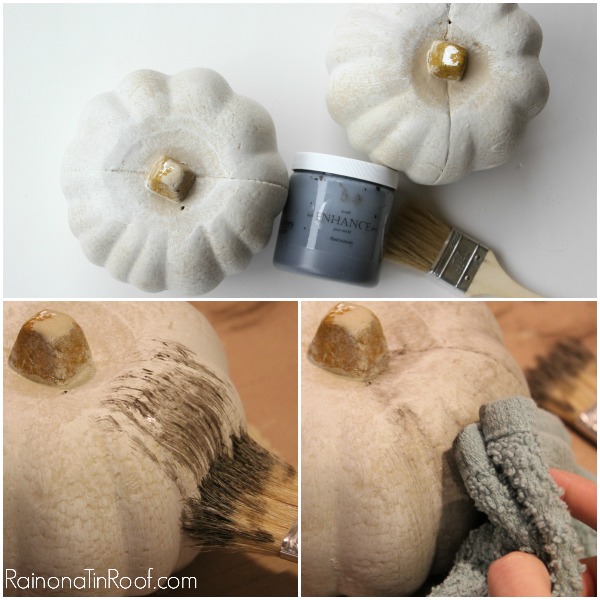
To make these, first paint your pumpkins with Soulful.
I did two coats. After its dried, come back and dry brush on Rococo.
You don’t want to have hardly any paint on your brush. Dip it in the paint, dab most of it off, then just do quick swipes up and down the pumpkin.
After that dried, I did a very light coat of the Enhance Dark Glaze.

If you have been around here long enough, you know I typically suck at glazes. This one is so much easier to use than any I’ve tried before. I used it on my IKEA Tarva Drink Bar and was honestly scared I would ruin the whole thing with the glaze, but I didn’t! It looked fab!
Instead of using these “aged pumpkins” as place card holders, I wrote Give Thanks on them.
More easy fall crafts:
DIY Ampersand Pumpkin – fall decor, but with a chic twist.
Fall Mums Watercolor Printables – free printable art in five different styles.
7 Simple and Frugal Fall Crafts and Decorating Ideas – easy on the wallet, high on style.
Want to come back to these later? Just picture the image below!
You know you don’t wanna miss any of this crazy.
Sign up to get my posts delivered to your inbox here.
Stalk Me Here:
Pinterest / Facebook / Twitter / Instagram


Melanie says
Your upcycled pumpkins are so much better than the original! Cute!
Jenna @ Rain on a Tin Roof says
Thank you, Melanie!
Amy Anderson says
These are so pretty! Pinning!
Jenna @ Rain on a Tin Roof says
Thanks, Amy!
Heather says
Great coverage of this pAint! Love!
Jenna @ Rain on a Tin Roof says
Thanks, Heather!
Shan Laux says
so pretty…Love the white ones! 🙂 Seriously wished my dollar store had cool stuff like that!
Jenna @ Rain on a Tin Roof says
Thanks, Shan! Oh no – your Dollar Tree doesn’t have these- we gotta have a chat with them!
Laura / Pet Scribbles says
Love these! The before and after is amazing. 🙂
Jenna @ Rain on a Tin Roof says
Thank you, Laura!
katie says
LOVE these place card holders–so sophisticated and chic!
Jenna @ Rain on a Tin Roof says
Thank you, Katie!
Sarah says
The aged version is amazing {and the other is gorgeous too}! Great idea. And you really can never go wrong with gold glitter 😉
Jenna @ Rain on a Tin Roof says
Thanks, Sarah!
Jamie says
This is fabulous girl!! Great job 😉
Hugs, J.
Jenna @ Rain on a Tin Roof says
Thank you, Jamie!
kelly says
I love this idea. It is so simple, but looks so elegant!
Jenna says
Thanks, Kelly!