Blog

  • Decorate My Space: Hope’s Kitchen

    A couple weeks back I asked for y’all’s help on decorating my stairwell.

    You were amazing with your responses.

    My stairwell isn’t decorated yet, but I’m still mulling over all your ideas.

    I thought it might be fun to ask for reader submissions and let everyone help out on decorating another space!

    The first one up is Hope’s Kitchen.

    Let’s start with her color scheme ideas and inspiration.

    She knows she wants these colors:

    Decorate My Space: Hope's Kitchen

    source

    However, instead of that darkest brown, she would like a soft buttery yellow, kind of like this one…

    Decorate My Space: Hope's Kitchen

    source

    Hope says: “I’m in love with French country.  A touch of industrial. And a touch of blue.”

    Decorate My Space: Hope's Kitchen

    source

    Decorate My Space: Hope's Kitchen

    source

    Her exact words for this space above were “Love, love, love.”

    Decorate My Space: Hope's Kitchen

    source

    She is also a fan of the red and yellow combination in this kitchen above.

    Decorate My Space: Hope's Kitchen

    source

    And the red and yellow in this kitchen.

    Alright, so there’s her inspiration. This is her current kitchen. Keep in mind, she is in the process of a renovation!

    Decorate My Space: Hope's Kitchen

    Decorate My Space: Hope's Kitchen

    She is going to make this dresser her kitchen island:

    Decorate My Space: Hope's Kitchen

    Isn’t that such a cool idea? She doesn’t know what color to paint it though!

    She also knows that her kitchen countertops will look like the island countertop in this photo:

    Decorate My Space: Hope's Kitchen

    source

    That wood will be on both her island and other countertops. She also knows she will have a beadboard backsplash.

    Her biggest dilemma is figuring out what paint colors to use where.

    So, what do you guys think?

    She wants a red, buttery yellow, and neutral toned space – what colors should go where?

    My first thoughts are to paint the cabinetry white, the island red, the beadboard backsplash yellow and the walls one of the neutral colors.

    Leave your opinions in the comments!

    Need more kitchen ideas?

    How to Make Laminate Counters Look Like Soapstone – I did it and it’s easy!

    DIY Kitchen Island Ideas – ideas for creating your own kitchen island that you probably haven’t thought of!

    DIY Kitchen Banquette – build your own banquette!

    10 DIY Countertop Makeovers – makeover those countertops on a budget!

    You know you don’t wanna miss any of this crazy.

    Sign up to get my posts delivered to your inbox here.

    Stalk Me Here:

    Pinterest / Facebook / Twitter / Instagram

  • Black & White Gallery Wall

    Black & White Gallery Wall

    I have visions.

    Not like psychic visions – but that would be really cool.

    Room visions, project visions, idea visions.

    And in my head – they are fan-freakin-tastic.

    In real life, they don’t always turn out so fan-freakin-tastic though.

    In my head, this black and white gallery wall was fan-freakin-tastic.

    In real life, its better than fan-freakin-tastic.

    In fact, I can’t even come up with a word for how awesome it is and how much I love it.

    This wall totally took my living room to a whole new level.

    STUNNING Black and White Gallery Wall! Simple to do - such a great accent wall!

    To get the full effect of how far this wall has come, here’s what it looked like before:

    The wall before

    It wasn’t terrible, but let’s be honest, it doesn’t hold a candle to the new accent wall.

    The best thing about this project is that its so easy. All you need is a little paint, FrogTape®, frames and art.

    This post contains affiliate links for your shopping convenience. Click here to read my full disclosure policy.

    frogtape-disclosure

    DIY Black and White Gallery Wall

    I used:

    Steps

    Step 1:

    Use the FrogTape® 1.88″ width to tape off baseboards, any crown molding, or other trim around the area that you don’t want to get paint on.

    Step 2: 

    Paint all four edges of the wall white (or other color of your choice). I edged with the paint brush and then rolled about 2-3 roller widths wide along the edges.

    Step 3:

    After the paint is dry, tape off the “frame” for your gallery wall. I waited a week or so before taping off my frame, so I used the FrogTape® Multi-Surface, however if you don’t want to wait long, you can use FrogTape® Delicate Surface.

    Create your "frame" with the FrogTape.

    I came in five inches all around the wall and taped off a rectangle using the wider width FrogTape®. After that, I came in 7 1/2″ all around the wall and taped off the second rectangle within the larger one using the smaller width FrogTape®. Of course, your wall will most likely be a different size than mine, so you can adjust the measurements as needed.

    Step 4: 

    Trim up the edges of the FrogTape®.

    Cut edges of FrogTape

    I use a ruler and craft knife to do this. After you have trimmed up all the edges, take your fingernail or a credit card and run it firmly along the edges of the FrogTape® to fully adhere it to the wall.

    Step 5: 

    Paint the rest of the wall black (or other color of your choice).

    Paint two coats of black.

    Two coats was all I needed.

    Step 6: 

    Remove the FrogTape® immediately after painting your last coat.

    Remove tape immediately after your last coat of paint.

    After the wall is good and dry, you can decorate it however you want.

    STUNNING Black and White Gallery Wall! Simple to do - such a great accent wall!

    I opted to go with simple white frames that popped off the wall, but showcased the art, along with gold sconces.

    STUNNING Black and White Gallery Wall! Simple to do - such a great accent wall!

    I used these 16×20 white frames with artwork in 8×10 sizes. I added these sconces (spray-painted gold) to either side of the television to bring in a touch of metallic and another element besides the frames.

    See more of the new living room in my latest home tour and find out how I stripped and re-stained the buffet here.

    Need more gallery and accent wall ideas?

    Indoor Lattice Walls– it’s not crazy, it’s gorgeous!

    9 Accent Walls for $30 or Less – Big Bang for your buck.

    Easy Confetti Accent Wall – fun. on a wall. seriously.

    Criss-Cross Accent Wall – a classic design that will work with any decor style.

    7 Wall Treatments that Aren’t Shiplap – let’s give shiplap a break, y’all.

    You know you don’t wanna miss any of this crazy.

    Sign up to get my posts delivered to your inbox here.

    Stalk Me Here:

    Pinterest / Facebook / Twitter / Instagram

    pin-this-post

    STUNNING Black and White Gallery Wall! Simple to do - such a great accent wall!

    SaveSaveSaveSaveSaveSaveSaveSaveSaveSave

  • Mid-Century Modern Lamp Makeover (A.K.A. I Dream of Jeannie Lamp)

    Mid-Century Modern Lamp Makeover (A.K.A. I Dream of Jeannie Lamp)

    I watched reruns of I Dream of Jeannie when I was a kid. It wasn’t one of my favorites, but I thought Barbara Eden was so pretty. And while Larry Hagman will always always always be J.R. Ewing in my mind, he was still pretty great in I Dream of Jeannie.

    Well over a year ago, I found a lamp that screamed “I Dream of Jeannie” at a yard sale.

    It was $2.

    It came home with me.

    And as most things do around here, it sat for a while until I had a great idea for it.

    And finally I did.

    If you follow me on Instagram, you may have seen this image where I asked YOU to tell me what to do with the lamp…

    Mid-Century Modern Lamp Makeover with Velvet Finishes

    Disclosure: This post was a collaboration with Velvet Finishes. However, all opinions and love of bright and cheery color schemes are 100% my own. This post contains affiliate links for your shopping convenience. Click here to read my full disclosure policy.

    You guys were just full of ideas.

    So many ideas that I was even more confused as to what to do to the lamp.

    Some of you even said to leave it as is, but that wasn’t an option – there were lots of chips in the finish and you know me – I needed some color.

    As I was pouring over my paint swatches stressing over what to do, the part-time child, Will, who insists on being called Bill on the blog (I know – I have no idea why either) walked over, played with the paint swatch for a while and said let’s do these colors…

    Velvet Finishes Exotic, Bold, and Minimalistic

    I looked at the colors and wondered how in the hell a 17 year old boy could come up with that great color combination in under five minutes.

    So we started painting. 

    Velvet Finishes Paint Lamp Makeover

    To do this lamp makeover, we used:

    • Paintbrushes of various sizes

    After sitting in my craft room for a year, this lamp was pretty dirty. So, to start with, we cleaned it up really well with Ready, which also primes pieces at the same time.

    Use Ready by Velvet Finishes to clean and prime before painting.

    I just sprayed the Ready onto a paper towel and wiped the lamp down. You can also spray it directly onto a piece, let it sit, then wipe it down.

    I gave the lamp a little while to dry and then started painting.

    Paint Velvet Finishes onto the piece.

    With all the nooks, crannies, and designs going on with this lamp, we used a variety of paint brush sizes. And I won’t lie, since we were using three different colors, it took a while to finish this lamp. I worked on it on and off for 30 minutes or so each day over the course of about five days. First, I painted all spots I wanted Bold, then I went back and painted the spots I wanted Exotic, and finally finished it off by painting some of the small details Minimalistic.

    Wow! That color combination is so pretty! Mid-Century Modern Lamp Makeover with Velvet Finishes Paint

    It wasn’t as hard as it looks to paint all the trim and details. When you use a small paintbrush, its actually pretty easy. I did have baby wipes on hand to quickly wipe up any paint if it got where it wasn’t supposed to be.

    I haven’t decided where I will put it just yet, but I’m thinking its the perfect color scheme for an outdoor living space – maybe the porch?

    Wow! That color combination is so pretty! Mid-Century Modern Lamp Makeover with Velvet Finishes Paint

    It also seems very Lilly Pulitizer-ish to me, which I won’t even get started on that whole Target fiasco.

    What do you think about this bold color scheme? 

    Need more lamp makeover ideas? 

    Don’t miss these 16 lamp ideas and makeovers  – they are so good.

    Find out how to make a lamp out of a bottle here.

    And see how easy it is to make your own gorgeous agate slice lamp finials here.

    You know you don’t wanna miss any of this crazy.

    Sign up to get my posts delivered to your inbox here.

    Stalk Me Here:

    Pinterest / Facebook / Twitter / Instagram

    pin-this-post

    Lamp Makeover Ideas | Painted Lamp Makeover Ideas | DIY Lamp Makeover | How to Paint a Lamp | Lamp Makeover DIY

  • DIY Countertops: 10 Countertop Makeover Ideas on a Budget

    DIY Countertops: 10 Countertop Makeover Ideas on a Budget

    Looking to update your countertops without breaking the bank? Give one of these DIY countertops a whirl then! These totally doable and cheap countertop makeover ideas will give your kitchen a whole new look in a weekend!

    I dream of marble countertops.

    I dream of having them in my kitchen and bathrooms.

    The dream is cut short when I realize two things:

    1. The high maintenance that is required to keep marble counters pristine.

    and

    2. The cost of marble countertops.

    New countertops, particularly stone counters, are expensive.

    The words “large” and “budget” are never put together when it comes to projects around our household.

    Since doing my faux soapstone countertops (link just below), I have found that the internets are filled with awesome DIY Countertop Makeovers. With these ideas, you can redo kitchen countertops without breaking the bank, but while still getting a whole new look in your space.

    DIY Countertops

    This post contains affiliate links for your shopping convenience. Click here to read my full disclosure policy.

    DIY Countertop Ideas

    These kitchen home improvement projects only look expensive…

    How to Make Your Laminate Counters Look Like Stone

    Countertop Makeover

    When Grunt Labor and I made over his man cave, we couldn’t afford a new countertop for his built-ins. Instead, I figured out a way (for only $15!) to turn them into “stone.” All you’ll need is a little elbow grease and some countertop paint!

    DIY Upholstered Countertop

    DIY Countertop Ideas

    Give your countertops an unexpected twist with upholstered countertops. Of course, this option is going to work best for built-in cabinetry countertops, not kitchen counters.

    DIY Faux Carrara Marble Countertops

    How to Redo Countertops

    There is nothing Diane from In My Own Style can’t do. Seriously – she is just amazing. Case in point, this faux carrara marble counter. Is that not stunning? And she painted it! If painting faux marble seems too daunting, you could always opt for marble contact paper like this.

    How to Redo Countertops Out of Wood Doors

    Redo Countertops

    Yep, those are actual doors. This kitchen counter makeover is sheer genius. The Mustard Ceiling made those counters out of wood doors. Nope, not even kidding. And aren’t they beautiful? I love a good piece of stained wood! Salvage yards often have doors for cheap!

    A Kitchen Countertop Makeover that Will Cost You Pennies

    Kitchen Counter Makeover

    Ashley from Domestic Imperfection is the queen of repurposing items. Not only did she use paper bags for flooring one time (for real!), but she also made a countertop from pennies. Pennies, people!

    DIY Painted Countertops

    Kitchen Countertop Makeover

    One of the more popular budget kitchen countertop options is to just paint them. Jacque and Matt, the husband and wife duo from The DIY Village, used an easy kit to take their counters from blah to bold. If you don’t have any DIY experience at all, then often a countertop kit is the way to go. I’ve used this countertop kit before and it’s really simple to use!

    Glossy Countertop Makeover

    DIY Countertop Makeover

    Designing Dawn got super creative with her cheap countertop makeover. She used a mixture of different paints and products to get a glossy countertop. It’s gorgeous! Glossy finishes always grab my heart and runs with it every single time!

    Granite Look Countertop Makeover

    Cheap Countertop Makeover

    Gail from My Repurposed Life gave her countertops a chic black stone makeover. The end result looks so much like the granite we had in one of our previous homes. This countertop paint kit will give you a similar look.

    Cheap Countertop Ideas in the Bathroom

    White Painted Countertop Makeover

    Redo Kitchen Countertops

    I’m Flying South painted both her vanity countertop and sink. I love the clean, crisp white. It gives the entire space a fresh, clean feel. So fresh and so clean clean. 😉 I’ve used this countertop paint before to give counters a uniform color.

    DIY Concrete Countertops

    Kitchen Countertop Options

    Tasha over at Designer Trapped in a Lawyer’s Body updated her vanity counter with concrete for a whopping $20. I’m generally not a huge fan of concrete in home decor, but I have to say – these look good!

    Do you have any cheap countertop ideas? Share them in the comments below!

    More budget kitchen and bathroom projects you might want to see…

    7 Kitchen Island Ideas You Haven’t Thought Of Yet.. – genius ideas for kitchen islands!

    10+ Kitchen Ideas for Decorating, Organizing and Storage – functional, but still pretty kitchen ideas!

    Bathroom Remodel Ideas on a Budget – nine different ways to save loads of money without compromising on style for your next bathroom remodel.

    High Style Low Budget Home Decor Projects – for when you’ve got champagne taste, but the beer budget.

    Want to remember these counter ideas for later? Just pin the image below!

    DIY Countertops on a Budget

    You know you don’t wanna miss any of this crazy.

    Sign up to get my posts delivered to your inbox here.

    Stalk Me Here:

    Pinterest / Facebook / Twitter / Instagram

    Affordable DIY Countertop Makeovers
  • How To Strip Furniture and Restain Wood

    How To Strip Furniture and Restain Wood

    Stripping paint or stain off an old piece of furniture can seem daunting. It is a bit of a messy job, but it’s not too difficult though. This post will walk you through step-by-step of how to strip furniture and then how to restain the wood – or paint it if that’s the route you want to go.

    I knew there would come a day when I would want to strip the paint off a piece I had so meticulously painted.

    I didn’t know that day would come so soon.

    Don’t get me wrong.

    I still love my boldly colored painted pieces. But…

    After the black and white gallery wall in the living room was completed, I knew the finishing touch would be to make the red buffet stained once more…

    How to Strip Furniture and Restaining Wood

    When I announced to Grunt Labor that I was stripping the buffet, he nearly fell out of his seat. He – A. couldn’t believe that I wasn’t just painting it a different color and B. couldn’t believe I would actually be able to get off the multiple coats of paint that were on this piece.

    Never doubt a woman.

    Never, ever, ever.

    Let’s take a trip down memory lane, shall we?

    When this buffet first came into my possession, it was in its original stain job. It was part of a dining room set that belonged to my great aunt and then my father and now me. When we moved into the beloved foreclosure, I opted to paint it a blue color – almost periwinkle.

    How to Remove Paint from Wood

    At the time, I loved that color. Also, at the time, I had no clue really what my decorating style was.

    The buffet eventually got painted red…

    How to Strip Paint from Wood

    The red was bold. I loved it. But then the black and white gallery wall happened and I didn’t want the buffet to take away from the wall.

    So here we are now:

    Restaining Wood

    And here is how we got there…

    Disclosure: This post was a collaboration with HomeRight. All opinions are 100% mine.This post contains affiliate links for your shopping convenience. Click here to read my full disclosure policy.

    How to Strip Paint or Stain off Furniture

    (with less mess!)

    What You Need:

    • Heat Gun – This makes stripping furniture so much easier with much less mess. I used my HomeRight Heat Gun.
    • Metal Scrapers – Mine came with my heat gun.
    • Sander – You will have to do a bit of sanding after the stripping to smooth everything up. I highly suggest using a power sander. I used my Dewalt Sheet Sander. If you aren’t familiar with using power sanders, I’ve got a How To on them here.
    • Tackcloths
    • Wood Stain 
    • Lint Free Rags (Optional – I prefer to use them when applying stain.)
    • Topcoat (I would go with either a Polyurethane or Polycrylic.)
    • High Quality Paintbrush
    • Breathing Mask

    Step 1 – Stripping Paint From Wood:

    The first thing you want to do is move the piece you are stripping to a location that can get messy and is well ventilated. I do this kind of stuff in my garage. Remove all doors and drawers and take off any hardware. Plug in your heat gun.

    Removing Paint From Wood with a Heat Gun

    I turned the fan speed up to 2, and the temperature to high.

    How to Strip Furniture with a Heat Gun

    **Note: This heat gun has been discontinued at HomeRight and replaced with the Digital Temperature Heat Gun. It works basically the same way – I even did a post on how to use it here.

    You may not need to turn the heat up that high for your piece. I knew that I had two different paint colors with multiple coats of each, so I would need a lot of heat to power through it.

    Put on your breathing mask – you don’t want to inhale the fumes.

    Now, get a metal scraper. Place the nozzle of your heat gun on your furniture, with the scraper just behind it.

    How to Strip Paint off Furniture with a Heat Gun

    Slowly, but constantly move both the heat gun and scraper at the same time. Your paint should come off like butta’. In the photo above, you can see a few little remnants of paint – that’s ok, it will sand right off in the end.

    Be sure to not leave your nozzle in one place for too long – this can cause you to burn your wood.

    Step 2 – Removing Paint From the Nooks & Crannies: 

    Stripping the flat edges on furniture is pretty easy, it just takes some time. The nooks and crannies are a bit more complicated. For those, instead of a flat metal scraper, you need one with more points. I used the triangle one that was included with my heat gun.

    Removing paint and stain from wood with a heat gun and triangle tool.

    Use it exactly the same way you did with the flat scraper. Place the nozzle of the heat gun right in front of your scraper and move them both at the same time slowly, but constantly.

    Step 3 – Sanding Paint Remnants

    This is what one of the doors looked like after I had stripped the paint off with the heat gun:

    Stripping paint from wood the least messiest way.

    To get rid of those remnants of paint, sand your piece with a medium grit sandpaper. It will come right off. You will probably have to do a little hand sanding in the nooks and crannies. Here’s what it looks like after sanding:

    How to Restain Wood Furniture

    Notice the little dark spots in some of the nooks and crannies. That’s ok – you won’t really see them once the new stain is on. There were a couple spots that I sanded too much and the stain didn’t adhere there as it did on the rest of the piece. You’ll see that in a minute.

    Step 4 – Clean the piece

    Wipe down the piece with a wet rag and then go back over it with a tack cloth to pick up any extra bits of dust.

    How to Restain Wood

    Step 5 – Restain the Wood

    I prefer to stain with a lint-free cloth, instead of a paintbrush. Just open up your stain, dip your cloth inside (don’t need much at all), and wipe the stain onto the furniture.

    How to restain wood.

    Work in small sections. Go back over the area with a clean cloth after a minute or two to pick up any excess stain.

    Step 6 – Protect it.

    While I haven’t done this yet (I know – I’m so bad), you need to protect your piece. You can do this by giving it a coat of polyurethane or polycrylic with a good quality paintbrush.

    Here’s a closeup of the piece now. Its looks lighter than what it really is, as the sun was shining right on it at this time.

    Stripping Paint off Furniture and Restaining It

    It took a while, but stripping and refinishing this piece of furniture was so worth it.

    How to Refinish Wood Furniture

    It works perfectly by lending a vintage / rustic feel to the very modern wall.

    How to Strip Furniture and Restain the Wood

    You can see a couple of small spots on the top and bottom edges of the small drawer where I sanded too much. Be careful not to repeat that mistake. 🙂

    Have you ever stripped and restained furniture before?

    Looking for more staining and stripping tips?

    How to Make Colored Stain for Wood – in any color!

    How to Refinish Wood Furniture & Cover Stains without Sanding or Stripping – a great way to update stained furniture if it’s not in too bad of a condition.

    How to Use a Heat Gun and 15 Things to Do With It – more things that you can tackle with a heat gun.

    Why your paint is peeling and how to stop it! – Peeling paint on a furniture makeover? This post will walk you through what might be happening and how to fix it.

    pin-this-post
    How to Strip Paint Off Wood and Restain Furniture

    You know you don’t wanna miss any of this crazy.

    Sign up to get my posts delivered to your inbox here.

    Stalk Me Here:

    Pinterest / Facebook / Twitter / Instagram

    SaveSave

  • Power Tools 101: How to Use a Sander

    Power Tools 101: How to Use a Sander

    After a month hiatus, I’m back with another round of Power Tools 101.

    This month is an easy one – How to Use a Sander.

    The basics of how to use a sander and what all it can do - How to Use a Sander

    This post contains affiliate links for your shopping convenience. Click here to read my full disclosure policy.

    There are lots of different types of power sanders, but my go-to pick is a sheet sander. Its very versatile and unless you have a huge job, it can take care of just about anything.

    Power Tools 101: How to Use a Sander

    I personally own and use a DeWalt Sheet Sander. I bought mine after having borrowed a friends. I loved it and knew I wanted my own.

    How to use a Sander

    To use a sander, you really just need to know how to attach the sandpaper to the sander.

    First, locate the metal (usually, metal) locks on the sides of the sander. Pull down and out on each lock.

    How to Use a Sander

    When you pull down and out on each lock, you will release the end clasps which will hold the sandpaper in place.

    Take a sheet of sandpaper and tear it into fourths.

    How to Use a Sander

    Take one of the fourths and place it onto the bottom pad of the sander.

    How to Use a Sander

    Tuck the sandpaper under each end clasp and lock down.

    My sander’s power button is on the top.

    How to Use a Sander

    Plug it in, flip the switch and you are ready to go.

    Sometimes the biggest struggle in using a sander is determining which grit of sandpaper to use. Here’s a breakdown:

    Fine Grit (180 – 320 Grit)

    • Use between topcoats to get a very smooth finish

    Medium Grit (100 – 150 Grit)

    • Surface Leveling & Smoothing

    • Sanding door edges that don’t close properly

    • Distressing furniture

    • Preparing furniture for paint

    • Rounding wood edges

    Rough Grit (60 – 80 Grit) 

    • Paint Stripping

    • Remove rust

    Do you have any tips or tricks for how to use a sander or other uses for it? 

    Need more Power Tools 101 posts?

    How to Use a Drill

    How to Use a Circular Saw

    How to Use a Miter Saw

    How to Use a Heat Gun and 15 Things It Can Do

    The Best Tools for DIYers at Any Level

    You know you don’t wanna miss any of this crazy.

    Sign up to get my posts delivered to your inbox here.

    Stalk Me Here:

    Pinterest / Facebook / Twitter / Instagram

    pin-this-post

    The basics of how to use a sander and what all it can do - How to Use a Sander

    SaveSave

  • 11 Colorful Furniture Makeovers

    As we all know, I can’t get enough color.

    In my opinion, too much color is always a good thing.

    I’ve never met a bold kelly green or a pop of coral I couldn’t help but smile at.

    And if you can’t smile at these bright spring colors that are popping up, then honey, you ain’t livin’ right.

    Here are some of my own favorite colorful furniture makeovers.

    11 Colorful Furniture Makeovers

    Aged Pink Dresser Makeover: 11 Colorful Furniture Makeovers

    Glamorous Dresser Makeover

    Yes, my darling, you. are. glamorous.

    Literally. That’s the name of the paint.

    Black, White, and Orange Chair Makeover: 11 Colorful Furniture Makeovers

    Orange, Black and White Chair Makeovers

    I’m not a huge fan of orange, but when its only $6 a gallon, you buy the paint and find something to paint with it!

    Emerald, Black and White Chair Makeover: 11 Colorful Furniture Makeovers

    French Country Chair Modern Makeover

    This chair was made for me. It calls my name. It whispers sweet nothings in my ear. I. am. in. love.

    Coral and Confetti Table Makeover: 11 Colorful Furniture Makeovers

    Coral & Gold Confetti Table Makeover

    Instead of confetti in her hair, she has confetti on her coral table.

    She likes it that way. 

    Pink and Houndstooth Chair Makeover: 11 Colorful Furniture Makeovers

    Pink & Houndstooth Chair Makeover

    Not a fan of pink? Pair it with a classic print like houndstooth to anchor the piece.

    Bold Blue Cabinet Makeover: 11 Colorful Furniture Makeovers

    Vintage Radio turned Bar Cabinet 

    Did you know that was once a radio? And my Hey Bud makes it play to remind me he’s still got my back…

    Coral and Wrapping Paper Table Makeover: 11 Colorful Furniture Makeovers

    Table Makeover with Wrapping Paper

    Because you should never pass up a $2 end table even if it has a ruined tabletop.

    Just cover it with wrapping paper.

    Duh.

    Aged Green and Brass Cabinet Makeover: 11 Colorful Furniture Makeovers

    IKEA Tarva Dresser turned Drink Bar

    Hello lover. 

    Coral and Mint Nightstand Makeover: 11 Colorful Furniture Makeovers

    Coral & Mint Nightstand Makeover

    What to do when you accidentally mess up the paint job?

    Just distress it and say you planned it that way…

    These two are not actually furniture makeovers, but it would have been a sin to leave them out of such a colorful post….

    How to Make Colored Furniture Glaze: 11 Colorful Furniture Makeovers

    How to Make Furniture Glaze in Any Color

    And that was the first time my life changed forever.

    How to Make Colored Stain: 11 Colorful Furniture Makeovers

    How to Make Colored Stain

    And that was the second time my life changed.

    I have no idea why you think I’m so dramatic.

    Don’t you just feel a good colorful furniture makeover coming on now?

    You know you don’t wanna miss any of this crazy.

    Sign up to get my posts delivered to your inbox here.

    Stalk Me Here:

    Pinterest / Facebook / Twitter / Instagram

     pin-this-post

    Go bold or go home with these colorful makeovers! 11 Colorful Furniture Makeovers

  • Spring Home Tour: Design Ideas for Small Budgets

    Spring Home Tour: Design Ideas for Small Budgets

    You guys.

    You guys.

    No really, you guys.

    So much has changed since the last time I did a full home tour.

    Especially my living room. And my kitchen.

    I’m almost pee-my-pants excited to show you.

    And now that I think about the things that have changed in the past two months, I realize I have no clue how it all got done and that I must be insane.

    Oh wait, we already knew that.

    Even though, I know you’ve already seen the entryway, let’s start there since its still new-ish.

    Disclosure: Kirkland’s provided me with a gift card to do a little shopping for my home tour. However, all opinions are 100% mine.

    Confetti Style Entryway: Spring Home Tour

    Entryway Makeover / DIY Confetti Wall

    I still love the entryway so much. Its light, bright, and most importantly – fun.

    The living room….

    Wait for it…

    Wait for it…

    Vintage Modern Rustic Living Room: Spring Home Tour

    Boom.

    Such a big difference from last time, right?

    There’s a new rug, the red buffet has been stripped, and my most favorite new feature of the living room – the black and white framed gallery wall.

    Black and White Framed Accent Wall: Spring Home Tour

    Stripped & Restained Buffet / Black & White Gallery Wall

    Living Room: Spring Home Tour

    There is still a lot of gold, green, navy, and red in this space. Those are my favorites. 

    Vintage Modern Living Room: Spring Home Tour

    IKEA Tarva turned Drink Bar / DIY Cowhide Rug

    I love all the black and white that anchors it as well.

    Black and White Gallery Wall: Spring Home Tour

    The gallery wall turned out far better than I ever could have dreamed.

    Fo Realz. I never thought I could make anything that pretty. 

    The gray chair is sporting a new shimmery gold pillow, that’s a new white bust as well, and yes, those sconces are new on the wall. The pouf ottoman is new-to-the-space. I may or may not have stolen it from the man cave…..shhhhhh…..

    Black and White Gallery Wall: Spring Home Tour

    Same thing with the pink ottoman – except I stole it from my office. Moving pieces around is my favorite way to decorate. I was tickled pink to find the gold sphere for a whopping $13.

    Let’s move on to the kitchen…

    Navy and White Kitchen with a DIY Island: Spring Home Tour

    Kitchen Makeover / DIY Kitchen Island / Green & Navy Barstool Makeover

    Spot anything different??

    NAVY CABINETS!

    I die. 

    Navy and White Kitchen: Spring Home Tour

    And pretty new brass hardware…

    I die again.

    Me, overdramatic? Whatever…

    I loved my kitchen before.

    Now, I love my kitchen. Painting the base cabinets navy and adding that brass hardware made it 100% Jenna…and Grunt Labor too..he really likes it..

    Navy, White, and Brass Kitchen: Spring Home Tour

    Coffee Station & 10+ Kitchen Ideas

    The entire kitchen got a makeover in three days. It was a total whirlwind and there’s no way I could have done it alone. Kellie, who makes Velvet Finishes, actually came with her crew to pitch in and filmed it all! All that will be posted soon too.

    After the cabinets were done, I did some editing and redecorating on the open shelving.

    Open Shelving in the Kitchen: Spring Home Tour

    Knock-Off Jonathan Adler Mohawk Lollipop Holder

    The Knock-Off Jonathan Adler Mohawk Lollipop Holder graces the top of the shelving. I added a few more touches of brass with the eagle thing (no clue what its called, but it was $1 at a thrift store) and the brass bowl on the bottom. I also switched up the clear glasses for my Grannie’s red ones. I can’t believe I didn’t have those babies showcased before. I love ’em. The antlers didn’t make it into the new gallery wall in the living room, so I hung them in the kitchen. The touch of rustic they add is perfect for the space.

    And the dining room…

    Black and White Dining Room: Spring Home Tour

    Not much is different here. I am plotting to strip the table and stain it to connect the space with the living room more.

    Dining Room: Spring Home Tour

    That would be an ice bucket holding those roses, ’cause I’m a genius like that. You may have seen that tray when I instagrammed it. Its Jonathan Adler and was $4 at Burlington. Score.

    Dining Room: Spring Home Tour

    Navy, White, & Gold Buffet

    I’m still quite smitten with the buffet makeover. Its perfect for tying in the navy cabinets in the kitchen, since that whole space is open.

    Black and White Accent Wall / Buffet Makeover: Spring Home Tour

    Criss-Cross Accent Wall

    Everyone who has entered my house for the first time since the Criss-Cross Accent Wall was completed can’t get over the fact that it isn’t wall paper – its paint. And then they totally can’t believe it when I tell them it actually wasn’t that hard.

    More on the Dining Room…

    Last but not least, the master bedroom…

    Pop of Color with the bedding. Spring Home Tour

    Very little has changed in here since the master bedroom mini-makeover. I did switch out the white lamps for mid-century modern style lamps like you see above. The shape of those lamps pulled me in and had me buying them in five minutes flat.

    Stacks of books for decorating: Spring Home Tour

    I added another of the gold pillows to the reading nook and to make the books look less like clutter and more like decor, I topped them off with faux peonies. I’m usually not a faux flower person, but these were really cute and I adore the black and white striped pot.

    More on the Master Bedroom…

    I didn’t include the kid’s room, guest bedroom + office, and bathroom in the tour since nothing has really changed there at all. You can tour them here though if you haven’t seen them before.

    You know you don’t wanna miss any of this crazy.

    Sign up to get my posts delivered to your inbox here.

    Stalk Me Here:

    Pinterest / Facebook / Twitter / Instagram

    pin-this-post

    Great and Realistic Design Ideas for Small Budgets: Home Tour

  • Make Wood Stain in Any Color

    Make Wood Stain in Any Color

    Want to kick your wood finishing techniques up a notch? Try making your own bright colored wood stains then! With this tutorial, you’ll learn how to make custom stain colors easily.

    After the amazing-out-of-this-world-discovery-that-changes-everything a few weeks ago (when I found out how to make furniture glazes in any color – ok. maybe I’m being a bit dramatic. Just a little bit though.)

    I wanted to see if it would work as a wood stain too – on unfinished wood.

    It did…

    So now you will not only know how to make glazes in any color, but you’ll now know how to make colored stain too.

    I KNOW.

    AMAZING.

    How to Make Bright Colored Wood Stains in Any Color - colored stains on a tray

    Disclosure: This post is a collaboration with Velvet Finishes. All opinions and color craziness is 100% mine. This post contains affiliate links for your shopping convenience. Click here to read my full disclosure policy.

    How to Make Colored Wood Stain

    Supplies Needed:

    How to Make Colored Wood Stain materials - velvet finishes paint and clear glaze

    Steps

    Step 1:

    You mix up the stain the same way you mix up the glaze, because, well its the same stuff. The difference is in how you apply it.

    Pour a small amount of clear glaze into your cup or plate. Dip your paintbrush into the paint you want to turn into your stain color. You don’t want much at all – then mix the glaze and paint together.

    Water Based Colored Wood Stains created with Velvet Finishes - creating a pink wood stain

    If you are worried about getting too much paint, then start with just a little bit, then add more if needed. The consistency should be pretty watery – similar to a stain. This is a water based stain.

    If the stain seems too thick or too saturated with color, you can add water to it.

     Step 2.

    Using your paintbrush, brush the stain onto the wood. Unlike with painted wood, the unfinished wood will absorb the stain super quickly, so do light coats so you don’t get more color than you want.

    Applying DIY pink colored stain.

    If you want more color, do more coats. Wipe off any excess with a lint free cloth.

    Take note: Different types of wood and wood grain will yield different results.

     Step 3: 

    Let it dry. Since there isn’t much paint in the stain, I would suggest a coat of Protect or finishing wax to keep your piece pretty.

    DIY Colored Wood Stains on a Tray

    I created colored stains using the Clear Glaze and:

    Enchanting (Green)
    Modern (Blue)
    Glamorous (Pink)
    Bold (Yellow)

    You can see with the yellow that I put a bit too much paint in the glaze. You can’t see a lot of the woodgrain.

    Using Colored Wood Stains on Unfinished Wood

    I think this cute little tray may end up in the circus’s big girl room. Its colorful – like her.

    What would you use colored stain on? 

    Are you a color lover? Here’s more colorful furniture makeover ideas…

    DIY Ottoman Coffee Table – a gorgeous deep teal blue hue paired with upholstery full of color.

    DIY Side Table Makeover Ideas – nine colorful ideas for making over a side table.

    How to Create a Beachy Color with Paint – give furniture a washed-out beach feel with this tutorial.

    Polka Dot Chair Makeover with Painted Upholstery – navy, pink and white polka dots collide in this fun makeover!

    Want to remember this colored stain recipe for later? Just pin the image below!

    DIY Bright Colored Wood Stains on a Tray

    Follow on social for more colorful ideas!

    Pinterest / Facebook / Twitter / Instagram

    Making your own colored stains.
  • How I Clean My Entire Kitchen With One Single Thing

    How I Clean My Entire Kitchen With One Single Thing

    Let me be the first to say that I am not a great house cleaner.

    If you’ve been around here long enough, I’m sure you could have easily guessed that one.

    Its not that I’m a bad house house cleaner, its just that I don’t do it often enough.

    We don’t have week old food laying out on the kitchen counter or anything, but most days its questionable as to what the sticky substance on the countertop might be.

    I’m just keeping it real, y’all. 

    However, when I do get around to cleaning – like I did yesterday so that I could take photos for an upcoming house tour that didn’t include gross sticky unknown substances – I clean my kitchen with one single thing. I call it my little mouse.

    Fo’ Realz. 

    How to Clean a Kitchen with One Thing | Kitchen Cleaning Hacks | Kitchen Cleaning Tips | Steam Cleaning Tips | Chemical Free Cleaning

    Disclosure: This post was a collaboration with HomeRight. All opinions and comparisons of mice and steam machines are 100% mine. This post contains affiliate links for your shopping convenience. Click here to read my full disclosure policy.

    I realize the irony in me calling my cleaning tool a little mouse.

    But its a good little mouse…

    HomeRight Steam Machine

    Its also known as the HomeRight Steam Machine.

    Doesn’t it slightly resemble a mouse?

    Ok, its just me and my weird imagination. 

    Anyway, I use this bad boy to clean my entire kitchen.

    This time around, I started with some grout cleaning…and removing blue paint apparently…

    Steam Cleaned Grout

    I just attach the nylon brush to the steam gun and fire away while scrubbing.

    I also had some dried white paint lurking on the countertops from a recent kitchen makeover…

    Get dried paint off with a steamer.

    I shot it with the steam and then used a scraper to peel it right off.

    I steam cleaned my sink as well.

    Steam Cleaned Sink

    With the sink, as I steam, I come behind with a sponge, wiping away the dirt and grime.

    It comes off like buttah’.

    I use it on all my appliances…

    Steam your appliances to get a streak free clean.

    Give the appliance a shot of steam, quickly followed by a wipe down with a towel. I do the same thing on my kitchen faucet.

    And shockingly – the steam machine can also tackle my stove…which is a whole other ballgame.

    Steam Clean Your Stove!

    I clean it the same as the stainless steel on the other appliances – steam, wipe, repeat as needed. If needed, I use a scraper to remove stuck on stuff.

    Do you use a steam machine for cleaning?

    Want more cleaning tips?

    How to Steam Clean Your Shower – you won’t believe how dirty this shower was before!

    How to Get Pet Stains and Odors Out Of Your Carpet – easy!

    9+ Must Read Cleaning Tips – super useful tips for all around the house!

    You know you don’t wanna miss any of this crazy.

    Sign up to get my posts delivered to your inbox here.

    Stalk Me Here:

    Pinterest / Facebook / Twitter / Instagram

  • How to Make Furniture Glaze in ANY Color

    How to Make Furniture Glaze in ANY Color

    Up until last October, I wasn’t a big glazed furniture kind of gal.

    Glazed donut kind of gal…abso-freakin-lutely….glazed furniture…not so much. 

    But then this happened.

    The glaze on this piece also functions as a topcoat. Painting 101: Topcoats and when to use them

    That would be the IKEA Tarva drink bar that I used Baroque and Enhance Dark Glaze on.

    At that point, dark glaze and I started to become friends.

    We experimented. We plotted makeovers.

    We worked together on a dresser…

    Gorgeous rich color! And no priming required with this paint! Glamorous Dresser Makeover

    That’s the glamorous dresser….

    Dark glaze and I were skipping happily along off into the sunset….

    And then I met clear glaze….

    And he swept me off my feet….because he can turn any color into a glaze….

    DIY Furniture Glaze Recipe in any color! Furniture Glaze Technique | Furniture Glaze Colors | Furniture Makeover Ideas

    Disclosure: This post is a collaboration with Velvet Finishes. All opinions and references to having an affair with furniture glazes are 100% mine. This post contains affiliate links for your shopping convenience. Click here to read my full disclosure policy.

    Before you ask me, no I was not drinking during the writing of this post. That’s shocking, I know, especially seeing how I just wrote about having a love affair with furniture glaze paint and then cheating on it with another one.

    I’m a special person.  

    But…

    Its true.

    You can make furniture glaze in any color – I like to call it color glaze.

    And its so easy. 

    How To Make Furniture Glaze In Any Color

    Supplies Needed: 

    How to make furniture glaze in any color

    Steps

    Step 1. 

    Combine a little clear glaze with a little paint.

    Make furniture glaze in any color!

    I mixed mine up on a styrofoam plate to show you the process better, but it would be easier to use a cup. You want more glaze than you do paint. I poured out about 1/8 – 1/4 of a cup of glaze and just dipped my paintbrush into the paint.

    Step 2.

    Mix it together.

    How to make furniture glazes in any color

    Just mix the two together until all the glaze is tinted with your color.

    Step 3.

    Brush it on.

    Color Glaze Paint - Make furniture glaze in any color!

    Brush the glaze on, let it sit for a minute or so, and then wipe off the excess with a lint free cloth. Repeat this process if you would like more color on your piece.

    The video below shows a turquoise colored glaze being made and then painted onto a piece painted white to get a beachy colored vibe.

    [adthrive-in-post-video-player video-id=”EyicUR72″ upload-date=”Fri Jul 22 2016 19:16:29 GMT+0000 (Coordinated Universal Time)” name=”Rain On A Tin Roof – How To Create A Beachy Look With Paint” description=”Learn how to create a beachy colored look with paint! Use any color you want!”]

    Step 4.

    Bask in the new-found possibilities.

    DIY Furniture Glaze Recipe in any color! Furniture Glaze Technique | Furniture Glaze Colors | Furniture Makeover Ideas

    The Modern glaze has a great beachy vibe. I think it would look great “washed” over white patio furniture if you are into that beachy look.

    I was planning to use the modern glaze above on an actual piece of furniture, but got so excited about all the color possibilities, I just pulled out more paint and started making glazes in all different colors to show you.

    A.K.A. my ADHD took over. 

    DIY Furniture Glaze Recipe in any color! Furniture Glaze Technique | Furniture Glaze Colors | Furniture Makeover Ideas

    I love the Glamorous glaze – I think it would be so fun in a little girl’s room. Enchanting glaze is bright and seems very boyish.

    DIY Furniture Glaze Recipe in any color! Furniture Glaze Technique | Furniture Glaze Colors | Furniture Makeover Ideas

    The Vivid glaze reminds me of faded lipstick – which I like the look of – I know – I’m weird. The Exotic glaze is pretty light – I think it has a beachy feel too.

    I’m dying to try these glazes out on some glass jars too.

    What do you think they would be good for? 

    What glaze colors would you make? 

    P.S. Velvet Finishes Glaze also doubles as a protectant topcoat!

    More colorful furniture makeovers to get you inspired…

    How to Get a Layered Caribbean Blue Look – a gorgeous layered look for furniture makeovers.

    How to Make Colored Wood Stain– yep, in any color too!

    How to Create a Beachy Colored Look (with Video Tutorial) – a washed out beachy feel on furniture makeovers.

    Want to remember this furniture glaze paint recipe for later? Just pin the image below!

    DIY Furniture Glaze Recipe in any color! Furniture Glaze Technique | Furniture Glaze Colors | Furniture Makeover Ideas

    You know you don’t wanna miss any of this crazy.

    Stalk Me Here:

    Pinterest / Facebook / Twitter / Instagram

  • Painting 101: Topcoats and when to use them

    Painting 101: Topcoats and when to use them

    Wondering what top coat to put over paint? Specifically what kind of top coat for painted furniture? Consider this guide the holy grail for just that. It will walk you through all the different types of top coats and when to use each.

    The first few pieces of painted furniture I did, I had no idea what a topcoat was or that I was supposed to use them to seal and protect furniture.

    I quickly learned that if you paint a piece with a flat sheen of paint, you will eventually wind up with a bruised and scratched up piece of furniture – that ain’t pretty.

    You live. You learn.

    And then get Luvs.

    Not really, those diapers were never great for us.

    It took a few more tries, but I finally realized the benefit of a topcoat and when to use one.

    This post contains affiliate links for your shopping convenience. Click here to read my full disclosure policy.

    Lists different topcoats for furniture makeovers, what to use each one on and how to do it. | Furniture Top Coat | Furniture Makeover Ideas

    Topcoats and When to Use Them

    Painting Topcoats and When to Use Them

    Polyurethane

    Polyurethane - use on wood. Painting 101: Topcoats and when to use them

    Polyurethane is most typically used on stained wood and gives a very durable finish. I don’t recommend polyurethane for painted furniture, because it tends to yellow the paint over time. Its also oil based, which works best on top of stained wood and other oil based paints. I do use Minwax Polyurethane to protect stained pieces like the inside of my front door. I typically brush on a light coat with a high quality paintbrush, followed by a light sanding, another light coat, light sanding, then a final light coat. I haven’t tried the wipe-on poly, but I have heard good things about it. I usually go with a satin polyurethane because the gloss is pretty glossy. If you don’t use the fast drying version, it usually takes a few days for your piece to fully cure.

    Velvet Finishes Protect

    Velvet Finishes Protect - use on painted furniture. Non-yellowing. Painting 101: Topcoats and when to use them

    Its no secret that my new favorite furniture paint is Velvet Finishes. Velvet Finishes paint already has a topcoat built into the paint. However, if you are painting something that will get a lot of use, like a tabletop, dresser, end table, etc., you should still use a topcoat on it. Velvet Finishes topcoat is called Protect. Its a polyurethane, but unlike Minwax, it is non-yellowing and water based, which is why I love it. Its gives great protection, without the yellowing. With this one, I brush on one light coat and let it dry- that’s it.

    Vintage Radio turned Drink Bar

    The vintage radio turned drink bar got a coat of Velvet Finishes Protect after it was painted.

    Furniture Wax

    Wax - use on furniture pieces. Painting 101: Topcoats and when to use them

    There are many people that are crazy about furniture wax. I am not one of those people. In fact, this is my least favorite way to protect furniture, but I still do it on occasion when necessary. Wax gives furniture more of a flat finish, but still protects the piece. Most people will rub it on with a cloth, let it sit and then buff it. However, I have a much easier method to waxing furniture when I have to. Anytime I have waxed a piece, I have used Minwax Paste Finishing Wax.

    NO WAY! So easy and you may even have the supplies laying around your house! How to make Laminate Countertops look like Faux Stone for only $15

    When I made our laminate counters look like stone, I used wax to finish them because it gave the flat stone like finish I was looking for.

    Polycrylic

    Polycrylic - gives a more protective finish than wax. Use on furniture. Painting 101: Topcoats and when to use them

    Where many polyurethanes (except Protect) are oil based and go on stained wood and oil painted furniture, polycrylic is water based and can go on wood or paint. It can be applied the same as polyurethane – brush on, light sanding, brush on, light sanding, brush on. However, polycrylic can also be sprayed on with a paint sprayer. This is what I typically do, because it takes a lot less time and I usually only need one coat with my sprayer. I use my HomeRight Finish Max to do this.

    diy-coffee-table-industrial

    I used polycrylic on this DIY Industrial coffee table over the stained wood.

    Clear Topcoat Spray

    Spray Topcoat - use on spray painted pieces. Painting 101: Topcoats and when to use them

    I only recommend using spray topcoats over spray painted pieces. Most of the time, spray painted pieces don’t need any extra protection. If you are spraying something that is decorative and not going to get a lot of hands-on action, then I wouldn’t worry with top coating it. That being said, if you spray paint something and want to make it really glossy, you can spray a clear gloss topcoat on it to achieve the look. Spray a gloss topcoat or any other spray topcoat on in light coats. Fair warning – it can be tough to get semi-gloss and gloss spray topcoats even on large pieces. This is why you do multiple light coats, otherwise you could end up with streaks. I have always used Rust-Oleum spray topcoats when I needed a spray topcoat.

    Kitchen Tour {rainonatinroof.com} #kitchen

    After I spray painted my barstools, I knew they would be getting a lot of use, so I gave them a couple coats of clear spray topcoat.

    Some Glazes

    These glazes also function as a topcoat. Painting 101: Topcoats and when to use them

    This is a new one to me. When I found Velvet Finishes, I learned that their glazes also function as topcoats for added protection to your furniture – which is pretty sweet. They have two glazes, a dark and clear. The dark is great for aging furniture and you can make any color of glaze you want with the clear glaze. I actually have a post on that coming up soon. To apply the glaze, you brush on a small amount and then wipe off any excess. You can see how-to photos of this from this recent dresser makeover.

    The glaze on this piece also functions as a topcoat. Painting 101: Topcoats and when to use them

    I used a dark glaze on this IKEA Tarva Dresser turned Drink Bar.

    There are some cases in which you may not need a topcoat, like: 

    •Pieces painted with high-gloss or semi-gloss paint. These sheens are pretty durable and are easily wiped clean.

    •Spray painted pieces such as lamps, photo frames, wall decor (things that don’t see a lot of hands-on use)

    •Accent chairs / tables that don’t get a whole lot of use.

    Do you have any tips or tricks about topcoats and when to use them? 

    Looking for more painting help?

    What kind of paint do I use on that?  – A guide to different types of paint and what kinds of surfaces each can be used on.

    Why is my paint peeling? – Tips & Tricks to Keep Your Paint from Peeling & Scratching Off Your Furniture.

    Prepping Furniture to Paint – when to sand, when to prime, when to degloss and when you can skip it.

    How to Paint Walls – how to do it in less time with less mess.

    And here’s everything you’ve ever wanted to know about painting just about anything.

    Want to keep this list of best top coats for painted furniture handy for later? Just pin the image below!

    Lists different topcoats for furniture makeovers, what to use each one on and how to do it. | Furniture Top Coat | Furniture Makeover Ideas

    You know you don’t wanna miss any of this crazy.

    Stalk Me Here:

    Pinterest / Facebook / Twitter / Instagram

    SaveSave

  • French Country Chair Modern Makeover

    French Country Chair Modern Makeover

    I’ve begun a new love affair.

    Grunt Labor doesn’t mind a bit.

    Its more beautiful than I ever dreamed.

    Its with green.

    And black and white stripes.

    Really, its just with the green, black and white combination in general.

    I never considered the combination until my Enchanting green paint swatch accidentally fell on top of some black and white fabric and I was like…

    Oh My Gosh.

    Of course, I totally said that in the style of Usher’s song.

    At that point, I did a walk-through of my house to determine which piece of furniture would be my next victim.

     The lucky guy was this french country chair which ended up with a modern makeover.

    OMG. I'm in love. Green+ Black + White = Perfection. Painted with Velvet Finishes Enchanting. French Country Chair Modern Makeover

    Disclosure: This post was a collaboration with Velvet Finishes. All opinions and love affairs with color are 100% mine. This post contains affiliate links for your shopping convenience. Click here to read my full disclosure policy.

    If you’ve been around here for a while, you may remember this chair.

    This is the second time that its gotten a makeover. First, it looked like this:

    chair-makeover-before-1

    Then it looked like this:

    French Country Chair BEFORE

    Apparently, I feel that this chair should always have some green on it. I didn’t dislike it painted white with green velvet upholstery, but I wasn’t attached to it either and it seemed like this chair had the perfect lines for my new love affair.

    I started by removing the cushion and upholstery on the arms, then priming it with Ready.

    Velvet Finishes Ready - a spray primer. You just spray it on, let it dry, then paint.

    Ready is the primer in the Velvet Finishes paint line. Lots of times you don’t have to prime the pieces you are painting with Velvet Finishes, but this chair had a semi-gloss finish, so priming was recommended.

    I sprayed Ready over the entire chair and let it dry.

    Prime with Velvet Finishes Ready - just spray it on and let it sit.

    After the chair was dry, I used Enchanting to paint it.

    Velvet Finishes Enchanting

    Enchanting is one of my new favorite colors in this line. It. Is. Gorgeous. I used the other green color, Baroque, on the IKEA Tarva dresser turned drink bar last fall and fell in love with it. Its a darker green. Enchanting is brighter than Baroque.  They are both stunning and I’ll never be able to choose between them now.

    I used a good quality paintbrush to apply the paint.

    Velvet Finishes Enchanting - no topcoat required.

    With all the curves and nooks and crannies on this piece, it took about five light coats to get the color even,  but it was so worth it. I didn’t put a topcoat of any sort on this chair – there’s already one built into the paint. Since this chair doesn’t get a whole lot of use, I didn’t think it would need anything extra.

    Painted with Velvet Finishes Enchanting. French Country Chair Modern Makeover

    The black and white fabric is some that I had left over from the shower curtains. Its quickly becoming my go-to fabric that works with anything. You also saw the outdoor version of it in action on my colorful screened-in porch makeover. Does it not pair beautifully with the Enchanting?

    Am I right or am I right? 

    Green + Black + White = Perfection. Painted with Velvet Finishes Enchanting. French Country Chair Modern Makeover

    And yes, that black and white wall is also new – details coming soon…

    Love this green, black and white combo. French Country Chair Modern Makeover

    The only thing I wish I would have done differently is on that little bit of upholstery on the arms. I totally wasn’t thinking and made the fabric vertical on it, instead of horizontal across the arm. Thus, I got one big black stripe and no white there. I didn’t realize my mistake until after one arm was completely done and I wasn’t changing it at that point.

    Ain’t nobody got time for that.

    It doesn’t change how I feel about this chair one bit though…

    This is going to be an fabulous enchanting love affair.

    Do you have any pieces begging for some enchantment? 

    Need more? 

    Be sure to see these 11 Colorful Furniture Makeovers.

    And if green’s your thing don’t miss these favorite green decorating moves or these gorgeous emerald green decorating ideas.

    You know you don’t wanna miss any of this crazy.

    Sign up to get my posts delivered to your inbox here.

    Stalk Me Here:

    Pinterest / Facebook / Twitter / Instagram

    pin-this-post

    OMG. I'm in love. French Country Chair Modern Makeover

  • 10+ Kitchen Ideas for Decorating, Organizing, and Storage

    10+ Kitchen Ideas for Decorating, Organizing, and Storage

    I am all about a pretty space.

    I’m also all about a real life space.

    The problem is that pretty + real life don’t always work together.

    And real life tends to trump pretty everyday of the week.

    I always struggle with finding that happy balance between pretty and real life in the kitchen.

    Prime example: the chips will always live on top of the fridge. No, its not pretty, but that’s where we expect them to be, so that’s where they will always be come hell or high water unless we magically get more pantry or cabinet space…which I won’t hold my breath for.

    That being said, these are my best kitchen ideas for merging real life and pretty. 

    Doritos bag on the refrigerator not included. 

    Full of easy to do ideas that are pretty, but also functional. 10+ Kitchen Ideas: Decorating, Organizing, Storage

    10+ Kitchen Ideas: Decorating, Organizing, Storage

    #1. Create a coffee station. 

    Create a coffee station. 10+ Kitchen Ideas: Decorating, Organizing, Storage

    This coffee station has only been around for the last few months and let me tell you it has made my morning coffee ritual so much smoother. You see, I tend to want my morning coffee faster than the Keurig can make it. I know – that’s like the purest definition of impatientness (which probably isn’t even a word) ever. It is what it is. I corralled my K-Cups, sugar, and spoons all on a cheap little IKEA tray to get my coffee in my mug as soon as possible. The only thing that isn’t there is the creamer in the fridge. Obviously, its not realistic to leave the creamer sitting out overnight uncovered, so I used that pitcher for my spoons. The little Cafe du Monde sign is a nice reminder of my favorite city in the world.

    #2. Use a locker basket to hold fruit.

    Use a locker basket to hold fruit. 10+ Kitchen Ideas: Decorating, Organizing, Storage

    I hate those banana hanger/holder things. I have no idea why, but they drive me crazy. Instead, I use a vintage locker basket to hold all our fruit.

    #3. Use a shiny pitcher to hold cooking utensils. 

    Use a silver pitcher to hold cooking utensils. 10+ Kitchen Ideas: Decorating, Organizing, Storage

    When I found that silver pitcher at Goodwill, I nearly peed my pants. It does the job of holding all the ugly cooking utensils, while adding a touch of chic.

    #4. Use a tray to corral salt, pepper, olive oil, etc. 

    Use a tray to corral olive oil, salt, pepper, etc. 10+ Kitchen Ideas: Decorating, Organizing, Storage

    Right beside the silver pitcher is a small rustic-y tray that holds salt, pepper and olive oil. The tray keeps everything corralled in one spot and makes them feel unified.

    #5. Bring in color with barstools. 

    Bring color into a kitchen with barstools. 10+ Kitchen Ideas: Decorating, Organizing, Storage

    Lots of kitchens lack color. In fact, just about everything in my kitchen is black and white except for the barstools and curtains. In terms of furniture, barstools are pretty cheap, which makes them a perfect candidate for color. Buy a cheap pair at Target and spray paint them or scour thrift stores for some to makeover. I gave my barstools a kelly green and navy blue makeover a couple years back and I’ve been in love ever since.

    #6. Switch out your hardware. 

    Switch out old hardware and cover the previous holes. 10+ Kitchen Ideas: Decorating, Organizing, Storage

    Granted, I painted my cabinets and switched out their hardware, but never underestimate the power of just switching out hardware. Grunt and I did this at our little cottage and it totally changed the look of the entire kitchen. We probably spent less than $50 on new hardware and it had a big impact. You can even change the location of your hardware and cover the holes easily.

    #7. Don’t want to trade out your hardware? Try restoring it. 

    Instead of switching out old hardware, restore it. 10+ Kitchen Ideas: Decorating, Organizing, Storage

    If your hardware is pretty old, chances are, it could use a good cleaning. Clean it up and you might realize you have a little gem under all the grime. Here’s how to restore your hardware.

    #8. Build your own island or peninsula. 

    AWESOME IDEAS - dressers turned island, build your own island, and more! 7 Kitchen Island Ideas You Haven't Thought Of... via RainonaTinRoof.com

    Yes you can. I know some of you were just like, “No way can I make my own island.” Y’all, if Grunt and I can, anyone can. Our kitchen island (in the photo with the barstools earlier) was made from porch posts and salvaged barn wood – and it only costs about $100 to make, excluding the counter. And if you don’t want to build one, look at these seven different kitchen island ideas – you can even use a dresser for an island.

    #9. Have fun with sweets. 

    Display treats in a unique way. 10+ Kitchen Ideas: Decorating, Organizing, Storage

    This mohawk lollipop holder is definitely not all that kitchen-y. Its not really even needed. Buts its fun and quirky. And I like that. The kid especially loves getting her lollipops out of the mohawk.

    #10. Use locker baskets for cookbook storage.

    Store your cookbooks in an unconventional way. 10+ Kitchen Ideas: Decorating, Organizing, Storage

    A kitchen ideas post wouldn’t be complete without my vintage locker basket cookbook storage. Almost three years and they haven’t budged.

    #11. Ditch some upper cabinets for open shelving. 

    Instead of having all upper cabinets, opt for some open shelving. 10+ Kitchen Ideas: Decorating, Organizing, Storage

    When Grunt Labor and I started the kitchen reno, I knew I wanted open shelving somewhere. Originally, I wanted it on both sides of the window (and would still like that), but there wasn’t enough space for the shelving we bought from IKEA on the left side of the window. The shelving is pretty and functional. In the photo above, its holding my whiteware, but now it actually holds dishes and glasses. You can see our entire kitchen renovation here.

    What are your best kitchen ideas for decorating, organizing, and storage? 

    Want more real life decorating ideas? 

    14 Real Life Bedroom Ideas Anyone Can Do – totally doable, totally real life.

    20+ Living Room Ideas – for every kind of design style.

    You know you don’t wanna miss any of this crazy.

    Sign up to get my posts delivered to your inbox here.

    Stalk Me Here:

    Pinterest / Facebook / Twitter / Instagram

    pin-this-post

    Full of easy to do ideas that are pretty, but also functional. 10+ Kitchen Ideas: Decorating, Organizing, Storage

  • Easy Confetti Accent Wall

    Easy Confetti Accent Wall

    Have you been introduced to my new favorite wall?

    Its shiny, its gold, its fun, and it was so easy to make.

    My favorite thing about it? There’s no way you can screw it up.

    Meet my Confetti Accent Wall.

    Super easy to make and fun! Easy Confetti Accent Wall

    This post contains affiliate links for your shopping convenience. Click here to read my full disclosure policy.

    frogtape-disclosure

    This baby made its debut in my recent entryway makeover – ya know – the makeover that was totally unplanned and random?

    I have done quite a few accent walls in my time and I have to say that this one was by far the easiest I’ve ever done. There’s no measuring needed and bonus – it only cost me about $25 to do this wall.

    Easy Confetti Accent Wall

    Materials Needed: 

    Steps

    Step 1:

    Before the confetti wall, this wall was a very dark navy. Since I was going with a much lighter color on the wall, I first needed to prime the entire wall. Using the wider width of FrogTape® Multi-Surface, tape off your edges and trim, then prime.

    Step 2:

    Using a small foam roller, roll on random strips of your “confetti” color. I opted to do gold.

    Step 3: 

    After the confetti color has dried, place strips of the smaller width of FrogTape® Multi-Surface onto the confetti color.

    Easy Confetti Accent Wall

    Use a credit card or something similar to burnish the edges of the tape.

    Step 4: 

    Paint your desired wall color over the entire wall.

    Step 5: 

    After your final coat of paint, remove the FrogTape® Multi-Surface, while the paint is still wet.

    Remove tape carefully - Easy Confetti Accent Wall

    Let the wall completely dry before you put anything on it or near it.

    Super easy to make and fun! Easy Confetti Accent Wall

     I love having this wall in our entryway – it lets guests know that we are fun and easygoing – or at least I hope that’s what they think about us…..

    Do you have a fun accent wall in your house?

    Looking for more great accent wall ideas? That’s kind of my thing…

    Cane Inspired Accent Wall for $25 or Less – gorgeous, not too hard and a classic design.

    Black & White Gallery Wall – a simple accent wall that disguises your television!

    Criss-Cross Accent Wall – another classic design, but on a larger scale.

    9 Accent Walls for $30 or Less – high on style, but low on budget.

    7 Wall Treatments that Aren’t Shiplap – please, simmer down on the shiplap, ya’ll.

    You know you don’t wanna miss any of this crazy.

    Sign up to get my posts delivered to your inbox here.

    Stalk Me Here:

    Pinterest / Facebook / Twitter / Instagram

    pin-this-postSuper easy to make and fun! Easy Confetti Accent Wall

    SaveSave

  • Painting 101: How to Paint Walls In Less Time With Less Mess

    Painting 101: How to Paint Walls In Less Time With Less Mess

    No one ever taught me how to paint walls.

    I learned how to paint completely by trial and error after my Pap died and I had to paint every wall and ceiling in his house with two coats of primer and two coats of paint.

    My uncle handed me a five gallon bucket of primer, a five gallon bucket of paint, some rollers and left.

    I called in reinforcements.

    My friends and I painted Pap’s entire house over the course of a couple months all while wearing his XXL overalls that we duck taped in the back to hold them up on us.

    That’s one of my favorite memories and a couple pairs of those overalls are safely tucked away now.

    Needless to say, after all that painting and all the painting I’ve done in my other homes, I’ve learned pretty quickly how to paint walls – and how to do it in less time with less mess.

    How to Paint Walls | Painting Walls Tips | Painting Walls Techniques | How to Paint Walls Quickly | How to Paint Walls Fast

    Disclosure: This post was a collaboration with HomeRight. All opinions and self taught stellar painting skills are 100% mine. This post contains affiliate links for your shopping convenience. Click here to read my full disclosure policy.

    Now, as we all know good and well around here, I tend to not always do things the “professional” way.

    I prefer the Jenna method.

    Therefore, others may critique my methods, but this is what I do and what works for me.

    How to Paint Walls

    Step 1.

    Tape off around any trim as needed.

    Step by step breakdown of painting walls. Painting 101: How to Paint Walls

    I typically only tape off around my baseboards. I can usually edge pretty easily around door casings and the ceiling. When I don’t tape the baseboards, it never fails that I end up accidentally running the paint roller over them a few times.

    Also, lay out an old sheet or blanket to protect against any paint splatter. I am a cheater and don’t always do this because I’m impatient and just want to get started. If you don’t put down a blanket and do get some splatter, either wipe the paint up immediately with a wet paper towel or wait for it to dry and then just scrape it up with your fingernail, it comes right off. However, that method only works on tile and hardwood floor, so ALWAYS put down a cover over carpet.

    Step 2. 

    Edge. Always edge before rolling. Edge around your ceiling, doorways, trim, and in your corners. If you have done a lot of painting or after you get some good practice, you might be able to edge pretty good with a regular paintbrush. I am pretty good edging with just a paintbrush, but I also like to use my HomeRight Quick Painter for edging too.

    Step by step breakdown of painting walls. Painting 101: How to Paint Walls

    The quick painter basically eliminates the need for you to tape off around your trim as much if any. The trigger releases paint and the pull handle sucks paint into the tube, like so:

    Step by step breakdown of painting walls. Painting 101: How to Paint Walls

    First, you remove the painting pad, dip the tip of the tube into the paint can and pull back on the handle. This draws paint into the tube. Place the paint pad back on and squeeze the trigger to get paint on the pad. Then edge away! The quick painter is really great for people who have trouble edging with a regular paintbrush – it can also save a lot of time. You aren’t constantly going back to your paint can for more paint.

    Step 3: 

    Roll on your paint. Since I first used the HomeRight EZ Twist Paint Stick last year, it has been my go-to tool for painting walls.

    Step by step breakdown of painting walls. Painting 101: How to Paint Walls

     The paint stick comes with a tube that you place over your paint can. You stick the nozzle on the underside of the paint stick onto the tube, pull back on the paint stick handle and paint is pulled into the tube. To release the paint into the roller, you just push up on the stick and start rolling.

    Once more, this saves a lot of time because you aren’t running back and forth to the paint tray. You can also easily paint ceilings or tall walls without a ladder since the paint stick is longer than a regular roller.

    Some people roll their paint on in a “W” or a “V” pattern. I don’t. I usually start rolling at the top, and just work my way down the wall rolling.

    You can see how I first used the EZ Twist on my living room walls here.

    Step 4: 

    After you have rolled on a coat of paint, go back and do another coat of edging and another coat of rolling, repeating as many times as needed.

    Remember to pull up your painter’s tape as soon as you paint on your last coat of paint – do not wait for the paint to dry before removing the tape. This increases the risk of some of your paint peeling off when you remove the tape.

    Do you have any tips or tricks for painting walls? 

    Need more Painting 101 help? 

    How to Paint Trim and Doors – everything you need to know about painting all types of trim and doors in your home.

    What Kind of Paint Do I Use on That? – a guide to all different types of paint and what surfaces to use on each.

    Painting 101: Everything you need to know about painting anything – from kitchen cabinets to furniture and more, it’s all here.

    You know you don’t wanna miss any of this crazy.

    Sign up to get my posts delivered to your inbox here.

    Stalk Me Here:

    Pinterest / Facebook / Twitter / Instagram

    pin-this-post

    How to Paint Walls | Painting Walls Tips | Painting Walls Techniques | How to Paint Walls Quickly | How to Paint Walls Fast

    SaveSave

  • Mohawk Lollipop Holder: A Jonathan Adler Knock-Off

    This project will fall into the category with the snake bowl and the snake vase for many of you.

    That’s the category classified as:

    Things Jenna Loves & Most People Hate

    That’s perfectly fine.

    Me, my snake bowl, snake vase, and the newest addition to the category, the mohawk lollipop holder will be perfectly happy together.

    The Jonathan Adler version will cost you $98. This version will cost you $10. Mohawk Lollipop Holder - A Jonathan Adler Knock-Off

    This post contains affiliate links for your shopping convenience. Click here to read my full disclosure policy.

    That’s right. A punk rocker lollipop holder.

    How much more fun could it get?

    I was perusing Jonathan Adler’s newest items a while back, plotting out which items I would buy when I hit the lottery (all of them) and I happened upon this little jewel.

    Jonathan Adler Mohawk Lollipop Holder

    The Jonathan Adler Mohawk Lollipop Holder

    This is actually one of his more affordable items – its $98.

    However, I couldn’t bring myself to shell out $98 for a lollipop holder.

    So I made my own.

    For $10.

    DIY Jonathan Adler Inspired Mohawk Lollipop Holder

    Materials & Tools Needed:

    DIY Mohawk Lollipop Holder - A Jonathan Adler Knock-Off

    • Styrofoam Head (Mine came from Hobby Lobby. Use a 40% off coupon to get it for $5.)
    • Round Styrofoam Disc (Mine came from Hobby Lobby. It was $2.)
    • Metal Studs (Mine came from Michael’s. They were $3)
    • Pencil
    • X-Acto Knife
    • Hot Glue Gun
    • Toothpicks

    Steps

    Step 1. 

    Place the styrofoam head on top of the styrofoam disc and do an outline around the top of the head with your pencil. See #1 in the photo below. This will be your mohawk. After you have made your outline, cut out the mohawk slowly with an X-Acto knife.

    DIY Mohawk Lollipop Holder - A Jonathan Adler Knock-Off

    Step 2:

    Place about five toothpicks in the center top of the head, spread out a little shorter than the mohawk.  See #2 in the photo above.

    Step 3: 

    Push the mohawk down on top of the toothpicks. Push it slowly, so that it doesn’t break.

    Step 4: 

    Run a line of hot glue quickly along each side of the mohawk, then push the mohawk down and firmly into place with your hand. Hold it down until the glue is dry. See #4 in the photo above.

    Step 5:

    Hot glue the studs around the base of the head.

    Step 6: 

    Push your lollipops into the mohawk.

    I realize mine does not look as good as his, but for $10, I’ll take it.

    Wouldn’t this be so fun and quirky to have out at a party?

    Is there a mohawk lollipop holder in your future?

    I think there should be, but I won’t judge you if there isn’t. 🙂

    Want more Jonathan Adler inspiration?

    Don’t miss these 8 Jonathan Adler Inspired Projects!

    You know you don’t wanna miss any of this crazy.

    Sign up to get my posts delivered to your inbox here.

    Stalk Me Here:

    Pinterest / Facebook / Twitter / Instagram

    pin-this-post

    The Jonathan Adler version will cost you $98. This version will cost you $10. Mohawk Lollipop Holder - A Jonathan Adler Knock-Off

    SaveSave

  • Valentine Cards and Decor in an hour

    Valentine Cards and Decor in an hour

    With the exception of Halloween and Christmas, I’m usually not a big holiday decorator. I have a few little things I set out for Valentine’s Day and Easter, but that’s about it.

    But…..the circus is now old enough to really enjoy these holidays a little bit more…and since I am mom of the year and all, I felt I should up my Valentine’s game a little.

    So, I whipped up an adorable little heart garland and the kid and I even made her very own valentines in an hour.

    Because I’m mom of the year like that.

    Short on time? Make your own valentine day cards (perfect for kids!) and a cute Valentine's Day garland in an hour with little effort!

    Disclosure: This post was a collaboration with Creative Collection. All opinions and random heart glittering are 100% mine.

    Ok, in all fairness, basically everything I needed for both of these crafts were in the paper packages. Its kind of like the lazy girl’s way to craft.

    I still get points for doing it though, right?

    Materials and Supplies Needed: 

    Everything you need is in the package! Valentine Cards & Decor in an hour

    • Creative Collection Valentine’s Pack: Hearts & String (available at Wal-Mart)
    • Creative Collection Premium Paper and/or Cardstock Valentine’s Packs (available at Wal-Mart)
    • Scissors
    • Tape
    • Mod Podge, Paint Brush, and Glitter (optional – if you want to jazz up the heart garland a bit)

    Really, you don’t need steps for these crafts at all. Everything you need is in the package. However, I did decide to jazz up the heart garland a bit with gold glitter.

    Adorable and super easy to make valentine garland - everything you need is in the package! Valentine Cards and Decor in an hour

    All I did was paint a little Mod Podge onto the hearts in random spots and then shake the glitter on. Once its dry, simply pull the included string through the pre-cut holes in the top of the hearts and hang it up.

    Adorable and super easy to make valentine garland - everything you need is in the package! Valentine Cards and Decor in an hour

    How freakin’ easy was that?

    Adorable and super easy to make valentine garland - everything you need is in the package! Valentine Cards and Decor in an hour

    I also opted to mix the larger hearts with the smaller hearts on my garland.

    Adorable and super easy to make valentine garland - everything you need is in the package! Valentine Cards and Decor in an hour

    While the glitter is drying on the hearts, make your cards and envelopes.

    Make your own valentine envelopes!

    Once more, everything you need is in the package! These come not only with card and envelope templates, but also with envelope liner templates – and I’m always a sucker for an adorable envelope liner.

    Trace and cut out as many as you need.

    Make your own valentine day cards - everything you need is in the package! Valentine Cards and Decor in an hour

    We opted to use patterned scotch tape to secure our envelopes for a little extra pizzaz.

    Make your own valentine day cards - everything you need is in the package! Valentine Cards and Decor in an hour

    The hearts on the front of the cards were templates that came in the packages also. I traced and cut them out for the kid and then let her stick them on the cards. On the inside of each card, we used paint to make her handprint.

    I had the garland up, the cards made with the handprints drying, and the envelopes addressed in an hour.

    Boom.

    Valentine’s Day? Check.

    Be sure to see this adorable (and super simple!) valentines wreath diy I made using vintage valentines too!

    And get ideas for all kinds of holiday decorating here!

    You know you don’t wanna miss any of this crazy.

    Sign up to get my posts delivered to your inbox here.

    Stalk Me Here:

    Pinterest / Facebook / Twitter / Instagram

    Short on time? Make your own valentine day cards (perfect for kids!) and a cute Valentine's Day garland in an hour with little effort!

  • The funnest entryway you ever did see, even if it is mine

    The funnest entryway you ever did see, even if it is mine

    I’m not sure that funnest is actually a word. I googled it after saying it over and over in my head a hundred times and still couldn’t get a clear answer as to whether or not it is a word.

    I finally just went with my redneck instincts and left it in the title.

    Keep in mind, I used to teach middle school Language Arts.

    Those poor children.

    So I know I didn’t tell you I was doing an entryway makeover.

    Here’s the thing.

    I hadn’t really planned on doing an entryway makeover.

    And then it all just kind of happened.

    Story of my life. 

    The Fun and Easy Entryway Makeover

    Disclosure: This post was a collaboration with Kirkland’s. All opinions and sporadic makeovers are 100% mine.

    Before we start this makeover process, let’s take a moment to look at the before so that we can really appreciate the after:

    Entryway Before

    I didn’t hate the entryway before. I loved that navy wall, but that navy wall was really making the space dark.

    Furthermore, the circus would barely miss hitting her head on the corner of that table as she tornadoed down the hall.

     Really, I could just say that I did this whole makeover for her safety. Right?

    Quit shaking your head at me.  

    So, as my former students would say, what had happened is…

    The Fun and Easy Entryway Makeover

    These prints. 

    That’s how it all started.

    I went into Kirkland’s a few weeks ago and lo and behold they were on sale for $13 a piece.

    And did you see how big they are?

    It would have been a sin to leave them behind at that price, so I bought all four designs:

    The Elephant One

    The Leopard One

    The Zebra One 

    The Giraffe One

    And then I got home and realized that I had grossly misjudged how much all four of them together on the wall would overpower the bench (I’ll get to the new bench in a minute).

    I was forced to pick favorites.

    The elephant and leopard won.

    Actually, my pick was the leopard and giraffe, but the circus screamed when I attempted to take the elephant off the wall, so that decided that.

    Sidenote: they are all still only $13 as of the writing of this post.

    And then there was the bench.

    The Fun and Easy Entryway Makeover

    You see, while I was in Kirkland’s I also happened upon this bench.

    And I’d been thinking I wanted a bench to put in place of the table.

    And this bench was a nice neutral, which meant it would work with my ever-changing decor.

    And it had nailhead trim.

    And nailhead trim kind of makes me all warm and fuzzy inside.

    So it came home with me too.

    And then I got it all home and I said to myself, “Self, this wall color has to go.”

    The Fun and Easy Entryway Makeover

    And Self concurred.

    Self deems it the “confetti wall” and you can read how Self and I did it here.

    And after the wall was finished, the bench placed in front of it, the art above it, I shopped my own house for the pillows, fur throw, and painted plant basket.

    Because I’m good like that.

    But then I realized the old light fixture no longer worked there.

    Yep, even I can make this one! $25 Easy DIY Light Fixture

    So I made a new super easy DIY light fixture for only $25.

    And that is how this entryway makeover came to be.

    Looking for more fun room design inspiration? 

    Mudroom – Laundry Room Makeover – complete with a wall of swimmers. Seriously.

    Home Office Makeover – where color and Burt Reynolds collide. 🙂

    DIY Master Closet Makeover – colorful tassels and black and white stripes – oh my!

    You know you don’t wanna miss any of this crazy.

    Sign up to get my posts delivered to your inbox here.

    Stalk Me Here:

    Pinterest / Facebook / Twitter / Instagram

    pin-this-post

    The Fun and Easy Entryway Makeover

  • Make Laminate Countertops look like Stone for about $20

    Make Laminate Countertops look like Stone for about $20

    Looking for an easy DIY countertop makeover? If you’ve got $20, then you can take your laminate countertops from dated to modern beauties by using this tutorial for creating faux stone countertops!

    Remember when I answered all your burning questions and you asked if I ever messed up on anything. And I was like, All. The. Time. 

    Ok, this project was one of those trial by error projects.

    Luckily, its result was stellar – stellarly good looking and stellarly cheap as well.

    And I’m aware stellarly may not actually be a word.

    It is now though.

    Dear friends, let me show you the cheapest and easiest way you can turn those ugly laminate countertops from yesteryear into beautiful “stone” counters.

    How to Make Faux Stone Countertops

    At first glance, what kind of material would you think that countertop was made of? Stone, right?! But it’s totally not – that countertop was once a regular old laminate countertop!

    Let’s back up for a second. First off, these countertops are in the man cave. I showed you the whole built-in makeover last week. Before all that though, the built-ins looked like this:

    NO WAY! So easy and you may even have the supplies laying around your house! How to make Laminate Countertops look like Faux Stone for only $15

    Complete with shiny brownish-burgundy countertops circa 1970.

    Initially when Grunt Labor and I did a “lazy job” of redoing this space, I painted the countertop. I knew good and well it would end up scratching off, but I didn’t really care because I was pregnant and just wanted to lounge around in my fold-out lawn chair and eat chocolate while I still had a good excuse to do so.

    So I did, and if you’ve been pregnant before, then don’t tell me you would have done any differently. 🙂

    And what did the countertop do after it was painted?

    NO WAY! So easy and you may even have the supplies laying around your house! How to make Laminate Countertops look like Faux Stone for only $15

    It got lots of little scratches here and there. Just like I knew it would.

    A few months back when I really committed to overhauling this space, I knew I couldn’t leave the countertop as it was. I had lots of ideas – I would clad it all in pallet wood, or 1 x 4s, or pleather with nailhead trim….. Then, I had a better idea, I wanted to make it look like soap stone. I would paint it black, then come back with a tiny paintbrush and maybe add some grayish-whiteish veining.

    Pssssshhhhhh…..As if I actually have the patience for all that.

    After I realized that idea was a bust, I had a thought.

    I wonder what this countertop looks like underneath the laminate.

    So I started tearing it off….

    Painting Countertops to Look Like Stone

    This post contains affiliate links for your shopping convenience. Click here to read my full disclosure policy.

    Tools & Supplies Needed:

    Steps

    Step 1

    Starting at a corner of the countertop or a side, gently hammer your pry bar, drywall knife or scraper under the laminate of your countertop, then pop it up.

    How to make laminate countertops look like stone.

    Continue doing this until your countertop is sans laminate and all you are left with is a piece of wood. It is totally ok if you make a few nicks, scratches and such on the wood as you tear the laminate off.

    Step 2

    Take a look at the wood you are left with and decide if the texture is “stone-y” enough for you. If you want more texture to it, you the scrapers to scrape into it some, beat it a few times with the hammer, hit it with a chain, whatever. This is also a great stress release exercise. 😉

    NO WAY! So easy and you may even have the supplies laying around your house! How to make Laminate Countertops look like Faux Stone for only $15

    If the wood is too rough for you, give it a light sanding with a palm sander. I did do this, as there were a few splinters sticking up that I wanted to take care of. A very light sanding is key here though.

    Step 3

    Once you are satisfied with the texture of your wood, give it a minimum of two coats (but I did three) of chalkboard paint.

    NO WAY! So easy and you may even have the supplies laying around your house! How to make Laminate Countertops look like Faux Stone for only $15

    Step 4

    After the paint is fully dry, you need to seal the countertop. I used Minwax Finishing Paste Wax. I am not a fan of using waxes usually, but I knew the wax would keep that muted look of the paint so it looked more like stone, but still protect it, so that’s what I went for.

    To apply the wax, I used my AutoRight Detailing Polisher.

    NO WAY! So easy and you may even have the supplies laying around your house! How to make Laminate Countertops look like Faux Stone for only $15

    I put some wax on the foam applicator, applied it to the counter, let it sit for 20 minutes or so, then came back with the microfiber bonnet and buffed it. The polisher makes it sooooo easier to apply wax to pieces.

    If you are doing this countertop technique on a kitchen countertop or bathroom countertop that is going to be getting a lot of use, I would highly recommend you using a more heavy duty sealant like a polyurethane or polycrylic, which would hold up to water much better.

    Here’s our end result:

    Painting Countertops to Look Like Stone

    And another shot:

    NO WAY! So easy and you may even have the supplies laying around your house! How to make Laminate Countertops look like Faux Stone for only $15

    Helpful Tips and Q&A About the DIY Faux Stone Counters:

    How are they holding up? 

    Since this project was completed, we have actually moved out of the house where this countertop is. We were there for about two years though with the countertop and it was holding up just fine! My in-laws actually live in that house now and the countertop is doing well for them too!

    Could I put food directly on the countertop? 

    Since you’re using a wax or polycrylic topcoat, I would suggest that you not put food directly on top of the counters.

    Can I use a different kind of paint? 

    So I used the chalkboard paint because I had it on hand and because it had that flat, black color, but a little grayed out like soapstone looks. I think that you could use a different paint, however I would definitely suggest using a flat finish paint to get that stone look.

    Want more DIY countertop makeover ideas? 

    Here are 9 DIY Countertop Makeovers! 

    Want to remember this countertop makeover for later? Just pin the image below!

    Make your counters look like stone with this DIY Countertop Makeover. DIY Countertop Ideas | DIY Countertop Redo | DIY Countertop Paint

    You know you don’t wanna miss any of this crazy.

    Sign up to get my posts delivered to your inbox here.

    Stalk Me Here:

    Pinterest / Facebook / Twitter / Instagram

  • Power Tools 101: How to Use a Heat Gun

    Power Tools 101: How to Use a Heat Gun

    This is probably the easiest tool to use – but that many people don’t have.

    A Heat Gun.

    I didn’t have a heat gun until last year – and I didn’t get it out of the box for a month or so after I got it because I wasn’t quite sure what to do with it.

    Let me tell you – it can do so many things.

    And it is so easy to use.

    How to use a Heat Gun

    How to Use a Heat Gun | Heat Gun Crafts | Heat Gun Projects | Heat Gun Uses

    This post contains affiliate links for your shopping convenience. Click here to read my full disclosure policy.

    My heat gun is the HomeRight Digital Temperature Heat Gun. I have only used it and the Heat Pro Deluxe II Heat Gun. I can’t attest to other heat guns, but these have always worked well for me and are easy to use. Gina at Shabby Creek Cottage is doing her Power Tools 101 post today on using the Heat Pro Deluxe II Heat Gun.

    The digital heat gun comes with a handy case and a few tools to go along with the gun:

    Who knew it was so easy to use and what all it can do! How to use a Heat Gun and 15 things to do with it...

    There is a scraper for paint and nozzles that you can attach to the end of the gun to focus your heat or change its direction. Typically, I just use the heat gun as is, without an added-on nozzle.

    To start, simply plug in the heat gun. This is all electric. I suggest using an extension cord if you are working on a larger project and need to move around a lot.

    There is a temperature display screen and two buttons on the back of the gun.

    Who knew it was so easy to use and what all it can do! How to use a Heat Gun and 15 things to do with it...

    The left button will decrease the temperature (the lowest it goes is 120 degrees) and the right button will increase the temperature (the highest it goes is 1000 degrees).

    You turn it on with that switch on the back of the handle there.

    Super hard, right? 

    The biggest question with a heat gun is what temperature do I use for what projects?

    There is an instruction manual that comes with the gun and has suggested temperatures for different things. However, I typically just feel it out for myself. I start with a lower setting and work my way up until the gun has accomplished what I need it to. Its always better to start at a low temperature, rather than starting at a higher one and messing up whatever project you are working on (a.k.a. melting something into oblivion).

    I recently stripped the top of a dresser. To strip the paint that was on it, I had to turn the heat gun all the way up to 1000 degrees.  When I made the snake bowl and snake vase, I was more at a “medium” degree setting.

    Now, the question is what all can I freakin’ do with a heat gun?

    Let me tell you…..

    Remove Paint from Furniture

    Make a Rustic Tealight Holder

    Strip Old Veneer

    Make a Golden Snake Bowl

    Age Galvanized Metal Roofing (and make a cool arrow sign in the process)

    Winterize Your Windows

    Make a Snake Bud Vase out of a Toy Snake

    Remove Old Vinyl Lettering

    Make an Acrylic Tray

    Make a plastic animal bowl 

    Make an Embossed T-Shirt

    Make an Abstract Plastic Bowl

    Melt Crayons 

    Have you used a heat gun before? What do you use it on?

    Need more Power Tools 101 courses?

    How to Use a Drill

    How to use a Circular Saw

    How to use a Miter Saw

    How to Use a Sander

    The Best Tools for DIYers at any Level

    Want to remember this guide for using a heat gun later? Just pin the image below!

    How to Use a Heat Gun | Heat Gun Crafts | Heat Gun Projects | Heat Gun Uses

    You know you don’t wanna miss any of this crazy.

    Stalk Me Here:

    Pinterest / Facebook / Twitter / Instagram

    SaveSave

  • Glamorous Dresser Makeover

    Glamorous Dresser Makeover

    Have I told you that my dad claims the title of “Rain on a Tin Roof Middle Tennessee Marketing Manager?”

    I’m not kidding. 

    He even signs his emails to me that way.

    And he hangs my business cards at the post office.

    And tells all his friends about me.

    And the people he works with.

    I’m sure they loathe me by now.

    One of his co-workers, Shannon, (who is forced to work right beside him – poor girl), offered me a dresser she had in her garage. Thanks, Shannon!

    Seeing as I never turn down free furniture, I went and picked it up.

    In my not-so-big SUV.

    With my dad, the kid, and Will.

    That was a tight squeeze fun ride home.

    It was well worth it though for this glamorous dresser makeover.

    Gorgeous rich color! And no priming required with this paint! Glamorous Dresser Makeover

    Disclosure: This post was a collaboration with Velvet Finishes. All opinions and overuse of the word Glamorous are 100% mine. This post contains affiliate links for your shopping convenience. Click here to read my full disclosure policy.

    Isn’t that color glamorous?

    Literally – that’s the name of the paint. 

    Before I started on the dresser, it looked like this:

    Dresser - Before

    I ended up stripping the top of it with my heat gun because of where the paint was already coming off on top. See that white spot? I didn’t want the paint to be uneven there, so I just stripped off the top and gave the rest of the piece a good cleaning before painting it – no priming needed!

    As I said earlier, I used Glamorous by Velvet Finishes – a rich pink hue, one of my favorites in their paint line.

    Velvet Finishes Glamorous Paint - No priming or topcoat needed with this paint!

     And yes, the whole time I was painting it, I was singing the G-L-A-M-O-R-O-U-S song by Fergie.

    You’re quite welcome for having that song stuck in your head now. 

    I just brushed the paint right on.

    No priming required! Velvet Finishes Glamorous Paint

    I did about four light coats of paint.

    After the paint was dry, I wanted a little more depth to this piece, so I layered on Velvet Finishes Enhance Glaze.

    Velvet Finishes Enhance Dark Glaze - also works as a topcoat protectant!

    Y’all, typically, I suck at glazes. This is one I can actually do.

    How to Use Enhance Glaze

    You just slap it on with a paintbrush and wipe it down with a lint free cloth. If you wipe off more than you want, go back and add more, then wipe again. Just work in small sections because this stuff dries pretty quickly.

    The glaze actually works as a topcoat for added protection as well.

    Score. 

    And the after…

    Gorgeous rich color! And no priming required with this paint! Glamorous Dresser Makeover

    Hello Gorgeous Glamorous.

    Gorgeous rich color! And no priming required with this paint! Glamorous Dresser Makeover

    I kept the drawer hardware that came with the dresser and just spray painted it gold. There weren’t knobs for the doors, so I spray painted some extra ones I had laying around and put them on.

    I am cra-cra about the gold with the glamorous. Its a very glamorous combination.

    Have I said glamorous too much in this post?

    Never. 

    Need more colorful furniture makeovers?

    Here are 11 of them.

    Also, find out how to make colored furniture glaze in any color and how to make colored stain here.

    You know you don’t wanna miss any of this crazy.

    Sign up to get my posts delivered to your inbox here.

    Stalk Me Here:

    Pinterest / Facebook / Twitter / Instagram

    pin-this-post

    Gorgeous rich color! And no priming required with this paint! Glamorous Dresser Makeover

    SaveSave
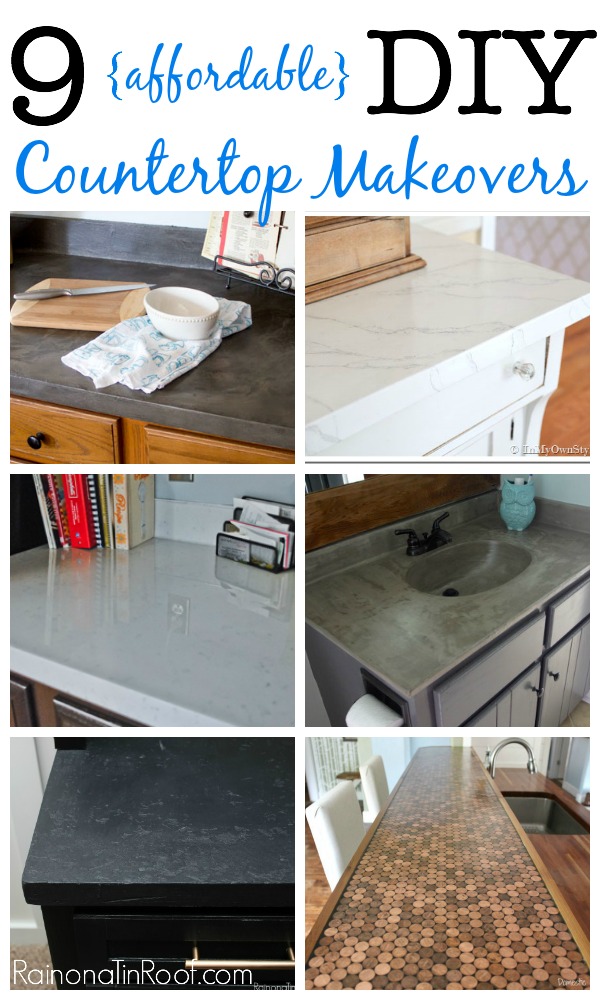
  • The Man Cave: Built-Ins Makeover

    The Man Cave: Built-Ins Makeover

    He’s waited almost four years.

    He thought it was going to happen in the winter of 2011 after I got knocked up.

    We tore down paneling, had drywall and carpet put in, and added moldings.

    We successfully made it less scary – and then moved onto the kid’s nursery.

    And the man cave became a dumping ground.

    It was a waste of space.

    And I hate wasted spaces.

    That’s one reason I don’t like vaulted ceilings because I think they waste too much space, but that’s another blog post, now isn’t it?

    Finally, Grunt Labor is getting his man cave.

    One makeover at a time.

    We started with the Vintage Radio turned Bar Cabinet, and now we just finished the Built-Ins Makeover.

    Wow! Big change - love the black on black. Man Cave Makeover: The Built-Ins

    Disclosure: This post was a collaboration with Build.com, however all opinions and lack of completing the man cave makeover in a timely manner, are 100% mine.

    When we first bought the beloved foreclosure, this room (in our basement) was covered in paneling and had stepped right out of 1975 – or somewhere thereabouts. The built-in unit was there, but it was on the other side of the room, which I guess technically means its not a built-in, but whatever. Here’s what it looked like then:

    Built-Ins Before

    The way the built-in was placed wasn’t ideal for us. As soon as you walked down the stairs, it was right there in your face. When I got knocked up and we realized that we’d better put this reno into overdrive and tore down the paneling and everything else, we moved the built-in to the other side. Grunt Labor took out the middle drawers and made them shelves. I threw some white paint on it and the countertop and called it a day.

    I was growing a human inside me. I had no energy for anything else.

    Eventually, it looked like this:

    man-cave-before

    We started to use it more, but it wasn’t how Grunt wanted it.

    And lord knows, he deserves something of his own around here.

    As fate would have it, Build.com contacted me a couple months back and asked if I wanted to work together on a project. I told Grunt Labor about it and he immediately started scouring their site…plotting out his man cave.

    The end result was this:

    Wow! Big change - love the black on black. Man Cave Makeover: The Built-Ins

    This space is now officially his. Well, except for the kid’s toys on the other side of the room. 🙂

    Grunt has been dying for a refrigerator down here for months – the vintage radio turned bar cabinet I made him just wasn’t enough for him apparently.

    Wow! Big change - love the black on black. Man Cave Makeover: The Built-Ins

    He found this refrigerator on Build and left the rest to me. The refrigerator was actually taller than the cabinets we had, so we had to raise them – it was much easier than I thought and I’ll be showing you just how easy it was in another post.

    The refrigerator holds a ton of drinks and keeps them super duper cold.

    Wow! Big change - love the black on black. Man Cave Makeover: The Built-Ins

    Obviously, we painted the entire unit as well. Before painting the cabinets and drawers, we added moldings around the edges to cover up the old design and give it a bit more of a modern look.

    The countertop got a makeover as well.

    Faux Stone Countertops. Man Cave Makeover: The Built-Ins

    It’s now sporting a faux stone look – you will die when you see how freakin’ easy it was to create this look. Not. Even. Kidding.

    I picked out new hardware too. I went for simple modern rose gold pulls on the drawers and lion head pulls on the doors.

    Wow! Big change - love the black on black. Man Cave Makeover: The Built-Ins

    The school’s mascot where Grunt teaches at is a lion, so they were only fitting.

    We had one issue with one of the drawer pulls – a screw broke off inside the handle and we couldn’t get it out. I contacted Build and they had me a new one delivered in just a few days. They have great customer service and even great customer resources including how-to videos, PDF instructions and more.

    Wow! Big change - love the black on black. Man Cave Makeover: The Built-Ins

    I did a lot of rearranging and editing on the shelves as well. Those vintage locker baskets are hiding DVDs.

    I made a little vignette as a tribute to Grunt Labor’s grandpa as well. I think it may be my favorite part of the whole makeover.

    Vignette for Grandpa - put old stamps in a shadow box.

    The stamps were his grandfather’s and we found them in one of his old tool boxes that Grunt got. We’ve had them for a couple years now and I knew I wanted to do something special with them, but it took me a while to figure out what. I finally mounted them all in a shadow box along with a stamped paper of each one. I put the little brass golf ball there because that is one of Grunt Labor’s memories of his grandpa – him swinging golf clubs in the backyard.

    Just a few more things to do and this man cave will be complete…he’s forcing me to paint a Tennessee Vols checkerboard table. I’m a Bama fan. If you’re from the south and know football, you know what this means. Send more cheap beer.

    Looking for more “manly” home decor ideas? See these then…

    Masculine Bedroom Makeover

    DIY Half-Bath Remodel

    The Jungle Room

    You know you don’t wanna miss any of this crazy.

    Sign up to get my posts delivered to your inbox here.

    Stalk Me Here:

    Pinterest / Facebook / Twitter / Instagram

    pin-this-post

    Wow! Big change - love the black on black. Man Cave Makeover: The Built-Ins

  • DIY Snake Bud Vase (Snake Haters, Avert Your Eyes)

    DIY Snake Bud Vase (Snake Haters, Avert Your Eyes)

    I knew there would be many of you that would hate it.

    Jenna's Favorite Things (Home and DIY Edition) and 11 HUGE GIVEAWAYS! via RainonaTinRoof.com

    The Golden Snake Bowl.

    That was fine with me.

    Because I love it. 

    And even if you did hate it, you totally have to give me an A+ for creativity.

    I mean, I took a rubber snake and made it into a bowl. 

    That has to count for something.

    While I was melting snakes into bowls, I also melted one into a bud vase.

    You read right – a Snake Bud Vase.

    Made from a $1 rubber snake! DIY Snake Bud Vase

    This post contains affiliate links for your shopping convenience. Click here to read my full disclosure policy.

    It’s totally fine – I get it if you don’t like this one either, but I still get an A+ for creativity.

    Possibly an A+ for playing with toy snakes as much as I do as well. 

    I made this beauty out of a $1 rubber snake. It was even easier to make than the snake bowl.

    How to Make a Snake Bud Vase

    Supplies and Tools Needed: 

    Made from a $1 rubber snake! DIY Snake Bud Vase

      • 1 Rubber Snake (I found that the best ones to use are the long and really bendy, bouncy ones from the Dollar Tree.)
      • Heat Safe Gloves
      • Empty metal can (I raided my cabinet and found a can of chicken gravy that was a year past its expiration date. SCORE.)
      • Toy Doctor’s Kit from the Dollar Store (this will make total sense in a little while, and no not because you will hurt yourself while making this stellar bud vase)

    Steps

    Step 1: 

    Make sure your metal can is clean (we don’t want a snake vase that smells like bad chicken gravy) and then coil the snake into the can.

    Made from a $1 rubber snake! DIY Snake Bud Vase

    I found the easiest way to do this was by holding the can between my feet and using both hands to tightly coil the snake in the can. Otherwise, the snake kept knocking the can over.

    Side note: I also did this right on my front porch for all the neighborhood to see. If they weren’t questioning my sanity before, they sure as hell are now.

    Step 2: 

    Turn on your heat gun (I turned mine up to high) and point the nozzle right down into the center of the can and also the center of the coiled snake.

    Made from a $1 rubber snake! DIY Snake Bud Vase

    Stop every once in a while and look in the can to see if he is good and melted together.

    Step 3:

    When the snake is melted together, let him cool for a few minutes, then pop him out of the can and give the sides of the snake a quick blast of the heat gun.

    Made from a $1 rubber snake! DIY Snake Bud Vase

    Keep the heat gun on high and focus the heat in between the layers of the snake. You just want to melt these pieces together – not turn it into liquid – so don’t leave it there too long.

    Step 4: 

    After the snake is fully cool, spray paint it gold or another color of your choice.

    Step 5: 

    Obviously, you can’t just plop a flower in this vase without something to hold water so the flower will live. Since this is a small vase, I had to get creative with this. I went to the Dollar Store (not the Dollar Tree where you got the snake, but the Dollar Store) and found this toy doctor’s kit:

    Made from a $1 rubber snake! DIY Snake Bud Vase

    I took the syringe apart and put a dab of monkey glue on the end of it where there was a small hole.

    Made from a $1 rubber snake! DIY Snake Bud VaseAfter it dried, I popped it into the bud vase with a little water and put my rose in it.

    Why yes, I do know that I’m a genius. Thank you. 

    Made from a $1 rubber snake! DIY Snake Bud Vase

     You can see just the edge of the syringe in the photo above.

    Looking for more great home decor projects? 

    If you’re a gold fan, don’t miss these 40+ gold home decor projects.

    And you won’t believe some of these 15+ Easy Crafts and DIY Projects!

    You know you don’t wanna miss any of this crazy.

    Sign up to get my posts delivered to your inbox here.

    Stalk Me Here:

    Pinterest / Facebook / Twitter / Instagram

    pin-this-post

    Made from a $1 rubber snake! DIY Snake Bud Vase

    SaveSave

