A circular saw is one of the more basic, versatile power tools. Below, you’ll learn about using a circular saw and it’s various parts. Before you know it, you’ll be teaching someone how to use a circular saw!
I have to admit – I was worried that the Power Tools 101 series may not be such a hit.
I was wrong.
And I’m so glad I was.
I’m thrilled you guys are finding this helpful! We want to empower you to get your DIY on!
By no means, am I pro at using every power tool in the book.
I still ask Grunt Labor questions about them all the time and I still make him put on any new hinges for doors because it seems I always drill the holes for those in the wrong place.
That’s ok.
I know the basics and for the most part, that’s all I need to know.
With that being said, here are the basics of how to use a circular saw.
Using a Circular Saw

Disclosure: Rockwell Tools sent me their compact circular saw and Versacut to review. However, all opinions are 100% mine. This post contains affiliate links for your shopping convenience. Click here to read my full disclosure policy.
Please use all appropriate and proper safety precautions when using tools and attempting projects. All projects and tool usage are attempted at the reader’s own risk.
If you are a first time circular saw user, I suggest that you have someone nearby who is familiar with circular saws when you first use it – just in case you have any questions and for safety’s sake. If you ever don’t feel comfortable cutting something, don’t do it. Wait until you have someone to help you who is comfortable with it. Power tools shouldn’t be scary, but you need to be careful with them at the same time.
Also, and this is probably the only situation in which I will say this, no cheap beer (or your preferred poison) while using a power tool, y’all.
And….always wear safety glasses when you cut something!
Ok, let’s get started.
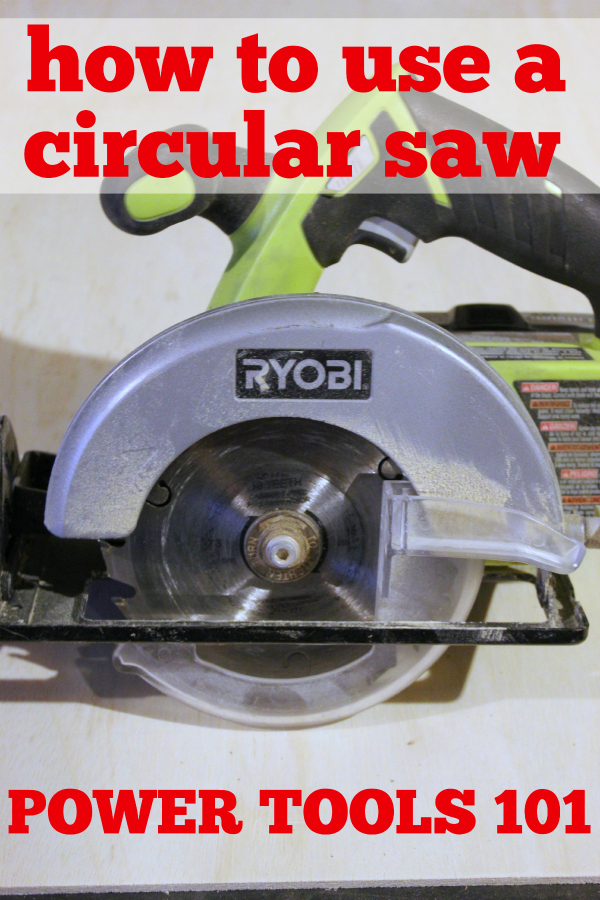
Parts of a Circular Saw
Grunt Labor and I have a few different types of circular saws.

The one we have had the longest and use the most is a Ryobi Cordless Circular Saw, which is pictured in the photo above. I’ve also noted the basic parts of the saw. There are also corded circular saws available.
I use our circular saw for longer cuts where it usually doesn’t matter if its perfectly straight or just cut little cuts.
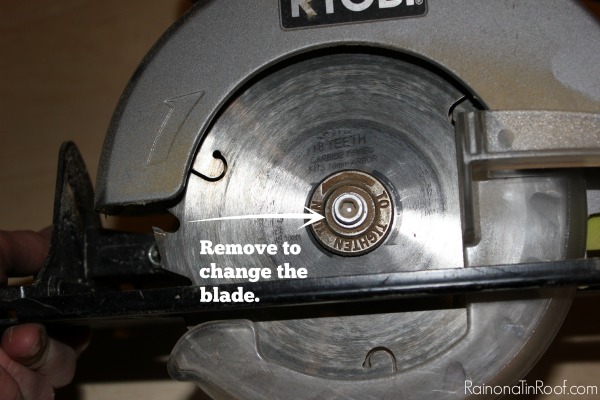
If you buy a new circular saw, you will most likely have to put the blade on. There will be instructions for this included, but all you do is remove that bolt in the center.
Another thing to keep in mind when buying a new circular saw blade is that a blade with more smaller teeth will give you a smoother cut. If you select a blade with bigger and fewer teeth, then your cuts with a circular saw won’t be as smooth.
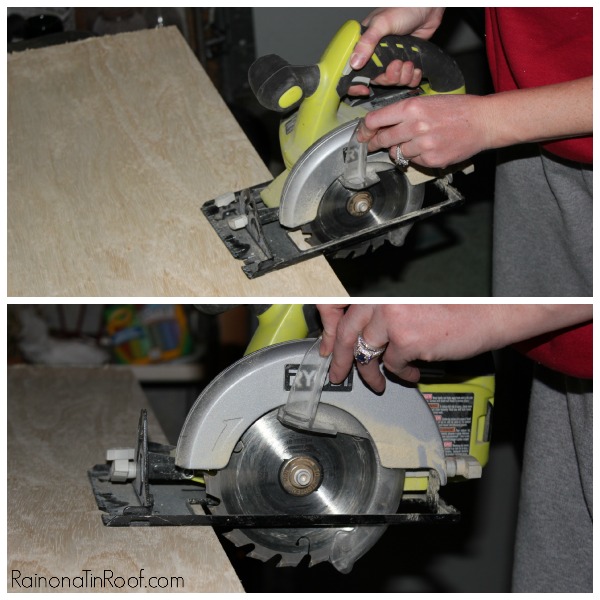
The blade guard will cover the bottom of the blade unless you move it.
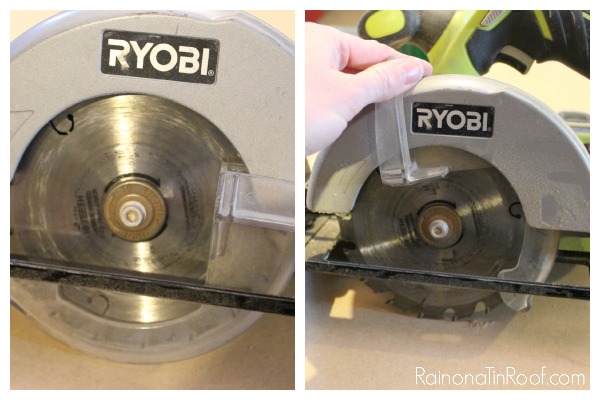
Once you start sawing something, it will move around the blade as you saw.
There are also functions on the circular saw where you can adjust the blade depth and angle.
To adjust the blade depth, there is a knob on the back of our saw (I believe it is on the back with most saws).
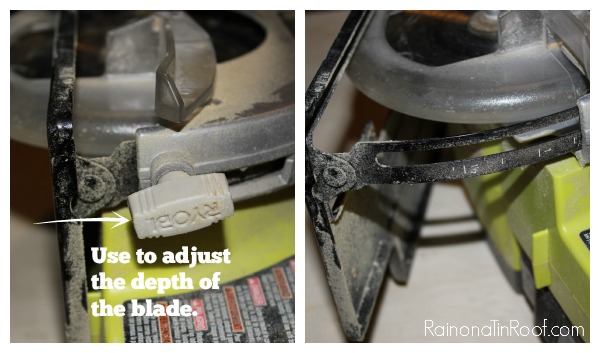
You simply turn it and the bottom plate will slide out.
There is also a place to adjust the angle of your cut.

This is on the front of our saw. This is used for bevel cuts.
In all honesty, we rarely ever use these two functions on our circular saw. We tend to make bevel cuts on our miter saw, which I’ll cover in another Power Tools 101 post. Its just good to know those functions are there.
Let’s get to the fun part – cutting.
Cutting Wood with a Circular Saw
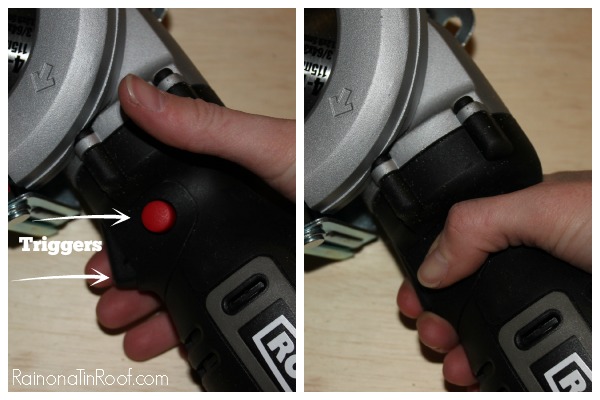
When you go to cut something with your saw, you must push in the trigger on the side of the handle and pull the trigger on the inside of the handle to start the saw.
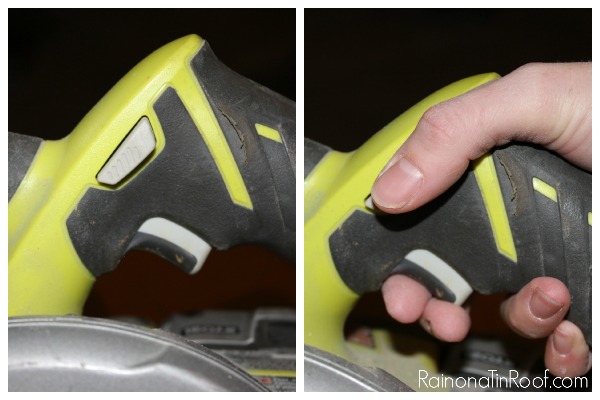
Typically, you will push in that top trigger first, and then the bottom one while still pushing the top trigger.
Before you cut something, measure and mark your line on your board or whatever you are cutting.

Use that notch in the saw (as noted above) as a guide to keep your cut straight.
When you begin to cut something, you will want to have the saw level, and don’t have the blade directly touching the wood – just barely by it as shown below.
 You will also have to pull up the blade guard when you first go to cut. Push your triggers and begin pushing the saw gently through your wood. Once you get your blade into your wood, you can release the blade guard and place that hand on the handle of your saw. If you are cutting something that is easily moveable, you may need to put that hand on the board to hold it steady, HOWEVER, keep your hands and fingers clear from the blade.
And that’s all you do to cut. Easier than you thought?
Other Types of Circular Saws
We also have two other types of circular saws which we just got.
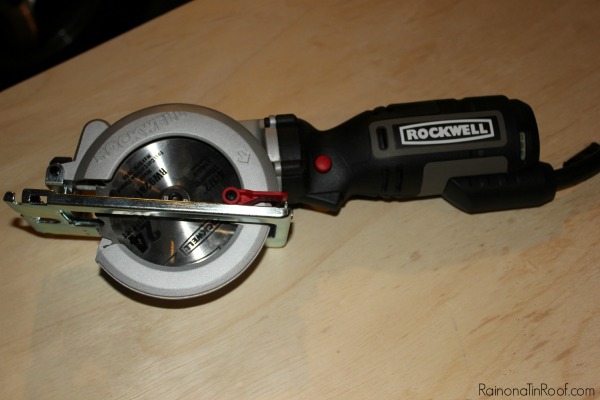
Rockwell Tools just sent us their compact circular saw (shown above). The compact circular saw is well, just that. Its a smaller version of a regular circular saw that is corded.
It also has two triggers as a regular circular saw does.
Since this compact circular saw is smaller, it is easier to maneuver.
Rockwell also sent us their Versacut circular saw.

The Versacut has a few more bells and whistles than the regular compact circular saw, however it is still a compact size. It can cut not only wood, but tile, pipe, and more. It is also corded.
It also has a two part trigger system.
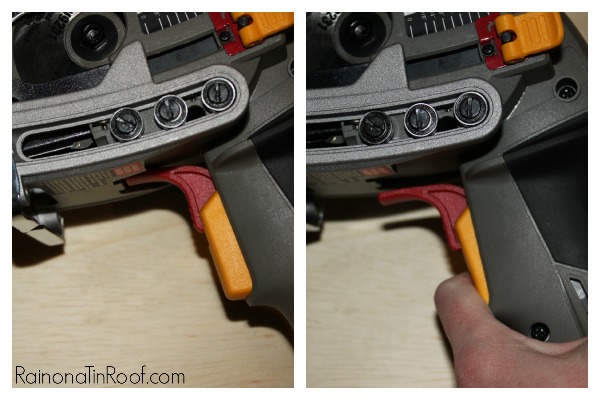 You have to push that red trigger first and then the yellow one.
It comes with an edge guide which allows you to get a straighter cut. You move the right part of the guide out and over your wood to the desired width.

It will move along the edge as you cut to give you a straighter cut.
Kreg also makes a guide, which they call a Rip-Cut that you can attach to a regular circular saw and use as a guide.

The Versacut also has a laser guide which is really helpful if the guide isn’t big enough for what you are cutting. We haven’t really had a chance to dive into using the new compact circular saws yet, but so far I am pretty impressed with their bells and whistles.
Any questions? Please leave them in the comments and I will do my best to answer them!
Please leave your tips for using a circular saw in the comments as well!
Looking for more help with learning to use power tools?
How to Use a Drill– it can actually do a whole lot more than you might think.
How to Use a Miter Saw – one of my favorite power tools.
How to use a Heat Gun and 15 things to do with it– another tool that has loads of different uses.
How to use a Sander– a must have tool for furniture flippers.
Need tool suggestions? Here are the best tools for DIYers at any level.
If you want to hang onto this post to refer to later, just pin the image below.
You know you don’t wanna miss any of this crazy.
Stalk Me Here:
Pinterest / Facebook / Twitter / Instagram

Mary says
Thanks so much for this post. I’ve been looking for a circular saw but a)they scare me b)I have small hands and they don’t feel right c)they are heavy. The Rockwell compact or the Versacut might just be the ticket!
Jenna @ Rain on a Tin Roof says
Awesome, Mary! I do want you to know – the Rockwell ones are compact, but they aren’t necessarily lightweight. They aren’t heavier than a regular circular saw or anything, but I just wanted you to be aware!
Susan says
Thank you for the information on the compact circular saw… it is exactly what I was looking for. My jigsaw doesn’t do a straight line and my circular saw is usually too big for what I need. Thank you
Susan
Homeroad.net
Jenna @ Rain on a Tin Roof says
You are welcome, Susan! Glad it was helpful!
Margy says
Thanks so much for the help! Could you give suggestions about “bases” for cutting. If I put my plywood on two sawhorses it will cave in and could mess up the wood. I’ve heard of people using foam to support the wood. Do you have any suggestions?
Jenna @ Rain on a Tin Roof says
Hey Margy. Are you cutting really large pieces of plywood or are they thin? I’ve never had a problem with the plywood caving in a lot. If its a larger piece, I try to have someone hold the other side of it in place to help with cutting. I hope that helps.