Hands down, my absolute favorite tool is my miter saw. Power miter saws can do so many things – and do it pretty easily as well. This guide will show you the basics of how to use a miter saw and what all a miter saw can be used for.
Its time for another empowering round of Power Tools 101.
In this round, I’m going to go over the basics of a miter saw, my favorite kind of saw, and Gina from The Shabby Creek Cottage is going to teach you how to use a table saw, which happens to be my least favorite saw.
Didn’t that work out nicely?

Please use all appropriate and proper safety precautions when using tools and attempting projects. All projects and tool usage are attempted at the reader’s own risk.
This post contains affiliate links for your shopping convenience. Click here to read my full disclosure policy.
Using a Miter Saw
First off…
What is a miter saw?
Why, I am just so darn glad you asked. In short, a miter saw is a saw that allows you to cut at a variety of angles. Its base sits on top of a miter saw stand, table or workbench, unlike the circular saw that you move yourself. Most of the time, miter saws are used for cutting things like baseboards, window trim, and crown molding. However, I like to use it whenever I can to just get a straight cut, because I suck at that sometimes with a circular saw.
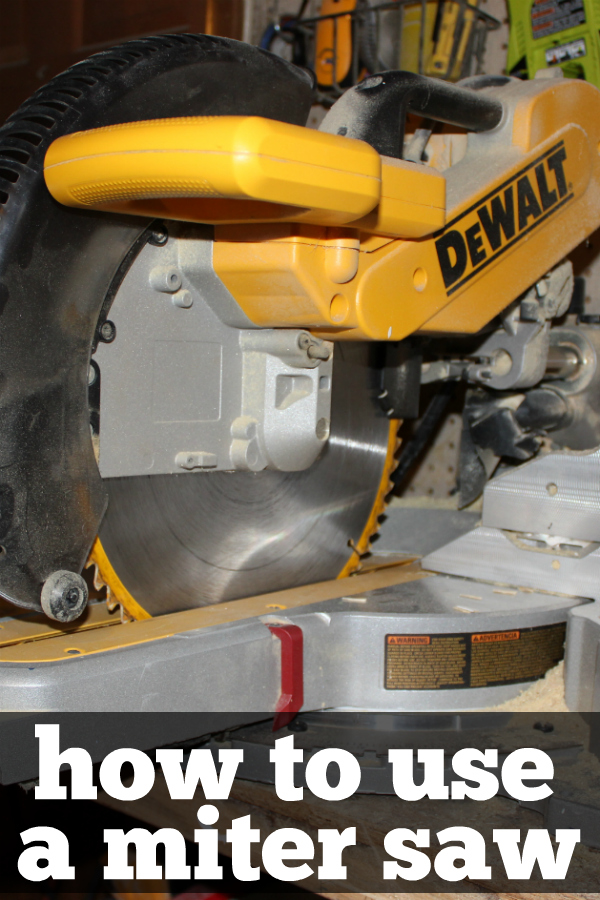
This is our miter saw:
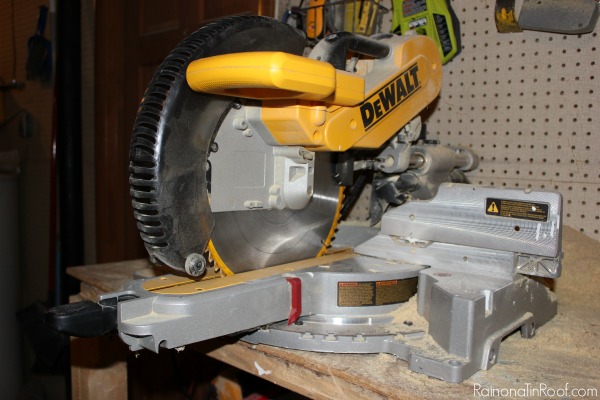
It is a DeWalt Double Bevel Sliding Compound Miter Saw. Our miter saw is a much larger miter saw than many people would require. We have a large one because a) it was on sale for a great price and b) we needed a heavy duty one when we started all the work on the beloved foreclosure. Right now, this one sells for about $600, but there are just as effective, smaller ones that start around $120, like this Ryobi one. I will say that I do love having a sliding miter saw because it can cut larger width pieces of wood.
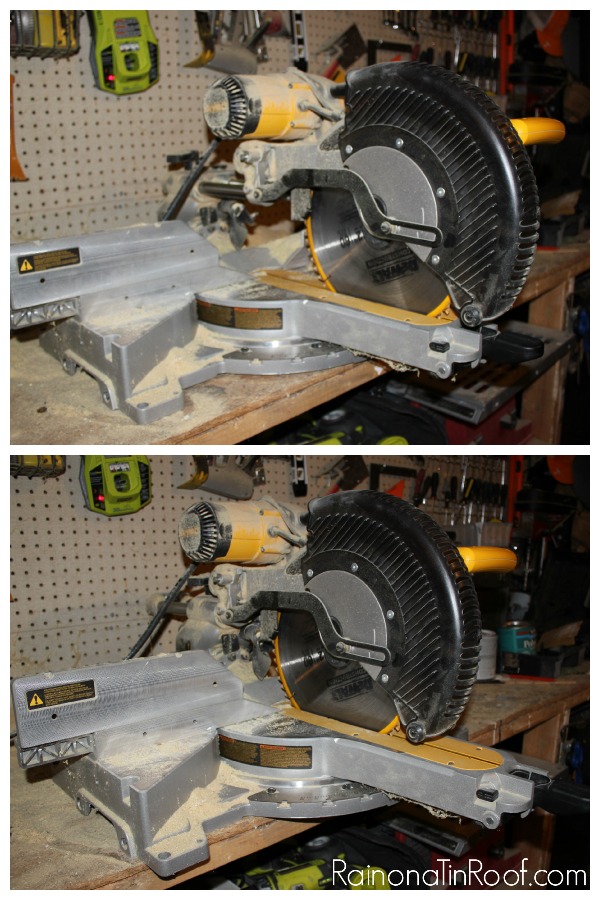
Here’s how it looks when the blade is up:

How a Miter Saw Works
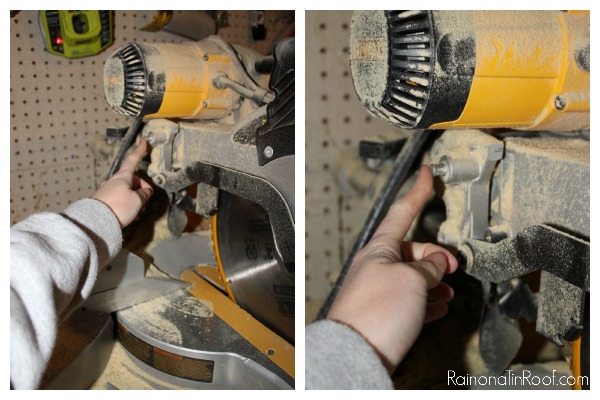
To release the blade, you push down on the handle with one hand, and press in on the “button” on the back left hand side, with the other hand:
The saw will operate by squeezing the trigger in the handle:

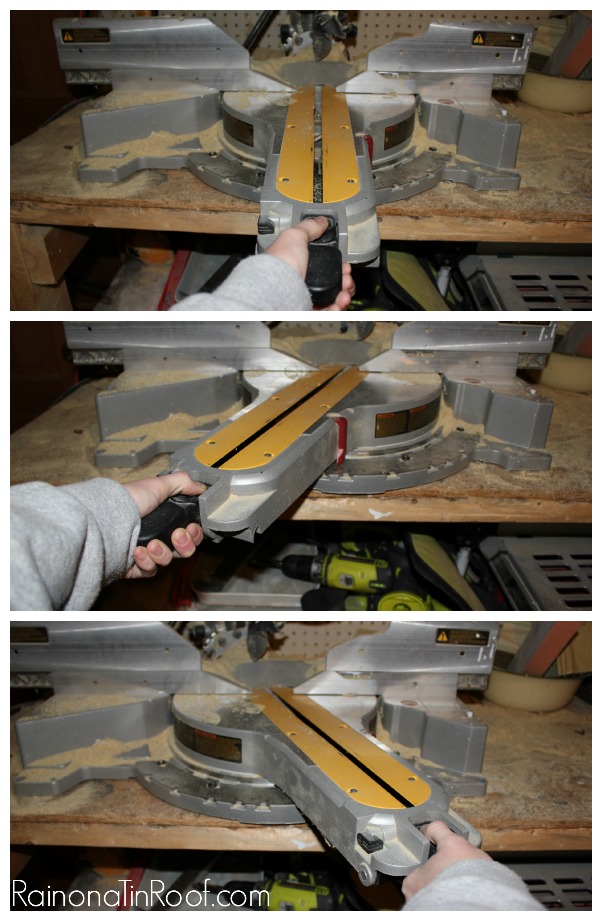
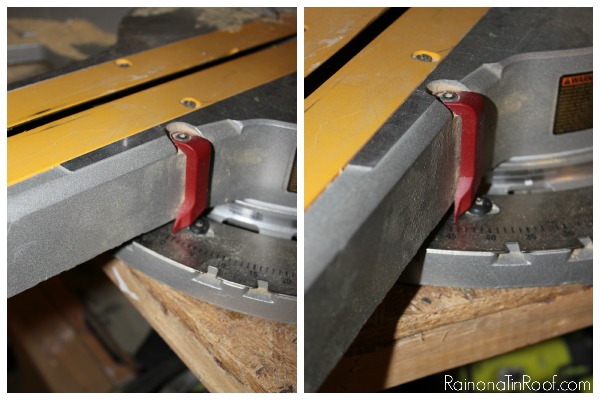
This saw is also capable of sliding back and forth by loosening the dial on the back of saw:

Why would you need to slide the saw? Well, if you have a larger piece of wood that the blade wouldn’t normally cut all the way the width of, you can start cutting on the front of the wood and then slide the blade back while cutting. In the photo below, you can see how the blade slides. The top photo shows the blade in the front and the bottom one shows the blade slid back:
Like I said in the beginning, one of the biggest reasons people use miter saws are to easily make angled cuts. You make angled cuts by moving the arm on the base of the saw:
You push down on the button while moving the arm. The saw will lock into place at set angles. Angles are marked along the bottom:
Anytime you cut a piece of wood on a miter saw, you need to make sure the wood is flush with the back:
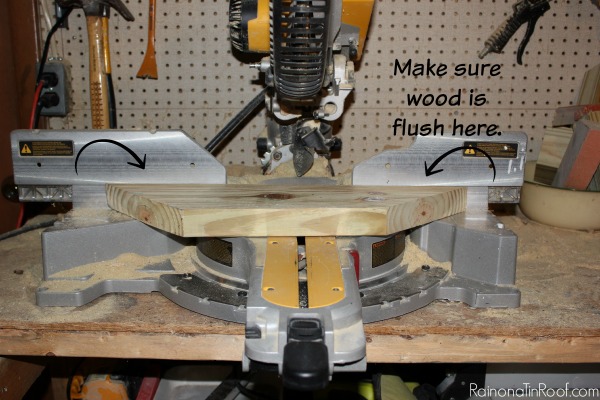
This gives you a nice, clean, straight cut. After marking where your cut should be and making sure your wood is flush, you will put one hand onto the handle and push the trigger (as shown in the photo above) and use your other hand to hold the wood still – make sure your hand is far away from the blade:

As you pull down on the blade, you will see that the safety blade guard will automatically move backwards. You cut angled cuts the same way as straight cuts, you just move the handle on the bottom to the desired angle like I showed you above.
After cutting through wood, release the trigger so that the blade stops spinning. As you raise the blade up, the blade guard will go back around the blade.
What is a Miter Saw Used For?
As you can see above from how a miter saw works, it can create many different types of cuts. But how do those cuts factor into real life projects. These are a few different projects where having a miter saw on hand is very useful:
- Trim Installation (baseboards, window casing, door casing, etc.) – a power miter saw can easily create those 45 degree angles to give you beautifully installed millwork.
- Crown Moulding – crown moulding is a little more trickier than regular trim, having a miter saw to get the correct cuts (like a bevel cut) is a necessity.
- Just about any building project – miter saws make quick work of just about any cut you need to make on lumber. As long as it will fit on the saw base and under the blade, you can probably cut it with a miter saw.
Do you have any tips for working with a miter saw?
More Power Tools 101 Posts You Might Find Helpful:
How to use a Drill – a must have tool for any DIYer!
How to use a Circular Saw – make cuts across large pieces of wood sheets such as plywood.
How to use a Heat Gun and 15 things to do with it – you won’t believe what all this thing is capable of!
How to Use a Sander – and what kind of sandpaper to use when.
The Best Tools for DIYers at any level – my tried and true tools.
Want to come back to this post later? Pin the image below!
Stalk Me Here:
Pinterest / Facebook / Twitter / Instagram

chris aka monkey says
hi hope your holidays were all wonderful…. i think this series is such a good thing.if a man can do it so can we..too many woman are afraid and i think because you are so cute and tiny it proves they have nothing to be afraid of…respect for power tools is a must we are afraid of vacuums or blender or food processors and they are power tools lol xx
chris aka monkey says
crap that should read are we afraid of xx
Jenna @ Rain on a Tin Roof says
hahaha, Chris. Maybe we should act more afraid of blenders and vacuums – then would the men start cooking too???
Linda Johnston says
I tell you what, I could not believe my eyes when I saw the title of this post! I SO NEEDED THIS! I got a miter saw for projects I want to make and sell. I can totally get it on with tools, but I had never had a saw like this. I have never used it even though I read the manual cover to cover. You gave me just enough confidence to move forward! Thanks and keep up the good work.
Jenna @ Rain on a Tin Roof says
Girl, don’t be scared! Just take it slow – baby steps! You’ve got this!
Linda Johnston says
I did it! I did it! Can you see me do my happy dance? Tom Brady and the boys have nothing on me right now! I think I’m all that for sure. Thanks again.
Jenna @ Rain on a Tin Roof says
hahaha!!! Way to rock it, Linda!
Laura says
It’s also important to keep your fingers from getting pinched between the wood and the back guide, which won’t be a problem if the wood is flush with the back.
Kent says
Nice looking and practicle miter saw bench, will build one for my saw.
John @ AZ DIY Guy says
I just stumbled on you site. Great tips on this cool tool! I think we have the exact same saw. I picked mine up on a Black Friday deal. Have you tried the add-on worklight that projects a shadow / cutline on your workpiece? I love it.
Jenna @ Rain on a Tin Roof says
Hey John! No, I have not tried that add-on work light, but its sounds awesome! I’ll have to check that out! Thanks for the tip!
Alstair Hick says
I am totally new at woodworking and I really like the way you have described everything. Thanks! Gotta start working.
Rachel says
Tanks for posting this. It has been very helpful. My mom gave away our miter saw after my dad only used it once to put in baseboards and didn’t touch it again. Now I’ve gotten into doing DIY work involving wood cutting and the jigsaw I bought just doesn’t work to get that perfect angle (at least not when wanting 2 pieces to join together flush like a frame. Well she refuses to let me get even a small one because they “take up too much space” so I resorted to a miter box. It’s taking FOREVER for something I could have done in 5 minutes with a miter saw. Anyway, enough rambling. I have a question. I tested it last night on an extra piece of the wood I’m using and all it did was split and fly everywhere. I know part had to do with it being a very short piece. When I use a longer piece though, do you have advice on cutting very thin wood (about 1.5″ wide x 1/4″ thick)? thank you!!
Jenna @ Rain on a Tin Roof says
Are you talking about cutting the wood with a jigsaw, miter saw or miter box, Rachel?
LJ says
i got a miter saw at a yard sale and love it already! I am working with landscape timbers, and my circular saw won’t cut all the way through them (too thick). I wondered if the miter saw would help. Boy, did it!! Took about 2 seconds to cut all the way through, and got a beautiful clean cut. I was scared to death of the saw but now realize it is so much safer — for the things I do at least — than the circular saw.
I do want to do beveled cuts too, for making trims and such. But this tutorial gave me more confidence just for basic use. Thank you!
Jenna @ Rain on a Tin Roof says
Awesome, LJ! Yes, miter saws are so much better for cutting through thick stuff! Have fun learning!
Brigitte says
Thanks SO much for this! I do have a little fear of power tools, which I’m trying to get over because I 1) want to do some DIY stuff around the house soon and my hubby won’t always be here and, 2) I want to start building things from scrap/reclaimed/pallet wood and my hubby won’t always be here. LOL! Seriously, tho, it’s WAY past time I put on my big girl panties and learned how to use these on my own. Up until now, I’ve always just told my hubby (or my son) what I wanted and they made it happen. No more! 🙂
Jenna says
Girl, you have totally got this!!!