Blog

  • Tips and Tricks for The Perfect Container Garden

    Tips and Tricks for The Perfect Container Garden

    This post contains affiliate links. 

    The last time I wrote about gardening or flowers in general, I was apparently misleading.

    You see the post was titled how to get a yard full of hydrangeas, but all I did to get a yard full of beautiful hydrangeas was have a husband who heard me say I’d never leave if I had them.

    So I see where you may have been a bit miffed with me. 

    But it was a good story, no? 

    This time though, I promise, I actually have real tips and tricks for you on how to get those glorious container gardens that we all lust after at the plant nurseries.

    Tips & Tricks for the Perfect Container Garden

    Tips & Tricks for the Perfect Container Garden

    *Husband and child not required for this, but helpful.

    First, let’s talk about what you need to start with:

    Tips & Tricks for the Perfect Container Garden

    First, you want to fill your planter about halfway up with soil.
    Tips & Tricks for the Perfect Container Garden

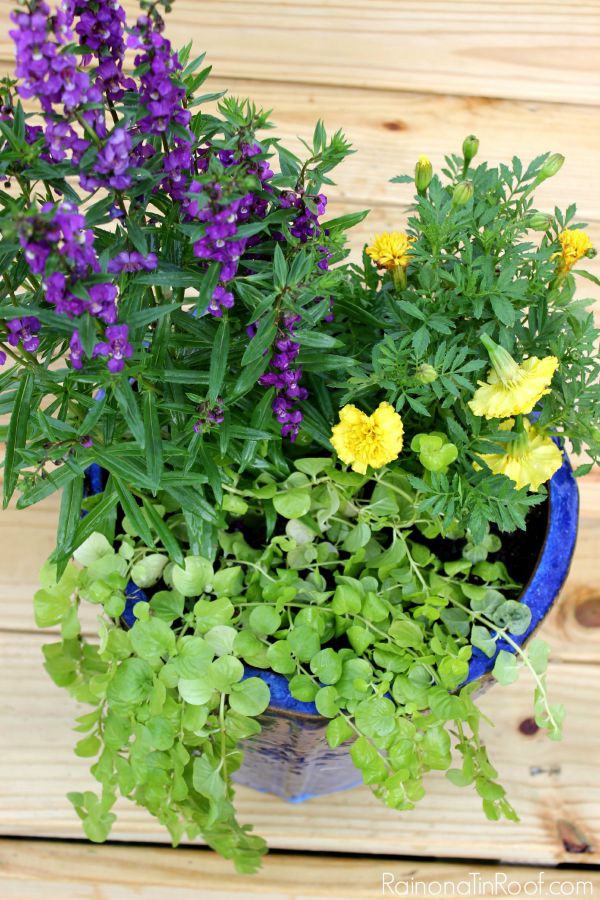
    Next, start adding in your plants. Start with the tall plant. Break up the roots some and place it toward the back of your planter.

    Tips & Tricks for the Perfect Container Garden

    Place your other plants toward the front while creating a triangle with all the plants.

    Then, fill the planter up with more soil as needed.

    Tips & Tricks for the Perfect Container Garden

    Now, water, water, water!

    Tips & Tricks for the Perfect Container Garden

    And feed, feed, feed!

    You can’t skimp on the watering and feeding. Its important to keep feeding and watering throughout the summer to get and keep those big, beautiful blooms longer.

    Plus, y’all its just really hot right now.

    I think us and the plants could use a little extra food and water, no?

    Tips & Tricks for the Perfect Container Garden

    The MiracleGro LiquaFeed System is what we use since its so easy to feed the plants while watering. Just hook the system up to your spigot, turn it to feed and you’re in business. The food comes right out through the hose with the water.

    Tips & Tricks for the Perfect Container Garden

    My last tip for container gardens…

    Tips & Tricks for the Perfect Container Garden

    Try to keep the marigold blooms away from the three year old who wants to squeeze them to pieces.

    Do you have any container gardening tips?

    If you liked this, you’re probably going to want to see this…

    This is so fun and quirky! Super affordable too! DIY Flamingo Sprinkler

    DIY Flamingo Sprinkler

    pin-this-post-2

    How to Plant a Container Garden | How to Make Flowers Last Longer | How to Make Flowers Live Longer | Tips for Growing Flowers

    You know you don’t wanna miss any of this crazy.

    Sign up to get my posts delivered to your inbox here.

    Stalk Me Here:

    Bloglovin / Pinterest / Facebook / Twitter / Google+ / Instagram

    blog-signature-summer-15

    If it waters, now it feeds with Miracle-Gro® LiquaFeed® Universal Feeder. It’s a great tool to help you reach your gardening goals by providing the essential nutrients your plants need to thrive all season long.

    This is a sponsored conversation written by me on behalf of Miracle-Gro. The opinions and text are all mine.

    SaveSaveSaveSave

  • DIY Headband Holder for $5

    DIY Headband Holder for $5

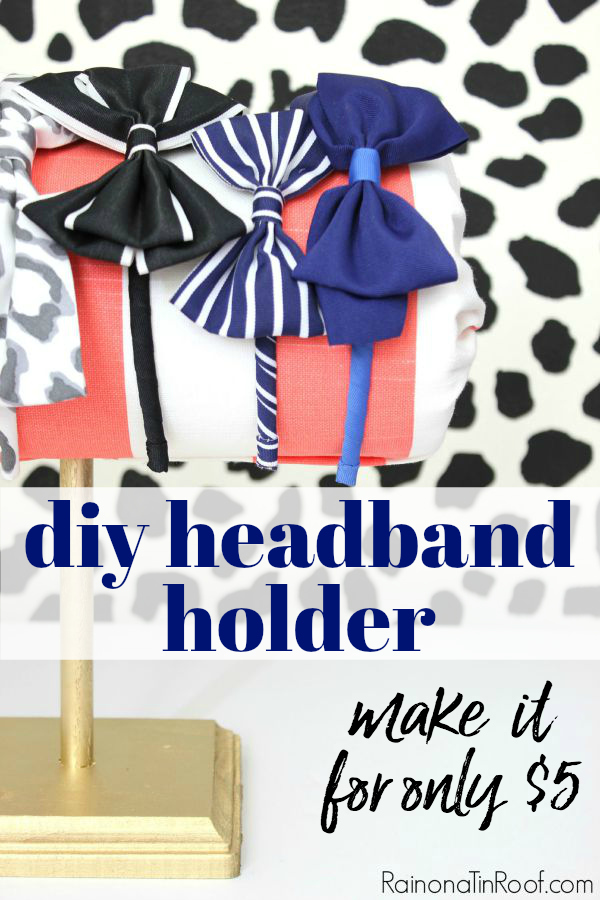
    Swimming in a sea of headbands for your little girl and not sure how to store and organize them? Then, learn how to make a headband holder below! This DIY headband holder is a perfect (and easy!) solution for headband storage.

    Remember our Aunt Rochelle?

    The aunt that you wanted for yourself?

    The one who sends the circus ensembles complete with matching shirts, pants, dresses, cardigans and even sunglasses.

    Well, that amazing Aunt Rochelle, she also sends hair accessories to match every single outfit she’s ever bought for the circus – mostly of the headband variety.

    She’s pretty much any little fashionista’s dream. 

    She is 100% the reason why the kid wins best dressed at preschool every year.

    Well, there really isn’t an award for that, but if there was, she’d have it in the bag. 

    While the circus will wear, and love, every shirt, shorts, dress, sunglasses and everything else Aunt Rochelle sends, she isn’t always a fan of the headbands.

    So I had a brilliant idea when I made her dress-up station.

    I would also make a headband holder so the circus would easily spot her headbands and in theory, want to wear them.

    DIY Headband Holder

    Headband Holder - easy diy project - Rain on a Tin Roof

    This post contains affiliate links for your shopping convenience. Click here to read my full disclosure policy.

    By the time I got to this addition of the dress-up station, funds were low, so I was scrounging around for cheap materials for this. I managed to make it for about $5 total – and you’re never going to believe what I used for the actual headband holder part…

    Materials Needed: 

    DIY Headband Holder - Supplies - Rain on a Tin Roof

    *Ignore the Mod Podge in the image – I ended up not needing it. 

    • Paper Towel Roll, preferably about 1/2 – 3/4 used. (yep, not kidding.)
    • Wood Base / Plaque (mine came from Michael’s – don’t forget to use a coupon!)
    • 5/8″ dowel – cut down to about 8 inches or so. You can easily make it shorter or taller if you wish, just cut the dowel accordingly.
    • Wood Glue
    • Drill and Drill Bits
    • Gold Spray Paint or another color of your choice
    • Fabric – about a 24″ inch square or so. You’ve probably got scrap laying around you can use.
    • Hot Glue Gun
    • X-Acto Knife
    • Scissors

    Step 1:

    Mark the center of your wooden plaque. Attach a drill bit that is the same size as the wooden dowel and drill a hole through the wooden plaque where you marked the center.

    How to Make a Headband Holder - drill hole in wood plaque - Rain on a Tin Roof

    Step 2: 

    After you have cut your dowel down to your desired size, place a little wood glue around the bottom of the dowel and insert it into the hole that you just made.

    Headband organizer - put wooden dowel in wood plaque - Rain on a Tin Roof

    Wipe away any excess glue from around the edges and let it dry for about 30 minutes.

     Step 3: 

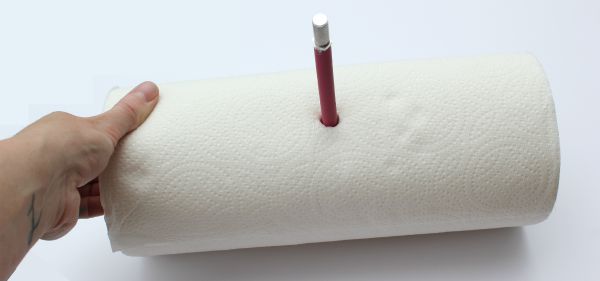
    While the glue is drying, cut a hole in the center of the paper towel roll using the X-Acto Knife. You want to go through one side of all the paper towels and the cardboard roll in the middle, but not all the way through the roll.

    Headband Storage - put hole in center of paper towel roll - Rain on a Tin Roof

    I found it easiest to punch a hole through the roll with the knife first and then kind of carve out the circle.

    Step 4: 

    Spray paint the wooden base and dowel.

    Step 5: 

    While the base and dowel are drying, wrap your fabric around the paper towel roll. Start by hot gluing an edge onto the paper towels where you made the hole and then wrapping around the other edge. Put a small line of hot glue along the edge that will be seen and fold it over so you have a clean edge, then hot glue that onto the paper towel roll just covering your first edge.

    headband storage organizer - cover with fabric - Rain on a Tin Roof

    Use scissors to cut a small hole in the fabric where the hole in your paper towel roll is. For the ends of the fabric, put a little hot glue inside the paper towel roll edges, then just shove the material into the edges.

    Step 6: 

    After the base and dowel is dry, slide the covered paper towel roll onto the dowel.

    Headband Storage Ideas - paper towel roll covered in fabric - Rain on a Tin Roof

    And now you have an adorable way to store and organize all those headbands!

    And ya know what, even though the kid now has this adorable little headband organizer, she still doesn’t wear all her cute headbands.

    Nope.

    She wants me to wear them instead. 

    Most days, you can find me sporting a huge pink bow on my head.

    Update: Just in case you were wondering, it’s now been nearly four years since we made this headband holder and we’re still using it! Paper towel rolls are pretty sturdy when they need to be!

    Will you be making a headband organizer?

    Looking for more great accessory storage ideas for your kiddos?

    This DIY sunglasses holder is a fun way to display all the kid’s shades.

    They will adore having their own dress-up closet! Psst….it’s easy to make too!

    And be sure to see these six pretend play stations for kids – they’ll even learn while they’re playing at the stations!

    Want to come back to this headband holder later? Just pin the image below!

    Headband Organizer DIY - hair accessories storage for little girls - Rain on a Tin Roof

    And Stalk Me Here…

    Pinterest / Facebook / Twitter / Instagram

    blog-signature-summer-15
    headband organizer diy - headband storage for little girls - Rain on a Tin Roof

    SaveSave

  • The View from the Floor | Painted Ceiling Designs

    The View from the Floor | Painted Ceiling Designs

    This post is sponsored by HomeRight, however all opinions are 100% mine. This post contains affiliate links. 

    Sometimes I lay on the floor.

    For no good reason at all.

    Sometimes I close my eyes.

    And daydream.

    Sometimes I stare at the despicable popcorn ceiling and try to find the strength to remove it.

    I usually decide I’ll pay someone to do that before I scrape ceilings again. 

    Sometimes I just ponder life’s mysteries.

    Either way, the ceiling is usually ugly.

    And most of the time, my wondering leads me down a rabbit hole of painted ceiling designs.

    Black Painted Ceiling • Painted Ceiling Designs • Tips for Painting Ceilings

    via

    Should I go for a bold, yet classic black?

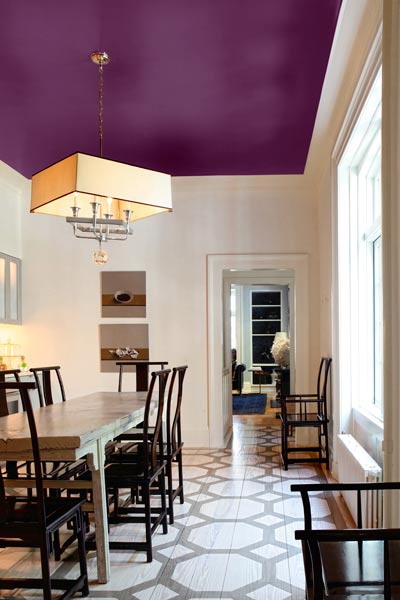
    Purple Painted Ceiling • Painted Ceiling Designs • Tips for Painting Ceilings

    via

    Or an un-expected punch of purple? I am usually never a purple girl, but man this one is reeling me in.

    Pink and White Trim Painted Ceiling Design • Painted Ceiling Designs • Tips for Painting Ceilings

    Should I change the color on my pink ceiling?

    Gray Painted Ceiling Design • Painted Ceiling Designs • Tips for Painting Ceilings

    via

    Perhaps, I should bring the ceiling color a third of the way down the wall too?

    Coral Painted Ceiling • Painted Ceiling Designs • Tips for Painting Ceilings

    Or maybe a cool and calm coral like Shavonda did?

    Yellow and White Striped Painted Ceiling Design • Circus Tent Ceiling Design • Painted Ceiling Designs • Tips for Painting Ceilings

    via 

    Or I could just pull out all the stops and turn my ceiling into a circus tent.

    No.

    But I will give them stellar execution on that ceiling. They have far more patience than I do.

    All of this ceiling dreaming usually ends in me deciding that I don’t have the strength to strip the popcorn ceilings off another room again.

    But one day.

    When I have had enough liquid courage to make me crazy enough to want to take off popcorn ceilings again, I’ll have a real pretty view from the floor.

    If you are already lucky enough to be free of popcorn ceilings, here are my best tips for painting ceilings A.K.A. what I learned from my pink ceiling adventure…

    Ceiling Painting Tips

    1. Always use flat paint on ceilings. 

    Ceilings (especially ones with removed popcorn) tend to have lots of imperfections. Using a satin, semi-gloss or gloss finish will only highlight those imperfections. Flat finish paints tend to hide them better.

    2. Clean the Cobwebs.

    Just admit it. My ceiling corners are usually littered with cobwebs and yours are too. 😉

    3. Tape off.

    Tape off any surrounding trim, light fixtures, etc. Yes, there is a difference in using plain old masking tape versus actual painter’s tape. Masking tape will not give you those crisp paint lines. With painter’s tape, you do have to firmly push down along all the edges after you put the tape on the wall to activate the tape against paint bleed. My usual go-to painting tape is FrogTape.

    4. Use a Quick Painter.

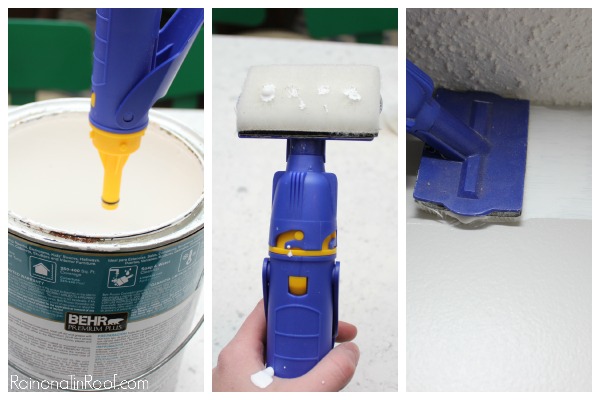
    If you have a hard time cutting in around a room, use the Quick Painter.

    Tips for Painting Ceilings

    The quick painter is this fabulous little tool that you suck your paint into, click the pad in place and run it right along trim, light fixtures and where the ceiling and wall meet. This little tool can also eliminate the need for taping in some cases.

    5. Use a good, easy to use, roller.

    When I paint any walls or ceilings, I use a PaintStick EZ-Twist.

    Tips for Painting Ceilings

    The PaintStick EZ-Twist fits onto your paint can. You pull back on the handle to draw paint into the tube. When the tube is full, twist the handle to release paint onto the roller and start painting your ceiling. No paint trays needed, so fewer trips for more paint. The EZ-Twist isn’t too bad to clean up either.

    6. Remove any painting tape as soon as you put your final coat on.

    A lot of people think they are supposed to wait to take the tape off until the paint is dry – don’t wait! If you wait, you risk the paint drying to the tape and the paint coming off with the tape.

    Need Wall Painting Tips? I’ve got you covered…

    Step by step breakdown of painting walls. Painting 101: How to Paint Walls

    pin-this-post-2

    Painted Ceiling Ideas | How to Paint a Ceiling | Tips for Painting a Ceiling | Painting a Ceiling a Color

    So who wants to take off my popcorn ceilings so I can have pretty ceilings everywhere and not just in my bathroom? 

    Yea, I figured there wouldn’t be any takers.

    You know you don’t wanna miss any of this crazy.

    Sign up to get my posts delivered to your inbox here.

    Stalk Me Here:

    Bloglovin / Pinterest / Facebook / Twitter / Google+ / Instagram

    blog-signature-summer-15

    Disclosure: This post was a collaboration with HomeRight. All opinions and longing for beautiful views from the floor are 100% mine.

    SaveSave

  • Don’t forget to tip your hat to Hank.

    Don’t forget to tip your hat to Hank.

    I remember being about four or five years old, in the kitchen with my Grannie one day, when we heard country music and line dancing start playing on TNN.

    All biscuit making halted.

    She swept me into her arms.

    Carried me into the den.

    And we did our own version of line dancing right then and there in front of that tv.

    She knew the song.

    She knew the steps.

    And she held me as we danced.

    And in those moments, my love affair with country music began.

    From Loretta & Conway to Garth & Trisha, I love them all.

    Furthermore, I firmly believe that every single situation in life has an accompanying country song and I’ll be happy to tell you what it is.

    Grunt Labor and I decided to take a quick trip for our five year anniversary back in June. As we pondered our options, one city seemed to be clear – Nashville.

    Music City U.S.A.

    We only had a couple of days to spend in the city, so we opted to stay downtown on Broadway within easy walking distance to just about everything besides The Opry.

    I’m sure there are hundreds of things that locals love to do in their great city, but these are always our favorite things to do in Nashville…

    1. Visit The Grand Ole Opry

    We didn’t get to see a performance at the Opry, but we did make it a point to stop by the sacred ground before heading into downtown. In other words, I insisted on going to the Opry gift shop to get an updated version of my Grand Ole Opry Member Book. The Opry is simply the heartbeat of country music.

    2. Peruse Broadway and Downtown

    Things to do in Nashville TN • Nashville Attractions • Fun things to do in Nashville • Nashville Tourism • Nashville TN Attractions • Broadway

    via

    Broadway is like the epicenter of downtown Nashville. This is where Tootsie’s is, lots of honky tonks and other things you won’t want to miss. Put your phone down and take it all in. See how many different songs you hear being played at once.

    Hit up the Paradise Park Trailer Resort for lunch.

    Paradise Park Trailer Resort

    via

    They make a mean BLT.

    At some point, we usually hit up The Big Bang off Broadway where they have dueling pianos. It also happens to be where Grunt Labor first told me he loved me…but he was drunk so it didn’t count. 😉

    3. Visit The Country Music Hall of Fame

    Things to do in Nashville TN • Nashville Attractions • Fun things to do in Nashville • Nashville Tourism • Nashville TN Attractions • Country Music Hall of Fame

    If you are a country music fan and have never been to The Country Music Hall of Fame, you must make it a point to go. This is not the same hall of fame from 15 years ago. They moved locations a while back and the new one is huge. Its filled to the brim with artists’ sacred outfits, guitars, even cars.

    things-to-do-in-nashville-tn-4

    I loved the Hee Haw exhibit.

    Things to do in Nashville TN • Nashville Attractions • Fun things to do in Nashville • Nashville Tourism • Nashville TN Attractions • Country Music Hall of Fame

    One of my favorite things were these, which were the handwritten original pieces of paper where Eric Church wrote Carolina and K.T. Oslin wrote 80’s Ladies.

    Things to do in Nashville TN • Nashville Attractions • Fun things to do in Nashville • Nashville Tourism • Nashville TN Attractions • Conway and Loretta

    I have to say though, I was a little disappointed with the lack of Conway Twitty items. I did take this quick picture of him and Loretta.

    4. And the Ryman. 

    Things to do in Nashville TN • Nashville Attractions • Fun things to do in Nashville • Nashville Tourism • Nashville TN Attractions • Ryman Auditorium

    God bless the Ryman. The Mother Church of Country Music. The Ryman is where the Grand Ole Opry originally started broadcasting. Its where Minnie Pearl stood on the stage for countless years.

    Things to do in Nashville TN • Nashville Attractions • Fun things to do in Nashville • Nashville Tourism • Nashville TN Attractions • Minnie Pearl's Hat and Shoes

    Don’t miss the display of her shoes and hat. Sit in a pew. Take it all in. If you listen closely, you’ll probably hear her announce, “Howdy! I’m just so proud to be here!”

    5. Have drinks at Acme Feed & Seed.

    Things to do in Nashville TN • Nashville Attractions • Fun things to do in Nashville • Nashville Tourism • Nashville TN Attractions • Acme Feed & Seed

    Acme Feed and Seed has been many things over the years including a feed store at one time. Now, it is home to a restaurant, gift shop, event space and a rooftop bar with amazing views of downtown and the river.

    6. Head over to Merchants for dinner. 

    Merchants

    via

    We opted to treat ourselves our last night in town at Merchants. Merchants was once a hotel where the one and only Dolly Parton, Patsy Cline and Hank Williams stayed among other country music royalty. The first floor is home to Merchants Bistro, but we opted for dinner on the second floor and just let me tell you, the steak was phenomenal. I had a whiskey with it and waved to Patsy in the booth across from us.

     7. Go down a side street off Broadway and find good live music. 

    Things to do in Nashville TN • Nashville Attractions • Fun things to do in Nashville • Nashville Tourism • Nashville TN Attractions

    While Broadway is hopping with live music and most definitely a sight to behold, I find that the best music and the best bars are off Broadway on the side streets. We ended up at Benchmark.

    The band played everything from George Strait to Eric Church and a little bit of 70’s rock.

    Things to do in Nashville TN • Nashville Attractions • Fun things to do in Nashville • Nashville Tourism • Nashville TN Attractions

    And shots were served in medicine cups. Brilliance. 

    8. Hit up Loveless Cafe for breakfast on your way out of town.

    Things to do in Nashville TN • Nashville Attractions • Fun things to do in Nashville • Nashville Tourism • Nashville TN Attractions • Loveless Cafe

    In the fifties, the Loveless’ started serving biscuits out of their front door. Eventually the little house became a full-blown restaurant and motel. The motel is no longer open, but Loveless Cafe still serves the best biscuits, and chicken and waffles according to Grunt Labor, for miles around.

    The one thing that we really wanted to do, but just couldn’t was visit The Bluebird Cafe. Its definitely on the list for the next time around though…

    And on the way out of town, be sure to tip your hat to Hank…

    Do you have any favorite spots in Nashville?

    Do tell so I can add them to my list for our next trip! 

    You might also want to read about one of my other favorite cities…and the time I visited a whorehouse…

    Amazing city full of fun! Must Do's in New Orleans

    The Must Do’s of New Orleans

    If you love the south and reading, you’re also going to want to see these….

    The Best Southern Books - A list of books about or set in the south that every lover of the south should read! Really great book recommendations!

    The Best Southern Books

    Favorite Southern Books: List of amazing books based in the south with unforgettable characters and plots!

    More Favorite Southern Books

    pin-this-post-2

    Things to Do in Nashville Tennessee | Where to Go in Nashville | What to Do in Nashville | Where to Eat in Nashville

    You know you don’t wanna miss any of this crazy.

    Sign up to get my posts delivered to your inbox here.

    Stalk Me Here:

    Bloglovin / Pinterest / Facebook / Twitter / Google+ / Instagram

    blog-signature-summer-15

  • Sparkly Horses Birthday Party

    Sparkly Horses Birthday Party

    Every year around the end of April, I feel the need to start drinking a tad bit more.

    Because a birthday party is on the horizon.

    And that means lots of planning.

    And organizing.

    And making.

    All in a specific timeframe.

    And I’ve never been good at any of that stuff all together at once.

    Thus, why the sparkly horse birthday party was two months ago and you are just now hearing about it.

    I needed time to recuperate.

    Sparkly Horses Birthday Party

    This post contains affiliate links. 

    Sparkly Horse Birthday Party / DIY Party Decorations / DIY Party Hats and More

    While many stuffed animals come and go around here, the horses never leave. The circus has an unwavering love for horses.

    It was obvious horses would be her 3rd birthday party theme.

    I actually did less in terms of decorations this year than the past two birthdays, which was nice. Here are a few of my favorite things from the party though.

    Horse Birthday Party / DIY Horse Wreath / DIY Party Decor / Horse Birthday Party Wreath

    I made a horse wreath to put on the front door. I started scouring thrift stores and yard sales for bigger sized horses a few months before the party and found that one for $0.25. I thought I would have to paint it, but it actually worked perfectly with the purple, pink and blue colors I used. The “3” came from the Target dollar spot. I just put gold glitter on it. I made a paper straw garland to drape across the wreath.

    Horse Birthday Party / Photo Number Collage / DIY Party Decorations

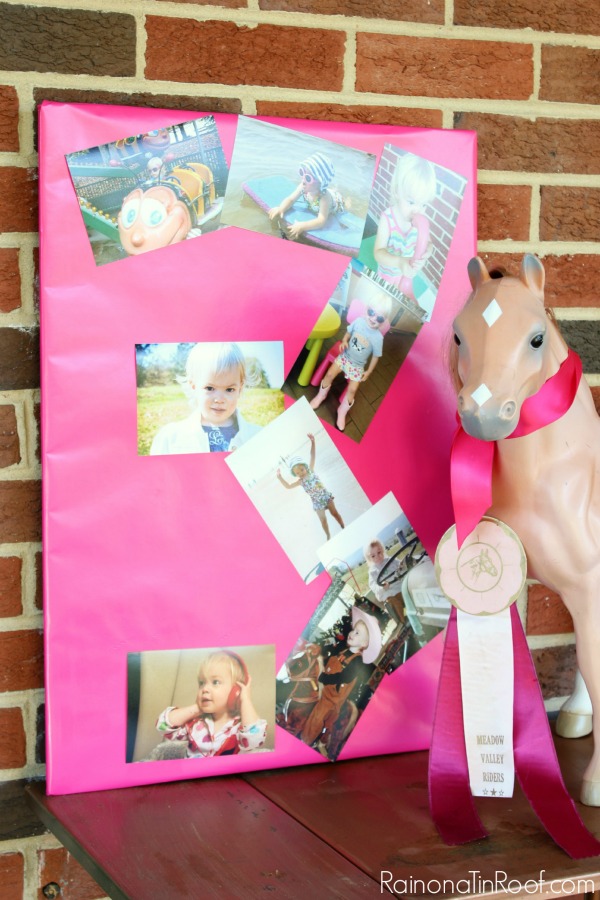
    There was also the annual number photo collage. Two and three have not been nearly as easy to make as “1” was. I picked up some vintage horse show ribbons at the Country Living Fair and draped it around the neck of one of the kid’s play horses and popped it beside the collage.

    DIY Party Background / DIY Party Decor / Horse Birthday Party / DIY Party Backdrop

    Inside, we had our also annual DIY party background. It’s just too easy and cheap not to make. I did opt not to make our own banner this year though and instead bought this one from Target. It worked pretty well with the rest of the decor and saved me some time. The black and white fans with horses were semi-DIY party decorations.

    DIY Birthday Party Hats / DIY Party Decor / Horse Birthday Party

    My favorite party decorations, excuse me, party attire, were the colorful and sparkly party hats. Once more, Target had the hats and we just added the horses after painting and glittering them up.

    Horse Birthday Party / DIY Party Decor / DIY Party Hats

    I spread out most of the hats on the buffet and tossed the horns in the clam shell.

    Also, I was a total slacker this year and did not make the birthday cupcakes.

    And it felt so good.  

    Instead, we had a horse birthday cake made and it was the most adorable (and scrumptious) thing I’ve ever seen or eaten. Local Chattanooga people – it was from the Irresistible Sweet Shoppe.

    The absolute best thing about the party though was the petting zoo. We hired Bagby’s Critter Corral to come out for an hour during the party and it was just awesome. They brought ponies, goats, sheep, pigs, rabbits, an alpaca and all other kinds of creatures. All the kids (and lots of the parents) had a ball.

    And the birthday girl got to ride a pony, which totally made her day.

    Need more DIY Party Ideas?

    Then, you’ll probably want to see this…

    DIY Party Decor Ideas

    pin-this-post-2

    Sparkly Horse Birthday Party / DIY Party Decorations / DIY Party Hats and More

    You know you don’t wanna miss any of this crazy.

    Sign up to get my posts delivered to your inbox here.

    Stalk Me Here:

    Bloglovin / Pinterest / Facebook / Twitter / Google+ / Instagram

    blog-signature-summer-15

    SaveSave

  • DIY Outdoor Daybed Tutorial – doubles as a sofa!

    DIY Outdoor Daybed Tutorial – doubles as a sofa!

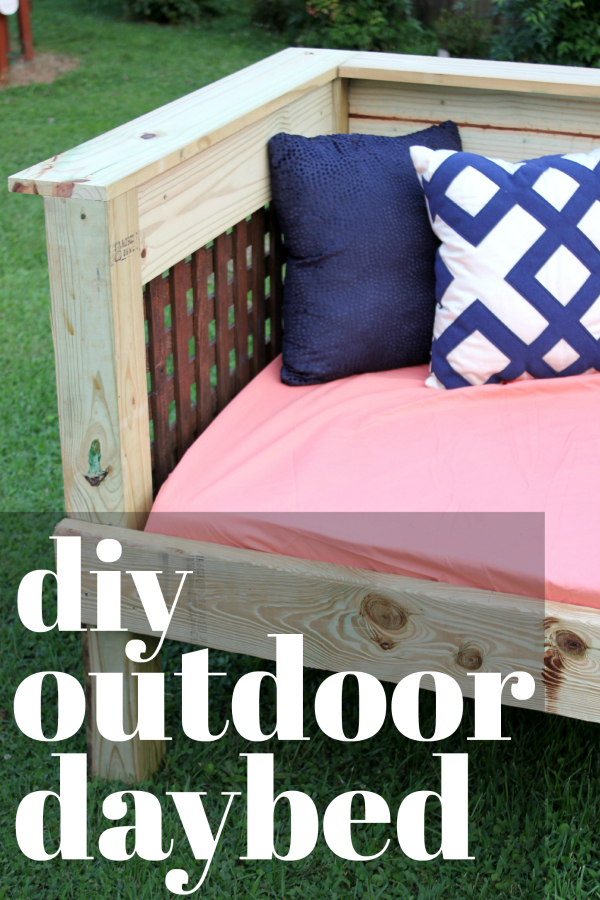
    If you’re looking for a piece of furniture to pull double duty outside, then this outdoor daybed is for you! Not only does it function as an outdoor bed, but it also makes a great outdoor sofa! Step-by-step instructions for making your own DIY Outdoor Daybed can be found below! 

    Remember how I made over my screened-in porch last year?

    For the second year in a row?

    Well, its gotten more changes this year too.

    I never intended to change it any.

    But we built a patio. And the patio got custody of the chaise lounge. And that meant I had no where to lay down and relax in the porch like I did before.

    Even though that only happens a few times during the year.

    When Furniture Medic challenged me to build an outdoor furniture project, I happily accepted and knew exactly what I wanted to build – an outside daybed.

    If you aren’t familiar with Furniture Medic, they are literally a medic for furniture. They are one of the world’s largest wood and furniture repair & restoration companies. They can do on-site color touch-up and finish restoration, refinishing, polishing, and repairs.

    See, they really are a medic for furniture. 

    DIY Outdoor Daybed / Simple Build / Make it for $200 or less

    I sketched out my drawings. I made a plan. Grunt Labor swooped in and figured out exactly what and how much lumber we would need, because otherwise I would have bought waaaayyyy too much or waaaayyy too little. Have I mentioned I’m terrible at guesstimating that kind of stuff?

    I had fully intended on Grunt and I building this together, but the next thing I knew, I was running around the house trying to get the kid to use the potty and Nicky showed up to help Grunt make the daybed.

    So Grunt and Nicky made it, but I had the idea and oversaw construction.

    That counts for something, right?

    DIY Outdoor Daybed

    Disclosure: This post was a collaboration with Furniture Medic. However, all opinions and constant changing of my porch are 100% mine. This post contains affiliate links for your shopping convenience. Click here to read my full disclosure policy.

    This cost us right around $200 to make. If you have an old twin mattress laying around, that will save you about $100.

    Lumber, Supplies & Tools Needed:

    Before cutting anything, measure your mattress to make sure it is the same size as mine. Mine is 36″ x 72″. You may have to adjust your cuts a bit, but it shouldn’t be much.

    Cut List:

    • 4 – 4 in. x 4 in. posts, 36″ long
    • 3 – 2 in. x 6 in. lumber, 81 5/8″ long
    • 4 – 2 in. x 6 in. lumber, 30 7/8″ long
    • 4 – 2 in. x 4 in. lumber, 37 3/4″ long
    • 2 – 1 in. x 6 in. lumber, 39 5/8″ long
    • 1 – 1 in. x 6 in. lumber, 74 1/2″ long
    • 2 – 1 in. x 6 in. lumber, 30 7/8″ long
    • 1 – 1 in. x 6 in. lumber, 74″ long
    • Plywood – 74″ x 37 1/4″
    • 2 Lattice Pieces  – 30 7/8″ x 19 3/4″
    • 1 Lattice Piece – 74″ x 19 3/4″

    Steps

    Step 1:

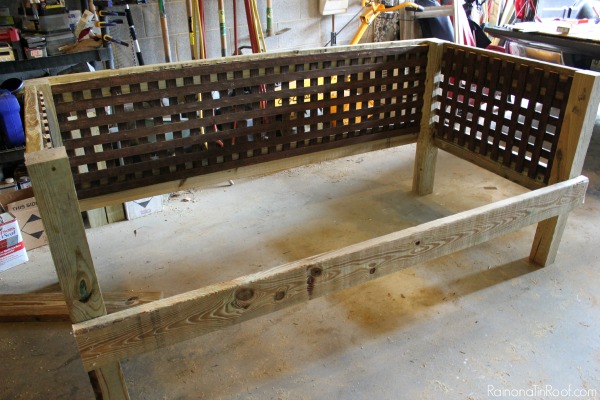
    Attach the four 4 x 4 posts on the back and sides with one of the 81 5/8″ 2 x 6’s and two of the 30 7/8″ 2 x 6’s. The back 2 x 6 should go from outside edge to outside edge on the back of the 4 x 4 posts. The side 2 x 6’s should go on the inside of the 4 x 4’s, but on the outer edge. Each of the 2 x 6’s should be attached to the 4 x 4 posts at 18 inches high (the top of the 2 x 6’s should be at 18 inches on the 4 x 4’s).

    DIY Outdoor Daybed - Assembly

    For the back 2 x 6, we attached it using just a regular old drill and screws. For the sides, we used a pocket hole jig to hide the screws, but that isn’t necessary.

    DIY Outdoor Bed - assembling the side supports

    Step 2:

    Attach another 81 5/8″ 2 x 6 at the top of the 4 x 4 posts in the back. Attach two more 30 7/8″ 2 x 6’s at the top of the 4 x4 posts on the sides.

    DIY Daybed - assembling the frame

    Step 3: 

    Attach the lattice panels to the sides and back of the daybed along the 2 x 6’s. We used a nail gun to do this.

    Outside daybed tutorial - step by step instructions

    The lattice panels will not cover the entire length of the 2 x 6’s – put them in the middle. (We had leftover lattice from another project, thus why they are already stained.)

    Step 4: 

    Attach the last 81 5/8″ 2 x 6 along the front of the daybed.

    DIY Daybed Couch for Outside - attaching front support

    Step 5:

    Attach all four of the 37 3/4″ 2 x 4’s along the bottom of the daybed between the front and back 2 x 6’s. Attach with screws. Place two 2 x 4’s in the corners and two in the middle.

    Outdoor Bed DIY Project - attaching mattress support

    Step 6:

    Screw the plywood sheet onto the 2 x 4’s that you just attached.

    Day Bed for Outside - mattress platform

    Step 7: 

    Attach the two 30 7/8″ 1 x 6’s along the inside sides of the daybed. Attach the 74″ 1 x 6 along the top back inside of the daybed.

    Step 8:

    Attach the two 39 5/8″ 1 x 6’s along the top sides of the daybed. Attach the 74 1/2″ 1 x 6 along the top back side of the daybed.

    Cover the mattress with a fitted sheet, accessorize with pillows and enjoy!

    Outdoor Bed and Sofa DIY Project

    My plan is to let all the pressure treated wood dry out and then paint the entire thing and move it into my screened-in porch. Now the question is, what color??

    Outdoor daybed that also works as a sofa.

    Is there a DIY outdoor bed in your future?

    Looking for another great project for your outdoor space?

    DIY Outdoor Sectional – Bonus: it has built-in drink coolers!

    10+ Outdoor Furniture Makeovers – if you’ve got outdoor furniture that needs a pick-me-up, then don’t miss these!

    How to Build a Picnic Table from an old Barn Door – the rustic outdoors at it’s finest!

    Want to come back for the how-to later? Just pin the image below!

    DIY Outdoor Daybed Tutorial that uses a twin mattress

    You know you don’t wanna miss any of this crazy.

    Sign up to get my posts delivered to your inbox here.

    Stalk Me Here:

    Pinterest / Facebook / Twitter / Instagram

    blog-signature-summer-15

    Outdoor Furniture Plans - daybed

    SaveSave

  • The Bold And The Beautiful Furniture Makeovers

    The Bold And The Beautiful Furniture Makeovers

    Yes, I did try to make that title sound like a soap opera on purpose.

    Why?

    Because these furniture makeovers deserve a title that is just as dramatic as they are.

    Because they are bold and beautiful.

    This post contains affiliate links. 

    The Bold and The Beautiful Furniture Makeovers

    Add a punch of color to your headboard.

    Bold and Beautiful Furniture Makeovers: Headboard Makeovers / Bed Makeovers / Painted Headboard

    Of course its no surprise that I would be quite smitten with that kelly green headboard from Jesse Coulter. Adding that hispanic vibe blanket on top is giving me some serious inspiration. And then there’s the red. Red is becoming a new favorite of mine as well. Makely Home knocked it out of the park with that color choice. Both of the headboards’ nooks and crannies were no match for the HomeRight Finish Max!

    Shades of Pink & Orange

    Bold and Beautiful Furniture Makeovers: Pastel Furniture Makeovers / Pink Furniture Makeovers

    I have no idea how Cuckoo for Design came up with such an amazing color combination for that midcentury modern dresser makeover, but its gorgeous. And while I’m not a huge fan of “little girl pink,” it definitely pairs well with gold hardware and a pop of pattern like the night stand makeover that 11 Magnolia Lane pulled off.

    When in doubt, black will never fail you.

    Bold and Beautiful Furniture Makeovers: Black Furniture Makeovers / Black and Gold / Black and Leopard Print

    Leopard Print Upholstery and Faux Black Bamboo. I die. This chair makeover from The Gathered Home has me drooling. Black + Gold will never fail you either. I gave this french country desk a modern, yet still classic makeover with my Finish Max paint sprayer.

    Go Aqua-licous

    Bold and Beautiful Furniture Makeovers: Aqua Furniture Makeovers The Shabby Creek Cottage gave her wood cabinet not only an aqua treatment, but also turned it into a great beverage center. Delicious and DIY gave her coffee table a super fun makeover, topped off with some gold stenciling details.

    Shades of Yellow

    Bold and Beautiful Furniture Makeovers: Yellow Furniture Makeovers / DIY Console Table / Mustard Furniture Makeovers

    Not only do I love the yellow shade that The Hunted Interior used for her console table, but I also love the fact that she made it – I totally want my own. Pneumatic Addict used a Finish Max Pro to complete her black and yellow dresser makeover.

    Bold Pink Furniture Makeovers

    Bold and Beautiful Furniture Makeovers: Bold Pink Furniture Makeovers / Dresser Makeover / Chair Makeover / Houndstooth Upholstery / Coral Dresser Makeover

    A good, bright, coral pink paired with gold never gets old. The Chronicles of Home updated this dresser with the perfect amount of gold detailing. And then there’s my bright pink chair paired with a classic houndstooth upholstery. Honestly, halfway through that makeover, I was a little worried, but I love the contrast in color and pattern.

    pin-this-post-2

    Bold and Beautiful Furniture Makeovers / Colorful Furniture Makeovers / Easy Furniture Makeovers

    Do you have any furniture that is just begging for a bold and beautiful makeover?

    Find more inspiration for furniture makeovers on my Knock-Your-Socks-Off Furniture Makeovers Pinterest board! 

    Follow Jenna @ Rain on a Tin Roof’s board Knock-Your-Socks-Off Furniture Makeovers & Hacks on Pinterest.

    Before you hurry off…

    They used a paint sprayer to paint outdoor cushions, wicker furniture, metal furniture and more!!! Outdoor Furniture Makeovers that are easier than you think!

    Sign up to get my posts delivered to your inbox here.

    Stalk Me Here:

    Bloglovin / Pinterest / Facebook / Twitter / Google+ / Instagram

    blog-signature-summer-15

    Disclosure: This post was a collaboration with HomeRight. However, all opinions and creating post titles that are soap opera worthy are 100% mine.

    SaveSaveSaveSaveSaveSave

  • DIY Sunglasses Holder for $5

    DIY Sunglasses Holder for $5

    There are few things in this world better than a great pair of sunglasses. Make this DIY sunglasses holder to both store and display your sunglasses. 

    We have an Aunt Rochelle.

    I hope you have an Aunt Rochelle too. 

    You see, Aunt Rochelles always send the good stuff.

    It is not uncommon for multiple packages (sporting color coordinated designs & patterns) to arrive on the front porch anytime of the year.

    It may be Christmas.

    Or it may not.

    It may be a birthday.

    Or it may not.

    Said packages will contain not one, not two, but multiple ensembles for the circus.

    Each ensemble is complete with a top, pants, cardigan, usually a skirt, socks, matching beret, and my favorite – matching sunglasses.

    And during the summer she gets multiple swimsuits with matching cover-ups, hats, and sunglasses.

    The kid has Jackie O sunglasses, pink sunglasses, movie star sunglasses, Iris Apfel sunglasses, floral print sunglasses, checked sunglasses.

    If she has an outfit from Aunt Rochelle, then she has the matching sunglasses.

    See why we love our Aunt Rochelle?

    We also love her because she’s just a load of fun too.

    With this vast assortment of sunglasses, it felt wrong just putting them in a drawer and only bringing them out as needed to complete an ensemble.

    No, no, no, no, no – sunglasses like this should be displayed.

    So Grunt Labor and I came up with this version of sunglasses storage so that the kid could enjoy her shades even inside.

    DIY Sunglasses Holder for $5

    I know. 

    Freakin’ adorable, right?

    It costs right around $5 to make this display piece and is a pretty easy build as long as you know how to use a drill.

    DIY Sunglass Holder

    This post contains affiliate links for your shopping convenience. Click here to read my full disclosure policy.

    Supplies Needed:

    Supplies for a DIY Sunglasses Holder

    Step 1: 

    Drill a hole into the bottom of the wood base that is slightly smaller than the largest dowel rod, then set aside.

    Drill hole in base for DIY Sunglasses Holder

    Step 2: 

    Determine how tall you want your DIY sunglasses holder to be. Ours is 11 inches. Cut the largest dowel down to this length, then set aside.

    Step 3: 

    Cut the smallest dowel into three inch lengths, then set aside. If you are doing this for adult sized sunglasses, you may need to make them longer.

    Step 4:

    Place the largest dowel in a vice or have another person hold it securely down. Drill holes down the dowel that the smallest dowels will fit snugly into. Our holes are two inches apart from center to center. Once more, you may need to make these larger for adult sized sunglasses.

    Drill holes in dowel for DIY Sunglasses Holder

    Step 5: 

    Place the small dowels into the larger dowel. These should fit pretty snugly and not need glue, but if some are loose, put a drop of wood glue in the hole before putting in the smaller dowel. Wipe away excess glue.

    Step 6:

    Place wood glue into the bottom of the wood base / plaque and place the large dowel into the base. Wipe away excess glue.

    Step 7: 

    Spray paint your sunglasses holder whatever color your little heart desires, then deck it out with sunglasses.

    Sunglass Holder

    Our new DIY sunglasses holder is actually residing atop the kid’s new dress-up closet, however, I couldn’t resist photographing it in front of the leopard print wall.

    P.S. Aunt Rochelle, can I get some sunglasses in my size too? I’ll take complete outfit ensembles as well. 😉

    P.P.S. Sorry folks, we won’t share her.

    Want more great ideas for the littles in your life?

    DIY Headband Holder – and it only costs $5 to make.

    DIY Kids’ Play Table with Storage – this bad boy is the perfect surface for playing farm, race cars, dinosaurs and more.

    DIY Children’s Stage with Hidden Dress-Up Storage – this stage is a simple build and will provide loads and loads of fun for your kiddo.

    Stalk Me Here:

    Pinterest / Facebook / Twitter / Instagram

    blog-signature-summer-15

    pin-this-post-2

    DIY Sunglasses Storage

    SaveSave

  • Liquor Cabinet Makeover + Adding Fretwork to Furniture

    Liquor Cabinet Makeover + Adding Fretwork to Furniture

    Something happened after I stripped and re-stained the buffet in the living room.

    After a few weeks, I started missing the red.

    Not the red on the buffet itself, but just the color red in general.

    Apparently, not only are my beloved colors kelly green and navy, but also a bold red.

    This really isn’t surprising. Red was always my favorite color growing up. I’m quite sure it became my favorite color when Reba wore the red dress.

    If you know the dress I’m talking about, then we are kindred spirits. 

    So I started hunting for something to paint red.

    Que Lorrie Morgan’s Something in Red.

    Sorry, I’m not quite sure how this post has become about country music of the 90’s. 

    And I happened upon my great-grandmother’s china cabinet turned liquor cabinet.

    I know. I know. You can judge me. It won’t bother me at all.

    It was time for a change.

    And not just a change in color, but also a change in location.

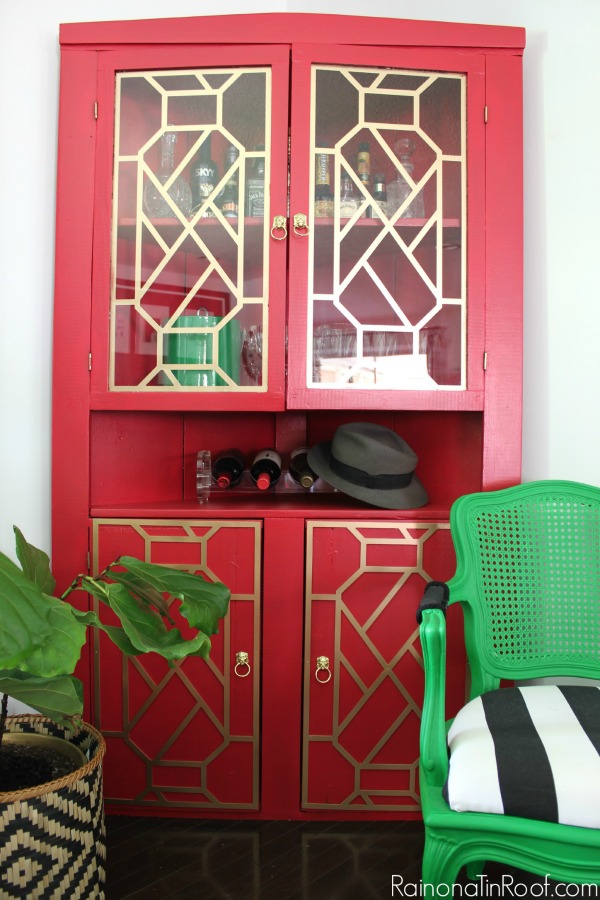
    Vivid Red Hutch Makeover / How to Add Fretwork to Furniture / Velvet Finishes Paint / O'verlays / Brass Lion Pulls / Chippendale Fretwork

    I know, right. It went from flat black to vivid red.

    Hutch Before

    Disclosure: This post was a collaboration with Velvet Finishes and O’verlays. However, all opinions and references to 90’s country music are 100% mine. This post contains affiliate links for your shopping convenience. Click here to read my full disclosure policy.

    It also moved from the dining room to the back corner in the living room.

    Here’s what we did…

    Liquor Cabinet Makeover + Adding Fretwork to Furniture

    Supplies & Materials Used:

    Step 1: 

    Before doing anything, I took off all the hardware, including the “campaign” corners that I had added to the piece a while back.

    fill-nail-holes

    I used wood filler to fill the holes and then sanded it smooth when dry (there’s a full tutorial here about filling holes). After that, I wiped the whole piece down with Ready to pick up any dirt and dust, then taped off the glass with FrogTape. This piece is so heavy that I painted it right there in the living room. Moving it from the dining room to the living room was a job, so once it was there – it stayed. For that reason, I also taped off the flooring around the cabinet.

    Step 2:

    After the prep work was done, which wasn’t much at all, I started painting the piece Vivid.

    Velvet Finishes Vivid: A true red. No priming or topcoat required.

    Vivid is a true red hue from Velvet Finishes. It took about four good coats to even out the red. If you have painted anything red before, you know it takes a while to even out the color. At my old house, I put eight, nope, not kidding, eight coats of red paint on the kitchen walls before the color evened out. Luckily, this paint didn’t require near as many coats.

    Step 3:

    After the paint was good and dry, I went back over the piece with Protect.

    Velvet Finishes Protect: A Polycrylic Topcoat for Furniture

    Protect is a satin poly topcoat. Velvet Finishes already has a topcoat built in, but this piece takes a good beating seeing as how we like our drinks around here, so I gave it some added protection.

    Step 4:

    While the Protect was drying, I painted the O’verlays.

    O'verlays Fretwork Panels for Furniture

    O’verlays are decorative fretwork panels that you can add to furniture to up your makeover game. 🙂

    That’s the Jenna definition anyway. 

    Really though, they are super cool. There are tons of designs to choose from and you can have them custom sized for your furniture. If you want to makeover an IKEA piece, they already have panels for those pieces sized and ready to go. How cool is that? 

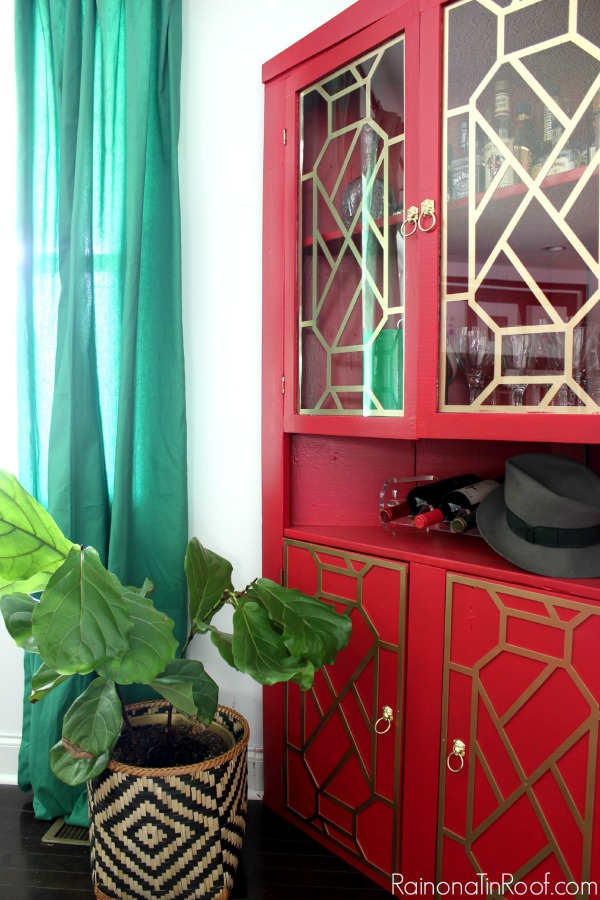
    I went with the Cheryle panels. They came to me primed white. I had toyed with the idea of leaving them white against the red, but in the end, gold won out. I gave them a few coats of gold spray paint.

    Step 5:

    Once the panels and cabinet were fully dry, I used my nail gun to attach the panels to the lower cabinet doors. You could also use a glue as well. The top panels went behind the glass. I used these panel clips to keep them in place.

    Vivid Red Hutch Makeover / How to Add Fretwork to Furniture / Velvet Finishes Paint / O'verlays / Brass Lion Pulls / Chippendale Fretwork

    Its vivid, its bold, and I love it.

    Vivid Red Hutch Makeover / How to Add Fretwork to Furniture / Velvet Finishes Paint / O'verlays / Brass Lion Pulls / Chippendale Fretwork

    I kept the lion hardware, but I have to say, I think it pops so much more with the red and gold fretwork than it did before.

    Vivid Red Hutch Makeover / How to Add Fretwork to Furniture / Velvet Finishes Paint / O'verlays / Brass Lion Pulls / Chippendale Fretwork

    And the fretwork? Ahhh, the fretwork – well that was just the icing on the cake, darlin’.

    So tell me, are you seeing red now? The good kind?

    Looking for more bold and daring furniture makeovers?

    DIY Tuxedo Bar – yes, it looks like a tuxedo. I’m serious.

    Malachite Credenza Makeover – I like to call this one party on top, business in the front.

    Bold and Beautiful Furniture Makeovers – very bold, very very beautiful.

    pin-this-post

    Vivid Red Hutch Makeover / How to Add Fretwork to Furniture / Velvet Finishes Paint / O'verlays / Brass Lion Pulls / Chippendale Fretwork

    SaveSave

  • Dress Up Closet: Easy DIY Dress Up Storage from a Bookcase

    Dress Up Closet: Easy DIY Dress Up Storage from a Bookcase

    Coming up with great storage solutions for your kids’ toys and paraphernalia can often be hard – not this one though! If dress up clothes are taking over your life then make this DIY dress up closet now! A bookcase is all you’ll need to get started and create dress up storage to save your sanity and a dress up station your little one will love!

    The circus has discovered princesses.

    Specifically Belle and Cinderella.

    She’s also discovered ballerinas and cowgirls and doctors.

    And she wants to be all those things.

    Numerous times throughout the day.

    Luckily, she hasn’t morphed into a total girly girl. Let’s be honest – I don’t know if I could handle that.

    Its more like tutu one minute and mud the next.

    I’ll take that any day over constant tea parties and tiaras. 

    I thought I had the dress-up department confined to one box.

    And then her birthday happened.

    Suddenly, it was as if all of Broadway’s costume department threw up in her room.

    There were meltdowns over not being able to find Ariel’s shoes to wear with Sophia’s dress – not to mention all the other princess dresses that were lost to the hurricane that went through her room.

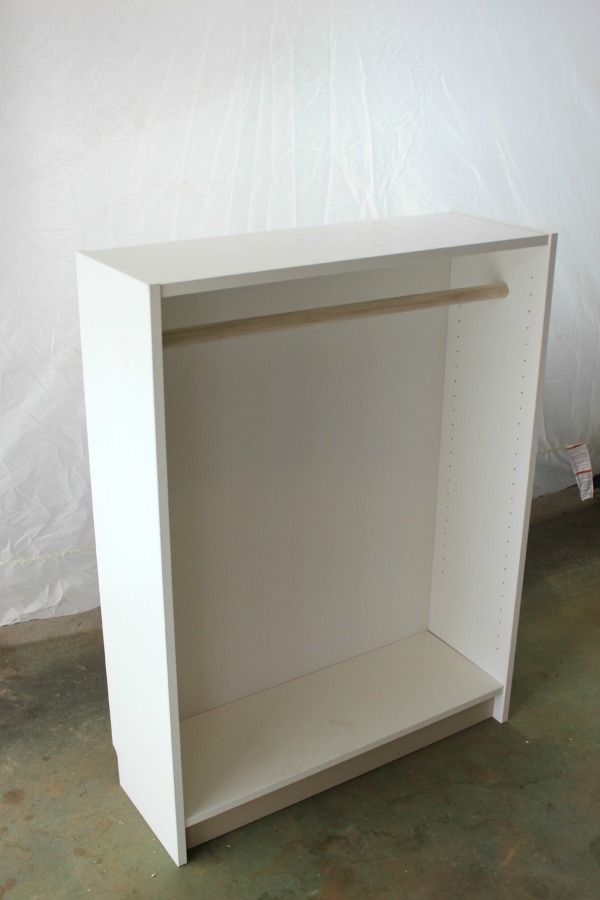
    It was around that time that a great idea finally hit me as to what I would do for the IKEA Billy Bookcase Hack that HomeRight asked me to participate in – it would become a super cute kids dress up closet.

    DIY Dress Up Closet using a Bookcase - Rain on a Tin Roof

    Disclosure: This post was a collaboration with HomeRight. However, all opinions and love of easy hacks that prevent meltdowns are 100% mine. This post contains affiliate links for your shopping convenience. Click here to read my full disclosure policy.

    I can’t begin to tell you how much the kid loves her new dress up storage. I’ve only heard that many “wows” from her once or twice before.

    And more importantly, mama hasn’t had to go on a mad search into a pile of never-ending dress up clothes for a missing Belle shoe.

    I almost feel bad calling this a “hack” because it was so easy, but technically its not what its meant to be, so that is a hack, right? And the easier the hack the better. 

    P.S. The bookcase is only $40. If you have paint and a mirror lying around to use, there’s a pretty good chance you can get out of this thing for $50.

    That’s a small price to pay to end meltdowns and keep your sanity.

    Also, it doesn’t have to be an IKEA bookcase – any mid-size bookcase will do!

    DIY Dress Up Station

    Materials and Supplies Needed: 

    Steps

    Step 1: 

    First off, you just want to assemble the bookcase as the directions say. The only thing you don’t need to worry about is putting in the shelves.

    Step 2: 

    Cut the dowel rod down to the width of the bookcase opening. Place the dowel where you would like it and use a nail gun to secure the dowel in place on either side of the bookcase.

    Bookcase Before Becoming a Dress Up Station - Adding the hanging bar - Rain on a Tin Roof

    You can also do this with a drill and a couple of screws if you prefer. I opted for the nail gun because it was easier. It also helps to have someone hold the dowel in place and make sure its level as you attach it to the bookcase. Not that mine wasn’t level the first go-round or anything.

    If you have another kind of hanging bar lying around, you could use that too as long as it fits within your bookcase and is sturdy enough for hanging clothes on.

    Painting the Kids Dress Up Closet

    Step 3: 

    Paint the bookcase and shelves.

    For this hack, I got to use one of my favorite toys and a new toy that is quickly becoming a favorite.

    Painting the DIY Dress Up Closet using the HomeRight Spray Shelter - Rain on a Tin Roof

    HomeRight just introduced their Spray Shelter. It is the best thing ever for painting in a garage or similar enclosed area. It keeps any paint overspray contained and takes less than 10 minutes to set up.

    My husband only wishes they had made it sooner so that his beloved tiller wasn’t speckled with black, kelly green, and navy dots. 🙂

    Using a paint sprayer to paint a kids dress up closet - Rain on a Tin Roof

    To paint the bookcase, I used my HomeRight Finish Max paint sprayer. This sprayer is by far the easiest paint sprayer I’ve ever used and gives a perfect fine finish. The best part is that no air tank is required – you just plug it in and go.

    Painting an upcycled bookcase with a HomeRight Paint Sprayer - Rain on a Tin Roof

    Since this piece is solely for the circus, I asked her what color she wanted it painted. She said blue. I had some Boheme by Velvet Finishes on hand, so that was what we went for. I thinned the paint with water before spraying it on.

    Shelves for the DIY Dress Up Storage - Rain on a Tin Roof

    To paint the shelves, I just laid them out on 2 x 4’s across sawhorses.

    Step 4: 

    After the paint was good and dry, I gave the bookcase a good topcoat of Polycrylic, then cleaned the paint sprayer.

    HomeRight has another new toy that makes cleaning the sprayer a breeze.

    Cleaning a HomeRight Finish Max Paint Sprayer - Rain on a Tin Roof

    Its called the Rapid Clean. You hook one end up to a water hose, the other up to your paint sprayer, turn on the water and pull the trigger.

    How to Clean a Paint Sprayer - Rain on a Tin Roof

    You’re all done with cleaning in a matter of minutes.

    Step 5:

    Once the topcoat was dry, I placed the shelves toward the bottom of the bookcase and took it up to the kid’s room.

    Dress Up Storage made from a Bookcase - Rain on a Tin Roof

    Mama saved the day with a mirror that she had hung onto from her childhood home. To make sure the mirror was secure, I found a stud in the wall behind where the bookcase would be, then marked that spot on the bookcase and cut out a small hole. There, I drilled a screw into the stud that I then hung the mirror on.

    The lower shelves hold shoes and hats.

    Dress Up Closet for Toddlers - Shoe Storage on Bottom - Rain on a Tin Roof

    I also made some DIY animal jewelry holders for the side of the dress up center.

    Dress Up Storage IKEA Bookcase - jewelry holders - Rain on a Tin Roof
    DIY Dress Up Station for Kids from a Bookshelf - Rain on a Tin Roof

    I topped it off with quote art (which pretty much sums the circus up) in a DIY lucite frame as well as a DIY sunglasses holder.

    DIY Sunglasses Holder - Rain on a Tin Roof

    And a DIY headband holder.

    DIY Headband Holder - Rain on a Tin Roof

    Well, what do ya think?

    Not too shabby for an easy $50 IKEA Billy Bookcase Hack, eh?

    Looking for more great projects to bring a smile to your kid’s face?

    This DIY Children’s Stage with Hidden Dress-Up Storage has brought our little girls countless hours of fun!

    Easiest Ever DIY Lemonade Stand – perfect for those little budding entrepreneurs in your life!

    How to Create an Object and Text Feature Wall for Your Little One – the perfect way to add a punch of their own special personality to their room.

    This diy wall-mounted drop down art desk has kept my little girl occupied for hours.

    DIY Kids’ Play Table with Storage – she loves playing farm on this table! It’s great for all kinds of things!

    Want to save this tutorial for later? Just pin the image below!

    How to Make a Dress Up Center - Rain on a Tin Roof

    You know you don’t wanna miss any of this crazy.

    Stalk Me Here:

    Pinterest / Facebook / Twitter / Instagram

    Storage Solutions for Kids - Dress Up Closet - Rain on a Tin Roof

    SaveSave

  • The Ultimate DIY Outdoor Sectional

    The Ultimate DIY Outdoor Sectional

    Grunt Labor is working on creating the ultimate backyard.

    Last year, we built the deck and made over the screened-in porch.

    This year, we added on a patio.

    And if this summer heat gets any worse, there’s going to be a new pool with me in it on a pink flamingo float.

    After said patio was finished, we looked at it and asked ourselves what in the world we were going to put on it.

    Didn’t think that one through.

    So we built an outdoor sectional.

    Ok, I came up with the idea and Grunt Labor mostly built it.

    Oh, and Nicky helped a little. He got mad that I didn’t mention him in my Facebook post about the sectional, so I have to mention him here. He’s such a girl sometimes. 

    Of course, the ultimate backyard must include ultimate seating and this is the ultimate DIY outdoor sectional.

    Disclosure: Home Depot provided us with a gift card to build this DIY outdoor sectional. However, all opinions and love of glass coke bottles are 100% mine. 

    DIY Outdoor Sectional with Built-In Umbrella and Drink Coolers

    Because it has a built-in cooler.

    DIY Outdoor Sectional with Built-In Umbrella and Drink Coolers

    And individual drink coolers.

    DIY Outdoor Sectional with Built-In Umbrella and Drink Coolers

    And a place for an umbrella.

    Boom.

    We partnered with The Home Depot on this project that I still can’t quite believe we built ourselves.

    The full tutorial is on The Home Depot’s Apron Blog.

    Head over there for the how-to and see if you can spot what’s wrong with the kid’s attire in the last photos – #momfail

    Want to see more great outdoor furniture projects?

    Here’s a DIY Outdoor daybed we built.

    And a picnic table made out of a barn door…

    And here are 12 ideas for making over outdoor furniture you already have.

    You know you don’t wanna miss any of this crazy.

    Sign up to get my posts delivered to your inbox here.

    Stalk Me Here:

    Pinterest / Facebook / Twitter / Instagram

    DIY Outdoor Sectional | DIY Outdoor Couch | Outdoor Furniture Plans | Outdoor Furniture Ideas | DIY Outdoor Furniture | DIY Outdoor Sofa

  • 13 Stunning Home Ideas I Found in One Place

    13 Stunning Home Ideas I Found in One Place

    Last Wednesday they let me into the Nashville Symphony Show House.

    Nashville Symphony House

    Builder, Castle Homes; Architect, Wade Weissman

    I know. Its gorgeous. Go ahead and take a minute to close your gaping mouth.

    I’m quite certain the powers that be must have never read my blog before to know that this gal is borderline redneck and hadn’t set foot in such a fancy house before – otherwise they may have thought twice before sending my invitation.

    I walked out of that house scolding myself for using inappropriate language in front of people who never met me before, but brimming over with DIY and decorating ideas.

    I quickly got over the inappropriate language scolding. I feel overall they became better people for having met me.

    The ideas though – my head is still spinning. Here’s 14 stunning home ideas that I took away from the Nashville Symphony Show House – and really, there were waaaay more than 14, but I felt I should cut it off somewhere instead of keeping you stuck here reading all day.

    1. Create an entryway nook to your bedroom.

    Have an entryway to your bedroom.

    Design by Julie Couch Interiors

    Obviously, we won’t all have the space for this, but I fell in love with this little entry of sorts that was carved out of the master bedroom.

    2. Always, always, always go for lots of windows in the bathroom.

    Opt for lots of windows in the bathroom.

    Design by Julie Couch Interiors

    Now, if you live in a neighborhood where you can open a window and toss a muffin to your next door neighbor, you’ll also want to invest in some window shades, as your neighbor doesn’t want to see your rear end.

    3. And hang your mirrors from the ceiling.

    Hang your mirrors from the ceiling instead of the wall.

    Design by Julie Couch Interiors

    I had never ever ever seen this idea before, but I thought it was genius – hang your mirrors from the ceiling!

    4. Go for a window in the shower too.

    Add a window in the shower.

    Design by Julie Couch Interiors

    Its much easier to wake up with a pretty view as you shower.

    5. Add “drooping” greenery to your floral arrangements. 

    Leafy Greens and Pink Flowers

    Design by Julie Couch Interiors

    I don’t know about you, but it seems I’m always wanting the leaves on my flowers to stand up right alongside the actual flower. I was smitten with this arrangement though that has “drooping” greenery.

    6. Clad a bookshelf – front, back, and sides – in barn wood.

    Cover a bookshelf in barn wood or pallet wood.

    Design by Julie Couch Interiors

    These bookshelves were built-ins, but I think you could easily re-create the look with regular bookshelves by just gluing on barn wood or pallet wood.

    7. Turn a vintage dough bowl into a succulent garden. 

    Plant a succulent garden in a dough bowl.

    Design by Castle Homes

    I’m not 100% sure that is a vintage dough bowl, in fact I don’t think it is, but it very much looks like one. Just make sure your bowl is lined very well to prevent water damage.

    8. Feathers are always right. 

    Feather Pillow

    Design by Rozanne Jackson Interiors for The Iron Gate

    There’s a good chance I left drool on this pillow. I’m already plotting out my own DIY version.

    9. Opt for the really tall lamp.

    Opt for the really tall lamp.

    Design by Rozanne Jackson Interiors for The Iron Gate

    I love the sophisticated lamp paired with the rustic-industrial nightstand.

    10. Always have at least one old piece in every room.
    Have something old in every room, like an antique mirror.

    Design by Rozanne Jackson Interiors for The Iron Gate

    Like this mirror. Just gorgeous.

    11. Use a vintage showcase as bedroom storage. 

    Use a vintage showcase in a bedroom for storage.

    Design by Rozanne Jackson Interiors for The Iron Gate

    This could very well be my favorite idea from the house. In one bedroom, there was an old showcase from a store that held records and such. I am crazy over this idea. 

    12. Go for the chimney that touches the sky.

    Go for the chimney that touches the sky.

    Design by Mark Simmons Interiors

    One day, when I save enough money from buying cheap beer, I’ll have a chimney that touches the sky.

    13. Remember the 3 T’s when it comes to container gardens. 

    Carmen Johnston Container Gardening

    Container Gardens by Carmen Johnston Gardens

    Something tall, something thick, and something trailing – all planted in a triangle.

    See what I mean? Stellar home ideas.

    Looking for more great home decor ideas…

    20+ Living Room Ideas – gorgeous, livable spaces!

    How to Coordinate Paint Colors in Your House – one little tip that will save your sanity!

    14 Real Life Bedroom Ideas – ideas that are both functional and pretty.

    You know you don’t wanna miss any of this crazy.

    Sign up to get my posts delivered to your inbox here.

    Stalk Me Here:

    Pinterest / Facebook / Twitter / Instagram

    pin-this-post

    Drop. Dead. Gorgeous! Stunning Home Ideas!

  • Summer Home Tour: The Details Make The Space

    Summer Home Tour: The Details Make The Space

    It doesn’t matter how many times I paint a piece of furniture or upholster a chair – if the accessories around it don’t look good, the furniture or chair won’t shine and the space will fall short.

    The details make the space. 

    It took me a really long time to realize that.

    And a lot of backaches and wasted paint. 

    I get it now though – and even if we are just talking about decorating – the pain was worth the reward.

    As dramatic as that sounds. 

    So this summer home tour is about the details.

    The quirky little objects that I love.

    That some may find ugly.

    Or even tacky.

    But for me, they make my space a reflection of my family.

    And that’s all that matters.

    So if you love it or hate it, either way, I don’t care.

    Because we love it.

    And its how we fly our freak flag.

    Welcome to our freak show.

    This post contains affiliate links for your shopping convenience. Click here to read my full disclosure policy.

    A fun and easy to do confetti wall treatment. Summer Home Tour: The details make the space.

    Entryway / Confetti Accent Wall

    The entryway hasn’t changed since the last home tour.

    That’s good considering I just made it over in February. 

    Its still full of fun with the confetti accent wall. Guests feel like they are walking right into a party and turn around to go buy booze.

    Or at least that’s the effect I wish it had on them. 

    Eclectic but Modern Living Room. Summer Home Tour: The details make the space.

    Living Room

    You just saw the completed living room on Tuesday, so it definitley hasn’t changed since then.

    Ain’t nobody got time fo’ that.

    Here are my favorite details from the space though…

    A fun book atop a navy end table. Summer Home Tour: The details make the space.

    The Perfect Navy End Table

    The perfect navy end table paired with Kate Spade’s Places to Go, People to See Book and a faux snakeskin lamp I scored at Bargain Hunt for $5.

    P.S. I’d be lying if I said that book always sat open, perfectly placed like that. You and I both know the  circus would have it turned into a sticky apple juice mess in 2.0 seconds flat. 

    Coral paired with Kelly Green. Summer Home Tour: The details make the space.

    Kelly Green Curtains

    The coral lamp against the kelly green curtains and the pop of glam the pillow adds to the gray chair – I just can’t quit you. Oh and the tray, can’t forget the giraffe print tray.

    In my opinion, every room should have a little animal print.

    Roar.  

    A vintage bull planter. Summer Home Tour: The details make the space.

    My new favorite thing in the giraffe tray is the vintage bull planter.

    Right beside the metallic angel wing.

    Whoever told you that a bull, giraffe, and angel made a bad combination was lying.

    Add a simple pop of color to a boring console table. Summer Home Tour: The details make the space.

    I’m also quite smitten with the new pop of coral on the console table.

    And the $2 brass duck that was supposed to have went out of style in 1989.

    A dramatic, but easy to make black and white gallery wall. Summer Home Tour: The details make the space.

    Black & White Gallery Wall / Stripped & Re-Stained Buffet

    And then there’s the gallery wall. The gallery wall that is almost a sin because its so damn pretty.

    Almost. 

    Sconces on a gallery wall. Summer Home Tour: The details make the space.

    Let’s be honest though.

    Without the art and the sconces, its just a black wall with a white border.

    And that’s just boring. 

    Let’s not dismiss the bowl of cotton and lilies either.

    And then there’s the kitchen.

    Navy and White Kitchen. Stunning. Summer Home Tour: The details make the space.

    Kitchen Makeover / Barstools / Island

    The navy and white kitchen in all its glory.

    Its the stuff dreams are made of.

    Navy and White Kitchen. Summer Home Tour: The details make the space.

    Hardware

    But the hardware is so good, I refer to it as hardware porn.

    I’m nothing if not blunt.

    Navy and White Kitchen. Summer Home Tour: The details make the space.

    Faucet

    The faucet is right behind the hardware porn show.

    Navy and White Kitchen with Quirky Elements. Summer Home Tour: The details make the space.

    Mohawk Lollipop Holder

    And to top the kitchen off, we have open shelving that consists of a mohawk lollipop holder, antlers, the scales of justice and my grandmother’s red glasses among other things.

    I’m also nothing if not random.

    A bold accent wall in the dining room. Summer Home Tour: The details make the space.

    Criss-Cross Accent Wall / Blue and White Buffet / Entire Dining Room

    The dining room hasn’t changed one bit.

    Oh wait – I’m lying. 

    I did move the corner cabinet into the living room and painted it red, but didn’t have time for photos so you’ll have to stick around for that one. 😉

    Nothing else has changed. Seriously, I’m not lying this time.

    What do you think? Are you a details person?

    Either way, keep flying your freak flag.

    pin-this-post

    A gorgeous home tour, but also a breath of fresh air! Decorate with what you love! Summer Home Tour: The details make the space.

    SaveSave
  • Collected Modern Living Room

    Collected Modern Living Room

    After four years of living in the beloved foreclosure, the living room is finally done.

    For now anyways. 

    It may have taken four years, but I can finally say that I know my style and I love my living room.

    Of course, its all subject to change on a whim.

    For now, I’m calling it the Collected Modern Living Room.

    I’m sure that isn’t the correct design technical term for this living room, but I don’t care. 

    Its a mix of vintage and thrifted pieces that have received a facelift with some modern elements.

    The PERFECT combination of modern and vintage elements! Collected Modern Living Room

    Disclosure: Frosting Home Decor provided me with curtains for my living room. However, all opinions and love of the color Kelly Green are 100% mine.

    You saw the super big change – the black and white gallery wall – in my spring home tour, but the whole space wasn’t finished yet. It needed curtains – and a couple other things I didn’t know it needed. 

    Modern Living Room Ideas: Black & White Gallery Wall

    Black & White Gallery Wall

    For example, I had no idea it needed the handsome end table.

    Living Room Decor Ideas: Paint an end table a bold, but classic hue.

    The Perfect Navy End Table

    But after I saw it in the living room, I knew this table and I could never part ways.

    I also ended up adding a punch of color to the console table.

    Easy way to add a pop of color to a space - paint "frames" around drawers and furniture surfaces!

    Punch of Color Console Table

    The icing on the cake was the window treatments.

    Living Room Design Ideas: Kelly Green Curtains with Coral Lamps

    I searched high and low for the perfect green curtains – I was even about to make my own – when I found these kelly green panels.

    Modern Living Room - love the kelly green curtains against the coral lamps!

    I am crazy over how they look against the coral lamps. They bring in that punch of green that is throughout the rest of my house as well.

    Modern Living Room - love the kelly green curtains against the coral lamps!

    I’m off to lounge on the couch and watch cartoons with the circus while gazing around my finally finished living room.

    What do you think of the new collected-modern living room? 

    Looking for more living room ideas? Don’t miss these 20+ gorgeous living room ideas that will have you planning your own living room makeover!

    You know you don’t wanna miss any of this crazy.

    Sign up to get my posts delivered to your inbox here.

    Stalk Me Here:

    Pinterest / Facebook / Twitter / Instagram

    pin-this-post

    Whoa. This living room is stunning - the perfect combination of modern style mixed with vintage pieces. Modern Living Room 

  • How to Remove Rust from Chrome and Other Metals

    How to Remove Rust from Chrome and Other Metals

    Do you have rust creeping up on metal surfaces, a chrome finish item or even metal furniture? Before you toss it or give up, read this method for how to remove rust from chrome and get rust off metal surfaces. It might just be easier than you think!

    About a month back, I dragged the kids out of bed early one Saturday morning to go yard saleing.

    Yes, saleing is a word.

    That’s when I got the paper sorter that became a rainbow.

    Before I found the paper organizer, well before I even got out of the neighborhood, I also found a leopard print rug for $5, a rattan side table for $2, and a mid-century modern chair with chrome plating for $2.

    We had to make a pit stop back home before proceeding with yard saleing.

    The rug was in great shape, I had to fix a leg on the table, but I was worried that the chair might have been a total waste. There were more rust spots covering it than not.

    This post contains affiliate links for your shopping convenience. Click here to read my full disclosure policy.

    How to remove rust from chrome

    Here’s a closer shot…

    How to Get Rust off Metal

    Rusty areas were pretty much all over the entire chair.

    I almost just tossed the chair, but then I remembered how Bar Keeper’s Friend had cleaned up the hardware on the radio turned bar cabinet so nicely. I decided to give it a whirl (and a lot of elbow grease) and ended up with this…

    how to get rust off chrome

    What I got was a sparkling, pretty much rust-free mid-century modern chair.

    Y’all, I was shocked. Grunt Labor saw it and said “It doesn’t even look like the same chair.”

    If he’s impressed, then its a win.

    Want to revive your metal furniture too? Here’s how to remove rust from metal furniture, chrome surfaces and more.

    How to Get Rust off Metal

    Supplies Needed:

    Step 1:

    Dampen your cleaning cloth with water a bit and shake a little Bar Keeper’s Friend onto it.

    how to remove heavy rust from chrome

    Rub the cloth together to create a sort of paste.

    Step 2:

    Using a circular motion, scrub down any metal areas that have rust.

    how to clean rust off chrome

    As you scrub, you will see your rag start to turn brownish-red from the rust that is coming off. Stop every once in a while, rinse the rag out, reload with more Bar Keepers Friend, then repeat the scrubbing process.

    Step 3:

    If you find that some of the rust spots aren’t coming up with just the cloth and Bar Keepers friend alone, use steel wool in combination with the Bar Keepers friend on those tougher areas.

    Step 4: 

    After you have removed all the rust, wipe the areas you cleaned down with a clean, wet cloth, followed by a clean dry cloth to avoid water marks.

    Ready for some side by side before and after action?

    how to remove rust

    I spent about an hour total removing rust from this chair, however I will say it was well worth it.

    how to remove rust from metal furniture

    The rust on the ends of chair back just wouldn’t budge. I think they may have been made of something other than metal.

    how to remove rust from chrome finishes

    There were also some tiny spots in the nook there that wouldn’t come off, but overall Bar Keeper’s Friend proved once more that it is a miracle product. In my opinion, anyway.

    No more worrying about getting rust stains on your clothes when you sit in this chair! It also did a heck of a job polishing up the chrome.

    Do you have any techniques for how to get rust off chrome or other metals?

    P.S. This post is not sponsored by Bar Keeper’s Friend. I just love the heck out of their product. 🙂

    More cleaning tips you’ll find helpful…

    How To Restore Your Hardware– before you toss it or paint, see what’s underneath…

    How to Clean Copper – bring back that gorgeous copper shine in minutes!

    Cleaning Up Vintage Brass – it can be a pain, but that shine is worth it.

    How to Clean a Disgustingly Gross Shower– the before and after is jaw dropping.

    9+ Must Read Cleaning Tips – cleaning tips for interiors and exteriors.

    Want to easily come back to this cleaning tip later? Just pin the image below!

    How to Remove Rust from Chrome and Other Metals

    You know you don’t wanna miss any of this crazy.

    Stalk Me Here:

    Pinterest / Facebook / Twitter / Instagram

    how to get rust off metal surfaces

    SaveSave

  • DIY Flamingo Wreath in under an hour

    DIY Flamingo Wreath in under an hour

    Want to dress up your front door for summer? What better way than with a DIY flamingo wreath! The best part? It’ll take just an hour to make!

    It’s the official symbol of summer.

    I don’t care if you think its tacky or not.

    The official symbol of summer: The Pink Flamingo

    All hail the pink flamingo. 

    I can’t get enough of this pink feathered friend of mine, therefore I am proclaiming it to be the official symbol of summer.

    I fully realize I may be the only one involved in this proclamation.

    That’s ok.

    I’ll own it. 

    It started with the DIY Flamingo Sprinkler.

    My fun friend has recently shown up once more.

    In the colorful screened-in porch.

    On a wreath.

    How to Make a Flamingo Wreath with a Plastic Flamingo

    This fun and colorful wreath fits in perfectly with the rest of the porch.

    It will also lend a fun touch to a summer party – it practically insists you have a drink complete with a mini-umbrella.

    Or at least that’s what it told me. 

    How to Make a Flamingo Wreath

    This post contains affiliate links for your shopping convenience. Click here to read my full disclosure policy.

    Here’s what you need to make your own pink flamingo wreath: 

    • Wreath Form (I used a 14 inch straw wreath)
    • Astroturf (You can go to your local home improvement store and buy the minimum that you can off the roll for about $5 or so and that should be plenty. I used scraps leftover from a project.)
    • Pink Flamingo
    • Drink Umbrellas – check your local Dollar Store or Dollar Tree for these during summer!
    • Hot Glue Gun
    • Scissors

    Step 1: 

    Cut the astroturf into long strips about three inches wide and three feet long. Wrap the strips around the wreath form securing with a dollop of hot glue between the astroturf and wreath as you wrap it. Continue until the wreath is covered with astroturf.

    Step 2: 

    Poke the mini drink umbrellas into the bottom of the wreath and a little up the sides.

    Step 3: 

    Hot glue the pink flamingo to the wreath. I did this by putting a good sized glob (love my terminology?) on the back of the neck and rear end of the flamingo, then immediately pressing and holding the flamingo onto the wreath. So far, its held up perfectly fine.

    Step 4: 
    Use another strip of astroturf to hang the wreath from or a ribbon.

    DIY Flamingo Wreath with Drink Umbrellas and a Plastic Flamingo

    Isn’t she just so fun? 

    Summer Wreath with a Pink Flamingo

    Are you in a summer lovin’ kind of mood yet?

    Want to come back to this flamingo wreath tutorial later? Then, just pin the image below!

    Flamingo Wreath for Summer

    Want more colorful summer project ideas?

    Creating a Cut Flower Garden for Beginners – ready to have fresh flowers every single day! It’s not as hard as you may think!

    12 Outdoor Furniture Makeovers – ideas to refresh your outdoor furniture rather than tossing it!

    DIY Outdoor Daybed – spend lazy summer afternoon right here!

    10+ Creative Flower Pot Ideas – things you never knew could be a flower pot!

    And get more inspiration for all your outdoor spaces HERE!

    Hang out with me on social media!

    Facebook | Instagram | Pinterest | Twitter

    DIY Flamingo Wreath for Summer with Drink Umbrellas

    SaveSave

  • 12 Outdoor Furniture Makeovers That Are Easier Than You Think

    12 Outdoor Furniture Makeovers That Are Easier Than You Think

    Its that time of the year, friends.

    Time for sipping drinks, preferably ones with little umbrellas, on porches, decks and patios.

    Furthermore, we should all be enjoying those beverages in pretty outdoor chairs, chaises and other comfortable perches. No?

    If you are like me though, as you were dusting the three inches or so of pollen off your outdoor furniture, you may have discovered the furniture needed a little facelift of its own.

    These outdoor furniture makeovers have my head brewing with ideas. The best part – they were all done with a HomeRight Paint Sprayer. That means they were easy as pie to re-hab.

    Now, if only a real facelift were that easy…and that inexpensive. 😉

    Outdoor Furniture Makeovers

    This post is sponsored by HomeRight, however all opinions are 100% mine. This post contains affiliate links for your shopping convenience. Click here to read my full disclosure policy.

    Wicker Furniture Makeovers

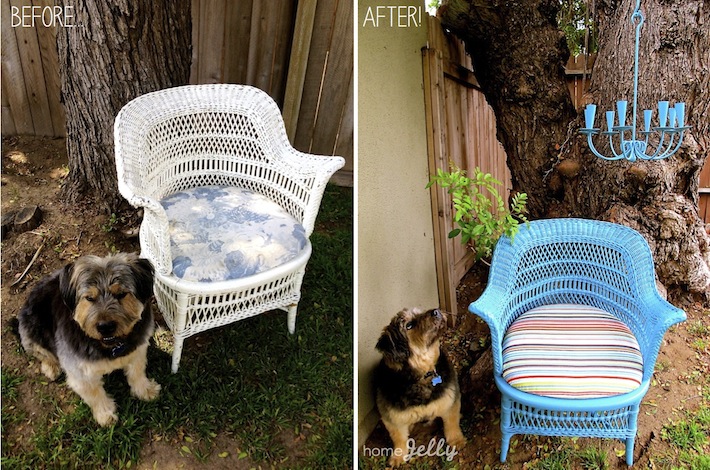
    Wicker Chair Makeover

    I am digging the classic white spin that Debbie from Refresh Restyle put on this wicker chair. The pattern on the cushion and pop of color on the pillows seals the deal.

    Wicker Chair Makeover

    And quite the opposite, but just as awesome is this bright blue wicker chair makeover from HomeJelly.

    Painted Outdoor CushionsPainting Outdoor Cushions

    Christy at 11 Magnolia Lane completely transformed her patio set (and saved herself a ton of money in the process!) by painting, yep painting her outdoor cushions – with a paint sprayer! I love how the green and white pillows pop off the white.

    Metal Outdoor Furniture Makeover

    Outdoor Metal Table Makeover

    Farm Fresh Vintage Finds took her old rusty table to brand new in no time at all and saved herself cans and cans of spray paint. Yes, friends, you can paint metal with something besides spray paint – you just need a sprayer!

    Adirondack Chair Makeovers

    Adirondack Chair Makeover

    My mouth is still open at this adirondack chair rehab from Virginia Sweet Pea. Do you see the before?! #nailedit

    Adirondack Chair Makeover

    If you want to add a pop of color to your adirondack chairs, go with a bold red and yellow like Front Porch Mercantile did. These totally belong right beside a beach.

    Bamboo & Rattan Chair MakeoversRattan Chair MakeoverWhen I saw all six of these chairs on Craigslist for $25, I couldn’t pass them up. I gave them a super colorful paint job, but anchored them with black and white upholstery.

    Outdoor Bench Makeovers 
    Park Bench MakeoverA Prudent Life did a killer job on stripping and then re-staining this outdoor park bench.

    Outdoor Bench Makeover

    This red bench makeover from Four Generations One Roof does go perfectly with the fall, but it could totally rock a 4th of July party as well.

    Outdoor Bench Makeover

    The Painted Chandelier opted for a light blue color on her outdoor bench. I love how it pops against the bright pink flowers above it.

    And its not furniture, but let’s all admit that the paraphernalia that comes with circus’ could use some sprucing up more than we care to admit…
    Playhouse Makeover

    I’m just going to go ahead and say it. I want this playhouse for myself. Seriously. This playhouse makeover from Ciburbanity could quite possibly look better than my house. Staining a Swingset

    Ummm. Fo Realz? That swing set looks brand spankin’ new! HeartWorkOrg killed it! Yes, the HomeRight Finish Max and Finish Max Pro can both be used with stain.

    Looking for more outdoor furniture projects?

    DIY Outdoor Daybed – we love this thing!

    The Ultimate DIY Outdoor Sectional – complete with built-in ice buckets!

    How to Build a Picnic Table from a Barn Door – this picnic table is full of character.

    You know you don’t wanna miss any of this crazy.

    Sign up to get my posts delivered to your inbox here.

    Stalk Me Here:

    Pinterest / Facebook / Twitter / Instagram

    pin-this-postOutdoor Furniture Makeovers | Outdoor Furniture DIY | Outdoor Furniture Ideas | How to Paint Outdoor Furniture

    SaveSave

  • When it doubt, use all the colors.

    About a month ago, I drug the kid and Bill out of bed early one Saturday morning to go yard saleing.

    They hate love it when I do that. 😉

    I decided to be nice for once and give Grunt Labor the Saturday morning off.

    He usually gives me Saturday mornings off, so it was long overdue. 

    Before leaving the neighborhood, we had lucked up on a bamboo patio table for a whopping $2 and a 5×7 leopard print rug for only $5.

    Luck was on my side that day. 

    It quickly ended when there was a meltdown with the kid when I refused to buy a creepy $7 FurrRealz Cat.

    $7 for a toy cat at a yard sale? And it looked possessed? Move along child, move along.

    At the next stop though, we lucked upon a play phone, a beanie baby skunk and a Care Bears nightgown that the kid just had to have.

    I’ve never been so happy to see a Ty Beanie Baby in my life.

    The meltdown ceased.

    As we were about to leave, I spotted something that had potential out of the corner of my eye…

    A vintage paper sorter.

    I looked at Bill.

    His eyes lit up and he said, “We can do something really cool with that.”

    He’s starting to think like me.

    I asked the man how much for it.

    $12.

    Oh honey. You must be crazy. I don’t pay $12 for anything at a yard sale unless its furniture. Let me show you the rug I just snagged for $5.

    Yep, I’m that girl, y’all.

    Sorry not sorry. 

    We started negotiating.

    I walked away with the paper sorter for $6.

    It was still more than I wanted to pay for a paper sorter, but it was half of what he started at.

    I’ll take it. 

    Once we got it home, we realized we weren’t really sure what that something really cool we would do to it would be.

    But when in doubt…use all the colors.

    Look at all those colors! Crazy how they all work perfectly together!

    Disclosure: This post was a collaboration with Velvet Finishes. However, all opinions and love of all the colors are 100% mine. This post contains affiliate links for your shopping convenience. Click here to read my full disclosure policy.

    I know, right?! 

    Aren’t they all just great together?

    Here’s how she started:

    Paper Sorter Before

    Vintage Paper Sorter Makeover

    To achieve this uber-colorful look, we used:

      • Paper Towels

    Steps

    Step 1: 

    I started by pulling the trim off the outside of the sorter to be able to get all the shelves out and easily paint them.

    Pull off the trim.

    I did this very carefully because I didn’t want to damage the wood.

     Step 2: 

    After the trim was off, I pulled out every shelf and primed each of them as well as the sorter itself with Ready.

    Use Velvet Finishes Ready to prime the piece.

    This thing had a glossy finish on it and was dirty as well. Ready primed and cleaned it at the same time. I just sprayed it on each shelf and the sorter, let it sit for a couple of minutes, then wiped it down with paper towels. Bill and I tag teamed it, so that it didn’t take as long.

    Step 3: 

    To make all the soon-to-be colorful shelves pop, I painted the outside and inside of the sorter with Minimalistic – a true white.

    Velvet Finishes Minimalistic

    It took about three light coats with a good quality paintbrush to do the job.

    Step 4: 

    I gave each shelf a couple coats of color.

    Velvet Finishes Boheme

    I also did this with just a paintbrush – but a good one. 😉

    I didn’t worry with a topcoat, because Velvet Finishes paint already has a topcoat built-in and this won’t be getting a lot of hardcore use.

    Step 5: 

    After everything was painted, I had to sand the edges of the shelves a bit to make them fit back in the sorter, then I put the trim back on.

    Oh my! Those colors! Can't believe how well they all work together! Vintage Paper Sorter Makeover

    There was a mishap with one shelf and it was tragically lost.

    I broke it. 🙁

    Vintage Paper Sorter Makeover - Those colors!

    But really, I don’t think this paper sorter makeover could get any cuter.

    Those colors are just perfection.

    I’m going to save it for the circus’ upcoming room makeover.

    Looking for more colorful and easy home projects and crafts? 

    Here are 9 unique and colorful ways to makeover a side table.

    Here is a super fun, easy and colorful step stool makeover.

    And here are bold and colorful furniture makeovers you’ll love!

    You know you don’t wanna miss any of this crazy.

    Sign up to get my posts delivered to your inbox here.

    Stalk Me Here:

    Pinterest / Facebook / Twitter / Instagram

    pin-this-post

    Those colors!!! I love how they all work together! Vintage Paper Sorter Makeover

    SaveSave

  • Semi-DIY Party Decorations

    Semi-DIY Party Decorations

    Did you ever watch that television show, Semi-Homemade Cooking with Sandra Lee?

    I’m not even sure that its still on anymore, and I only watched it a few times but what I loved most about it was that she always made a great cocktail during the show, oh and that some of the actual food was already made.

    But mostly that she always had a cocktail.

    I worked on discovering my inner Sandra Lee with these semi-DIY party decorations for the circus’ upcoming third birthday party.

    The circus even helped me with them.

    Which explains why cocktails were needed when we were finished. 

    Such a great idea! Save yourself time by getting store bought party decorations, but then customizing them with items that fit your party theme! Birthday Party Decorations

    Disclosure: This post was a collaboration with Delta Faucet. However, all opinions and kids with duck faces are 100% mine.

    Black + White, Bright Colors, Gold + Glitter.

    I mean really, could it get any better?

    Semi-DIY Party Decorations

    To make some semi-DIY party decorations of your own, you’ll need:

      • Store bought party fans (those came from Target too)
      • Something that relates to the theme of your party. The kid is having a horse birthday party, so we bought the larger plastic horses from the Dollar Tree and the smaller ones from Amazon.
      • Acrylic paints in colors of your choice (all of our colors came from Target)
      • Paintbrushes
      • Glitter
    • Hot glue

    Make your own party decorations!

    • And a cute little circus (duck face optional)

    Steps

    Step 1:

    Paint the horses.

    Paint your horses bright colors!

    We stuck with pink, purple, and blue for our horse. Those are the kid’s favorite colors and just so happen to work perfectly together.

    I swear, her mama didn’t have a say in it at all. 

    Paint your horses fun colors!

    Most of our horses took a couple of coats of paint, so between coats, we may have had a little too much fun with the paint.

    Get messy! Delta Happimess

    It may or may not have ended up everywhere…

    But that was ok, it was a #HappiMess.

    And really if you aren’t making a mess, is it even worth doing? 

    Clean up with the Delta Trinsic Touch2O Faucet!

    Our shiny, new Delta Trinsic Touch2O Kitchen faucet cleaned up all paint splattered hands, and faces, easily.

    Clean up with the Delta Trinsic Touch2O Faucet!

    To turn it on, you touch it.

    Literally. You just touch it. 

    Needless to say, the kid thinks its the coolest thing ever.

    Step 2:

    After our painted horses were dry, I carefully painted Mod Podge on their tails and manes, then let the circus sprinkle glitter on them.

    Semi-Homemade DIY Birthday Party Decorations

    That’s her, OMG, she’s giving me glitter again! I can’t believe I get to have glitter again after what went down with glitter last time she handed it to me, face.

    We won’t talk about the last time she got glitter…

    Throw some glitter, make it rain!

    She did a really good job this time though. 🙂

    Step 3: 

    After the Mod-Podge had time to dry, I hot-glued the large horses onto the fans and the small ones onto the party hats.

    Semi-Homemade DIY Party Decorations

    She was pretty pumped about them.

    Birthday Decoration Ideas - Buy plain party decorations from a store, then customize them to fit your theme!

    Ok, even I’m pumped about how colorful and glittery they are. 

    So cute! Buy the birthday party hats at the store, but then customize it with your theme! DIY Birthday Party Decorations

    If these actually make it to her birthday party in a semi-decent state, it’ll be nothing short of a miracle.

    She can’t keep her hands off them.

    Get store bought party decoration items, then customize them to your theme! DIY Party Decorations

    Are you a semi-homemade party decorations kind of gal? 

    Need more easy party decoration ideas?

    Don’t miss these simple DIY party decorations on a budget and then be sure to see my full gallery of DIY party invitations, decorations and more.

    You know you don’t wanna miss any of this crazy.

    Sign up to get my posts delivered to your inbox here.

    Stalk Me Here:

    Pinterest / Facebook / Twitter / Instagram

    pin-this-post

    Oh. My. Goodness. Stop it! These horse birthday party decorations are just too much! Love this idea for "semi-homemade" DIY Party Decorations!

  • 9+ Must Read Cleaning Tips

    9+ Must Read Cleaning Tips

    If we’re being honest, and since I’m always honest with you, my house is not clean right now.

    Its not clean at all. 

    May is a whirlwind of events for us and cleaning is not one of those events that tends to take place during the month.

    Until there is a mad dash next Friday to clean right before the kid’s birthday party so that our guests don’t turn and run screaming out the door…

    I can hear the circus talking to her therapist in ten years, “Everyone showed up for my birthday party that year, but then made a beeline for the door when they saw dust an inch thick and dried crusty milk on the floor. They took all their presents with them. I’ve never been the same since.”

     Therapy is going to cost me a fortune. 

    So next week, to hopefully cut down on therapy costs, these are my best cleaning tips that I will actually do…well at least everywhere that guests will be… 😉

    Must Read Cleaning Tips and Cleaning Ideas for the Home | Cleaning Hacks | DIY Cleaning Hacks | Bathroom Cleaning Tips | Cleaning Tricks

    Disclosure: This post was a collaboration with HomeRight. However, all opinions and dirty, dirty houses are 100% mine. This post contains affiliate links for your shopping convenience. Click here to read my full disclosure policy.

    Indoor and Outdoor Cleaning Tips

    First off, let’s de-clutter.

    This is an awesome printable - perfect for decluttering your home! 9 MUST READ Cleaning Tips!

    Shockingly, I did this last night when I found out the in-laws were coming down for the night. Lord knows, I can’t let them sleep on a bed where they may or may not end up being poked by plastic horses and measuring tapes – both of which were all over the guest bed last night. This de-cluttering printable covers every room, closet, nook and cranny.

    I should probably work on the bathrooms next…

    What??? I have to try this method for cleaning my shower! 9 MUST READ Cleaning Tips!

    I finally did take out the overflowing trash can in my bathroom last night. Once more, because my in-laws are coming down. Thanks for helping me get my butt in gear, Mama and Dad. I will be doing some deep cleaning in the showers though with my HomeRight Steam Machine. Honestly, never in a million years did I think I would love something that cleans so much. I guess age does that to you. Or maybe its the fact that it cuts down on so much time that I can have that cheap beer sooner? 😉

    Of course, the kitchen is gross too…and has a variety of craft items all over the counters that are supposed to be making some party decorations for the kid’s party. Still working on that one.

    I HAVE to get one of these - its the easiest way to clean your kitchen by far! 9 MUST READ Cleaning Tips!

    I also use my steam machine to clean my entire kitchen. Yep. The whole room. Counters, backsplash, sink, stove, refrigerator, all the stainless steel. You name it. I clean it with my steamer. See why I like it so much?

    My favorite thing to do, ok wait its not my favorite because it involves dog accidents, but maybe the best thing about my steam machine plus, is that it can easily clean up pet stains and odors.

    Wish I would have known this a long time ago!! How to clean pet stains and get the odor out of your carpet! 9 MUST READ Cleaning Tips!

    I am not a dog person. Go ahead. Throw the tomatoes at me. Sorry, y’all, they just aren’t my cup of tea. The thought of cuddling up with a furry creature is just gross to me. Alas, Grunt Labor and the circus adore the dogs, therefore I tolerate them. Ok, they are just a tad bit cute. Just a tad though. Their accidents are not cute. At all. Here’s how I clean up their stains and odors easily – yep, even on carpets.

    I steam clean just about every floor in my house actually.

    Use a steam mop to clean just about ANYTHING! 9 MUST READ Cleaning Tips!

    And trust me, never in a million years did I think I would be cleaning chemical-free. I grew up in the country where old ladies load their Cadillacs down with ammonia every spring for cleaning. I had fully intended on being one of those old ladies. The Cadillac will definitely happen – the ammonia, not so much.

    That being said, I do still use store-bought cleaners for some things.

    5 Ways to Use a Mr. Clean Magic Eraser you didn't know about | Cleaning Tips

    I am also a fan of using my magic eraser on a lot of things around the house.

    Instead of spray painting your hardware, here's a way to clean it! Isn't that crazy?! 9 MUST READ Cleaning Tips!

    One of those things being to clean my hardware. Its much cheaper than replacing it.

    How to waterproof fabric and protect upholstery against stains! Great to know! 9 MUST READ Cleaning Tips!

    I also use a spray to protect my upholstery from stains and to waterproof it.

    See, I’m not 100% hippie.

    I literally just laughed out loud at the thought of even being considered a hippie. 

    And since the birthday entourage will obviously see the outside of my house, I’d better make that look a little more presentable too..

    Easy way to clean up your concrete landscape blocks. 9 MUST READ Cleaning Tips!

    There will be some cleaning of concrete landscaping blocks.

    And the sidewalk could use a quick little cleaning refresh…

    Isn't that difference crazy?! How to Clean A Sidewalk. 9 MUST READ Cleaning Tips!

    Yea, I just cringed too at that before picture. I still have no idea what was growing on the sidewalk before I cleaned it.

    How to remove rust. You WILL NOT believe this!

    If you’ve got rust on anything, I’ve got a killer way to remove it.

    How to Clean Copper and Restore It using water, one product, and a little elbow grease will make your copper look new in no time. A MUST TRY! Great cleaning tip!

    I thought this little cookie jar was way past it’s prime, until I figured out how to clean copper!

    I love vintage brass, but I despise cleaning it up! Here’s the easiest way I’ve found to clean it.

    What are your best cleaning tips? 

    Do any of you have a magic genie in a bottle that can just do all the cleaning, the party decorations and make all the food for me before next Saturday?

    Anyone? Anyone?

    Looking for more useful cleaning and organization tips?

    Be sure to see these five simple storage and organization ideas that are truly life-changing!

    You know you don’t wanna miss any of this crazy.

    Sign up to get my posts delivered to your inbox here.

    Stalk Me Here:

    Pinterest / Facebook / Twitter / Instagram

    pin-this-post

    Must Read Cleaning Tips and Cleaning Ideas for the Home | Cleaning Hacks | DIY Cleaning Hacks | Bathroom Cleaning Tips | Cleaning Tricks

    SaveSave

  • 3 Easy Ways to Update Your Furniture Hardware

    3 Easy Ways to Update Your Furniture Hardware

    I’m the farthest thing from a tree hugger you’ll ever meet.

    You already knew that didn’t you? 

    But I do like to re-use and recycle things.

    I’m just cheap, really. 

    My favorite thing to re-use is furniture hardware.

    This is for two reasons.

    1. I don’t want to spend money on new, expensive hardware.

    See, cheap?

    2. I don’t want to have to potentially drill holes for new hardware.

    Ok, I’m lazy too. 

    These are my three favorite ways to update furniture hardware while doing as little as possible and spending as little as possible.

    ‘Cause that’s how we roll.

    3 Really Simple and Cheap Ways to Update Furniture Hardware without paying a fortune for new pulls and knobs!

    This post contains affiliate links for your shopping convenience. Click here to read my full disclosure policy.

    1. Spray paint

    Spray painting your hardware is the cheapest way and probably the easiest way to give it an update. It will only set you back $3 – $5 for a can of paint, but if you are a spray paint fiend like me, chances are you may even have a can laying around the house you can use. I tend to spray paint hardware when I want it to really pop off the furniture piece.

    Update Furniture Hardware with Spray Paint: White hardware pops against the bright colors.

    White is actually one of my favorite colors to spray paint hardware – especially when its against bright colors like the nightstand makeover above.

    Update Furniture Hardware with Spray Paint: The gold hardware adds a touch of glam to this piece.

    If I want a really bright gold on my furniture hardware, I will spray paint it. The crowning jewel on the magenta dresser above is the gold hardware. If you want a really great gold, go for Design Masters spray paint in Gold Medal. Its one of the best gold spray paints I’ve found.

    If you can’t decide what color to spray paint your hardware, white or black is usually a safe option – they go with just about anything.

    2. Rub ‘ N Buff

    If you want a true metallic look for your hardware, your best bet will be to use Rub ‘N Buff. Rub ‘N Buff is a wax type product that you literally just rub onto your hardware and then buff it to as much of a shine as you would like.

    Update furniture hardware with Rub 'N Buff: Give your hardware a true brass or metal look with Rub N' Buff.

    The pulls on the red buffet above went from black to a muted gold with Rub ‘N Buff.

    Use Rub 'N Buff to update furniture hardware and still keep a true metallic look.

    The hardware on my dresser and chest in my master bedroom were in rough condition when I got them. There were a few rusty spots. I didn’t want to spray paint them because I knew that would take away from the beauty of the dresser and chest. Instead, I used a brass colored Rub ‘N Buff and it worked like a charm.

    Rub ‘N Buff comes in just about every metallic color under the sun – gold, brass, pewter, bronze, and more.

    3. Restore your hardware

    Instead of painting or waxing your hardware, it may just need a really good cleaning. I found Bar Keepers Friend about nine months ago, and in all honesty, I consider it a miracle product for hardware. There’s no doubt in my mind they are working some kind of voodoo magic into that little can.

    Update Furniture Hardware with Barkeeper's Friend, a cleaner that takes years and years of dirt and grime off hardware.

    The first time I used it was on this vintage radio turned bar cabinet and I was shocked at just how well it cleaned up the pulls. Here’s a side-by-side comparison:

    Update Furniture Hardware with Barkeeper's Friend - instead of painting the hardware, this gives it a deep cleaning.

    Baffling, right? Now, those pulls probably had close to 50 years of grime on them. I’m not kidding. I have a complete how-to here for using Bar Keeper’s Friend.

    Do you have any favorite ways to update furniture hardware? 

    You might also want to read these posts…

    9 Unique Ways to Makeover a Side Table – smart and creative ideas!

    The Best Painting Tools for Furniture Refinishing – a list of my tried and true favorite tools for painting furniture.

    FAQ: Painting Furniture – got a question about painting furniture? This post probably has the answer.

    You know you don’t wanna miss any of this crazy.

    Sign up to get my posts delivered to your inbox here.

    Stalk Me Here:

    Pinterest / Facebook / Twitter / Instagram

    pin-this-post

    3 Really Simple and Cheap Ways to Update Furniture Hardware without paying a fortune for new pulls and knobs!

    SaveSave

  • DIY Flamingo Sprinkler

    DIY Flamingo Sprinkler

    I have a thing.

    For pink plastic flamingos. 

    Some consider them tacky.

    I consider them fun.

    And the perfect symbol of summer.

    Since I have a deep love for this plastic being, Grunt Labor decided we should make a pink flamingo sprinkler.

    We did. 

    But the really cool thing about it is that its not only a sprinkler, but also feeds your plants at the same time.

    World rocked. 

    DIY Flamingo Sprinkler | How to Make a Sprinkler | DIY Sprinkler | Sprinkler DIY

    Miracle-Gro® sponsored this blog post. The opinions and text are all mine. This post contains affiliate links for your shopping convenience. Click here to read my full disclosure policy.

    Isn’t that just the most fun sprinkler you ever did see?

    I thought you would agree. 

    How to Make a Flamingo Water Sprinkler

    To make your own sprinkler & plant feeder, you will need:

      • Small piece of 1/2″ PVC pipe
      • 1/2″ male adapter with threads PVC pipe on one end and female adapter on other end
      • Female adapter with threads PVC pipe
    • Drill, Small Drill Bit, 1/2″ spade drill bit

    Steps

    Step 1: 

    Using a 1/2″ spade drill bit, drill an opening into the bottom of the flamingo.

    drill-hole

    Be careful not to push too hard, or you may crack the flamingo. Let the drill do the work.

    Step 2: 

    Connect your piping and place it in the flamingo.

    pipe-parts

    Using pipe glue, glue a small piece (about 2 inches) of the 1/2″ pipe into the female end of the male adapter. You can put waterproof caulk around this area if you wish.

    Step 3: 

    Cover the area around the pipe really well with a strong and waterproof glue.

    Use gorilla glue around pipe.

    Let this all dry for a couple of days.

    Step 4: 

    To make your sprinkler feed your plants as well, hook up the Miracle-Gro® Liqua Feed® Universal Feeder.

    Miracle-Gro Liqua Feed Universal Feeder

    All you do is screw the universal feeder onto the bottom of your water spigot and place the bottle of Miracle-Gro® LiqiaFeed® All-Purpose Plant Food in the feeder.

    Miracle-Gro Liqua Feed Universal Feeder

    You can switch between watering and feeding by turning the switch on the right to feed or water. It can connect to any watering device to feed as you water. My favorite thing about it is that there is no mixing required – I am always worried I will over or under-mix the plant food.

    Step 5:

    After you have given your flamingo plenty of time to dry, drill a few small holes in the top of the flamingo.

    Drill small holes in top of flamingo.

    Step 6:

    Hook the female adapter with threads onto your flamingo and then onto your water hose.

    Oh my goodness!! How awesome is this - a flamingo sprinkler!

    Let the fun flamingo watering and feeding begin!

    I spray-painted my piping after the glue was dry to blend it in with the hose a little better.

    That’s it!

    How do you feel about pink flamingos?

    Specifically fun DIY flamingo sprinklers? 😉

    Love flamingos? Be sure to see this fun summer flamingo wreath then.

    Want more great outdoor DIY projects? Right this way…

    You know you don’t wanna miss any of this crazy.

    Sign up to get my posts delivered to your inbox here.

    Stalk Me Here:

    Pinterest / Facebook / Twitter / Instagram

    pin-this-post

    DIY Flamingo Sprinkler | How to Make a Sprinkler | DIY Sprinkler | Sprinkler DIY

    SaveSave

  • The Perfect Navy Paint

    The part-time child, Bill, and I have formed a sort of business partnership.

    I find furniture for him to paint. He paints it. I write about it. We sell it. I get my initial investment back and he keeps the profit for his labor.

    When I first presented this idea to him, he was ecstatic and couldn’t wait to jump on the two end tables that I had already picked up.

    I even let him pick out the color, which in my opinion is the perfect navy paint…

    Look no more! Not only is this the perfect shade of navy, its also the perfect paint - no priming or topcoat required! The Perfect Navy Paint

    This post contains affiliate links for your shopping convenience. Click here to read my full disclosure policy.

    But then something happened.

    I brought one of the finished tables upstairs to photograph.

    And it was like it was made for my living room. 

    Even Grunt Labor came home and said, “That table isn’t going anywhere but there.”

    So it appears that Bill’s first furniture sale is to me.

    Let’s hope our actual business model goes according to plan the next time around.

    This navy beauty started out like this:

    End Table Before

    I actually scored two of them for $15 each at Goodwill. I think what pulled me to them the most was the drawer hardware.

    We started by removing the glass top, taping and papering off the inlay of caning (I think that’s caning?). I thought it might be nice to have just a touch of contrast with the navy. After that we sprayed down both tables with Ready.

    Spray on Ready to prime the piece.

    Ready, by Velvet Finishes, is essentially a spray-on primer. You don’t always have to use it with Velvet Finishes paint, but if the surface you are painting over is shiny or dirty, you should definitely prime it. These tables were both. We sprayed the Ready on, let it sit for a few minutes, then wiped the tables down.

    Next, we gave the tables about three light coats of the navy paint, which is called Handsome.

    Paint on Velvet Finishes Handsome - the perfect navy paint.

    Or as I like to call it, The Perfect Navy.

    It never ceases to amaze me how much just one single color can totally transform a piece of furniture. The Perfect Navy Paint

    You can see why it needs to stay in my living room, right? Seriously, it just goes perfectly with the rug.

    I need you to back me up here and make me feel better about my furniture hoarding tendencies. Mkay? Thanks.

    Navy with brass accents, plus the pop of red in the rug is perfection. The Perfect Navy Paint

    I didn’t worry with adding on an extra topcoat, since Velvet Finishes already has a topcoat built in. I knew the glass part of the table would get the most action and all we can do with that is hope the circus doesn’t break it.  I did clean up the hardware with Bar Keeper’s Friend (you can see how I clean hardware here).

    Oh, and this is also the same color I used on my base kitchen cabinets that you saw in my home tour.

    See, it is the perfect navy.

    Am I right or am I right? 

    Do you have anything screaming for navy?

    Find more furniture makeover inspiration here and see how I used this gorgeous navy on my cabinets here.

    You know you don’t wanna miss any of this crazy.

    Sign up to get my posts delivered to your inbox here.

    Stalk Me Here:

    Pinterest / Facebook / Twitter / Instagram

    Disclosure: This post was a collaboration with Velvet Finishes paint. However, all opinions and love of the perfect navy are 100% mine.

    pin-this-post

    Look no more! Not only is this the perfect shade of navy, its also the perfect paint - no priming or topcoat required! The Perfect Navy Paint

    SaveSave

  • How to Clean Concrete Blocks

    How to Clean Concrete Blocks

    Typically, I leave the outdoor arena to Grunt Labor.

    He is amazing at growing flowers.

    He loves to keep the grass looking good.

    He puts his heart and soul into our garden.

    He’s currently working on building a new patio.

    However, cleaning outdoors isn’t necessarily his thing. 

    That’s usually left to me – and that’s ok – especially when its as easy as it was to clean these concrete blocks.

    Wow! Gotta check this cleaning method out! How to Clean Concrete Blocks

    Just before you go into our garage, we have a retaining wall full of these concrete blocks..

    Before: How to Clean Concrete Blocks

    And up until just a few days ago, they all looked like that.

    Now they look like this…

    After: How to Clean Concrete Blocks

    This is a sponsored conversation written by me on behalf of Scotts® Outdoor Cleaner plus OxiClean™ via Burst Media. The opinions and text are all mine.

    Yep, that is the same block.

    How to Clean Concrete Blocks

    Supplies & Materials Needed: 

    Step 1: 

    Spray Scotts® Outdoor Cleaner plus OxiClean™ onto the dirty, gross and grimy area.

    How to Clean Concrete Blocks

    The great thing about this cleaner is that its safe to use around grass and plants. I didn’t have to worry about covering up my boxwoods that are just on the other side of the wall. It has a fast-foaming action that starts working as soon as you spray it on the affected area.

    Step 2: 

    Scrub.

    How to clean concrete blocks

    You may be an excellent homeowner that cleans your outdoor areas regularly. If you are, you may not have as bad of stains as we did and not have to scrub. Us, well….ummm….we had never cleaned these before – so its been a while to say the least.

    As you scrub, you can see the dirt and grime coming off. It gets rid of stains from moss, mold, mildew and algae.

    Step 3: 

    Rinse off the blocks and bask in your awesome cleanliness.

    WOW! Have to check this out! How to Clean Concrete Blocks

    Ya’ll, that’s a minimum of five years worth of gunk that came off. Scotts® Outdoor Cleaner plus OxiClean™ can also be used on fabrics, wood, siding, patio furniture and more.

    I used the Scotts® Outdoor Cleaner plus OxiClean™ in the Ready to Use Trigger sprayer, but if you have a bigger area, you can also buy it in concentrate form. You can find it at the Home Depot, Lowe’s, and Walmart.

    Need more easy outdoor cleaning tips? 

    How to Clean Your Sidewalk – you won’t believe how dirty mine was and you won’t believe how clean it came!

    How to Refresh Your Lattice – in under an hour!

    12 Outdoor Furniture Makeovers – before you toss it, think about giving your outdoor furniture one of these makeovers!

    9 Must Read Cleaning Tips – Outside and inside cleaning tricks!

    pin-this-post

    Wow! Gotta check this cleaning method out! How to Clean Concrete Blocks