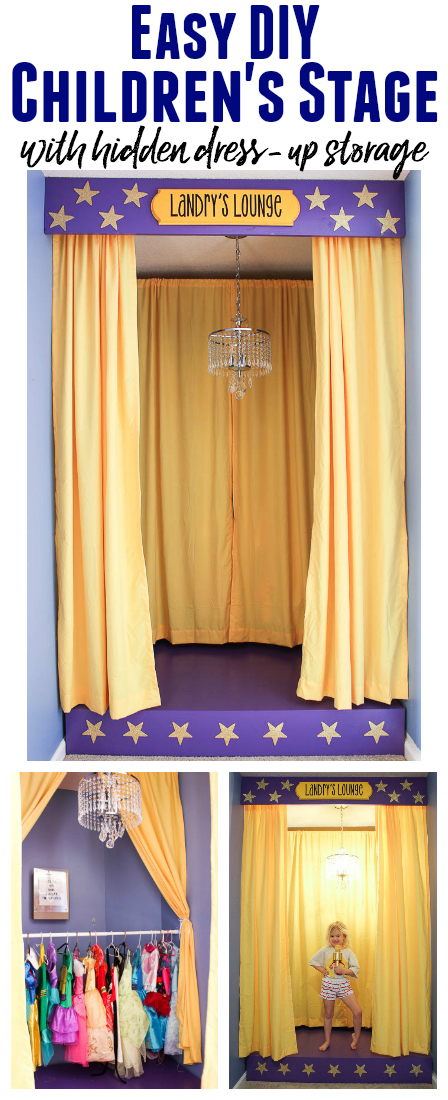
This kids stage is the perfect addition to your child’s playroom or bedroom! The DIY stage is a simple build that will provide loads and loads of fun and entertainment for years to come…
All I ever wanted to be was either Reba McEntire or Dolly Parton.
I mean really, that isn’t too much to ask, is it?
I didn’t think so either.
When my singing voice never quite caught up with my dreams, I decided I would be ok being a Modern Day Minnie Pearl. I mean, Minnie Pearl. She was amazing. And funny as shit. I could do that.
Well that never panned out either.
So when the Circus started falling in love with music, singing and dancing up a storm, and became quite fond of the one and only Dolly, I basically decided that when it came to music and singing, she could have whatever her little heart desired and maybe by the grace of God, she would end up with a good singing voice and I would get to live out my country music dreams vicariously through her.
Yep. I’m that mom.
And so the idea of a stage all her own was born.
We call it Landry’s Lounge.
I am also quite fond of alliteration, but that’s for another blog post.
She even has a “backstage” where she can select from a variety of outfits to suit her performance needs.
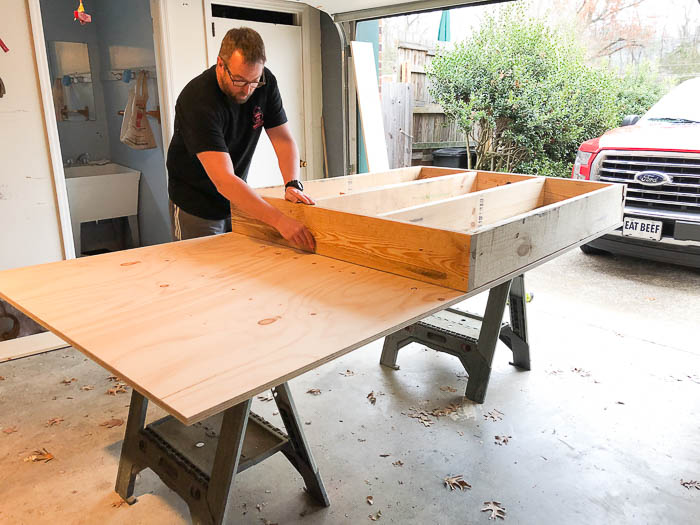
This is a pretty simple build, but you’re working with heavier lumber, so I do advise you have two people on deck for moving the stage into place. I’m going to provide you with the dimensions of our stage, however you can easily change the dimensions to fit your own needs. We wanted the Circus’ stage to fit and fill one side of her playroom, wall to wall, thus how we came up with our stage dimensions.
How to Build a Stage
This post contains affiliate links for your shopping convenience. Click here to read my full disclosure policy.
Tools & Supplies
As a point of reference, our stage is 48″ x 57″. The list below is for a stage that size. You can easily modify our dimensions to fit your own needs.
For the Actual Stage:
- Three pieces of 2″ x 6″ x 10′ Lumber
- One Sheet of Sanded 3/4″ Plywood
- One – 1″ x 10″ x 8′
- 3″ Construction Screws
- Drill
- Circular Saw
- Miter Saw (optional, we used this to cut down our 2″ x 6″ pieces, but you could use your circular saw for it.)
- Finish Nails and Hammer or Nail Gun
- Paint – we opted for Behr Alkyd paint, it works like an oil-based paint in terms of durability, but goes on like latex.
For the Stage Header / Sign:
- One – 1″ x 10″ x 8′
- Corner Braces
- Drill
- Wooden Stars
- Gold Glitter
- Wood Plaque
- Hot Glue Gun
- Paint – we used the same Behr Allkyd as noted above.
- Paint for the Wood Plaque – I used Rustoleum’s Sun Yellow Spray Paint.
- Vinyl Lettering for the Plaque – I had my friend cut this out for me with her Cricut. You could also use letter stickers that you could find at just about any craft store.
For the Hidden Dress-Up Storage and Curtains:
- 1 Adjustable Shower Curtain Rod
- 2 Tension Curtain Rods
- 4 Curtain Panels – we used these.
Side note: you could totally build this with 2x4s instead of 2x6s. We wanted her stage elevated more than 2x4s would give us though, thus why we went with 2x6s.
Steps
To make the playroom stage:
Step 1
Cut your 2″ x 6″ pieces to size using a circular saw or miter saw. You’ll need the following lengths:
- 2 cut at 48″
- 5 cut at 54″ (You will have to sister two pieces of 2″ x 6″ together to get one of these.)
Assemble the pieces as shown below:
Step 2
Attach the outside pieces together first by screwing two 3″ construction screws in at all the corners.
Step 3
Attach the inside pieces by screwing two 3″ constructions screws in along the outside pieces thru to the inside pieces. Use screws to also sister the two separate 2″ x 6″ pieces together.
Step 4
Lay the frame on top of the sheet of plywood and trace around it onto the plywood.
Use a circular saw to cut along the traced line.
Step 5
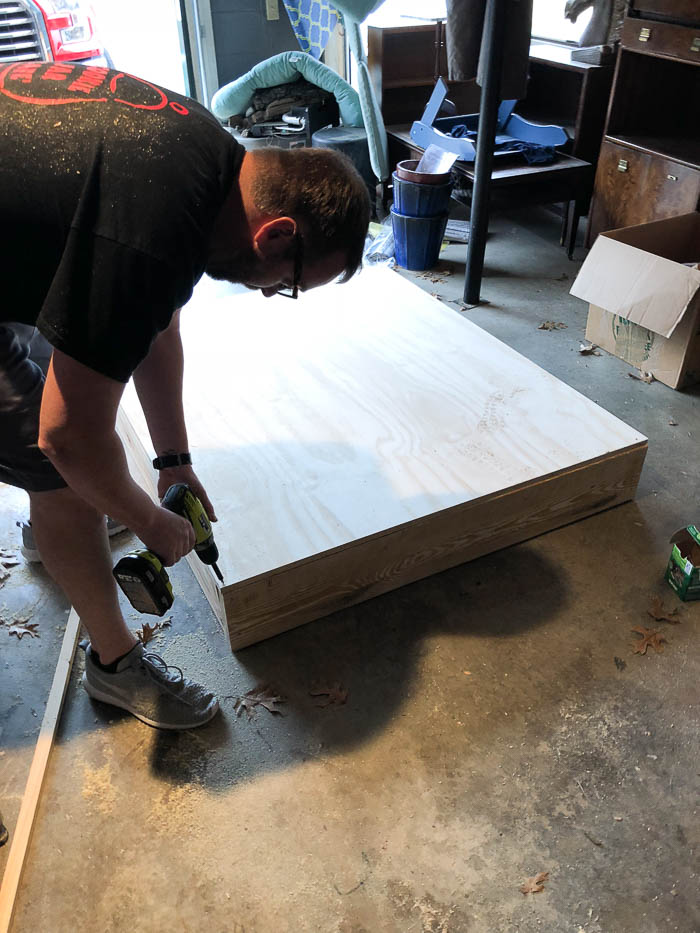
Use more construction screws along the corners and edges to attach the plywood to the frame.
Step 6
Paint it!
Like I said above, we used Behr’s Alkyd paint. I knew this thing would take a beating from the Circus and had actually planned on using oil-based paint which is super durable. However, the paint guy talked me into trying the Alkyd paint since it acts like oil-based paint in terms of durability but goes on like latex. It does have a smell though. It’s not as smelly as oil-based, but enough that I didn’t let the Circus sleep in her room for a couple of nights while this thing was still curing. She chose the purple paint color which is called Just a Fairytale. We did two coats of the paint.
Step 7
Cut the 1″ x 10″ x 8′ down to the length of your stage front. You will also have to cut down the height of this piece as well to match the height of your stage so that you don’t have a lip on the front of your stage which equals hurt kiddos. With the dimensions of our stage, we cut the 1″ x 10″ x 8′ down to 57″ long and 8″ tall. Paint this piece as well and then attach it to the front of the stage with finish nails and a hammer or a nail gun. We also added glittered wood stars to ours, which we just attached with hot glue.
That’s it for the actual stage part!
To make the stage header / sign:
Step 1
Cut your 1″ x 10″ x 8′ down to the width of your stage or the width from wall to wall if you are making your stage like ours.
Step 2
Paint and embellish it. We added wooden stars coated with gold glitter, and the sign that reads Landry’s Lounge. We hot-glued the stars on and then once the header was hung, I attached the Landry’s Lounge sign with a nail gun.
Step 3
Use corner braces to attach the sides of the board to the wall on each edge. If you aren’t going wall to wall, you can attach the braces on the board and then onto the ceiling above.
To create the hidden dress-up storage and curtains:
Step 1
Install the shower curtain tension rod toward the back of the stage at a height your child can easily reach.
Step 2
Run one of the tension rods through two of the curtain panels. Hang that curtain tension rod higher up on the wall, almost to the ceiling and slightly in front of the shower curtain tension rod. This will allow the curtains to cover up the play clothes when they are closed. It also creates a pretty backdrop as well.
Step 3
For the curtains in the front of the stage, run two panels through a tension rod, then install it just behind the stage header.
We opted for the yellow curtains (more colors also available!) because they complimented the purple so well. Now, these aren’t something I would hang up to block out light because they are thin, but for this little budding performer and her stage, they are perfect.
We also replaced what was a single bare bulb light fixture with this chandelier to make it a bit more glam. The Circus picked it out and lord help us all, she is totally champagne taste on a beer budget.
She got her microphone for Christmas and we have all had the best time playing with it. It also has a speaker attached to it that can hook to Bluetooth.
Fingers are crossed that this is just a small investment towards stardom. 😉
But it’s ok too if she just decides to live a simple life. I mean, I might be a little bitter, but it’ll be ok. 😉
Will you be creating a small stage for a playroom?
More kiddo related posts you should see…
How to Build Wall-to-Wall Shelving – these are perfect for toy storage!
DIY Dress-Up Closet – this is made from a bookcase!
How to Create an Object and Text Feature Wall – perfect decor addition to their bedrooms that display their fun personality!
If you want to save this post to look at later, you can pin it here:


Susan says
AWESOME!!!!
Jenna says
Thanks, Susan!
Tammy says
My. God.
This is INSANELY awesome! Right down to the Pink Floyd quote!
Mama, you done GOOD!
Jenna says
Thanks, girl!
Susan the Farm Quilter says
Well, if you want your plans for a country music star child to come to fruition, my may need to provide Circus with as many siblings as Dolly has! Only one out of that brood is a star, so you need to up the kid-factor to improve your odds!!! I know you need more than a case of cheap beer to deal with that little piece of reality :), but there has to be a single child who became a music legend, right? Wasn’t Elvis Presley an only child??? Love the stage and can’t wait to see videos of Circus performing. Perhaps she needs her one youtube channel to get the attention of an agent??!!
Jenna says
Oh lord, honey. You know I can’t deal with more than one kiddo. Elvis was kind of an only child – he had a twin that died at birth. She would love to have a YouTube channel – I just don’t think I’m ready for her to have one yet! hahah!
Bonnie Schulte says
Boy, what fun to have you as a MOM, and the Circus is so adorable…Maybe before she becomes a famous singer, you might post a video of her singing on the stage. The cute photo of her on the stage, looks like she has everything under control and ready to belt out the next song..
Jenna says
haha! I try to be! I have been trying to get a video of her singing, but she is not being cooperative. Apparently, a bit shy in that department. Have to work on it!
JOY says
OMG this is the BEST!!!
Jenna says
Thank you, Joy!
Julie says
LOVE IT! How very cute!
Jenna says
Thanks, Julie!
DIY Home Sweet Home says
This is adorable. I have a knock in my girls bedroom that I’m trying to decide what to do with. I think she would really like this idea.
Jenna says
Thanks! I bet your girls would love it!
BrocanteuseRose says
This is so awesome!!! I need one. Seriously, I now know that I have not been showcased to my full potential just dancing around my living room, with the TV remote as my microphone. haha
Jenna says
bahahahahahahahahaha!!! Get you one, girl!
Pam S says
Get that little girl a gee-tar!!! Really….too cute!
Jenna says
hahaha! Oh, if she wants to learn, you better believe I’ll be buying one!
angie says
if all the world is a stage how great it is to give your little one a place to perform
Jenna says
Thanks, Angie! She certainly is loving it!
Nikki Gwin says
Hi Jenna! I love the stage and especially that you made a dressing room even. So cool. My granddaughter needs this.
I chose your stage as one of my features for the next OVER THE MOON LINK PARTY which goes live on Sunday at 6 pm eastern. Please stop by and link up again! I have pinned this fantastic stage.
🙂 gwingal
Jenna says
Oh awesome! Thank you so much, Nikki!
Akaleistar says
This is such a cool idea! Love the costume rack 🙂
Jenna says
Thank you!
Deanna says
Racking my brain trying to figure out where I could create such a space for my “greatest showman” but do not have a place where I could use tension rods between two walls. Any other ideas for how I could hang the curtains in a corner or maybe suspended from the ceiling?
Jenna says
You could absolutely suspend them from the ceiling, Deanna. If you got some light weight rods and light weight curtains, you could just use those hooks with the attached anchors that go right in the ceiling.