Tag: kids

  • Five Minute DIY Stuffed Animal Storage

    Five Minute DIY Stuffed Animal Storage

    Does your kid have their very own, very complete stuffed animal zoo? Same here! They were taking over our lives until we got creative with our own DIY stuffed animal storage. Take advantage of your vertical space and learn how to store stuffed animals better below!

    As many of you may know, the kid and I are frequent thrift store shoppers. Thursday afternoons are what we like to refer to as ‘Thrift Store Thursday.’ I pick her up from school, we grab a snack from Sonic and onto the thrift stores we go to snag the treasures.

    One day at one of our usual thrift store haunts, the Circus and I noticed how they were displaying their stuffed animals vertically on chains. Now that I wrote that out, it sounds kind of like a 50 shades stuffed animal version, but I assure you that is not where this is headed. 😂

    Anywho, we analyzed their stuffed animal hanging storage that day and decided we could modify it and make it work perfectly in the Circus’ playroom.

    diy stuffed animal storage

    We came home, determined what we needed and pretty soon storing stuffed animals around here became so much easier. Did I mention that my kid is stuffed animal obsessed?

    Related: Need a different kind of toy storage in your kids room? Try these wall to wall shelves that we also use in my daughter’s play area!

    This post contains affiliate links for your shopping convenience. Click here to read my full disclosure policy.

    Hanging Stuffed Animal Storage

    This is an easy to install DIY project you can tackle in mere minutes!

    Supplies and Tools Needed:

    Steps

    Step 1


    Mark the location where you want your ceiling hooks to go. Keep in mind you want to come off the wall with them a bit as the stuffed animals will take up some space against the wall. We brought ours out about nine inches.

    Install the ceiling hooks according to the package directions.

    hanging stuffed animal storage - installing ceiling hooks

    Step 2

    Hang the plastic chain on the hooks.

    how to store stuffed animals - hanging chain from the ceiling

    Adjust the chain to the length of your liking.

    Step 3

    Clip the hooks onto the stuffed animals and hang on the chain.

    stuffed animal storage - hanging animals on plastic chains with clip hooks

    We did three vertical rows for the plush toy storage.

    stuffed animal storage ideas- hanging chain from the ceiling and hanging animals from clip hooks

    Organize stuffed animals to your liking. As you can see though, we have no organization method.

    storing stuffed animals vertically by hanging chains from the ceiling

    Let tell you though, having every last teddy bear, dog, rabbit, and all other species very visible has significantly reduced the risk of me breaking a leg in an attempt to find a certain animal.

    Related: Kids Play Table with Storage – perfect for playing farm, legos and more!

    Do you have any creative storage ideas for toys? Share them in the comments!

    Looking for another great idea for the kids? Here’s a few of our homeruns…

    Play Based Learning Play Stations – they won’t know they are learning while they’re playing too!

    How to Build a Kids Stage – and it has hidden storage for dress up clothes!

    DIY Wall Mounted Desk – this one has hidden storage as well and your kids will love having their very own creation station!

    Want to come back to this simple stuffed animal storage solution later? Just pin the image below!

    diy hanging stuffed animal storage from the ceiling - stuffed animals hung from the ceiling on chain.

    Keep up with more of myself and the Circus’ shenanigans on social media:

    Facebook | Instagram | Pinterest | Twitter

  • Gifts for Little Kids that Aren’t Toys

    Gifts for Little Kids that Aren’t Toys

    Most kids can easily create a list a mile long containing all the toys they want for Christmas. I know my kid can and already has! But, we don’t always want to get them just toys. This list of gifts for kids that aren’t toys has a few things they might not have wanted, but will end up enjoying – a whole lot. 

    If any of you have kids or grandkids like my little Circus, they’ve already made up their list for Santa and their parents and it’s full of toy after toy after toy. And hey, that’s alright! It is Christmas and I can’t imagine not seeing the Circus’ face light up as she gets a few toys she’s been longing for.

    However, I also like to surprise the Circus with a Christmas gift or two that she didn’t ask for and that aren’t toys, but that she will enjoy just as much.

    If you’re on that same page, this list of gifts for kids might have a thing or two the littles in your life would love – they just don’t know it yet!

    This list is more focused on gifts for little kids, roughly ages 4-8ish. My kiddo fits in that age bracket, so it’s easier for me to come up with things that kids in that age group would enjoy. Some of these gifts could absolutely work for kids younger or older than four and eight, and of course, you’ll be the best judge for that!

    Some brands provided products and/or compensation for inclusion in this gift guide. However, all thoughts and opinions are 100% my own. This post contains affiliate links for your shopping convenience. Click here to read my full disclosure policy.

    Non Toy Gifts for Kids

    Gifts for Creative Kids

    Have a kid on your list who loves art projects? Stock them up on cool projects and craft supplies!

    Gifts for Kids That Aren't Toys

    Suncatcher Art Kit

    It’s hard to find a kid who doesn’t love a good, fun art project. We are big fans of sun catchers around here and the Circus loves making them. This sun catcher kit has 20 different ones to complete!

    Non Toy Gifts for Kids

    3D Pen

    Bring their art to life with this 3D pen! This is definitely one for kids that are a little older, as it does plug in and heat up. Instead of ink, this pen puts out plastic to create 3D shapes.

    Non Toy Gifts

    Paint by Sticker Kit

    We also love some painting by sticker around here. These are especially great for road trips to keep the kids occupied. It also requires them to use those fine motor skills as well.

    Gifts for the R&R Kids

    Have a kiddo who loves a good movie night? Check these ideas out for them!

    Gift Idea for Kids

    Kids Size Recliner

    My kiddo asked for one of these last year and her wish was granted! She loves relaxing in her recliner during movie night! Find this one here!

    Christmas Gift for Kids


    101 Movies Book

    This is something both parents and kids can enjoy! Besides noting each of the 101 movies to watch, this book also has a section for the kiddos to be movie critics themselves and write their own reviews.

    Great Idea for Non Toy Gifts for Kids

    Pig Ottoman

    Not ready to commit to a kid’s recliner? How about an ottoman for them to prop their feet on? This one is adorable, but you can also get it in other animal varieties including: an elephant, panda, and cow.

    Gifts for Kids Who Love Adventure

    Have a kiddo who’s always up for adventure? These might help them out on their next one…

    Gifts for Adventurous Kids

    World Traveler Play Set

    This fun little play set includes tickets, postcards, a passport and more that can take your little kiddo on whatever adventure they create for themselves. Find this set here.

    Non Toy Gift Ideas for Kids

    Fox Sleeping Bag

    Whether they’re camping under the stars or in the den, they’ll enjoy it even more in this woodland fox sleeping bag! Other animal designs available. Find it here!

    Gifts for the Animal Loving Kids

    It’s hard to find a kid who doesn’t love animals. Here’s a couple options for them…

    Christmas Gift Ideas for Kids

    Zoobooks Magazine Subscription

    We love our Zoobooks magazine around here! This is one of those gifts that keep giving all year long! Zoobooks has magazine subscriptions geared toward all different age brackets; you can find one that fits well for your kiddos here.

    Holiday Gifts for Kids that Aren't Toys


    Canine Christmas Tree

    This one is perfect for dog lovers and it also gives kids their own special little holiday decoration. This canine Christmas tree lights up and also plays music. My daughter received one of these for Christmas last year and she adores it!

    Gifts for the Super Hero Fan

    Every kiddo needs a little super hero magic in their lives…

    Super Hero Gifts for Kids That Aren't Toys

    The Big Book of Bedtime Stories for Super Heroes

    Send your kids off to bed ready to dream about all their super powers. The Big Book of Bedtime Stories for Super Heroes will set the scene for super dreaming!

    Gift Books for Kids

    The Book Book of Super Villains


    One must always be educated in the villains as well! The Big Book of Super Villains leaves no villain untouched!

    Gifts for the Kids Who Love Drawing and Writing

    For the kids who are always dreaming through words and drawings…

    Gift Ideas for Kids for Christmas

    Personalized Notebooks

    At Minted, you can get personalized notebooks for kids and choose to get either lined or blank paper inside the notebook. We’re getting the Circus two notebooks – one blank for drawing and one lined for writing this year. Each is personalized with her name as well. Find the Dino notebook here and the full selection of kid’s notebooks from Minted here.

    Gift Ideas for Kids for the Holidays

    Personalized Stationery

    When I was a kid, I had a few fancy notepads that had my name on them and I thought that was so cool. Since the Circus is learning how to write now, I thought it might be fun to get her some of her own stationery that she can write letters to family and friends on. Besides the rainbow design there are also lots of other designs to choose from here.

    Gifts for Creative Kids

    Black Paper Sketchbook

    If you’ve got a mini-artist on your hands, then they will think this black paper sketchbook is super cool. They might never want to go back to boring white paper after using this.

    Gifts for Artsy Kids

    Moonlight Pen Set

    To go along with the sketchbook, get them some brightly colored pens or markers, like this moonlight pen set that really pops on the black drawing paper.

    Gifts for the Kids Who Love Personalization

    They think it’s pretty cool when something has their name on it…

    Personalized Gifts for Kids

    Personalized Beach Towels

    Your kids won’t ever fight over beach towels again because they’ll each have their own personalized one! There are lots of different themes, animals, patterns and designs to choose from at Just So Posh. Find the whale one here.

    Learning Gifts for Kids


    Personalized Activity Placemats

    If you’ve got littles who are learning their ABCs, numbers, or how to tell time, a great way to help them with that is with these personalized activity placemats. They keep learning fun while eating dinner and also wipe clean!

    Gifts Especially for Strong Girls

    Books to teach our girls to be strong, determined and to stand for what they believe in…

    Gifts for Strong Girls

    She Persisted

    This book tells the stories of 13 different American women who changed the world in some way. They range from Harriet Tubman to Sally Ride to Helen Keller just to name a few. Find the book here.

    Gift Ideas for Little Girls

    I Dissent

    This is the story of the one and only, Ruth Bader Ginsburg and how how she’s spent her life standing up for equality by arguing against unfair treatment. It’s in picture book form, so it’s easily digestible for little girls. Find it here.

    What non toy gifts will you be picking up this year?

    More Gift Ideas:

    Gifts for the Impossible Man

    Funny Gift Ideas

    Gift Ideas for Friends

    Unique Gifts for Someone Who Has Everything Already

    Gifts for Drinkers

    Best Gifts for People Who Travel

    Gifts for Sarcastic Friends

    Gifts for Grandparents

    Gifts for Book Lovers

    Gifts for People Who Love Music

    Gifts for New Homeowners

    Unique Personalized Gifts

    Gifts that Keep Giving

    Gifts for Her

    Gifts for Couples

    Gifts for Creative People

    Gifts for Foodies, Cooks and Entertainers

    Gifts for DIYers

    Are you getting our holiday gift guide emails? If not, sign up below for special discounts, sales and more great gift ideas! You’ll also get a free gift planner!

    Want to remember this list for later? Just pin the image below!

    Gifts for Little Kids
  • DIY Kids Microphones – Great party favors!

    DIY Kids Microphones – Great party favors!

    This easy-to-make kids microphone will make any little guy or gal feel like the star of their own show! These are perfect for everyday play, but also make great party favors as well! Best of all – this toy microphone is simple and affordable to make.

    Since summer has ended and both of my crew members are back at work and school, I’m finally getting around to sharing how I made everything come together for the Circus’ VIP Red Carpet Birthday Party.

    One of my favorite projects from the party were these kids microphones.

    kids microphone tutorial

    The little partygoers had a ball singing with them at the party and they doubled as party favors they could take home as well! Bonus – these toy microphones are super easy to make!

    Play Microphone Tutorial

    This post contains affiliate links for your shopping convenience. Click here to read my full disclosure policy.

    Materials Needed

    toy microphone supplies

    Steps

    Step 1

    Spray paint all the PVC pipe black.

    play microphone tutorial

    I found it easiest to attach screws to a scrap piece of wood and stand the pipe on them to spray paint.

    Step 2

    While the spray paint is drying, glitter the eggs.

    how to make a kids play microphone

    To do this, place a toothpick in the narrow end of each egg. Apply Mod Podge, then immediately cover the egg with glitter.

    To dry the eggs, I placed each toothpick through a cardboard box to keep them elevated.

    Step 3

    After the pipes are dry, put a good bit of hot glue or another adhesive along one end of the pipe as shown below.

    diy kids toy microphone

    Put some adhesive a little bit inside the pipe as well.

    Place an egg, narrow end down, into each microphone pushing firmly.

    Let the glue dry.

    Step 4

    microphone party favors

    Once the glue has had enough time to dry, give each microphone a couple of coats of clear gloss top coat spray paint. This will help to seal all the glitter to the egg and keep it from falling off so much.

    Let dry and then rock out!

    We placed the microphones on our VIP table for the kids to grab as soon as they made their entrance into the party lounge.

    DIY Play Microphones

    Ice buckets were perfect for corralling them all!

    Need more great party ideas?

    Looking for more Red Carpet party ideas? See our entire VIP Red Carpet Party here!

    Make these VIP Passes for your next event with this free printable!

    Need an easy party backdrop? This DIY Party Background is easy to make and only costs around $5!

    Want to DIY as many party decorations as you can! That’s my jam too! Don’t miss these simple DIY party decorations on a budget!

    Want to come back to these instructions later? Just pin the image below!

    DIY Toy Microphones

    Are you following along on social media?

    Facebook | Instagram | Pinterest | Twitter

  • 6 DIY Kids Pretend Play Stations for Play Based Learning

    6 DIY Kids Pretend Play Stations for Play Based Learning

    Looking for great ways to get your kids away from the screen and instead up and using their imagination? These DIY pretend play stations for play based learning will help to do just that! On top of it all, you’ll probably score major brownie points with your kids for making these for them!

    Summer is just around the corner! Just a few weeks of school left here and then it’s quality time with the kid. I see lots of pool time, yard saleing and hammock time coming our way. 🙂

    That being said though, we all know that keeping them occupied all summer long can sometimes pose a challenge. It doesn’t take too long before we all start hearing the “I’m bored!” cries.

    Here are a few pretend play stations you can make your kids – these will keep them entertained for hours and hours! They’ll love you for making them. Your sanity will also thank you for making them. 😉

    What’s even better is that these play stations will foster learning and development through playtime! I know, right?! When I made these for my Circus, that wasn’t even necessarily the goal, but it happened anyway. 🙂

    DIY Imaginative Play Centers For Kids

    Kids Stage with Dress Up Area

    Pretend Play Stations for Kids

    Not only has this stage served as, of course, a stage, but it has also masqueraded around as a restaurant, doctor’s office, zoo and more. This DIY kids stage is a super simple build. The stage even has an area in the back that can be used for dress-up clothes.

    DIY Kids Activity Table

    DIY Kids Pretend Play Centers

    This play table is another project that can pull double duty. Here, it’s a barnyard, but it could easily be turned into a racetrack, building zone, Lego table and more. It’s also on wheels, so you can easily move it around. Attach some hooks and baskets to the sides for easy access storage and organization!

    Lemonade Stand

    Kids Pretend Play Stations for Learning Through Play

    There isn’t a hard thing at all about making this DIY lemonade stand! You’ll just need a couple of crates and a few pieces of wood. If you can drill a hole and make a straight cut, you’re good to go! This is perfect for those little entrepreneurs in your life. The Circus loves setting up her lemonade stand at yard sales and she doesn’t make chump change doing it either! She made $70 in one day doing it! When they aren’t creating their fortunes though, it also makes a great grocery play station.

    Space Saving Wall Mounted Desk

    Young Children Flip Down Wall Desk

    No doubt, this is one of the best things I’ve ever made my kid. This flip-down wall desk is great for small spaces. You can even hide away and organize all the art supplies inside!

    Dress-Up Closet from a Bookshelf

    Learning Through Play - DIY Kids Dress Up Station

    Keep the dress-up clothes out and within easy reach with this dress-up closet! I made this from a bookshelf – an easy hack! If you’ve got the space, you can even work a mirror into it. If the clothes would cover the mirror on the back of the closet, then mount the mirror on the side.

    Crate Wagons

    Learning Experiences - Kids Wagon Crates

    Forgive the holiday-esque vibe going on with this image. When I made and photographed these wagons, it was right around Christmas. The fun thing about these wagons made out of crates is that the kids can really get in on the building process here – the handles are made from PVC pipe, so they can figure out how to put it all together!

    Have you created any DIY play centers for your child?

    Tell us about them in the comments!

    More great ideas for kids and their spaces:

    Kids Bedroom Feature Wall – this is a great and unique way to incorporate their own little personalities into their rooms!

    Playroom Wall to Wall Shelves – colorful, easy to build shelves that are UH-MAZING for toy storage!

    Super Easy to Make DIY Headband Holder – this headband holder is perfect for keeping all those adorable headbands organized and within reach!

    Want to hang onto this post for later? Pin the image below then!

    Play Based Learning Projects

    Find me on social media:

    Facebook | Instagram | Pinterest | Twitter

  • Easy DIY Lemonade Stand with Video

    Easy DIY Lemonade Stand with Video

    Looking for kids lemonade stand ideas for your little one? I’m willing to bet this is THE most simple to build DIY lemonade stand you’ll find! It’s also pretty darn cute! See below for how to build a lemonade stand your kiddo will love and use for years to come!

    Sometimes life doesn’t hand you lemons.

    Sometimes it hands you an adorable little girl with blonde curls full of personality who also tends to lean on the “hustler” side.

    She comes by it honestly though, bless her heart.

    And even when life doesn’t hand her lemons, she still likes to make lemonade – pink lemonade.

    Exactly 12 hours before a yard sale we had in the spring, the little girl with blonde curls asked for a lemonade stand to sell lemonade at during the yard sale.

    There was simply zero time to throw all that together in under 12 hours though and there wasn’t a lick of anything to make lemonade with in the house.

    With a sad face, she settled for my promise to make her a lemonade stand for the next yard sale.

    I didn’t let her down.

    Easy DIY Lemonade Stand - use this tutorial to make a simple lemonade stand for kids!

    This was such a simple simple simple build, y’all. Honestly, it’s hardly a building project at all, you’re just putting a few pieces of wood together!

    This post is sponsored by Velvet Finishes, however all opinions are 100% my own. This post contains affiliate links for your shopping convenience. Click here to read my full disclosure policy.

    How to Make a Lemonade Stand

    Tools & Supplies Needed:

    how to make a lemonade stand - supplies - Rain on a Tin Roof

    Steps

    Step 1.

    Cut your wood to size.

    The 1″ x 4″ x 12′ should be cut into three different pieces in the following sizes:

    • 5 feet long
    • 5 feet long
    • 2 feet long

    After you cut both your five feet long pieces, you should have your 2 feet piece. You can cut these pieces using a circular saw, miter saw or a chop saw. You can also have your local hardware store cut these pieces to size for you before you leave the store.

    The plywood panel should be cut down to 11 5/8″ x 18″. You can cut this with a circular saw or table saw. You can also have your local hardware store cut it as noted above.

    The crates will stay as is. The video below provides a visual of the cuts as well.

    Step 2. 

    Time to paint!

    You’re going to paint all the 1″ x 4″ pieces and the plywood panel in Velvet Finishes Bold. You’ll paint the sides of the crates in Velvet Finishes Baroque and alternate between that color and Bold on the slats. We used Reviver paint brushes for the painting. They are really great quality that minimize brush strokes and don’t lose their bristles on your pieces.

    The video below will walk you through the cuts we noted above, the painting of the pieces and putting it all together. It also stars a pretty cute kid. 😉
    [adthrive-in-post-video-player video-id=”GbGcoL9N” upload-date=”Thu Aug 03 2017 18:39:34 GMT+0000 (Coordinated Universal Time)” name=”Easy Diy Lemonade Stand” description=”Use this tutorial for an easy DIY lemonade stand to keep your kids entertained and making their own money!”]

    Velvet Finishes paint doesn’t require a piece to be primed beforehand and it already has a topcoat built-in, so no need to worry with that. I had mentioned in the video that I might put on an additional topcoat on the counter, but in the end I didn’t worry with it and it weathered the first lemonade sale just fine.

    how to build a lemonade stand using crates - rain on a tin roof

    Helpful Tips & Hints: 

    • It took two coats of Velvet Finishes Baroque and about 3-4 coats of the Velvet Finishes Bold. Yellows tend to take more time to get the color even, especially on raw wood, so give yourself a little extra time there. This paint dries really fast though, so it doesn’t take too terribly long to get the paint on.
    • If you want to save on space after your kiddos have their lemonade sale, you can easily just unscrew everything and store it away. When you’re ready to use the stand again, just screw it back together using the holes you already made.
    • I made the “Landry’s Lemonade” with my Silhouette. After cutting it out, I mod-podged on the “Landry’s,” then hot-glued the “Lemonade” to string and taped it up.

    kids lemonade stand - easy to build - rain on a tin roof

    The lemonade stand was a big hit – the kid made $70!

    cute lemonade stand - diy project to make for your kids - Rain on a Tin Roof

    She would ask nearly every person that walked up if they would like lemonade or a treat. And really, who could tell her no?!

    Here’s to life not always handing you lemons so you can make your own pink lemonade and little hustlers in the making!

    Share your cute lemonade stand ideas in the comments!

    Want more great DIY ideas for your kiddos?

    DIY Children’s Stage with Hidden Dress-Up Storage – this one provides loads and loads of entertainment!

    DIY Dress-Up Closet from a Bookcase – great and easy way to store all those dress-up clothes!

    How to Create an Object and Feature Wall for Your Little One – the perfect accent wall for a kid’s bedroom!

    How to Build Wall to Wall Shelving Easily – we have these in my daughter’s playroom and they are a lifesaver when it comes to toy storage!

    Want to save this post to look at later? Just pin the image below! 

    Build a Lemonade Stand Using Crates - Easy - Rain on a Tin Roof

    How to Make a Lemonade Stand Using Wooden Crates - Rain on a Tin Roof

    SaveSave

    SaveSaveSaveSave

  • DIY Kids’ Play Table with Storage

    DIY Kids’ Play Table with Storage

    If you’ve got basic DIY skills, then you can easily make this kids play table in one weekend – and your kiddos will forever be grateful! On top of that, this activity table for kids with storage can easily be customized to fit the interests of your own individual child!

    I first must start by saying that Grunt Labor gets all the building credit for this one. While I helped with the final touches, the table might not be done if it weren’t for him. We had told the Circus we would build her one when she got a play horse stable for her birthday and two months later, we still hadn’t done it. Things had just been crazy with the guest bathroom and bedroom remodel. So one day while I was working away on those two spaces, Grunt went out in the garage and built this kids farm play table in just a few hours.

    kids play table

    It can actually be any kind of activity table for kids. We went with the farm theme because that’s the kind of stuff the Circus loves to play with. If your kid is more into Legos, the jungle or something else, it could totally be that instead. You’d just want to replace our “grass” with lego bases or jungle-esque stuff – whatever your kid likes.

    DIY Kids’ Activity Table with Storage

    This post contains affiliate links for your shopping convenience. Click here to read my full disclosure policy.

    For reference, our kids’ play table is 41 1/2″ x  39 1/2″. You can alter the dimensions below to make your activity table bigger or smaller as desired.

    Materials & Tools Needed for Table Construction:

    Cut List

    Using the circular saw, make the following cuts.

    • Cut the 2″ x 4″s into the following lengths:

    • 4 pieces – 20 1/2″ long (legs)
    • 2 pieces – 26 7/8″ long (frame around table)
    • 2 pieces – 48″ long (frame around table)
    • 1 piece – 45″ long (support underneath table)

    • Cut the 1″ x 2″s into the following lengths:

    • 2 pieces – 48″ long (rim around table)
    • 2 pieces – 31 1/2″ long (rim around table)

    • Cut the plywood down to 30″ x 48″.

    Steps

    Step 1

    Gather the 2″ x 4″ pieces that make up the frame of the table (2 – 26 7/8″ long pieces and 2 – 48″ long pieces) and the 2″ x 4″ piece that is the middle support (45″ long piece) underneath the table.

    Arrange the 2″ x 4″ frame pieces in a rectangle and place the 45″ long support piece in the middle. Use wood screws to attach the 2″ x 4″s together where each 2″ x 4″ meets.

    kids activity table with storage

    The photo above shows two support pieces. Ignore that. This was actually from the first round of Grunt making the table and it was way too big. He ended up disassembling it and making it to the dimensions noted in this post. The photo will help you get a visual though of how to construct the frame of the table.

    Step 2

    Attach the 2″ x 4″ leg pieces (the 20 1/2″ long pieces) to each corner of the frame using wood screws.

    activity table for kids

    Be sure that the 2″ x 4″ leg is flush with the bottom of the 2″ x 4″ frame you are attaching it to and also pushed into the corner of the frame. You can use clamps to hold it in place while you are screwing it to the frame.

    Go ahead and attach the casters at this time as well.

    kids farm table

    Step 3

    Flip the table over and put it on the ground. Place the plywood on top of the 2″ x 4″ frame you’ve just constructed. Attach it to the frame with wood screws all around the edges and in the middle where that middle support is.

    Step 4

    Attach the 1″ x 2″ pieces around the edges of the plywood using finish nails and a hammer or a nail gun.

    kids farm play table

    The bottom of the 1″ x 2″ should be flush with the plywood. This will create a rim around the activity table to keep things from falling off.

    Step 5

    Attach cup hooks to the sides of the 2″ x 4″ frame to hang bins from for storage.

    diy kids play table

    Our storage containers came from The Dollar Tree.

    How to Make It Into a Kids’ Farm Table

    As I said, you can customize the top of the activity table to meet your own child’s interests and needs. Here’s how we made ours a farm play table…

    Materials & Tools Needed

    Step 1

    Do the painting and staining first. We painted the legs and 2″ x 4″ frame white and stained the 1″ x 2″ rims so they looked like fencing. The only thing we didn’t paint first was the pond.

    Step 2

    Cut your green material down to the size of the plywood base and attach it to the table. We did this with a staple gun along the edges. You could also glue it if you wish.

    Step 3

    Determine where you want the pond to be on the kids’ farm table. Outline it using a pen or marker, then cut out that portion of the green material using an X-Acto knife. Once the green material is cut away, carefully paint that exposed portion of the plywood blue to resemble a pond.

    diy kids activity table with storage

    Step 4

    Place your faux trees wherever you desire. Ours wouldn’t stay standing very well, so we hot-glued them down.

    diy activity table for kids

    And that’s it!

    diy kids farm table

    The Circus has loved playing with her farm table. She had all her Schleich paraphernalia up on it and set up before we could even put the finishing touches on it. I’m glad we finally got it done for her.

    Having it on wheels is especially nice because it’s so movable.

    diy kids farm play table

    Will you be adding an activity table for kids to your to-do list?

    With Christmas just around the corner, this could be a great gift idea!

    You might also want to see…

    Drop Down Desk for Kids

    DIY Kids Wall Mounted Desk with Storage

    This is such an easy build! Any beginning DIYer could complete these! How to Build Wall to Wall Shelves in an hour for $50

    How to Build Wall to Wall Shelves

    How to Build a Children’s Stage with Hidden Dress-Up Storage

    Pin This Post

    kids play table with storage


  • DIY Wall Mounted Desk with Storage

    DIY Wall Mounted Desk with Storage

    Have a small space where you’d like to fit in a wall mounted desk? Need a little storage there too? You’re in the right place then! This DIY wall mounted desk is a simple build that folds down to reveal space for your computer or writing and hidden storage.

    This project has only been completed for a month or so and I can already confidently say that it is hands-down the Circus’ most favorite thing I’ve ever made her – a wall mounted drop down desk.

    DIY Wall Mounted Desk - with storage and writing space - Rain on a Tin Roof

    Y’all, she is at this desk everyday. In fact, before I could even get photos of it, I had to give it a good wipe down because she’d already gotten marker ink and glue on it from her various art projects.

    And from a mama’s point of view, it is so nice to have all her art supplies (sans paint because we ain’t letting her run wild with paint just yet) in one place. And to be able to just close it all up and hide the mess is the icing on the cake.

    DIY Fold Down Desk - folded up - Rain on a Tin Roof

    This DIY desk can easily be made to work for both kids and adults. For adults, you’ll just want to raise up the mounting height a bit and possibly increase the overall size of the desk. For me though, even as an adult the size is more than adequate.

    This post contains affiliate links for your shopping convenience. Click here to read my full disclosure policy.

    DIY Fold Down Desk

    Supplies and Tools Needed

    Cut List

    Make the following cuts using either a miter saw or circular saw.

    1. Cut the 1″ x 8″ x 8′ piece of wood into the following lengths:

    • Two pieces that are 28″ long
    • Two pieces that are 17 7/8″ long

    2. With the remaining 1″ x 8″ piece of wood that is left, cut four small squares. These don’t have to be perfect at all.

    3. Using a circular saw, cut the 3/4″ plywood project panel down to 28″ x 19 1/2″.

    4. Using a circular saw, cut the pegboard project panel down to 26 3/8″ x 17 7/8″.

    Steps

    Step 1

    Gather your measured and cut four 1″ x 8″ pieces, drill and longer wood screws.

    Drop Down Desk Assembly - Rain on a Tin Roof

    Arrange the boards as shown below.

    Drop Down Wall Desk - putting together the frame - Rain on a Tin Roof

    Attach each longer 1″ x 8″ piece to each shorter 1″ x 8″ piece at the end of each board using two screws on each board. Drill a pilot hole first and then drill your screws in.

    To keep these pieces from ever coming apart, you can also apply wood glue along the edges of the boards before attaching together with screws if you wish. We did not do this, as I do think it’s strong enough as is, but if you’ve really got a rough and tumble kiddo, this could be a good idea.

    Step 2

    Lay your cut plywood panel on top of the 1″ x 8″ frame to make sure it fits properly. It should cover the entire frame.

    Building a diy wall mounted desk with storage. Rain on a Tin Roof

    Adjust as needed.

    Step 3

    If you plan to paint your desk, go ahead and do so now. The Circus wanted two colors, so we painted the frame Tropical Sea and the drop down portion of the desk Yellow Groove.

    How to Make a DIY Fold Down Desk - mounts to wall - Rain on a Tin Roof

    After the yellow was dry, she also made a design with tape to block off a few areas to paint the Tropical Sea on as well.

    Painting the DIY Wall Desk - Rain on a Tin Roof

    Step 4

    Get your cut piece of pegboard, the four small 1″ x 8″ square pieces you cut and the longer wood screws.

    Pegboard in back of drop down desk - Rain on a Tin Roof

    Place a square in each corner of the backside of the desk frame. Drill a pilot hole and then fasten the square wood piece to the desk frame with one of your longer screws.

    Assembling the drop down wall desk - Rain on a Tin Roof

    After you’ve attached all four wood pieces, place your cut pegboard piece through the front of the desk frame and attach it to each wood square using a smaller wood screw.

    Wall Mounted Desk with Storage Building Plans

    Step 5

    Lay your drop down desk front on it’s face directly in front of the desk frame.

    Attach the frame and desk front together by using the 90 degree surface hinges.

    DIY Desk plans for a wall mounted desk -  Rain on a Tin Roof

    Step 6

    Get both your left hand lid support hinges and your right hand lid support hinges. Attach each following the package directions.

    Building Plans for a Wall Mounted Desk - Rain on a Tin Roof

    An important thing to note here is that you might have to play with these right and left hinges a bit. For me, the lower portion that goes on the drop down front needed to be scooted in a bit more than what the package directions said (as you can see from my holes above!). This could vary from different brands of hinges. If you do have to play around with it and end up with a few holes, just fill with wood filler, sand and paint over them.

    Step 7

    Attach the magnetic latches at the top of the drop-down desk frame and lid using the mounting instructions on the package.

    Tutorial for building a wall desk - Rain on a Tin Roof

    Step 8

    Attach whatever pretty knob you’ve decided to go with on the top front of your drop-down desk.

    Step 9

    Determine where you want to hang your new DIY drop down desk. To do this, I had the Circus sit on the seat I knew she would be using at the desk and then held the desk up to see where it would be best to hang it for her. Make a mark on the wall where you want it to hang.

    Grab a stud finder and mark all the studs in that area.

    On the back of the desk, measure the area between the top two wood squares you attached in the corners. Cut your 1″ x 2″ furring strip to that length or slightly less than.

    Space Saving DIY Wall Mounted Flip Down Desk - Rain on a Tin Roof

    Place the furring strip on the wall and attach it to the wall where studs are using your drill and the longer wood screws.

    Attaching the Wall Mounted Desk to the Wall - Rain on a Tin Roof

    Use a level to check for levelness before placing the second screw into the furring strip and wall.

    Step 10

    Place the drop down desk on top of the furring strip. Using your longer wood screws, attach the desk to the furring strip you just attached to the wall. I put three screws along the back of our desk top as shown below.

    Small Space DIY Wall Mounted Fold Down Desk - Rain on a Tin Roof

    Drop it down and enjoy!

    Fold Down Desk Plans - Rain on a Tin Roof

    She absolutely loves this thing.

    Wall Mounted Flip Down Desk Plans - Rain on a Tin Roof

    We used pegboard hooks to organize and hang most of her art supplies.

    Tutorial for a Space Saving Wall Mounted DIY Desk - Rain on a Tin Roof

    The two purple baskets are part of this set of pegboard baskets that we spray painted. The other baskets are from the Dollar Tree.

    DIY Wall Mounted Drop Down Desk with Storage - Rain on a Tin Roof

    We also placed a few other Dollar Tree baskets along the bottom to hold colored pencils, crayons and random other art supplies.

    Hands down, this space saving wall desk is the best thing I’ve built for the kid so far!

    Have you made a DIY wall desk before? Need one anywhere? 🙂

    Want more great ideas for your kids?

    DIY Dress Up Closet– so easy to make and they will love it!

    Easiest Ever DIY Lemonade Stand– great for those budding entrepreneurs!

    Easy DIY Children’s Stage with Hidden Dress-Up Clothes Storage– they will love you forever for making this one!

    If you’d like to save this diy desk build to refer back to later, pin the image below!

    Fold Down Wall Desk Plans - Rain on a Tin Roof
  • How to Build a Kids Stage with Dress-Up Clothes Storage

    How to Build a Kids Stage with Dress-Up Clothes Storage

    This kids stage is the perfect addition to your child’s playroom or bedroom! The DIY stage is a simple build that will provide loads and loads of fun and entertainment for years to come…

    All I ever wanted to be was either Reba McEntire or Dolly Parton.

    I mean really, that isn’t too much to ask, is it?

    I didn’t think so either.

    When my singing voice never quite caught up with my dreams, I decided I would be ok being a Modern Day Minnie Pearl. I mean, Minnie Pearl. She was amazing. And funny as shit. I could do that.

    Well that never panned out either.

    So when the Circus started falling in love with music, singing and dancing up a storm, and became quite fond of the one and only Dolly, I basically decided that when it came to music and singing, she could have whatever her little heart desired and maybe by the grace of God, she would end up with a good singing voice and I would get to live out my country music dreams vicariously through her.

    Yep. I’m that mom.

    And so the idea of a stage all her own was born.

    DIY Children's Stage - easy build for your child's playroom, also has hidden dress-up clothes storage.

    We call it Landry’s Lounge.

    I am also quite fond of alliteration, but that’s for another blog post.

    She even has a “backstage” where she can select from a variety of outfits to suit her performance needs.

    How to Build a Stage - dress-up clothes storage - Rain on a Tin Roof

    This is a pretty simple build, but you’re working with heavier lumber, so I do advise you have two people on deck for moving the stage into place. I’m going to provide you with the dimensions of our stage, however you can easily change the dimensions to fit your own needs. We wanted the Circus’ stage to fit and fill one side of her playroom, wall to wall, thus how we came up with our stage dimensions.

    How to Build a Stage

    This post contains affiliate links for your shopping convenience. Click here to read my full disclosure policy.

    Tools & Supplies 

    As a point of reference, our stage is 48″ x 57″. The list below is for a stage that size. You can easily modify our dimensions to fit your own needs.

    For the Actual Stage:

    For the Stage Header / Sign:

    For the Hidden Dress-Up Storage and Curtains:

    Side note: you could totally build this with 2x4s instead of 2x6s. We wanted her stage elevated more than 2x4s would give us though, thus why we went with 2x6s.

    Steps

    To make the playroom stage:

    Step 1

    Cut your 2″ x 6″ pieces to size using a circular saw or miter saw. You’ll need the following lengths:

    • 2 cut at 48″
    • 5 cut at 54″ (You will have to sister two pieces of 2″ x 6″ together to get one of these.)

    Assemble the pieces as shown below:

    DIY Stage - assembling the stage - Rain on a Tin Roof

    Step 2

    Attach the outside pieces together first by screwing two  3″ construction screws in at all the corners.

    Playroom Stage - assembling the corners of the stage - Rain on a Tin Roof

    Step 3

    Attach the inside pieces by screwing two 3″ constructions screws in along the outside pieces thru to the inside pieces. Use screws to also sister the two separate 2″ x 6″ pieces together.

    Step 4

    Lay the frame on top of the sheet of plywood and trace around it onto the plywood.

    Playroom Stage - cutting the top of the stage - Rain on a Tin Roof

    Use a circular saw to cut along the traced line.

    Step 5

    Use more construction screws along the corners and edges to attach the plywood to the frame.

    Small Stage for Playroom - attaching the top of the stage - Rain on a Tin Roof

    Step 6

    Paint it!

    Kids Stage for Playroom - painting the stage - Rain on a Tin Roof

    Like I said above, we used Behr’s Alkyd paint. I knew this thing would take a beating from the Circus and had actually planned on using oil-based paint which is super durable. However, the paint guy talked me into trying the Alkyd paint since it acts like oil-based paint in terms of durability but goes on like latex. It does have a smell though. It’s not as smelly as oil-based, but enough that I didn’t let the Circus sleep in her room for a couple of nights while this thing was still curing. She chose the purple paint color which is called Just a Fairytale. We did two coats of the paint.

    Step 7

    Cut the 1″ x 10″ x 8′ down to the length of your stage front. You will also have to cut down the height of this piece as well to match the height of your stage so that you don’t have a lip on the front of your stage which equals hurt kiddos. With the dimensions of our stage, we cut the 1″ x 10″ x 8′ down to 57″ long and 8″ tall. Paint this piece as well and then attach it to the front of the stage with finish nails and a hammer or a nail gun. We also added glittered wood stars to ours, which we just attached with hot glue.

    That’s it for the actual stage part!

    To make the stage header / sign:

    Step 1

    Cut your 1″ x 10″ x 8′ down to the width of your stage or the width from wall to wall if you are making your stage like ours.

    Step 2

    Paint and embellish it. We added wooden stars coated with gold glitter, and the sign that reads Landry’s Lounge. We hot-glued the stars on and then once the header was hung, I attached the Landry’s Lounge sign with a nail gun.

    Step 3

    Use corner braces to attach the sides of the board to the wall on each edge. If you aren’t going wall to wall, you can attach the braces on the board and then onto the ceiling above.

    To create the hidden dress-up storage and curtains:

    Step 1

    Install the shower curtain tension rod toward the back of the stage at a height your child can easily reach.

    How to Build a Stage with Hidden Dress-Up Clothes Storage - curtain hiding clothes - Rain on a Tin Roof

    Step 2 

    Run one of the tension rods through two of the curtain panels. Hang that curtain tension rod higher up on the wall, almost to the ceiling and slightly in front of the shower curtain tension rod. This will allow the curtains to cover up the play clothes when they are closed. It also creates a pretty backdrop as well.

    Kids Playroom DIY Stage - open curtains on stage - Rain on a Tin Roof

    Step 3

    For the curtains in the front of the stage, run two panels through a tension rod, then install it just behind the stage header.

    We opted for the yellow curtains (more colors also available!) because they complimented the purple so well. Now, these aren’t something I would hang up to block out light because they are thin, but for this little budding performer and her stage, they are perfect.

    We also replaced what was a single bare bulb light fixture with this chandelier to make it a bit more glam. The Circus picked it out and lord help us all, she is totally champagne taste on a beer budget.

    She got her microphone for Christmas and we have all had the best time playing with it. It also has a speaker attached to it that can hook to Bluetooth.

    Building a Kids Stage in a Playroom - Curtains Closed - Rain on a Tin Roof

    Fingers are crossed that this is just a small investment towards stardom. 😉

    But it’s ok too if she just decides to live a simple life. I mean, I might be a little bitter, but it’ll be ok. 😉

    Will you be creating a small stage for a playroom?

    More kiddo related posts you should see…

    How to Build Wall-to-Wall Shelving – these are perfect for toy storage!

    DIY Dress-Up Closet – this is made from a bookcase!

    How to Create an Object and Text Feature Wall – perfect decor addition to their bedrooms that display their fun personality!

    If you want to save this post to look at later, you can pin it here:

    How to Build a Small Stage for a Playroom - with hidden storage - Rain on a Tin Roof

    Gift Ideas Signature

    SaveSave

    SaveSaveSaveSave

  • Sparkly Horses Birthday Party

    Sparkly Horses Birthday Party

    Every year around the end of April, I feel the need to start drinking a tad bit more.

    Because a birthday party is on the horizon.

    And that means lots of planning.

    And organizing.

    And making.

    All in a specific timeframe.

    And I’ve never been good at any of that stuff all together at once.

    Thus, why the sparkly horse birthday party was two months ago and you are just now hearing about it.

    I needed time to recuperate.

    Sparkly Horses Birthday Party

    This post contains affiliate links. 

    Sparkly Horse Birthday Party / DIY Party Decorations / DIY Party Hats and More

    While many stuffed animals come and go around here, the horses never leave. The circus has an unwavering love for horses.

    It was obvious horses would be her 3rd birthday party theme.

    I actually did less in terms of decorations this year than the past two birthdays, which was nice. Here are a few of my favorite things from the party though.

    Horse Birthday Party / DIY Horse Wreath / DIY Party Decor / Horse Birthday Party Wreath

    I made a horse wreath to put on the front door. I started scouring thrift stores and yard sales for bigger sized horses a few months before the party and found that one for $0.25. I thought I would have to paint it, but it actually worked perfectly with the purple, pink and blue colors I used. The “3” came from the Target dollar spot. I just put gold glitter on it. I made a paper straw garland to drape across the wreath.

    Horse Birthday Party / Photo Number Collage / DIY Party Decorations

    There was also the annual number photo collage. Two and three have not been nearly as easy to make as “1” was. I picked up some vintage horse show ribbons at the Country Living Fair and draped it around the neck of one of the kid’s play horses and popped it beside the collage.

    DIY Party Background / DIY Party Decor / Horse Birthday Party / DIY Party Backdrop

    Inside, we had our also annual DIY party background. It’s just too easy and cheap not to make. I did opt not to make our own banner this year though and instead bought this one from Target. It worked pretty well with the rest of the decor and saved me some time. The black and white fans with horses were semi-DIY party decorations.

    DIY Birthday Party Hats / DIY Party Decor / Horse Birthday Party

    My favorite party decorations, excuse me, party attire, were the colorful and sparkly party hats. Once more, Target had the hats and we just added the horses after painting and glittering them up.

    Horse Birthday Party / DIY Party Decor / DIY Party Hats

    I spread out most of the hats on the buffet and tossed the horns in the clam shell.

    Also, I was a total slacker this year and did not make the birthday cupcakes.

    And it felt so good.  

    Instead, we had a horse birthday cake made and it was the most adorable (and scrumptious) thing I’ve ever seen or eaten. Local Chattanooga people – it was from the Irresistible Sweet Shoppe.

    The absolute best thing about the party though was the petting zoo. We hired Bagby’s Critter Corral to come out for an hour during the party and it was just awesome. They brought ponies, goats, sheep, pigs, rabbits, an alpaca and all other kinds of creatures. All the kids (and lots of the parents) had a ball.

    And the birthday girl got to ride a pony, which totally made her day.

    Need more DIY Party Ideas?

    Then, you’ll probably want to see this…

    DIY Party Decor Ideas

    pin-this-post-2

    Sparkly Horse Birthday Party / DIY Party Decorations / DIY Party Hats and More

    You know you don’t wanna miss any of this crazy.

    Sign up to get my posts delivered to your inbox here.

    Stalk Me Here:

    Bloglovin / Pinterest / Facebook / Twitter / Google+ / Instagram

    blog-signature-summer-15

    SaveSave

  • DIY Sunglasses Holder for $5

    DIY Sunglasses Holder for $5

    There are few things in this world better than a great pair of sunglasses. Make this DIY sunglasses holder to both store and display your sunglasses. 

    We have an Aunt Rochelle.

    I hope you have an Aunt Rochelle too. 

    You see, Aunt Rochelles always send the good stuff.

    It is not uncommon for multiple packages (sporting color coordinated designs & patterns) to arrive on the front porch anytime of the year.

    It may be Christmas.

    Or it may not.

    It may be a birthday.

    Or it may not.

    Said packages will contain not one, not two, but multiple ensembles for the circus.

    Each ensemble is complete with a top, pants, cardigan, usually a skirt, socks, matching beret, and my favorite – matching sunglasses.

    And during the summer she gets multiple swimsuits with matching cover-ups, hats, and sunglasses.

    The kid has Jackie O sunglasses, pink sunglasses, movie star sunglasses, Iris Apfel sunglasses, floral print sunglasses, checked sunglasses.

    If she has an outfit from Aunt Rochelle, then she has the matching sunglasses.

    See why we love our Aunt Rochelle?

    We also love her because she’s just a load of fun too.

    With this vast assortment of sunglasses, it felt wrong just putting them in a drawer and only bringing them out as needed to complete an ensemble.

    No, no, no, no, no – sunglasses like this should be displayed.

    So Grunt Labor and I came up with this version of sunglasses storage so that the kid could enjoy her shades even inside.

    DIY Sunglasses Holder for $5

    I know. 

    Freakin’ adorable, right?

    It costs right around $5 to make this display piece and is a pretty easy build as long as you know how to use a drill.

    DIY Sunglass Holder

    This post contains affiliate links for your shopping convenience. Click here to read my full disclosure policy.

    Supplies Needed:

    Supplies for a DIY Sunglasses Holder

    Step 1: 

    Drill a hole into the bottom of the wood base that is slightly smaller than the largest dowel rod, then set aside.

    Drill hole in base for DIY Sunglasses Holder

    Step 2: 

    Determine how tall you want your DIY sunglasses holder to be. Ours is 11 inches. Cut the largest dowel down to this length, then set aside.

    Step 3: 

    Cut the smallest dowel into three inch lengths, then set aside. If you are doing this for adult sized sunglasses, you may need to make them longer.

    Step 4:

    Place the largest dowel in a vice or have another person hold it securely down. Drill holes down the dowel that the smallest dowels will fit snugly into. Our holes are two inches apart from center to center. Once more, you may need to make these larger for adult sized sunglasses.

    Drill holes in dowel for DIY Sunglasses Holder

    Step 5: 

    Place the small dowels into the larger dowel. These should fit pretty snugly and not need glue, but if some are loose, put a drop of wood glue in the hole before putting in the smaller dowel. Wipe away excess glue.

    Step 6:

    Place wood glue into the bottom of the wood base / plaque and place the large dowel into the base. Wipe away excess glue.

    Step 7: 

    Spray paint your sunglasses holder whatever color your little heart desires, then deck it out with sunglasses.

    Sunglass Holder

    Our new DIY sunglasses holder is actually residing atop the kid’s new dress-up closet, however, I couldn’t resist photographing it in front of the leopard print wall.

    P.S. Aunt Rochelle, can I get some sunglasses in my size too? I’ll take complete outfit ensembles as well. 😉

    P.P.S. Sorry folks, we won’t share her.

    Want more great ideas for the littles in your life?

    DIY Headband Holder – and it only costs $5 to make.

    DIY Kids’ Play Table with Storage – this bad boy is the perfect surface for playing farm, race cars, dinosaurs and more.

    DIY Children’s Stage with Hidden Dress-Up Storage – this stage is a simple build and will provide loads and loads of fun for your kiddo.

    Stalk Me Here:

    Pinterest / Facebook / Twitter / Instagram

    blog-signature-summer-15

    pin-this-post-2

    DIY Sunglasses Storage

    SaveSave

  • Dress Up Closet: Easy DIY Dress Up Storage from a Bookcase

    Dress Up Closet: Easy DIY Dress Up Storage from a Bookcase

    Coming up with great storage solutions for your kids’ toys and paraphernalia can often be hard – not this one though! If dress up clothes are taking over your life then make this DIY dress up closet now! A bookcase is all you’ll need to get started and create dress up storage to save your sanity and a dress up station your little one will love!

    The circus has discovered princesses.

    Specifically Belle and Cinderella.

    She’s also discovered ballerinas and cowgirls and doctors.

    And she wants to be all those things.

    Numerous times throughout the day.

    Luckily, she hasn’t morphed into a total girly girl. Let’s be honest – I don’t know if I could handle that.

    Its more like tutu one minute and mud the next.

    I’ll take that any day over constant tea parties and tiaras. 

    I thought I had the dress-up department confined to one box.

    And then her birthday happened.

    Suddenly, it was as if all of Broadway’s costume department threw up in her room.

    There were meltdowns over not being able to find Ariel’s shoes to wear with Sophia’s dress – not to mention all the other princess dresses that were lost to the hurricane that went through her room.

    It was around that time that a great idea finally hit me as to what I would do for the IKEA Billy Bookcase Hack that HomeRight asked me to participate in – it would become a super cute kids dress up closet.

    DIY Dress Up Closet using a Bookcase - Rain on a Tin Roof

    Disclosure: This post was a collaboration with HomeRight. However, all opinions and love of easy hacks that prevent meltdowns are 100% mine. This post contains affiliate links for your shopping convenience. Click here to read my full disclosure policy.

    I can’t begin to tell you how much the kid loves her new dress up storage. I’ve only heard that many “wows” from her once or twice before.

    And more importantly, mama hasn’t had to go on a mad search into a pile of never-ending dress up clothes for a missing Belle shoe.

    I almost feel bad calling this a “hack” because it was so easy, but technically its not what its meant to be, so that is a hack, right? And the easier the hack the better. 

    P.S. The bookcase is only $40. If you have paint and a mirror lying around to use, there’s a pretty good chance you can get out of this thing for $50.

    That’s a small price to pay to end meltdowns and keep your sanity.

    Also, it doesn’t have to be an IKEA bookcase – any mid-size bookcase will do!

    DIY Dress Up Station

    Materials and Supplies Needed: 

    Steps

    Step 1: 

    First off, you just want to assemble the bookcase as the directions say. The only thing you don’t need to worry about is putting in the shelves.

    Step 2: 

    Cut the dowel rod down to the width of the bookcase opening. Place the dowel where you would like it and use a nail gun to secure the dowel in place on either side of the bookcase.

    Bookcase Before Becoming a Dress Up Station - Adding the hanging bar - Rain on a Tin Roof

    You can also do this with a drill and a couple of screws if you prefer. I opted for the nail gun because it was easier. It also helps to have someone hold the dowel in place and make sure its level as you attach it to the bookcase. Not that mine wasn’t level the first go-round or anything.

    If you have another kind of hanging bar lying around, you could use that too as long as it fits within your bookcase and is sturdy enough for hanging clothes on.

    Painting the Kids Dress Up Closet

    Step 3: 

    Paint the bookcase and shelves.

    For this hack, I got to use one of my favorite toys and a new toy that is quickly becoming a favorite.

    Painting the DIY Dress Up Closet using the HomeRight Spray Shelter - Rain on a Tin Roof

    HomeRight just introduced their Spray Shelter. It is the best thing ever for painting in a garage or similar enclosed area. It keeps any paint overspray contained and takes less than 10 minutes to set up.

    My husband only wishes they had made it sooner so that his beloved tiller wasn’t speckled with black, kelly green, and navy dots. 🙂

    Using a paint sprayer to paint a kids dress up closet - Rain on a Tin Roof

    To paint the bookcase, I used my HomeRight Finish Max paint sprayer. This sprayer is by far the easiest paint sprayer I’ve ever used and gives a perfect fine finish. The best part is that no air tank is required – you just plug it in and go.

    Painting an upcycled bookcase with a HomeRight Paint Sprayer - Rain on a Tin Roof

    Since this piece is solely for the circus, I asked her what color she wanted it painted. She said blue. I had some Boheme by Velvet Finishes on hand, so that was what we went for. I thinned the paint with water before spraying it on.

    Shelves for the DIY Dress Up Storage - Rain on a Tin Roof

    To paint the shelves, I just laid them out on 2 x 4’s across sawhorses.

    Step 4: 

    After the paint was good and dry, I gave the bookcase a good topcoat of Polycrylic, then cleaned the paint sprayer.

    HomeRight has another new toy that makes cleaning the sprayer a breeze.

    Cleaning a HomeRight Finish Max Paint Sprayer - Rain on a Tin Roof

    Its called the Rapid Clean. You hook one end up to a water hose, the other up to your paint sprayer, turn on the water and pull the trigger.

    How to Clean a Paint Sprayer - Rain on a Tin Roof

    You’re all done with cleaning in a matter of minutes.

    Step 5:

    Once the topcoat was dry, I placed the shelves toward the bottom of the bookcase and took it up to the kid’s room.

    Dress Up Storage made from a Bookcase - Rain on a Tin Roof

    Mama saved the day with a mirror that she had hung onto from her childhood home. To make sure the mirror was secure, I found a stud in the wall behind where the bookcase would be, then marked that spot on the bookcase and cut out a small hole. There, I drilled a screw into the stud that I then hung the mirror on.

    The lower shelves hold shoes and hats.

    Dress Up Closet for Toddlers - Shoe Storage on Bottom - Rain on a Tin Roof

    I also made some DIY animal jewelry holders for the side of the dress up center.

    Dress Up Storage IKEA Bookcase - jewelry holders - Rain on a Tin Roof
    DIY Dress Up Station for Kids from a Bookshelf - Rain on a Tin Roof

    I topped it off with quote art (which pretty much sums the circus up) in a DIY lucite frame as well as a DIY sunglasses holder.

    DIY Sunglasses Holder - Rain on a Tin Roof

    And a DIY headband holder.

    DIY Headband Holder - Rain on a Tin Roof

    Well, what do ya think?

    Not too shabby for an easy $50 IKEA Billy Bookcase Hack, eh?

    Looking for more great projects to bring a smile to your kid’s face?

    This DIY Children’s Stage with Hidden Dress-Up Storage has brought our little girls countless hours of fun!

    Easiest Ever DIY Lemonade Stand – perfect for those little budding entrepreneurs in your life!

    How to Create an Object and Text Feature Wall for Your Little One – the perfect way to add a punch of their own special personality to their room.

    This diy wall-mounted drop down art desk has kept my little girl occupied for hours.

    DIY Kids’ Play Table with Storage – she loves playing farm on this table! It’s great for all kinds of things!

    Want to save this tutorial for later? Just pin the image below!

    How to Make a Dress Up Center - Rain on a Tin Roof

    You know you don’t wanna miss any of this crazy.

    Stalk Me Here:

    Pinterest / Facebook / Twitter / Instagram

    Storage Solutions for Kids - Dress Up Closet - Rain on a Tin Roof

    SaveSave

  • Care Bear and Rainbow Party {I Survived….Barely}

    Care Bear and Rainbow Party {I Survived….Barely}

    Seriously y’all, I don’t think I’ve ever been so happy to have a birthday party over with.

    Not that it wasn’t a great little party and yes, I’m a little sad the kid is growing up so fast, but party planning and party decorating for kids birthdays are just. so. exhausting.

    Can I get an amen?

    This year we opted for a Care Bear and Rainbow Party for the kid’s birthday. When I started planning it, she was really into her stuffed bears, by the time the party rolled around she was really into her stuffed dogs. Can’t go anywhere without a stuffed dog these days.

    Kid changes her mind more than I do.

    Care Bear and Rainbow Party via RainonaTinRoof.com #rainbow #party #kids #carebears #diy #partydecorThis post contains affiliate links for your shopping convenience. Click here to read my full disclosure policy.

    This post is an overview of the entire party. I’ll be sharing the details on all the DIY party decorations I made over the next few weeks.

    Care Bear & Rainbow Party

    Guests were greeted by a photo collage in the shape of a 2 as they came in the door.

    Care Bear and Rainbow Party via RainonaTinRoof.com #rainbow #party #kids #carebears #diy #partydecor

    Its a little different than our “1” photo collage from last year, but still the same idea.

    A Care Bear sign with rainbow streamers was on the door…

    Care Bear and Rainbow Party via RainonaTinRoof.com #rainbow #party #kids #carebears #diy #partydecor

    And just in case you didn’t know, the reason for all the rainbows is because in Care-A-Lot, where all the Care Bears live, there are lots of rainbows coming out of clouds.

    You feel incredibly well-educated all of a sudden, don’t you?

    Its ok, you can admit it.

    Care Bear and Rainbow Party via RainonaTinRoof.com #rainbow #party #kids #carebears #diy #partydecor

    The dining room was the main attraction.

    Care Bear and Rainbow Party via RainonaTinRoof.com #rainbow #party #kids #carebears #diy #partydecor

    Complete with white cloud balloons and a rainbow made from streamers.

    I found that the best thing to attach the balloons and streamers to the ceiling was with masking tape. It held it all up – not one fell – and it didn’t take off too much of the ceiling. I have popcorn ceilings, but you can’t tell where the tape strips were. To make the tape part of the decorations, I used this bright yellow masking tape.

    Care Bear and Rainbow Party via RainonaTinRoof.com #rainbow #party #kids #carebears #diy #partydecor

    I made another easy party backdrop, but gave it a twist. The details on it are here.

    I also made the birthday sign, which is different from last years, but still easy.

    Each one of her Care Bears got their own party hat – you have no idea how difficult it can be to make such a tiny party hat.

    Care Bear and Rainbow Party via RainonaTinRoof.com #rainbow #party #kids #carebears #diy #partydecor

    The DIY cupcake pedestals made another appearance as well.

    Care Bear and Rainbow Party via RainonaTinRoof.com #rainbow #party #kids #carebears #diy #partydecorThe kid also got a new party hat, complete with bright poms. That party hat worked about as well as last year’s did.

    Care Bear and Rainbow Party via RainonaTinRoof.com #rainbow #party #kids #carebears #diy #partydecor

    Both chalkboards got a birthday treatment.

    Care Bear and Rainbow Party via RainonaTinRoof.com #rainbow #party #kids #carebears #diy #partydecor

    My chalkboard skills are definitely still lacking, but hey I gave it a whirl. I did discover that this colored chalk is my all-time favorite colored chalk. The colors were so vivid – especially helpful in distracting eyes away from my horrible chalk penmanship.

    And what was the kid’s favorite part of her birthday?

    The balloons. All she wanted to do after the party and for the following two days was to run around with 12 balloons in her hand.

    Those balloons took a freedom flight night before last.

    Mama had enough.

    Stick around for the details on all the party decor!

    You can see last year’s party and all the DIY party decorations that went along with it here.

    Have you thrown a Care Bear or Rainbow Party before?

    Did you also come out of it needing a drink in your hand for the next few days?

    Anyone? Anyone?

    Need more great DIY party decor ideas on a budget? You’ll want to see these then…

    Easy DIY Cake Topper – make an easy cake topper to complement your party theme using just scrapbook paper and stickers!

    DIY Birthday Party Hat – it will take you all of five minutes and it’s so stinking adorable!

    Make Your Own Custom Party Invitations – this is so easy and gives the party a great personal touch!

    You know you don’t wanna miss any of this crazy.

    Sign up to get my posts delivered to your inbox here. 

    Stalk Me Here:

    Pinterest / Facebook / Twitter / Instagram

    SaveSave

  • 9 Nursery Ideas That Won’t Break the Bank

    9 Nursery Ideas That Won’t Break the Bank

    Let me go ahead and squash what all of you are thinking.

    I am not pregnant. 

    Nor do I have any plans of being pregnant. I am a one and done parent. Or even a one and fun kind of parent. To all you other parents out there that have multiple children, my hat is off to you. The thought of having another one just makes me want to go take a nap. Grunt Labor, the kid, and I are perfectly happy as a unit of three.

    Over the past week during the fiasco of preparing for the kid’s birthday party (details coming soon), I started thinking about her nursery and what all has worked in there for us, what didn’t work and what I would do differently. I thought some of you guys with kiddos on the way, may want to hear my words of wisdom.

    Or not.

    But trust me, my words of wisdom on nursery ideas and decorating is far better than my words of wisdom on actual parenting. At least I can admit it.

    Nursery Ideas that won't break the bank via RainonaTinRoof.com #nurseryideas #nursery #diy

    (more…)

  • A Vintage Inspired Nursery Makeover

    A Vintage Inspired Nursery Makeover

    Baby girl’s nursery has changed, and had a few little improvements since I last posted about it. So, I thought it might be fun to share some new photos with you! I didn’t want a nursery for her that would be full of brightly color characters. I wanted something more authentic, I guess you could say. So, I created a vintage nursery for her.
    A Vintage Nursery {rainonatinroof.com} #vintage #nursery

    A Vintage Nursery

    Vintage Inspired Nursery Makeover
    Vintage Inspired Nursery Makeover

    The dresser was a $75 Craigslist find. I sanded and painted it Salmon Pink by Behr. The mirror was another Craigslist find, $30, that was previously gold.

    Vintage Inspired Nursery Makeover

    I picked up a couple of vintage nursery rhyme books at an antique store and framed my favorites in simple white frames from Michael’s.  Read more about those here.
    I wanted the wall color to be something she could grow with. I took a paint swatch of some gray paint I loved to Home Depot and had them custom color match it with Behr paint.

    Vintage Inspired Nursery Makeover
    The coat rack is really just a piece of old barn wood from the family farm with a piece of molding on top and hardware from Lowe’s.
    Vintage Inspired Nursery Makeover
    I found the hamper at the Salvation Army for a whopping $2. It did not look anywhere near this cute when I got a hold of it. It had been painted yellow, which was peeling, and had this  horrendous floral pattern underneath that. I sanded it and sprayed it blue. The top wouldn’t take paint well, so I used fabric to cover it. Grunt Labor was way “wowed” by this. He thought it was the cutest thing ever. Score.
    Vintage Inspired Nursery Makeover

    I picked up an old chandelier at Habitat for Humanity ReStore and spray painted it the same color as the hamper and coat rack.

    Vintage Inspired Nursery Makeover
    The chair was another Craigslist find. I made something close to a slipcover for it (there’s a reason there is no close-up photo of the chair). I called about having a professional make one, but that was going to be in the ballpark of $300. Um, no, I will not pay $300 for a slipcover for a chair I paid $25 for and will probably get rid of in a few years….So, it got a makeshift slipcover and so far, so good.
    Vintage Inspired Nursery Makeover

    The bedding was purchased from Etsy. As soon as I saw it, I knew it was what I wanted for the room.

    Vintage Inspired Nursery Makeover
    I made the tissue paper pom-poms that hang in the corner. The artwork above the bookshelf was actually from the end of my crib when I was a bambino. The bookshelf used to sit in my grandparent’s den. I remember my crayons being stored in a cigar box on the bottom shelf for me to easily access them. Landry’s cigar box is already there, just waiting on crayons. She would totally eat them now. Go ahead and judge the cigar box crayon storage. I don’t really care what you think about it. Its not like there are cigars in the box. Wait – I better go check…..
    Vintage Inspired Nursery Makeover
    The Bambi wall art was in Grunt Labor’s nursery when he was little. I was over the moon when my mama-in-law broke out those bad boys!
    What do you think? The perfect amount of vintage nursery without it looking old?

    Need more nursery ideas? Here are nine ones that won’t break the bank!

    You know you don’t wanna miss any of this crazy.

    Sign up to get my posts delivered to your inbox here. 

    Stalk Me Here:

    Pinterest / Facebook / Twitter / Instagram

  • A Stylish Blue and Pink Birthday Party

    A Stylish Blue and Pink Birthday Party

    We made it through year one. No serious injuries, no serious sickness, only busted her lip a few times, fell off the couch and bed a couple times, multiple bruises, and I only let her eat a clump of dirt once. We. Survived. It. Hallelujah.

    To celebrate the big day, we threw a blue and pink birthday party. As much as I may or may not love the Care Bears and Strawberry Shortcake theme ideas, we went for a more stylish approach to the party: Blue & Pink.
    Pink and Blue Birthday Party
    With the exception of running out of gas for the grill and setting off the smoke alarm (luckily Grandma rigged it with a plastic bag), the party went great! But hey, at least we can tell her a funny story about her 1st birthday.
    This post contains affiliate links for your shopping convenience. Click here to read my full disclosure policy.
    Pink and Blue Birthday Party
    If you remember my birthday party inspiration board, you know I used a lot of ideas from Jamie at Better with Age and April at House by Hoff.
    Blue and Pink Birthday Party Ideas
    I loved Jamie’s cake for her little girl with all the sprinkles. I ended up not using the recipe she did, but still going for the sprinkle effect on top. I read that recipe and totally knew I was not a good enough baker to pull it off.  She also put really cute sprinkles around the bottom of her cake, but once more, I am not very good at icing (Thank God my amazing mother-in-law was here to salvage the cake), so I opted to not attempt the sprinkles around the bottom.
    To top the cake off, I made the happy birthday banner for it.
    Blue and Pink Birthday Party Ideas
    The kid got her very own cake served on a silver platter. Spoiled much? Grunt Labor iced it because at that point in the day, I was done icing cakes and cupcakes and in desperate need of alcohol. These birthday parties are BEASTS! My hat is off to all you folks with multiple kids!
    Blue and Pink Birthday Party Ideas
    Blue and Pink Birthday Party
    We also served cupcakes. I did use the same recipe Jamie did for her cupcakes, which can be found here.
    The white cupcake pedestals were thrifted finds I put together for less than $3 each. I’ll show you how to do those here.
    I completely stole the idea for the balloon cupcake toppers from April. She made flowers for her cupcake toppers and shows you how to make them here. I made the tissue paper flowers, similar to the ones April also made. They were very easy to make, a lot like my tissue paper pom-poms, just on a smaller scale.
    Blue and Pink Birthday Party
    We served pink lemonade and had some blue and pink striped straws for extra flair and decor.
    Blue and Pink Birthday Party
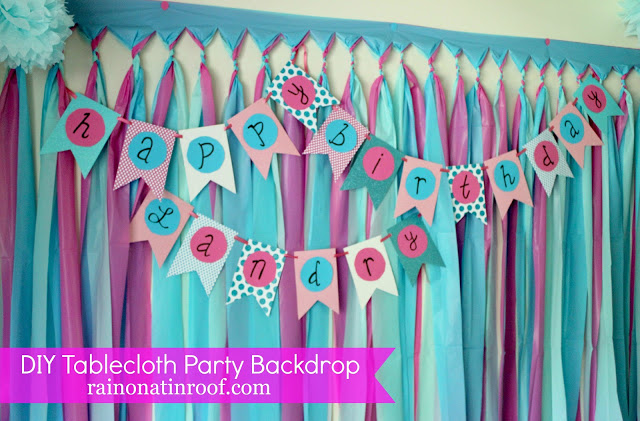
    The backdrop is made from tablecloths – super easy, I’ll show you how to make it here – and I made the banner out of scrapbook paper – I’ll show you how to do that here! I threw together some of the tissue paper pom-poms to hang from the ceiling.
    1st Birthday Chalkboard
    1st Birthday Chalkboard Wall
    I decorated both chalkboards with birthday themes and the best chalkboard writing skills I could muster.
    Blue and Pink Birthday Party
    While scouring through the attic a couple months back, I found this Happy Birthday musical thing-a-ma-bob that was my Dad’s. I thought it fit perfectly with the theme, so I set it out as a little vintage touch. Sorry, Dad, I’m sure the “vintage” description makes you feel old.
    1st Birthday Party Ideas
    I took an old barn door from my great grandfather’s farm and made a picture collage in the shape of a 1 to greet guests as they entered. See the full barn door tutorial here.
    Remember the super cute DIY party hat I made? That is how that turned out…
    See all my DIY party decorations and ideas here.
    You know you don’t wanna miss any of this crazy.

    Sign up to get my posts delivered to your inbox here. 

    Stalk Me Here:

    Pinterest / Facebook / Twitter / Instagram

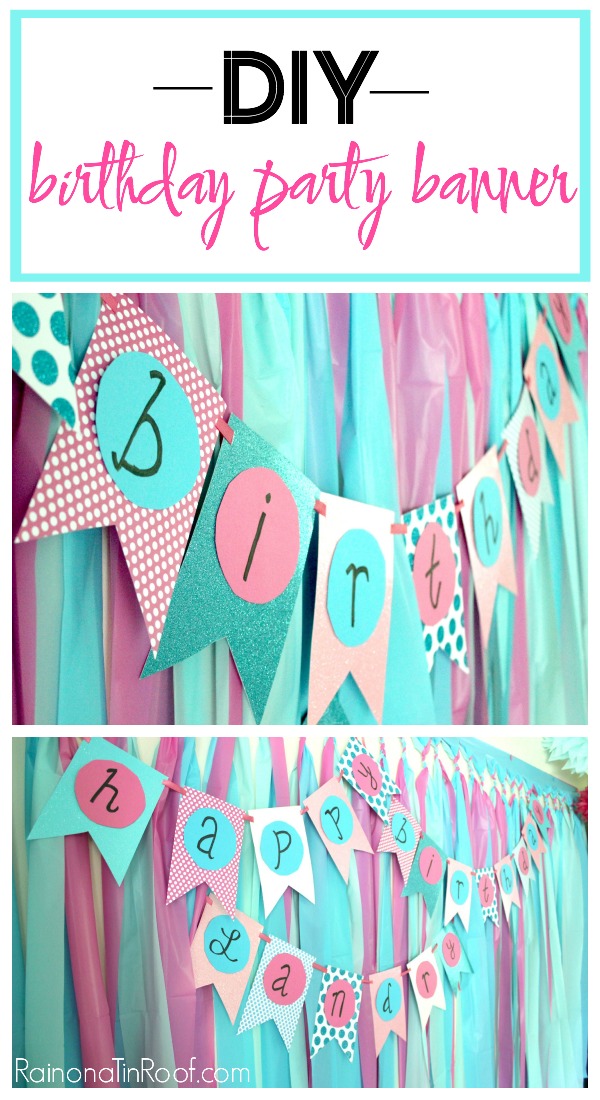
  • DIY Birthday Banner: Simple and Affordable

    DIY Birthday Banner: Simple and Affordable

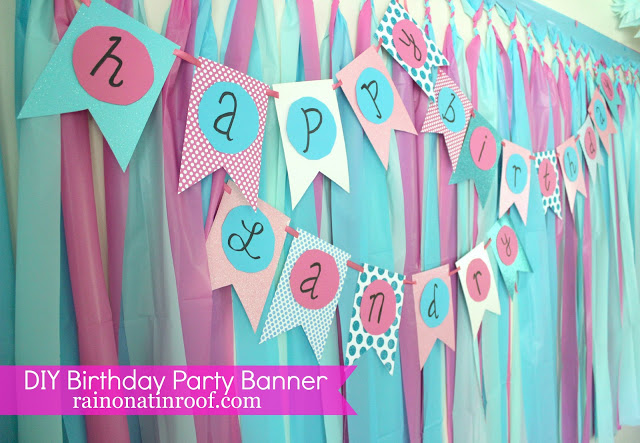
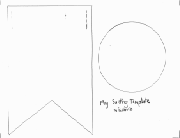
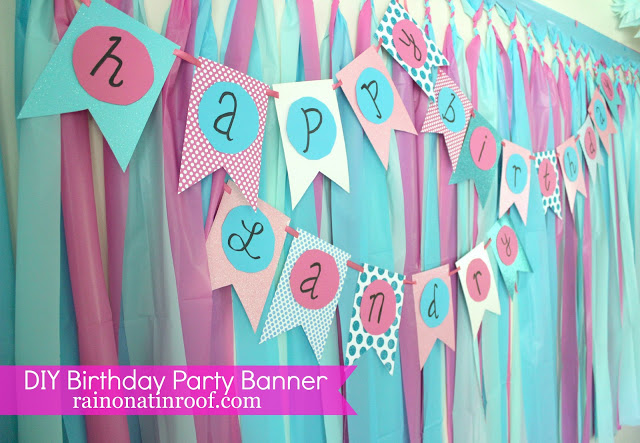
    Looking for a simple to make, yet adorable DIY birthday banner? Look no further! This DIY banner is easily made with a printable template, card stock, scissors and markers. You can fully customize it to match your party’s decor! 
    This DIY Birthday Banner is one of the many homemade DIY party decorations I made for my daughter’s 1st birthday party.
    DIY Birthday Banner - made with cardstock and markers -  Rain on a Tin Roof

     It was a blue and pink themed party with LOTS of DIY party decorations (did you really expect me to pay lots of $$ for it all considering how cheap I am?)!

    This DIY party banner hung on top of the DIY party backdrop. The banner was super simple to make and turned out really cute! Really, it can be a DIY banner for any kind of celebration – customize it to your own liking!

    This post contains affiliate links for your shopping convenience. Click here to read my full disclosure policy.

    Happy Birthday Banner DIY Project

    Materials Needed:

    • Scrapbook Paper or Cardstock (I got about two “flags” out of a 12×12 piece of scrapbook paper. I got all my paper at Hobby Lobby.)
    • DIY Birthday Banner Template (found here)
    • Adhesive Mounts of some sort (I used these)
    • X-Acto Knife or Hole Punch
    • Ribbon (I used this kind)
    • Sharpie
    • Scissors

    I know I took pictures of this process, but it appears, I have deleted those photos! I am so sorry, but I promise, this is so easy you really don’t need photos.

    Steps

    Step 1:

    Print out the banner template noted in the supply list from Miss Lovie Creations. She did a great job of making her DIY birthday banner and I did mine similar to hers.

    Happy Birthday Banner DIY - DIY Birthday Banner Template Printable -  Rain on a Tin Roof
    Source

    Step 2:

    Cut out the template. I used regular scissors for this.

    Step 3:
    Place the banner template over the back of your scrapbook paper or card stock and trace it with a pencil. Trace as many banners and circles as you will need. To spell out just “Happy Birthday,” you’ll need 13 banners.

    Step 4:

    Cut out the traced pieces. I used scissors for this as well, but you could use the X-Acto knife.

    Step 5:

    Place the circle template over scrapbook paper or card stock. Trace as many circles as letters you need. Again, you’ll need 13 to spell out “Happy Birthday.” I chose to use just blue and pink solid card stock for this so that my letters didn’t disappear on patterned paper.

    Step 6:

    Cut out circles.

    Step 7:

    Write your letters on the circles. I used a pencil to sketch the letters out and then just went over them with a sharpie.

    Step 8:

    Use the adhesive mounts or some other adhesive to attach the circles to the flags. Hot glue would probably work fine as well.

    Step 9:

    Use the X-Acto knife to cut small slits in each upper corner of the flags. If you don’t want to use the X-Acto knife for this, you could also use the hole punch.

    Step 10:

    Weave your ribbon in and out of the flags to string them together, then hang with thumbtacks.

    All done! Easy peasy!

    How to Make a Birthday Banner - Homemade birthday banner on party backdrop -  Rain on a Tin Roof

    I put my thumbtacks behind the backdrop to keep them hidden.
    DIY Banner - How to Make Homemade Banners using Cardstock -  Rain on a Tin Roof

    Now aren’t you glad you learned how to make a birthday banner?

    Told you it was super easy!
    Need more DIY party decoration ideas? I totally have you covered!
    DIY Birthday Party Hat – so cute and takes about 5 minutes to make with scrapbook paper!
    DIY Bunting Cake Topper – another easy scrapbook paper and sticker project!
    DIY Cupcake Pedestals – made with thrift store items and you can use them over and over again!
    DIY Tablecloth Party Backdrop – the easiest and cheapest party backdrop EVER! It’s made from plastic tablecloths!
    And you can always find all my DIY party decorations HERE!
    Want to come back here later? Just pin the image below!
    How to Make Homemade Banners for Parties -  Rain on a Tin Roof

    Sign up to get my posts delivered to your inbox here. 

    You know you don’t wanna miss any of this crazy.

    Stalk Me Here:

    Pinterest / Facebook / Twitter / Instagram

    How to Make a Happy Birthday Banner - customizable for any party -  Rain on a Tin Roof

  • DIY Birthday Hat for less than $5 in 15 minutes

    DIY Birthday Hat for less than $5 in 15 minutes

    Can’t find the perfect party hat for the big bash? Don’t fret! Make your own DIY birthday hat in no time using this tutorial for how to make a party hat out of paper! It’s super easy using the provided party hat template!

    As you all probably know by now, there is a big birthday party to be had. Baby girl is turning one. Of course, she must have a party hat. I would not settle for your typical birthday hat you can buy at a party store. Those are fine and dandy, but no, no, no. I wanted something that she would really hate me for later in life. That’s how I roll. So, along with all the other DIY party decorations, I made this birthday party hat for her.

    DIY Birthday Hat using Party Hat Template - Rain on a Tin Roof

    Yes, this should do. This birthday hat was surprisingly VERY simple to make. Here’s how to do it…

    How to Make a Birthday Hat

    This post contains affiliate links for your shopping convenience. Click here to read my full disclosure policy.

    Materials Needed:
    • Birthday Hat Template (can be found here)
    • Scissors
    • Cardstock Paper in Color / Patterns of Your Choice
    • X-Acto Knife
    • Hot Glue Gun
    • Items for decorating the hat (optional) – I used a pom pom maker to make pom poms for embellishing the hat.
    • Ribbon or Elastic String

    Steps

    Step 1

    Print the party hat template noted above, then cut out the template.

    Party Hat Template - Rain on a Tin Roof

    Step 2

    Place the template over the paper you are making your party hat out of.

    How to Make a Party Hat Out of Paper - Rain on a Tin Roof
    I found this super cute blue glitter dots scrapbook paper at Hobby Lobby.
    Trace around the template onto your party hat paper, then cut it out.
    DIY Party Hats using a Birthday Hat Template - Rain on a Tin Roof
    Use the X-Acto knife to make slits on the cardstock paper where the template notes.
    Step 3
    Wrap the scrapbook paper into a cone shaped hat and stick the tab in the slot. I did have to make my slot a bit longer than the template had. I also hot glued under the tab to secure it once it was in the slot.
    Step 4
    If you want to embellish your birthday hat further, then do so now.
    I used my Pom-Pom maker to make pom poms to add to the hat.
    How to Make a Birthday Hat - embellishing with pom poms - Rain on a Tin Roof
    Some people make these with forks, but I have always used my makers. I used the large green one for the pom-pom on top of the hat. I also made 6 small poms with the pink one to place around the bottom edges of the party hat. I just hot-glued those bad boys right on the hat.
    Step 5
    For our straps, I bought some pink ribbon and made a small slit on each side of the party hat. I tied a knot on the inside of the hat to secure the ribbon.
    How to Make a Paper Party Hat - Rain on a Tin Roof
    You could also hot glue the ribbon or elastic string to the inside bottom edge  to secure the hat onto the party guy or gal.
    Make a party hat using cardstock - Rain on a Tin Roof
    And of course, we had to give the first birthday hat a test run…
    Yep, you can already see the disbelief and resentment in her face. Score.

    Any DIY Party Hats in your future?

    See another version of this party hat here and loads more party ideas are here. Make sure you don’t miss this easiest ever and cheapest ever DIY party backdrop using plastic tablecloths either!
    Want to come back here later? Just pin the image below!
    Birthday Party Hat DIY - Rain on a Tin Roof
    You know you don’t wanna miss any of this crazy.

    Sign up to get my posts delivered to your inbox here. 

    Stalk Me Here:

    Pinterest / Facebook / Twitter / Instagram

    SaveSave

  • How to Create an Invitation in PicMonkey

    How to Create an Invitation in PicMonkey

    Learn how to make your own party invitations with this PicMonkey invitation tutorial! You can customize it with any colors or fonts of your choice.

    This post contains affiliate links for your shopping convenience. Click here to read my full disclosure policy.

    With the kid’s 1st birthday quickly approaching, I realized I had better get some invitations made for her birthday party.

    As many of you already know, I am a big PicMonkey fan. I love all the cool things it lets you do with photos. And for just $6 a month, it is well worth the money since you can save boatloads on creating your own invitations, holiday cards and more and not pay retail for them! If you don’t have a Picmonkey subscription yet, you can get a free trial by clicking here.

    I have used PicMonkey for my master bedroom wall art, my blog design, and to make my pictures “pin-worthy,” among other things. So, with the help of Picmonkey, I whipped up some pretty stellar invitations for the kiddo’s birthday.

    Picmonkey Invitation Tutorial

    How to Create an Invitation with Picmonkey

    Isn’t it adorable? The birthday party theme” is pink and blue, thus why those pops of color in the invitation.
    This invitation was pretty simple to make. Here’s how I created this Picmonkey invitation:
    Step 1
    The first thing you want to do is upload an image for your background. I used a chalkboard background I found for free here.
    Step 2
    Next, add any other overlays you want to use. I added the blue borders I found here. The banners and labels were all found on PicMonkey. I put where you can find them in the image below.
    DIY Picmonkey Invitation
    Step 3
    Now, its time to add your text. All you do is add the text box and place it where you want it on the image. I put what fonts I used in the image below.
    DIY Party Invitation with Picmonkey
    Step 4
    Once you have your Picmonkey invitation how you want it, save it. At this point, you can opt to print it off locally or you can go to Picmonkey Print and print from there – one stop shop.

    What kind of Picmonkey invitations will you whip up?

    Want to see other party invitations I’ve made with Picmonkey…

    Colorful Polka Dots Invitation – a basic party invitation that’s great for any party!

    Farm Birthday Party Invitation – perfect for your next hoedown!

    Need more party ideas? Here you go:

    How to Make a Superhero Party Banner with Picmonkey – easy and you can switch it up to match your party’s decor!

    DIY $5 Party Backdrop – so stinkin’ easy, cheap and an awesome party decoration!


  • DIY Tissue Paper Pom Poms (Easy and Fun)

    DIY Tissue Paper Pom Poms (Easy and Fun)

    Aren’t these tissue paper pom poms so fun?

    How to Make Tissue Paper Pom Poms
    Instead of a mobile in the vintage style nursery, I thought these would be much more pretty and stylish! And, we all know, my kid has gotta have style!
    DIY Tissue Paper Pom Poms
    I used this simple tutorial from Martha Stewart, that you can find here. All you need is tissue paper, floral wire and fishing line.
    Way easy and CHEAP!!!
    Tissue Paper Pom Poms Tutorial
    I also made some of these for my daughter’s blue and pink birthday party. And notice those little tissue paper flowers in the mason jar, there? I used the same tutorial for those as I did the poms, I just made them on a smaller scale.
    Looking for more great nursery ideas on a budget? Be sure to see these nine nursery ideas that won’t break the bank!

    Sign up to get my posts delivered to your inbox here. 

    You know you don’t wanna miss any of this crazy.

    Stalk Me Here:

    Pinterest / Facebook / Twitter / Instagram

  • DIY Vintage Nursery Rhyme Prints

    DIY Vintage Nursery Rhyme Prints

    If you remember, I bought some vintage nursery rhyme books and made this cute tissue box cover for the nursery….

    Vintage Nursery Rhyme Tissue Box Holder
    I also chose 6 of the nursery rhymes to frame. I bought simple white frames at Micheal’s and used scrapbook paper as the background.
    Framed Vintage Nursery Rhyme
    Vintage Nursery Rhymes Framed
    Framed Vintage Nursery Rhymes - Nursery Art
    Vintage Nursery Rhyme Prints for Nursery Decor
    Simple, cute, and vintage. How can you go wrong with that combination?
    What do you think of the bambino’s vintage nursery rhymes framed prints?

    Looking for more easy wall decor? Check these out:

    How to Make a Silhouette the Easy Way – you seriously won’t believe how stinkin’ easy this is!

    Sassy Fabric Covered Message Board – a fun way to display family reminders!

    Monogram Photo Art – turn family photos into monogram art!

    Song Lyrics as Wall Art – take your favorite song lyrics and make them art!

    DIY Wall Art with Picmonkey – can’t find the art you want, make it then!

    You know you don’t wanna miss any of this crazy.

    Sign up to get my posts delivered to your inbox here. 

    Stalk Me Here:

    Pinterest / Facebook / Twitter / Instagram