Blog

  • How To Get Pet Stains and Odors Out of Your Carpet without Chemicals

    How To Get Pet Stains and Odors Out of Your Carpet without Chemicals

    I am not a dog person.

    I’m not really a pet person at all.

    Some of you may have just decided to unsubscribe from my blog. I fully understand that not being very fond of pets, especially dogs, is considered to most very un-American.

    You see, I was always skiddish around them when I was a kid – like even a small kid when you are supposed to love all cute and cuddly things. I’m past the skiddish part, but I cannot stand to be licked by a dog or have it up in my face.

    And they smell. They totally have the smelliest farts in the history of the universe. 

    You know I’m right.

    And then Grunt and I got together.

    And he had two dogs.

    That stayed inside the house most of the time.

    And one that slept with him.

    And I seriously considered whether or not I could marry a man who slept with a dog. 

    But then all those chocolate milks just won me over and I had to learn to deal, ok and love, the dogs.

    I couldn’t deal with the dog sleeping with us though – that had to end. I have my limits.

    And then the circus entered the picture.

    And she was sharing her bottle with the dogs at six months old.

    And crawling on their bed, wallowing around in it.

    And I cringed. 

    And then for a solid year all she wanted to play with was her stuffed dogs and the real dogs.

    My friend Ashley even mocked me for having a child that loved dogs when I detested them so much.

    They aren’t kidding when they say God has a sense of humor. 

    I have come to somewhat love the dogs. Well, I love them because Grunt Labor and the kid love the dogs.

    Super easy way to get rid of that nasty smell! How To Get Pet Stains and Odors Out of Your Carpet without Chemicals

    Yea, Zie is pretty cute.

    So the other night after dinner as I was straightening up the kid’s room and asking myself why a two year old just can’t pick up after herself, I stepped in something. Wet.

    And I said, please sweet Lord Jesus, don’t let this be dog pee.

    I got down on the floor and sniffed.

    Super easy way to get rid of that nasty smell! How To Get Pet Stains and Odors Out of Your Carpet without Chemicals

    Remember how I said God has a sense of humor?

    Seriously?  

    Super easy way to get rid of that nasty smell! How To Get Pet Stains and Odors Out of Your Carpet without Chemicals

    Disclosure: This post was a collaboration with HomeRight. All opinions and non-pet person qualities are 100% mine. This post contains affiliate links for your shopping convenience. Click here to read my full disclosure policy.

    After a string of not-so-nice words, I decided to try something new on the pet accidents.

    How To Get Pet Stains and Odors Out of Your Carpet without Chemicals

    First, I got my HomeRight Steam Machine Plus out of the hall closet, filled it with water, and plugged it in.

    Super easy way to get rid of that nasty smell! How To Get Pet Stains and Odors Out of Your Carpet without Chemicals

    Remember the steamer I used to clean that disgustingly gross shower of Grunt Labor’s? Ok, this is similar to that except its kind of like an all-in-one deal. Its a steam mop, but the mop head portion also comes off to make it handheld. I use that handheld deal to clean grout. Probably my favorite thing about this one is that it heats up in less than two minutes – thus why its great for pet accidents.

    Next, I took some paper towels and sopped up as much of the “accident” as possible with those.

    Super easy way to get rid of that nasty smell! How To Get Pet Stains and Odors Out of Your Carpet without Chemicals

    After that, I put the glider attachment (ok, that probably isn’t the technical word for that attachment, but its what I call it) on the mop head. It makes it super easy to use the steam mop on carpets and rugs – it just glides right over them, thus why I call it the glider attachment.

    Super easy way to get rid of that nasty smell! How To Get Pet Stains and Odors Out of Your Carpet without ChemicalsIt just pops on and off.

    Then I held the steamer over the spot where the accident occurred and steamed the heck out of it for 30 seconds or so.

    Super easy way to get rid of that nasty smell! How To Get Pet Stains and Odors Out of Your Carpet without Chemicals

    Then, I got another wad of paper towels and sopped up the area where I had just steamed to soak up any remaining “accident.”

    Super easy way to get rid of that nasty smell! How To Get Pet Stains and Odors Out of Your Carpet without Chemicals

    I repeated this process two more times.

    A little while later I assessed my work.

    Super easy way to get rid of that nasty smell! How To Get Pet Stains and Odors Out of Your Carpet without Chemicals

    No stain.

    And then I got down on all fours and sniffed.

    No smell.

    Victory is mine. 

    I should probably vacuum though.

    Now, if only I would have known this little trick five years ago, then we wouldn’t have had to throw out over $1000 worth of rugs.

    Nope, not kidding.

    Need more helpful cleaning tips?

    9+ Must Read Cleaning Tips – cleaning tips and tricks for all around the house.

    How to Clean a Disgustingly Gross Shower – you will not believe how gross it was or how clean it came.

    How I Clean My Entire Kitchen with One Single Thing – and it’s chemical free!

    You know you don’t wanna miss any of this crazy.

    Sign up to get my posts delivered to your inbox here.

    Stalk Me Here:

    Pinterest / Facebook / Twitter / Instagram

    pin-this-post

    Super easy way to get rid of that nasty smell! How To Get Pet Stains and Odors Out of Your Carpet without Chemicals

    SaveSave

  • Painting 101: Why is my paint peeling? Tips and tricks to keep paint from peeling and scratching off your furniture.

    Painting 101: Why is my paint peeling? Tips and tricks to keep paint from peeling and scratching off your furniture.

    If you read the longest blog post in history (a.k.a. the reader survey results), you know that there were some questions about furniture painting – what finish to use, why is the paint peeling, etc.

    Since I am a woman for the people and cannot let my people down, I decided to start a little Painting 101 series with basic tips and tricks for painting furniture.

    The first thing we are going to chat about is:

    Why is my paint peeling?

    Tips and tricks to keep paint from peeling and scratching off your furniture. 

    This post contains affiliate links for your shopping convenience. Click here to read my full disclosure policy.

    Tips and tricks to keep your painted furniture from peeling and scratching. Paint Peeling Fix | Peeling Paint Repair | Peeling Paint Fix

    Usually the reason paint ends up peeling off a surface, is because it didn’t fully adhere to the surface as it was supposed to do.

    There are a couple reasons why it may not have adhered correctly:

    Reason 1. The surface wasn’t clean.

    Anytime you paint something, it is so important to clean it first. You don’t have to do soap and water (unless its really nasty), usually just a wet cloth will do the trick. With any piece of furniture I paint, I always wipe it down first with a wet cloth to remove any dust and dirt. If the piece is really gross, like has been sitting in my garage for months, I will pull out the shop vac and run that over it first, then come back with the wet cloth.

    After you have wiped down the surface with a wet cloth, you need to go back over it with a tack cloth. A tack cloth is literally just that, a tacky cloth that feels a little sticky. You just wipe it over your piece and it will pick up any remaining dirt and dust.

    The basics and tips and tricks to keep your painted furniture from peeling and scratching. Why is my paint peeling?

    Mint + Coral Nightstand Makeover

    Reason 2. The surface had a topcoat or finish that kept the paint from adhering as it should have.

    There are some paints out there that you can paint directly onto just about any surface. One of those is Velvet Finishes, which if you’ve been around here for the last few months, you know that’s my new favorite furniture paint. Depending on what type of surface you are painting though, you may still need a primer with that paint and you will most likely need it if you are painting with regular latex paint. If the furniture you are painting has one of these types of finishes, you will need to sand and/or prime it before painting:

    • A thick waxy finish
    • A shiny, glossy finish
    • Laminate
    • A polyurethaned finish

    I recommend doing a quick sanding if the piece has any uneven spots or if its just really super shiny. Does that make sense? You won’t need to sand it down to the bare wood, just rough it up a bit. After you have sanded, run the tack cloth over the piece and apply a primer.

    If you are painting a piece of unfinished furniture, there is no need for sanding. However, depending on the paint you are using, you may need to prime it. If you are using a regular latex paint, you will definitely want to prime it with something like Zinnser or Kilz primer. All you will need is one coat. It will just keep the furniture from soaking up your paint and taking coat after coat after coat of paint. If you are using a paint that requires no priming first, you can skip that part.

    The basics and tips and tricks to keep your painted furniture from peeling and scratching. Why is my paint peeling?

    Vintage Radio turned Bar Cabinet

    After you’ve prepped your piece as needed, its important to remember a couple of other things when you get ready to paint:

    3. Apply Thin Coats of Paint.

    I’m guilty of it too – trying to put on thick coats to minimize my work time and because I’m just plain lazy. You will get the best protection and finish on your furniture if you apply thin coats of paint. To speed up the process, I will often use my HomeRight Finish Max Paint Sprayer when the weather permits. If I can’t spray a piece, I use a high quality paintbrush and/or roller.

    The basics and tips and tricks to keep your painted furniture from peeling and scratching. Why is my paint peeling?

    IKEA Tarva Dresser turned Drink Bar

    4. Protect It. 

    Some paints already have a topcoat built in, such as the Velvet Finishes paint that I mentioned before. High gloss paints are usually pretty tough too, but not everyone likes that super shiny look. If your piece is going to be seeing a lot of use, you need to put a good topcoat on it. I like to use Protect or a Polycrylic. With this step you can also use a paint sprayer or a high quality paint brush. A good topcoat will make your paint job stronger and hold up against little circuses that may be roaming around.

    The basics and tips and tricks to keep your painted furniture from peeling and scratching. Why is my paint peeling?

    5. Let It Cure.

    Just because the paint or the topcoat is dry to the touch doesn’t mean that its fully cured.  It can take paint and/or a topcoat up to three weeks to fully cure sometimes – this is especially true when its really hot and humid. Typically, once a piece is dry to the touch I will move it to its “spot,” however I try not to put anything on it until 2-3 weeks later – especially no magazines and papers, they will easily stick to paint that isn’t fully cured and leave some of their ink on the piece.

    Do you have any tips and tricks to keep paint from peeling or on protecting painted furniture pieces? 

    Need more painting tips and tricks? 

    Painting 101: Topcoats and when to use them– a guide to topcoats and when they should be used.

    FAQ: Painting Furniture – questions I’ve been asked over and over again about furniture painting and then some.

    A Guide on What Types of Paints to Use on Various Surfaces – all the different types of paints and what surfaces they work best on.

    How to Paint Walls in less time with less mess – a great little tip for getting your walls painted in less time.

    And you can see all of my furniture makeovers here. 

    If you want to come back to these painting tips easily later, just pin the image below!

    Tips and tricks to keep your painted furniture from peeling and scratching. Paint Peeling Fix | Peeling Paint Repair | Peeling Paint Fix

    You know you don’t wanna miss any of this crazy.

    Stalk Me Here:

    Pinterest / Facebook / Twitter / Instagram

    SaveSave

  • Color Coded Organization

    Color Coded Organization

    Let’s get one thing clear.

    I am not an organization guru.

    Heck, I’m not really a guru of any sorts. I just fly my freak flag and do what works.

    I have my own weird methods for organizing and storing stuff.

    For example, the kid has three different boxes in her room for small toys.

    One holds things that could potentially be living: plastic dinosaurs, My Little Ponies, Smurf figurines, Little People, California Raisin figurines, etc.

    I don’t know where I come up with this stuff either.

    Or why I consider Smurfs and California Raisins to be potentially living things.

    Another box holds non-potential living things: wooden blocks and plastic easter eggs.

    I know, it makes no sense.

    And the last box holds paper items: stickers and things to write on.

    Shocking. One box actually makes sense.

    See what I mean when I say that I do what works for me?

    I knew you would get me – you’re my people.

    This is my latest “what works for me” organizing method:

    Color Coded Organization 

    And shockingly, this may actually make sense to more people than myself.

    This is such an easy organizing idea and it holds family members accountable for their mess! Color Coded Organization

    Disclosure: This post was a collaboration with Velvet Finishes. All opinions and ridiculous organization methods are 100% mine. This post contains affiliate links for your shopping convenience. Click here to read my full disclosure policy.

    Here’s the deal.

    I hate clutter.

    (Thus why I shared the 15 days to a Clutter Free Home Checklist last week.)

    That doesn’t mean clutter never happens around here.

    It happens all the time. 

    And then life happens.

    And I don’t have time to pick up all the clutter everyday because I was chasing the kid trying to make her keep her clothes on while its 30 degrees outside.

    In an effort to combat the clutter and at least corral it, I picked up cheap plastic bins and then assigned a color combination to myself, the kid, and Grunt Labor. The bins stay in the living room and each of our bins contain our own items. At the end of the week, we each go through our bins and put whatever has accumulated there over the week back into its proper place.

    Make sense?

    Good. Here’s how I made them.

    Color Coded Organization Bins

    Materials & Supplies Needed: 

    This is such an easy organizing idea and it holds family members accountable for their mess! Color Coded Organization

    • Plastic Bins (Mine were $3 each at Target in the Dollar Spot.
    • Paint Colors of your choice. (I opted to give these a bit of a cohesive feel by painting everyone’s bottom stripe, Modern by Velvet Finishes, a bold blue. The kid chose Bold, a bright yellow, for her other color, Grunt chose Vivid, which is a fabulous red hue, and I went girly and opted for Glamorous, a pink color.
    • FrogTape 
    • Paint Brush

    Steps

    Step 1: 

    Tape off where you want your stripes to be.

    This is such an easy organizing idea and it holds family members accountable for their mess! Color Coded Organization

    You could actually get much more creative and decorative than I did with this and opt for a different pattern or design. However, I am in a “simple” mode right now (probably also referred to as a lazy mode), so easy stripes were just the ticket.

    Step 2: 

    Paint your color on.

    This paint works on just about any surface! No priming needed on plastic - just brush it on!

    As I said above, I used all Velvet Finishes colors on these bins. To be honest, I wasn’t 100% sure if this paint would work on plastic – but it did. No priming it at all! That’s totally why my heart has been captured by this paint – its the lazy girl’s paint. 

    I did three light coats of each color and was impressed by the fact that I still got super saturated, pretty colors.

    Step 3: 

    As soon as you’ve painted on your final coat, remove the FrogTape. If you let the paint dry before removing the tape, you risk the tape pulling some of the paint off.

    Put the bins where everyone can easily access them and lay down the law.

    If you have crap in this room, it goes in your bin. 

    This is such an easy organizing idea and it holds family members accountable for their mess! Color Coded Organization

    Yea, I’m still working on getting the two year old to understand that.

    This is such an easy organizing idea and it holds family members accountable for their mess! Color Coded Organization

    I have to say, I was a little worried about these sticking out like a sore thumb with the decor, but I am digging their colorfulness.

    Have you done any color coded organization before?

    Or maybe you just have an organizing tip you want to share that doesn’t involve classifying Smurfs as potential living things??

    More Organization and Storage Ideas:

    5 Simple but Life-Changing Storage and Organization Ideas – super affordable too!

    10+ Kitchen Ideas for Decorating, Organizing and Storage – and they’re pretty!

    You know you don’t wanna miss any of this crazy.

    Sign up to get my posts delivered to your inbox here.

    Stalk Me Here:

    Pinterest / Facebook / Twitter / Instagram

    pin-this-post

    This is such an easy organizing idea and it holds family members accountable for their mess! Color Coded Organization

    SaveSave

  • That time I went in the whorehouse… (Must Do’s in New Orleans)

    That time I went in the whorehouse… (Must Do’s in New Orleans)

    Everyone should have a great love affair with a city. 

    A love affair that rivals Holly Golightly and Paul Varjak’s in Breakfast at Tiffany’s – its passionate and crazy and always leaves you guessing.

    Mine is with New Orleans. 

    A city full of debauchery, excitement, and thrill.

    And let’s be honest, booze – lots of booze.

    I hate to put a cliche to it, but you truly never know what’s going to happen when you’re there.

    My love affair with New Orleans began when I was 13.

    My father took my brother and I to the French Quarter.

    We went in the daytime, otherwise, I too, like you probably are now, would be questioning his parenting skills for taking a 13 year old and an 8 year old to the quarter.

    One look at all that architecture and I was hooked.

    Amazing city full of fun! Must Do's in New Orleans

    This post contains affiliate links for your shopping convenience. Click here to read my full disclosure policy.

    There is a spirit in New Orleans that you just can’t quite describe.

    You either love it or you hate it.

    There can be no gray area with this city.

    I am madly in love with it – and not just with the architecture anymore.

    No, no.

    I am madly in love with the lore of Marie Laveau and her voodoo, the legends of Storyville and Norma Wallace, The Last Madam, the cities of the dead, the sound of jazz in the air and the ghostly whispers of great writers that once walked the quarter.

    When I drug Grunt Labor there for the first time, he balked at me as I left pennies on Marie’s grave, followed by a visit to the voodoo temple to buy vesta powder, sage, and brick dust.

    The day he came home and found me scattering the brick dust across our threshold and waving burning sage through our beloved foreclosure, I’m pretty sure he was ready to call the psychiatric ward.

    We haven’t had any evil spirits here yet. Just sayin’.

    Grunt Labor and I had to cash in some unused plane tickets before the new year. We had one weekend to jet away and only one place made sense: NOLA.

    We left on a Friday at noon and were enjoying drinks and BBQ shrimp (a messy, but must-have dish) in the quarter by 7pm.

    We spent too much money, ate too many beignets, drank too much bourbon, and walked it all off perusing the quarter.

    And the best absolute my-life-is-now-complete thing about this trip?

    I got to go in a whorehouse. 

    One of the most fascinating things to me about New Orleans is its history of vice.

    I devour books on Storyville (New Orlean’s Red Light District in the early 1900’s).

    My absolute favorite tale of prostitution in New Orleans in the one of The Last Madam, Norma Wallace. I have read the book three times now. I will read it at least 100 more times before I die.

    Norma Wallace was, as the title of the book states, The Last Madam of New Orleans. She ran her upscale house of prostitution until the mid 60’s. She entertained movie stars, gangsters, and high political officials. There wasn’t a better house than The Queen’s. 

    Armed with my book in hand, Grunt Labor and I set out to see her last residence in the quarter where she entertained: 1026 Conti Street, coincidentally (or not?), also once the house of E.J. Bellocq, the famed photographer of Storyville. As we walked down Conti, I was worried the house may no longer be standing while I was frantically scoping out house numbers.

    But it was still standing.

    Amazing city full of fun! Must Do's in New Orleans

    I snapped a few pictures of the front of the house, the sign hanging on it, and then realized someone was coming out of the door. I apologized for being that corny tourist and started to walk away.

    Amazing city full of fun! Must Do's in New Orleans

    But then something amazing happened.

    One of the men coming out of the house was Mark Boline.

    A broker who just so happened to be the broker for the apartments which 1026 Conti have become.

    A ridiculously nice man that asked if we would like a tour. 

    I nearly wet myself.

    As Grunt Labor gives me the look of, Are you crazy?! Should we really be going into a house with a man we don’t know in a city that’s crazy as hell?!, I followed the man inside the house.

    I may die in the whorehouse, but damn it, I’ll die crossing something off the bucket list.

    Mr. Mark Boline was completely harmless – and totally made this girl’s day year. Thank you, sir.

    The entryway is lined with paintings and photographs remembering the past owners of the residence, Norma Wallace and E.J. Bellocq.

    Amazing city full of fun! Must Do's in New Orleans

    The painting on the left was done from one of the famed photographs E.J. Bellocq took in Storyville. The top right picture is of two paintings that grace the wall – one of Norma Wallace and one of E.J. Bellocq. The bottom right picture is a series of photographs of Norma and the residence.

    The courtyard was nothing short of stunning.

    Amazing city full of fun! Must Do's in New Orleans

    Amazing city full of fun! Must Do's in New Orleans

    The area of the courtyard photographed above is actually much longer – I just couldn’t get a good shot. If I remember correctly, Mr. Boline said that area was where Ms. Wallace’s girls would perform their “shows.” I’ll let you read the book to learn more about those shows.

    Mr. Boline showed us one of the units available to rent. In that certain unit was the place, Norma would stash her cash:

    Amazing city full of fun! Must Do's in New Orleans

    I was thrilled to see they had preserved it. Of course in her day, a brick would have covered the hiding spot.

    In this same apartment was the side door of the house where Norma would pay off the police.

    Amazing city full of fun! Must Do's in New Orleans

    She would hand it right through the door and carry on with business.

    This is the kitchen of that apartment.

    Amazing city full of fun! Must Do's in New Orleans

    I was taking photos with my phone, thus the blurriness – I had left my camera at home as I had promised I wouldn’t do any photography for work, but ya know, when duty calls… Anyway, these apartments are small, but have beautiful high end finishes.

    Upon leaving the whorehouse, Grunt Labor put his arm around me, laughed and said, “Well, I guess nothing else we ever do in New Orleans will top this.”

    Nope.

    But I’ll still go back to my beloved city. I just can’t get enough.

    Here are our favorite things to do in the city, photos and commentaries included. 🙂

    Must Do’s in New Orleans:

    1. Peruse the quarter, preferably with coffee from Cafe du Monde or booze in hand. Bask in the architecture.

    Amazing city full of fun! Must Do's in New Orleans

    And then bask a little more.

    Amazing city full of fun! Must Do's in New Orleans

    Amazing city full of fun! Must Do's in New Orleans

    2. Have a breakfast of cafe au lait and beignets (french doughnuts) at Cafe du Monde. 

    Amazing city full of fun! Must Do's in New Orleans

    And then go back a couple hours later for more.

    3. Dance to a jazz band in the street. 

    Amazing city full of fun! Must Do's in New Orleans

    And then leave them a few dollars.

    4. Walk down Bourbon Street at least once in the daytime and once in the nighttime. 

    Amazing city full of fun! Must Do's in New Orleans

    This should also be done drink-in-hand. People watch – you won’t believe the stuff you’ll see at night.

    5. Visit Faulkner House Books where, yes, William Faulkner once lived. 

    Take in all the fine literature here, buy a book or two – I suggest a Faulkner or New Orleans one as a souvenir.

    6. Visit a City of the Dead

    Amazing city full of fun! Must Do's in New Orleans

    New Orleans cemeteries are known as cities of the dead. I think you can see why from the photo. If you have never been to NOLA before, I highly suggest taking a cemetery tour. Going alone on your first visit isn’t the best idea. Some of the cemeteries are not safe.

    Amazing city full of fun! Must Do's in New Orleans

    If you visit St. Louis #1, leave some pennies or gifts on Mrs. Laveau’s tomb. It can’t hurt.

    7. Take the St. Charles Street Car to the Garden District 

    Amazing city full of fun! Must Do's in New Orleans

    Peruse the garden district. Take in all the beautiful mansions.

    Amazing city full of fun! Must Do's in New Orleans

    If you have read any of the Anne Rice Mayfair Witches books, many of the places in those books are in this district.

    8. Visit the Roosevelt Hotel, preferably at Christmas time.

    Amazing city full of fun! Must Do's in New Orleans

    This was suggested to me by Kim from O is for Organize, and boy was she right on. This hotel is stunning at Christmas.

    Amazing city full of fun! Must Do's in New Orleans

    I also couldn’t resist this old letter box in the hotel.

    9. Stop in at NOLA Couture.

    This is a new favorite shop Grunt Labor and I discovered on our recent trip. Pick up a classy bow tie for your man and an out-of-this-world good smelling candle inspired by none other than the city of sin itself.

    10. Visit the address where Marie Laveau once lived.

    Amazing city full of fun! Must Do's in New Orleans

    Her house is no longer standing, another one is in its place, but its still worth the walk.

    11. Have a cigar in the quarter. 

    According to Grunt Labor, the cigar shops in NOLA are pretty good. This visit, we stopped in at the Cigar Factory on Bourbon Street.

    12. Drive out to River Road and visit an old Plantation.

    Amazing city full of fun! Must Do's in New Orleans

    Grunt Labor and I didn’t have time to do this on our recent visit, but the time before we drove out to River Road (I think it was about a 45 minute drive out of the city) to tour a plantation. The one pictured above is Oak Alley Plantation (you’ve probably seen it in movies before). We just stopped at it and looked around, but didn’t tour the inside. However, we did tour a creole plantation, Laura, and we throughly enjoyed it.

    Books I Love about New Orleans & Their Characters:

    The Last Madam by Christine Wiltz – hands down, my favorite book.

    Anne Rice’s Mayfair Witches Series

    Voodoo in New Orleans, Robert Tallant

    Storyville, New Orleans, Al Rose – This book contains many of the famed Storyville photographs taken by E.J. Bellocq.

    Empire of Sin, Gary Krist- Just got my hands on this one, but I think its going to be great.

    See more of my favorite southern books here.

    If you have any suggestions on things to see in New Orleans or books to read, please leave them in the comments!

    More posts about Southern travel:

    Things to Do in Nashville – probably my 2nd favorite southern city!

    Isle of Palms Beach Vacation – no traffic like in Florida!

    Fried Green Tomatoes Road Trip – visit the place where the movie was filmed!

    Jimmy Carter Sunday school in Plains, Georgia – attend a Sunday school class taught by former President Carter.

    You know you don’t wanna miss any of this crazy.

    Sign up to get my posts delivered to your inbox here.

    Stalk Me Here:

    Pinterest / Facebook / Twitter / Instagram

    pin-this-post

    Things to Do in New Orleans | New Orleans French Quarter | New Orleans Travel | New Orleans Food | Cemeteries | Whorehouse

    SaveSaveSaveSave

  • 15 Days to a Clutter-Free Home…And Some Extra Cash

    15 Days to a Clutter-Free Home…And Some Extra Cash

    Every year, usually a day or two after Christmas, something very liberating happens at our house.

    No bra burning.

    No marches on the courthouse lawn.

    We purge.

    I go through every nook and cranny of this house and I get rid of stuff.

    Lots of stuff.

    And it feels so good. 

    And then after I’ve went through every nook and cranny, I start selling all that stuff.

    And I make a little money.

    And that feels damn good. 

    This year, I wanted you to get in on the excitement of purging and finding money, so I whipped up this little printable to share what I do.

    A Clutter Free Home in 15 Days | Clutter Organization | Storage Ideas | Organization Ideas for the Home | Organization Ideas for Clutter

    Yes.

    15 Days to a Clutter-Free Home

    And the extra cash – don’t forget the cash.

    Before you download the printable checklist though, let me be clear about something:

    This checklist will not organize your home. I don’t have the first clue how to teach you how to organize your home, because I don’t even know that I have a system for that – I just do whatever works.

    This checklist will help you de-clutter your home and free up some possibly much needed space.

    This checklist may not be anything new to you. That’s probably because these are real-life common sense things that you’ve probably done before. Sometimes, it just helps to have it in checklist form – I’m not the only one who gets a rush when I check something off, right?

    Alright, I think that’s my whole spill.

    Free Clutter-Free Home Checklist

    And by all means, if you’ve got some de-cluttering tips, please share them in the comments below!

    Looking for more organizing and de-cluttering tips?

    Here are five simple storage and organization ideas that are life-changing and don’t miss these 12+ Ideas for Organizing Your Home.

    If you like money (hehehe), you may also want to read these tips…

    How I “Find” Money – you know, when it doesn’t grow on a tree. 😉

    Three Things that Could Cut Your Electric Bill in Half – don’t miss these!

    You know you don’t wanna miss any of this crazy.

    Sign up to get my posts delivered to your inbox here.

    Stalk Me Here:

    Pinterest / Facebook / Twitter / Instagram

    pin-this-post

    A Clutter Free Home in 15 Days | Clutter Organization | Storage Ideas | Organization Ideas for the Home | Organization Ideas for Clutter

  • Power Tools 101: How to Use a Miter Saw

    Power Tools 101: How to Use a Miter Saw

    Hands down, my absolute favorite tool is my miter saw. Power miter saws can do so many things – and do it pretty easily as well. This guide will show you the basics of how to use a miter saw and what all a miter saw can be used for.

    Its time for another empowering round of Power Tools 101.

    In this round, I’m going to go over the basics of a miter saw, my favorite kind of saw, and Gina from The Shabby Creek Cottage is going to teach you how to use a table saw, which happens to be my least favorite saw.

    Didn’t that work out nicely?

    How to Use a Miter Saw for Beginners - Rain on a Tin Roof

    Please use all appropriate and proper safety precautions when using tools and attempting projects. All projects and tool usage are attempted at the reader’s own risk.

    This post contains affiliate links for your shopping convenience. Click here to read my full disclosure policy.

    Using a Miter Saw

    First off…

    What is a miter saw? 

    Why, I am just so darn glad you asked. In short, a miter saw is a saw that allows you to cut at a variety of angles. Its base sits on top of a miter saw stand, table or workbench, unlike the circular saw that you move yourself. Most of the time, miter saws are used for cutting things like baseboards, window trim, and crown molding. However, I like to use it whenever I can to just get a straight cut, because I suck at that sometimes with a circular saw.

    This is our miter saw:

    What Is a Miter Saw Used For - Power Miter Saw - Rain on a Tin Roof

    It is a DeWalt Double Bevel Sliding Compound Miter Saw. Our miter saw is a much larger miter saw than many people would require. We have a large one because a) it was on sale for a great price and b) we needed a heavy duty one when we started all the work on the beloved foreclosure. Right now, this one sells for about $600, but there are just as effective, smaller ones that start around $120, like this Ryobi one. I will say that I do love having a sliding miter saw because it can cut larger width pieces of wood.

    Here’s how it looks when the blade is up:

    Blade Up on Miter Saw - Rain on a Tin Roof

    How a Miter Saw Works

    To release the blade, you push down on the handle with one hand, and press in on the “button” on the back left hand side, with the other hand:

    How a Miter Saw Works - Rain on a Tin Roof

    The saw will operate by squeezing the trigger in the handle:

    Trigger on a Miter Saw - Rain on a Tin Roof

    This saw is also capable of sliding back and forth by loosening the dial on the back of saw:

    Using the sliding feature on a miter saw. Rain on a Tin Roof

    Why would you need to slide the saw? Well, if you have a larger piece of wood that the blade wouldn’t normally cut all the way the width of, you can start cutting on the front of the wood and then slide the blade back while cutting. In the photo below, you can see how the blade slides. The top photo shows the blade in the front and the bottom one shows the blade slid back:

    Miter Saw Blade Down - Rain on a Tin Roof

    Like I said in the beginning, one of the biggest reasons people use miter saws are to easily make angled cuts. You make angled cuts by moving the arm on the base of the saw:

    Using a Miter Saw - Adjusting the Angle - Rain on a Tin Roof

     You push down on the button while moving the arm. The saw will lock into place at set angles. Angles are marked along the bottom:

    Choosing with angle to cut on a miter saw - Rain on a Tin Roof

    Anytime you cut a piece of wood on a miter saw, you need to make sure the wood is flush with the back:

    Cutting wood with a power miter saw - Rain on a Tin Roof

    This gives you a nice, clean, straight cut. After marking where your cut should be and making sure your wood is flush, you will put one hand onto the handle and push the trigger (as shown in the photo above) and use your other hand to hold the wood still – make sure your hand is far away from the blade:

    Making a cut with a miter saw - Rain on a Tin Roof

    As you pull down on the blade, you will see that the safety blade guard will automatically move backwards. You cut angled cuts the same way as straight cuts, you just move the handle on the bottom to the desired angle like I showed you above.

    After cutting through wood, release the trigger so that the blade stops spinning. As you raise the blade up, the blade guard will go back around the blade.

    What is a Miter Saw Used For?

    As you can see above from how a miter saw works, it can create many different types of cuts. But how do those cuts factor into real life projects. These are a few different projects where having a miter saw on hand is very useful:

    • Trim Installation (baseboards, window casing, door casing, etc.) – a power miter saw can easily create those 45 degree angles to give you beautifully installed millwork.
    • Crown Moulding – crown moulding is a little more trickier than regular trim, having a miter saw to get the correct cuts (like a bevel cut) is a necessity.
    • Just about any building project – miter saws make quick work of just about any cut you need to make on lumber. As long as it will fit on the saw base and under the blade, you can probably cut it with a miter saw.

    Do you have any tips for working with a miter saw?

    More Power Tools 101 Posts You Might Find Helpful:

    How to use a Drill – a must have tool for any DIYer!

    How to use a Circular Saw – make cuts across large pieces of wood sheets such as plywood.

    How to use a Heat Gun and 15 things to do with it – you won’t believe what all this thing is capable of!

    How to Use a Sander – and what kind of sandpaper to use when.

    The Best Tools for DIYers at any level – my tried and true tools.

    Want to come back to this post later? Pin the image below!

    Beginner's Guide to Using a Power Miter Saw - Rain on a Tin Roof

    Stalk Me Here:

    Pinterest / Facebook / Twitter / Instagram

    SaveSave

    How to Use a Miter Saw Guide - Rain on a Tin Roof

  • DIY Marble Top Table for $30 or less

    This one will be as short and sweet as possible, friends. The flu has struck our house and its first victim is me.

    I love marble. Have I told you that before? I mean, I’m sure its apparent by looking at my bathroom.

    I also love little side tables that can be moved around as needed to hold drinks and what not.

    And I love a classic black – paired with gold.

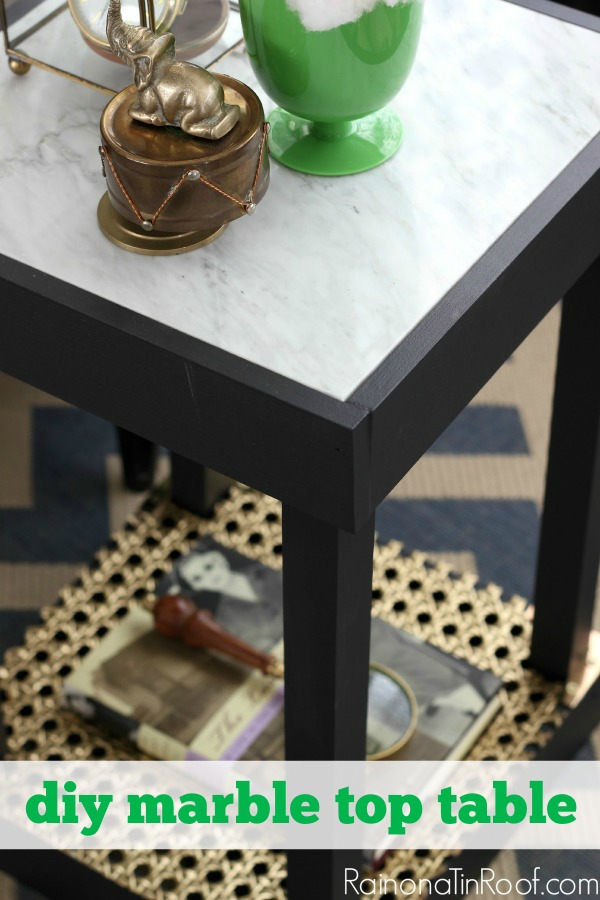
    The three loves combined in this DIY Marble Top Table.

    diy-marble-top-table-2

    Disclosure: This post was a collaboration with Velvet Finishes. All opinions and love of black, gold, and marble are 100% mine. This post contains affiliate links for your shopping convenience. Click here to read my full disclosure policy.

    I came up with this idea, but I have to give Grunt Labor credit for building it. Preschool is out until after the first of the year, so while I chased the kid, he worked on the table. Thanks, Grunt.

    How to Build a Marble Top Table

    Supplies & Tools Needed:

    • 1 marble tile (Mine was leftover from my bathroom reno, but they still have it at Home Depot)
    • 2 square balusters
    • 12 x 12 piece of MDF
    • 1 x 3 wood – 8 ft piece
    • Finish Nails
    • Nail Gun (that’s what we used, but you may be able to just use a hammer and nails)
    • Wood Glue
    • Circular Saw and/or Miter Saw
    • 4 – 2 1/2 inch L brackets
    • Caning or something else for the bottom
    • Velvet Finishes Luxurious Paint

    Steps

    Step 1:

    Trace out the tile on the MDF.

    Chic and small, but functional! DIY Marble Top Table via RainonaTinRoof.com

    Cut out the traced piece with a circular saw.

    Chic and small, but functional! DIY Marble Top Table via RainonaTinRoof.com

    Ignore that other square. We were going to use it for the bottom, but it didn’t work out.

    Step 2: 

    Cut the ends off the square balusters and then cut both in half – approximately 20 inches long and set aside.

    Chic and small, but functional! DIY Marble Top Table via RainonaTinRoof.com

    Step 3:

    Frame the tile with the 1 x 3s and cut as needed to fit the tile.

    Chic and small, but functional! DIY Marble Top Table via RainonaTinRoof.com

    Put wood glue on the ends, then use your nail gun to nail the frame together on the edges. Be sure not to nail where the tile is.

    Chic and small, but functional! DIY Marble Top Table via RainonaTinRoof.com

    Step 4:

    Place the cut MDF piece on top of the tile, but still within the frame you just nailed together. Take the balusters and place one in each corner. Nail them to the frame of 1 x 3s.

    Chic and small, but functional! DIY Marble Top Table via RainonaTinRoof.com

    Step 5: 

    At this point lift the spindles and frame (they should be nailed together) off the MDF and tile, and flip it over. Set the the MDF and tile aside.

    Cut 4 more pieces of 1 x 3 to create a square around the base of your table. Nail these pieces to the balusters at the bottom.

    Chic and small, but functional! DIY Marble Top Table via RainonaTinRoof.com

    Step 6: 

    Take your cut MDF square and place it in the top of the frame. Nail it down in the corners onto the spindles.

    Chic and small, but functional! DIY Marble Top Table via RainonaTinRoof.com

    Sit your marble inside the top frame. You can glue it down with something like Elmer’s Advanced, but I opted to just sit mine in there in case I ever want to change it out.

    Step 7: 

    Paint it, baby!

    So, I really really really wanted to paint this piece with Velvet Finishes Glamorous, but when I got it on the table, it just didn’t work with the marble.

    Instead, I opted to go with a classic never-fail black, Velvet Finishes Luxurious.

    Chic and small, but functional! DIY Marble Top Table via RainonaTinRoof.com

    I just slapped it on with a regular paintbrush and it only took two coats – even on the raw 1 x 3s. That kind of shocked me, because raw wood usually just soaks up paint and it takes coat after coat after coat if you don’t prime it. No priming here though and still only two coats. Holla.

    Step 8: 

    For the bottom, I cut some leftover caning to size, spray painted it gold, then secured it down with 4 L brackets.

    Chic and small, but functional! DIY Marble Top Table via RainonaTinRoof.com

    I love the classic combination of black and gold – it never fails me and it can work with just about any decor.

    Chic and small, but functional! DIY Marble Top Table via RainonaTinRoof.com

    Another thing I noticed with this paint is that even though I used a brush to put it on, there were no brush strokes.

    Chic and small, but functional! DIY Marble Top Table via RainonaTinRoof.com

    Cheers to the new year, friends – and black & gold marble tables!

    Looking for more easy DIY builds?

    DIY Modern Rustic Bookshelf – customize in any color you like!

    DIY Chippendale Desk – probably my most favorite build of all time, and an easy one too!

    DIY Clothes Rack – an easy build and perfect for extra clothes storage or selling clothes at yard sales!

    You know you don’t wanna miss any of this crazy.

    Sign up to get my posts delivered to your inbox here.

    Stalk Me Here:

    Pinterest / Facebook / Twitter / Instagram

    SaveSave

  • 6 Creative and Easy Ways to Document Memories

    6 Creative and Easy Ways to Document Memories

    When the kid started talking, she would answer “Sure” instead of “Yes.” Example:

    Kid (screaming): “Emonade, emonade, emonade!”

    Me (about to lose my sh*t): “Would you like some lemonade?!”

    Kid (very nonchalantly, as if she wasn’t just screaming for it: “Sure.”

    She now says “Yes” more than “Sure,” which I know is the way things are supposed to go, but it does make me just a little sad.

    My point is, I’m always terrified I will forget those little things.

    I’m also worried about forgetting Grunt Labor’s ways of saying I Love You, like “You’re the thin set to my tile.”

    (Where does he come up with this stuff?)

    And the time Will asked if this was Jesus music on the radio.

    AWESOME ways to remember stuff! And super easy and cheap! 6 Creative and Easy Ways to Document Memories via RainonaTinRoof.com

    I mean, it is Garth Brooks, he’s kind of like the Jesus of country music, people.

    And then there was the time Grandma told the kid (at the age of 1), “Its amazing how advanced you are. Its also unfortunate.”

    Truer words were never spoken.

    So, to keep up with all those sweet (and humorous) memories of our cra-cra lives, I’ve found a few ideas.

    Creative and Easy Ways to Document Memories

    This post contains affiliate links for your shopping convenience. Click here to read my full disclosure policy.

    1. Memory Rocks

    AWESOME ways to remember stuff! And super easy and cheap! 6 Creative and Easy Ways to Document Memories via RainonaTinRoof.com

    Memory Rocks are something Grunt Labor and I already do. We’ve actually been doing these since the first year we were together and I realized that our courtship wasn’t just some fling. Apparently, he knew that long before I did, but that’s a whole other story. Each rock is numbered and that number represents a moment in our lives that we don’t want to forget. More details on our memory rocks (including some of our best memories are here.)

    2. Family, Guest, and Friends Notebook

    AWESOME ways to remember stuff! And super easy and cheap! 6 Creative and Easy Ways to Document Memories via RainonaTinRoof.com

    I had this idea a few weeks ago and it is definitely something I plan on putting into action in the new year. Sometimes, our friends will bring up some of the funniest things we have done and I will have totally forgotten about it. Case in point, when we went on the RV trip to the middle of nowhere and David and Heather reminded me about the party at their house where I moved around the house all night engrossed with the Ghost Radar app on their iPad.

    I’m a sucker for anything ghostly.

    Since our friends tend to have better memories than we do sometimes, I thought it would be fun to put a pretty notebook on our entry table and let them write down a few things before they leave our house after a visit. Of course, a green Kate Spade notebook that says Penny for Your Thoughts is my pick.

    3. Yearly Calendar or Planner

    AWESOME ways to remember stuff! And super easy and cheap! 6 Creative and Easy Ways to Document Memories via RainonaTinRoof.com

    I’m stealing this idea from my father-in-law. When Grunt Labor was born, his dad had a calendar and would write down anything that Grunt did on that day. So when the kid was born and we were wondering when Grunt Labor started eating solid foods or pooping on a regular schedule (I’m kidding – he’ll kill me for writing that), all we had to do was phone Mom and Dad, and they whipped out the calendar and told us. Seriously, how hard would it be to just buy an extra calendar or planner and jot down those memories right as they happen? I would suggest a planner or calendar that has large spaces for writing, and of course it has to be pretty, like this one.

    4. Ticket Stub Holder

    AWESOME ways to remember stuff! And super easy and cheap! 6 Creative and Easy Ways to Document Memories via RainonaTinRoof.com

    As soon as I saw this ticket stub holder idea from Lauren at The Thinking Closet, I did it. I mean, really, its so stinkin’ cute and its a fun and pretty way to display all those ticket stubs! One of the boys actually asked for one of his own recently and he’s in the full blown teenager stage. If he thinks its cool, its most definitely cool.

    5. Memory Jar

    AWESOME ways to remember stuff! And super easy and cheap! 6 Creative and Easy Ways to Document Memories via RainonaTinRoof.com

    I love how pretty and easy to make this Etched Glass Memory Jar is. You don’t have to stash it away – keep it out to enjoy all the time!

    6. Memory Box (from a Recipe Box)

    AWESOME ways to remember stuff! And super easy and cheap! 6 Creative and Easy Ways to Document Memories via RainonaTinRoof.com

    This is also another super simple way to keep up with those special moments. Wit and Whistle uses a pretty recipe box to document her life.

    Do you have any creative and easy ways to document memories?

    You know you don’t wanna miss any of this crazy.

    Sign up to get my posts delivered to your inbox here.

    Stalk Me Here:

    Pinterest / Facebook / Twitter / Instagram

    pin-this-post

     AWESOME ways to remember stuff! And super easy and cheap! 6 Creative and Easy Ways to Document Memories via RainonaTinRoof.com

    SaveSave

  • How to Cover Old Hardware Holes

    How to Cover Old Hardware Holes

    Want to change the location of hardware in your cabinet doors or on another piece of furniture but don’t know what to do about those old holes? It’s actually an easy fix! Here’s how to fill holes in wood….

    Apparently, its hardware themed week here.

    On Monday, it was how to restore your hardware in five minutes and today its how to cover old hardware holes.

    I didn’t realize that when I was flying by the stick of my broom planned out my posts.

    After my kitchen was featured in Better Homes & Gardens, there were a few new people who came over and asked how I covered the old hardware holes that were in the center of my cabinets.

    I’ve filled holes in furniture so many times now, I often forget I should actually tell you how I do it. I actually figured out how to do this myself in my former life when I was working on the old farmhouse. It was totally by trial and error, y’all.

    You see, I used to think paint would just magically fill holes in trim.

    smacking myself in the face

    After I replaced and painted the trim, I realized, “Oh, that didn’t work.”

    So I found this stuff called wood putty. We’ve been good friends ever since.

    Anyone else find it pathetic that I’m referring to myself and wood putty as good friends?

    How to Cover Old Hardware Holes | How to Cover Holes in Wood | How to Fill Holes in Wood | How to Fill Holes in Cabinets

    If you have seen my kitchen renovation before, you know that we kept our original cabinets and just painted over them. They were in really great condition and I didn’t want to give my first born child as collateral for new cabinets.

    The cabinets use to have centered hardware.

    Banish that old centered hardware! So easy to do! How to Cover Old Hardware Holes via RainonaTinRoof.com

    Now, just so you don’t think I’m pulling a fast one on you, this is not one of the cabinets that is currently in our kitchen. It did used to be in the kitchen, but when we opted to put in open shelving we were left with a couple extra cabinets and so this one is used for storage in the garage. It never got painted, so it was the perfect candidate for this tutorial.

    How to Cover Old Hardware Holes

    This post contains affiliate links for your shopping convenience. Click here to read my full disclosure policy.

    Supplies / Materials Needed: 

    • Wood Putty / Filler (If painting over the wood filler / cabinets, the color of filler doesn’t matter. If you are staining over the filler / cabinets, get a stainable filler.)
    • Fine Grit Sandpaper (I usually use about a 220 grit.)

    Step 1: 

    Remove the old hardware. If your cabinets are older like mine were, there may be a grimy outline of the old hardware left behind. Just sand this lightly until its smooth with the cabinet door.

    Banish that old centered hardware! So easy to do! How to Cover Old Hardware Holes via RainonaTinRoof.com

    Step 2: 

    Grab your wood filler / putty.

    Banish that old centered hardware! So easy to do! How to Cover Old Hardware Holes via RainonaTinRoof.com

    I have used lots of different fillers over the years and this Elmer’s Wood Filler Max is by far my favorite. Its the easiest to work with and the easiest to sand, in my opinion.

    Squeeze a small amount of the filler onto your finger, then rub it right into the hole in a circular motion.

    Banish that old centered hardware! So easy to do! How to Cover Old Hardware Holes via RainonaTinRoof.com

    Some people prefer to do this with a spatula, but honestly, I’ve found that my finger is the best tool.

    After you have covered the hole, let it dry (doesn’t take long at all) and then sand it smooth. After you have sanded it, you may need another coat of the filler. If you do, just repeat as needed. Typically, I find that most holes need 1-2 coats of filler.

    Finally, paint or stain over the filler with paint or stain of your choice.

    Banish that old centered hardware! So easy to do! How to Cover Old Hardware Holes via RainonaTinRoof.com

    As I said in the beginning, if you are staining or want to stain the spot where you filled the hole, be sure to buy one of the wood fillers that is stainable. The stain won’t match up with the rest of the door as well as paint would, but it won’t be too noticeable at all.

    Have you covered up old hardware holes before? Any tips or tricks you can share with us? 

    Looking for more hardware or cabinet tricks? You'll like these then...

    Easy Ways to Update Furniture Hardware - instead of buying new, give these ideas a whirl!

    Best Paint for Painting Kitchen Cabinets - different types of paint you can use for painting cabinets and which does what best.

    Want to remember this wood filler tip for later? Just pin the image below!

    How to Cover Old Hardware Holes | How to Cover Holes in Wood | How to Fill Holes in Wood | How to Fill Holes in Cabinets

    You know you don't wanna miss any of this crazy.

    Stalk Me Here:

    Pinterest / Facebook / Twitter / Google+ / Instagram

    SaveSaveSaveSaveSaveSaveSaveSaveSaveSaveSaveSaveSaveSaveSaveSaveSaveSaveSaveSaveSaveSaveSaveSaveSaveSaveSaveSaveSaveSaveSaveSaveSaveSaveSaveSaveSaveSaveSaveSaveSaveSaveSaveSave

  • How to Restore Hardware in 5 Minutes

    How to Restore Hardware in 5 Minutes

    I am kicking myself, y’all.

    Kicking myself. 

    I’ve spray painted and Rub ‘N Buffed so many pulls and knobs over the years – I had no idea how to clean them.

    Don’t get me wrong – there are sometimes when you want a bold colored knob, but sometimes I just want that hardware restored to its former glory.

    I had no clue how to restore hardware to its former glory though.

    Until a few weeks ago.

    How to Restore Hardware | How to Clean Hardware | Kitchen Cleaning Tips | Kitchen Cleaning Hacks | Easy Cleaning Tips | Cleaning Hacks

    This post contains affiliate links for your shopping convenience. Click here to read my full disclosure policy.

    First off, thank you to Jennifer from Dimples & Tangles for sharing this product when she cleaned up some silver trays. She’s just awesome, y’all.

    How to Restore Hardware

    The hardware in the photo above is what was original to the vintage radio that I just turned into a bar cabinet. I almost spray painted them, but decided first to give Bar Keeper’s Friend a try.

    AMAZING! How to Restore Hardware in 5 Minutes (No painting, no wax!) via RainonaTinRoof.com

    I had only used it to clean real brass before, and I was pretty sure this hardware wasn’t real brass. I wasn’t sure if it would work or not, but it SO did!

    First, I ran some water over the hardware, then sprinkled the Bar Keeper’s Friend on.

    AMAZING! How to Restore Hardware in 5 Minutes (No painting, no wax!) via RainonaTinRoof.com

    Next, I took an old cloth that was a little damp and rubbed it around the hardware. These pieces had some nooks and crannies, so I took an old toothbrush to really get into those. Then, I just rinsed it off and let it dry.

    How to Restore Hardware | How to Clean Hardware | Kitchen Cleaning Tips | Kitchen Cleaning Hacks | Easy Cleaning Tips | Cleaning Hacks

    The top pull is from the same cabinet, just not cleaned yet.

    Is that not crazy?!

    I was totally baffled. And it took less than 5 minutes to clean it up!

    Have you used Bar Keeper’s Friend before to restore hardware or clean anything else? I want to know what else this bad boy will accomplish!!

    You can see this hardware in all its restored glory on the Vintage Radio turned Bar Cabinet.

    Also guys, this IS NOT a sponsored post for Bar Keeper’s Friend – I just wanted you to know how easy it can be to restore your hardware – put that spray paint down!

    Need another cleaning tip?

    Got rust? Here’s how to get rid of that…

    Or need to know how to cover old hardware holes?

    You know you don’t wanna miss any of this crazy.

    Sign up to get my posts delivered to your inbox here.

    Stalk Me Here:

    Pinterest / Facebook / Twitter / Instagram

    pin-this-post
    How to Restore Hardware | How to Clean Hardware | Kitchen Cleaning Tips | Kitchen Cleaning Hacks | Easy Cleaning Tips | Cleaning Hacks

    SaveSave

  • Red, Green and Navy Christmas Home Tour: Part Two

    Red, Green and Navy Christmas Home Tour: Part Two

    After telling you lies in round one of my Christmas home tour yesterday, I thought today I would tell you a story.

    If you are a regular here, you know I love stories and have lots of them. If you are new here and hopping over from Lindsay’s place (she’s the brainchild behind Blogger Stylin’ Home Tours), The White Buffalo Styling Co., or from Just a Girl, welcome. I hope you like stories too. Be sure to visit everyone else in the Christmas home tours at the end of this post!

    Every Christmas, when its time to wrap gifts, I go downstairs.

    Full of simple and cute ideas that anyone can do! Red, Green and Navy Christmas Home Tour via RainonaTinRoof.com

    Where its quiet.

    Full of simple and cute ideas that anyone can do! Red, Green and Navy Christmas Home Tour via RainonaTinRoof.com

    And I pull out the wrapping paper, the tape, scissors, gift tags and ribbon.

    I don’t want to have to get up for anything.

    Full of simple and cute ideas that anyone can do! Red, Green and Navy Christmas Home Tour via RainonaTinRoof.com

    DIY Lucite Frame + Free Printable

    Then I find the stack of dvds.

    Blow off the dust.

    Full of simple and cute ideas that anyone can do! Red, Green and Navy Christmas Home Tour via RainonaTinRoof.com

    And search for the one labeled Christmas 1988 from Grannie’s Tape, put it into the dvd player and push play.

    Because its my favorite. 

    Full of simple and cute ideas that anyone can do! Red, Green and Navy Christmas Home Tour via RainonaTinRoof.com

    And I wrap gifts.

    And as I wrap gifts.

    Full of simple and cute ideas that anyone can do! Red, Green and Navy Christmas Home Tour via RainonaTinRoof.com

    I listen.

    To me – when I was three years old.

    Full of simple and cute ideas that anyone can do! Red, Green and Navy Christmas Home Tour via RainonaTinRoof.com

    Vintage Storybook Garland / Unusual but Meaningful Christmas Tree Ornaments

    And to their voices.

    And I try to memorize every word.

    And I watch.

    Every smile.

    Every laugh.

    Full of simple and cute ideas that anyone can do! Red, Green and Navy Christmas Home Tour via RainonaTinRoof.com

    Every present that was given.

    I try to remember what the burnt orange carpet felt like.

    And how shiny that Power Wheels Jeep was.

    But most of all, I just listen and watch.

    And think about my Grannie & Pap.

    Full of simple and cute ideas that anyone can do! Red, Green and Navy Christmas Home Tour via RainonaTinRoof.com

    If you want more simple holiday decorating, you can see part one of my Christmas home tour here and holiday crafts from this tour can be found here!

    The next stop in the Blogger Stylin’ Home Tours is Eleven Gables – see the complete list below too!

    You know you don’t wanna miss any of this crazy.

    Sign up to get my posts delivered to your inbox here.

    Stalk Me Here:

     Pinterest / Facebook / Twitter / Instagram

  • Red, Green, and Navy Christmas Home Tour Part 1

    Red, Green, and Navy Christmas Home Tour Part 1

    This is the post when I’m supposed to lie to you.

    Easy and budget friendly ideas that anyone can do! Red, Green & Navy Christmas Home Tour with simple ideas... via RainonaTinRoof.com

    When I don’t tell you that I went with red, green, and navy Christmas decorations because they worked so well with the decor in the rest of my house.

    When I’m supposed to act like I really cozy up in the adirondack chair outside….

    Easy and budget friendly ideas that anyone can do! Red, Green & Navy Christmas Home Tour with simple ideas... via RainonaTinRoof.com

    When its 30 degrees out.

    Easy and budget friendly ideas that anyone can do! Red, Green & Navy Christmas Home Tour with simple ideas... via RainonaTinRoof.com

    Of course I do, don’t you? Psssshhhh…

    Easy and budget friendly ideas that anyone can do! Red, Green & Navy Christmas Home Tour with simple ideas... via RainonaTinRoof.com

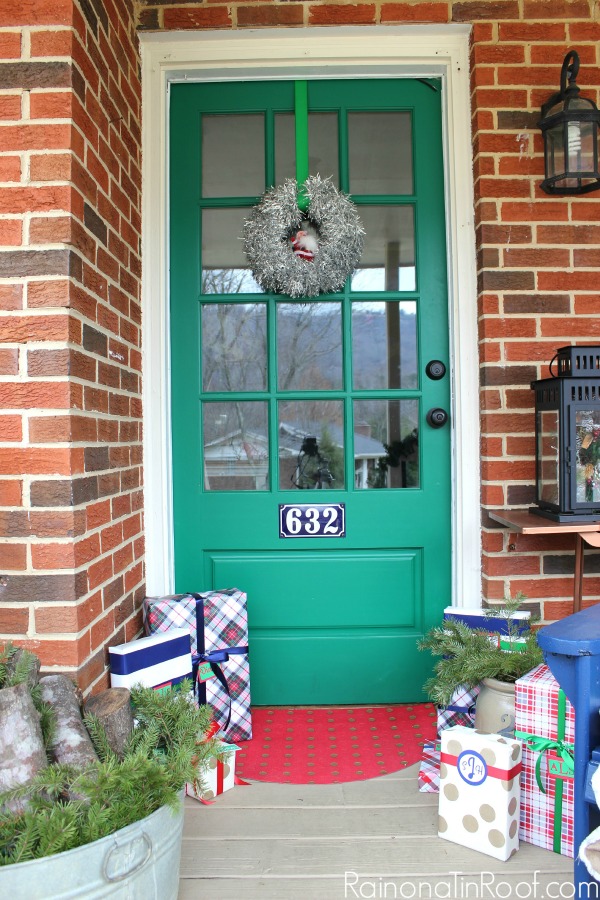
    And that I just leave Christmas presents on my porch.

    Easy and budget friendly ideas that anyone can do! Red, Green & Navy Christmas Home Tour with simple ideas... via RainonaTinRoof.com

    For anyone to just walk by and grab.

    And I’m not supposed to tell you about how I utterly failed at a new holiday wreath on multiple tries this year…

    Easy and budget friendly ideas that anyone can do! Red, Green & Navy Christmas Home Tour with simple ideas... via RainonaTinRoof.com

    And that I finally opted to just put the never-failed-me-yet Santa tinsel wreath on the door.

    Easy and budget friendly ideas that anyone can do! Red, Green & Navy Christmas Home Tour with simple ideas... via RainonaTinRoof.com

    I’m also supposed to pretend that my entryway table is always that clean.

    Easy and budget friendly ideas that anyone can do! Red, Green & Navy Christmas Home Tour with simple ideas... via RainonaTinRoof.com

    And that the bowl of Sour Patch Kids actually stays that full for more than a day.

    Easy and budget friendly ideas that anyone can do! Red, Green & Navy Christmas Home Tour with simple ideas... via RainonaTinRoof.com

    Raffle Ticket Christmas Card Holder

    Easy and budget friendly ideas that anyone can do! Red, Green & Navy Christmas Home Tour with simple ideas... via RainonaTinRoof.com

    And that all the toys are always put away.

    Yes, I’m aware the camel is on top of the manger. Apparently, the kid feels a camel should have proclaimed Baby Jesus’ birth instead of an angel. Who am I to judge?

    Easy and budget friendly ideas that anyone can do! Red, Green & Navy Christmas Home Tour with simple ideas... via RainonaTinRoof.com

    And I’ll pretend that I didn’t just move all those gifts from the outside to the entry table to the chalkboard wall. I totally just have that many laying around.

    I also won’t admit to the fact that I am totally making my gifts double as decor all around the house.

    Easy and budget friendly ideas that anyone can do! Red, Green & Navy Christmas Home Tour with simple ideas... via RainonaTinRoof.com

    Elf & Poinsettia DIY Christmas Wreath

    I totally just draped this wreath over the kitchen window very nonchalantly. Its not like it took me days to figure out a place for it and then 30 minutes to tie the ribbon just right.

    Easy and budget friendly ideas that anyone can do! Red, Green & Navy Christmas Home Tour with simple ideas... via RainonaTinRoof.com

    And I’ll also not tell you about crawling up on the kitchen island just to get the perfect angle for the photo of the open shelves.

    Easy and budget friendly ideas that anyone can do! Red, Green & Navy Christmas Home Tour with simple ideas... via RainonaTinRoof.com

    And I also won’t tell you that this deer looks almost exactly the same as it did in last year’s Christmas tour.

    That may or may not even be the exact same drawings around it. Surely, I’ve changed it in a year……

    But if it ain’t broke, don’t fix it, right?

    And that is exactly what I learned from this holiday’s decorating – do what works (even if its the same as last year), make it simple, and don’t over analyze yourself.

    pin-this-post

    Easy and budget friendly ideas that anyone can do! Red, Green & Navy Christmas Home Tour with simple ideas... via RainonaTinRoof.com

    You know you don’t wanna miss any of this crazy.

    Sign up to get my posts delivered to your inbox here.

    Stalk Me Here:

     Pinterest / Facebook / Twitter / Instagram

  • Clean that Disgustingly Gross Shower with One Single Tool

    Clean that Disgustingly Gross Shower with One Single Tool

    Apparently, I have no shame.

    None. At. All.

    Because first I showed you just how dusty, dirty, and messy my house was and now I’m showing you just how disgusting Grunt Labor’s shower is was.

    A really great idea for cleaning a shower and you only need one thing! Shower Cleaner DIY | Shower Cleaning Tips

    Disclosure: This post was sponsored by HomeRight. However, all opinions and disgustingly gross showers are 100% mine. This post contains affiliate links for your shopping convenience. Click here to read my full disclosure policy.

    To be honest, we had both lost all hope for this shower. Since we moved into the beloved foreclosure, its always been in pretty rough shape. I have scrubbed it with every cleaner and scrub brush known to man and it would remove the surface gunk, but not much else. I thought it was just permanently gross.

    I was wrong.  

    It took one single tool to clean this disgusting shower up.

    GROSS, but very interesting! Clean that Disgustingly Gross Shower with One Single Tool via RainonaTinRoof.com

    The HomeRight Steam Machine.

    No chemical cleaners, nothing else, just good old fashioned steam.

    Just so you know how gross this shower was:

    GROSS, but very interesting! Clean that Disgustingly Gross Shower with One Single Tool via RainonaTinRoof.com

    GROSS, but now I want one! Clean that Disgustingly Gross Shower with One Single Tool via RainonaTinRoof.com

    Told ya.

    And its mainly just on the right side of the shower – the other side hasn’t ever been as bad. Weird.

    I started by filling the steam machine up with water.

    GROSS, but very interesting! Clean that Disgustingly Gross Shower with One Single Tool via RainonaTinRoof.com

    I let it heat up for a little while.

    And then I went to scrubbing.

    A really great idea for cleaning a shower and you only need one thing! Shower Cleaner DIY | Shower Cleaning Tips

    I was pretty surprised at how easily it just cleaned up the shower pan. The gunk kind of just melted off.

    There are two brushes, both came with the steam machine, that I used on the shower. I started with the small regular nylon brush (two nylon brushes come with it).

    A really great idea for cleaning a shower and you only need one thing! Shower Cleaner DIY | Shower Cleaning Tips

    The nylon brush took off most of the gunk. When I got to some tougher spots, I put on the brass brush.

    A really great idea for cleaning a shower and you only need one thing! Shower Cleaner DIY | Shower Cleaning Tips

    As you clean your shower, be sure to stop every once and a while and rinse away all the grossness that is collecting – you don’t want it to dry back onto the shower.

    A really great idea for cleaning a shower and you only need one thing! Shower Cleaner DIY | Shower Cleaning Tips

    Yep, that’s the stuff you want to rinse away. Ewwwww.

    I wasn’t really keeping track of the time, but I’m thinking it took me 20 – 30 minutes to really get the shower pan cleaned up good with the steam machine.

    Here’s the after of that same area:

    A really great idea for cleaning a shower and you only need one thing! Shower Cleaner DIY | Shower Cleaning Tips

    And a side by side so your mouth can really hit the floor:

    A really great idea for cleaning a shower and you only need one thing! Shower Cleaner DIY | Shower Cleaning Tips

    I did not use the steam cleaner on the tile surround in this shower for one reason – its painted.

    When we moved into the beloved foreclosure, we painted both my shower tile and Grunt Labor’s. I was a little worried the steam may make some of the paint peel off in his shower, considering some of it already has. However, I have used my HomeRight Steam Mop on the marble tile in my bathroom floor and it has been awesome for cleaning grout.

    There was one spot in the shower pan that seems to be permanently stained.

    A really great idea for cleaning a shower and you only need one thing! Shower Cleaner DIY | Shower Cleaning Tips

    See right there in the bottom right corner? That’s the only place I couldn’t really get it clean. I’m totally cool with that though considering how bad it was before. Grunt Labor and I thought we would be replacing his entire shower pan and tile surround sometime soon. Now, we are thinking that we may be able to just replace his tile surround since the shower pan wasn’t as bad as we thought! Save that money!

    Have you used a steam cleaner in your bathroom before? Any tips to share?

    Need more cleaning tips? 

    9+ Must Read Cleaning Tips – for all around your house!

    5 Ways to Use a Mr. Clean Magic Eraser You Didn’t Know About – these are little gems for cleaning so many things!

    How to Get Pet Stains & Odors Out of Your Carpet Without Chemicals – easy!

    How I Clean My Entire Kitchen with one single thing – makes cleaning so much easier!

    You know you don’t wanna miss any of this crazy.

    Sign up to get my posts delivered to your inbox here.

    Stalk Me Here:

    Pinterest / Facebook / Twitter / Instagram

    pin-this-post

    A really great idea for cleaning a shower and you only need one thing! Shower Cleaner DIY | Shower Cleaning Tips

    SaveSave

  • A Grammy Themed Christmas Tree for Lauren

    A Grammy Themed Christmas Tree for Lauren

    I know what you are thinking.

    You are wondering why the girl who throws stuffed animals, barbies, G.I. Joes, glasses, and shoes on her Christmas tree is posting about a Grammy Themed Christmas tree – one that is color coordinated with not a stuffed animal in sight.

    A few months back, Dana & Nancy from Forest Home Media in Nashville contacted me. They wanted me to decorate a tree in the theme of a child’s wish – a child that is braver than I ever could be, fighting for their life. Afterwards, the tree would be auctioned off and proceeds would go to Make-A-Wish of Middle Tennessee.

    My first thoughts were:

    Me? You really want me? Have you seen my Christmas decor? Nothing matches, nothing is themed, its just all a big hot mess that somehow works for us.

    But I said yes. Because it was for an amazing cause.

    And I started acting like the little engine that could, “I think I can. I think I can. I think I can.”

    When Dana sent the email with the list of kids and their wishes, I knew I could.

    One of the kids was a girl.

    An 18 year old named Lauren, who has Cystic Fibrosis and her wish is to go to the Grammys. She loves music and playing the guitar.

    And if there is anything I love as much as decorating, its music – and little girls like Lauren who are braver than I’ll ever be.

    If you love music, this is the tree for you!! A Grammy Themed Christmas Tree via RainonaTinRoof.com

    I am the girl who knew for certain at the age of four that she was going to be the next Reba McEntire. And I still believed that until I finally reached high school and realized that my voice just wasn’t ever going to be pretty enough to sing in public – only in my car and the kitchen.

    Dreams crushed. Love of music still strong though. 

    I was thrilled to be able to share my love of music is such an awesome, awesome way with an extraordinary girl.

    There were four of us that were asked to decorate trees (look for the links to everyone at the end) and each was showcased in four different homes in the Kings Chapel Neighborhood in Arrington, Tennessee. My tree was in a home built by Drees Homes – it was stunning and I will be sharing more photos from it soon. The builders provided each of us with funds to decorate the tree and Kirkland’s also gave us a gift card for some of the ornaments – thank you!

    grammy-music-christmas-tree

    Doesn’t that tree look real? Its not!! Balsam Hill donated the trees for this project, so a big thank you to them! My tree was the Calistoga Fir.

    Honestly, I had no idea where I was going with this tree, except that I knew there would be lots of gold because the Grammys have gold awards. I knew I wanted musical notes somewhere and thought I may have to make them, but I ended up finding ones.

    If you love music, this is the tree for you!! A Grammy Themed Christmas Tree via RainonaTinRoof.com

    And they were already gold and sparkly, so that was a huge win.

    Then I found pink microphones, pink headphones and pink guitar ornaments.

    If you love music, this is the tree for you!! A Grammy Themed Christmas Tree via RainonaTinRoof.com

    Those worked perfectly since Lauren loves music and playing the guitar. It also helped to decided my colors of gold, a little black, and pops of pink.

    If you love music, this is the tree for you!! A Grammy Themed Christmas Tree via RainonaTinRoof.com

    The only thing I actually made myself for this tree was the bunting garland and the record tree skirt.

    If you love music, this is the tree for you!! A Grammy Themed Christmas Tree via RainonaTinRoof.com

    I found scrapbook paper with musical notes on it and made it exactly how I made the Vintage Storybook Garland on my tree.

    If you love music, this is the tree for you!! A Grammy Themed Christmas Tree via RainonaTinRoof.com

    I found some gold glitter paint that I put over the top of each “flag.”

    For the tree skirt, I put out a plea for old records on Facebook. A big thanks to Rosemary from Not Just Paper and Paint who convinced her husband to give me some of his old records, my friend, Kara, who rounded up a ton for me and my father-in-law who went through his record collection pulling out duplicates.

    If you love music, this is the tree for you!! A Grammy Themed Christmas Tree via RainonaTinRoof.com

    All I did was spray paint the records gold with this spray paint and laid them around the edges of the tree skirt. I opted not to glue them down because whoever wins this tree may not prefer gold records on their tree skirt.

    If you love music, this is the tree for you!! A Grammy Themed Christmas Tree via RainonaTinRoof.com

    Nancy, one part of Forest Home Media, saw my plea on Facebook and connected with one of her friends whose husband is a three time Grammy winner, Keb’ Mo’. Although they wouldn’t give me their Grammy  to pop on the top of the tree as I so desperately wanted (haha!), they did graciously send me an album of his that won a Grammy. How cool (and super nice) is that?! I was pretty pumped.

    If you love music, this is the tree for you!! A Grammy Themed Christmas Tree via RainonaTinRoof.com

    I tied it onto one of the gifts under the tree and it is part of my tree’s silent auction.

    And as if that wasn’t enough, Keb’ Mo’ and his wife, Robbie, even stopped by to see the tree!

    If you love music, this is the tree for you!! A Grammy Themed Christmas Tree via RainonaTinRoof.com

    Unfortunately, I wasn’t there to thank them in person for helping out, so here is a big virtual thank you!!

    I topped the tree off with a gold glittery star and some fun picks.

    If you love music, this is the tree for you!! A Grammy Themed Christmas Tree via RainonaTinRoof.com

    The trees (and gorgeous homes) can all be viewed at the Holiday Parade of Homes at Kings’ Chapel from now through December 21st. As I said earlier, all our trees will be auctioned off and the proceeds will go to Make-A-Wish of Middle Tennessee.

    Lauren, I hope you get to go to the Grammys, sweetie. 

    After we all decorated our trees, we had a fun blogger high tea that was sponsored by HomeTalk, StyleBlueprint and Kirkland’s. Big thanks to them for letting us have a little fun!

    The other trees were:

    Circus Themed Tree from Thistlewood Farms

    Super Model Themed Tree from Chaotically Creative

    Greece Themed Tree from The Decorologist

    And one more thing, while I still have your attention. 

    Guys, let’s all remember that it is so much more important to give back this time of  year than to receive, well I think that’s true throughout the year.

    There are so many good causes out there and even just giving a toy for a kid who won’t get anything for Christmas or $10 can help out.

    Thank you to everyone who made this event happen – it was truly an honor to be included.

    Looking for more holiday decorating ideas that sparkle?

    Be sure to see how to make these ornament clusters and don’t miss these simple but gorgeous holiday decorating ideas.

     You know you don’t wanna miss any of this crazy.

    Sign up to get my posts delivered to your inbox here.

    Stalk Me Here:

    Pinterest / Facebook / Twitter / Instagram

    pin-this-post

    If you love music, this is the tree for you!! A Grammy Themed Christmas Tree via RainonaTinRoof.com

  • Raffle Ticket Christmas Card Holder

    Raffle Ticket Christmas Card Holder

    When I was a kid, all the Christmas cards we received would be taped around a door frame, proudly displayed. I loved to look at them – especially the ones with photos (Those were the rich families – back in the 80’s it was much more expensive to put Christmas cards on your photos).

    I do still love getting everyone’s Christmas cards – with or without photos.

    I really love when we get Christmas cards from older relatives. You know they have that stockpile of Christmas cards that date back to 1954, and those are just the prettiest cards ever with all those vintage Christmas colors and scenes.

    Anyway, I wanted a better way to display all our Christmas cards this year.

    Basically, so everyone can see just how popular and cool I am – you know everyone wants to be friends with me, right?

    I’m kidding.

    For my new Christmas card holder, I opted to make it fun. With raffle tickets.

    Raffle Tickets!! Fun twist on your normal Christmas decor! Raffle Ticket Christmas Card Holder via RainonaTinRoof.com

    Disclosure: This project was sponsored by Staples. However, all opinions and love of weird things to decorate with are 100% mine. This post contains affiliate links for your shopping convenience. Click here to read my full disclosure policy.

    That’s right, I used raffle tickets.

    I’m sure that’s breaking some decorating or Christmas rule. Whatevs.

    Here’s how to make it.

    Because you know you want some raffle tickets for Christmas decor now too, don’t you?

    Told ya people wanted to be like me.

    Psstt… really I had no idea if this was going to work or not – 90% of my ideas never do.

    DIY Christmas Card Holder

    Materials & Supplies Needed:

    Steps

    Step 1: 

    Make the wood frame.

    Raffle Tickets!! Fun twist on your normal Christmas decor! Raffle Ticket Christmas Card Holder via RainonaTinRoof.com

    You can really make this any size you want. I made mine bigger just because I wanted it to also function as Christmas decor. Mine is 28 1/4″ high x 36″ wide. Stain your wood if you want to. I really wanted to use some of the old barn wood I used on the bottom of my kitchen island for this, but sadly I didn’t have enough here. Boo.

    After the wood is stained and dry, place glue on the top and bottoms of the vertical pieces, then place the horizontal pieces on top of the glue. Clamp it together or put something heavy on top of the corners.

    Step 2:

    Let the sparkliness commence!

    Raffle Tickets!! Fun twist on your normal Christmas decor! Raffle Ticket Christmas Card Holder via RainonaTinRoof.com

    To make the glittery word goodness, I used these stencils.

    Raffle Tickets!! Fun twist on your normal Christmas decor! Raffle Ticket Christmas Card Holder via RainonaTinRoof.com

    The stencils are cardboard and the letters just punch right out. Punch out the letters and lay them out on your frame. There are multiples of some letters, but you may still have to reuse some letters, like the “R” if you do “Merry & Bright.”

    Starting from the end of wherever you are putting your sparkly goodness, pounce a small amount of glue onto the stencil, then immediately shake the glitter on. My glitter shakers came from Staples as well (can’t find a link online, but I bought them in the store anyway.)

    Raffle Tickets!! Fun twist on your normal Christmas decor! Raffle Ticket Christmas Card Holder via RainonaTinRoof.com

    After you have put the glitter on, remove the stencil, and place the next letter to be stenciled on the frame. I put the edge of the stencil right against the letter I had just stenciled in terms of spacing (last photo). Continue until all your letters are done.

    Step 3: 

    Let your piece sit a while for the glue to dry, then just string raffle tickets (I used these) back and forth along the frame, securing with tape on the back.

    Use paperclips to secure the cards to the raffle tickets. I opted for these gold paperclips, just because they were prettier than the silver ones.

    Raffle Tickets!! Fun twist on your normal Christmas decor! Raffle Ticket Christmas Card Holder via RainonaTinRoof.com

    I love the stenciled letters – I think that font / style has a vintage feel too it. Its uncomplicated- how Christmas used to be.

    Raffle Tickets!! Fun twist on your normal Christmas decor! Raffle Ticket Christmas Card Holder via RainonaTinRoof.com

    Since we haven’t received any Christmas cards yet, you are stuck seeing all of ours from years past.

    Raffle Tickets!! Fun twist on your normal Christmas decor! Raffle Ticket Christmas Card Holder via RainonaTinRoof.com

    The cute little elf topped ornament tree tutorial is here.

    How do you display your holiday cards?

    More simple holiday projects and decorating ideas:

    Vintage Storybook Garland – an easy Christmas tree garland to make that your kids will love!

    How to Make Ornament Clusters – beautiful holiday decorations that are eye-catching but simple to make.

    And here are loads of Christmas decoration ideas that are simple and affordable.

    Easily come back to this post later by pinning the image below!

    Raffle Tickets!! Fun twist on your normal Christmas decor! Raffle Ticket Christmas Card Holder via RainonaTinRoof.com

    You know you don’t wanna miss any of this crazy.

    Sign up to get my posts delivered to your inbox here.

    Stalk Me Here:

    Pinterest / Facebook / Twitter / Instagram

  • Vintage Storybook Garland

    Vintage Storybook Garland

    I am a sucker for old Christmas storybooks.

    Doesn’t matter if they are barely bound together anymore, I buy them.

    They just have the best vintage-y Christmas colors and are so sweet.

    Last year, I made a vintage storybook garland to go around my tree with some of the pages from books that were falling apart. I didn’t post about it because I didn’t think it was a big deal. Then, when I did my Christmas tour last year and shared photos on Facebook recently, so many people said they loved the garland.

    And when the people talk, I listen.

    For the most part.

    So here it is.

    I don’t have step-by-step photos, but you won’t need them – its pretty simple.

    So sweet and simple to make! Vintage Storybook Garland via RainonaTinRoof.com

    This post contains affiliate links for your shopping convenience. Click here to read my full disclosure policy.

    DIY Christmas Tree Garland

    Materials & Supplies Needed:

    Steps

    Step 1:

    Lay the bunting template over the book pages, trace it onto your page, then cut it out.

    Step 2:

    With a small paintbrush, apply Mod Podge just around the edges of your now bunted (for lack of better wordage), book page. After applying the Mod Podge, immediately shake on some glitter and let it dry.

    Step 3: 

    After its dry, use your X-Acto knife to cut small slits into the upper edges of each page.

    Step 4:

    Run your string, twine, or ribbon through each page and hang it on your tree.

    So sweet and simple to make! Vintage Storybook Garland via RainonaTinRoof.com

    Like I said, I used a total of 18 pages for the garland, however I do cheat a bit and just string it back and forth on the front and sides – I didn’t have enough to go around the back of the tree.

    Judge if you want – I don’t care.

    So sweet and simple to make! Vintage Storybook Garland via RainonaTinRoof.com

    Lots of our pages also feature Mickey and friends – the kid loves him.

    Do you have a favorite garland or vintage storybook? 

    More kid-friendly holiday crafts and decorating ideas:

    Elf Hat Tree Topper – super simple to make and a fun topper for kiddos!

    7 Unusual but Meaningful Ornaments You Have Laying Around the House – break out the mementos for this one!

    Easily come back to this garland tutorial later by pinning the image below!

    So sweet and simple to make! Vintage Storybook Garland via RainonaTinRoof.com

    You know you don’t wanna miss any of this crazy.

    Sign up to get my posts delivered to your inbox here.

    Stalk Me Here:

    Pinterest / Facebook / Twitter / Instagram

    SaveSave

  • DIY Elf Hat Tree Topper

    DIY Elf Hat Tree Topper

    Looking for a fun tree topper this holiday season, but don’t want to spend a fortune? Here’s your answer! This elf hat tree topper is adorable, cheap to make and easily customizable!

    This is so easy to do, it almost feels wrong to post about it.

    But I’ve never let that stop me before.

    I have this cute little white Christmas tree I picked up at Goodwill a few years back, but its top has always been naked – no tree topper.

    This year as I was adding sparkly blue ornaments to it (the only color coordinated Christmas tree you will find here), I spied the kid’s birthday hat out of the corner of my eye and it hit me.

    Well, the hat didn’t actually hit me, but you know what I mean.

    Make an elf hat tree topper.

    That’s what hit me.

    This post contains affiliate links for your shopping convenience. Click here to read my full disclosure policy.

    Elf Hat Tree Topper

    As I said, this is so easy, it’s almost a sin.

    Almost.

    How to Make an Elf Hat

    Materials

    Steps

    Step 1

    Print out the paper pattern template from this post, then cut it out.

    Trace that pattern onto the green card stock, then cut that out.

    You could also use any color of card stock for make the hat, then cover it with green felt for a more realistic look if you wish!

    Step 2

    Form your card stock into a cone and hot glue along the seam.

    Step 3

    Freehand a triangle pattern (as seen below) onto the red card stock, cut it out, then hot glue onto the hat.

    You could also embellish with pom poms instead or add them on top of the red band!

    How to Make an Elf Hat

    Step 4

    Top off the hat with a pom pom, jingle bells or any other embellishment of your choice!

    I like to turn the hat at an angle on top of the tree to give it a playful feel.

    Even a kid could do this. Just don’t let them near the hot glue gun. Or anything hot for that matter, like say, a ummm, flat iron. It hasn’t happened here before or anything, I’m just sayin’.

    Do you have an easy go-to DIY tree topper? 

    More easy Christmas and holiday crafts….

    DIY Christmas Ornament Drink Stirrers – so easy to make and so fun for holidays parties!

    How to Make Character Stocking Holders – mine rocks a miniature Barbie from an 80’s McDonald’s Happy Meal. 🙂

    Simple & Affordable Christmas Decoration Ideas – gorgeous holiday decorating, without breaking the bank.

    Want to come back to this elf hat tutorial later? Just pin the image below!

    DIY Elf Hat Tree Topper

    You know you don’t wanna miss any of this crazy.

    Sign up to get my posts delivered to your inbox here.

    Stalk Me Here:

    Pinterest / Facebook / Twitter / Instagram

  • 7 Unusual but Meaningful Ornaments You Have Around the House

    7 Unusual but Meaningful Ornaments You Have Around the House

    Before you go buying all those color coordinated glass ornaments this year, first take a look at these unique Christmas ornaments! The best part? You’ve already got them in your house! These may seem like weird ornaments to some, but they’ll be special to you.

    If you were around here last year, you may remember my Christmas tree is not what many would consider a “pretty” tree.

    I don’t color coordinate.

    I don’t have a whole lot of beautifully detailed ornaments.

    There aren’t even many breakable ones on there.

    But it is filled with meaningful ornaments – some that aren’t even supposed to be ornaments.

    And many are unusual.

    But so am I.

    Unique Christmas Ornaments

    Today, I’m going to chat about some of our meaningful, but also unusual Christmas ornaments. The great thing about these, besides them being sentimental of course, is that you’ll only have to go as far as your own home for them.

    Special Christmas Ornaments

    1. Baby Shoes

    Special Christmas Ornaments

    I’m not one to get the kid’s shoes bronzed. I’ve never really been a fan of that. However, those very first Nikes of hers I will keep forever. Her first pair grace our tree (complete with dirt) every year.

    2. Sentimental Family Heirlooms(?)

    Unusual Christmas Ornaments

    Ok, so glasses aren’t technically considered an heirloom. However, these were my Grannie’s glasses that were in her beloved Cadillac Sedan Deville. They usually stay in a tray in my office so I can look at them and smile every once in a while, but during Christmas I like to put them on the tree so everyone can enjoy them.

    3. Keys

    Weird Ornaments

    Speaking of that Cadillac, there’s the key that opened its door. Us southerners tend to get attached to vehicles very easily. We can usually tell you exactly what make and model we were driving when we learned to drive a stick shift (1989 Chevrolet Cheyenne Long Bed Truck), caused our grandfather to beat on the dash because he thought we were going to run off the mountain (1994 Dodge Dakota), got pulled over for the first time (1989 Cadillac Sedan Deville), and ran into the ditch and couldn’t get out (2003 Dodge Ram 1500).

    P.S. – I think a special key and tag like this would make a great gift!

    4. Special Toys

    Unique Ornaments

    These keys have been around for as long as I can remember. I played with them at my grandparent’s house as a kid and my dad and uncle did too.

    Weird Christmas Tree Ornaments

    Anyone else remember the snap bead necklaces? When I was a little girl, my dad and I would go and buy my great-grandfather his groceries every week. He would usually give me a dollar to two to get something, and I always opted for these bead necklaces.

    5. Cake Toppers

    Unique Christmas Tree Ornaments

    Fun Fact: Mine and Grunt Labor’s cake topper was what you see above – a Barbie and GIJOE figurine. Instead of them staying in a box all year long, they are on the tree. I’m sure you could take a normal cake topper too and nestle it into the Christmas tree. Heck, you could even make it your tree topper!

    6. Small Stuffed Animals

    Special Christmas Tree Ornaments

    It just occurred to me that this probably falls under toys. Whatevs. When I was a little girl, my grannie would put stuffed animals on the Christmas tree for me. These are two of the ones she put on the tree for me and I still put them on my tree every year. My daughter loves these animal ornaments.

    7. PEZ Dispensers

    Unique Christmas Tree Ornaments

    These aren’t quite as meaningful as the rest – besides the fact that I just love Batman – but they are pretty fun. At a yard sale a few months back, I found a box full of PEZ dispensers for a quarter each. I snagged this Batman one and a few other favorite characters that are gracing my Christmas tree. And really – who doesn’t just love PEZ candy? It kind of takes you back to your childhood, right?

     What are your favorite unique ornaments on your Christmas tree?

    Looking for more unique ways to decorate for the season?

    DIY Stocking Holders – not your average stocking holders. 😉

    Vintage Storybook Garland – my family adores this Christmas tree garland featuring pages from holiday storybooks. It’s so easy to make too!

    How to Make an Elf Hat Tree Topper – a super fun craft for kiddos!

    Want to remember these ornament ideas for later? Just pin the image below!

    Unusual Christmas Tree Ornaments

    You know you don’t wanna miss any of this crazy.

    Sign up to get my posts delivered to your inbox here.

    Stalk Me Here:

    Pinterest / Facebook / Twitter / Instagram

  • Vintage Radio turned Bar Cabinet

    Vintage Radio turned Bar Cabinet

    Grunt Labor has a man cave.

    Did you know that?

    But really, its only been his man cave for the past three months or so.

    Prior to that, it was the dumping ground for yard sale items, the kid’s toys, an outdated computer, and just crap in general.

    Said crap was moved elsewhere (a.k.a. shoved in the attic) and he is finally getting the room that he deserves.

    That he deserved a long time ago.

    His words to me were, “Just do your thing.” when asked what he wanted done to the space.

    So I’m doing my thang. 

    Because I like to do my thang, rather than my thing.

    And I started with this vintage radio turned bar cabinet.

    So cool! Awesome way to upcycle outdated pieces and that color! Gorgeous! Vintage Radio turned Bar Cabinet via RainonaTinRoof.com

    Disclosure: This post was a collaboration with Velvet Finishes. All opinions and love of rat’s nests infested pieces are 100% mine. This post contains affiliate links for your shopping convenience. Click here to read my full disclosure policy.

    This won’t be shocking to you I’m sure, but this piece was my great grandfather’s.

    I know, well as we all know, the motto in my family seems to be, “Just give the stuff no one wants to Jenna. She’s a hoarder.”

    It’s true.

    I actually got this piece eight or so years ago in my former life. When Grunt Labor and I moved in together, there wasn’t enough room for all my furniture so I left it with my dad.

    So I guess technically, I’m an indian giver since I wanted it back?

    Dad wasn’t using it though, it was in a storage shed.

    Where rats also live.

    I know this because there were multiple rat’s nests in this piece.

    I can hear you through my computer.

    “First she kills snakes, now she’s taking home rat’s nests, God help the poor girl, all the cheap beer has finally gotten to her.”

    I gave it a thorough cleaning, so don’t worry.

    Here’s what I started with:

    The top two photos are of the front of the piece. The bottom left door didn’t open – it was glued shut and was made like this.

    And I’m sure you can see the break in the right door.

    Vintage Radio turned Bar Cabinet via RainonaTinRoof.com

    And that’s the back. There wasn’t a back for the bottom left cabinet either.

    And one of the drawers…

    Vintage Radio turned Bar Cabinet via RainonaTinRoof.com

    Well, it wasn’t such a drawer anymore. My dad said it used to hold a record player. It had a piece of cardboard for the bottom that was rotted out.

    Fun times, y’all. Fun times.

    I started with the doors. First, I took off the one that was broken. I removed both of their backings and just left them out – they were gross. On the broken door, I glued it together and clamped it where needed.

    Vintage Radio turned Bar Cabinet via RainonaTinRoof.comAfter it dried, there was still a little chunk of wood missing in the design. I filled it with two coats of wood filler and then sanded it smooth.

    I pried off the door that was glued shut, which wasn’t as hard as I thought it would be.

    I also pulled out the actual radio and cut out a thin square piece of plywood to be the backing on the radio where there wasn’t one before.

    And then we were finally ready for paint.

    I will say that there was a small part of me that didn’t want to paint this piece – once upon a time, it had a beautiful glossy stain. It still looked ok far away, but closer up, it was covered in scratches.

    Vintage Radio turned Bar Cabinet via RainonaTinRoof.com

    Since it did have a glossy finish, I primed it first with Ready and then painted it with Velvet Finishes Modern.

    Velvet Finishes Modern & Ready Primer via RainonaTinRoof.com

    To apply the Ready, you just spray it on your piece, let it sit for a minute, then wipe it down with a paper towel. Repeat until the shine is gone from your piece.

    Velvet Finishes Ready Spray Primer via RainonaTinRoof.com

    Yea, I’m not even kidding. Most of the time you don’t even need a primer with this paint, but for glossy surfaces its recommended.

    After the Ready was dry, I spray painted the trim on the drawers and doors gold and let it dry.

    Vintage Radio turned Bar Cabinet via RainonaTinRoof.com

    Next, I painted Modern over the piece.

    Velvet Finishes Modern via RainonaTinRoof.com

    Normally, I would use my paint sprayer on this type of makeover, but it was unusually cold here last week. I just didn’t want to freeze my tail off with my garage door opened for ventilation. I was worried about seeing a lot of the brush strokes, but you can’t see that many at all.

    It took three coats of Modern to do this piece. I had a full quart to begin with and used about half of it. The paint had pretty good coverage.

    Since this piece is going to be used as a bar of sorts, I wanted to make sure it could stand up to drinks and spills. So, I gave it a coat of Protect after the paint dried.

    Velvet Finishes Protect via RainonaTinRoof.com

    Protect is a polyurethane that is non-yellowing. All you do is brush on a thin coat.

    So cool! Awesome way to upcycle outdated pieces and that color! Gorgeous! Vintage Radio turned Bar Cabinet via RainonaTinRoof.com

    And it is sitting pretty in the man cave now.

    So cool! Awesome way to upcycle outdated pieces and that color! Gorgeous! Vintage Radio turned Bar Cabinet via RainonaTinRoof.com

    I love the gold with the Modern blue. Imagine that.

    I kept the piece’s original hardware and restored it with Bar Keeper’s Friend. 

    THAT COLOR! Gorgeous! Vintage Radio turned Bar Cabinet via RainonaTinRoof.com

    THAT COLOR! Gorgeous! Vintage Radio turned Bar Cabinet via RainonaTinRoof.com

    What do you think of the new bar cabinet and its bold hue?

    Love a good furniture makeover? See these then…

    11 Colorful Furniture Makeovers – glorious, glorious color.

    Here’s my complete guide to painting furniture – any question you’ve ever had, answered.

    And see all my furniture makeovers right here.

    You know you don’t wanna miss any of this crazy.

    Sign up to get my posts delivered to your inbox here.

    Stalk Me Here:

    Pinterest / Facebook / Twitter / Instagram

    pin-this-post

    So cool! Awesome way to upcycle outdated pieces and that color! Gorgeous! Vintage Radio turned Bar Cabinet via RainonaTinRoof.com

    SaveSave

  • DIY Golden Snake Bowl

    DIY Golden Snake Bowl

    At my old house, killing snakes was at least a monthly occurrence.

    There was the one time my Dad showed up, walked up the porch steps, immediately started jumping around and yelling, “JENNA, SNAKE!”

    It was wrapped around a porch chair, hissing.

    I killed it with a hoe.

    And there was the one that liked to live inside my roof on the back of the house. Every once in a while, it would stick its head out and I could see it from the kitchen window – I could never catch him.

    And then once, as I was walking down the stairs, talking to my cousin on the phone, I was met by a snake in the middle of the living room floor. I hung up, killed the snake, then called her back two minutes later.

    She answered asking if I was ok. Of course, it was just a snake.

    It was a nearly 100 year old farm house with lots of holes – what did you expect?

    Luckily, we don’t really have any snakes to deal with around here.

    Except pretty gold ones – made into a bowl.

    Had no clue you could do something like this with a heat gun! So many possibilities! DIY Gold Snake Bowl via RainonaTinRoof.com

    Disclosure: This post was sponsored by HomeRight. However, all opinions, snake killing stories, and love of golden snakes are 100% mine. This post contains affiliate links for your shopping convenience. Click here to read my full disclosure policy.

    Let me say that I do realize this will not be to everyone’s liking. I love it, so that’s all that matters. If you don’t like it, just use it as inspiration for something else you could make into a bowl.

    And also, before anyone starts to call me a devil worshipper because I made snake bowl – I’m not.

    I live in the south, I know someone is bound to think it.

    DIY Gold Snake Bowl

    Tools & Supplies Needed:

    Had no clue you could do something like this with a heat gun! So many possibilities! DIY Gold Snake Bowl via RainonaTinRoof.com

    • 2 Plastic Toy Snakes – I found that the best ones were the most flexible ones, which I found at The Dollar Tree.
    • Heat Gun – I used one of my new favorite tools, the HomeRight Heat Pro.
    • Heat Safe Gloves
    • Gold Spray Paint
    • Bowl that is approximately the size you want your bowl to be – make sure it will stand up to heat – mine was stainless steel.
    • Respirator Mask – just because you never know what kind of fumes the melting of the snakes will let off.

    Steps

    Step 1: 

    Put on the respirator. Turn your heat gun on – around medium high. Begin wrapping the snake into a circle, while focusing the heat between the rolls of the snake. Make sense?

    Had no clue you could do something like this with a heat gun! So many possibilities! DIY Gold Snake Bowl via RainonaTinRoof.com

    You don’t want to completely melt the snake, just weld it together.

    Step 2:

    Once you’ve got a small circle of him welded together, place it in the bowl and begin wrapping the snake around the bowl, while still focusing the heat gun in between his rolls.

    Had no clue you could do something like this with a heat gun! So many possibilities! DIY Gold Snake Bowl via RainonaTinRoof.com

    Every once in a while, stop and use your gloves to press down on the snake to weld him together well.

    Step 3: 

    Place your second snake in the bowl. Do this by taking the smallest end of the snake and placing it between the top rolls of the bottom snake as shown below.

    Had no clue you could do something like this with a heat gun! So many possibilities! DIY Gold Snake Bowl via RainonaTinRoof.com

    Heat it up and continue pushing it together with your gloves until its all welded together. Let the snake cool in the bowl for a couple of hours.

    Step 4:

    Once the snake is out of the bowl and fully cooled off, give it a coat of gold spray paint.

    Had no clue you could do something like this with a heat gun! So many possibilities! DIY Gold Snake Bowl via RainonaTinRoof.com

    Aren’t snakes much prettier gold?

    Had no clue you could do something like this with a heat gun! So many possibilities! DIY Gold Snake Bowl via RainonaTinRoof.com

    Especially when it only cost me a whopping $2, since I already had everything else on hand.

    I am in love with my heat gun – its one of my new favorite toys and so easy to use.

    Want to know what else a heat gun can do? 

    DIY Snake Bud Vase– made with a rubber snake too!

    How to Use a Heat Gun and 15 Things to do With It – you won’t believe all the things it’s capable of!

    How to Strip and Restain Furniture – so much less mess!

    You know you don’t wanna miss any of this crazy.

    Sign up to get my posts delivered to your inbox here.

    Stalk Me Here:

    Pinterest / Facebook / Twitter / Instagram

    pin-this-postHad no clue you could do something like this with a heat gun! So many possibilities! DIY Gold Snake Bowl via RainonaTinRoof.com

    SaveSave

  • DIY Faux Malachite Tray (For Less than $10)

    DIY Faux Malachite Tray (For Less than $10)

    Lately, I’ve been lusting.

    Lusting after this malachite fabric.

    I’ve kind of been dreaming and scheming to make that fabric into curtains for the living room.

    But I just can’t bite the bullet yet.

    But I do love malachite. 

    And as I was walking through the craft store the other day, plotting to make a pink and white marbled tray, I changed my mind.

    Which happens often. 

    I would make a faux malachite tray. 

    And I did.

    ANYONE can do this - its hard to mess up! And its cheap! DIY Faux Malachite Tray (For Less than $10) via RainonaTinRoof.com

    This post contains affiliate links for your shopping convenience. Click here to read my full disclosure policy.

    The best part?

    It will cost you $10 or less.

    If you are like me and tend to have some gold spray paint lying around, its only going to set you back about $6.

    Boom.

    How to Make a Faux Malachite Tray

    Materials & Supplies Needed:

    ANYONE can do this - its hard to mess up! And its cheap! DIY Faux Malachite Tray (For Less than $10) via RainonaTinRoof.com

    Steps

    Step 1: 

    Spray paint your picture frame gold.

    Step 2:

    Starting with the darkest color of green, squeeze out a line into the bottom of the tray. On both sides of the darkest green, squeeze out lines of the next darkest, and finally on both sides of those lines, squeeze out lines of the lightest green. It will eventually look like this:

    ANYONE can do this - its hard to mess up! And its cheap! DIY Faux Malachite Tray (For Less than $10) via RainonaTinRoof.com

    You will see that you kind of start to curve your lines as you work your way out. Don’t worry about that.

    Stop every once in a while and tap your tray against a level solid surface to kind of spread the paint out, but still maintain the pattern. Once you’ve got most of the tray covered with paint, you can move the tray around to get in any corners.

    Step 3:

    Run a toothpick back and forth and all around throughout the paint while it is still wet.

    ANYONE can do this - its hard to mess up! And its cheap! DIY Faux Malachite Tray (For Less than $10) via RainonaTinRoof.com

    Just go crazy with it until you have a pattern you like. You really can’t mess this up.

    Step 4: 

    Let the paint fully cure. This is a lot of paint, so its going to take a while. I let mine sit untouched for three days to let it fully dry.

    After its dry, you may have some green paint where you don’t want it on your gold, or maybe I’m the only hot mess crafter around. To cover those spots, I laid a few sheets of plain white printer paper in the tray and pressed it down with my hand while spray painting over the spots.

    ANYONE can do this - its hard to mess up! And its cheap! DIY Faux Malachite Tray (For Less than $10) via RainonaTinRoof.com

    Yes, your hands will get spray paint on them. Wear gloves if you aren’t down with that.

    Step 5: 

    After the spray paint dries, give your faux malachite a coat of satin Mod Podge and allow it to dry.

    ANYONE can do this - its hard to mess up! And its cheap! DIY Faux Malachite Tray (For Less than $10) via RainonaTinRoof.com

    This is totally one of my new favorite trays. I know – I’m kind of a tray whore.

    I love the way the gold snake bowl looks against the faux malachite.

    Are you a tray whore too? 

    Here are more tray makeovers you might like then…

    DIY Bathtub Tray – a simple build and functional!

    DIY Monogrammed Tray – makes a great gift!

     DIY Lucite Trays for less than $5 – so easy to make.

    You know you don’t wanna miss any of this crazy.

    Sign up to get my posts delivered to your inbox here.

    Stalk Me Here:

    Pinterest / Facebook / Twitter /Instagram

    pin-this-post

    ANYONE can do this - its hard to mess up! And its cheap! DIY Faux Malachite Tray (For Less than $10) via RainonaTinRoof.com

    SaveSaveSaveSaveSaveSave

  • 7 Unique Kitchen Island Ideas on a Budget

    7 Unique Kitchen Island Ideas on a Budget

    Increase the counter space and storage space in your kitchen with a new kitchen island – DIY style! Here are seven different kitchen island ideas on a budget that are functional and creative! 

    On the last three “house hunts” for a new home, a kitchen island was always at the top of the list in the kitchen space. The kitchen didn’t have to have an island right then, but there had to be a space where we could DIY one – and we’re pretty creative about fitting things like that in spaces. 🙂

    Kitchen islands can have a serious impact on your kitchen’s functionality – they can offer much needed food preparation space and also extra storage space. Who couldn’t use more of that in their kitchen?!

    These kitchen island designs are not only unique and creative, but they can easily be tweaked to work in any kitchen – big or small!

    Kitchen Island Ideas DIY

    DIY Reclaimed Materials Kitchen Island

    As you know, I am very partial to my kitchen island. I love it. Like love it so much, I threaten to be laid out on it when I die.

    kitchen island ideas on a budget - island made from reclaimed wood

    Grunt Labor & I built our kitchen island from barn wood out of my great grandfather’s barn and old porch posts.

    Turn a Sofa Table into a Kitchen Island

    kitchen island ideas diy - kitchen island made from a sofa table

    I had never thought of this before – find a sofa table you like and turn it into a kitchen island! That’s just what Designing Domesticity did! The open shelves below are perfect for larger kitchen items.

    Turn a Dresser into a Kitchen Island

    diy kitchen island ideas - island made from a dresser

    How about just taking an old dresser, painting it a bright color and turning it into an island? I love this one from You’re So Martha.

    diy kitchen islands on a budget - islands made from dressers with area for barstools.

    Here’s another dresser turned island, but this one from traerloves has an added overhang where you could push bar stools under. This would make the perfect spot for breakfast! Love how they added that overhang – such a unique diy.

    No room for a floating island? What about a kitchen peninsula?

    Turn a Dresser into a Kitchen Peninsula

    DIY Kitchen Peninsula made from a Dresser

    If you can’t get your hands on an old dresser, you could always pick up an IKEA dresser on the cheap and make it into an island. Ruffles and Such made her IKEA dresser into a peninsula and a breakfast bar.

    Small Kitchen Island Ideas

    Small diy kitchen island build

    This kitchen island looks pretty easy to make and very budget friendly from Kruse’s Workshop. It’s also narrow, so it would be perfect for a smaller rustic farmhouse kitchen.

    diy budget kitchen islands - rustic farmhouse kitchen island

    This kitchen island from Shanty 2 Chic is a bit more complicated to build, but only costs $85! It’s another one that is smaller scale so great for a small kitchen. It also has great shelves for storage and that butcher block countertop is gorgeous!

    Any DIY kitchen island ideas you’re brewing up?

    Need more DIY projects for the kitchen?

    See how I made laminate counters look like stone.

    And here are nine more DIY countertop makeover ideas.

    10+ Kitchen Ideas for Decorating, Organizing, and Storage – super good ones too.

    Want to come back to these kitchen island ideas later? Pin the image below!

    unique kitchen island ideas on a budget

    You know you don’t wanna miss any of this crazy.

    Stalk Me Here:

    Pinterest / Facebook / Twitter / Instagram

  • DIY Lucite Frame + Gone With the Wind Printable

    DIY Lucite Frame + Gone With the Wind Printable

    I am a sucker for many things.

    Laffy Taffy.

    Kelly Green.

    Oh, and Navy Blue or Cobalt Blue – its pretty good too.

    Sausage & Biscuits.

    Grunt Labor.

    Cherry Coke.

    Cheap Beer.

    Lucite.

    Good Southern Movies.

    The last two are the focus of this project.

    Because really who doesn’t love a little faux lucite and a good Gone With the Wind quote?

    Now, let’s pair those together in this DIY Lucite Frame.

    AWESOME idea to really showcase the art - super affordable too! DIY Lucite Frame + Gone With the Wind Printable via RainonaTinRoof.com

    This post contains affiliate links for your shopping convenience. Click here to read my full disclosure policy.

    Start to finish, this is going to take you all of 10 minutes. If that.

    Boom.

    How to Make a Lucite Wall Frame

    Tools & Supplies Needed:

    AWESOME idea to really showcase the art - super affordable too! DIY Lucite Frame + Gone With the Wind Printable via RainonaTinRoof.com

    • Printable (link at end of post) or other art of your choice.
    • 2 pieces of Acrylic or Styrene Sheets in whatever size of your choice. Mine are 18″ x 24″, but you can do whatever size you want. I got mine at Home Depot. They are also on Amazon and I’m sure at other home improvement stores.
    • 4 – #8 Machine Screws 3/4″ length (the length can be smaller if you aren’t using as thick of acrylic as I was.)
    • 4 – #8 Screw Nuts
    • Drill and Drill Bit the size of your screw ends
    • 4 Small Clamps
    • Pen or Pencil

    Steps

    Step 1: 

    Take the plastic off the acrylic.

    AWESOME idea to really showcase the art - super affordable too! DIY Lucite Frame + Gone With the Wind Printable via RainonaTinRoof.com

    Step 2: 

    Place your art on one of the pieces of acrylic. You may want to put a couple pieces of tape on the back of the art to keep it in place while you make the frame. Next, place the other piece of acrylic directly on top of that.

    AWESOME idea to really showcase the art - super affordable too! DIY Lucite Frame + Gone With the Wind Printable via RainonaTinRoof.com

    Clamp it all together.

    Step 3: 

    Mark where you want your screws to go.

    AWESOME idea to really showcase the art - super affordable too! DIY Lucite Frame + Gone With the Wind Printable via RainonaTinRoof.com

    I came in about 1 1/4″ on both sides.

    Step 4: 

    Going slowly and not putting too much pressure on the drill, drill through your marks until you make it through both pieces of acrylic.

    AWESOME idea to really showcase the art - super affordable too! DIY Lucite Frame + Gone With the Wind Printable via RainonaTinRoof.com

    Step 5:

    Place a screw through each of the holes and screw a nut onto the back.

    AWESOME idea to really showcase the art - super affordable too! DIY Lucite Frame + Gone With the Wind Printable via RainonaTinRoof.com

    AWESOME idea to really showcase the art - super affordable too! DIY Lucite Frame + Gone With the Wind Printable via RainonaTinRoof.com

    Heck of a lot cheaper than having someone else frame art for you.

    AWESOME idea to really showcase the art - super affordable too! DIY Lucite Frame + Gone With the Wind Printable via RainonaTinRoof.com

    Don’t you just love that quote from Rhett?

    It will never get old.

    Free Gone with the Wind Printable

    I hope you have a damn good day.

    Looking for more great projects to add to your list?

    How to Make a Huge Wall Frame for Cheap – and I mean huge. And cheap.

    DIY Lucite Handrail – the sexiest handrail you ever did see.

    DIY Lucite Trays – another lucite hack and it costs less than $5 to make.

    Free Printable Horse Art – gorgeous artwork that’s free!

    You know you don’t wanna miss any of this crazy.

    Sign up to get my posts delivered to your inbox here.

    Stalk Me Here:

    Pinterest / Facebook / Twitter / Instagram

    pin-this-post

    AWESOME idea to really showcase the art - super affordable too! DIY Lucite Frame + Gone With the Wind Printable via RainonaTinRoof.com

    SaveSave

  • Pumpkin Place Card Holders (with Dollar Tree Pumpkins!)

    Pumpkin Place Card Holders (with Dollar Tree Pumpkins!)

    These little gems are the perfect fall place card holders – they’ll carry you through the entire season! And they are super affordable – you can make these pumpkin place card holders with items from the Dollar Tree!

    I would like to thank the Dollar Tree for two things.

    1. Having an abundant supply of plastic toys for me to spray paint.

    2. Having cheap pumpkins that make fabulous place card holders.

    I know, I said I wasn’t doing any more fall crafts, but really how can I turn down $1 pumpkins that can be made into fabulous pumpkin place card holders?

    I thought you’d agree.

    They are also really for my Thanksgiving tablescape coming up tomorrow, so that doesn’t really qualify as a fall craft…

    Pumpkin Place Card Holders

    Disclosure: This post was a collaboration with Velvet Finishes. All opinions and love of Dollar Tree pumpkins are 100% mine. This post contains affiliate links for your shopping convenience. Click here to read my full disclosure policy.

    I really really really wanted to paint these green.

    Imagine that.

    But, I had just done the green pumpkins for my other fall decor and I did want these to look a bit harvest-y. So, I opted for a deep red. I also made some “aged” pumpkins for the centerpiece that I’ll show you too.

    Dollar Tree Place Card Holders

    Materials & Supplies Needed:

    Dollar Tree Place Card Holders

    Materials & Supplies for the Name Cards:

    Steps

    Step 1:

    To get the deep red that I used on the pumpkins, I mixed together Vivid & Luxurious.

    Fall Place Card Holders with Painted Pumpkins

    I started with three parts vivid and one part luxurious. Easy peasy. After I mixed up my concoction, I wanted a bit more red, so I added just a large dollop of red to the mix and mixed again.

    Then, I painted it on the pumpkins with a plain old non-fancy chip brush.

    DIY Pumpkin Place Card Holders

    I did two coats on each pumpkin.

    Step 2:

    After the pumpkins dried, I applied Mod Podge to the stem and then sprinkled on gold glitter.

    Painted Pumpkin Dollar Tree Place Card Holders

    Step 3:

    To make the name cards, I just used the same method I did on my DIY Silhouette Gift Tags last Christmas. I cut out the actual tag and silhouette on my Silhouette Cutting Machine and then glued down the silhouette to the tag. With these, I ran some Mod Podge along the edges and then poured glitter on top. I wrote the name with a gold Sharpie paint pen.

    Step 4:

    To attach the feather and card together, simply tie a few feathers together, and then tie them onto the place card. I just put a piece of tape on the back of the card to attach it to the pumpkin.

    I also made these super cute little pumpkins as part of the centerpiece you’ll see tomorrow.

    Aged Pumpkin Place Card Holders

    To make these, first paint your pumpkins with Soulful.

    DIY Aged Pumpkins from the Dollar Tree

    I did two coats. After its dried, come back and dry brush on Rococo.

    How to Make Aged Pumpkins

    You don’t want to have hardly any paint on your brush. Dip it in the paint, dab most of it off, then just do quick swipes up and down the pumpkin.

    After that dried, I did a very light coat of the Enhance Dark Glaze.

    DIY Aged PumpkinsAs soon as I painted on a few swipes, I came back with my rag and wiped it off.

    DIY Aged Pumpkins with pumpkins from the Dollar Tree

    If you have been around here long enough, you know I typically suck at glazes. This one is so much easier to use than any I’ve tried before. I used it on my IKEA Tarva Drink Bar and was honestly scared I would ruin the whole thing with the glaze, but I didn’t! It looked fab!

    Instead of using these “aged pumpkins” as place card holders, I wrote Give Thanks on them.

    More easy fall crafts: 

    DIY Ampersand Pumpkin – fall decor, but with a chic twist.

    Fall Mums Watercolor Printables – free printable art in five different styles.

    7 Simple and Frugal Fall Crafts and Decorating Ideas – easy on the wallet, high on style.

    Want to come back to these later? Just picture the image below!

    DIY Pumpkin Place Card Holders with stuff from the Dollar Tree

    You know you don’t wanna miss any of this crazy.

    Sign up to get my posts delivered to your inbox here.

    Stalk Me Here:

    Pinterest / Facebook / Twitter / Instagram

    SaveSave