Blog

  • How to Clean A Ridiculously Gross & Dirty Sidewalk

    How to Clean A Ridiculously Gross & Dirty Sidewalk

    I am almost ashamed to show you just how gross my sidewalk was.

    Almost.

    But I know that you guys understand the concept of real life.

    Real life that involves neglecting things such as the sidewalk while focusing on much more important and fun things such as a kitchen makeover or just chasing around the circus at the park.

    When we bought the beloved foreclosure, the exterior was the last thing on our minds. It may not have been that pretty, but there was nothing wrong with it and we would have rather had a functional kitchen and bathroom rather than a pretty exterior.

    So we didn’t really touch the exterior except for some painting on the porch and a semi-makeover on the screened-in porch.

    This summer I kicked the screened-in porch up quite a few notches with a complete (and super colorful) makeover.

    And then I looked at our sidewalk.

    And realized just how disgustingly gross it was.

    How to Clean A Sidewalk | Outdoor Cleaning Tips | Outdoor Cleaning Hacks | Exterior Cleaning | Cleaning Concrete

    Disclosure: This post is sponsored by HomeRight and Thompson’s provided me with their products. However, all opinions and ridiculously dirty sidewalks are 100% mine. This post contains affiliate links for your shopping convenience. Click here to read my full disclosure policy.

    You guys.

    I had no idea just how dirty my sidewalk was until after it was cleaned.

    Here is the before:

    How to Clean A Sidewalk | Outdoor Cleaning Tips | Outdoor Cleaning Hacks | Exterior CleaningI knew there were some stains and a strange funk growing on it, but I had no idea how it was really supposed to look. Honestly guys, I don’t think that this sidewalk had been cleaned in at least 15 years.

    I’m trying to be optimistic on that timeframe. I’m probably wrong.

    Grunt Labor doesn’t think that it was ever cleaned before now.

    Here’s how we cleaned this bad boy up.

    How to Clean a Sidewalk

    Supplies Needed: 

    Steps

    Step 1

    Give your sidewalk a light scrubbing with the scrub brush to remove any loose dirt or grass and loosen up any stuck on dirt.

    How to Clean A Sidewalk | Outdoor Cleaning Tips | Outdoor Cleaning Hacks | Exterior Cleaning

    Step 2

    You don’t want your sidewalk to be soaking wet, only lightly wet when you apply the cleaner. Let your sidewalk dry for a bit and mix up your cleaner. The cleaner must be used within an hour of mixing it, so don’t mix it until right before you are ready to use it.

    How to Clean A Sidewalk | Outdoor Cleaning Tips | Outdoor Cleaning Hacks | Exterior CleaningI filled up my tank sprayer with two gallons of hot water (hot water is recommended) and added in eight capfuls of the oxy foaming cleaner. The directions say to use at least three capfuls per gallon or four capfuls per gallon if you have a very dirty area.

    As y’all well know, mine was ridiculously dirty.

    Step 3

    Shake up your tank to dissolve all the cleaner crystals and spray the cleaner onto your sidewalk.

    How to Clean A Sidewalk | Outdoor Cleaning Tips | Outdoor Cleaning Hacks | Exterior Cleaning

    Let the cleaner sit for 5-10 minutes depending on how dirty your sidewalk is. I let mine sit for the full ten minutes.

    While you are waiting, you can use the time to clean off your driveway with the deck brush.

    How to Clean A Sidewalk | Outdoor Cleaning Tips | Outdoor Cleaning Hacks | Exterior Cleaning

    I found it to be pretty perfect for that.

    Step 4

    After the allotted time, give the area you sprayed a good scrubbing with just the brush. You will literally see the dirt and grime lift off the concrete. After you have scrubbed it good, turn on the water to your brush and scrub some more while rinsing the sidewalk off.

    How to Clean A Sidewalk | Outdoor Cleaning Tips | Outdoor Cleaning Hacks | Exterior Cleaning

    Step 5

    Depending on how dirty your sidewalk is, you may have to repeat the cleaning process twice. I did. After the second cleaning, I still had these little black spots lingering just near the porch steps.

    How to Clean A Sidewalk | Outdoor Cleaning Tips | Outdoor Cleaning Hacks | Exterior Cleaning

    Since this sidewalk hadn’t been cleaned in the history of ever, they weren’t budging very easily. Grunt Labor did a quick run over of those spots near the steps with a pressure washer.

    Here is our after:

    How to Clean A Sidewalk | Outdoor Cleaning Tips | Outdoor Cleaning Hacks | Exterior Cleaning

    Why hello, nice and pretty sidewalk.

    It’s nice to meet you.

    I’m the one who neglected you for the past three years.

    How to Clean A Sidewalk | Outdoor Cleaning Tips | Outdoor Cleaning Hacks | Exterior Cleaning | Cleaning Concrete

    The cleaning and scrubbing removed a huge amount of dirt and grime and brightened it up like nobody’s business.

    Need more cleaning tips? 

    How to Clean Concrete Blocks– clean up all those landscaping blocks!

    How to Remove Rust and Polish Chrome– you won’t believe how much rust I got off this one chair!

    9+ Must Read Cleaning Tips– all sorts of cleaning tips for around the house!

    You know you don’t wanna miss any of this crazy.

    Sign up to get my posts delivered to your inbox here. 

    Stalk Me Here:

    Pinterest / Facebook / Twitter / Instagram

    SaveSave

  • 17 Easy Crafts and DIY Projects for under $10

    17 Easy Crafts and DIY Projects for under $10

    What makes DIY projects and crafts even better?

    When they are EASY DIY Projects and EASY crafts and……..when they cost LESS THAN $10!

    Can I get an amen?!

    Easy Crafts and DIY Projects for the Home

    DIY Agate Slice Lamp Finials

    Your lamps will love you for these! So pretty and crazy easy to make! Tutorial for these beauties here!

    Step Stool Makeover

    Jazz up those blah and basic step stools with a little scrapbook paper and tassel love – super easy to do! Step stool makeover here!

    Golden Snake Bud Vase

    Would you believe that this snake was once just a rubber snake you bought at the Dollar Store? Yep! Now, it’s a golden beauty though! Here’s how I made it!

    Lamp Tassels

    I love a great tassel and I love them even more when they dress up lamps! I made these lamp tassels in under 5 minutes!

    Mohawk Lollipop Holder

    This one definitely isn’t everyone’s cup of tea, but it definitely starts a lot of conversations at my house! Find this project here.

    DIY Crystal Knobs

    I love making unique hardware for my furniture – these DIY crystal knobs are some of my favorites!

    Glittered Mason Jars

    The great thing about these glittered mason jars is that they are so versatile – they make great vases, lanterns and more!

    Faux Malachite Tray

    I love malachite, but not the heavy price tag attached to it. This malachite tray though comes at a cheap price!

    DIY Crystal Magnets

    These crystal magnets would make a great little gift for your girlfriends!

    Golden Snake Bowl

    Another snake home accessory that used to be residing in the Dollar Store aisle – here’s how I made this beauty!

    Crystal Lamp Finials

    Is it obvious that I can’t get enough crystals? Here’s how I made these crystal lamp finials!

    Duck Tape Fringe

    A little fringe always makes things better, right?! Make your own fringe on a budget using Duck Tape!

    DIY Sunglasses Holder

    We made this cute little sunglasses holder to display and hold all the Circus’ adorable shades.

    DIY Selenite Knobs

    Another great DIY knob! Selenite is one of my favorite stones and it was so easy to make these selenite knobs!

    DIY Headband Holder

    Would you believe that part of this headband holder is made with a paper towel roll?!

    DIY Stone Embellished Napkin Rings

    These napkin rings went from “ok” to little gems with this easy stone napkin ring tutorial!

    Crystal Embellished Vase

    Easily embellish any vase with pretty crystals using this tutorial.

    DIY Faux Jadeite

    faux-jadeite-sidebar

    DIY Faux Jadeite  – you WILL NOT believe how easy this one is!

    Knock-Off Kate Spade Photo Frame

    Kate Spade Knock-Off Photo Frame via RainonaTInRoof.com #katespade #knockoff #photo #diy #craft

    Kate Spade Knock-Off Photo Frame – create this Kate Spade Knock-Off for $5!

    DIY Lucite Trays

    DIY Lucite Trays {Under $5 in 15 minutes} via RainonaTinRoof.com

    DIY Lucite Trays – you will never believe what these trays are actually made from!

    Electrical Tape Embellished Lampshade

    Small Changes with Big Impact via RainonaTinRoof.com #homedecor

    Electrical Tape Lampshade – give a little black and white love to a lampshade!

    Duck Tape Trimmed Curtains

    Duck Tape Trim Curtains via RainonaTinRoof.com #ducktape #ikeacurtain #hack

    Duck Tape Trimmed Curtains – easily add bling to your curtains!

    DIY Animal Candleholders

    DIY Animal Candleholders via RainonaTinRoof.com

    DIY Animal Candleholders – make candle holders from toys!

    Sequined Coat Hangers

    Sequined Coat Hangers via RainonaTinRoof.com #lifequotes #sequins #coathanger

    Sequined Coathangers – hang your clothes in style!

    Faux Brass Furniture Feet

    Faux Brass Capped Feet via RainonaTinRoof.com

    Faux Brass Capped Feet – give the Midas touch to all your furniture feet!

    DIY Decorative Horse Accessories

    40+ Gold Projects {rainonatinroof.com} #gold #DIY #craft

    Decorative Horse Accessories – another home accessory you can make out of toys!

    Chic and Sassy Message Board

    Four Easy DIY Gift Ideas via RainonaTinRoof.com #diy #giftideas

    Sassy Fabric Covered Message Board – create a chic message board and get your sassy on with fun quotes!

    Easy Home Decor Crafts | Easy Home Decor DIY Projects | Easy DIY Home Decor | Easy Crafts to Make and Sell | Easy Crafts to Sell

    Still need more great craft and DIY ideas? 

    14 Painted Rug Hacks – who knew a rug could get so fancied up with paint?

    14 Classic Black and White DIY Projects – you can never go wrong with black and white!

    You know you don’t wanna miss any of this crazy.

    Sign up to get my posts delivered to your inbox here. 

    Stalk Me Here:

    Pinterest / Facebook / Twitter / Instagram

  • 14 Painted Rug Hacks

    14 Painted Rug Hacks

    I love a good hack, especially a good hack that is so much cheaper than the real thing. Painting a basic rug is an affordable way to get exactly the look you want without paying a fortune on a rug that may get grape Kool-Aid spilled on it only minutes after you put it down. Yea, you know what I’m talking about.

    14 Painted Rug Hacks

    DIY Painted AstroTurf Rug Tutorial via RainonaTinRoof.com #diy #rug #homedecor #outdoordecor

    Painted Astroturf Rug from Rain on a Tin Roof

    14 Painted Rug Hacks that you CANNOT miss! Paint rugs to get a prettier higher end look without spending a fortune!

    Fruit Welcome Mat from The House that Lars Built

    14 Painted Rug Hacks that you CANNOT miss! Paint rugs to get a prettier higher end look without spending a fortune!

    Pink and White Patterned Painted Rug from Rappsody in Rooms

    14 Painted Rug Hacks that you CANNOT miss! Paint rugs to get a prettier higher end look without spending a fortune!

    Cabana and Nautical Rug from Made in a Day

    14 Painted Rug Hacks that you CANNOT miss! Paint rugs to get a prettier higher end look without spending a fortune!

    Monogram Welcome Mat from Thistlewood Farms

    14 Painted Rug Hacks that you CANNOT miss! Paint rugs to get a prettier higher end look without spending a fortune!

    Chevron Painted Rug from Cape Twenty Seven

    14 Painted Rug Hacks that you CANNOT miss! Paint rugs to get a prettier higher end look without spending a fortune!

    Stenciled Circle Rug from Tatertots & Jello

    14 Painted Rug Hacks that you CANNOT miss! Paint rugs to get a prettier higher end look without spending a fortune!

    Navy Painted Rug from  Little Black Door

    14 Painted Rug Hacks that you CANNOT miss! Paint rugs to get a prettier higher end look without spending a fortune!

    Black and White Stripes Painted Rug from  Adventures of an Almost 40 year old Intern

    14 Painted Rug Hacks that you CANNOT miss! Paint rugs to get a prettier higher end look without spending a fortune!

    Polka Dot Rug from  A Beautiful Mess

    14 Painted Rug Hacks that you CANNOT miss! Paint rugs to get a prettier higher end look without spending a fortune!

    Spray Painted Herringbone Rug from  Park House Love

    14 Painted Rug Hacks that you CANNOT miss! Paint rugs to get a prettier higher end look without spending a fortune!

    Trellis Painted Rug from Pudel-Design

    14 Painted Rug Hacks that you CANNOT miss! Paint rugs to get a prettier higher end look without spending a fortune!

    Yellow Starburst Painted Rug from  Adventures of an Almost 40 year old Intern

    Want another great rug hack? Don’t miss this DIY Cowhide rug – no painting required on it!

    Do you have any ideas for painted rugs?

    DIY Painted Rug Ideas | DIY Painted Rug Tutorials | Painted Rug DIY | DIY Painted Rug | DIY Painted Rug Outdoor

    Happy hacking!

    You know you don’t wanna miss any of this crazy.

    Sign up to get my posts delivered to your inbox here. 

    Stalk Me Here:

    Pinterest / Facebook / Twitter / Instagram

  • DIY Faux Jadeite from thrift store finds

    DIY Faux Jadeite from thrift store finds

    Don’t want to commit to the real stuff? I totally get it! Real jadeite is gorgeous, but also expensive. No problem! Make your own “jadeite” using the simple tutorial below!

    You guys.

    I just got back from an amazingly fun wedding weekend.

    In Fort Wayne, Indiana.

    Totally in the middle of nowhere – or so it seemed, but our group rocked that town like none other. You can see some of the debauchery that took place on my Instagram account.

    There are so many stories from this weekend that will be making their way onto the blog.

    Prepare yourself.

    However, I am still trying to unpack and regain some sleep from the lack thereof this weekend.

    Oh, and Better Homes & Gardens is coming to photograph my kitchen on Wednesday.

    Wha What?

    Yep. I found out about a week and a half ago and went into crazy mode immediately.

    Needless to say, I am running around patching nail holes, touching up paint, and deep cleaning like nobody’s business.

    Therefore, I have for you a very quick, very simple, very cheap DIY project:

    Faux Jadeite

    DIY Faux Jadeite from thrift store finds | Jadeite Dishes | DIY Jadeite | Thrift Store Crafts | Easy Crafts to Make and Sell | Glass Crafts


    I love the look of jadeite, however I don’t have a whole lot of places where I can work it into my home without the kid having it obliterated in less than five minutes.

    Word.

    This faux jadeite is perfect because its easy to make and if a piece gets broken – it won’t be the end of your world. You’ll just need another trip to the thrift store – and ain’t nobody gonna complain about extra trips to the thrift store.

    Except maybe your significant other.

    But really, what do they know about good thrifting?

    How to Make Your Own Jadeite

    This post contains affiliate links for your shopping convenience. Click here to read my full disclosure policy.

    Materials Needed: 

    DIY Faux Jadeite from thrift store finds | Jadeite Dishes | DIY Jadeite | Thrift Store Crafts | Easy Crafts to Make and Sell | Glass Crafts

    Steps

    Step 1

    Clean your glass pieces very well. Make sure they are free of all sticker residue, grease, and grime. Let them dry fully before proceeding.

    Step 2

    Give each piece 2-3 light coats of Krylon Pistachio spray paint. There is probably a better acrylic paint that would match Jadeite better out there, however, I did not want to spend hours painting multiple coats of acrylic paint on glass pieces that I paid $5 for, nor did I want to have to deal with brush strokes. That’s your call though – I will support your decision either way. I will just always choose to take the faster solution.

    Just sayin’.

    Step 3

    After the pistachio spray paint has dried, give each piece two light coats of the gloss topcoat. This helps to protect the paint from easily scratching off. Let dry for a full day before using.

    DIY Faux Jadeite from thrift store finds | Jadeite Dishes | DIY Jadeite | Thrift Store Crafts | Easy Crafts to Make and Sell | Glass Crafts

    These are a fun little way of displaying trinkets or holding jewelry.

    I do not recommend serving food on these pieces, as they are covered with spray paint.

    Are you a jadeite fan?

    I still love the real thing, but this faux jadeite is a great frugal alternative.

    I love ya’ll, but I gotta go scrub some floors.

    Want more great home decor hacks?

    Don’t miss this tutorial for how to make your own faux crystals and then turn them into finials, knobs, magnets and more!

    Glitter up mason jars like this to turn them into pretty lanterns.

    And here are 17+ Easy Crafts and DIY projects you’ll want to see too!

    Want to come back here later? Just pin the image below!

    DIY Faux Jadeite from thrift store finds | Jadeite Dishes | DIY Jadeite | Thrift Store Crafts | Easy Crafts to Make and Sell | Glass Crafts

    You know you don’t wanna miss any of this crazy.

    Sign up to get my posts delivered to your inbox here. 

    Stalk Me Here:

     Pinterest / Facebook / Twitter / Instagram

    SaveSave

  • How to Glitter Mason Jars

    How to Glitter Mason Jars

    These glitter mason jars are easy to make and add a fun touch to your home’s decor or a party. They also make a great gift idea! Find out how to make glitter mason jars yourself below!

    Is there anyone else out there that just feels the need to add a little bling everywhere?

    A little gold here, a little glitter there?

    It just makes everything a little more fun and pretty.

    When I made over the porch recently, I realized that these mason jars didn’t quite fit with the fun, colorful vibe going on out there. I wanted to keep them though to use as lanterns for extra lighting at night.

    My solution: Bling ‘Em Out.

    Now, I have sparkly glitter mason jars.

    DIY Glitter Mason Jars - easy mason jar crafts - Rain on a Tin Roof

    This post contains affiliate links for your shopping convenience. Click here to read my full disclosure policy.

    If you’re a fan of mason jar crafts, this one’s for you!

    DIY Glitter Mason Jars

    This is a really simple and relatively fast craft project – you guys know I love the fast projects with instant gratification.

    Materials Needed: 

    How to Make Glitter Mason Jars using Mod Podge - Rain on a Tin Roof

    • Mason Jars or Glass Jars (Mine came from Kirkland’s about three years ago, but they still have them for a whopping $3 a pop!!! They are here.)
    • Glitter in Colors of Your Choice
    • Mod Podge
    • Foam Brush or Paint Brush
    • FrogTape

    Steps

    Step 1

    Before starting the glittering process, I spray painted the handles of my jars gold. The gold just worked better with the porch. Painting the handles is completely optional.

    Grab your FrogTape and wrap a strip of it across the jar diagonally.

    Glitter Dipped Mason Jars - tape across jars - Rain on a Tin Roof

    I didn’t really do any sort of measurements with the tape. I just wrapped it around the jar as you can see in the photos above. I did keep a straight edge on the side of the jar – that’s why the straight vertical piece of tape is there. You don’t have to do this. You can just keep wrapping the tape if you want to.

    Step 2

    Starting at the bottom of the jar where the glass is still visible, use your foam brush or paint brush and apply Mod Podge where you want the glitter.

    Mod Podge Mason Jars to Add Glitter - Rain on a Tin Roof

    You don’t need a really thick coat, just an even coverage over the glass. Don’t let the Mod Podge sit too long – this stuff can dry fast on glass. As soon as you have put your Mod Podge on the glass, sprinkle your glitter on the jar, gently tap the excess glitter off and let it sit for five minutes or so.

    Step 3

    Remove your tape carefully. If you just want one swirl of glitter – you are done! If you want two swirls (like I did), then you can repeat the first two steps and add another color of glitter.

    How to Glitter Mason Jars - apply glitter to jars - Rain on a Tin Roof

    You can also skip the tape on this one and run your Mod Podge just along the edge of your first glitter color and apply your other glitter there.

    Putting Glitter on Mason Jars - Rain on a Tin Roof

    I have these hanging on large cup hooks in the screened-in porch.

    Mason Jar Crafts - Glittered Mason Jars - Rain on a Tin Roof

    Gold glitter just gets me every time and the pink works perfectly on the porch. Who knew putting glitter on mason jars could be so fun?

    Any glitter dipped mason jars in your future?

    Looking for more great craft and DIY projects for the home?

    17+ Easy Crafts and DIY Projects Under $10 – you won’t believe what all is here!

    Looking to make a little money on your projects? Take a look at these 10 Easy Crafts to Make and Sell.

    Want to remember this project? Just pin the image below! 

    Glittering Mason Jars with Mod Podge - Rain on a Tin Roof

    You know you don’t wanna miss any of this crazy.

    Sign up to get my posts delivered to your inbox here. 

    Stalk Me Here:

    Pinterest / Facebook / Twitter / Instagram

    Easy Crafts - DIY Glittered Mason Jars - Rain on a Tin Roof

    SaveSave

  • How I Buy Fabric Online (Without Seeing It In Person First)

    How I Buy Fabric Online (Without Seeing It In Person First)

    Want to get more helpful tips like this one delivered right to your inbox? Did I mention it’s free? SIGN UP HERE!

    It may be 2014, but I am still so skeptical about purchasing items online.

    I’m always worried whatever I order isn’t going to look like what it looks like online or it will be different than I pictured it.

    This is especially true when its a larger scale item or something that costs a good bit of money.

    I absolutely despise paying return shipping fees if its not what I expected.

    A lot of times though, prices are just so much better online than in store.

    For example, fabric.

    Oh my goodness, I could stay in a fabric store FOR-EV-ER.

    (Please picture me saying FOR-EV-ER just like the kid with the glasses said it in The Sandlot.

    And if you don’t know what I’m talking about, run and find a copy of The Sandlot and watch it.

    Even though my brother subjected me to watching it over and over and over again one summer until the VHS finally gave out (thank you, lord), it really is a great movie.

    Ok, back to fabric. I love fabric. I buy fabric and have no clue what I’m going to do with it all the time – I just think its pretty.

    However, fabric can be so ridiculously expensive – except in this great realm of possibilities that we call the internet.

    Seriously y’all, when I was using dial-up internet 15 years ago to download music illegally from Napster (we had no clue it was illegal then), I never dreamed I would one day be able to purchase just about anything I wanted with the click of a button.

    Toilet paper. Click.

    10 swimsuits from Victoria’s Secret (so you can try them on in the privacy of your home, only to return all 10 of them). Click.

    Fabric. Click.

    Now that I’ve rambled on and on about The Sandlot, the amazingness of the internet, and other things that the cheap beer I am drinking has led me to type, let’s talk about the real question here:

    How I Buy Fabric Online Without Seeing It In Person

    How to Buy Fabric Online | Where to Find Fabric Online | How to Mix Patterns | How to Mix Fabrics | How to Mix Fabric Patterns

    This post contains affiliate links for your shopping convenience. Click here to read my full disclosure policy.

    Fabrics Pictured Above, Left to Right:

    Fynn Jade / Portobello Vase / Linked Navy / Kaleidoscope / Guitars / Hockley Mandarin / Coral Stripes / Morrow Cool Grey / Feathers

    Buying fabric online can be tricky.

    Is the picture really showing the fabric’s true color?

    Is it going to work with your rug?

    Will it work with your curtains?

    What about those pillows you want to be buried with? (Oh, maybe that’s one just me.)

    There are two ways (according to me) you can rest assured you made the right fabric choice when buying online:

    1. Order a sample of the fabric (for the patient person and large fabric purchases)

    Many online sites that sell fabric offer samples of their fabric as well. Personally, my favorite online fabric stores are Online Fabric Store and Fabric.com. At both stores, you can purchase a small square sample of the fabric you are thinking about buying for about $2 per sample. Shipping and handling on samples are usually free. In 5-7 days you get your samples, put them against your rug, your curtains, your accent pillows, etc., see which works and then order it. You still get the savings of buying your fabric online, you just have to wait a bit longer.

    When I was re-upholstering my dining room chairs, I went this route in selecting the fabric. The material I wanted was more expensive than any I had purchased before, so I wanted to make sure it was the right choice. I highly suggest going this route when you are purchasing a large quantity of fabric or a fabric that is more expensive than usual.

    If you are impatient like I am most of the time and don’t like to wait to get your samples or the place you are buying from does not sell samples, you can go with option #2.

    2. Create a collage of your fabric options and your current patterns & colors in your home (for the impatient person)

    This is the route I usually go when buying fabrics online. I’m usually impatient and when I dream up a project – I want what I want when I say that I want it.

    First, save images to your computer of the fabrics you are considering. You can usually drag them to your desktop on a Mac or do a right click and save image on a PC.

    Next, take photos of your rugs, curtains, wall colors, etc. If you can find these items online, you can also save the images as you did above.

    Now, go to PicMonkey and click Design, then select one of the options, I usually click the 5×7 one. Leave the canvas color white. Click on the Overlays button, which is the butterfly icon on the left side. Select Your Own at the top and choose a file of one of your fabric options. Continuing adding in all your files with the Your Own button until you have all your fabric options, rugs, curtains, wall color, etc. on the image.

    Make the images larger so that you can actually see the curtains and patterns and play around with them until you decide which work best together.

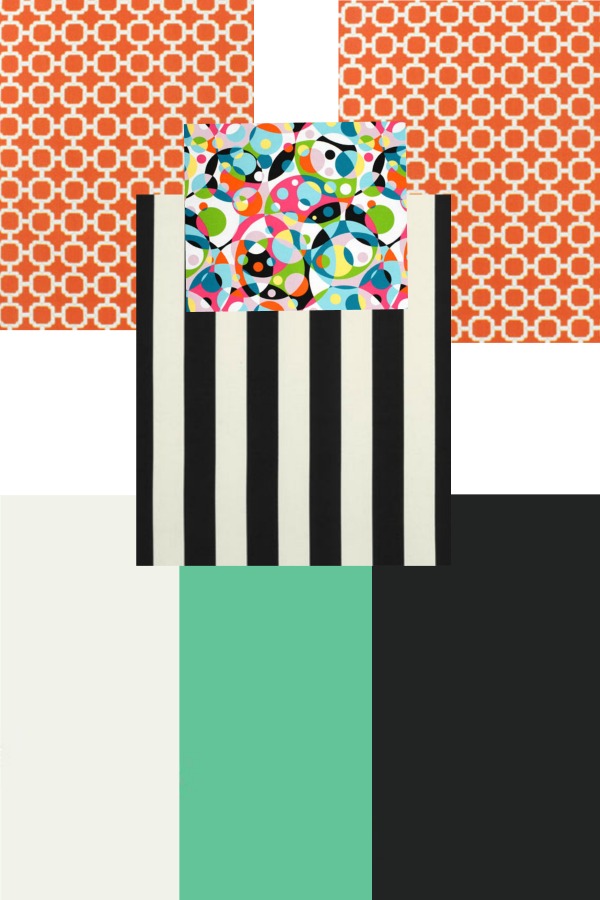
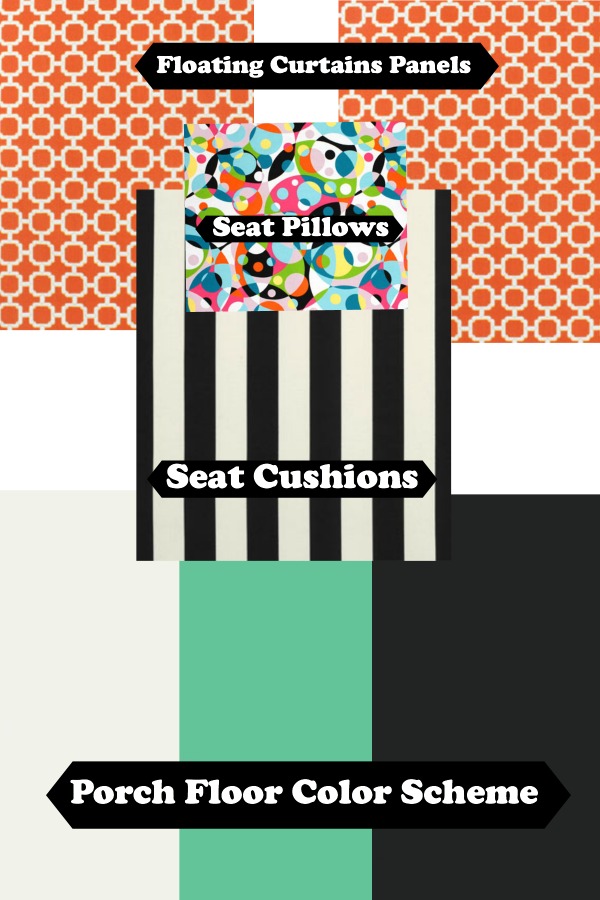
    This method is what I used for selecting the fabrics on my screened-in porch makeover. Here is what my image I made on PicMonkey looked like in the end.

    How I Buy Fabric Online (Without Seeing It In Person First) via RainonaTinRoof.com #fabric #DIY #shoppingonline

    And just in case you are wondering what all those colors and patterns are:

    How I Buy Fabric Online (Without Seeing It In Person First) via RainonaTinRoof.com #fabric #DIY #shoppingonline

    I grabbed images of the colors of my porch floor from Home Depot, then just pulled in the rest of the images of the fabrics I was considering. I knew I was good to go with all my fabric choices after making the collage on PicMonkey.

    How to Buy Fabric Online | Where to Find Fabric Online | How to Mix Patterns | How to Mix Fabrics | How to Mix Fabric Patterns

    Don’t believe me?

    Its all good, I wouldn’t believe me either – I’m a freak. See how it all came together in the porch reveal here.

    Need affordable, but pretty fabrics? Then be sure to see these 50+ Home Decor Fabrics Under $15 a yard!

    And if you need a way to protect that fabric read this about How to Waterproof & Repel Stains on Fabric.

    More Helpful Picmonkey Tutorials:

    17 PicMonkey Tutorials, Tips & Projects – you won’t believe all you can do with it!

    DIY Party Invitation – Yep, I even create my kiddo’s birthday invitations with it!

    How to Make a Party Banner with Picmonkey – easily customizable for any party!

    You know you don’t wanna miss any of this crazy.

    Sign up to get my posts delivered to your inbox here. 

    Stalk Me Here:

    Pinterest / Facebook / Twitter / Instagram

    SaveSave

  • 9 Outdoor Living Spaces You’ll Never Wanna Leave

    9 Outdoor Living Spaces You’ll Never Wanna Leave

    As you guys know, my new favorite happy place is my screened-in porch. It’s colorful, it’s relaxing, and it’s the perfect place for a cheap beer or two. Or three. Here are my favorite outdoor spaces – both mine and others. A.K.A. places I wouldn’t mind have a few beers at…

    9 Outdoor Living Spaces You’ll Never Wanna Leave

    If you're looking for outdoor decorating ideas, this is the article for you! 9 Outdoor Living Spaces You'll Never Wanna Leave

    A Colorful Screened-In Porch Makeover

    Warning: It’s quite colorful! I dare you to not smile while looking at that porch! It’s my new favorite place!

    If you're looking for outdoor decorating ideas, this is the article for you! 9 Outdoor Living Spaces You'll Never Wanna Leave

    A Thrifty and Colorful Deck from The Happy Housie

    This deck is perfect for admiring that view of the water!

    If you're looking for outdoor decorating ideas, this is the article for you! 9 Outdoor Living Spaces You'll Never Wanna Leave

    A Patio Full of Pallet Furniture from Place of My Taste

    Short on cash? Use pallets to make your own porch furniture!

    If you're looking for outdoor decorating ideas, this is the article for you! 9 Outdoor Living Spaces You'll Never Wanna Leave

    Astroturf Patio from Makely Home

    I am a sucker for astroturf! I love how Makely Home used pieces of Astroturf on her porch.

    If you're looking for outdoor decorating ideas, this is the article for you! 9 Outdoor Living Spaces You'll Never Wanna Leave

    Refreshed Patio from Hi Sugarplum

    Hi Sugarplum never disappoints. I’m especially digging her layered rugs there.

    If you're looking for outdoor decorating ideas, this is the article for you! 9 Outdoor Living Spaces You'll Never Wanna Leave

    A Cozy Deck from Southern State of Mind

    Pretty sure I wouldn’t shake my head at chillin’ on this deck.

    If you're looking for outdoor decorating ideas, this is the article for you! 9 Outdoor Living Spaces You'll Never Wanna Leave

    Patio with Colorful Pallet Furniture from One Lucky Girl

    More ideas for reworking those pallets!

    If you're looking for outdoor decorating ideas, this is the article for you! 9 Outdoor Living Spaces You'll Never Wanna Leave

    Thrifted Patio Makeover from Liz Marie Blog

    Is that not an incredible makeover?! Liz Marie is full of thrifty ideas for outdoor spaces!

    If you're looking for outdoor decorating ideas, this is the article for you! 9 Outdoor Living Spaces You'll Never Wanna Leave

    Screened-In Porch and Deck Combo from Our Fifth House

    No one else but Carmel from Our Fifth House can combine lots of different elements and styles and create a space so gorgeous!

    Are you ready to get your outdoors on?

    I’ll bring the booze…. 😉

    What are your best tips for decorating outdoors?

    Need more great outdoor decorating ideas?

    12 Outdoor Furniture Makeovers – great ideas for refreshing that old patio furniture!

    13 Ideas for Sprucing Up Your Front Door and Entry – add some curb appeal to your home!

    Fantastic Outdoor Projects – from DIY swings to furniture and more, you’re sure to find something here you’ll want to make!

    Outdoor Living Space Ideas | DIY Outdoor Decor | Outdoor Living Space on a Budget | Outdoor Living Room | Outdoor Living Space DIY

    You know you don’t wanna miss any of this crazy.

    Sign up to get my posts delivered to your inbox here. 

    Stalk Me Here:

    Pinterest / Facebook / Twitter / Instagram

  • DIY Floating Curtain Panels

    DIY Floating Curtain Panels

    As you guys well know, I will stretch a dollar as far as I possibly can.

    And then some.

    The same is true with fabric.

    When I started the colorful porch makeover, Grunt Labor had one request:

    Curtains.

    Well he had other requests too, like a fireplace and a television, but at the current moment, those aren’t attainable.

    He was adamant on the curtains though. He thought it would make the space feel more homey.

    Yes, that coming from a male who even refers to himself as Grunt Labor is a little odd, but he was right. And really, the man rarely asks for anything around here – there was no way I could say no.

    My problem was that I only had three yards of fabric for the curtains. Typically, I would be lucky to get two curtain panels out of three yards – and they would be skinnier panels at that.

    My other problem here was that even though the porch is screened-in, the curtains were still going to get dirty at the bottom pretty quickly.

    Luckily at Home Depot one day, the lightbulb went off.

    Does anyone else have moments of genius at Home Depot? I swear sometimes that’s the only place I get them. I will have ran in for one can of spray paint and by the time I get to the checkout line, I’m struggling to hold onto everything that I’ve picked up and apologizing for knocking over a display with the 10 foot piece of pipe I’m barely holding under my arm.

    Yep, I’m that girl.

    But it was that stroke of genius that solved both problems – I would make Floating Curtain Panels.

    DIY Floating Curtain Panels | DIY Outdoor Curtains | How to Make Outdoor Curtains | Outdoor Curtains for Porch or Patio | DIY Outdoor DecorThis post contains affiliate links for your shopping convenience. Click here to read my full disclosure policy.

    DIY Floating Curtain Panels

    If you can sew a straight semi-straight line (my lines are never totally straight) and make a couple of simple cuts with a hand saw or electrical saw, you can totally do these. Seriously, they aren’t hard at all.

    Materials Needed:

    -3 yards of fabric of your choice (I used this outdoor fabric and it made three panels for me that were 19 in wide x 89 in long before being hemmed. I did have a little leftover. If these are going outdoors and you don’t find an outdoor fabric you like, you can always waterproof, color protect, and stain repel the fabric yourself by using this tutorial.

    -10′ piece of 1/2″ PVC pipe

    –Gold Spray Paint

    -Regular Hand Saw or Circular Saw or Miter Saw (I used our Miter Saw)

    -12 Screw Eyes 

    –Neon Pink Cord (or other color of your choice – you guys know I love my bright flashy colors)

    -Scissors

    -Sewing Machine & Thread or Stitch Witchery

    -Straight pins

    -Measuring Tape

    Steps

    Step 1

    Cut your pipe down to whatever your desired length is. I was fitting my pipe between the 2×4 supports on my porch. Of course, no measurement between the 2x4s were the same. That’s just what you get with older houses and foreclosures, people. I thought it would look funny to have different size panels, so I opted to make all my pipes the same size, which was 19 inches. I marked my pipe and cut it with a miter saw.

    DIY Floating Curtain Panels via RainonaTinRoof.com #curtains #drapery #diy #fabric #ad #onlinefabricstore #porchMost of the pipe will be covered by the panels, however, the ends do still show. I didn’t want them to be white, so I spray painted the ends gold.

    Step 2

    Lay out your fabric and cut it into panels. Each of my panels were 19 inches wide x 89 inches long.

    DIY Floating Curtain Panels via RainonaTinRoof.com #curtains #drapery #diy #fabric #ad #onlinefabricstore #porch

    After you have cut your panels, pin down the long side edges only (not the top or bottom edges) and hem them. If you want to go the no-sew route, use the stitch witchery here.

    And by the way, if I can sew a decently straight line on this….

    DIY Floating Curtain Panels via RainonaTinRoof.com #curtains #drapery #diy #fabric #ad #onlinefabricstore #porch

    Anyone can sew a decently straight line. That sewing machine was my great grandmother’s, my grandmother’s, and now mine. I’ve cursed it, hit it (that hurt), ran my finger through it on more than one occasion (that hurt more), but I wouldn’t think of sewing with anything else.

    We have a history.

    Step 3

    Now you need to hem your top edges, but leave an opening for the pipe to fit through.

    DIY Floating Curtain Panels via RainonaTinRoof.com #curtains #drapery #diy #fabric #ad #onlinefabricstore #porch

    Do this by placing the pipe long the top edge, then pulling the fabric over the pipe and pinning the edges in place (#1 in the photo above). Remove the pipe and pin down the rest of the edge (#2 above). Finally, sew the edge down (#3). Repeat this with the top and bottom edges for all the panels.

    Step 4

    Take your screw eyes and screw one into each corner where your panels will hang from (top and bottom). Since my pipes were 19 inches long, I put my screw eyes about 19 inches apart.

    DIY Floating Curtain Panels via RainonaTinRoof.com #curtains #drapery #diy #fabric #ad #onlinefabricstore #porch

    Next, thread the nylon cord through your pipe and tie each end onto the screw eyes.

    Stand back and observe your amazingness.

    DIY Floating Curtain Panels via RainonaTinRoof.com #curtains #drapery #diy #fabric #ad #onlinefabricstore #porch

    Go grab a cheap beer or a cocktail.

    DIY Floating Curtain Panels via RainonaTinRoof.com #curtains #drapery #diy #fabric #ad #onlinefabricstore #porch

    And relax in the shade of your new floating curtain panels that you made all by yourself.

    Because you are a superstar.

    DIY Floating Curtain Panels | DIY Outdoor Curtains | How to Make Outdoor Curtains | Outdoor Curtains for Porch or Patio | DIY Outdoor Decor

    Do you have any DIY curtain hacks?

    See the full porch makeover here and this little DIY flamingo wreath that embellishes these curtain panels now!

    Love a good curtain hack? Be sure to see these duck tape trimmed curtains too!

    You know you don’t wanna miss any of this crazy.

    Sign up to get my posts delivered to your inbox here. 

    Stalk Me Here:

    Pinterest / Facebook / Twitter / Instagram

    SaveSave

  • Colorful Screened-In Porch Makeover

    Colorful Screened-In Porch Makeover

    As I write this post, I am sitting in the most colorful space in my home.

    I dare you to step into the screened-in porch and not be happy.

    Double Triple Dog Dare You. 

    And if you do step out here, and you aren’t happy, I’ve got a cheap beer for ya and a kid is bound to turn the corner at any moment riding a plastic pink flamingo.

    Heck, you just smiled as you read that last sentence, didn’t you?

    Sweet friends, who put up with way too much craziness from me, welcome to my back porch.

    Colorful Porch Makeover (because I like to drink cheap beer in colorful places) via RainonaTinRoof.com #porch #outdoors #porchdecor #diy #decorating (more…)

  • DIY Painted AstroTurf Rug

    DIY Painted AstroTurf Rug

    It all started with Nancy Drew.

    The Hidden Staircase to be exact.

    After reading the book as a middle schooler, and being a lover of all ghost stories and mysteries, I became convinced that a secret staircase was nearby.

    Under my grandparent’s screened-in porch.

    As I was walking around my grandparent’s house one sunny spring day collecting old glass I found buried in the ground (convinced it held a secret meant for only me), I stumbled onto their screened-in porch and began to examine it.

    The porch was a simple square structure that came off their dining room. It wasn’t above their basement though, as the rest of the house was. It was supported by four sturdy walls of brick.

    There had to be something under that porch, and there had to be a staircase that led to whatever was under there.

    I immediately rushed up to the porch and started stomping my feet on the AstroTurf covered floor to find a hollow spot where a door leading to the staircase might be.

    My feet were met by the sound of concrete.

    I persisted, making my way to the outer edges of the porch where the AstroTurf carpeting ended.

    I attempted to pull it up, but discovered it was securely glued down.

    Darn the AstroTurf.

    The secrets of the porch were never uncovered.

    However, I’m now coming to love AstroTurf very very much.

    Seriously, what other 6 ft. x 8 ft. rug can you find for $20?

    Only AstroTurf baby. 

    DIY Painted AstroTurf Rug Tutorial via RainonaTinRoof.com #diy #rug #homedecor #outdoordecor

    This post contains affiliate links for your shopping convenience. Click here to read my full disclosure policy.

    DIY Painted AstroTurf Rug Tutorial

    This is picture heavy, but stick with me.

    Materials Needed

    AstroTurf Rug

    1 – 2 quarts of gloss exterior paint depending on how intense you want your colors. I used two quarts.

    Paint Roller and Tray

    FrogTape

    Steps

    Step 1

    Roll out the rug and begin marking your border off with FrogTape.

    DIY Painted AstroTurf Rug Tutorial via RainonaTinRoof.com #diy #rug #homedecor #outdoordecor

    As you can see, I was super technical with measurements and used tape as my guide. I started on the very edge of the rug and placed three small strips of tape that would remain AstroTurf underneath, then two strips that would be painted white, then another strip for Astroturf. You want to paint inside of the tape marked Astroturf. See the photo above.

    Step 2

    Finish taping the rest of your border around the edges of the rug.

    DIY Painted AstroTurf Rug Tutorial via RainonaTinRoof.com #diy #rug #homedecor #outdoordecor

    See photo above. You want to repeat this on each side of the rug, using the same “tape measurements.”

    Step 3

    You will have some overlap that needs to be cut out on the corners where the tapes meet.

    DIY Painted AstroTurf Rug Tutorial via RainonaTinRoof.com #diy #rug #homedecor #outdoordecor

    Cut out the small pieces of tape that would keep your border from being continuous as shown above.

    After cutting out the small pieces, your rug should look like this:

    DIY Painted AstroTurf Rug Tutorial via RainonaTinRoof.com #diy #rug #homedecor #outdoordecor

    Step 4

    Paint your border.

    DIY Painted AstroTurf Rug Tutorial via RainonaTinRoof.com #diy #rug #homedecor #outdoordecor

    I found the best way to paint AstroTurf is with a roller. I did three coats and went in different directions with each coat to get every side of the AstroTurf fiber.

    Step 5

    Remove the tape around your border after your final coat. I didn’t wait for it to dry, however if you put the paint on pretty heavy, you may want to wait a bit to make sure you don’t get leakage.

    Begin taping off the stripes for the inside of your border.

    DIY Painted AstroTurf Rug Tutorial via RainonaTinRoof.com #diy #rug #homedecor #outdoordecor

    I just chose a spot in the middle of the rug to start a diagonal line with tape and went with it. Once more, I used tape as my measuring guides as you can see above.

    Step 6

    DIY Painted AstroTurf Rug Tutorial via RainonaTinRoof.com #diy #rug #homedecor #outdoordecor

    Continue with your diagonal stripes in the middle of the rug until it is covered.

    It should look similar to this when its done:

    DIY Painted AstroTurf Rug Tutorial via RainonaTinRoof.com #diy #rug #homedecor #outdoordecor

    Be sure to run tape along the white edges where your diagonal stripes meet it.

    Step 7

    Paint your diagonal stripes using the same method as with the border, then remove the tape.

    The finished product: 

    DIY Painted AstroTurf Rug Tutorial via RainonaTinRoof.com #diy #rug #homedecor #outdoordecor

    I love how fun this rug is. I put it on the screened-in porch for photos, but am planning on moving it to the front porch when the floor out there is finished.

    DIY Painted AstroTurf Rug Tutorial via RainonaTinRoof.com #diy #rug #homedecor #outdoordecor

    I did somehow mess up my “tape measurements” at one point. You can see where some of my diagonal lines are skinnier than others. No biggie – nothing’s perfect around here.

    DIY Painted AstroTurf Rug Tutorial via RainonaTinRoof.com #diy #rug #homedecor #outdoordecor

    I love the Juicy Passionfruit and stark white against the green. Its a fun, unexpected element.

    DIY Painted AstroTurf Rug Tutorial via RainonaTinRoof.com #diy #rug #homedecor #outdoordecor

    What do you think?

    Too tacky?

    If its not a little tacky, its no fun, right?!

    How can you jazz up an AstroTurf rug?

    Want more great ideas for rugs? Then don’t miss these 14 painted rug hacks!

    Love a great cowhide rug? Here’s how I made a faux cowhide rug for about $15.

    Oh, and here’s my little trick for keeping rugs from sliding on your floors.

    You know you don’t wanna miss any of this crazy.

    Sign up to get my posts delivered to your inbox here. 

    Stalk Me Here:

    Pinterest / Facebook / Twitter / Instagram

    SaveSave

  • Kate Spade Knock-Off Photo Frame for $5 in 15 minutes

    Kate Spade Knock-Off Photo Frame for $5 in 15 minutes

    You guys know I have a love for just about everything Kate Spade.

    It all started with this Kate Spade inspired lamp.

    And then Mama bought me this Kate Spade serving set for mother’s day and I nearly peed my pants.

    I saw this black and white Kate Spade photo frame around Christmas and almost put it on my wish list, but then I realized I could easily do a Kate Spade Knock-Off on this picture frame.

    DIY Kate Spade Photo Frame Knock-Off | Kate Spade Crafts | DIY Kate Spade Decor | DIY Kate Spade Office This post contains affiliate links for your shopping convenience. Click here to read my full disclosure policy.

    Kate Spade Knock-Off Frame

    This will take all of about 15 minutes of your time and cost you about $5.

    Boom.

    Materials Needed:

    -Acrylic Photo Frame (I used a 5×7 size. These are the same kind I used on my DIY Lucite Trays.)

    -White paint (optional if you have a white back already)

    -Electrical Tape

    -Scissors

    Steps

    Remove the cardboard backing of the frame. You can paint it white or if its already white, leave it. Just to be sure mine was a true white, I spray painted it white and let it dry for about an hour before proceeding.

    Kate Spade Knock-Off Photo Frame via RainonaTInRoof.com #katespade #knockoff #photo #diy #craft

    Step 1

    Put a strip of electrical tape across the top of the white cardboard backing.

    Step 2

    Put strips of electrical tape across the top and bottom of the cardboard backing.

    Step 3

    Use tape strips to measure the width between tape strips.

    Step 4

    Apply two more strips to the backing.

    Step 5

    Place a photo in your frame, then put the backing in with the black and white stripes facing out.

    Kate Spade Knock-Off Photo Frame via RainonaTInRoof.com #katespade #knockoff #photo #diy #craft

    Kate Spade Knock-Off Photo Frame via RainonaTInRoof.com #katespade #knockoff #photo #diy #craft

    Kate Spade Knock-Off Photo Frame via RainonaTInRoof.com #katespade #knockoff #photo #diy #craft

    DIY Kate Spade Photo Frame Knock-Off | Kate Spade Crafts | DIY Kate Spade Decor | DIY Kate Spade Office

    Easy, chic, and cheap.

    What’s not to love?

    Have you done a Kate Spade Knock-Off before?

    And if you are looking for more cheap craft ideas using tape, don’t miss these 7 Super Simple, Super Cute Electrical Tape Crafts or these 20+ Duck Tape Craft and Home Projects – oh, the power of tape! 

    You know you don’t wanna miss any of this crazy.

    Sign up to get my posts delivered to your inbox here. 

    Stalk Me Here:

    Pinterest / Facebook / Twitter / Instagram

    SaveSaveSaveSaveSaveSaveSaveSave

  • 7 {To Die For} White Kitchens

    7 {To Die For} White Kitchens

    Ok, maybe not To Die For, but you know what I mean. They are good.

    Way good.

    Let’s talk about white kitchens for a moment, shall we?

    First off, let’s define them. To me, a white kitchen is one that is mostly white of course. It doesn’t mean that all the cabinets have to be white, the backsplash white, or the countertops all white. To me, it just means that when you look at the overall space, it feels light and airy.

    Personally, I love white kitchens. To me, they have the most clean lines and seem the most inviting.

    7 {To Die For} White Kitchens via RainonaTinRoof.com

    White Kitchens

    Modern Rustic White Kitchen

    When Grunt Labor and I bought our foreclosure, I knew I wanted to make the cabinets white and have subway tile in our kitchen. We went for a white on white on white scheme with the cabinets, countertops, and backsplash, then brought in color with the barstools, and character with the island. I do have to say though, I am starting to crave just a bit more color in here – I’m thinking I can bring some in with a couple rugs.

    And on a side note – everyone always asks me how hard it is to keep white cabinets clean. Well honestly, I’m not the best at keeping them spic ‘n span everyday. I don’t have time to wipe them down daily. However, when I do get around to wiping them down, any grease, dirt, or smudges come off super easily with a Mr. Clean Magic Eraser.

    White Kitchens

    via

    I love the simple white cabinets in this kitchen and the classic subway tile. What I really really love about this kitchen though are the pops of black and white. Those countertops are perfection and the black and white rugs tie it all in.

    Navy and White Kitchen

    via

    Sara Richardson is one of my all time favorite designers. This kitchen she designed is to me, breathtaking. On one side, you’ve got the clean white cabinets and then bam that navy and brass island just make it all pop.

    Dark Blue and White Kitchen

    via

    Yep, more navy. I am totally digging the white cabinets on top, navy on the bottom. Even though this space has some definite color, it still has that overall white feel to me with the countertops and backsplash.

    White Kitchen

    Four Generations One Roof  has a beautiful white kitchen. She brought in some color with her backsplash and tied it together with her rug. I love the cozy cottage feel.

    Black and White Kitchen

    via

    This kitchen is definitely on the modern side. I’m not 100% crazy about the style of it, but I love how it shows that you can have lots of black in a kitchen and still have it feeling light and airy by painting the walls white and doing a white backsplash.

    Teal and White Kitchen

    Mom 4 Real has another beautiful white kitchen, but had the genius idea of removing some of her upper cabinet doors and painting the backs with a fun teal color. Such a great way to add color, while still keeping that white kitchen feel.

    What are your thoughts on white kitchens?

    Love ’em? Hate ’em? Somewhere in between?

    Looking for more kitchen inspiration? 

    See how I made my boring and basic laminate counters look like STONE! It was easy! And don’t miss these other 9 DIY countertop ideas either!

    Check out these 7 Kitchen Island Ideas you would have never thought of!

    Here are 10+ ideas for organizing, decorating and storage in your kitchen.

     You know you don’t wanna miss any of this crazy.

    Sign up to get my posts delivered to your inbox here. 

    Stalk Me Here:

    Pinterest / Facebook / Twitter / Instagram

  • Easy Happy Birthday Sign

    Easy Happy Birthday Sign

    Hi Friends!

    I was secretly MIA last week on a beach vacation. It was great, but of course I’m playing catch-up. So today, I’m going to share the last of my DIY party decorations from the Care Bear & Rainbow Birthday party.

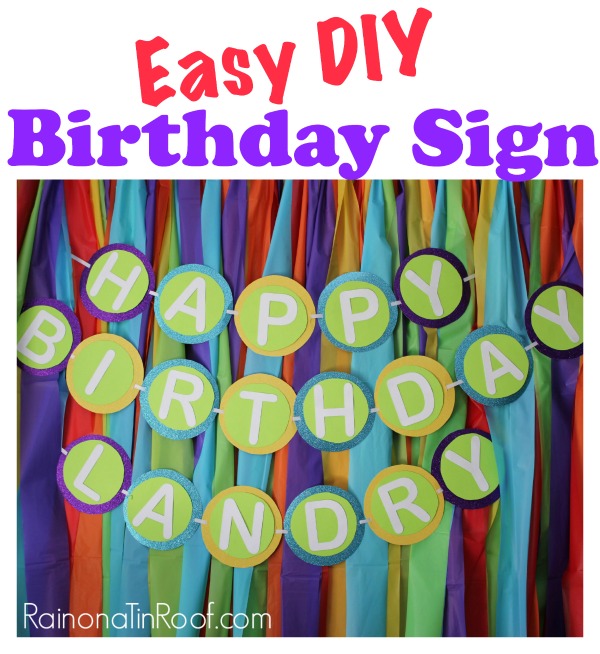
    This Happy Birthday sign was easy to make and got the job done.

    Easy Happy Birthday Sign via RainonaTinRoof.com #happybirthdaysign #birthday #crafts #diypartydecorationsThis post contains affiliate links for your shopping convenience. Click here to read my full disclosure policy.

    Instead of going with a bunting or flag shape like last year’s banner, I opted for simple circles this year.

    This was real technical, y’all, so pay very close attention.

    If you know anything about me, then you know that last sentence was a lie.

    Materials: 

    Cardstock in colors of your choice, 12 x 12 size  – This is for the background circles. I used 10 sheets total. If you are just doing “Happy Birthday,” you will only need 8 sheets. I used glitter card stock as the biggest background circle and regular card stock for the rest.

    Cardstock for the letters – 5-6 sheets

    Scissors

    Silhoutte (optional)

    2 Round Objects – 1 slightly smaller than the other

    Skinny Ribbon

    Pencil

    Steps

    Step 1

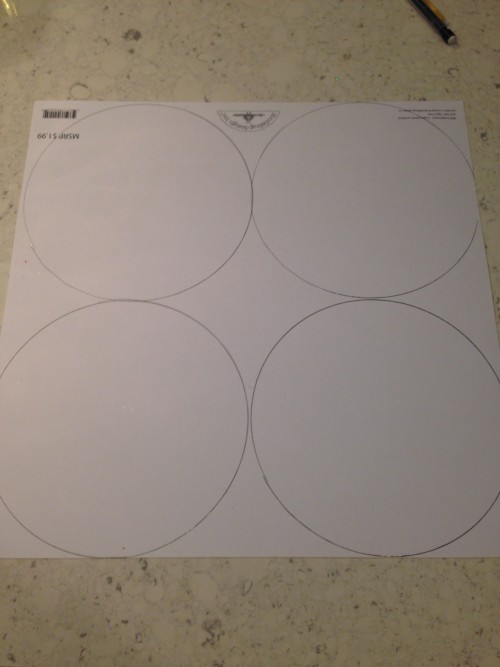
    Flip over the card stock you will use as your biggest background circle. This was the glitter card stock for me. Place the largest circle object over it and trace around it. I got four circles on one 12 x 12 sheet.

    Easy Happy Birthday Sign via RainonaTinRoof.com #happybirthdaysign #birthday #crafts #diypartydecorations

    Repeat this on all the card stock you will be using for your biggest circle. Cut them out

    Step 2

    Trace the smaller circle over the backside of the your other card stock, then cut them out.

    Step 3

    Glue the smaller circle onto the larger circle. I used hot glue for this.

    Step 4

    For the letters, I used my Silhouette. You can do that, or you can use large sticker letters or trace some and then cut them out like I did here.

    Step 5

    Adhere the letters to the top circle.

    Step 6

    Cut small slits on each side of the circles and weave ribbon in out and to connect them.

    Sorry for the lack of pictures to go along with the steps. I kind of, umm, waited till the last minute to get this done and had no time for photos. Its so simple though, you don’t even need them.

    Easy Happy Birthday Sign via RainonaTinRoof.com #happybirthdaysign #birthday #crafts #diypartydecorationsI used thumbtacks to put it on the wall and hid them behind the DIY party backdrop– easiest backdrop ever!

    Have you made a happy birthday sign before?

    You can find loads more DIY party decorations here.

    You know you don’t wanna miss any of this crazy.

    Sign up to get my posts delivered to your inbox here. 

    Stalk Me Here:

    Pinterest / Facebook / Twitter / Instagram

    SaveSave

  • Painted Porch Floor

    Painted Porch Floor

    Last week, I showed a little sneak peek of this project when you saw the leopard print table.

    I’ve been sitting over here antsy as all get out to show you the whole project.

    I’m pretty pumped about how this painted porch floor turned out.

    Painted Porch Floor via RainonaTinRoof.com #porch #summer #diy

    Last year, I did a makeover on the screened-in porch. Well, really it was like a semi-makeover. I painted the floor, bought new seat cushions, made a chalkboard, and that was about it.

    After adding on the deck this year, I really wanted to make this space more colorful, and an extension of our living area. So far, I’ve spruced up the chandelier, added a buffet table, and now this floor. There is still more to come, y’all, and with every change, I love this space even more!

    Here’s how I did my floor:

    Painted Porch Floor

    Disclosure: This post is sponsored by FrogTape, however all opinions and my love of black, white, and green are 100% my own. This post contains affiliate links for your shopping convenience. Click here to read my full disclosure policy.

    First, you want to start out with a clean floor. My old floor color was brown and I wanted to do a white, black and green color scheme, so the brown had to go. I cleaned the floor really well first, then painted on two coats of white exterior paint.

    Painted Porch Floor via RainonaTinRoof.com #porch #summer #diy

    Now, before you even think about putting that tape down, I want you to wait a minimum of seven days to let the paint fully cure.

    I know – it really stinks waiting that long, but trust me, you need to. You see, at first, I did not wait seven days. I waited three days and put the tape down, then when I pulled it up, some of the paint came with the tape. The paint hadn’t fully cured. So, I repainted the entire floor with another two coats of white paint and didn’t touch it for a week.

    Go have yourself a cocktail or two (per day of course), and just wait the seven days for it to fully dry. You’ll thank me later.

    Let’s all hum the Jeopardy theme in our head while we pretend that we just waited seven days for the paint to fully cure…….

    Ok, seven days later, we’re ready to tape. My concrete is very old school. Remember, I am dealing with a 1960s Rancher here. Needless to say, the concrete was uneven in places and had multiple bumps and divets, and just plain not smooth – anywhere really.

    Regular tape wouldn’t work – the paint would have bled through. To combat this, I used FrogTape for Textured Surfaces.

    Painted Porch Floor via RainonaTinRoof.com #porch #summer #diy

    It has a two part system – tape and liquid PaintBlock.

    The first thing you will do is measure out your sections. I did 28 1/2 inch wide sections – that width took up the entire porch floor, which was perfect. After measuring and marking out your sections, run the tape along the edge of each section.

    Painted Porch Floor via RainonaTinRoof.com #porch #summer #diy

    Next, run a damp cloth around the edge of the tape. This helps to activate the PaintBlock technology.

    Painted Porch Floor via RainonaTinRoof.com #porch #summer #diy

    Like I said, this tape is a two part system. Next, you will take the bottle of liquid PaintBlock sealer and apply it to the edges of the tape. Shake the bottle well, then remove the cap and replace it with the included brush applicator.

    Painted Porch Floor via RainonaTinRoof.com #porch #summer #diy

    Apply it generously along the seal, going back and forth to overlap. It goes on milky, but dries clear. Let it dry for 15 minutes and then paint! Remove the tape when the final coat of paint is dry to the touch.

    Painted Porch Floor via RainonaTinRoof.com #porch #summer #diy

    Don’t worry about the liquid PaintBlock keeping paint from adhering places where there was no tape – it just seals the tape edge.

    Painted Porch Floor via RainonaTinRoof.com #porch #summer #diy

    Isn’t is crazy how just three simple colors in stripes work so well together? No fancy pattern, just stripes, but an awesome impact.

    And I still got sharp paint lines even with the un-eveness of my concrete!

    I do recommend that you follow the rule of seven days after applying the rest of your paint colors as well. Don’t move any furniture back in until you are sure that baby is dry!

    Painted Porch Floor via RainonaTinRoof.com #porch #summer #diy

    I love the combination of the black, white, and green! Its the perfect shot of color, but allows me to work in many more colors – which are coming soon!

    Have you done a painted porch floor before?

    See the completed porch HERE!

    You know you don’t wanna miss any of this crazy.

    Sign up to get my posts delivered to your inbox here. 

    Stalk Me Here:

    Pinterest / Facebook / Twitter / Instagram

    I’m participating in the summer celebration!! Don’t miss all the other summer projects below and come back Thursday to link up with us! 

    250x250

    Here are even more ideas to kick off your summer in style…

    Monday…

    Tuesday…

    SaveSave

  • DIY Birthday Hat…Another reason I’m not the kid’s favorite parent…

    DIY Birthday Hat…Another reason I’m not the kid’s favorite parent…

    There is no doubt in my mind that my kid loves her father much more than she loves me.

    That’s ok, and really its no surprise.

    With the exception of summer, she’s stuck with me for at least eight hours a day.

    Eight hours of random dance parties, eight hours of DIY projects, eight hours of hearing me scream at the dogs, eight hours of reruns of Sex and the City.

    Wait a minute, why doesn’t she love me the most? Obviously, I am the most awesome parent alive.

    Although, maybe not the most award winning one…

     Adding to her reasons of why I’m not her favorite would be this lovely birthday hat I made her.

    I find it adorable.

    She refused to wear it for more than 30 seconds.

    DIY Birthday Hat via RainonaTinRoof.com #birthday #partyhat #kids

    This post contains affiliate links for your shopping convenience. Click here to read my full disclosure policy.

    DIY Birthday Hat

    Isn’t it adorable?

    Sparkly, yet not too girly with the purple?

    I thought so too.

    I made this birthday hat with the same template I used for last year’s party hat. Get the details here.

    DIY Birthday Hat via RainonaTinRoof.com #birthday #partyhat #kids The purple glitter card stock was a great base, and I added a bit more pizzaz with the bright poms. I did use my Silhouette to cut out the “2,” however, you could easily follow this tutorial here on how to cut letters and numbers without a silhouette. I attached everything with hot glue.

    I did manage to sneak a photo right after I tricked her into wearing it for a brief shining moment.

    DIY Birthday Hat via RainonaTinRoof.com #birthday #partyhat #kids

    At least the birthday hat still looks good by itself.

    Have you made any party hats before?

    Were you that rockstar mom who actually got your kids to wear them?

    If so, please send me your tips.

    Now.

    Looking for more party decorating ideas?

    See how I made the Circus’ first birthday party hat here.

    Make the easiest ever party backdrop using this tutorial.

    And here’s a super easy DIY party banner here.

    You can see the entire Rainbow & Care Bear Party here.

    And all of my DIY party decorations are here.

    You know you don’t wanna miss any of this crazy.

    Sign up to get my posts delivered to your inbox here. 

    Stalk Me Here:

    Pinterest / Facebook / Twitter / Instagram

    SaveSave

  • DIY Leopard Print Table A.K.A. The (Almost) Bee Table

    DIY Leopard Print Table A.K.A. The (Almost) Bee Table

    I’ve had this table in my basement for nearly a year. I loved its shape so much, but just couldn’t decide what to do with it. When I finally did decide what to do with it, it was an utter failure (I’ll get there in a minute). Luckily, it made a spectacular comeback with the help of a little leopard print goodness.

    Leopard Print Table via RainonaTinRoof.com #leopard #stencil #makeover #painting #diy #furnituremakeoverThis post contains affiliate links for your shopping convenience. Click here to read my full disclosure policy.

    This piece is the last one that my sweet neighbor gave me before she moved. Remember how she gave me the navy chests, the chevron tray, the coral and mint nightstand, and so much more? She’s such a sweetie and we miss her dearly. This table sat in my basement for a while because I couldn’t decide what to do with it.

    Leopard Print Table via RainonaTinRoof.com #leopard #stencil #makeover #painting #diy #furnituremakeover

    I was absolutely in love with its retro feel and would have been completely fine keeping it wood toned. But upon close inspection, the finish was peeling – and the top of it wasn’t real wood – it was laminate. No re-staining for this baby.

    And then one day, it hit me. The perfect combination of colors and I already them on hand – black and mustard.

    Bee Table

    Guys.

    Seriously.

    The next time I think that black and mustard (I swear the color was more mustard in the can and was called fresh mustard) work well together please remind me that they work well together on a bumble bee. And a caution sign.

    Not on a table.

    Mkay? Thanks.

    So we went back to square one. I primed the table all over again. It sat around for a while.

    One day I finally said to myself, “Black and Gold. Its never failed you. It looked great on that french desk. Put it on the table.”

    So I painted.

    Leopard Print Table via RainonaTinRoof.com #leopard #stencil #makeover #painting #diy #furnituremakeover

    I painted the whole piece black with my paint sprayer. Next, I topped it off with a gold leopard print using the stencil from the accent wall in my guest bedroom and office.

    Leopard Print Table via RainonaTinRoof.com #leopard #stencil #makeover #painting #diy #furnituremakeover

    I finished it all off with my usual coat of Polycrylic. If you look closely in those pictures, you can see a sneak peek of my porch floor I’m working on – reveal coming next week!

    Leopard Print Table via RainonaTinRoof.com #leopard #stencil #makeover #painting #diy #furnituremakeover

    I was thinking I would put this inside somewhere, but I’m loving the feel of it on the porch.

    Every room needs a little animal print, right?

    Need a little more furniture makeover inspiration? 

    Find out how to make gorgeous colored glazes in any color for furniture flips and colored stains here!

    Get all my tips, tricks and techniques and more for furniture painting here!

    And see my complete gallery of all my furniture makeovers right here.

    You know you don’t wanna miss any of this crazy.

    Sign up to get my posts delivered to your inbox here. 

    Stalk Me Here:

    Pinterest / Facebook / Twitter / Instagram

    SaveSave

  • Easy Party Backgrounds for $10 or less (Video)

    Easy Party Backgrounds for $10 or less (Video)

    Having a great photography backdrop for any event or party is always fun for guests. Make this colorful rainbow backdrop in under an hour for just about $10.

    As you may well know, kid’s birthday parties can get expensive really quick.

    And I’m not even talking about their gifts. I’m talking about feeding everyone, decorations, invitations, etc.

    I like to DIY as many party decorations as I possibly can to save money.

    I first showed you my easy party backgrounds last year when I did one for the kid’s 1st birthday party. This year, I added a bit more umph to it.

    Easy DIY Rainbow Backdrop

    This post contains affiliate links for your shopping convenience. Click here to read my full disclosure policy.

    Rainbow Photo Backdrop

    To make these, you only need plastic rectangle tablecloths. Last year, I only used two different colors for the backdrop. This year, I started out using just green, blue, and yellow. The result was a very lemon-limey, Sierra Mist, Sprite looking backdrop.

    Not exactly what we were going for.

    Since the kid’s party was a Care Bear and Rainbow theme, I didn’t want that.

    Rainbow Photo Backdrop using Plastic Tablecloths

    I ended up going back to the party store and buying the other three colors of the rainbow (red, orange, and purple) and making a second backdrop to layer on top the lemon-lime one.

    To add the extra colors, I just left the lemon-lime background up on the wall, then pinned up the new colors and made a separate backdrop with them. The tutorial for how to make the basic party backdrop is here. After I had finished the new rainbow color background, I just ran my fingers through both and blended them together. You can also find the tutorial for that simple birthday banner here.

    Rainbow Color Background Tutorial for parties.

    You can watch the video below to see how to make one of the backgrounds. To make one with more than three colors, just layer another three different colored backdrops on top of the first one.

    [adthrive-in-post-video-player video-id=”yhS6773x” upload-date=”Tue Aug 16 2016 14:38:10 GMT+0000 (Coordinated Universal Time)” name=”Rain on a Tin Roof – DIY Party Backdrop” description=”Make this less than $5 and very simple diy party backdrop to spruce up any party! All it takes is a little time and three plastic tablecloths.”]

    Of course, it doesn’t have to be a rainbow background; you could use any colors you wish. These make the perfect photography backdrop to document those fun memories made at the party!

    Rainbow is better than lemon-lime any day of the week, right?

    I got my tablecloths from Party City at $2 each, however you could easily use ones from the Dollar Tree and have $6 in this bad boy.

    Have you made a rainbow party backdrop before?

    Need more DIY party decorating ideas?

    DIY Birthday Party Hat – so easy to make and easily customizable for any party colors or theme!

    Easy DIY Cake Topper – you just need stickers and some scrapbook paper for this adorable cake topper!

    And don’t miss all these simple DIY Party Decorations on a budget!

    If you want to remember this rainbow backdrop for later, just pin the image below!

    Rainbow background on a wall made using plastic tablecloths.

    You know you don’t wanna miss any of this crazy.

    Stalk Me Here:

    Pinterest / Facebook / Twitter / InstagramSaveSave

  • Care Bear and Rainbow Party {I Survived….Barely}

    Care Bear and Rainbow Party {I Survived….Barely}

    Seriously y’all, I don’t think I’ve ever been so happy to have a birthday party over with.

    Not that it wasn’t a great little party and yes, I’m a little sad the kid is growing up so fast, but party planning and party decorating for kids birthdays are just. so. exhausting.

    Can I get an amen?

    This year we opted for a Care Bear and Rainbow Party for the kid’s birthday. When I started planning it, she was really into her stuffed bears, by the time the party rolled around she was really into her stuffed dogs. Can’t go anywhere without a stuffed dog these days.

    Kid changes her mind more than I do.

    Care Bear and Rainbow Party via RainonaTinRoof.com #rainbow #party #kids #carebears #diy #partydecorThis post contains affiliate links for your shopping convenience. Click here to read my full disclosure policy.

    This post is an overview of the entire party. I’ll be sharing the details on all the DIY party decorations I made over the next few weeks.

    Care Bear & Rainbow Party

    Guests were greeted by a photo collage in the shape of a 2 as they came in the door.

    Care Bear and Rainbow Party via RainonaTinRoof.com #rainbow #party #kids #carebears #diy #partydecor

    Its a little different than our “1” photo collage from last year, but still the same idea.

    A Care Bear sign with rainbow streamers was on the door…

    Care Bear and Rainbow Party via RainonaTinRoof.com #rainbow #party #kids #carebears #diy #partydecor

    And just in case you didn’t know, the reason for all the rainbows is because in Care-A-Lot, where all the Care Bears live, there are lots of rainbows coming out of clouds.

    You feel incredibly well-educated all of a sudden, don’t you?

    Its ok, you can admit it.

    Care Bear and Rainbow Party via RainonaTinRoof.com #rainbow #party #kids #carebears #diy #partydecor

    The dining room was the main attraction.

    Care Bear and Rainbow Party via RainonaTinRoof.com #rainbow #party #kids #carebears #diy #partydecor

    Complete with white cloud balloons and a rainbow made from streamers.

    I found that the best thing to attach the balloons and streamers to the ceiling was with masking tape. It held it all up – not one fell – and it didn’t take off too much of the ceiling. I have popcorn ceilings, but you can’t tell where the tape strips were. To make the tape part of the decorations, I used this bright yellow masking tape.

    Care Bear and Rainbow Party via RainonaTinRoof.com #rainbow #party #kids #carebears #diy #partydecor

    I made another easy party backdrop, but gave it a twist. The details on it are here.

    I also made the birthday sign, which is different from last years, but still easy.

    Each one of her Care Bears got their own party hat – you have no idea how difficult it can be to make such a tiny party hat.

    Care Bear and Rainbow Party via RainonaTinRoof.com #rainbow #party #kids #carebears #diy #partydecor

    The DIY cupcake pedestals made another appearance as well.

    Care Bear and Rainbow Party via RainonaTinRoof.com #rainbow #party #kids #carebears #diy #partydecorThe kid also got a new party hat, complete with bright poms. That party hat worked about as well as last year’s did.

    Care Bear and Rainbow Party via RainonaTinRoof.com #rainbow #party #kids #carebears #diy #partydecor

    Both chalkboards got a birthday treatment.

    Care Bear and Rainbow Party via RainonaTinRoof.com #rainbow #party #kids #carebears #diy #partydecor

    My chalkboard skills are definitely still lacking, but hey I gave it a whirl. I did discover that this colored chalk is my all-time favorite colored chalk. The colors were so vivid – especially helpful in distracting eyes away from my horrible chalk penmanship.

    And what was the kid’s favorite part of her birthday?

    The balloons. All she wanted to do after the party and for the following two days was to run around with 12 balloons in her hand.

    Those balloons took a freedom flight night before last.

    Mama had enough.

    Stick around for the details on all the party decor!

    You can see last year’s party and all the DIY party decorations that went along with it here.

    Have you thrown a Care Bear or Rainbow Party before?

    Did you also come out of it needing a drink in your hand for the next few days?

    Anyone? Anyone?

    Need more great DIY party decor ideas on a budget? You’ll want to see these then…

    Easy DIY Cake Topper – make an easy cake topper to complement your party theme using just scrapbook paper and stickers!

    DIY Birthday Party Hat – it will take you all of five minutes and it’s so stinking adorable!

    Make Your Own Custom Party Invitations – this is so easy and gives the party a great personal touch!

    You know you don’t wanna miss any of this crazy.

    Sign up to get my posts delivered to your inbox here. 

    Stalk Me Here:

    Pinterest / Facebook / Twitter / Instagram

    SaveSave

  • 9 Nursery Ideas That Won’t Break the Bank

    9 Nursery Ideas That Won’t Break the Bank

    Let me go ahead and squash what all of you are thinking.

    I am not pregnant. 

    Nor do I have any plans of being pregnant. I am a one and done parent. Or even a one and fun kind of parent. To all you other parents out there that have multiple children, my hat is off to you. The thought of having another one just makes me want to go take a nap. Grunt Labor, the kid, and I are perfectly happy as a unit of three.

    Over the past week during the fiasco of preparing for the kid’s birthday party (details coming soon), I started thinking about her nursery and what all has worked in there for us, what didn’t work and what I would do differently. I thought some of you guys with kiddos on the way, may want to hear my words of wisdom.

    Or not.

    But trust me, my words of wisdom on nursery ideas and decorating is far better than my words of wisdom on actual parenting. At least I can admit it.

    Nursery Ideas that won't break the bank via RainonaTinRoof.com #nurseryideas #nursery #diy

    (more…)

  • Industrial DIY Coffee Table from a Yard Sale Cart

    Industrial DIY Coffee Table from a Yard Sale Cart

    Remember how I confessed that my latest chair makeover was a roadside find that sat untouched in my basement for nearly a year?

    Yea, ummm, the same is true of this cart turned industrial DIY coffee table. I picked it up at a yard sale well over a year ago now. From the time I bought it, I had planned on turning it into a coffee table, but one thing led to another and it just now got completed.

    Just like the chair though, I think this one was worth the wait.

    Industrial DIY Coffee Table via RainonaTinRoof.com #diycoffeetable #diy #industrial

    This is a Sponsored post written by me on behalf of Elmer’s ProBond Advanced. All opinions are 100% mine. This post contains affiliate links for your shopping convenience. Click here to read my full disclosure policy.

    Industrial DIY Coffee Table

    We started with this:

    Industrial DIY Coffee Table via RainonaTinRoof.com #diycoffeetable #diy #industrial

    I had used it  to do painting on, so there were lots of different colors on it. After taking off the old wood top, I had this:

    Industrial DIY Coffee Table via RainonaTinRoof.com #diycoffeetable #diy #industrial

    I painted the metal frame with copper spray paint to keep that metal look, but add a bit of color. After that, we started the process of cutting wood for the top and bottom.

    Industrial DIY Coffee Table via RainonaTinRoof.com #diycoffeetable #diy #industrial

    We started with 1x6s for the top. We made them overhang slightly on each side, so they were each about 29 inches long. On the bottom, we used 1x4s. The cart was divided into three sections on the bottom by the bars, so each bottom side was 23 7×8 inches long and the middle was slightly smaller at 23 3/4 inches. As we cut the wood, we placed it on the cart to make sure it would fit. After it was all on the cart, we began the process of gluing down the wood.

    Industrial DIY Coffee Table via RainonaTinRoof.com #diycoffeetable #diy #industrial

    We used Elmer’s ProBond Advanced glue to adhere the wood to the metal. This glue is known for bonding Mixed Materials like wood to metal. The great thing about it is there is no foam residue left after it dries. We glued down the wood on the bottom first. All I did was simply run a bead of glue right along the metal rails and then placed the wood on top of the glue. I did the exact same thing on the top of the cart. To really push the wood down onto the glue, we raided our nearby retaining wall for a few concrete blocks to weigh down the wood. I let the table sit like this overnight. The next morning, I removed all the blocks and started staining and painting it.

    Industrial DIY Coffee Table via RainonaTinRoof.com #diycoffeetable #diy #industrial

    First, I sanded it to smooth rough edges and round the corners a bit. Next, I stained all the wood and let it dry overnight. I liked just the wood stain, but ya’ll know me, I wanted it to stand out a bit more, so I added some decorative “arrows” with white paint and FrogTape. I used a piece of tape to space between two pieces of tape, cause I’m lazy (or smart ) like that. Then, as shown in #3, you want to remove the tape where those two x’s are so that you have clean lines on your point. I did this by taking another piece of wood, lining it up on the tape, and running my X-Acto knife over it.  After cleaning up my lines, I painted between the tape, let it dry and finished the whole thing off with a coat of polycrylic.

    Industrial DIY Coffee Table via RainonaTinRoof.com #diycoffeetable #diy #industrial

    The ProBond Advanced glue worked perfectly – not one of the wood pieces will budge at all.

    Industrial DIY Coffee Table via RainonaTinRoof.com #diycoffeetable #diy #industrial

    What do you think? Was it worth the wait?

    Industrial DIY Coffee Table via RainonaTinRoof.com #diycoffeetable #diy #industrial

    Do you have any carts that could become a DIY coffee table?

    If you liked this furniture flip, you should see these too…

    How to Turn a Side Table into a Chic Bench – this can double as a coffee table, bench, end table and ottoman!

    Bookcase turned Kid’s Dress Up Closet – grab an old bookcase and turn it into a magical destination for your kiddos!

    How to Build a Desk Using an Old Kitchen Table – this desk might be slim, but it has loads of storage!

    And you can always see all my furniture makeovers here.

    You know you don’t wanna miss any of this crazy.

    Sign up to get my posts delivered to your inbox here. 

    Stalk Me Here:

    Pinterest / Facebook / Twitter / Instagram

    SaveSave

  • 14 Real Life Bedroom Ideas Anyone Can Do

    14 Real Life Bedroom Ideas Anyone Can Do

    Ok, ya know how sometimes when you are reading a magazine or browsing on Pinterest, and you see those perfectly gorgeous bedrooms? There is high end wall art, beautiful mirrors, comfy bedding, and perfect antique furniture.

    And you know that the bedding alone probably cost $1000?

    If you have $1000 to spend on bedding or on a mirror or wall art, by all means, go for it.

    I don’t.

    Hell, I can’t remember when the last time was that I had $1000 to spend on a whole room.

    Oh, wait, yea, I haven’t ever had that.

    So, for the rest of us that want beautiful bedrooms without breaking the bank, here are 14 real life bedroom ideas that anyone can do.

    Real Life Bedroom Decorating Ideas

    #1 – Create An Accent Wall

    14 Real Life Bedroom Ideas Anyone Can Do - create an accent wall

    Creating an accent wall is one of the easiest things you can do that gives huge impact. For the easiest route, go with one single color. I love this bold pink accent wall that SAS Interiors did. I’m also very into bright pinks now. Obviously, a bright pink wall isn’t going to work as an accent wall in many of our bedrooms. However, think bold for your accent wall. You want it to make a statement. The accent wall in my entryway is Rich Navy and it works perfectly for the space. If you want to really step up your accent wall game, you could stencil a design onto your wall. That is exactly what I did in our guest bedroom with this leopard accent wall. The walls were all white with black moldings – it was very stark. With the accent wall, it tied everything together perfectly and added some much needed interest to the walls.

    #2: Do a Mini-Makeover

    14 Real Life Bedroom Ideas Anyone Can Do - a mini-makeover

    Sometimes, we just need a little freshening up. I did a makeover in my master bedroom last year, but a couple months ago, I felt it needed a little something. Instead of doing a full-fledged makeover, I gave it a mini-makeover. I kept most of the main elements of the room, but changed the look with paint and a few other little ideas.

    #3: Get yourself a vanity. 

    Option 1: Build a floating vanity table.

    I did this in my walk-in-closet, but you could do it in your bedroom if you wanted to. I desperately needed a place to sit down and put on my makeup, so I build a simple floating vanity table that even has storage. The tutorial for it is HERE!

    Option 2: Turn an old armoire into a vanity.

    14 Real Life Bedroom Ideas Anyone Can Do - Turn an armoire into a vanity

    If you have enough room in your bedroom, this is a great idea for creating a vanity space. How cool is this old media cabinet turned vanity? I could totally sit there and primp for an hour. Until the kid gets in the way…

    #4: Paint a Headboard on Your Wall

    14 Real Life Bedroom Ideas Anyone Can Do - Paint a headboard on your wall.

    Beds and headboards can be expensive. Hopefully, you can luck up on a good used one that you can makeover or you can DIY your own. You could also just paint a headboard on the wall and call it done. Seriously ya’ll, this headboard is like two lines of paint and one stenciled design. So easy and gorgeous! If you aren’t into painting on a headboard, you can purchase a headboard wall decal. Yes friends, I said a headboard decal – and they look great!

    #5: Decorate your room around your favorite icon

    14 Real Life Bedroom Ideas Anyone Can Do - decorate your bedroom around your favorite icon.

    Most of us all have a favorite icon or celebrity. Hopefully its someone classic like Princess Diana and not Eminem, but hey if Eminem is your idol, who am I to judge? This Audrey Hepburn inspired bedroom is just too adorable. Really, how easy would it be to take your icon and use them as inspiration in your bedroom? Just think about their favorite colors, what movies they’ve been in and pull from that!

    #6: Create a Reading Nook

    14 Real Life Bedroom Ideas Anyone Can Do - create a reading nook!

    I love a good reading nook just about anywhere, but especially in a bedroom. I am one of those people that believe bedrooms should always have at least one chair – and that chair should be perfect for reading in.The reading nook in my bedroom is simply a single chair and side table. You’ll never believe where that chair came from! I am dying over that adorable reading nook for a kiddo from These Moments of Mine. Really, how cute are those curtains? A kid would love hanging out in a place like that, heck I would!

    #7: Make Storage Decorative

    14 Real Life Bedroom Ideas Anyone Can Do - make storage decorative!

    I don’t know about you guys, but there is never enough storage in our bedroom. Half of my clothes are in the guest closet and we are busting out of our dresser and chest of drawers. To save a little closet space, Grunt Labor’s ties are stored outside of the closet. We took an old coke crate and turned it into decorative storage for his ties.I also kinda sorta maybe have a good bit of jewelry. Fake jewelry of course, but there’s a good bit of it. Grunt Labor gave me this bust of David for Christmas (from this Etsy store) that I use to store my necklaces that I wear most often. Its pretty, quirky, and useful.

    #8 – Upholster Your Box Spring

    When it was time for the guest bedroom to get a makeover, I knew I wanted to keep the bed we had in there. The problem was that a bed skirt didn’t hang right on it.

    14 Real Life Bedroom Ideas Anyone Can Do via RainonaTinRoof.com #bedroom #DIY

    I fixed the problem by upholstering the box spring. It was easy to do – no sewing required – and it added some extra color and pattern to the room.

    #9 – Create an Office Space with Skinny Furniture Pieces

    While also plotting out the guest bedroom makeover, I knew I needed to somehow incorporate an office space in there for me. However, the room isn’t large, I needed the office area to take up as little space as possible.

    14 Real Life Bedroom Ideas Anyone Can Do via RainonaTinRoof.com #bedroom #DIYI created the office space by taking an old kitchen table and putting a hutch from a yard sale on top of it to create a desk. There is still ample storage, but it doesn’t take up much space at all.

    #10 – Save Money on Bedding by Buying the Basics

    As we all know, I am cheap. As I said at the beginning of this post, I do not have $1000 to drop on a room, much less on bedding.

    14 Real Life Bedroom Ideas Anyone Can Do via RainonaTinRoof.com #bedroom #DIYOne idea to save on bedding is to buy “basics” and liven them up with pillows and other elements.

    #11 – Create Your Own Art

    In both the guest bedroom and master bedroom, I created my own art.

    14 Real Life Bedroom Ideas Anyone Can Do via RainonaTinRoof.com #bedroom #DIY

    In my master, I made all the animal print wall art using Picmonkey and then found inexpensive frames that I spray painted.

    14 Real Life Bedroom Ideas Anyone Can Do via RainonaTinRoof.com #bedroom #DIY

    In the guest bedroom, I took an old framed print and replaced the prints with this hello darlin’ wall art.

    #12 – Add Drama with Moldings (Real or Fake)

    Moldings add interest to any room, a bedroom is no different.

    14 Real Life Bedroom Ideas Anyone Can Do via RainonaTinRoof.com #bedroom #DIY

    If you are good with wood and have basic DIY skills, you can easily do moldings similar to what Evolution of Style did in her bedroom.

    14 Real Life Bedroom Ideas Anyone Can Do via RainonaTinRoof.com #bedroom #DIY

    If you want to go the cheaper route, you can create faux wall moldings, as I did in my guest bedroom and office space.

    #13 – Keep Bedding Mostly Neutral

    When it comes to bedding, its always smart to keep it mostly neutral.

    14 Real Life Bedroom Ideas Anyone Can Do via RainonaTinRoof.com #bedroom #DIY

    I can easily tire of patterns. That’s why I went with simple white bedding with a pop of coral around the edges on my bed. I can easily change the room color, pillows, throws, etc without having to worry about clashing with lots of other colors or patterns.

    #14 – Keep Existing Furniture and Give It a Simple Makeover

    You don’t have to do extensive paint jobs to give your furniture new life.

    14 Real Life Bedroom Ideas Anyone Can Do via RainonaTinRoof.com #bedroom #DIY

    I am crazy about my dresser and chest of drawers in my bedroom. However, the pulls were definitely lacking some luster. I easily brought them back to life with Rub ‘N Buff.

    What are your go-to bedroom ideas or decorating tips?

    Find more bedroom ideas on my Pinterest board!

    Want more real life decorating ideas? Don’t miss these then…

    10+ Kitchen Ideas for Decorating, Organizing, and Storage – functional ideas for your kitchen that are pretty too!

    20+ Living Room Ideas – real life living room decorating ideas that are actually doable!

    14 Stunning Home Ideas – stunning home ideas that you might not have thought of before!

    You know you don’t wanna miss any of this crazy.

    Sign up to get my posts delivered to your inbox here. 

    Stalk Me Here:

    Pinterest / Facebook / Twitter / Instagram

    Real Life Bedroom Ideas | Bedroom Decor | Bedroom Decorating Ideas | DIY Bedroom Decor | DIY Bedroom Ideas | Bedroom Decor DIY

  • How I turned into a Chemical-Free Floor Cleanin’ Fool

    How I turned into a Chemical-Free Floor Cleanin’ Fool

    Let me be honest with you for a moment.

    I am not a “Granola Mom”.

    I am not the mom that is worrying about her child getting too dirty or even eating dirt for that matter. Yea, it happened once.

    I don’t worry too much about scheduling playdates – she has the dog.

    Yes, I let my child eat frozen foods and things that have all sorts of preservatives and all those other big words people say are bad for you all the time. I figure I turned out ok, so what harm is it going to do? I don’t let her veg out on cookies all day, but if she wants a frozen waffle for dinner, who am I to say no? She doesn’t want me to heat it up first? Whatever. I mean Nick ate frozen french fries as a child. He’s ok. Kind of.

    And if all we have time for on the way to preschool is a Nutri-Grain bar that she’s eating as we walk out the door, so be it. In my defense, this kid loves fruit and she eats the heck out of it all the time. That has to count for something.

    Furthermore, I am not usually a “Granola Cleaner.” Y’all, I’m from the South. Buying Ammonia by the case for spring cleaning was is commonplace. They just check your id to make sure you aren’t a Meth maker. I’m pretty sure the 80 year old lady with perfectly coifed hair driving a Cadillac isn’t a meth maker, but hey, who am I to say? Those Cadys are pretty big – it could be a mobile Meth lab. I personally haven’t ever used ammonia – can’t stand the smell – but I’ve seen multiple women walking out of the Dollar General loaded down with Ammonia in their buggies.

    Let me be clear for a second, I am not hatin’ on the Granola Moms. In fact, I commend you. I bow down in your presence. You are a far better mom and homemaker than I ever will be. I’m just lazy. Its much easier to reach for the Spic ‘N Span than whip up some organic concoction.

    Until now.

    I am happy to say that I am now a chemical-free floor cleanin’ fool.

    Of course, I’m not whipping up any organic concoctions (I wouldn’t even know how to go about that), but I am using one chemical-free ingredient while cleaning my floors now.

    Water.

    Disclosure: This post is sponsored by HomeRight. However, all opinions and references to Granola Moms are 100% mine. This post contains affiliate links for your shopping convenience. Click here to read my full disclosure policy.

    How I turned into a Chemical-Free Floor Cleanin' Fool via RainonaTinRoof.com #steamclean #steammachineplus #homerightFriends, let me introduce you to the HomeRight SteamMachine Plus.

     How I turned into a Chemical-Free Floor Cleanin' Fool via RainonaTinRoof.com #steamclean #steammachineplus #homerightThe only tool you will ever need to steam clean anything.

    Let me reiterate only tool and steam clean anything.

    Watch and learn friends, watch and learn.

    I started out by cleaning the marble on my bathroom floors. All you need to do first is attach the cloth pad to the bottom of the steam mop head.

    How I turned into a Chemical-Free Floor Cleanin' Fool via RainonaTinRoof.com #steamclean #steammachineplus #homeright

    It simply attaches by velcro. So hard.

    Next, fill up your water tank.

    How I turned into a Chemical-Free Floor Cleanin' Fool via RainonaTinRoof.com #steamclean #steammachineplus #homeright

    Squeeze the buttons on either side of the tank, twist off the cap and fill the tank with water. Replace the tank to the cleaner.

    Plug the machine in and press the power button that is just above the water tank.

    How I turned into a Chemical-Free Floor Cleanin' Fool via RainonaTinRoof.com #steamclean #steammachineplus #homeright

    Once you power it on, it will light up with an orange-y color (photo on left). The steam is ready to go when the light turns blue (photo on right). Seriously y’all, I think it took about a minute for my water to heat up. This thing is fast.

    Then go to work.

    How I turned into a Chemical-Free Floor Cleanin' Fool via RainonaTinRoof.com #steamclean #steammachineplus #homeright

    Pull the trigger button on the handle to release steam. Did you notice how flexible this thing is? It pivots like nobody’s business.

    Oh, so you want to do some deep cleaning, eh?

    How I turned into a Chemical-Free Floor Cleanin' Fool via RainonaTinRoof.com #steamclean #steammachineplus #homeright

    No problem. The unit transforms into a handheld steamer at the click of a button. Push the button just above the blue portion to release the tank. Attach one of the included accessories as desired (I used the round brush scrubber for my tile). Hit the button on the back to release steam. On a side note, please turn the unit off as you are attaching the accessories. I, ummm, didn’t, and accidentally mashed the button at the same time I was putting on the brush, and well, steam burns…

    You want to clean your hardwoods, you say?

    How I turned into a Chemical-Free Floor Cleanin' Fool via RainonaTinRoof.com #steamclean #steammachineplus #homeright

    Not a problem, either. If you follow me on Instagram, I posted a similar photo to the one above. The left photo was spilled milk. See, I was trying to be a better mom and actually feed the kid before leaving for preschool. Mistake. I turned around, wasn’t looking, and my arm slammed right into a sippy cup full of milk. I soaked some of it up, then decided I would give the SteamMachine Plus a whirl on it. It was heated up and had it cleaned in no time.

    You want to freshen up your carpet now?

    How I turned into a Chemical-Free Floor Cleanin' Fool via RainonaTinRoof.com #steamclean #steammachineplus #homeright

    Yes, my friends, it can do that too. Attach the gliding accessory over the pad and go to town.

     Thank you HomeRight SteamMachine Plus, for making me into a chemical-free floor cleanin’ fool.

    How I turned into a Chemical-Free Floor Cleanin' Fool via RainonaTinRoof.com #steamclean #steammachineplus #homerightI hear the kid. I have to go make sure we have cereal bars for breakfast. Or maybe a frozen sausage biscuit….

    Need more cleaning tips? Be sure to see these then…

    How to Get Pet Stains & Odors out of your carpet Without Chemicals – easy, easy, easy!

    How I Steam Clean My Entire Kitchen – one tool cleans the entire kitchen!

    How to clean that gross shower with one single tool – you WILL NOT believe just how gross my shower was!

    You know you don’t wanna miss any of this crazy.

    Sign up to get my posts delivered to your inbox here. 

    Stalk Me Here:

    Pinterest / Facebook / Twitter / Instagram

    SaveSave

    SaveSave

  • 10 of My Favorite Weapons of Choice for DIY Projects

    10 of My Favorite Weapons of Choice for DIY Projects

    By now, many of you could easily tell a perfect stranger what my favorite colors are, my favorite beverage of choice, and that I call my husband Grunt Labor.

    And we’ve only met through the internet.

    Most of you could probably whip up a list in under a minute of my favorite weapons – products and tools for DIY projects.

    But, just in case you can’t and if you were wondering here is my complete list (at the moment) of my favorite weapons of choice.

    Commentaries included.

    This post contains affiliate links for your shopping convenience. Click here to read my full disclosure policy.

    Tools for DIY Projects | Best Tools for DIY | Tools for Woodworking | Tools for Furniture Painting | Tools for Painting

     #1 – Spray Paint

    Spray paint is most definitely my favorite weapon of choice.  In my opinion, there is nothing that spray paint can’t fix. The average can of spray paint will cost anywhere from $3 – $10 and gives a great bang for your buck. Use it to update lamps in no time, bring a roadside rescue metal cabinet back to life, and update home décor stuck in the 80’s.

    My 10 Favorite Products & Tools for DIY Projects via RainonaTinRoof.com #diy

    Favorite Spray Paint Brand: Rust-Oleum

    Hands down, Rust-Oleum has the best coverage when it comes to spray paint and at around $4 a can, its the best bang for your buck. The only thing I have against Rust-Oleum spray paint is that they need more colors. They need a good coral color and a red color that isn’t too apple-y or dark. If someone there could get that ball rolling, I’d greatly appreciate it. Mkay? Thanks.  My favorite Rust-Oleum color is a toss-up between Forest Green (on my barstools) and Metallic Gold (on just about anything that is gold in my house).

    #2 – Rust-Oleum Comfort Grip

    My 10 Favorite Products & Tools for DIY Projects via RainonaTinRoof.com #diy

    Speaking of spray-painting, this little gem will make spray painting a cakewalk. The comfort grip fits over the spray nozzle and has a nice little hand grip that you pull to spray paint. No more sore, red pointy fingers, y’all.

     #3 – Duck Tape

    My 10 Favorite Products & Tools for DIY Projects via RainonaTinRoof.com #diy

    You knew it was coming. I’m from the south, and around here duck tape is a staple. It fixes anything. These days, its also making everything a whole lot prettier just like these duck tape curtains and these 20+ duck tape crafts and ideas. My favorite kind of duck tape is…..duh, metallic gold. There are lots of more patterns and colors though.

    #4 – HomeRight Finish Max Paint Sprayers

    My 10 Favorite Products & Tools for DIY Projects via RainonaTinRoof.com #diy

    Many of you know of my love for my HomeRight Finish Max paint sprayer. If you would have asked me to paint something with an electric paint sprayer a year ago, I would have adamantly said no.  Things have changed since then. Last fall, I tried out a HomeRight FinishMax Paint Sprayer and fell in love. I thought it would be just like the other sprayers I had tried before – uneven spraying, hard to clean, and gets more paint on the floor than on the furniture. I was wrong about this one. It has totally transformed the way I paint furniture. It gives fine even coats and is simple to clean. I have used it on these navy and gold chests, this French desk makeover, and much more in my furniture makeover gallery. HomeRight has even came out with a new paint sprayer, the Finish Max Pro, and shockingly, it gives an even finer finish than the Finish Max. Either of them are great sprayers. As a bonus, when you own a Finish Max, you also get to take really goofy photos with it, such as the one pictured above.

    #5 – Rub ‘N Buff

    My 10 Favorite Products & Tools for DIY Projects via RainonaTinRoof.com #diy

    If I ever meet the person who created Rub ‘N Buff, I will probably be arrested for harassment. I just want to hug them and tell them how much time and money they have saved me and how much fabulous-ness they have brought into my home. Rub ‘N Buff is a type of wax-y finish that comes in 10+ colors ranging from metallic to whites to blacks. It comes in an itty bitty tube and costs around $5 – $10. However, that itty-bitty tube will last for-ev-er (imagine me saying that like the kid in The Sandlot says it). It is great for updating furniture pulls, reviving brass feet, and so much more. You can put it on metal, wood, just about anything. I’ve used it to update my bedroom furniture hardware, on a bar cart, my barstools, on a photo frame, and along the edge of my entry table that you can see here.  Seriously y’all, that one little tube goes a long way. One tube I bought last January has been used on at least five projects and I still have a good bit left. You can find Rub ‘N Buff at Michael’s, Hobby Lobby (use one of their coupons for more money off) and on Amazon.

    #6 – Gorilla Glue Epoxy

    My 10 Favorite Products & Tools for DIY Projects via RainonaTinRoof.com #diy

    When I was a teenager, my father sang the praises of Gorilla Glue. At that time, I didn’t care what Gorilla Glue was or what it could do. Instead, I was trying to figure out how I could get money for the weekend out of my tightwad father. Things change though, and I too am now a faithful follower of Gorilla Glue and being a tightwad as well. However, my Gorilla Glue preference is their Epoxy. It can adhere anything to anything – seriously. I used it to make this bamboo mirror.

    #7 – FrogTape Painter’s Tape and Shape Tape

    My 10 Favorite Products & Tools for DIY Projects via RainonaTinRoof.com #diy

    Thanks to FrogTape, creating chevron, wave, and scalloped patterns with paint is now a very easy thing to do. You can create a stylish chevron pattern in record time with Shape Tape and spray paint. I also used a combination of standard FrogTape and scalloped shape tape to create faux wall moldings. They were more affordable than real wall moldings, easy to do, and just as chic.

    #8 – HomeRight EZTwist PaintStick

    My 10 Favorite Products & Tools for DIY Projects via RainonaTinRoof.com #diy

    When Grunt Labor and I moved into the foreclosure, we were in a mad dash to finish most of the renovations within a two-month timeframe. I scrambled to pick paint colors and ended up not being happy with well, any of them. I put off re-painting for two years because I dreaded the thought of painting walls again. In November, I finally bit the bullet and repainted our entire main living area. Luckily, I had the HomeRight EZTwist PaintStick, which cut the painting time in half. Not only have I repainted the main living area with it, but since January I’ve also painted the guest bedroom, an accent wall, and the master bedroom with this little gem.

    #9 – Mod Podge

    My 10 Favorite Products & Tools for DIY Projects via RainonaTinRoof.com #diy

    Mod Podge is a powerful weapon. Its like a glue adhesive that leaves projects with a protective topcoat. I had a side table with a rough top that I just could not sand smooth. My solution was to put pretty wrapping paper over the top of it using Mod Podge. It worked like a charm and turned out cuter than I could have imagined. I’ve also used Mod Podge to create wall art using remnants of an old calendar and its what I used to adhere decorative numbers to dresser drawers. I made an adorable vintage nursery rhyme tissue box cover with it for my daughter’s nursery and used it to make a mongrammed serving tray that was a wedding gift. My favorite Mod Podge is the satin finish.

    #10 – Elmer’s ProBond Advanced Glue

    My 10 Favorite Products & Tools for DIY Projects via RainonaTinRoof.com #diy

    This is a new type of glue that just came out. It bonds porous materials to non-porous materials such as wood to metal or ceramic to drywall or glass to wood. And it works. It works amazingly well, y’all. I just used it on an awesome project that I’ll be showing you in a couple of weeks.

    That’s all I’ve got, folks. What are your favorite weapons of choice for DIY projects and crafts?

    Need more painting tips and advice? These should help you out then:

    The Ultimate Guide to Painting Anything – everything about painting furniture, walls and trim in one place.

    What Kind of Paint Do I Use on That? – Not sure what kind of paint to use? Read this article then – it walks you through all the types and paint and what to use each for!

    Topcoats 101 – when you should use a topcoat on furniture makeovers and when you don’t have to worry about it!

    You know you don't wanna miss any of this crazy.

    Sign up to get my posts delivered to your inbox here. 

    Stalk Me Here:

    Pinterest / Facebook / Twitter / Instagram

    SaveSave

  • Make Fabric Stain Resistant and Waterproof for Less than $10

    Make Fabric Stain Resistant and Waterproof for Less than $10

    Don’t chance your upholstery to kids or another red wine spill again! Learn how to make fabric stain resistant and waterproof it at the same time for only about $20.

    Maybe you’ve figured out one of my dirty little secrets…

    Ya know how when you see my dining room, you’ve never really seen the cushions on the chairs?

    You may have seen a shot of the side of the chair seat, but not the whole thing.

    Well, ummm…..

    They were gross. Way gross and way past their makeover due date.

    But I have a two year old, so I didn’t really want to re-upholster them and have her destroy them again in 2.0 seconds.

    I looked longingly at fabric swatches, impatiently waiting for the day when my dining room chairs could shine once more.

    One day, I happened upon the tool that would make them shine – without worrying about stains. I discovered how to waterproof and repel stains on fabric.

    how to waterproof fabric with a waterproofing spray

    Disclosure: This post is sponsored by Thompson’s Waterseal. However, all gross seat cushions and opinions are 100% mine. This post contains affiliate links for your shopping convenience. Click here to read my full disclosure policy.

    How to Waterproof Fabric and Repel Stains

    This could quite possibly be one of the easiest, yet most valuable DIY projects of all time.

    For me and my circus of a two year old anyway.

    Here is a shot of one of my seat cushions before:

    The old stained upholstery before new DIY waterproofed fabric.

    Ugh. I purposefully did not zoom in – because well, its just gross. You could probably discern between spaghetti sauce, mustard, and / or ketchup and who knows what else.

    It was bad. Oh, and don’t worry about that brightly colored striped towel below the chair – its nothing new – just the catchall that sits under the kid’s chair when she loses her food.

    Innovative, I am.

    Materials and Supplies Needed:

    Step 1

    First off, you want to pick out pretty new fabric for your seats. I chose the gorgeous Williamsburg Portobello Vase Ladybug fabric from Online Fabric Store.

    I fell for it the moment I saw it. Its a reproduction of fabric from the real Williamsburg, so if you have a nerdy of love of history like me, that’s kinda cool. It also has so many colors that it can work with just about anything.

    Step 2

    Measure and cut out the fabric you will need. I took the seats off my chairs, then laid it on the fabric and cut around it leaving extra to go over the edges.

    Step 3

    Lay all your fabric pieces out on a clean surface. I used a tarp. Give each piece a coat of Thompson’s WaterSeal FabricSeal. You may want to do a test spray on a small piece of fabric first to make sure it doesn’t change the color. (Mine was fine – no color change.) You are spraying this on the RIGHT side up of the fabric – not on the back.

    Waterproof upholstery fabric using this fabric seal.

    You don’t want to saturate the pieces – just give them a nice even coat. Let them air dry for four hours, then give each piece another coat. Let them dry for four more hours, but wait 24 hours before exposing to moisture.

    Step 4

    Before you put them back on your seat cushions or make it into a pillow or whatever, you can test the seal by flipping water on the fabric to see if it will repel water now.

    DIY stain resistant fabric showing water repelled.

    See those little bubbles of water? That mean’s the fabric is sealed. If it wasn’t sealed, the water would have seeped into the fabric. If the water doesn’t “bubble,” give the fabric another coat.

    It took almost two cans for me to seal 6 pieces of large sized square cut pieces of fabric.

    DIY method for how to waterproof fabric on dining room chair upholstery.

    I am so happy to finally have pretty dining room chairs again.

    How to Make Interior Upholstery Fabric Stain Resistant - dining room chair upholstery that has been sealed.

    After I re-upholstered my cushions, I tested out the stain and spill repellent-ness of the fabric seal a little more.

    I took Coke and poured a little on one of the cushions.

    DIY stain resistant fabric showing coke not soaking in.

    I zoomed in so you could see the bubbling – it repelled the Coke!

    I used a paper towel to soak up the Coke and this is what it looked like afterward:

    Waterproofing spray used to waterproof upholstery fabric.

    Not a stain in sight!

    Take note: According to the can, Thompson’s does recommend that you reapply the seal after any cleanings and annually.

    Waterproofing sprays are also great to waterproof outdoor pillows and cushions that are always exposed to the elements.

    You can find Thompson’s WaterSeal FabricSeal here.

    Will you be stainproofing and waterproofing your upholstery now?

    You might also want to see these other cleaning hacks and decor tips…

    How to Clean Really Gross Vinyl Upholstery – the grime just melts off!

    How to Get Pet Stains and Odors Out of Your Carpet Naturally – no harsh chemicals!

    50+ Home Decor Fabrics under $15 a yard – gorgeous fabrics at low prices!

    If you want to remember this upholstery waterproofing tip for later, just pin the image below!

    How to Make Fabric Waterproof and Stain Resistant for Upholstery
    How to Waterproof Fabric and Make Fabric Stain Resistant done on dining room chair upholstery.
    Williamsburg Portobello Vase Ladybug