Blog

  • Faux Wall Moldings

    Faux Wall Moldings

    Today, you get to see another little piece of the guest bedroom and office.

    I’m still not quite done with the rest of the room as I told you on Tuesday, but I’m hoping I get to show you a full reveal next week.

    When I began plotting out this room makeover, I found some great inspiration photos on Pinterest. If you follow me there, you may have noticed I pinned a lot of black and white rooms that had some great black wall moldings.

    Disclosure: This post is sponsored by FrogTape, but you know how I roll, all opinions are 100% mine. This post contains affiliate links for your shopping convenience. Click here to read my full disclosure policy.

    Here’s the problem with wall moldings -they can be expensive.

    My solution?

    Faux wall moldings made with FrogTape and glossy black paint.

    Faux Wall Moldings via RainonaTinRoof.com #frogtape #faux #wallmoldings

    Faux Wall Moldings

    After I nailed down my measurements, these were pretty easy to do. From outside edge to outside edge, my moldings are 24 1/2 inches wide x 74 inches long. The bottom edge comes up 11 1/2 inches from the floor and the top edge comes down 10 inches from the ceiling. There is more room between the ceiling and top edge than the baseboard and the bottom edge. I did that on purpose – I may want to add faux crown molding one day!

    I determined the size by sketching lines on my wall to get an idea of how large I wanted the moldings. Be sure to write down your measurements before completing the next step.

    When I had the lines where I wanted them, I painted a rough rectangle right over the lines.

    Faux Wall Moldings via RainonaTinRoof.com #frogtape #faux #wallmoldingsNow, you need to put FrogTape over the black where your rectangle will go.

    To do this, you first need to measure back out your dimensions. You don’t have to draw the entire line again, just measure to where you want your tape edge to start and put a mark.

    After you have your marks, enlist help.

    Seriously, this step is done much easier with another person.

    I enlisted Bill, whose name isn’t really Bill, but he said he liked the name Bill. He told me he wanted to be on the blog. I said I needed help on a project that was going on the blog. He’s on the blog, I get help. Its a win-win for myself and for Bill.

    Now, have your helper, in my case, Bill, hold a level on the mark and make sure its level.

    Faux Wall Moldings via RainonaTinRoof.com #frogtape #faux #wallmoldingsOnce its level, run your FrogTape along the edge. Because I had just painted the black the day before, I used the FrogTape Delicate Surface for newly painted surfaces.

    Faux Wall Moldings via RainonaTinRoof.com #frogtape #faux #wallmoldingsDo your vertical and horizontal edges the same way. You’ll end up with this:

    Faux Wall Moldings via RainonaTinRoof.com #frogtape #faux #wallmoldingsNow, I didn’t just want a plain jane rectangle. We all know I’m not a plain jane kinda gal. So, I took some FrogTape Scalloped Shape Tape and put it in the corners.

    Faux Wall Moldings via RainonaTinRoof.com #frogtape #faux #wallmoldingsBe sure to trim up your corners evenly as well.

    After all your tape is up, paint over it with your existing wall color. In my case, white.

    Which took about five coats to cover the black.

    But, the end result was worth the five coats.

    Faux Wall Moldings via RainonaTinRoof.com #frogtape #faux #wallmoldings

    Faux Wall Moldings via RainonaTinRoof.com #frogtape #faux #wallmoldings

    Faux Wall Moldings via RainonaTinRoof.com #frogtape #faux #wallmoldings

    More projects in this post that may have caught your eye: 

    DIY Sequined Coat Hangers– so fun to use for display!

    How to Build a Desk Using Furniture You Already Have– I made this desk using an old kitchen table and a discarded hutch top!

    Free Sassy Printables – everyone needs a little sass in their lives, right?

    Where would you like to add faux molding?

    Sign up to get my posts delivered to your inbox here. 

    You know you don’t wanna miss any of this crazy.

    Stalk Me Here:

    Pinterest / Facebook / Twitter / Instagram

    SaveSave

  • $15 Hutch Update

    $15 Hutch Update

    I remember it sitting in the corner of my Hey Bud’s dining room.

    I remember my dad insisting it could be moved when my Hey Bud died.

    I remember it sitting in our garage waiting on a new home.

    I remember my dad painting it white when he moved it into his new house.

    I remember moving it back to my Hey Bud’s house after I remodeled it.

    I remember Grunt Labor standing in front of it the first time he saw it and proclaiming it a future liquor cabinet.

    And I remember the look on Grunt Labor and Nick’s faces when I told them it was my great grandmother’s china cabinet, while they had hammers in mid-swing knocking out one of its shelves.

    Grannie Eva, it may not be a china cabinet anymore, but its still one of my most beloved pieces.

    And the fact that I named my kid after you, makes up for me making it into a liquor cabinet, right?

    This piece has seen many transformations in its time. The latest hutch update cost less than $15, but made a huge impact.

    $15 Hutch Makeover via RainonaTinRoof.com #makeover
    You may remember when I updated it with wrapping paper last year. The wrapping paper definitely helped to break up all the black, but I still wanted something more.

    $15 Hutch Makeover via RainonaTinRoof.com #makeoverI picked up flat corner braces from Home Depot a few months back . They already came in a brass color, but I wanted them more gold, so I spray painted them, then screwed them into the corners of each door.

    I used 4 packs (4 are in a pack) at $2.47 a pack, so I spent about $10. I already had the spray paint on hand.

    I love the “campaign” feel they give the cabinet.

    $15 Hutch Makeover via RainonaTinRoof.com #makeoverI also switched the old wrapping paper out with a new roll I got at HomeGoods for $3.

    $15 Hutch Makeover via RainonaTinRoof.com #makeover$13 for a hutch makeover with big bang?

    I’ll take it.

    $15 Hutch Makeover via RainonaTinRoof.com #makeover

    Update! See the brand new red look this hutch got right here!

    Love a good furniture makeover? Don’t miss any of these then…

    Sign up to get my posts delivered to your inbox here. 

    You know you don’t wanna miss any of this crazy.

    Stalk Me Here:

    Pinterest / Facebook / Twitter / Instagram

  • Vintage Modern Rustic Living Room

    Vintage Modern Rustic Living Room

    As I told you a couple weeks ago when I introduced this series, it has taken me a long time to really figure out what style(s) I truly love.

    At my old farmhouse, my style was 100% shabby chic. It went with the house, and at that time I loved it.

    When Grunt Labor and I moved in together, he was definitely not the shabby chic type and we ended up with more of a modern-casual home. We even went to a big furniture chain and bought an entire new bedroom suit (I cringe thinking of it now) that we both thought we loved.

    Less than a year later, we sold it.

    Our current home, the beloved rancher, has been the house that has taught me what my style truly is – not to say it won’t change a little over time.

    It always does.

    My style is a mix of Vintage, Modern, and Rustic that somehow all work well together and allow me to keep those family heirlooms that tell a story.

    Here’s my Vintage Modern Rustic Living Room where we spend most of our time. Quite a few things have changed since the last home tour.

    Vintage Modern Rustic Living Room | Living Room Ideas | Living Room Decor | Living Room Decor on a Budget | Living Room Wall Decor (more…)

  • Furniture Makeovers Not to Miss that will leave you inspired

    As you guys well know, I love giving new life to old furniture. I’m not shy about picking up a sander and paint at all.

     Here are some fab furniture makeovers that were linked up at last week’s party and caught my eye!

    Furniture Makeovers Not to Miss via RainonaTinRoof.com (more…)

  • DIY Acrylic / Lucite Trays for $5 or less in 5 minutes!

    DIY Acrylic / Lucite Trays for $5 or less in 5 minutes!

    I absolutely love having lots of pretty trays around my home. Lucite or acrylic trays (whichever you want to call them!) are perfect for corralling items in a stylish way. They can easily make your home look chic and organized at the same time. But, those clear acrylic trays can also be really expensive! Keep reading though to see how I created my own lucite trays for less than $5 and in five minutes! 

    I was ecstatic with all your comments last Friday when I introduced this new series, 15 on Friday! Thanks so much, y’all!

    This week’s 15 on Friday, I think, is FAB.

    This post contains affiliate links for your shopping convenience. Click here to read my full disclosure policy.

    See, I have this thing for lucite / acrylic. When Grunt Labor asked me what lucite was, my response was, “It’s the stuff dreams are made of.”

    Obsessed much? Probably too much.

    For Christmas, I asked for a plethora of lucite items from Anthropologie. One being this tape dispenser (that I got!) and another one, this lucite tray. Friends, that tray is $44. You can get this one cheaper – its $25.

    Or, you could make your own DIY lucite tray for $5 and in less than 5 minutes.

    And you can make the bottom prettier than those other ones.

    We have a winner! {Insert Price is Right theme song here}
    DIY Acrylic Tray

    DIY Lucite Tray

    Here’s what ya do.

    Step 1

    Go to Michael’s (mine came from Michael’s) or another craft store or maybe even Target and buy an acrylic frame and pretty paper (12 x 12).

    DIY Lucite Tray

    I got two frames – a larger one and smaller one – and by using a 40% coupon at Michael’s each was under $5. I think the paper was like $0.50 a sheet on sale.

    Step 2

    Now, unwrap the frames and flip them over.

    How to Make a Clear Acrylic Tray

    Step 3

    Pull out the cardboard backing.

    DIY Lucite Trays {Under $5 in 15 minutes} via RainonaTinRoof.com

    Instant clear acrylic tray.

    Now, this next step isn’t necessary, but if you want to add a bit more to your tray, you can easily add a little bling.

    Trace the tray’s shape on the back of the paper and cut it out. Pop it in the tray.

    Acrylic Tray

    Bling added.

    Were you expecting it to be more complicated? You should know by now that I love quick and easy projects with some bling.

    DIY Lucite Trays {Under $5 in 15 minutes} via RainonaTinRoof.com

    I sent my paper to work with Grunt Labor one day and had him laminate it. You don’t have to do this, but it just adds a little extra protection. You can also get that done pretty cheap at just about any office supply store. Or, you could even Mod-Podge it in there.

    DIY Lucite Trays {Under $5 in 15 minutes} via RainonaTinRoof.com

    Both trays are on my new office desk / hutch.

    The small one is holding my business cards (that need an update), extra gold animal push-pins, and my grandmother’s retro glasses that she wore while driving her beloved Cadillac.

    DIY Lucite Trays {Under $5 in 15 minutes} via RainonaTinRoof.com

    The larger one holds….

    DIY Lucite Trays {Under $5 in 15 minutes} via RainonaTinRoof.com

    An old Avon perfume bottle that is a cross between a giraffe and the Eiffel Tower?? Strange, but pretty when spray painted gold….

    Lucite Tray

    A fun (and inappropriate) coaster my friend Lindsay got me from Z-Gallerie.

    DIY Lucite Trays {Under $5 in 15 minutes} via RainonaTinRoof.com

    And the beloved lucite tape dispenser….

    DIY Lucite Trays {Under $5 in 15 minutes} via RainonaTinRoof.com

    What do you think of these DIY lucite trays? Better than a $40 one?

    Love a good tray hack or knock-off DIY? Then you’ll want to see these…

    This Faux Malachite Tray costs less than $10 to make.

    This DIY Monogrammed Tray makes a perfect gift.

    Learn how to make your own lucite frame – and get a free Gone with the Wind printable.

    You know you don’t wanna miss any of this crazy.

    Stalk Me Here:

    Pinterest / Facebook / Twitter / Instagram

    SaveSave

    SaveSave

  • DIY Kitchen Island with salvaged wood

    DIY Kitchen Island with salvaged wood

    Don’t miss another post like this one! Sign up to get my posts delivered to your inbox here. 

    Every time I post about my kitchen, it seems that you guys love the DIY kitchen island the most.

    And I love that you love it the most.

    That piece is pretty special to me.

    So special that I regularly threaten to be laid out on it when I die.

    {Insert Grunt Labor rolling his eyes here.}

    If you have read about the full kitchen makeover renovation, you know it has come a really long way. We knocked down walls, moved appliances, painted cabinets, took out cabinets, dealt with rude plumbers and much more.

    And it was all worth it.

    So, here is how we built our DIY kitchen island.

    This post contains affiliate links for your shopping convenience. Click here to read my full disclosure policy.

    Kitchen Tour {rainonatinroof.com} #kitchen

    DIY Kitchen Island

    First off, I apologize for the lack of photos of us actually building it. I was pregnant during the process (which was an adventure) and honestly, after it taking a couple hours to figure out how to build it, I wasn’t sure if it would even turn out well. 

    Luckily, I was wrong.

    The good news for you is that since it did take us a few hours and a few curse words and few cross looks to figure it out, we figured out it was actually pretty easy in the end. So, really if you have basic DIY skills, you can build this island. 

    First off, let me give you the dimensions:

    NO WAY! They built this and it cost less than $100! DIY Kitchen Island via RainonaTinRoof.com

    It’s five feet long, two feet (and a smidge over) wide and right at about three feet in height. For us, its the perfect size. It functions as a great workspace, we can eat breakfast at it, but it doesn’t take over the entire kitchen. 

    Here’s the materials we used:

    NO WAY! They built this and it cost less than $100! DIY Kitchen Island via RainonaTinRoof.com

    The legs are old porch columns we purchased from a local architectural salvage store. If you can’t find salvaged porch columns, you can always find them at Home Depot or another local hardware store. We made a frame of 2x4s to go around the columns at the top and at the base. We used wood screws to attach all the 2 x 4s to the columns.

    The bottom shelf is barn wood that came from my great grandfather’s farm. After the frame was completed, we just used a finish nailer to nail the barn wood into both sides of the 2 x 4s.

    NO WAY! They built this and it cost less than $100! DIY Kitchen Island via RainonaTinRoof.com

    The top is the same countertop material that is in the rest of the kitchen. We did add some 1 x 4s between the 2×4 frame on top (underneath the counter) to give the countertops a little more support.

    The screws weren’t too noticeable at the bottom, but were at the top. So, after the countertop was installed, we added decorative trim around the top to hide the screws. Its the same trim we used on our built-in bathroom shelving.

    NO WAY! They built this and it cost less than $100! DIY Kitchen Island via RainonaTinRoof.com

    DIY Kitchen Island via RainonaTinRoof.com #kitchenisland #diy

    A coat of white paint and my barstools make it complete.

    After we finally got our dimensions figured out, it took about an hour (without the countertop – we had pros put that in) to construct.

    NO WAY! They built this and it cost less than $100! DIY Kitchen Island via RainonaTinRoof.com

    All in all, excluding the countertop, we have less than $100 in it. If you didn’t want a regular countertop, like ours, you could always just opt for wood.

    Vintage Modern Rustic Kitchen via RainonaTinRoof.com #vintage #modern #rustic #kitchen #whatsyourstyle

    You can see more of the kitchen details here or tour our entire renovated rancher here.

    What do you think of our DIY Kitchen Island?

    You’ll also love these ideas for your kitchen…

    See how I made my laminate countertops look like stone here – you won’t believe how easy it was! 

    You can also get more DIY countertop makeover ideas here!

    7 Kitchen Island Ideas you haven’t thought Of– out-of-the-box ideas for your own DIY kitchen island!

    10+ Kitchen Ideas for Decorating, Organizing, and Storage– functional, but still pretty ideas!

    7 (To-Die-For) White Kitchens – love white kitchens? Don’t miss these then!

    Sign up to get my posts delivered to your inbox here. 

    You know you don’t wanna miss any of this crazy.

    Stalk Me Here:

    Pinterest / Facebook / Twitter / Instagram

    pin-this-post-2

    DIY Kitchen Island Idea | How to Build a Kitchen Island | Rustic Kitchen Island | Farmhouse Kitchen Island | Affordable Kitchen Island

  • DIY Animal Candleholders

    DIY Animal Candleholders

    Have you ever seen something, told yourself you could totally make that and then you found out, ummmm, no, I can’t do this.

    Happens to me all the time. Truth.

    I have had many crafting and DIY fails. And that’s ok.

    Sometimes, I can salvage them. Sometimes, I don’t know whether to call it a fail or a win.

    Here’s how I took my latest potential fail and still came out with something pretty.

    DIY Animal Candleholders via RainonaTinRoof.com (more…)

  • Easy to Make DIY Cowhide Lamp Shade for $15

    Easy to Make DIY Cowhide Lamp Shade for $15

    If there was one thing that ever defined my Pap’s schedule the most, it was the cows.

    Cattle farmer’s lives run on when cows have to be fed.

    I vividly remember leaving my great uncle’s funeral in a hurry to go feed the cows with my Pap.

    We both rode on the tractor, him in his suit, me in a dress, and hurriedly fed the cows before going back to gather with the rest of the family after the funeral.

    I also vividly remember a calf I grew up with, named Blackjack.

    I also remember when I asked my dad where Blackjack was one day and he responded with, “On our plates.”

    And I didn’t bat an eye.

    The cows fed us and paid our bills.

    I still miss feeding the cattle and I miss my Pap.

    Disclosure: This post is sponsored by Online Fabric Store. Y’all know how I roll though, all opinions are 100% mine. This post contains affiliate links for your shopping convenience. Click here to read my full disclosure policy.

    A few weeks back I saw this cowhide lamp shade and fell in love with it. The only problem was, of course, its price tag of $109.

    I knew I wanted a cowhide lamp shade though. Not only would it fit perfectly with my decor, but it would be a nod to my Pap.

    Even though he is somewhere shaking his head and laughing because he probably doesn’t understand why in the world someone would want a DIY cowhide lampshade.

    DIY Cowhide Lampshade | How to Make a Cowhide Lamp Shade | DIY Lampshade | DIY Lampshade Ideas | DIY Lampshade Makeover | Lampshade Makeover

    DIY Cowhide Lamp Shade

    Here is how I made my own DIY cowhide lamp shade and you can make one too for less than $15.

    Get excited!

    Here’s what ya need:

    – 1 1/2 yards of Tan Cow Velboa Faux Fur Fabric

    – Brown Satin Ribbon

    -Lampshade (I used one I already had. You can find a basic one here* for $10.)

    – Hot Glue

    *Depending on the size of your lampshade, you may need more or less fabric. I got three yards to begin with because I thought my lampshade was pretty big and still overestimated.

    I started by taking the lampshade from my DIY bottle lamp and ripping off the old covering. If your lampshade wasn’t re-covered to begin with, you don’t have to do this. I’m just a frugal gal and re-use things as often as possible.

    Then, I spread my fabric on the floor and laid the lampshade on top of it.

    DIY Cowhide Lampshade via RainonaTinRoof.com #OnlineFabricStore #cowhide #knockoff #diyI rolled the lampshade over the fabric to get a good idea of how much fabric I would need, then did a rough cut of the excess fabric.

    Once I had the excess cut, I took my hot glue gun and glued one end of the fabric down along my lampshade.

    DIY Cowhide Lampshade via RainonaTinRoof.com #OnlineFabricStore #cowhide #knockoff #diy

    Next, I rolled the fabric back onto the lampshade and applied hot glue along the inside bottom edge, then pushed the fabric into the glue.

    DIY Cowhide Lampshade via RainonaTinRoof.com #OnlineFabricStore #cowhide #knockoff #diy

    Keep going! You’re almost about to have your very own DIY cowhide lamp shade!

    When my two ends met, I hot glued the edge that would be on top into a neat fold and then glued it down on top of the other end.

    DIY Cowhide Lampshade via RainonaTinRoof.com #OnlineFabricStore #cowhide #knockoff #diyI sat the lampshade upright and snipped the fabric where the metal frame was, then hot glued those edges down and trimmed the fabric.

    DIY Cowhide Lampshade via RainonaTinRoof.com #OnlineFabricStore #cowhide #knockoff #diy

    I added the brown ribbon along both the top and bottom edges of the lampshade. I just put a dot of hot glue every little bit and pushed it onto the shade.

    DIY Cowhide Lampshade via RainonaTinRoof.com #OnlineFabricStore #cowhide #knockoff #diyAnd that’s it.

    DIY Cowhide Lampshade via RainonaTinRoof.com #OnlineFabricStore #cowhide #knockoff #diy

    DIY Cowhide Lampshade via RainonaTinRoof.com #OnlineFabricStore #cowhide #knockoff #diy

    DIY Cowhide Lampshade | How to Make a Cowhide Lamp Shade | DIY Lampshade | DIY Lampshade Ideas | DIY Lampshade Makeover | Lampshade Makeover

    $100 lampshade or $15 DIY cowhide lamp shade?

    Ding! Ding! Ding!

    I’ll take the $15 one!

    You can get the info on the DIY bottle lamp here – it’s easy to make! And see how I used this same fabric to make a faux cowhide rug here!

    You might also want to see…

    How to Make a Lampshade from Scratch and Your Own Lamp Finials – turn any fabric into a lampshade!

    16+ DIY Lamp Makeovers and Ideas – SO many great ideas here!

    Sign up to get my posts delivered to your inbox here. 

    You know you don’t wanna miss any of this crazy.

    Stalk Me Here:

    Pinterest / Facebook / Twitter / Instagram

    SaveSave

  • Repose Gray Walls + The Easiest Way to Paint a Room

    Repose Gray Walls + The Easiest Way to Paint a Room

    Gray is the hot new choice for wall color these days and after just giving my kitchen, living room and dining room walls a fresh coat of Repose Gray, I can see why! This color is a true gray color and was the perfect choice for us! And the icing on the cake? I used a cool, new tool for painting my walls and it made the job so much easier! 

    That’s right.

    I went gray.

    Not with my hair yet, though.

    Thank the Lord.

    Because when the kid tries my patience, its like I can just feel the color fading from my hair, as well as my sanity quickly disappearing.

    But right now, just my walls are gray, repose gray to be exact.

    Things do change quickly around here though, so here’s hoping there are no gray hairs in my near future.

    Repose Gray Walls
    Repose Gray Walls + The Easiest Way to Paint a Room

    Disclosure: This post is sponsored by HomeRight. Y’all know how I roll though, all opinions are 100% mine. This post contains affiliate links for your shopping convenience. Click here to read my full disclosure policy.

    Tools & Supplies Used:

    • Sherwin Williams Repose Gray Paint – while this is a Sherwin Williams color, we actually had it mixed in Behr paint at Home Depot. They can mix colors of just about any paint brand, just tell ’em the name and brand!
    • HomeRight PaintStick EZ-Twist – makes painting a breeze!
    • QuickPainter for edging around trim and the ceiling.

    Ever since we moved into our rancher and made a mad rush to finish the renovation in two months, I was never really 100% happy with our previous wall color. No doubt, it was my fault – the mad rush took over and I lost all sight of actually taking my time on selecting colors. The same happened in my bathroom, the nursery, the guest room, and our bedroom.

    And that’s pretty much every room in our house.

    And that’s a lot of re-painting.

    Its no big surprise that it took me two years to even begin thinking about re-painting our main living space.

    Enter the HomeRight PaintStick EZ-Twist.

    Repose Gray Walls + The Easiest Way to Paint a Room via RainonaTinRoof.com #homeright #paintstickeztwist #reposegrayY’all I painted our entire main living area (that includes the kitchen, living room, dining room, entryway, and hallway) in about four hours with this bad boy.

    How to Use the EZ-Twist for Painting Walls

    It comes with a big paint stick (as if its name didn’t already allude to that), a roller, a roller cover, and a suction tube and cover for your paint can.

    Step 1

    Attach the roller to the stick.

    Repose Gray Walls + The Easiest Way to Paint a Room via RainonaTinRoof.com #homeright #paintstickeztwist #reposegray

    Step 2

    Attach the roller cover to the roller.

    Repose Gray Walls + The Easiest Way to Paint a Room via RainonaTinRoof.com #homeright #paintstickeztwist #reposegray

    Step 3

    Place the suction tube and cover over your gallon of paint.

    Repose Gray Walls + The Easiest Way to Paint a Room via RainonaTinRoof.com #homeright #paintstickeztwist #reposegray

    Step 4

    Put your PaintStick EZ-Twist onto the suction tube and pull the paint into the handle of the tube by pulling back on the inner tube.

    Repose Gray Walls + The Easiest Way to Paint a Room via RainonaTinRoof.com #homeright #paintstickeztwist #reposegray

    Step 5

    Take the EZ Twist to your walls, twist on the end of it to make the paint come up into the roller cover and start rolling your paint on the walls!

    There is no running back and forth to your paint tray hundreds of times.

    There is no messy tray to trip over and track paint all over your floors.

    Yes. That has happened to me before.

    When your roller needs more paint, you simply twist the handle and keep rolling.

    Repose Gray Walls + The Easiest Way to Paint a Room via RainonaTinRoof.com #homeright #paintstickeztwist #reposegrayWhen you have finally ran out of paint in the handle, just go fill it back up.

    To edge around all the trim in the areas we painted, I used the HomeRight Quick Painter.

    Repose Gray Walls + The Easiest Way to Paint a Room via RainonaTinRoof.com #homeright #paintstickeztwist #reposegray

    How to Use the Quick Painter

    Step 1

    Suction the paint right into the handle of the Quick Painter.

    Repose Gray Walls + The Easiest Way to Paint a Room via RainonaTinRoof.com #homeright #paintstickeztwist #reposegray

    Step 2

    Place the paint pad on the handle, squeeze the trigger and paint the town, I mean edges.Repose Gray Walls + The Easiest Way to Paint a Room via RainonaTinRoof.com #homeright #paintstickeztwist #reposegray

    Want to see the final product?

    The Repose Gray in all its glory?

    The Entryway

    Sherwin Williams Repose Gray Paint

    Repose Gray Walls + The Easiest Way to Paint a Room via RainonaTinRoof.com #homeright #paintstickeztwist #reposegray

    Repose Gray Walls + The Easiest Way to Paint a Room via RainonaTinRoof.com #homeright #paintstickeztwist #reposegray

    Repose Gray Walls + The Easiest Way to Paint a Room via RainonaTinRoof.com #homeright #paintstickeztwist #reposegray

    The Kitchen

    Repose Gray Walls + The Easiest Way to Paint a Room via RainonaTinRoof.com #homeright #paintstickeztwist #reposegray

    I especially love how the gray made the subway tile pop a bit more in the kitchen.

    Repose Gray Walls + The Easiest Way to Paint a Room via RainonaTinRoof.com #homeright #paintstickeztwist #reposegray

    Gray Walls in The Dining Room

    Gray Walls in the Dining Room

    Repose Gray Walls + The Easiest Way to Paint a Room via RainonaTinRoof.com #homeright #paintstickeztwist #reposegray

    Repose Gray Walls + The Easiest Way to Paint a Room via RainonaTinRoof.com #homeright #paintstickeztwist #reposegray

    Gray Living Room

    Repose Gray Walls + The Easiest Way to Paint a Room via RainonaTinRoof.com #homeright #paintstickeztwist #reposegray

    Gray Living Room

    Repose Gray Walls + The Easiest Way to Paint a Room via RainonaTinRoof.com #homeright #paintstickeztwist #reposegray

    Repose Gray Walls + The Easiest Way to Paint a Room via RainonaTinRoof.com #homeright #paintstickeztwist #reposegray

    Repose Grey WallsYou can see the boring beige walls of yesterday here. They weren’t terrible, they just weren’t that pretty.

    And we all know I like pretty things.

    And functional things.

    That make my life so much easier.

    Sign up to get my posts delivered to your inbox here. 

    You know you don’t wanna miss any of this crazy.

    Sherwin Williams Repose Gray Walls + The Easiest Way to Paint a Room

    SaveSave

  • Get Organized! 12 Ideas for Organizing Your Home

    Get Organized! 12 Ideas for Organizing Your Home

    It’s the new year, (Happy New Year by the way!) and everyone is ready to get their home (and life) organized! Around here, we have been purging like crazy and organizing as well! Here are 12 ideas for Organizing Your Home:

    Ideas for Organizing Your Home

    Jewelry and Hat Organization 

    In our recent closet makeover, I created hanging jewelry storage so everything was easily within reach and I could see it. I also turned shelf brackets upside down to create hat storage. See more of the closet and get the details on these organization ideas here.

    Shoe Storage

    When you can’t go out, go up! For shoe storage in the closet, we stacked shoe shelves on top of one another to get the maximum amount of storage possible. More details here!

    15 Days to a Clutter-Free Home

    This is an awesome printable - perfect for decluttering your home! 9 MUST READ Cleaning Tips!

    First of all, let’s de-clutter! Here is a printable for 15 Days to a Clutter Free Home, along with tips on how to turn some of that clutter into money!

    Create a Cleaning Closet

    Create a cleaning closet - even more great ideas in the post! 5 Simple Storage and Organization Ideas that are Life-Changing

    Wrangle all your cleaning items together in a closet and then organize it! Details on my cleaning closet are here.

    Baskets & Command Hooks

    Use command hooks and Dollar Tree bins for vanity organization. More great ideas in the post! 5 Simple Storage and Organization Ideas that are Life-Changing

    Baskets from the Dollar Tree and Command Hooks can easily become your best friend for organization. I use these all the time, all around the house to organize things. See some of my ideas for them here.

    DIY Clothes Racks & Free Printable Size Dividers

    DIY Clothes Racks and Free Printable Size Dividers - perfect for extra hanging clothes storage, yard sales and kid's closets.

    I made these easy DIY clothes racks to use at our yard sales, but you could make them, paint them and they would also be great for use inside your house. Use the size dividers to organize baby clothing or for a yard sale! Get the how-to and printables both here!

    Organization and Storage Ideas for the Kitchen

    Full of easy to do ideas that are pretty, but also functional. 10+ Kitchen Ideas: Decorating, Organizing, Storage

    Get ideas that are both effective and stylish with these organization and storage ideas for your kitchen.

    Color Coded Organization

    This is such an easy organizing idea and it holds family members accountable for their mess! Color Coded Organization

    One simple, cute, and decorative way to organize: Color Coded Organization. This is also a way to get the whole family involved in organizing and de-cluttering.

    Metal Basket Shelving

    Metal Basket Shelving for the Kitchen

    I hung vintage metal baskets in my kitchen to store and organize my cookbooks – organization and decor in one!

    DIY Wall – To – Wall Shelving

    This is such an easy build! Any beginning DIYer could complete these! How to Build Wall to Wall Shelves in an hour for $50

    These wall-to-wall shelves are great for organizing and storing all sorts of things – they’re a really simple build too! I did these in my daughter’s playroom for toy storage, but I’ve also built them in bathrooms for extra storage there!

    Coke Crate Tie Organization

    Coke Crate Tie Holder

    My husband uses vintage coke crates to organize all of his ties.

    Garage Organization 

    Create a one-stop workshop in your garage with this DIY Mobile Workbench and Pegboard Organization Ideas.

    In my garage, I installed pegboard to keep all the tools nicely organized and easily within reach. I also made this mobile workbench for added storage and for more mobility when working on projects. Get the details on both here!

    Pantry Organization Tips

    Pantry Organization Tips - organization tips for your entire home.

    Grab some Pantry Organization Tips from So Much Better with Age.

    DIY Paper Organizer

    Ideas & Projects for Organizing Your Home via RainonaTinRoof.com

    Create a fun Washi Tape Inspired Mod Podge Paper Organizer from TiTi-Crafty.

    Quick and Easy Ornament Organization

    Ideas & Projects for Organizing Your Home via RainonaTinRoof.com

    Find tips for Quick and Easy Ornament Organization from So Much Better with Age.

    Resolution Organizer

    Ideas & Projects for Organizing Your Home via RainonaTinRoof.com

    Those resolutions are more likely to actually get accomplished if you write them down and organize them with this New Year’s Resolutions Printable from Mama’s Got it Together.

    Pantry Makeover

    Pantry Makeover and Organization Ideas for Your Home

    Get more pantry organization ideas with this Pantry Makeover from Neat Little Nest.

    pin-this-post

    Simple organizing ideas. Most are decorative too! 12 Ideas for Organizing Your Home

    You know you don’t wanna miss any of this crazy.

    Sign up to get my posts delivered to your inbox here.

    Stalk Me Here:

    Pinterest / Facebook / Twitter / Instagram

    SaveSaveSaveSave

  • Emerald Green Decorating Ideas

    Emerald Green Decorating Ideas

    According to Pantone, the color of 2013 was emerald.

    And that was just fine by me. I did not call to complain.

    I’m sure they breathed a sigh of relief that I approved.

    Not.

    Really, I’m not one who changes everything in my home just because a new trend is out or something is hot at the moment.

    But, emerald and I – we got along fabulously this year.

    And will continue to do so throughout 2014 and probably the better part of my life.

    Emerald and I are just destined for each other.

    I mean, it is my birthstone.

    Here is a 2013 emerald re-cap including some of my own projects and some fabulous emerald green decorating ideas.

    Love green - it can go with so many other colors! Emerald Green Decorating IdeasEmerald Green Decorating Ideas

    ANYONE can do this - its hard to mess up! And its cheap! DIY Faux Malachite Tray (For Less than $10) via RainonaTinRoof.com

    DIY Faux Malachite Tray – this was so easy to make! You can’t mess it up!

    IKEA Tarva Hack: Turn It Into a Drink Bar via RainonaTinRoof.com

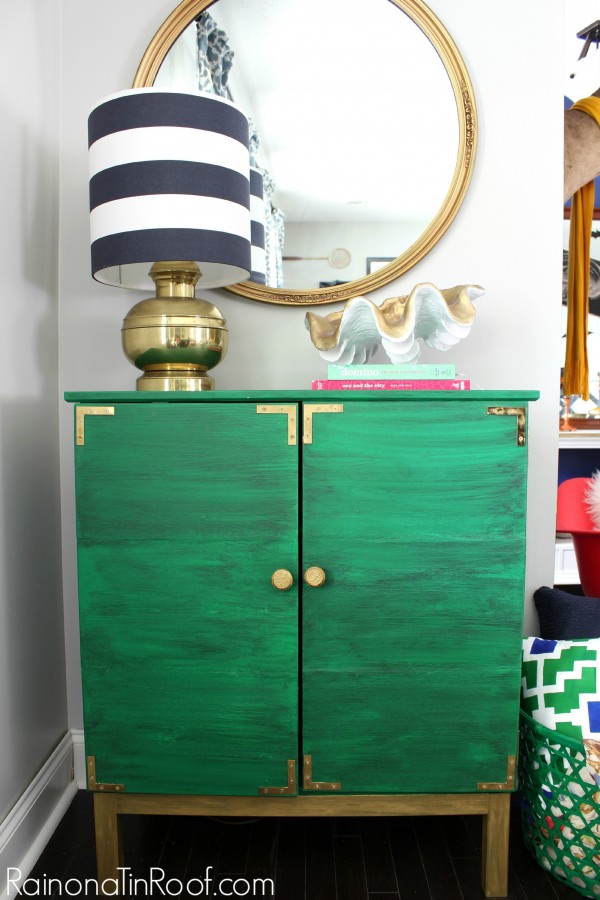
    IKEA Tarva turned Drink Bar

    2013 Emerald Re-Cap via RainonaTinRoof.com

    And then there was the Kate Spade lamp. This project was the one that started it all.

    2013 Emerald Re-Cap via RainonaTinRoof.com

    And then, there are my barstools. Oh, the barstools. I do still adore them so.

    2013 Emerald Re-Cap via RainonaTinRoof.com

    I also discovered that sometimes the simple combination of white and emerald is just perfect. Such was the case with this French country chair makeover.

    2013 Emerald Re-Cap via RainonaTinRoof.comI want these chairs.

    No, I really really really want these chairs from Jen Langston Interiors. Seriously, if I just had one of these in my entire house and no other seating, I would be good.

    2013 Emerald Re-Cap via RainonaTinRoof.com

    Jennifer from Dimples and Tangles is a genius. If you don’t know about her or her fabulous hall of green mirrors, you are missing out.

    2013 Emerald Re-Cap via RainonaTinRoof.com

    Grunt Labor chose the paint color for the front door this summer. Why did he choose this color? Because of its name.

    Precious Emerald. He said he wanted to be able to tell people his front door was a precious emerald.

    2013 Emerald Re-Cap via RainonaTinRoof.com

    This dresser is not only emerald, but it also combines one my other favorite things: gold.

    A simple, yet fabulous combination from Something is Done.

    2013 Emerald Re-Cap via RainonaTinRoof.com

    This entryway is simply amazing.

    2013 Emerald Re-Cap via RainonaTinRoof.com

    I am usually not a fan of yellow. However, this combination of yellow and kelly green is beautiful from Honey.

    2013 Emerald Re-Cap via RainonaTinRoof.com

    I love all campaign furniture. But, put a coat of green on it and combine with gold. BAM. Gorgeous from Centsational Girl.
    2013 Emerald Re-Cap via RainonaTinRoof.com

    And since there was extra precious emerald paint left over, I used it on this restored rocking chair.

    2013 Emerald Re-Cap via RainonaTinRoof.com

    I die. Those stairs. Oh. My. Word.

    It would be the perfect place for me to give my rendition of Scarlett.

    Don’t you think so?
    green-tray-2-e1377599480228

    And while showing you how I transformed this Goodwill tray into an emerald gem, I told you about the rules of 1/2 off Goodwill shopping days.

    Wasn’t that a fun read?

    Or did it make you want to call the asylum on me?

    2013 Emerald Re-Cap via RainonaTinRoof.com

    I honestly don’t know that I would get any work done at all sitting at this gorgeous desk from Design in Bloom.

    2013 Emerald Re-Cap via RainonaTinRoof.comTypically, I loathe ceiling fans. However, this one is awesome. Why is it awesome? Because it has emerald painted blades. See the full tutorial from How Joyful here.

    And what is Pantone’s 2014 color of the year?

    Radiant Orchid.

    I may have to make a call about this one.

    Love green (me too!) and want more green decorating ideas? 

    Here are my favorite green decorating moves and here are the best green color combinations when it comes to decorating!

    You know you don’t wanna miss any of this crazy.

    Sign up to get my posts delivered to your inbox here.

    Stalk Me Here:

    Pinterest / Facebook / Twitter / Instagram

  • Christmas Mantel Decorating

    Christmas Mantel Decorating

    You guys know I don’t have a mantel.

    *sigh*

    Its ok, though. I live vicariously through you and your mantels.

    Here is some Christmas mantel decorating that is sure to impress.

    Christmas Mantel Decorating via RainonaTinRoof.com (more…)

  • Navy and Gold Chest Makeovers

    Navy and Gold Chest Makeovers

    Have I chatted with you about the guest bedroom before?

    Why am I asking? I know the answer to this. Its no.

    And why have you never heard of this guest bedroom before or seen photos of it?

    Because its ugly.

    Let’s be honest. What room is usually last on the list when it comes to decorating?

    The guest bedroom.

    Those poor guests. A.K.A my amazing in-laws.

    Bless them. They deserve better.

    And they will get it. It’s all starting with these navy and gold chest makeovers.

    Disclosure: This post is sponsored by HomeRight. Y’all know how I roll though, all opinions are 100% mine. This post contains affiliate links for your shopping convenience. Click here to read my full disclosure policy.

    Navy and Gold Chest Makeovers via RainonaTinRoof.com #furnituremakeover #homeright #finishmax

    Sometimes, all you need to make something pop is the simple combination of two colors.

    No frills. No intricate details. Just the simple combination.

    And for me, that simple combination in this case was navy and gold.

    Notice, I said makeovers in the title. Yep, there are two of these. A night stand and a chest of drawers. I think the night stand probably  qualifies as a chest because it certainly doesn’t seem like a “stand.”

    Both of these are pretty solid, but had some issues.

    Navy and Gold Chest Makeovers via RainonaTinRoof.com #furnituremakeover #homeright #finishmaxI think at some point, they may have been in some water. See the bottom of the big chest above?

    And the top needed some love as well.

    Navy and Gold Chest Makeovers via RainonaTinRoof.com #furnituremakeover #homeright #finishmaxSo, before any paint went on these, I sanded them well. And picked up all the sanding dust with a tack cloth.

    And then I pulled out my beloved, my coveted, my just-go-ahead-and-bury-me-with-it, HomeRight Finish Max paint sprayer.

    Navy and Gold Chest Makeovers via RainonaTinRoof.com #furnituremakeover #homeright #finishmax

    Heaven help. Why did I just show you that picture?

    That would be one of those days when the circus went to preschool and I tend to go a little loco.

    You don’t get to judge.

    After a coat of primer, I painted the chests the same navy color I used on the $10 dresser turned buffet.

    Navy and Gold Chest Makeovers via RainonaTinRoof.com #furnituremakeover #homeright #finishmax

    Navy and Gold Chest Makeovers via RainonaTinRoof.com #furnituremakeover #homeright #finishmax

    This is a really deep navy, so it took a few light coats to get the color uniform. The finish was still impeccable.

    Wow, I don’t know that I’ve used that word before on the blog. Yay, Jenna for using big words!

    But, that’s the beauty of the Finish Max, it has a fine finish that looks completely professional.

    Navy and Gold Chest Makeovers via RainonaTinRoof.com #furnituremakeover #homeright #finishmax

    I was not parting with the hardware that these chests came with – I loved their vintage vibe. They got a coat of gold spray paint.

    Navy and Gold Chest Makeovers via RainonaTinRoof.com #furnituremakeover #homeright #finishmax

    Navy and Gold Chest Makeovers via RainonaTinRoof.com #furnituremakeover #homeright #finishmax

    There was this inlay on the top of each chest. To highlight it, I went over it with a gold Sharpie paint pen.

    Navy and Gold Chest Makeovers via RainonaTinRoof.com #furnituremakeover #homeright #finishmax

    Navy and Gold Chest Makeovers via RainonaTinRoof.com #furnituremakeover #homeright #finishmax

    Want to learn more about how to use the Finish Max paint sprayer? See this post then! Oh, you are worried about clean-up of the Finish Max? Don’t be. It takes less than 10 minutes to clean it and in only six steps! Read all about it here!

    So, where is this guest bedroom headed?

    My friends, that is a fabulous question.

    Here’s what I know:

    The Jonathan Adler inspired chair is staying.

    The wall color is going.

    Somewhere in all of it, there needs to be an office space.

    And these chest makeovers were a fabulous start.

    That’s about it.

    Stayed tuned. It should be fun.

    Sign up to get my posts delivered to your inbox here. 

    You know you don’t wanna miss any of this crazy.

    Stalk Me Here:

    Pinterest / Facebook / Twitter / Instagram

  • Four Easy DIY Gift Ideas

    Just a quick little post today to share some easy DIY gift ideas with you!

    I am trying to get caught up around here so I can take some time off during Christmas!

    Four Easy DIY Gift Ideas via RainonaTinRoof.com #diy #giftideas (more…)

  • An Eclectic Christmas Home Tour {Part 2}

    An Eclectic Christmas Home Tour {Part 2}

    Hi there. Are you hopping over from Desert Domicile?

    I’m so happy you are here – wherever you came from.

    I hope you are ready for the final installment of my Christmas tour.

    And for a little story.

    And I hope you like a random smattering of styles and items thrown together.

    Because that is what this eclectic Christmas home tour is all about.

    That and really special people.

    Eclectic Christmas Home Tour via RainonaTinRoof.com #christmas #hometour (more…)

  • DIY Silhouette Gift Tags

    DIY Silhouette Gift Tags

    Maybe when you read about my daily circus, oh, I mean quick and simple holiday decorating, you noticed how I used wrapped gifts as decor.

    And maybe, just maybe, you noticed those silhouette gift tags on those wrapped gifts.

    DIY Silhouette Gift Tags via rainonatinroof.com #silhouette

    This post contains affiliate links for your shopping convenience. Click here to read my full disclosure policy.

    These were so easy to make! For the actual tag, I just drew lines and angled them into the shape of a gift tag on my Silhouette. I drew a little circle in the upper center for string. Then, I grouped all the lines and circle together to make one design.

    Whoa, people, watch out, she is actually using her Silhouette to draw.

    I know, not really all that impressive.

    DIY Silhouette Gift Tags via rainonatinroof.com #silhouette

    I bought the silhouette shapes in the Silhouette store. They were $0.99 each and really, y’all know I ain’t got no time to attempt to draw a silhouette on my own.

    So, yea, I cut silhouettes on my Silhouette. hahahaha.

    DIY Silhouette Gift Tags via rainonatinroof.com #silhouette

    She even has terrible jokes.

    I adhered the silhouette to the tag with a glue runner and used a gold Sharpie paint pen to draw the designs and write the names.DIY Silhouette Gift Tags via rainonatinroof.com #silhouette

    If you look closely, you will see that the string holding the tag is actually white and gold. I found it at the Target dollar spot when I found the dollar trays I hacked.

    DIY Silhouette Gift Tags via rainonatinroof.com #silhouette

    I do have to say, thanks to these gift tags and the fab wrapping paper I scored at HomeGoods, my gift wrapping is looking 100 times better than last year.

    See how I used these tags to create pumpkin place card holders for Thanksgiving right here!

    Stalk me:

    Pinterest / Facebook / Twitter

  • 10+ DIY Holiday Wreaths

    10+ DIY Holiday Wreaths

    This week, we are talking DIY holiday wreaths, baby! Lots of them!

    10+ DIY Holiday Wreaths via rainonatinroof.com #wreath

    10+ DIY Holiday Wreath Ideas

    10+ DIY Holiday Wreaths via rainonatinroof.com #wreath

    Paint Stick Evergreen Wreaths from Me!

    10+ DIY Holiday Wreaths via rainonatinroof.com #wreath

    Vintage Santa Tinsel Wreath from Me

    10+ DIY Holiday Wreaths via rainonatinroof.com #wreath

    Vintage Elf Yarn Wrapped Wreath from Me 🙂

    10+ DIY Holiday Wreaths via rainonatinroof.com #wreath

    Cotton Ball Wreath from Learning Creating Living

    10+ DIY Holiday Wreaths via rainonatinroof.com #wreath

    Burlap, Boughs and Blades Winter Wreath from The Happy Housie

    10+ DIY Holiday Wreaths via rainonatinroof.com #wreath

    The Grinch Wreath from Style BluePrint

    10+ DIY Holiday Wreaths via rainonatinroof.com #wreath

    Anthropologie Inspired Wool Wreath from View From the Fridge

    10+ DIY Holiday Wreaths via rainonatinroof.com #wreath

    Colorful Vintage Style Wreath from Silly Old Suitcase

    10+ DIY Holiday Wreaths via rainonatinroof.com #wreath

    Jute and Glitter Wreaths from So Much Better With Age

    10+ DIY Holiday Wreaths via rainonatinroof.com #wreath

    Boxwood Christmas Wreath from Heather Bullard

    10+ DIY Holiday Wreaths via rainonatinroof.com #wreath

    Fresh Holiday Monogrammed Wreath from House in the Heights

    Looking for more holiday decorating inspiration? 

    Simple and Affordable Christmas Decoration Ideas – they’re gorgeous too! 

    Don’t get your tinsel in a tangle! – here are ideas for decorating with tinsel during the holidays!


  • Quick and Simple Holiday Decorating

    Quick and Simple Holiday Decorating

    Welcome, friends! Quick and Simple Holiday Decorating {Holiday Home Tour} via rainonatinroof.com #holidaydecorating

    Let me give you a glimpse of my everyday life.

    I wake up around 6:30 a.m., have a cup of coffee, count my blessings, write posts, edit photos, etc. until the kid wakes up, with any luck at least an hour and a half later.

    Quick and Simple Holiday Decorating {Holiday Home Tour} via rainonatinroof.com #holidaydecorating

    Then God gets a cup of coffee and gets ready for his daily entertainment of the three ring circus that is about to begin at my house.

    Quick and Simple Holiday Decorating {Holiday Home Tour} via rainonatinroof.com #holidaydecorating

    Quick and Simple Holiday Decorating {Holiday Home Tour} via rainonatinroof.com #holidaydecorating

    For the next 4-6 hours, I try to keep the kid from falling down stairs, jumping off the couch & breaking a limb, booty dancing on the coffee table, climbing on the dining room table & swinging from the chandelier, eating questionable items, pestering the dog, laying on the dog bed, coloring on the walls, playing in the toilet, pouring her milk on the floor, pulling heavy objects on top of herself and somewhere in between it all, I try to make sure she actually eats more than a strawberry for breakfast and a chicken nugget for lunch.

    Besides enjoying the circus, I hope God is listening to my prayers for patience throughout the day.

    Quick and Simple Holiday Decorating {Holiday Home Tour} via rainonatinroof.com #holidaydecorating

    If I’m lucky, at some point she will take a 1 1/2 – 2 hour nap.

    Quick and Simple Holiday Decorating {Holiday Home Tour} via rainonatinroof.com #holidaydecorating

    If I’m lucky.

    And during that time, I do some more post writing, pay bills, take more photos, edit more photos, etc.

    And I do it all very quietly in hopes she will sleep longer.

    But she never does.

    Because evidently, God really likes the circus.

    Quick and Simple Holiday Decorating {Holiday Home Tour} via rainonatinroof.com #holidaydecorating

    And when she wakes up, I crack open a cheap beer and turn on Mickey Mouse because I need a break in order to maintain the little mental stability I had to begin with.

    Quick and Simple Holiday Decorating {Holiday Home Tour} via rainonatinroof.com #holidaydecorating

    Sure, there are those two days a week that she goes to preschool for 4 1/2 hours. And during that time, I am painting beds, re-upholstering chairs, and turning trash into treasure.

    Quick and Simple Holiday Decorating {Holiday Home Tour} via rainonatinroof.com #holidaydecorating

    And now, I’m supposed to decorate for Christmas on top of it all.

    And I love Christmas. I told you all about how much I love gift giving.

    Quick and Simple Holiday Decorating {Holiday Home Tour} via rainonatinroof.com #holidaydecorating

    Can my gift be a personal assistant?

    Pretty please, Santa? Grunt Labor? Dad? Anyone?

    Quick and Simple Holiday Decorating {Holiday Home Tour} via rainonatinroof.com #holidaydecorating

    Quick and Simple Holiday Decorating {Holiday Home Tour} via rainonatinroof.com #holidaydecorating

    Please don’t get me wrong, I wouldn’t trade my little circus for anything. I mean, I totally understand her. She is 100% her mama’s child, God bless it.

    Quick and Simple Holiday Decorating {Holiday Home Tour} via rainonatinroof.com #holidaydecorating

    Quick and Simple Holiday Decorating {Holiday Home Tour} via rainonatinroof.com #holidaydecorating

    So, over here, this girl is all about quick and simple holiday decorating.

    Quick and Simple Holiday Decorating {Holiday Home Tour} via rainonatinroof.com #holidaydecorating

    My quick and simple holiday decorating tips:

    Throw some ornaments, make it rain.

    Quick and Simple Holiday Decorating {Holiday Home Tour} via rainonatinroof.com #holidaydecorating

    My favorite Christmas decorating items are ball ornaments. Preferably vintage ones, but I will take any. Anytime I see them at Goodwill, on clearance, or in an antique store for a good price, I buy them.

    Quick and Simple Holiday Decorating {Holiday Home Tour} via rainonatinroof.com #holidaydecorating

    So, throw some of those bad boys everywhere.

    Quick and Simple Holiday Decorating {Holiday Home Tour} via rainonatinroof.com #holidaydecorating

    In bowls. On Goodwill trays. Hang them from chandeliers. Unless you have a circus that likes to hang from chandeliers, then you shouldn’t do that.

    Use Wrapped Gifts as Decor

    Quick and Simple Holiday Decorating {Holiday Home Tour} via rainonatinroof.com #holidaydecorating

    The other day, I was talking with Mama and she was saying how she read in a magazine about using gifts as decor.

    Quick and Simple Holiday Decorating {Holiday Home Tour} via rainonatinroof.com #holidaydecorating

    It was like angels started singing.

    Quick and Simple Holiday Decorating {Holiday Home Tour} via rainonatinroof.com #holidaydecorating

    Duh. You have to wrap presents. We usually try to make them pretty. Why do they have to stay under the tree? Spread those bad boys around the house.

    Quick and Simple Holiday Decorating {Holiday Home Tour} via rainonatinroof.com #holidaydecorating

    I even used mine as my dining room table centerpiece this year.This is also fabulous for keeping them out of reach of the little circus. Until the little circus climbs on the table. And on a side note, I will show you how I made those gift tags on Monday!

    Quick and Simple Holiday Decorating {Holiday Home Tour} via rainonatinroof.com #holidaydecorating

    Oh, and don’t let me fool you for a minute. The gifts you see on my table are the same gifts you saw in the entryway. As if I have had time to wrap all the presents yet.

    Personal assistant??

    Anyone? Anyone?

    Tinsel is My Friend

    Quick and Simple Holiday Decorating {Holiday Home Tour} via rainonatinroof.com #holidaydecorating

    As you will see more of next week in part 2 of my home tour, I love tinsel.

    Quick and Simple Holiday Decorating {Holiday Home Tour} via rainonatinroof.com #holidaydecorating

    I drape it around wall decor, use it as a filler in bowls and lay it out anywhere a little more bling is needed. There are some fab tinsel ideas here.

    I think tinsel has a way of making it feel more like a party, instead of holiday decorations.

    And I like that.

    Curly Gold Ribbon Makes Everything Better

    Quick and Simple Holiday Decorating {Holiday Home Tour} via rainonatinroof.com #holidaydecorating

    Go buy a roll of gold, or another color of your preference, curling ribbon. Cut pieces off and throw it on the ornaments that you rained all over the house. Instant glam.

    Quick and Simple Holiday Decorating {Holiday Home Tour} via rainonatinroof.com #holidaydecorating

    Where Ornaments Won’t Go, Use Greenery

    Quick and Simple Holiday Decorating {Holiday Home Tour} via rainonatinroof.com #holidaydecorating

    Not enough ornaments? Or they won’t fit in your containers? Fill them with live greenery!

    Quick and Simple Holiday Decorating {Holiday Home Tour} via rainonatinroof.com #holidaydecorating

    I have an evergreen tree that I take clippings from, but Lowe’s (and maybe HomeDepot?) gives away their greenery clippings from Christmas trees.

    Quick and Simple Holiday Decorating {Holiday Home Tour} via rainonatinroof.com #holidaydecorating

    If I can, I love to pop a few ornaments on top of the greenery – I can’t get enough of that contrast.Quick and Simple Holiday Decorating {Holiday Home Tour} via rainonatinroof.com #holidaydecorating

    Wreaths aren’t just for doors

    Quick and Simple Holiday Decorating {Holiday Home Tour} via rainonatinroof.com #holidaydecorating

    As you may have picked up on now, I am a wreath lovin’ fool. Quick and Simple Holiday Decorating {Holiday Home Tour} via rainonatinroof.com #holidaydecorating

    I love to put my vintage elf wreath over the mirror in my entryway. I just use ribbon and a thumbtack.

    And my paint stick evergreen wreaths graced my liquor cabinet this year.

    Quick and Simple Holiday Decorating {Holiday Home Tour} via rainonatinroof.com #holidaydecorating

    Be sure to come back next Tuesday to see the rest of my Christmas tour.

    Ya know, like the tree. Cause that is supposed to be the biggest holiday decoration, right?

    There is lots more in store for you next Tuesday.

    I have to go catch the circus now.

    Need more easy Christmas decorating ideas? Be sure to see these simple and affordable Christmas decoration ideas then!

    Like what you see?

    Follow along:
  • Four Fantastic Ideas for Book Pages, Paper, and Old Cards

    This week, I am loving these paper crafts!

    Four Fantastic Ideas for Book Pages, Paper, and Old Cards via rainonatinroof.com #papercrafts

    Four Fantastic Ideas for Book Pages, Paper, and Old Cards via rainonatinroof.com #papercraftsPrintable Christmas Gift Tags from Tiny Sidekick

    Four Fantastic Ideas for Book Pages, Paper, and Old Cards via rainonatinroof.com #papercrafts

    Repurposed Book Flower from Designed Decor

    Four Fantastic Ideas for Book Pages, Paper, and Old Cards via rainonatinroof.com #papercrafts

    Simple Christmas Sign using Old Christmas Cards from 3 Little Green Woods

    Four Fantastic Ideas for Book Pages, Paper, and Old Cards via rainonatinroof.com #papercraftsVintage Wreaths with Paper Decor Printables from Refresh-Renew

    Most Viewed Link:
    Four Fantastic Ideas for Book Pages, Paper, and Old Cards via rainonatinroof.com #papercrafts

    Kitchen Backsplash Before and After from Southern State of Mind

  • How to Clean the HomeRight Finish Max Paint Sprayer

    How to Clean the HomeRight Finish Max Paint Sprayer

    By now, you guys know that I love my HomeRight Finish Max Paint Sprayer.

    If you don’t know that, then you have been living under a rock or you haven’t read about my toy chest makeover, french country chair makeover, black and gold french country desk, or the polka dot bed.

    The one question that people always ask me about the Finish Max is whether or not its easy to clean.

    And I don’t blame them a bit for asking. If there is any person in the world that understands their fear, it is me. If you read about the toy chest makeover, you know that I have dealt with my fair share of paint sprayers that were not easy to clean and didn’t even work well. I was even skeptical of the Finish Max at first.

    I felt it was time to show you how to clean the HomeRight Finish Max paint sprayer and just how fast and easy it really is.

    I’m a believe-it-when-I-see-it gal and I figured some of you were too.

    Disclosure: This post was sponsored by HomeRight, but you know how I roll, all opinions are 100% mine. This post contains affiliate links for your shopping convenience. Click here to read my full disclosure policy.

    How to Clean the HomeRight Finish Max Paint Sprayer via rainonatinroof.com #homeright #finishmax #paintsprayer

    Let’s do this!

    **Update: It’s now even easier than this to clean a Finish Max Paint Sprayer! There’s a new attachment called the Rapid Clean that plugs right into your water hose and the paint sprayer and cleans it up in just a few minutes. 

    Step #1:

    After you are done painting, discard or place back into the paint can any remaining paint in container. (Keep in mind if you thinned the paint with water, you may not want to put it back in the can with un-thinned paint. I do typically go on and put it back in the can because I know if I use the paint again, it will most likely be in the sprayer anyway and will need thinning.) Rinse out the container well and fill it up with water.

    How to Clean the HomeRight Finish Max Paint Sprayer via rainonatinroof.com #homeright #finishmax #paintsprayer

    Step #2:

    Twist the container back into place on the sprayer. Plug in the Finish Max and spray the water out.

    How to Clean the HomeRight Finish Max Paint Sprayer via rainonatinroof.com #homeright #finishmax #paintsprayer

    How to Clean the HomeRight Finish Max Paint Sprayer via rainonatinroof.com #homeright #finishmax #paintsprayer

    Step #3:

    Unplug the Finish Max. Unscrew paint container and suction tube, rinse well with water and set aside to dry.

    How to Clean the HomeRight Finish Max Paint Sprayer via rainonatinroof.com #homeright #finishmax #paintsprayer

    Step #4:

    Unscrew the nozzle (technical word is air cap ring) where the paint comes out. This will free the other two pieces of the nozzle (technical words: air cap and directional air cap) and rinse all three parts well.

    How to Clean the HomeRight Finish Max Paint Sprayer via rainonatinroof.com #homeright #finishmax #paintsprayer

    How to Clean the HomeRight Finish Max Paint Sprayer via rainonatinroof.com #homeright #finishmax #paintsprayer

    How to Clean the HomeRight Finish Max Paint Sprayer via rainonatinroof.com #homeright #finishmax #paintsprayer

    Step #5:

    Remove any remaining paint from around the brass fluid nozzle. You can do this with the included brush, or as I choose to do, my fingernail. Rinse brass nozzle with water. Also, unscrew and remove the brass nozzle and spray it well with water.

    How to Clean the HomeRight Finish Max Paint Sprayer via rainonatinroof.com #homeright #finishmax #paintsprayer

    How to Clean the HomeRight Finish Max Paint Sprayer via rainonatinroof.com #homeright #finishmax #paintsprayer

    I also like to take my water hose and spray some water up the bottom of the sprayer and out the nozzle by depressing the trigger while spraying the water.

    How to Clean the HomeRight Finish Max Paint Sprayer via rainonatinroof.com #homeright #finishmax #paintsprayer

    Step #6:

    Lay it all out to dry. If you need to use it immediately, just dry off the parts with a towel and get going again!

    How to Clean the HomeRight Finish Max Paint Sprayer via rainonatinroof.com #homeright #finishmax #paintsprayerBAM.

    10 minutes or less and you are done.

    So. not only did you just get an entire piece of furniture painted in half (or even a 1/4 sometimes) the time it would take to roll and brush, but you also did all the cleanup in less than 10 minutes.

    And I know I’ve spent longer than 10 minutes just trying to get paint out of brushes and rollers before, not to mention cleaning the paint trays.

    No excuses with the Finish Max. Its easy to use and easy to clean.

    Need a step-by-step play on How to Use the Finish Max Paint Sprayer? Head here!

    Want to see how fab of a finish the HomeRight Finish Max sprayer gives? Then check out these furniture makeovers. 

    Sign up to get my posts delivered to your inbox here. 

    You know you don’t wanna miss any of this crazy.

    Stalk Me Here:

    Pinterest / Facebook / Twitter / Instagram

  • Don’t Get Your Tinsel in a Tangle: Ideas for Decorating with Tinsel

    Don’t Get Your Tinsel in a Tangle: Ideas for Decorating with Tinsel

    I have a confession to make.

    Just like I’m a tray whore, I’m a tinsel whore.

    I have one large rubbermaid container dedicated to tinsel.

    Guys, that’s a lot of tinsel.

    I may even use it so much that some would consider it borderline tacky.

    That’s their problem.

    Here’s some of my favorite ideas for decorating with tinsel:

     Ideas for Decorating with Tinsel via rainonatinroof.com #tinsel #holidaydecorating (more…)

  • Target Dollar Spot Trays Hack {A Fabulous Fifteen Minute Hack}

    I’m not quite sure if this is considered a hack or an upcycle.

    I’m a pathetic excuse for a DIY blogger, aren’t I?

    I was definitely up-cycling these trays into something better, but I guess I’m also hacking them too?

    I settled on a hack.

    Because it sounds more scandalous.

    And I’m nothing if I’m not scandalous.

    If you only knew the half of it…..

    Target Hack Dollar Spot Trays via rainonatinroof.com #targethack #diytray

    This post contains affiliate links for your shopping convenience. Click here to read my full disclosure policy.

    Aren’t they so pretty?

    Don’t they look expensive?

    Don’t shatter my dreams if you don’t like them.

    I am in love with them and just know they will look fabulous on my coming-soon bar cart.

    So, seriously, these took less than 15 minutes to hack. They already came in those super cute green and blue colors.

    Target Hack Dollar Spot Trays via rainonatinroof.com #targethack #diytrayGeez, the lighting is terrible in my craft room. But you can see where they were just $1, right?

    And they also come in pink and yellow colors as well.

    To do these, I took a gold Sharpie paint pen, and just ran it along the lines, edges, and corners of the tray.

    Target Hack Dollar Spot Trays via rainonatinroof.com #targethack #diytray

    Yup, real hardcore DIY stuff, y’all.

    Each tray has little dots, so with the green one, I just pressed my marker over the dots to make the polka dot pattern.

    Target Hack Dollar Spot Trays via rainonatinroof.com #targethack #diytray

    Wouldn’t these be fabulous little gifts too?

    Target Hack Dollar Spot Trays via rainonatinroof.com #targethack #diytray
    Give it with a fab necklace or some smell good lotion.

    Target Hack Dollar Spot Trays via rainonatinroof.com #targethack #diytray

    I picked these up just last week and they had tons of them, so I’m sure you can still get some.

    If you hurry.

    Target Hack Dollar Spot Trays via rainonatinroof.com #targethack #diytrayLove trays?

    Me too. Some, myself included, would even call me a tray whore. You can see the evidence for yourself:

    Looking for more tray ideas? Check these out:

    DIY Bathtub Tray with Book Holder – one of my favorite projects to date and it’s an easy build!

    DIY Lucite Trays– so easy to make and great for desk storage!

    This DIY Monogram Tray makes a fab Christmas gift as well.

    This vanity tray was once stuck in 1988 and barely made it out alive or through the half-off Goodwill day.

    You know you don’t wanna miss any of this crazy.

    Sign up to get my posts delivered to your inbox here. 

    Stalk Me Here:

    Pinterest / Facebook / Twitter / Instagram


    SaveSave

  • Paint Stick Evergreen Wreaths

    Paint Stick Evergreen Wreaths

    Create gorgeous evergreen Christmas wreaths this holiday season using paint sticks! Yes, paint sticks! Read on to learn how to make an evergreen wreath in all shapes and sizes….

    Update: To everyone who is freaking out about me stealing these paint sticks and think that I’m a thief: I have talked to my paint guy at Home Depot. They give these things away for free all the time – without you purchasing paint. Just a little FYI.

    Please Home Depot, don’t hate me.

    You see, when I was buying paint at your store the other day, I may have picked up more paint sticks than I was allotted.

    I bought two gallons and one quart of paint. But, I took 15 paint sticks. Did I go over my quota?

    If it makes it any better, there have been multiple times when I’ve bought paint and not gotten the paint sticks….

    I’m really, really sorry.

    But you see, I just had to have those extra paint sticks to make these stellar evergreen wreaths.

    How to Make an Evergreen Wreath


    You understand, don’t you Home Depot?

    And all of you, my fabulous friends understand too, don’t you?

    I mean, really, how could I not make these spectacular paint stick evergreen wreaths? Especially when they cost me a total of $0.

    You want to make your own now too, don’t you?

    Let’s do it!

    This post contains affiliate links for your shopping convenience. Click here to read my full disclosure policy.

    DIY Evergreen Wreaths using Paint Sticks

    I made two square wreaths and one large star wreath. I’ll show you how to do both.

    For the Square Evergreen Wreaths

    Materials

    • 4 Paint Sticks per Wreath
    • Green Spray Paint
    • Evergreen Clippings
    • Hot Glue Gun
    • Wide Ribbon for Hanging

    Steps

    Step 1


    If you want to make the wreaths smaller than the size of the paint stick, cut the paint sticks down first. Next, spray paint the paint sticks.

    Step 2

    Using the hot glue gun, glue the paint sticks together to form a square.

    DIY Evergreen Wreath

    Step 3

    Gather your evergreen clippings. Cut them down to the size you’d like them to be on your wreath. Just hold a few up to the wreath frame and decide.

    Start hot gluing the clippings onto the paint sticks starting in a corner.

    Paint Stick Evergreen Wreaths

    Hang a ribbon from the top and enjoy!

    How to Make an Evergreen Wreath using Paint Sticks
    Wreaths made from Paint Sticks
    DIY Christmas Evergreen Wreaths

    For the Star Evergreen Wreath

    Materials

    Steps

    Step 1

    You will need ten paint sticks to make the size that I made. Now, mine is pretty big people. I didn’t cut any of the paint sticks down to size. It works for me because I will be sitting it on my front porch for decor and it would probably look great on a mantel if I had one, but if you want to hang it on a door, you will want to cut all your sticks down some. I would just play with the size until you have what you like.

    Gather your paint sticks.

    Using paint sticks for Christmas wreaths.

    Lay them out in the floor in the best star shape you can muster, if it looks like this at first, don’t worry:

    How to Make a Star Shaped Evergreen Wreath

    Yea, that big huge gap wouldn’t cut it. Just play with it until you have the correct shape. The best way I found was to take a square and put it into the angles and push the sticks together until they met up with the square.

    Paint Stick Star
    DIY Star Evergreen Wreath

    Step 2

    Once you have it laid out how you want it, hot glue all the sticks together. If its a little off, don’t worry because the greenery will cover up some of the unevenness.

    DIY Paint Stick Star

    Step 3

    Spray paint the frame green.

    Step 4

    Hot glue the greenery onto the star just like with the squares.

    How to Make an Evergreen Star Shaped Wreath

    Use a wide ribbon to hang the star wreath as well.

    DIY Star Shaped Evergreen Wreath

    Yes, it takes a little time to hot glue all the greenery on, but it is so worth it.

    Especially since its free.

    Thanks for the paint sticks, Home Depot. And no, Home Depot did not compensate me in any way for this post. In fact, they may be really pissed at me now.

    Uh-oh.

    Still in a wreath lovin’ mood?

    Then don’t miss the easy Santa Tinsel Wreath or these 10+ Holiday Wreath Ideas.

    There are also loads of simple and affordable Christmas decoration ideas here!

    Want to come back to this wreath tutorial later? Just pin the image below!

    How to Make Evergreen Wreaths from Paint Sticks

    Sign up to get my posts delivered to your inbox here. 

    You know you don’t wanna miss any of this crazy.

    Stalk Me Here:

    Pinterest / Facebook / Twitter / Instagram

  • DIY Horse Silhouette Pillow and How to Cut Felt on a Silhouette

    I’m still learning the ropes of my Silhouette, so no judging how simple or elementary this project is.

    But, aren’t fabulous simple projects what you love?

    I do.

    And I think that my horse silhouette pillow is pretty fabulous. And simple.

    This post contains affiliate links for your shopping convenience. Click here to read my full disclosure policy.

    And if you don’t have a Silhouette, I’m pretty sure you could easily make this project without one.

    DIY Horse Silhouette Pillow via rainonatinroof.com #silhouette #horsepillow
    So, first, you are gonna need a pillow. I made my pillow out of leftover fabric I had from the new navy and white striped curtains you may have noticed in my kitchen tour. The fabric came from Ikea and it was a whopping $2 a yard. Needless to say, I came back with more  navy and white striped fabric than I can ever use. They will probably cover my coffin in it. You could always use an existing pillow you have or grab a pillow cover from Hobby Lobby. Whatever floats your boat.

    I just did a simple small rectangle pillow that was 17 inches x 10 inches before sewing it together.

    I purchased the horse shape from the online Silhouette store. Did you really think I could draw that horse myself with my elementary skills? I know there is some trace feature, but I haven’t conquered that one either.

    I played with the size of the horses and cut them out on printer paper unil I had the right size.

    DIY Horse Silhouette Pillow via rainonatinroof.com #silhouette #horsepillow

    The right size for the horse turned out to be about 6 x 7.5.

    I cut out my horse on felt. Learn from my mistakes, DO NOT buy the felt that already has a sticky back. It will not work. Just buy the plain old $0.50 a piece felt at Hobby Lobby. Once I did have the right felt, I made my settings as follows, which seemed to work ok for me.

    DIY Horse Silhouette Pillow via rainonatinroof.com #silhouette #horsepillow

    This is what the felt looked like when it came out of the Silhouette.

    DIY Horse Silhouette Pillow via rainonatinroof.com #silhouette #horsepillow

    There were places where it didn’t go all the way through. I’m sure if I had a separate fabric blade, it would have cut more, but it was easily fixed with a pair of scissors.

    DIY Horse Silhouette Pillow via rainonatinroof.com #silhouette #horsepillow

    After I cut out the horse, I adhered it to the pillow with hot glue.

    DIY Horse Silhouette Pillow via rainonatinroof.com #silhouette #horsepillow

    It is definitely improving the look of my ugly brown couch.

    DIY Horse Silhouette Pillow via rainonatinroof.com #silhouette #horsepillow

    What do you think? Too simple for you? haha!

    Looking for more things to make with your Silhouette?

    Check out these vintage-esque holiday gift tags.

    These pumpkin place card holders also used my Silhouette.

    And I made this fun and colorful party banner with it too!

     Like what you see?

    Follow along:

    SaveSave