By now, you guys know that I love my HomeRight Finish Max Paint Sprayer.
If you don’t know that, then you have been living under a rock or you haven’t read about my toy chest makeover, french country chair makeover, black and gold french country desk, or the polka dot bed.
The one question that people always ask me about the Finish Max is whether or not its easy to clean.
And I don’t blame them a bit for asking. If there is any person in the world that understands their fear, it is me. If you read about the toy chest makeover, you know that I have dealt with my fair share of paint sprayers that were not easy to clean and didn’t even work well. I was even skeptical of the Finish Max at first.
I felt it was time to show you how to clean the HomeRight Finish Max paint sprayer and just how fast and easy it really is.
I’m a believe-it-when-I-see-it gal and I figured some of you were too.
Disclosure: This post was sponsored by HomeRight, but you know how I roll, all opinions are 100% mine. This post contains affiliate links for your shopping convenience. Click here to read my full disclosure policy.

Let’s do this!
**Update: It’s now even easier than this to clean a Finish Max Paint Sprayer! There’s a new attachment called the Rapid Clean that plugs right into your water hose and the paint sprayer and cleans it up in just a few minutes.
Step #1:
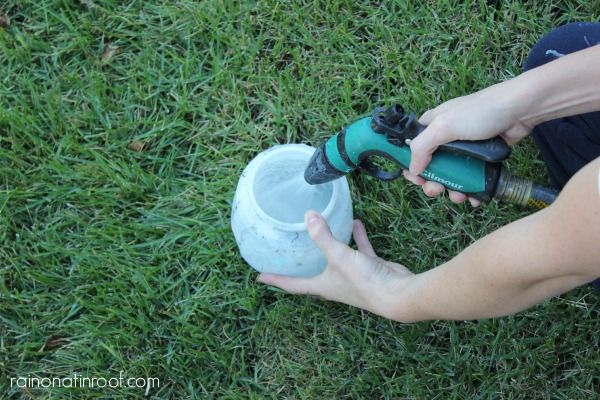
After you are done painting, discard or place back into the paint can any remaining paint in container. (Keep in mind if you thinned the paint with water, you may not want to put it back in the can with un-thinned paint. I do typically go on and put it back in the can because I know if I use the paint again, it will most likely be in the sprayer anyway and will need thinning.) Rinse out the container well and fill it up with water.
Step #2:
Twist the container back into place on the sprayer. Plug in the Finish Max and spray the water out.

Step #3:
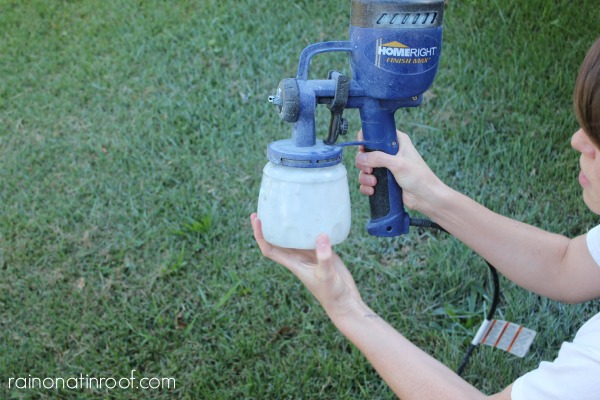
Unplug the Finish Max. Unscrew paint container and suction tube, rinse well with water and set aside to dry.

Step #4:
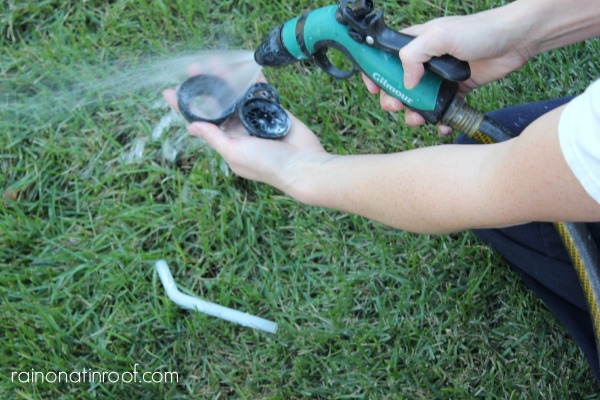
Unscrew the nozzle (technical word is air cap ring) where the paint comes out. This will free the other two pieces of the nozzle (technical words: air cap and directional air cap) and rinse all three parts well.


Step #5:
Remove any remaining paint from around the brass fluid nozzle. You can do this with the included brush, or as I choose to do, my fingernail. Rinse brass nozzle with water. Also, unscrew and remove the brass nozzle and spray it well with water.


I also like to take my water hose and spray some water up the bottom of the sprayer and out the nozzle by depressing the trigger while spraying the water.

Step #6:
Lay it all out to dry. If you need to use it immediately, just dry off the parts with a towel and get going again!
 BAM.
BAM.
10 minutes or less and you are done.
So. not only did you just get an entire piece of furniture painted in half (or even a 1/4 sometimes) the time it would take to roll and brush, but you also did all the cleanup in less than 10 minutes.
And I know I’ve spent longer than 10 minutes just trying to get paint out of brushes and rollers before, not to mention cleaning the paint trays.
No excuses with the Finish Max. Its easy to use and easy to clean.
Need a step-by-step play on How to Use the Finish Max Paint Sprayer? Head here!
Want to see how fab of a finish the HomeRight Finish Max sprayer gives? Then check out these furniture makeovers.
Sign up to get my posts delivered to your inbox here.
You know you don’t wanna miss any of this crazy.
Stalk Me Here:
DeDe@Designed Decor says
Jenna, do you get much over spray when painting with a sprayer? How much work space do you need, space around the piece you are painting? Thanks!
Jenna @ Rain on a Tin Roof says
Nope, not much overspray at all with this one, DeDe. The Finish Max focuses on giving you that fine finish so it may take 2 -3 light coats (typically 2 for me unless I’m going over a really dark color), but there isn’t much overspray at all. I work in my garage, and usually try to get a few feet on each side of me.
Dee Williamson says
Yup I am pretty convinced that I need one of these now! Thanks for the tutorial.
Jenna @ Rain on a Tin Roof says
You are welcome, Dee! Honestly, it is so easy to use and cleanup!
gail says
Great job Jenna!
I recommend that you unscrew and remove the brass nozzle and spray it good with the hose. My nephew used mine, and didn’t clean it, and it took me 2 hours to get the pin to move again. After doing that, you can really get a good spray of water through there.
gail
Jenna @ Rain on a Tin Roof says
Thanks for the tip, Gail! I tried to unscrew it once and just could not get it to budge. Do you just use your hand, a wrench, something else? I’ve used it a ton and haven’t had an issue with that yet – but I want to be prepared!!
Dorcas Bess says
Love the navy and gold transformations. Viewing your blog through your guest appearance on A Stroll thru Life. The navy color you used is fabulous. Mine sharing the color. Thanks.
Jenna @ Rain on a Tin Roof says
Hi Dorcas! I’m so glad you found me! I love that navy color too! It is called Nocturnal Sea by Behr!
polly plum says
Jenna,I’m new to DIY decorating, and just finished spray painting an outdoor park-type of bench, which sits on my front porch, whereI wait for the afternoon bus. Can you explain the need for aFinishMax Sprayer, or any sprayer?Why not just spray paint with the can of paint?
Jenna @ Rain on a Tin Roof says
Polly, spray painting with a can is absolutely fine! I like to have my sprayer because it gives a very fine finish which looks a bit more professional. I also like it because I can’t always find every color I want to use in spray paint form. With the FinishMax, I can put any color in there and not be limited by only spray paint colors. Hope that helps!
polly plum says
Oh, I understand now-I thought it was just a handle to make spray painting more comfortable-I think I have carpal tunnel from painting one bench:/ but you can actually use regular paint in it- what kinds of paint can you use? That’s so versatile! So helpful! Now I see…Now can you explain the Rustoleum comfort grip?
Jenna @ Rain on a Tin Roof says
You can use just about any paint imaginable, Polly. It just has to be thinned down to the right consistency to flow through the sprayer easily. This sprayer comes with a handy tool for getting that perfect consistency. The Rust-Oleum comfort grip is something that just fits over a spray paint can to make it more comfortable to spray paint.
Herbert says
I always mess things up when it comes to clean. Thanks to your tutorial , it saved me a lot of time
Mary says
Thank you Jenna for this tutorial. I’m thinking of spraying my first piece with chalk paint. ???? Do you use a drifferent designated sprayer for topcoats such as polyurethane and then one for your paint or do you use the same spray gun?
Jenna @ Rain on a Tin Roof says
Nope, I use the same spray gun for everything – just clean between materials!
Teri says
I just bought one of these and absolutely LOVE it. I read all the instructions, prepped the area and the items to be painted, determined to get it done right and neat, step by step the first time. I was painting bookcases and had all of the shelves laid in rows so I could go down each row and paint. The first two rows (four shelves each) went on like a dream! At the start of the third row the paint started sputtering out. I quickly stopped to troubleshoot when I came across spray painting for dummies. They give hints of what to have on hand like a paint brush in the event your paint sputters or drips to smooth out the drops and an extra cloth to wipe the drips. Also, a viscosity cup to determine the correct thickness of your paint (I should have mine by tomorrow). Even though I thinned the latex paint, it was not enough and once again, I reverted back to the messy painter I have always been. When I opened the sprayer to thin the paint again I pulled the paint container away and (you guessed it), paint everywhere – USER ERROR. I remembered thinking: OMG, if I had a brain I’d probably take it out and play with it!
Additionally, although I had thinned the paint, it was also extremely hot and humid which did not lend to consistent paint flow. If you’re new to using spray painters, do ALL of your homework first. This spray painter will not disappoint! The issues I had were due to being a complete novice! I can’t wait to use it again.