Blog

  • Pink & Houndstooth Vintage Chair Makeover {Roadside Rescue}

    Pink & Houndstooth Vintage Chair Makeover {Roadside Rescue}

    This chair was a monumental find for me.

    It was my first roadside find. I found it even before I found my metal cabinet that I turned into craft storage.

    I was just, ummmm, slow, very slow about getting around to fixing it.

    I think the wait was worth it though – I love how this chair makeover turned out.

    Pink & Houndstooth Vintage Chair Makeover {Roadside Find} via RainonaTinRoof.com #chairmakeover #houndstooth #coral #pink #roadsidefind #vintageThis post contains affiliate links for your shopping convenience. Click here to read my full disclosure policy.

    Where I live, there just don’t seem to be many roadside finds. I’ve been on the lookout for the better part of ten years and have found two to date.

    I was so excited about this that I had my friend snap a picture when I was picking it up.

    I’m a dork like that.

    As with all things that seem too good to be true, this chair did have a flaw. The back legs looked to be missing their feet. They were both angled off.

    Pink & Houndstooth Vintage Chair Makeover {Roadside Find} via RainonaTinRoof.com #chairmakeover #houndstooth #coral #pink #roadsidefind #vintage

    To fix them, I chopped them off to make the back legs flat, then drilled a hole and put in feet from a table I had bought at a yard sale that I didn’t need.

    After I fixed the feet, I stripped all the fabric off the chair, then gave it a coat of primer, then a couple coats of Dragon Fruit by Behr in a gloss finish. I used my HomeRight Finish Max Pro to do all the painting.

    Next was the fun part, upholstering. I was really excited about the fabric I chose –  Houndstooth Black Fabric.

    However, I was worried about upholstering this chair – perhaps why I had put it off for so long?

    If you noticed the back of this chair was tufted. I was terrified of tufting. I had never once attempted it.

    Now, I am so mad at myself for not trying it before – it was so easy!

    Before attempting the actual tufting, I took the old buttons and wrapped them in the houndstooth fabric with hot glue.

    ‘Cause I’m a professional like that.

    Pink & Houndstooth Vintage Chair Makeover {Roadside Find} via RainonaTinRoof.com #chairmakeover #houndstooth #coral #pink #roadsidefind #vintage

    For the tufting:

    First, I cut a piece of fabric that was about double the size of the back. You don’t need that much – I was just worried about not having enough. Then, I poked my buttons through, starting in the middle and working my way out.

    Pink & Houndstooth Vintage Chair Makeover {Roadside Find} via RainonaTinRoof.com #chairmakeover #houndstooth #coral #pink #roadsidefind #vintage

    You can see in #3 how it looks on the backside. You put a little disk through the metal prongs, then spread them out. After I had all the tufting done, I trimmed the fabric and stapled it around the edges, then trimmed it out, like I did on my Jonathan Adler inspired chair.

    Next, I started on the seat. You can see the layers of everything below. Because I hate to sew anything that isn’t a straight line, I used the old seat cushion to trace out a new piece of foam and just made the whole seat one piece.

    Pink & Houndstooth Vintage Chair Makeover {Roadside Find} via RainonaTinRoof.com #chairmakeover #houndstooth #coral #pink #roadsidefind #vintage

    Before doing any of the main seat upholstery, I did these little patches on the side.

    Pink & Houndstooth Vintage Chair Makeover {Roadside Find} via RainonaTinRoof.com #chairmakeover #houndstooth #coral #pink #roadsidefind #vintage

    Then, I just cut a large piece of fabric, pulled, and stapled around the bottom of the chair as necessary.

    Pink & Houndstooth Vintage Chair Makeover {Roadside Find} via RainonaTinRoof.com #chairmakeover #houndstooth #coral #pink #roadsidefind #vintage

    I love the combination of the pink paint with the houndstooth fabric. I think it would be perfect for a little girl’s room.

    Pink & Houndstooth Vintage Chair Makeover {Roadside Find} via RainonaTinRoof.com #chairmakeover #houndstooth #coral #pink #roadsidefind #vintage

    I kept the trim a simple black just because there was so much color going on with the pink.

    Pink & Houndstooth Vintage Chair Makeover {Roadside Find} via RainonaTinRoof.com #chairmakeover #houndstooth #coral #pink #roadsidefind #vintageHave you ever done a chair makeover with a roadside find?

    More Chair Makeovers & Upholstery Posts You Might Want To See:

    How to Waterproof & Repel Stains on Fabric

    How to Upholster a Cane Chair (Jonathan Adler Inspired)

    French Country Chair Makeover

    Restored Rocking Chair

    Upholstered Box Spring

    You know you don’t wanna miss any of this crazy.

    Sign up to get my posts delivered to your inbox here. 

    Stalk Me Here:

    Pinterest / Facebook / Twitter / Instagram

    SaveSave

  • Staining Pressure Treated Wood

    Staining Pressure Treated Wood

    When it comes to wood staining, there are a few differences between staining regular wood and staining pressure treated wood. You can typically stain regular wood immediately. With pressure treated lumber, you might be able to stain it immediately or you might have to wait a bit. Read on to see how I was able to stain my new deck without waiting!

    I am not a patient person.

    I do not like to wait. On anything.

    Good things come to those who wait, right? Well, I guess I’m more of a go out there and get it done now kind of girl.

    Case in point, our new deck.

    Yep, I said new deck. Over the past month, Grunt Labor built a deck. Isn’t he just awesome, y’all?

    Of course that deck was built with pressure treated wood. Many people say you should wait at least six months before staining pressure treated wood.

    Six months. 

    Negative.

    Ain’t nobody got time for that.

    So being a real rebel, I stained that pressure treated wood after only two weeks of the deck being completed.

    All that being said, if you do have time to wait, then by all means wait.

    Staining Pressure Treated Wood - Before and After New Deck Staining - Rain on a Tin Roof

    Disclosure: This post is sponsored by Thompson’s WaterSeal. However, all opinions and impatient-ness are 100% mine. This post contains affiliate links for your shopping convenience. Click here to read my full disclosure policy.

    Can You Stain Pressure Treated Wood?

    Yes, you can absolutely stain pressure treated wood. The key is knowing when to stain it. As I said, it’s typically recommended that you wait six months before staining new installed pressure treated wood. But as I said, I did not.

    I was able to do mine sooner because of a stain I used that is specifically for new pressure treated lumbers builds that can be used much sooner than the six month wait time. The stain I used was Thompson’s Waterproofing Stain.

    To determine if your treated wood is ready for stain, simply flick a little bit of the stain onto the wood in a small spot. If the stain bubbles up on the wood, you are not ready to stain. If the stain soaks in, you’re ready to stain. After two weeks, my deck was ready for stain.

    Staining Treated Wood

    Because we all love a good before and after, here is the deck before staining:

    Can You Stain Pressure Treated Wood - The New Deck Before - Rain on a Tin Roof

    I’m sure you are looking at that photo and saying, “Ummmm…..Jenna, sweetie, you do realize that there are no steps up or down to the deck, right? How are you going to use it?”

    I have stellar jumping skills, y’all. Stellar.

    Not.

    The deck is right beside the screened-in porch and you access the deck through a soon-to-be-door from the screened-in porch. We could have put steps down from the deck, but we didn’t really want the dog running up there anytime she wanted. No steps also help to contain the kid. I can just let her go on the screened in porch and deck without me having to worry she will fall off it.

    As you guys know, I am a fan of Thompson’s WaterSeal products. I used their spray stain to give my lattice and mailbox a quick makeover. For the deck stain, I turned to them again.

    Staining Treated Wood - Outdoor wood stain for new decks - Rain on a Tin Roof

    Tools and Supplies Needed:

    • Thompson’s WaterSeal Waterproofing Stain – I went with their Acorn Brown Waterproofing Stain in Transparent. You can also get it in semi-transparent. It only takes one coat and dries in two hours – perfect for impatient people like myself.
    • Paint Brush made for stain
    • Stain Stick – makes it super easy to stain the deck floor boards.

    Steps

    Step 1. 

    Pour some of the stain into a container and stir the stain well.

    Using a brush, apply the stain to the rails and spindles.

    Can you stain treated wood - brush on the stain - Rain on a Tin Roof

    Don’t be scared when you see that the stain looks like this. When it first comes out of the can, it is this mauve-y brown color and I totally freaked out. It’s ok, though. It doesn’t dry like that.

    This is what it looked like as I was brushing it on.

    Staining a New Deck - brushing the stain onto the rails - Rain on a Tin Roof

    It does dry pretty quickly, but you need to give it two hours to fully dry or recoat – if you aren’t impatient like me and want a second coat. If you think you want a lighter stained deck, then definitely do multiple coats and have a cloth on hand to wipe up excess stain as you put it on.

    Step 2.

    You can also brush the stain on the floor, but I went with my HomeRight Stain Stick.

    Can pressure treated wood be stained - using a stain stick on the deck floor - Rain on a Tin Roof

    The Stain Stick has an attached stain pad and a padded roller that easily applies the stain into the crevices between each board. The stain is pulled up through the stick and you push it out as needed.

    Let the stain fully dry before applying another coat or putting the deck to use.

    A couple hours later this is what we had…..

    How to Stain Pressure Treated Wood - new deck stained two weeks after - Rain on a Tin Roof

    That one single coat will act as a water repellent and protect the deck for three years. Holla.

    Here’s a little close-up after the sun had went down a bit:

    Staining Pressure Treated Lumber after two weeks - Rain on a Tin Roof

    There were some places where I overlapped the stain a bit on the floor and it made it more dark. Ya know what, though? I like it like that – gives it a bit more depth and character.

    Do you have any tips to share for staining treated lumber?

    More outdoor projects you might just want to see…

    DIY Cedar Planter Box – a beautiful planter box that’s great for also displaying your house numbers!

    How to Clean Your Sidewalk – I was shocked at how gross mine was!

    Lattice Makeover in an Hour – got rough looking lattice somewhere? Give it a quick refresh – you won’t believe how good it looks after!

    Easy Mailbox Makeover – another easy project with big impact!

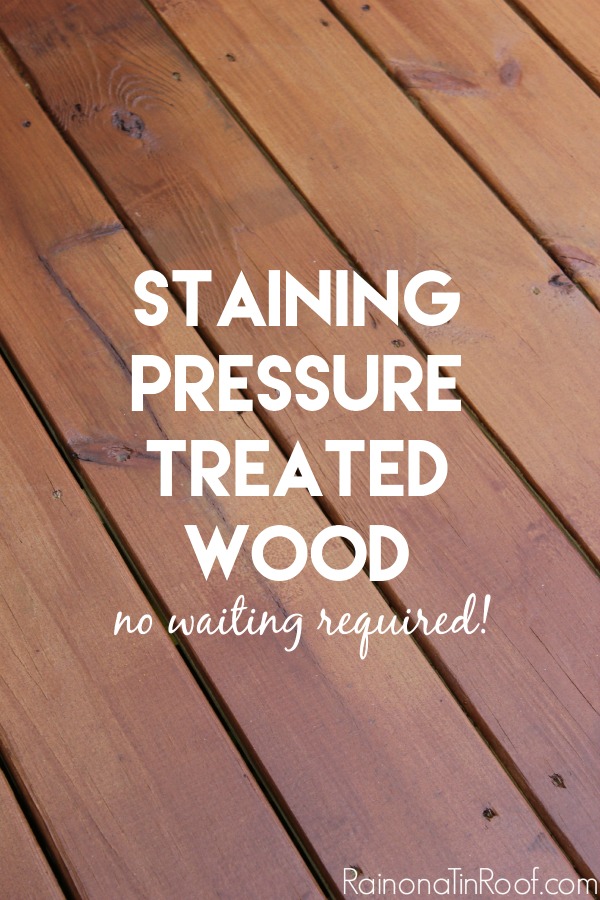
    Want to come back to this post later? Just pin the image below!

    Tips for Staining Pressure Treated Wood on a New Deck - Rain on a Tin Roof

    You know you don’t wanna miss any of this crazy.

    Sign up to get my posts delivered to your inbox here. 

    Stalk Me Here:

    Pinterest / Facebook / Twitter / Instagram

    Staining a New Deck - Rain on a Tin Roof

    SaveSave

  • 20+ Duck Tape Crafts and Projects You’re Gonna Love

    20+ Duck Tape Crafts and Projects You’re Gonna Love

    You guys know I love me some quick and easy crafts and projects with Duct Tape – particularly gold duck tape. I have used it to embellish curtains, make DIY art, and to dress up a bookcase.

    Ya’ll, that’s just the tip of the iceberg, though. You aren’t going to believe some of these awesome Duct Tape Crafts and Projects that I’ve found. Get ready to be inspired!

    This post contains affiliate links for your shopping convenience. Click here to read my full disclosure policy.

    Duct Tape Crafts and Projects for the Home

    Get your fringe on!

    Seriously?! DUCK TAPE FRINGE! And its easy to make! Duck Tape Fringe Pillow: Dress Up Boring Pillows on the Cheap via RainonaTinRoof.com

    Embellish pillows, curtains, lampshades and more with fringe made from duck tape! Find out how easy it is to do here!

    Head for the bathroom.

    DIY Shower Cornice with Black & White Shower Curtains via RainonaTinRoof.com #diy

    Make a custom, but super simple, cornice for your shower and then embellish it with duck tape!

    Trim out your curtains.

    Duck Tape Trim Curtains via RainonaTinRoof.com #ducktape #ikeacurtain #hack

    Got boring curtains? Spice them up by trimming them out along the edges with duck tape!

    Make your own art.

    I made this DIY art with a gift bag, then spiced it up with a little gold duck tape!

    Get floral with it.

    Duct Tape Crafts and Projects via RainonaTinRoof.com #ducttape #ducktape #crafts #projects

    Seriously, who knew that duck tape flowers could be so stinkin’ cute? Four Generations One Roof knew. That’s who.

    Faux Gold-Leaf It Up.

    Duct Tape Crafts and Projects via RainonaTinRoof.com #ducttape #ducktape #crafts #projects

    Let me be honest. I have never attempted gold leaf. I think I could do this faux gold leaf from Shwin & Shwin though.

    Grace your mantel with garland.

    Duct Tape Crafts and Projects via RainonaTinRoof.com #ducttape #ducktape #crafts #projects

    Ok, as soon as I saw this easy breezy duct tape craft, I wanted one. Charming Zebra is full of great ideas and this garland is no exception.

    Give your refrigerator the Midas touch.

    Duct Tape Crafts and Projects via RainonaTinRoof.com #ducttape #ducktape #crafts #projects

    The Hunted Interior is also full of great ideas that are simple, but make a big impact – like this refrigerator.

    Go for stripes and polka dots.

    Duct Tape Crafts and Projects via RainonaTinRoof.com #ducttape #ducktape #crafts #projects

    One of my favorite blogs on the planet is Dimples and Tangles. She is just full of wonderful, beautiful ideas. She gave a wall and her ceiling the duck tape treatment.

    Make diamonds with it.

    Duct Tape Crafts and Projects

    Ok, we all know The Nester is brilliant and amazing. So brilliant and amazing that she made this accent wall out of duct tape.

    Add a houndstooth touch in seconds.

    Duct Tape Crafts and Projects via RainonaTinRoof.com #ducttape #ducktape #crafts #projects

    I am a huge houndstooth fan. Yes, I am an Alabama fan, but it is also a classic pattern that never dates. In My Own Style had the genius idea to cover a step stool with houndstooth duct tape.

    Make a wreath.

    Duct Tape Crafts and Projects via RainonaTinRoof.com #ducttape #ducktape #crafts #projects

    I am just dying over how adorable this duct tape flowers wreath is from The Country Chic Cottage.

    Adorn your candles with it.

    Duct Tape Crafts and Projects via RainonaTinRoof.com #ducttape #ducktape #crafts #projects

    How great are these metallic candles from Something Turquoise? I’m usually not a big candle fan,  but I love these.

    Add stripes to boring vases.

    Duct Tape Crafts and Projects via RainonaTinRoof.com #ducttape #ducktape #crafts #projects

    Hi Sugarplum is another absolute favorite blog of mine. See that fab vase? She made it with duct tape.

    Create art.

    Duct Tape Crafts and Projects via RainonaTinRoof.com #ducttape #ducktape #crafts #projects

    I love how simple, yet stunning this Duck Tape art is from Less Than Perfect Life of Bliss.

    Accessorize your outfit.

    Duct Tape Crafts and Projects via RainonaTinRoof.com #ducttape #ducktape #crafts #projects

    Typically, I would never consider Duck Tape for clutch. However, Ginger Snap Craftsmakes this one look cool.

    Make jewelry.

    Duct Tape Crafts and Projects via RainonaTinRoof.com #ducttape #ducktape #crafts #projects

    52 Mantels made this really cool color block jewelry using duck tape. I love those colors.

    Go for an easy IKEA hack.

    Duct Tape Crafts and Projects via RainonaTinRoof.com #ducttape #ducktape #crafts #projects

    I love this quick duct tape project from Amy Krist. Such an easy IKEA hack.

    Create a fun homework spot.

    Duct Tape Crafts and Projects via RainonaTinRoof.com #ducttape #ducktape #crafts #projects

    Artchoo! had the idea to cover a desk with duck tape – how fun would this be for a kid?

    A buck head for the win.

    Duct Tape Crafts and Projects via RainonaTinRoof.com #ducttape #ducktape #crafts #projects

    I love buck heads. Love ’em to pieces. This duck tape deer head from DIY Candy is amazeballs.

    Make a pouch.

    Duct Tape Crafts and Projects via RainonaTinRoof.com #ducttape #ducktape #crafts #projects

    Less Than Perfect Life of Bliss knows her duck tape, y’all. She also made this cool zippered pouch with it!

     And if you are looking for more cheap craft ideas using tape, don’t miss these 7 Super Simple, Super Cute Electrical Tape Crafts!

    pin-this-post
    Duct Tape Crafts | Duct Tape Crafts for Kids and Teens | DIY Duct Tape Crafts | DIY Duct Tape Projects | Duct Tape Ideas

    What home decor crafts with Duct Tape will you come up with?

    You know you don’t wanna miss any of this crazy.

    Sign up to get my posts delivered to your inbox here. 

    Stalk Me Here:

    Pinterest / Facebook / Twitter / Instagram

    SaveSaveSaveSave

    SaveSaveSaveSaveSaveSaveSaveSaveSaveSaveSaveSaveSaveSaveSaveSaveSaveSaveSaveSaveSaveSaveSaveSaveSaveSaveSaveSaveSaveSaveSaveSaveSaveSaveSaveSaveSaveSave

  • Army Locker turned Toy Box

    Army Locker turned Toy Box

    My in-laws have totally been holding out on me.

    A few weeks ago, my mother-in-law and I were wondering through the garage gathering items for a yard sale and what did we stumble across?

    My father-in-law’s old army locker.

    Just sitting there.

    Waiting to be made into something awesome. 

    Army Locker turned Toy Box via RainonaTinRoof.com #makeover #armylocker #toybox #homeright #finishmaxpro
    Disclosure: I am a Brand Ambassador for HomeRight. However, all opinions and trouble comprehending how amazing this sprayer is, are 100% mine. This post contains affiliate links for your shopping convenience. Click here to read my full disclosure policy.

    Here’s how this baby started out.

    Army Locker turned Toy Box via RainonaTinRoof.com #makeover #armylocker #toybox #homeright #finishmaxproWell, maybe I shouldn’t say that’s how it started out. Of course, at one time it was the standard army color for lockers. Then my father-in-law said he plastered paisley fabric on it during his hippie days. And at some point it was yellow? So, the photo above is how it looked when I got it.

    I sanded it down and scraped off some remaining glue left behind from the paisley days, then gave it a coat of primer.

    What did you use to prime the piece with, you ask?

    I used Kilz primer on this one and………

    The new kid in town.

    Army Locker turned Toy Box via RainonaTinRoof.com #makeover #armylocker #toybox #homeright #finishmaxpro

    You guys.

    You guys.

    I’m seriously having trouble with this.

    I thought that nothing could top my HomeRight Finish Max paint sprayer. As you well know, I had been through other paint sprayers before and they were terrible. I had given up hope on ever finding a good paint sprayer. Then fate stepped in, and I fell in love with my Finish Max the first time I used it on this project.

    Yes, I just referred to fate having a hand in my love for my Finish Max.

    The Finish Max wasn’t just good, it was great. No runs, no drips, no messes.

    And then fate stepped in again.

    In the form of the new HomeRight Finish Max Pro.

    Just when I thought that HomeRight products couldn’t get more amazeballs, they proved me wrong.

    This new paint sprayer is essentially the same as the regular Finish Max, it just has even more of a fine finish than the regular one.

    I know – that’s hard to imagine. 

    If you have a HomeRight Finish Max, you know what I’m talking about. The finer finish comes from this hose that continually blows air through the sprayer.

    Army Locker turned Toy Box via RainonaTinRoof.com #makeover #armylocker #toybox #homeright #finishmaxpro

    All you do is attach the hose to the gun and turn it to lock it in as shown in the photo above. The other end goes into the main housing of the paint sprayer.

    Army Locker turned Toy Box via RainonaTinRoof.com #makeover #armylocker #toybox #homeright #finishmaxpro

    You still mix your paint as you normally would with the regular Finish Max and you can still adjust the spray pattern and volume of paint coming out.

    Army Locker turned Toy Box via RainonaTinRoof.com #makeover #armylocker #toybox #homeright #finishmaxpro

    And it still works by simply plugging it in, flipping the “on” switch and pulling the trigger.

    Army Locker turned Toy Box via RainonaTinRoof.com #makeover #armylocker #toybox #homeright #finishmaxpro

    No air tank needed.

    So, back to the army locker. After priming it, I gave it a coat of mint green and then a polycrylic top coat.

    Army Locker turned Toy Box via RainonaTinRoof.com #makeover #armylocker #toybox #homeright #finishmaxpro

    I gave the top a few coats of chalkboard paint to grow the budding artist’s talent.

    Army Locker turned Toy Box via RainonaTinRoof.com #makeover #armylocker #toybox #homeright #finishmaxpro

    I added a cute little “L” to the bottom corner of the chest.

    Everything needs a monogram or initial on it.

    Just sayin’.

    Don’t worry about the clean-up of the new kid. The Finish Max Pro is still just as easy to clean as the regular Finish Max which you can read about here. I know what you’re thinking – paint doesn’t go through that long tube, just air. You don’t have to wash it out every time.

    Army Locker turned Toy Box via RainonaTinRoof.com #makeover #armylocker #toybox #homeright #finishmaxpro

    And no, you can’t have my regular Finish Max. Its still amazing.

    See more furniture makeovers here.

    See more of my favorite tools and products for DIY projects here.

    You know you don’t wanna miss any of this crazy.

    Sign up to get my posts delivered to your inbox here. 

    Stalk Me Here:

    Pinterest / Facebook / Twitter / Instagram

  • Ranch Style House Tour

    Ranch Style House Tour

    **Updated Home Tour is HERE!**

    There have been a lot of changes around here lately.

    Like a lot.

    A guest bedroom and office makeover, a mini-master bedroom makeover, and lots of little projects in between all that.

    Needless to say, this gal is exhausted and a vacation can’t come soon enough.

    I was asked to be a part of the Spring Parade of Homes and thought that this would be the perfect time to update my full home tour, seeing as how so many things have changed. The last full home tour I did was last summer. You can see it here.

    If you are popping over from May Richer Fuller Be, or another blog in the parade, welcome! And if its your first time here, prepare yourself for snarky comments, witty jokes that may not seem so witty to you, and many references to cheap beer and possibly 80’s hair bands.

    Just wanted to give you the full disclosure before you begin the tour.

    Our home is a 1969 Ranch Style House and we love it.

    Rancher Remodel | Ranch Style Homes | Ranch House | Rancher Homes | Renovated Rancher House Tour | Remodeled Rancher House

    (more…)

  • Stenciled Leopard Skin Accent Wall

    Stenciled Leopard Skin Accent Wall

    I hope you just started singing Guns ‘N Roses Welcome to the Jungle after reading that title.

    You’re welcome.

    As I told you when I revealed the guest bedroom and office makeover on Monday, this space is a 100% selfish act.

    When I started plotting this makeover, yes, I wanted guests to enjoy the room, but it was going to contain my workspace as well. And I would be the one spending the most time in here. So, come Hades or high water, this space would be whatever my little heart desired.

    And it is.

    When I showed you the guest bedding a few weeks back, I hinted that the back wall would be getting a serious treatment, so the bedding didn’t need to be too patterned.

    That back wall did get a serious treatment – a serious leopard skin accent wall treatment.

    Disclosure: Cutting Edge Stencils provided me with the materials for this project. However, all opinions and love for animal prints are solely my own.

    Leopard Skin Accent Wall via RainonaTinRoof.com #leopard #animalprint #accentwall #stencil #cuttingedgestencil (more…)

  • Chic Guest Bedroom and Office Reveal

    Chic Guest Bedroom and Office Reveal

    Sometimes, I must think I’m Wonder Woman.

    At the beginning of every week, I create a list of what I need / want to get accomplished.

    The list is usually one full page of my large planner long and somehow I think I will be able to do all this stuff within the week.

    The only time I get to work on my projects and the blog is a few hours each day before the kid wakes up and after she goes to sleep, and for 4 1/2 hours two days a week while she is at preschool.

    I must be crazy.

    Not every item on that list ever gets checked off.

    Needless to say, I had planned on showing this completed guest bedroom and office space to you months ago.

    Yea, right.

    Whatever voice in my head telling me that was insane.

    You have seen some projects from it already, but you haven’t seen the whole enchilada.

    Guest Bedroom + Office Reveal {Guest Bedroom Ideas} via RainonaTinRoof.com #guestbedroom #bedroom #office #homeoffice (more…)

  • DIY Wall Decor with a Gift Bag

    DIY Wall Decor with a Gift Bag

    Guys, this may be one of my favorite Fifteen on Friday projects ever.

    Ok well, its right up there with the electrical tape lampshade, duck tape curtains, and lucite trays anyway.

    As you know, I am a huge fan of making my own DIY wall decor. I made my own prints with PicMonkey for my master bedroom, used the sassy printables on the sequined coat hangers, and  made my own silhouette art.

    This DIY modern art was by far one of the easiest home decor items I have ever created and I think it looks fab.

    And did I mention I made it with a gift bag?

    DIY Wall Decor with a Gift Bag via RainonaTinRoof.com #diy #walldecor #wallart #art #modernart (more…)

  • How to Stain Wood or Lattice the Easy Way {Lattice Refresh}

    How to Stain Wood or Lattice the Easy Way {Lattice Refresh}

    Remember back in November when I made a confession?

    I told you that I kinda, sorta, maybe, sometimes ignore the outside of my house.

    Well, a couple weeks ago it seemed as if spring was finally arriving here (it was a trick though!). It was sunny, it was nearly 70 degrees and the kid was at preschool (thank heaven).

    I certainly did not want to coop myself up in front of this computer all day. I thought it was a good time to spruce-up the porch a bit – seeing as how I have not touched it since its makeover nearly three years ago. And when I did do the makeover, I got pregnant half-way through and failed to touch the lattice on account of being tired all the time.

    At least that’s the excuse I’m giving.

    So, on that beautiful day a couple weeks ago, I figured out how to stain wood the easy way and gave my lattice a much needed refresh.

    How to Stain Wood Outdoors | How to Stain Lattice | Lattice Ideas | How to Clean Lattice

    How to Stain Wood the Easy Way

     Disclosure: This post was a collaboration with Thompson’s WaterSeal. However, all opinions and witty remarks are 100% mine. This post contains affiliate links for your shopping convenience. Click here to read my full disclosure policy.

    Seriously y’all, excluding drying time, this whole project took less than an hour.

    I have no idea when the last time was that this lattice had been touched.

    How to Stain Wood the Easy Way {Lattice Refresh} via RainonaTinRoof.com #stain #wood #lattice #Thompsons

    I hadn’t touched it since we bought the foreclosure and the house had sat vacant for a year before we got it. I know that the previous owner did not build the porch onto the front of the house, so I’m not sure if they ever spruced up the lattice or not.

    How to Stain Wood the Easy Way {Lattice Refresh} via RainonaTinRoof.com #stain #wood #lattice #Thompsons

    Either way, the lattice definitely needed a facelift.

    Ok, so let’s be real for a moment. Who really wants to stain lattice by hand? Do you see all those criss-crosses, nooks, and crannies? It would have taken forever for me to do this by hand. Like two days worth of preschool and ain’t nobody got time for that. The kid only goes to preschool two days a week and I need every second of that time to accomplish multiple projects.

    I had a trick up my sleeve, though. Remember when I did that mailbox makeover last year? I turned once more to Thompson’s WaterSeal Traditional Brown Wood Stain Spray.

    How to Stain Wood the Easy Way {Lattice Refresh} via RainonaTinRoof.com #stain #wood #lattice #Thompsons

    Yep, its just like spray paint, except its stain.

    To do the lattice, I didn’t tape anything off. I just took a piece of cardboard and held it up against the top of the lattice to keep the stain from getting on the painted wood. There were some places where the stain got on the painted wood, but it just wipes right off while wet or its an easy touch-up. Please excuse the fact that there is no picture showing me staining the lattice. I was all alone and I figured the roofers next door wouldn’t take time out of their work day to help a sister out.

    Here is a during photo though. The lattice on the left had just gotten the first coat and was still wet.

    How to Stain Wood the Easy Way {Lattice Refresh} via RainonaTinRoof.com #stain #wood #lattice #Thompsons

    Seriously y’all, I’m a little embarrassed to show you that photo. I don’t think I realized how bad the lattice was until I saw that huge difference.

    I did two coats total and it took about three cans for all of the lattice.

    How to Stain Wood the Easy Way {Lattice Refresh} via RainonaTinRoof.com #stain #wood #lattice #Thompsons

    How to Stain Wood the Easy Way {Lattice Refresh} via RainonaTinRoof.com #stain #wood #lattice #Thompsons

    Grunt Labor was quite impressed that I took some outdoor initiative when he got home. I didn’t tell him how easy it was. I just said I had worked all day and couldn’t possibly cook supper. hehehehe

    How to Stain Wood Outdoors | How to Stain Lattice | Lattice Ideas | How to Clean Lattice

    There you have it, how to stain wood the easy way.

    You can find Thompson’s WaterSeal spray stain at Wal-Mart and on Amazon.

    Now, I no longer have an excuse to neglect the outdoors. But please, don’t tell Grunt Labor about my secret weapon!

    More outdoor projects you might just want to see…

    Staining Pressure Treated Wood –No Waiting Required!

    DIY Cedar Planter Box – so pretty and a great way to display your house numbers as well!

    Mailbox Makeover– took less than an hour and such a big impact!

    How to Clean Your Sidewalk – had no idea mine was so dirty!

    You know you don’t wanna miss any of this crazy.

    Sign up to get my posts delivered to your inbox here. 

    Stalk Me Here:

    Pinterest / Facebook / Twitter / Instagram

  • Master Bedroom Mini-Makeover

    Master Bedroom Mini-Makeover

    So, remember a few weeks back when I created this whole master bedroom inspiration board?

    Remember how we were looking at building on a new master suite?

    Exactly one day after that post published, we met with a contractor. We walked him around the house, showed him what we wanted to do, and then he gave us a heartfelt smile and said, “It won’t work. I’ve never seen a house more stuck than yours.”

    Seriously?

    Yes. I kid you not.

    Now, we really don’t need a new master suite. We really don’t need anymore space at all, though it would be nice. And honestly, we could live in less than we have and we are are truly blessed to have what we do have.

    And that was a lot of “haves” in the last sentence.

    But, I figured if I’m not going to get a new master suite, I’m at least going to give the current one a mini-makeover. And what better time to show you that master bedroom makeover and share with you my master bedroom ideas than on the last round of What’s Your Style.

    This post contains affiliate links for your shopping convenience. Click here to read my full disclosure policy.

    Master Bedroom Ideas {A Mini-Makeover} via RainonaTinRoof.com #masterbedroom #bedroom #makeover #homedecor #interiordesign

    (more…)

  • Super Easy No-Sew Upholstered Box Spring

    Super Easy No-Sew Upholstered Box Spring

    When I showed you the guest bedroom’s new bedding a couple weeks back, some of you guys asked about the upholstered box spring. I hadn’t really planned on posting about it because I’ve seen a few other tutorials out there on how to do it.

    But, since you asked, here is how I made my upholstered box spring. And of course, it’s no-sew. If I don’t have to sew – I don’t!

    DIY Upholstered Box Spring | Upholstered Bed | Upholstered Box Spring DIY | Fabric Covered Box Spring | How to Upholster a Box Spring

    (more…)

  • Duck Tape Trim Curtains

    Duck Tape Trim Curtains

    I hope you are ready for some great projects and inspiration! Today, I’m very excited to show you how I salvaged the curtains in my guest room / office instead of having to buy new ones.

    Duck Tape Trim Curtains via RainonaTinRoof.com #ducktape #ikeacurtain #hack
    Duck Tape Trim Curtains

    This post contains affiliate links for your shopping convenience. Click here to read my full disclosure policy.

    That’s right, people, I used Duck Tape on my curtains.

    When I was plotting out the guest bedroom and office, I knew something had to happen with the curtains. They were just basic IKEA white panels and they were boring. We had them left over from our old house and there they had been against dark blue walls and worked perfectly.

    I wanted to switch out the curtains completely and had them pulled down and ready to go in the yard sale pile.

    But………..

    I really didn’t want to spend money on new curtains. Surprise, surprise.

    So, I held onto them for a little while longer. And then one day, while meandering through Michael’s attempting to keep the kid from jumping out the cart and escaping my rule, I happened upon Gold Duck Tape. Gold Duck Tape. 

    My heart stopped.

    I had to catch my breath.

    And it was on sale.

    I snatched up two of those bad boys, the kid, and headed for the cash register.

    Because I didn’t have much time, and wanted to make this as easy as possible, I just put the Duck Tape along the edges of the curtains and called it done.

    Duck Tape Trim Curtains via RainonaTinRoof.com #ducktape #ikeacurtain #hack

    Check out the askew pull on that chest. Obviously, I’m a perfectionist.

    Duck Tape Trim Curtains via RainonaTinRoof.com #ducktape #ikeacurtain #hack

    The Duck Tape has been on the curtains for over a month and hasn’t budged.

    Duck Tape Trim Curtains via RainonaTinRoof.com #ducktape #ikeacurtain #hackWhat do you think? Can you embellish some curtains with Duck Tape?

    Want more great tape crafts, hacks and DIY projects? I love ’em too! Be sure to see these…

    There are 20+ Duct Tape craft and project ideas here! 

    Find out how to make gorgeous fringe out of duck tape to add to pillows, lampshades and more here!

    Got some electrical tape on hand – easily dress up a lampshade with it using this tutorial!

    And don’t miss these seven super simple, super cute electrical tape crafts either!

    You know you don’t wanna miss any of this crazy.

    Sign up to get my posts delivered to your inbox here. 

    Stalk Me Here:

    Pinterest / Facebook / Twitter / Instagram

    SaveSave

  • Coral and Mint Nightstand Makeover

    Coral and Mint Nightstand Makeover

    You guys, spring is finally starting to show up around these parts! I can hardly contain my excitement! I hope its warming up wherever you are as well. I thought I would share this nightstand makeover with you because its cheerful colors just beg spring to come on now!

    Mint and Coral Nightstand Makeover via RainonaTinRoof.com #makeover #nightstand #DIY

    This post contains affiliate links for your shopping convenience. Click here to read my full disclosure policy.

    I actually did this makeover last fall. I just never got around to posting about it. And then when I started to post about it, it was winter, and I thought it would just be a better spring post with its colors.

    This piece was seriously heavy for a nightstand. It was solid wood, but had a laminate-ish top and sides. Strange, but it had potential.

    Mint and Coral Nightstand Makeover via RainonaTinRoof.com #makeover #nightstand #DIYAnytime I makeover a small piece of furniture like this, I try to use paint I already have. I hate going out and buying a can of paint for one small piece. In other words, I’m cheap. Luckily, I had enough of the salmon pink from the kid’s dresser in her nursery, and mint green from another project to do the job.

    Mint and Coral Nightstand Makeover via RainonaTinRoof.com #makeover #nightstand #DIY

    Since there was some laminate, I gave the entire piece a coat of Zinnser primer first, and then the mint. I used my HomeRight FinishMax to paint the entire piece except the drawers.

    Mint and Coral Nightstand Makeover via RainonaTinRoof.com #makeover #nightstand #DIY

    I just brushed the coral paint on them while the mint was drying. I kept the original hardware and updated it with white spray paint.

    And did you notice I distressed this piece?

    And I hardly ever distress any furniture, unless I have to.

    You see, I accidentally bumped into it while the paint was drying and smudged it. So, rather than having to paint it again, I just waited until it was dry, sanded the smudge a bit and then the rest of it. I sprayed the whole thing with a coat of Polycrylic afterwards.

    Lazy, I was. But, I actually love how the distressing turned out on this piece. What do you think?

    Need more furniture painting tips and ideas? You’ll want to see these then…

    How to Make Furniture Glaze in Any Color – the possibilities are endless and this is easy!

    How to Create a Beachy Colored Look on Furniture – this gives furniture a cool washed-out beach look!

    Painting 101 – Everything you could ever want to know about painting furniture – tips, tricks, FAQ, and so much more!

    And you can always see all my furniture makeovers here.

    You know you don’t wanna miss any of this crazy.

    Sign up to get my posts delivered to your inbox here. 

    Stalk Me Here:

    Pinterest / Facebook / Twitter / Instagram

    SaveSave

  • 20+ Living Room Ideas

    20+ Living Room Ideas

    Y’all, I never thought in a million years I would ever show you my living room. Seriously. I don’t know why, but for me, decorating the living room has always been a struggle. I’m not even quite sure what it is. To inspire me in my living room endeavors and to hopefully inspire you, I’ve gathered 20+ living room ideas that will hopefully help us all out. Unless you are a living room decorating genius. In that case, I bow down in your genius presence.

    20+ Living Room Decorating Ideas

    Create a Gallery Wall Around Your Television

    Looking for BIG bang for your buck? Here are 9 Accent Walls for $30 or Less - includes lots of wall painting ideas, techniques and designs - and they are all DIY projects! Great painting ideas including this black and white gallery wall!

    In the living room at our Beloved Foreclosure, I created a black and white gallery wall around our television. It helped to distract the eye away from the not-so-pretty television and also worked in meaningful art pieces to us. It was a pretty simple project and you can see how I did it here.

    Don’t paint over the knotty pine – work with it!

    Living Room Ideas - Knotty Pine Paneling

    We have knotty pine paneling at our farmhouse and I wouldn’t change it for a thing! Instead of working against it and trying to cover it up, I work with it – here’s how!

    Mix and Match with a Collected Modern Living Room

    Whoa. This living room is stunning - the perfect combination of modern style mixed with vintage pieces. Modern Living Room

    You can tour my whole Collected Modern living room that includes the black gallery wall and get easy and affordable ideas for your space as well.

    Waterproof Living Room Upholstery

    How to waterproof fabric and protect upholstery against stains! Great to know! 9 MUST READ Cleaning Tips!To keep those pretty sofas and chairs looking newer longer, give them a protective coat that will waterproof and repel stains from the material. Find out how here. No plastic covers from the 70’s needed. 🙂

    Go Traditional, but Casual

    Traditional Casual Living Room - living room decor ideas for a traditional, but casual and comfortable room.

    In our farmhouse, we opted for a traditional living room that would stand the test of time, but also a casual one that we could relax in. Tour it here.

    Give Black Walls a Chance

    Love black walls but not sure how to decorate with them? Here are great decorating ideas for rooms with black walls!

    In the living room at our 70’s Landing Pad, I really wanted to create a dramatic, 1970’s but updated feel. Black walls and deep jewel tones helped to achieve that look. Tour the space here.

    Got that 70’s Paneling? No problem!

    Living Room Ideas - working with paneling.

    If you’ve got some serious 70’s wood paneling going on, don’t fear! Here are five ways to decorate around it and make it look good!

    Add Pops of Color with Accent Chairs

    Fuchsia Upholstered Accent Chair | Affordable Accent Chairs for $300 or Less | Accent Chairs for Living Room | Upholstered Chairs | Upholstered Accent Chair

    Affordable accent chairs are a great way to add pops of color and pattern to a space! Here’s a list of 20 affordable, upholstered accent chairs.

    Go for Oversized Art

    Love black walls but not sure how to decorate with them? Here are great decorating ideas for rooms with black walls!

    Create a stop-you-in-your-tracks focal point with big, oversized art. Some of my favorite pieces of oversized art is here, along with the easiest way to hang them.

    Duck Tape Those Curtains

    Duck Tape Trim Curtains v

    If all you can afford are some basic curtains, spice them up by trimming them out with duck tape along the edges. Here’s how I did mine.

    Layer Your Rugs

    DIY Cowhide Rug (No Painting Required!)

    I really wanted to have some pattern mixing in my living room and I really wanted a cowhide rug. I didn’t have the money for a real cowhide rug, so I made my own DIY Cowhide Rug.

    Create a Meaningful Gallery Wall

    A Southern Girl's Gallery Wall via RainonaTinRoof.com #gallerywall #mothersday #balsamhill

    I am a huge fan of decorating with objects that are meaningful or attached to special memories. My Southern Girl’s Gallery Wall does just that.

    Neutral is Beautiful

    20+ Living Room Ideas via RainonaTinRoof.com #livingroom

    If there is anyone that can show us how beautiful a neutral living room is, its Jamie. Don’t miss these neutral, yet beautiful living room ideas.

    Choose Two Colors and Go With It

    20+ Living Room Ideas via RainonaTinRoof.com #livingroom

    Charming Zebra’s living room space is just calling my name. I LOVE those chairs. The dark color she has on the wall is balanced perfectly with all the white accents.

    Create a Photo Gallery Above Your Sofa

    20+ Living Room Ideas via RainonaTinRoof.com #livingroom

    I love photos. I love displaying photos. The problem is that I don’t always know how to display them beautifully. I love how Suburbs Mama created a photo gallery above her couch.

    Mix Rustic with Glam

    Rustic Glam Living Room

    I love this mix of rustic and glam that Jones Design company has going on. The linen couch has a rustic-y feeling while that mirrored side table is 100% glam. Genius combination.

    Install Board & Batten to Create a Cozy Cottage Feel

    Board and Batten in the living room

    The Wood Grain Cottage installed board and batten in her living room. It creates such a cozy feeling.

    Go Bold with Red

    20+ Living Room Ideas via RainonaTinRoof.com #livingroom

    I mentioned that I was adding more red to our living room when I showed you the buffet makeover. I love all of Carmel’s red touches in her living room. And that gold trunk as a coffee table – I die.

    Add Built-Ins to Anchor Your Space

    Living Room Built-Ins

    I have always been a huge fan of built-in bookcases on either side of a fireplace like Making Lemonade has in her home. They are a classic.

    Mix Patterns and Textures with Both Fabric and Furniture

    Patterns and Textures in the Living Room

    I will fully admit that I stalk Dimples and Tangles. She can mix patterns and textures like nobody’s business and we both share a love for green. I would have never thought a rattan chair could be so fabulous, but she made it happen in her space.

    Mix and Match Pillow Patterns

    Living Room Pillows - mixing and matching

    House by Hoff shares some great tips for mixing patterns with pillows – something I always struggle with.

    Make Your Coffee Table More Functional

    20+ Living Room Ideas via RainonaTinRoof.com #livingroom

    Check out AKA Design’s coffee table. Its large, so it can accommodate lots of goodies, but its also a chest. Hello storage!

    Go Overboard with Pillows

    20+ Living Room Ideas via RainonaTinRoof.com #livingroom

    I have drooled over this photo from Blue Skies and Sunshine numerous times. Seriously – all those pillows are just begging me to jump on them. And the colors and patterns are perfectly mixed.

    Formal, but Beautiful Living Room

    20+ Living Room Ideas via RainonaTinRoof.com #livingroom

    Some of you may not know, but Sarah Richardson is my absolute favorite designer. I love everything she does. Everything. This living room is very formal, but its just so beautiful. The soft touches of pink are gorgeous.

    Light & Bright Colorful Living Room

    20+ Living Room Ideas via RainonaTinRoof.com #livingroom

    Hi Sugarplum is another gal who can mix colors and patterns like nobody’s business. I love all the bright colors on her couch.

    Go Bold With Your Sofa

    20+ Living Room Ideas via RainonaTinRoof.com #livingroom

    Ok, so I know this one isn’t exactly real life for most of us I mean, my circus would have that glass coffee table shattered in 2.1 seconds. However, I just couldn’t resist not showing you this gorgeous blue velvet couch. I’m also a huge fan of how the art is hung on the bookcase. I’ve seen that in many places before, and I want to fit that in somewhere in my home.

    My head is swimming with living room decor ideas.

    What about you?

    Do you have any great real-life living room decorating ideas to share?

    Loved these? You’ll want to see these awesome home decorating ideas too then….

    How to Coordinate Paint Colors Throughout your Whole House – SO much easier than you think!

    10+ Kitchen Ideas for Decorating, Organizing, and Storage – ideas that are functional and beautiful!

    14 Real Life Bedroom Ideas Anyone Can Do – seriously great ideas that are doable!

    How to Accessorize a Space without Over-Accessorizing – it can be tricky, right?!

    You know you don’t wanna miss any of this crazy.

    Sign up to get my posts delivered to your inbox here. 

    Stalk Me Here:

    Pinterest / Facebook / Twitter / Instagram

    pin-this-post-2

    Living Room Ideas | Living Room Decor | Living Room Decor on a Budget | Living Room Wall Decor | Living Room Paint Color Ideas

    SaveSaveSaveSave

    SaveSaveSaveSaveSaveSave

    SaveSave

  • Faux Brass Capped Feet (A.K.A Ferrules and Sabots)

    Faux Brass Capped Feet (A.K.A Ferrules and Sabots)

    Here’s a quick little project that adds a little pop to your furniture.

    You may have noticed in the red buffet makeover, that the feet of said buffet were sporting a little touch of metal.

    You see, I have this thing for metal feet on furniture. Once I saw brass feet on the vintage chair for Grunt Labor that now sits in our living room, it was a done deal.

    I’m takin’ it home, baby.

    I’m sure you could buy these brass caps, also known as ferrules and sabots (look at me breaking out the big words – crazy what you learn as a blogger!), but I don’t know where and I did a version of it myself anyway.

    Here’s how I made my faux brass capped feet.

    Faux Brass Capped Feet via RainonaTinRoof.com

    Faux Brass Capped Feet

    This post contains affiliate links for your shopping convenience. Click here to read my full disclosure policy.

    After painting the buffet, I simply wrapped FrogTape around each foot of the buffet. I measured the chair I already had with brass capped feet to get an idea of how far up to go. I put the tape on at 1 1/4 inches up.

    Faux Brass Capped Feet via RainonaTinRoof.comAnd then I just applied Rub ‘N Buff below the tape.

    And yes, that floor is dirty.

    And yes, those cords are a hot mess.

    Just keepin’ it real.

    Remove the tape and you have brass capped feet.

    Faux Brass Capped Feet via RainonaTinRoof.com

    Just a little somethin’ somethin’ that adds to your piece.

    What will you add brass capped feet to?

    Need more super easy DIY and craft projects? Don’t miss these then…

    Make your own gorgeous agate slice lamp finials using this tutorial – it’s so easy!

    Dress up your lamps with these super simple five minute lamp tassels!

    Learn how to make faux crystals here and then turn them into cabinet knobs, magnets, finials and more!

    You know you don’t wanna miss any of this crazy.

    Sign up to get my posts delivered to your inbox here. 

    Stalk Me Here:

    Pinterest / Facebook / Twitter / Instagram

    SaveSave

  • Accent Wall: Rich Navy Entryway

    Hi, my name is Jenna and I’m an over-analyzer.

    The last time I over-analyzed something was just yesterday this morning.

    I am easy going on many things. Most of the time, I’m just a “It is what it is” kind of girl.

    But then, I start thinking about fabric and paint swatches and should I place this brass golf ball here or maybe here or maybe it needs to be on top of a vintage book…

    Sheesh…. it never ends.

    Case in point: The new rich navy accent wall in my entryway.

    Rich Navy Accent Wall via RainonaTinRoof.com #homeright #richnavy #accentwall

    Rich Navy Accent Wall

    Disclosure: This post is sponsored by HomeRight. Y’all know how I roll though, all opinions and over analyzations are 100% mine. This post contains affiliate links for your shopping convenience. Click here to read my full disclosure policy.

    This was one of the quickest and most simple projects I have ever done, yet it took me around two months to decide what I wanted to do with the wall.

    It went something like this in my head:

    Maybe I should stencil that tiger stripe on the wall from my bar cart makeover.

    No, maybe I should do wide stripes.

    No, stripes are everywhere.

    Maybe I should do more faux moldings.

    Maybe I should do a different stencil.

    Maybe I should do vertical stripes.

    Maybe, maybe, maybe……

    Then one day, while in a stare down with said wall, telling it that it would not beat me on this, it dawned on me.

    Why not just do one single, simple, solitary color for the accent wall?

    And then as if it were meant to be, my brain responded with navy.

    Seriously? It took two months to figure that out. Geez.

    Once the decision was made, I tested out a few navy shades and went with Rich Navy by Behr. I used my and it took no time at all to do this wall.

    Rich Navy Accent Wall via RainonaTinRoof.com #homeright #richnavy #accentwall

    That’s the same PaintStick I used on my Repose Gray walls, except its a smaller version and doesn’t twist, you just push it.

    Push it real good.

    Sorry, I couldn’t resist a little Salt ‘N Pepa action there.

    The PaintStick Mini is great for small jobs and tight spaces (and its only $15!) – exactly what that accent wall was.

    Rich Navy Accent Wall via RainonaTinRoof.com #homeright #richnavy #accentwall

    Everything just seems to pop beautifully off the navy.

    Rich Navy Accent Wall via RainonaTinRoof.com #homeright #richnavy #accentwallThe Rich Navy is also a perfect contrast to the Repose Gray in the rest of the main living area.

    Rich Navy Accent Wall via RainonaTinRoof.com #homeright #richnavy #accentwallThe moral of this story is don’t over-analyze. Seriously, y’all. Save yourself time. Sometimes the easiest and most dramatic look can be achieved with one color and one fabulous tool. My accent wall is the perfect example.

    If you liked this accent wall, you may like my Leopard Print Accent Wall as well.

    Need more accent wall ideas? I’m your girl – here are a slew of different ideas for painting your walls in all sorts of gorgeous colors and patterns!

    You know you don’t wanna miss any of this crazy.

    Sign up to get my posts delivered to your inbox here. 

    Stalk Me Here:

    Pinterest / Facebook / Twitter / Instagram

    SaveSave

  • Free Printable Quotes (Sassy, Witty, and Fun!)

    Free Printable Quotes (Sassy, Witty, and Fun!)

    This Fifteen on Friday, I wanted to give you a gift. Something that still takes less than 15 minutes, but is absolutely free to you.

    With the exception of printer ink and paper. Sorry.

    Its not much, some of you won’t even like it, but its the best I can do.

    If I could, I would buy each of you a cheap beer. But, for now, these free printable quotes will have to suffice.

    Free Printable Quotes (Sassy, Witty, and Fun!) via RainonaTinRoof.com #printable #quotes

    Free Printable Quotes

    Some of you may remember seeing Haters Gonna Hate and Don’t Be Like the Rest of Them, Darling hanging from my sequined coat hangers.

    Free Printable Quotes (Sassy, Witty, and Fun!) via RainonaTinRoof.com #printable #quotesAnd some of you even said you wanted them!

    A big thank you to The Girl Creative for letting me use her printable scrapbook paper on one of images!

    Well, here ya go.

    You get:

    Haters Gonna Hate

    Don’t Be Like the Rest of Them, Darling

    You Always Look So Cool

    Y’all Gonna Make Me Lose My Mind. Up in Here. Up in Here.

    We’re Just Like You Only Prettier

    To get your free printable quotes, you need to be an email subscriber to Rain on a Tin Roof.

    Free Printable Quote Art

    After confirming your subscription, you will be directed to a page to download your freebies!

    I really hope you guys enjoy these!

    What will you do with yours?

    Need more great printable art? Don’t miss these then…

    This Kitchen is for Dancing Printable Art

    Find Her Jesus, Keep Her Well (Miranda Lambert song lyrics) Printable Art

    Free Printable Horse Art

    You know you don’t wanna miss any of this crazy.

    Sign up to get my posts delivered to your inbox here. 

    Stalk Me Here:

    Pinterest / Facebook / Twitter / Instagram

  • Vintage Modern Rustic Kitchen Tour

    Vintage Modern Rustic Kitchen Tour

    Are you tired of my kitchen yet?

    If I were you, I may be tired of my kitchen.

    But, here’s hoping you aren’t tired of my kitchen.

    Because, its the second round of the What’s Your Style series, which means we are talking kitchens.

    So today, I’m sharing a little bit more about my Vintage Modern Rustic Kitchen.

    There are a few changes since the last time you saw it.

    Rustic Kitchen | White Kitchen | Kitchen Remodel | Kitchen Ideas | DIY Kitchen Ideas | Painted Kitchen Cabinets | DIY Kitchen IslandVintage Modern Rustic Kitchen

    This post contains affiliate links for your shopping convenience. Click here to read my full disclosure policy.

    During the first round of What’s Your Style, we determined that my style was Vintage-Modern-Rustic.

    And that shockingly, it all works together.

    I showed you my living room (something I never thought would happen) and we chatted about all the different elements.

    Today, let’s chat about the kitchen.

    Obviously, the most rustic piece in my kitchen is the island.

    Vintage Modern Rustic Kitchen via RainonaTinRoof.com #vintage #modern #rustic #kitchen #whatsyourstyle

    As you know, Grunt Labor and I built the island ourselves (sans the countertop). I painted it a crisp white, but left the bottom shelf of barn wood untouched. I love that look of barn wood mixed with clean white paint.

    Vintage Modern Rustic Kitchen via RainonaTinRoof.com #vintage #modern #rustic #kitchen #whatsyourstyleThe barstool makeover‘s brought them a bit more in the modern realm.

    And did you notice the new addition over the island?

    Vintage Modern Rustic Kitchen via RainonaTinRoof.com #vintage #modern #rustic #kitchen #whatsyourstyleI finally found some pendant lights I loved. They are much more modern than the light fixture over the sink, which may get switched out soon.

    Vintage Modern Rustic Kitchen via RainonaTinRoof.com #vintage #modern #rustic #kitchen #whatsyourstyleOf course, my kitchen would not be complete without a touch of cotton somewhere.

    Vintage Modern Rustic Kitchen via RainonaTinRoof.com #vintage #modern #rustic #kitchen #whatsyourstyleAnd intricate hand iced cookies. Why, yes, I did make those. And no, I’d  never lie to you about something like perfectly iced cookies. *evil laugh*

    Isn’t the little vintage plate the cookies are on adorable? I have a small set of those that were my aunt’s. The cream and sugar set go well with the vintage coffee jar.

    Vintage Modern Rustic Kitchen via RainonaTinRoof.com #vintage #modern #rustic #kitchen #whatsyourstyle

    The open shelving has a bit of a rustic touch with the stained wood, but not as much as the island.

    Vintage Modern Rustic Kitchen via RainonaTinRoof.com #vintage #modern #rustic #kitchen #whatsyourstyleI will say that I love all the “white-ware,” but I’m not quite sure its still working for me. It may get changed soon.

    Vintage Modern Rustic Kitchen via RainonaTinRoof.com #vintage #modern #rustic #kitchen #whatsyourstyleThe metal basket cookbook storage is another vintage touch.

    Vintage Modern Rustic Kitchen via RainonaTinRoof.com #vintage #modern #rustic #kitchen #whatsyourstyleMy mother-in-law bought me this fabulous caddy from Pottery Barn. Its probably supposed to be used outside, but it is perfect to corral all the clutter on the countertops.

    Vintage Modern Rustic Kitchen via RainonaTinRoof.com #vintage #modern #rustic #kitchen #whatsyourstyleIn the last kitchen tour, many people asked about my faucet. We bought it at Lowe’s and it was only $100 – a great price for a faucet. It has held up perfectly.  To me, it has an old farmhouse feel which works well with the island, but it contrasts nicely against the classic subway tile backsplash.

    Vintage Modern Rustic Kitchen via RainonaTinRoof.com #vintage #modern #rustic #kitchen #whatsyourstyleI use a modern wood container to hold my salt, pepper, olive oil, etc. by the stove. Its easy access and makes the necessities a bit prettier. The same goes for the silver pitcher – a Goodwill find. I’m not quite sure what the round piece of wood is from that is behind it all. I picked it up at one of my favorite local shops because I thought it would be a nice contrast with the backsplash.

    That’s it. My Vintage Modern Rustic Kitchen in a nutshell.

    Do you have any vintage, modern, or rustic elements in your kitchen?

    Need more kitchen ideas and inspiration? Be sure to see these then…

    Love white kitchens? Then get more white kitchen inspiration here!

    Need kitchen island ideas? Here are 7 Kitchen Island Ideas you haven’t thought of…

    Ready to paint your kitchen cabinets? Then be sure to read this post about all the different types of paint for cabinets and details on each.

    Want more general kitchen ideas? Then see these 10+ Kitchen Ideas for Decorating, Organizing, and Storage

     You know you don’t wanna miss any of this crazy.

    Sign up to get my posts delivered to your inbox here. 

    Stalk Me Here:

    Pinterest / Facebook / Twitter / Instagram

    SaveSave

  • How to Build a Desk (Using Furniture You Already Have)

    How to Build a Desk (Using Furniture You Already Have)

    When I walked through the back door, I knew he would either be in his recliner or at the kitchen table.

    If he was in his recliner, there was a 50 / 50 chance he had fallen asleep with a cigarette in hand and either Bonanza or In the Heat of the Night blaring from the television.

    If he was expecting me and it was morning, he would most likely be at the kitchen table, facing me when I walked through the door, flipping through a magazine he had pulled from the stack that was a foot tall and rising.

    This kitchen table was more than a table to me.

    I sat on this table and ate my first birthday cake and drank milk from a mustard bottle.

    I sat at this table and watched my grannie make me milkshakes.

    I sat at this table and watched my pap try to make those same milkshakes after Grannie died.

    I sat at this table and said my first curse word as I stuck a fork into a potato.

    I sat at this table as he told me he would work on the tractor and I would mow the grass. I may hurt myself on the tractor.

    I sat at this table with every cookbook of my grannie’s open, looking for that one chicken spaghetti recipe that my pap wanted so much to make.

    I sit at this table now and write this post.

    This table has been around as long as I can remember. Its solid, its sturdy, and if there is one piece of furniture that I want to work at every day, its this one. Its got a good history.

    And we all know a piece of furniture with a good history is the best.

    How to Build a Desk (Using Furniture You Already Have) via RainonaTinRoof.com #desk #diy #furnituremakeover

    How to Build a Desk Using a Kitchen Table

    This post contains affiliate links for your shopping convenience. Click here to read my full disclosure policy.

    This table actually has two leaves that go with it. They fold down, but when they are folded down, they block your knees and its uncomfortable. Because of this, I just unscrewed them from the table.

    How to Build a Desk (Using Furniture You Already Have) via RainonaTinRoof.com #desk #diy #furnituremakeoverThe top part, the hutch, actually came with that dresser I paid $10 for at a yard sale and turned into my buffet. I didn’t really need the hutch on the buffet, so I just took it off, but knew I would end up having the perfect project for it one day.

    How to Build a Desk (Using Furniture You Already Have) via RainonaTinRoof.com #desk #diy #furnituremakeoverOnce the table was in place, we set the hutch on top of it, then Grunt Labor found a stud and secured the hutch to the wall with a screw.

    How to Build a Desk (Using Furniture You Already Have) via RainonaTinRoof.com #desk #diy #furnituremakeoverI painted it all glossy black to match the moldings and other black accents in the guest bedroom. Then, I “dipped” the feet with gold spray paint.

    How to Build a Desk (Using Furniture You Already Have) via RainonaTinRoof.com #desk #diy #furnituremakeover

    I kept my Jonathan Adler inspired chair in the room as my office chair.

    How to Build a Desk (Using Furniture You Already Have) via RainonaTinRoof.com #desk #diy #furnituremakeoverAnd added a fun pillow to keep me workin’ hard.

    How to Build a Desk (Using Furniture You Already Have) via RainonaTinRoof.com #desk #diy #furnituremakeoverAnd I love it. I seriously love working in this space every single day. I smile every time I look at my new office space.

    Its functional, its stylish, it was affordable, and most importantly, it has a history.

    My history.

    Loved this one? Be sure to see these projects too then…

    DIY Chippendale Desk – a gorgeous, easy to build desk with beautiful chippendale panels on the ends.

    DIY Kitchen Island – made using old porch posts and barn wood!

    DIY Ottoman Coffee Table – turn a coffee table into an ottoman or bench!

    A Dress-Up Station Made from a Bookshelf – perfect for kiddos and an easy project!

    How to Build a Desk (Using Furniture You Already Have) via RainonaTinRoof.com #desk #diy #furnituremakeover

    You know you don’t wanna miss any of this crazy.

    Sign up to get my posts delivered to your inbox here. 

    Stalk Me Here:

    Pinterest / Facebook / Twitter / Instagram

  • Waxing Furniture {The Easy Way}

    Waxing Furniture {The Easy Way}

    DIY blogger confession time:

    Until a couple weeks ago, I had only attempted to wax two pieces of furniture.

    One turned out so-so.

    The other was a complete failure.

    In the end, the failure, the french country chest ended up with a light sanding and a coat of Polycrylic.

    Disclosure: This post is sponsored by HomeRight. Y’all know how I roll though, all opinions are 100% mine. This post contains affiliate links for your shopping convenience. Click here to read my full disclosure policy.

    I would now like to announce that I am a waxing furniture pro.

    Yes, after only one successful piece of furniture waxed two weeks ago, I am declaring myself a pro.

    I don’t have an ego at all.

    However, my pro-ness in the waxing furniture department depends on one thing.

    The AutoRight cordless detailing polisher, made by HomeRight.

    Yes, I turned to the big guns to perfect my waxing skills and it was so worth it.

    How to Wax Furniture the Easy Way | How to Wax Furniture Tutorial | Waxing Furniture | Waxing Furniture Tips | How to Wax Wood Furniture

    Last week, I showed you this beauty.

    Buffet Makeover via RainonaTinRoof.com #buffet #makeover #red #countrychicpaint

    And when I showed it to you, I hinted around that I had discovered the easiest way to waxing furniture. There are only four steps.

    The Easiest Way to Wax Furniture

    How to Wax Furniture the Easy Way | How to Wax Furniture Tutorial | Waxing Furniture | Waxing Furniture Tips | How to Wax Wood Furniture

    #1 – Attach foam pad to the polisher and rub it around in the wax of your choice. If the can isn’t big enough to rub it around in, spread a little on the pad with a knife (that’s what I did.)

    #2 – Can you push a button? You can? Good. That’s all you have to do to apply the wax to the furniture. Simply pull the trigger and watch that bad boy coat your piece in wax. The foam pad is great for getting into tight spots.

    #3 – After letting your wax sit for a while, attach the cute little blue bonnet to the polisher.

    #4 – Pull the trigger again and watched your piece become polished to perfection.

    That’s it. This polisher makes waxing so much easier and now I can actually use wax on pieces!

    Would you like your own? You can buy one on Amazon for around $55. Not too shabby for a tool that is life changing.

    Need more furniture hacks and makeovers? You’re going to want to see these then…

    Questions about painting furniture, trim, cabinets and more? Start here with the complete guide to painting EVERYTHING!

    Questions about furniture topcoats in general? Head HERE.

    Learn how to make furniture glaze in any color you want to HERE!

    Want to get the details on using a paint sprayer for furniture painting? Go here then! 

    You know you don’t wanna miss any of this crazy.

    Sign up to get my posts delivered to your inbox here. 

    Stalk Me Here:

     Pinterest / Facebook / Twitter / Instagram

  • Sequined Coat Hangers

    Sequined Coat Hangers

    Last week when I showed you the faux wall moldings, many of you mentioned the sequined coat hangers.

    Who knew a coat hanger could be so fabulous?

    When I was trying to figure out how I could make frugal wall decor for the guest bedroom, I knew I wanted to have lots of inspiring and fun life quotes. I also wanted them to be fabulously displayed. And what better to display them with than sequined coat hangers.

    Sequined Coat Hangers via RainonaTinRoof.com #lifequotes #sequins #coathanger
    Sequined Coat Hangers

    This post contains affiliate links. 

    I bought an 8 pack of the Bumerang Curved Coat Hangers from IKEA for $5.

    Sequined Coat Hangers + Free Printable Life Quotes via RainonaTinRoof.com #lifequotes #sequins #coathangerI bought four small rolls of stretch sequin ribbon in gold from Michael’s. It took two rolls per coat hanger. I think each roll was about $4 regular. Use your coupons or wait till its on sale to get it cheaper! That’s what I did!

    Sequined Coat Hangers + Free Printable Life Quotes via RainonaTinRoof.com #lifequotes #sequins #coathangerAfter the sequin ribbon fabulous-ness was attained, I just wrapped it around the coat hanger, putting a dot of hot glue on the coat hanger every now and then to keep the ribbon in place.

    Sequined Coat Hangers + Free Printable Life Quotes via RainonaTinRoof.com #lifequotes #sequins #coathangerI used Rub ‘N Buff to make the bottom bar gold.

    I taped gold and white twine to the back from the Target Dollar Spot, then tied them on the coat hangers.

    Sequined Coat Hangers via RainonaTinRoof.com #lifequotes #sequins #coathanger

    And aren’t those prints so fun?

    Sequined Coat Hangers via RainonaTinRoof.com #lifequotes #sequins #coathanger

    I like to think of them as life quotes. Words to live by.

    Words to live by in my crazy life anyway.

    Get those life quotes as well as some other ones for free here! 

    Read about the faux wall moldings shown in this post here.

    If you liked this easy little craft, you’ll want to see these too…

    Learn how to make faux crystals and then turn them into gorgeous knobs HERE!

    Find out how to make a huge wall frame for super cheap HERE!

    You know you don’t wanna miss any of this crazy.

    Sign up to get my posts delivered to your inbox here. 

    Stalk Me Here:

    Pinterest / Facebook / Twitter / Instagram

    SaveSave

  • Red Buffet Makeover

    Red Buffet Makeover

    Let’s be honest.

    The blue-lilac color on the buffet in my living room…..

    it wasn’t working.

    It went with nothing in my living room. When we first moved in the beloved foreclosure a few years ago, I loved that color. And it is still a really pretty color. But it does not work well with navy blue or gray or kelly green.

    So it got booted.

    And now I’m seeing red.

    Country Chic Paint Buffet Makeover via RainonaTinRoof.com #buffet #makeover #red #countrychicpaint (more…)

  • Faux Cowhide Rug DIY using Faux Cowhide Fabric for only $15

    Faux Cowhide Rug DIY using Faux Cowhide Fabric for only $15

    I love a great cowhide rug, but not the price tag that comes with them. I found a solution though with this faux cowhide rug I made for only $15. All you’ll need is some faux cowhide fabric and a few other things to make your own!

    I have been lusting after a cowhide rug for quite some time. The cowhide lampshade I made just wasn’t enough. I needed more.

    Honestly, I don’t know why I don’t already have one. As a girl who has spent the better part of her life around cows, how in the world I don’t already have my very own cowhide is beyond me.

    I have talked with my uncle about this problem, who is a cattle farmer. He has promised me that the next time a cow goes to the slaughterhouse, he will have them save the hide and we will tan it for a rug.

    Now that the whole world knows of his promise, I feel he must carry through on it. Don’t you think so?

    Talk about a great DIY post – tanning your own cow hide – that should be interesting.

    So, dear uncle, if you are reading this post, you are not off the hook just because I made a DIY version.

    For now though, this faux cow rug will have to suffice.

    Faux Cowhide Rug DIY

    This post contains affiliate links for your shopping convenience. Click here to read my full disclosure policy.

    Fake Cowhide Rug Tutorial

    The tutorials I have seen for DIY any-type-of-hide rugs have required painting on the pattern of the hide.

    People, I can paint a wall, a piece of furniture, or faux moldings like nobody’s business.

    Freehand the pattern on a hide? Houston, we have a problem.

    So, when I had fabric left over from my cowhide lampshade, I saw the sign….. and it opened up my eyes.

    Did you catch that Ace of Base reference?

    I didn’t have a large piece of fabric left over, so I opted for a small version of a cowhide rug. However, you can make your rug any size you wish – just buy enough cow print fabric to do so.

    Supplies & Materials Needed:

    Steps

    Step 1

    Lay out your fabric, animal printed side facing down.

    Faux Cowhide Fabric - lay on ground.

    For reference, my fabric was 62 inches x 59.5 inches. Again though, you can go as big as the fabric will let you.

    Step 2

    Pull up a real cowhide rug that you like online (I just did a Google search for one). Use the photo from online to sketch out the shape on your fabric – be sure to do this on the back! I would suggest doing this with a pencil, a real pencil, not a mechanical pencil. I didn’t have a real pencil on hand, only a mechanical pencil and that didn’t work, so I used a black marker.

    Fake Cowhide Rug - trace shape on fabric.

    It’s really not rocket science, folks. This isn’t hard at all and since you’re sketching on the back of the faux cow hide, there’s room for error.

    Step 3

    Once you’ve got it all sketched out, cut it out with sharp scissors.

    Cowhide Fabric for Faux Cowhide Rug - Cut Out

    Step 4

    If you plan on putting this in a low traffic area, you could flip it over and stop right here.

    But, if you plan on putting it in a higher traffic area, you want to protect the top of the rug from dirt and easily tearing. To protect mine, I flipped it cow print side up, stuck cardboard gift boxes under it, and rolled on a couple coats of Polycrylic.

    I let it dry for a couple of days, then put it in my vintage-modern-rustic living room where it fits in perfectly.

    Faux Cow Rug Tutorial

    I really like the two different rug patterns working with each other.

    Faux Cow Hide Rug DIY

    Is there a faux cow rug in your future?

    I think ours should work until the uncle comes through.

    Love a great rug hack?

    Be sure to check out these 14 painted rug hacks then!

    Here’s a cool way to upgrade an astroturf rug too!

    And don’t miss my trick for keeping rugs from sliding here!

    Want to come back for the instructions later? Just pin the image below then!

    DIY Cow Print Rug Tutorial

    Stalk Me Here:

    Pinterest / Facebook / Twitter / Instagram

    DIY Cow Hide Rug Tutorial

    SaveSave

  • Electrical Tape Lampshade

    Electrical Tape Lampshade

    Sometimes…

    Rarely…

    But it happens every once in a while…

    Totally out of the blue…

    I have a stroke of genius…

    Or genius for me anyway… I’m sure most of you guys are way above my level.

    As I was working on my guest bedroom / office makeover, I decided I needed a lamp for one of the nightstands.

    And if you’re gonna have a lamp, you’re gonna need a lampshade.

    So, I made over a lamp and picked up a basic white lampshade at Target for $8 on clearance.

    We all knew that basic white lampshade wasn’t going to stay basic and white.

    It needed something.

    So, I asked myself: “Self, what can we do that won’t cost a dime to this lampshade?’

    Self responded: “Self, grab the electrical tape, quick!”

    And the electrical tape was attained and a black and white striped electrical tape lampshade was born.

    Electrical Tape Lampshade via RainonaTinRoof.com #electricaltape #lampshade #fifteenonFriday

    This post contains affiliate links for your shopping convenience. Click here to read my full disclosure policy.

    This little black and white striped gem took about a whole five minutes to whip up.

    Materials and Supplies: 

    • Lampshade
    • Electrical Tape
    • Scissors

    Steps

    Step 1

    Cut strips of tape.

    Step 2

    Apply to lampshade.

    Obviously, you really didn’t need those steps, but I’m trying to be a good DIY blogger.

    DIY Electrical Tape Lampshade | DIY Lampshade | DIY Lampshade Ideas | DIY Lampshade Makeover | Lampshade Makeover

    Fun Fact: This lampshade didn’t work quite right on its intended lamp. Instead, it is sitting atop the Kate Spade lamp and the Kate Spade lampshade is on the recently made over lamp that you haven’t seen yet.

    DIY Electrical Tape Lampshade | DIY Lampshade | DIY Lampshade Ideas | DIY Lampshade Makeover | Lampshade Makeover

    Ok – now what will you use electrical tape on??

    Love a good lamp, lampshade or all things lamp related? And on a budget? Oh good –  you’ll love these then: 

    16+ Lamp Makeovers and Ideas

    Easy DIY Agate Slice Lamp Finials

    How to Make Custom Lampshades and Finials

    Looking for more cheap craft ideas using tape, then don’t miss these:

     7 Super Simple, Super Cute Electrical Tape Crafts

    20+ Duck Tape Crafts and Projects

    Duck Tape Trimmed Curtains

    Sign up to get my posts delivered to your inbox here. 

    You know you don’t wanna miss any of this crazy.

    Stalk Me Here:

    Pinterest / Facebook / Twitter / Instagram

    SaveSave