After posting my DIY wall art for my master bedroom makeover, there were a few people who asked for a tutorial of how to make them. So here ya go, y’all.
This post contains affiliate links for your shopping convenience. Click here to read my full disclosure policy.
I did this all in Picmonkey.
Supplies:
–Graphics / Images in .png format (.png gives the images a transparent background)
–Backgrounds of your choice
I bought images on Etsy from GraphicDreamz and from Graphique. When you order, just specify in the message that you would like the .png file.
I bought backgrounds from Maishop Digital Art and Gidget Designs, both on Etsy.
Okay, now down to business.
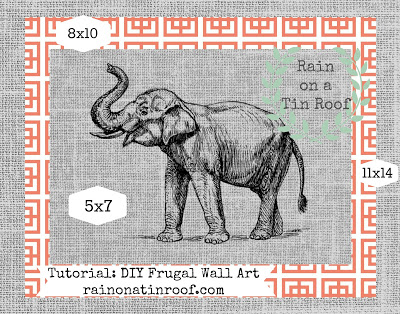
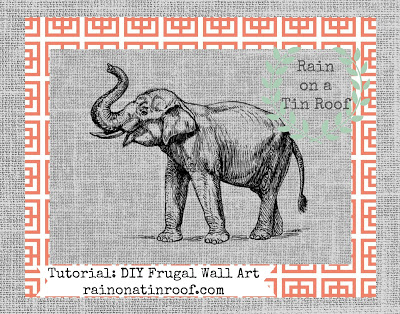
What I did first, was size my backgrounds. I wanted all of these to be 11×14 prints (including backgrounds) in the end. I wanted to use two backgrounds, the coral and the linen to make the prints pop. See how the image below is on a linen background, the linen is on the coral pattern, and the coral is on the same linen background again.

I also noted above what size crops to use for each background. The linen background that the elephant is on is 5×7, the coral is 8×10, and the back linen is 11×14. Just because I made these an 11×14 doesn’t mean I have to print them out that size. I just wanted standard dimensions to work with.
To size your backgrounds:
1. Go to Picmonkey.
2. Select edit a photo near the top.
3. Select whatever background you are using. I’m going to use my linen background first.
4. Once the background appears, select the 1st button on the left under editor, which is the basic edits button.
5. Select crop.
6. In the drop down menu that says “no fixed proportions”, select the size you want to use. I’m doing my first linen background first, so I am selecting 5×7.

7. Look at the crop screen to the right on your background. If what is in the crop regions works for you, hit apply. If the crop regions do not include part of the pattern you want, then move around the box, but don’t make the box bigger or smaller.
8. Save the background. Do not save it as the original file. I saved mine as “5×7 linen background”.
9. If you are using multiple backgrounds, as I did, you will need to repeat these steps for each background, cropping them to your desired size. Example: I cropped the coral one to an 8×10 and the back linen one to an 11×14 and saved them accordingly.
Now, you are going to add your image to your background. I put my image on my 5×7 linen background.
To put your image on your background:
1. Go to Picmonkey.
2. Select edit a photo near the top.
3. Select the background you want your image to go on, NOT the image. I selected my 5×7 linen background. ****At this point: if you are using a horizontal image and your background is vertical, you will need to rotate your background under the basic edits button and rotate. I did this with mine.***
4. Click on the overlay button on the left (the fifth button down).
5. Select Your Own at the top.
6. Find the image on your computer you are wanting to use, highlight it, and click open. I’m using my elephant. Your screen should look something like this, once you choose your image.

7. Use the circles on the corners of the image to make it bigger and then position it in the center of the background.
8. When you are satisfied, save the entire image. I saved mine as “elephant on linen.”
At this point, if you are just doing one background, you’re done! However, if you are doing multiple backgrounds, continue on!
To add a second background:
1. Go to Picmonkey.
2. Select edit a photo near the top.
3. Select the background you want to put under the image you just made. (This should be one of the backgrounds you have already sized. Mine is the 8×10 coral background.) Rotate if needed.
4. Click on the overlay button on the left (the fifth button down).
5. Select Your Own at the top.
6. Find the first background with your image on your computer that you just did (mine is the elephant on the linen background), highlight it, and click open.Your screen should look something like this, once you choose your image.

7. Just like you did with your last one, size the image to where it is center on the new background.
8. Save it when you are satisfied. I saved mine as “elephant both backs.”
If you want to add a third background:
1. Go to Picmonkey.
2. Select edit a photo near the top.
3. Select the background you want to put under (in the very back) the image you just made. (This should be one of the backgrounds you have already sized. Mine is the 11×14 linen background.) Rotate if needed.
4. Click on the overlay button on the left (the fifth button down).
5. Select Your Own at the top.
6. Find the last background you just made that has your image and two backgrounds (mine is the “elephant both backs” file. highlight it, and click open. Your screen should look something like this, once you choose your image.

7. Just like you did with your last one, size the image to where it is center on the new background.
8. Save it. So I would know this was the final one, I saved it as “elephant final”.
And now you are done. It seems like it takes a long time, but it really doesn’t. You only size your backgrounds once and when you get the hang of it, you’ve done an entire print in no time. I think it took me about 30 – 45 minutes to make 10 complete prints.
And this was the longest blog post. Ever. Good Grief.
Now, some of you that are familiar with PicMonkey are thinking “Why in the world didn’t she just do an overlay on top of an overlay on top of an overlay???!!” “Is she crazy?”
Duh. We all already knew that. I tried the overlay on top of an overlay, yada-yada-yada method. But it just would not work for me. It wouldn’t let me re-size the backgrounds and image like I wanted it. Maybe some of you can get it to work for you.
Now, go buy cute graphics and backgrounds (I think I paid around $15 for backgrounds and 9 or 10 images) from Etsy and make your own wall art.
I have to go get a beer. Because this was the longest blog post ever. I know I already said that, I just wanted to re-inforce it. Love y’all!
Looking for more easy wall decor? Check these out:
How to Make a Silhouette the Easy Way
You know you don’t wanna miss any of this crazy.
Sign up to get my posts delivered to your inbox here.
Stalk Me Here:

Bridgett Shepherd says
Great tutorial, Jenna! You’ve totally inspired me to try and incorporate an elephant into our Master somehow, lol!! xo
Jenna LaFevor says
Thanks, Bridgett! I would love to see how yours turns out!
Melissa Owczarzak says
Wow! That’s awesome but I am not sure I’m techno savvy enough!!
Jenna LaFevor says
Melissa, its much easier than it seems! I promise!
Sarah says
This is such a great idea! A few months into blogging I bought some digital papers and clip art to use for buttons, as backgrounds, etc. but didn’t end up needing most of them. This is a great way to put them to use!
Jenna LaFevor says
Sarah, this would be a great way to use those!! So happy you stopped by!
Natalia Lynn says
This is so cool, LOVE it! I’m gonna have to try it!
Jenna LaFevor says
Natalia, thanks so much! They were really easy! Happy you stopped by!
Noting Grace says
This is an awesome tutorial!
Jen @ Noting Grace
Jenna LaFevor says
Jen, thanks so much! I was worried it might be too confusing! So happy you stopped by!
Sherry @ No Minimalist Here says
Jenna, Thanks for sharing the tutorial at the Open House party. Your project turned out wonderful! xx, Sherry
Jenna LaFevor says
Thanks for hosting the party, Sherry! Love linking up at your blog!
Marlys Folly says
great tutorial.. Come from Tasty Thursday. Pinning this so I have the details when I need them
Jenna LaFevor says
Thanks! So glad it helped you and so happy you stopped by!
Donna Wilkes says
I have been reading because I love each of these posts. I am a Pic Monkey Junkie. I appreciate the long post!
Jenna LaFevor says
Donna, I’m so glad the tutorial is helpful to you! I felt like I was just blabbing on! So happy you stopped by!
Jenna LaFevor says
Thanks, Cheryl! You are too sweet!
Ashton says
Stopping in from the blog hop over on Ladies Holiday!
Love this idea! Pic Monkey is such a wonderful resource.
Happy Weekend! 🙂
Jenna LaFevor says
Pic Monkey is awesome, Ashton! Thanks so much for stopping by!
Diana - FreeStyleMama says
Cool!
Jenna LaFevor says
Thanks, Diana!
stacey gibbon says
Love picmonkey and LOVE what you designed! So cute
Thank you for sharing it at Crafty Thursday Obsessions. Hope to see you this week again
Have a great week <3
Lyuba @ Will Cook For Smiles says
This is a great tutorial and lots of good sources too. Thank you for sharing!
andrea miller says
Really amazing wall art, i like them. many thanks for sharing this DIY wall art.
click here for read more on canvas
dj says
Thank you for this fantastic tutorial. I happened upon your blog today from another blog and am so glad I did. I’ve wanted to use picmonkey more but felt completely lost when I tried. I’m your newest follower!
Jenna @ Rain on a Tin Roof says
You are so welcome! I’m so happy it was helpful for you! I love Picmonkey! You can do sooo many amazing things with it!
Sidge says
How do you actually get them from your computer onto paper – do you have a printer at home?
Jenna @ Rain on a Tin Roof says
I have a printer at home, but its just a black and white laser one. So, I save them as jpeg files and then upload them to a photo printing company like Snapfish and have them print them out and mail them to me!
Amanda K says
Great tutorial! I’ve only attempted chalkboard art on PicMonkey… I should branch out now 🙂
Jenna @ Rain on a Tin Roof says
Thanks, Amanda! I love PicMonkey! The possibilities are endless!
Kelli says
My students and daughter have used this site for the yearbook. Never thought to use it to create wall art. You have inspired me to see what I can do with my daughter’s art and my photos. Great tutorial.
Jenna @ Rain on a Tin Roof says
Kelli, I love PicMonkey!! It is awesome for so many things!! There is also a post on here with, I think, 17 or so different PicMonkey projects.