Tag: wall decor

  • 8 Unique & Cheap Wall Decor Ideas

    8 Unique & Cheap Wall Decor Ideas

    Want to break away from the usual wall decor and stay on budget? These wall decor ideas are super affordable – you’ve probably already got a few laying around your house!

    Monday was a sad day in our house. Well, a sad day for Mama but a happy one for the Circus. We said goodbye to the adorable little text and object wall in her room.

    She’s been talking about a room makeover for the better part of a year now and it’s finally coming to fruition for her. Alas, the vision she has for her new room doesn’t include a wall all about her. Instead, she envisions a confetti wall there.

    While the wall is here no more, it will always be one of my favorite projects and one of the most unique ones I’ve done as well. Planning her room makeover and the design for The Loft at Local Depot has had me thinking out of the box for wall decor. Here’s a few of my favorites I’ve done in the past. The great part about these wall decor ideas is that you probably already have what you need for some of these laying around your house – so they are going to be especially unique to you and cheap too!

    8 Unusual Wall Decor Ideas

    Text & Object Wall

    Since we’re in mourning this week over the loss of this wall, let’s start with it…

    This wall was made up of vinyl lettering and objects. In the place of some words, I replaced the word with the actual object – like a horse or tutu. The whole wall was about the kiddo and her little personality. The complete how-to for the object and text feature wall is here.

    Special Mementos

    In the den at the farm, I used quite a few special little things to decorate the walls.

    I have the center piece from my Pap’s truck steering wheel mounted in a frame and his belt below it.

    On the opposite wall, I hung Grunt’s grandpa’s service hats.

    The kitchen wall at the farmhouse is full of treasures – one of my favorites though is this paddle that my Grannie got when she retired. See more of the farmhouse here – it’s filled with lots of treasures.

    Things they’ve outgrown…

    Our laundry room also doubles as a mudroom / pool room, so we went with a swimmer theme and bright colors in here. I framed my daughter’s first swimsuit for this space and it’s one of my favorite things in here!

    Hang Baskets on the Wall

    Another trick I use in my laundry room / mudroom – vintage metal locker baskets on the wall! These are perfect for corralling sunscreens and pool toys and look good while doing it. There are lots of other laundry room – mudroom ideas here. I also used baskets just like this once to create wall storage for cookbooks in my kitchen.

    Travel Souvenirs

    Y’all know part of my heart is in New Orleans. One time when we visited, I got an extra bag from Cafe du Monde and framed it – super cheap and it always reminds me of good memories made in NOLA.

    Related: Things to Do in New Orleans with Kids

    Loved Ones Handwriting

    When I redid my office, I really wanted a special reminder of my Pap in there. Something I could look up at when I was stressed or ready to give up that would remind me to pull it together and saddle up. I pulled out some cards he had given me and scanned in his signature and where he had written my name, then printed them out for wall art. You can also see more of my budget-friendly office makeover here.

    What kind of unique wall decor have you guys done before? I’m off to continue work on a colorful confetti wall!

  • DIY Silhouette: How to Make a Silhouette The Easy Way

    DIY Silhouette: How to Make a Silhouette The Easy Way

    I have always loved a classic piece of silhouette art – especially when it’s my kid! When I wanted to make a silhouette art wall in our home, I figured out how to make a silhouette myself. And you know what? It’s easy! Find out how to make your own DIY silhouette below! 

    Remember last week, when I showed you my DIY tassel garland?

    You, do? Good.

    And remember in that same post, I said that if all went according to plan, I would show you how I did my silhouettes?

    You, do? Good.

    Well, you are about to see how to make a silhouette. But, over the course of the week, all has not went according to plan with the silhouettes. You see, the other day, I was just sitting at my dining room table minding my own business, trying to be a good blogger, when out of nowhere one of those silhouettes fell right off the wall. And the glass shattered into a million little pieces.

    No lie.

    And what’s weirder? There was no apparent cause for this fall. Nope, the nail was still in the wall when I went over there and the hook was just fine on the back of the frame.

    Strange.

    Do you believe in ghosts?

    I believe in ghosts.

    I think my Pap was just bored and trying to entertain himself at my expense.

    Just wait until the end of this post to call the asylum on me, you’ll want to see this first.

    DIY Silhouette Wall Art - an easy way to make your own silhouette art.

    So, here is the story of my silhouette wall and and the easy way to make silhouette art.

    How to Do a Silhouette

    This post contains affiliate links for your shopping convenience. Click here to read my full disclosure policy.

    First off, I only made one of those silhouettes on the wall.

    How to Make a Silhouette Easily

    Mine and Grunt Labor’s silhouettes were both made when we were kids. I smuggled mine away a long time ago and when Mama (Grunt Labor’s mom), found out I wanted a silhouette wall, she went and dug out his from long ago. Both of ours may be considered antiques by now.

    Heaven, help. If anyone asks, I’m 25.

    That’s my story and I’m sticking to it.

    I digress. So, all I needed was a silhouette of the kid.

    Materials Needed:

    • Side Profile Photo of the Person You Are Making a Silhouette Of
    • Printer
    • Black Paper
    • Scissors
    • Contrasting Paper for Mounting the Silhouette On
    • Mounting Squares

    Steps

    Step 1

    The first thing you’ll need is a side profile photo of the person you are making a silhouette of. You’ll want to have the person turn to their side, stand in front of their side straight on and snap a picture.

    In a rare moment of stillness, I snapped this side profile of my kiddo.

    How to Do a Silhouette - Snap a picture of the person.

    Step 2

    After I had my image, I loaded it onto my computer and cropped it around just her face using Picmonkey.

    Easy Way to Make Silhouette - side profile shot of person.

    I also turned it black and white, because all I have is a black and white printer. That’s not necessary of course.

    After you’ve cropped your image, save it to your computer.

    Step 3

    Next, open up a blank word document. Insert the picture you just cropped and saved into the document and make it just about as big as the whole page, then print it out.

    Step 4

    Using scissors, cut out the profile from the image you printed out. Also, cut a kind of curve into the chest of the person’s profile.

    How to Do Silhouette Art - cutout of person's profile.

    No, she doesn’t have a golden dinosaur growing out of her head. When I was done with the silhouette, I just popped it on my craft room wall with one of those push pins from my sassy message board.

    Step 5

    Lay the cut-out silhouette on black cardstock, trace the outline onto it and then cut it out.

    Of course, you could also use white paper or colored paper to do your silhouette. Black is just the traditional color.

    Step 6

    Mount your silhouette onto a contrasting piece of cardstock or paper.

    Silhouette Easy Art

    I spray painted frames gold I already had and mounted the silhouettes to scrapbook paper to serve as a mat. I like the unexpected pattern it adds to the art.

    And that my friends, is the easy way to make a silhouette.

    Do you have any tips for how to do silhouette art?

    Share them in the comments!

    Need more easy DIY art ideas?

    Monogram Photo Art – super easy wall art using your own photos!

    Free Printable Find Her Jesus Keep Her Well Art – perfect for those little girls in your life!

    DIY Wall Decor from a Gift Bag – there are some gorgeous gift bags out there these days!

    And here’s my trick for hanging heavy frames, mirrors and more!

    Want to come back for the instructions later? Just pin the image below! 

    How to Make Silhouette Art the Easy Way

    You know you don’t wanna miss any of this crazy.

    Stalk Me Here:

    Pinterest / Facebook / Twitter / Instagram

  • 17+ PicMonkey Tutorials, Tips, and Projects

    17+ PicMonkey Tutorials, Tips, and Projects

    Picmonkey is an online resource for editing photos, creating collages and graphics, making your own watermark, invitations and much more! Not only will you learn Picmonkey photo editing with these Picmonkey tutorials, but you’ll also learn how to make so much more with it!

    This post contains affiliate links. 

    If you have been around here for long enough, you may have heard me chat about Picmonkey – the way I edit pictures online. But the question is, what all can it really do? The short answer: everything. The long answer: collages, recipe cards, labels, tags, and so much more….

    How to Use PicMonkey

    First things first, right? Head to PicMonkey. If you don’t already have an account, go ahead and create one. PicMonkey used to be free, but with upgrades you can buy. Now, it does cost $5.99 a month to use the service. In my opinion, it’s completely worth it. If you’re not sure though about going ahead and signing up for a paid account, I totally get it. You can do a free trial by clicking here.

    Now, onto actually using PicMonkey. Here are some basic PicMonkey tutorials.

    The Beginner’s Guide

    Picmonkey Tutorial for Beginners

    If you haven’t done much with PicMonkey before, then you should probably start with this beginner’s guide.

    PicMonkey Photo Editing Tutorials

    Editing Baby Pictures with PicMonkey

    Picmonkey Photo Editing - Babies

    This Picmonkey tutorial from We Lived Happily Ever After is a great guide for editing not only baby photos but other photos as well. Seriously, look at that photo! Gorgeous! This gal knows her PicMonkey!

    30 Second Edits on PicMonkey

    Editing Photos with PicMonkey

    Ummm, seriously, do you see the difference in those two photos? Yes, people. PicMonkey can do that with its photo edits. Creative Cain Cabin will show you how to make these 30 second edits. 

    Create Collages with PicMonkey

    How to Use PicMonkey

    Sweet C Designs has the deets on making collages with Picmonkey.

    PicMonkey Tutorials for Making Your Own Cards, Invitations, Party Decor and More

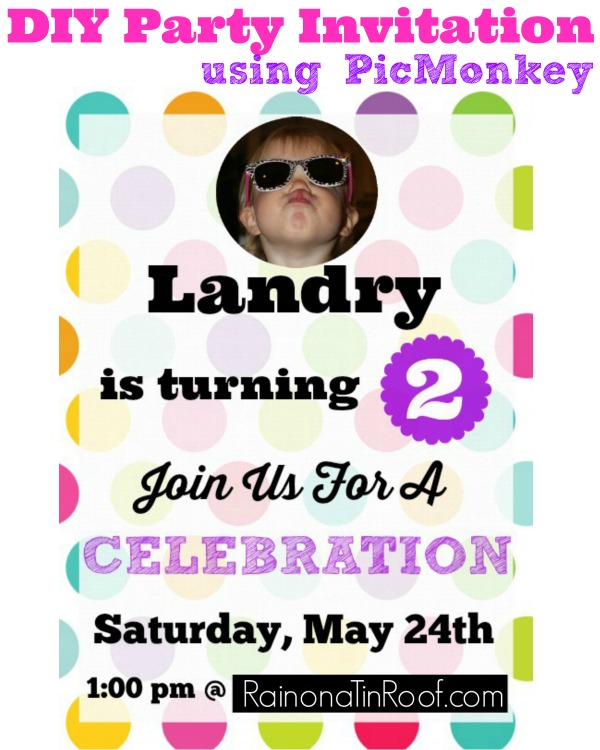
    Birthday Party Invitation using PicMonkey

    Picmonkey Tutorial for Party Invitations

    For the kid’s second birthday, I made this fun party invitation on PicMonkey.

    Farm Party Invitation Using PicMonkey

    Picmonkey tutorial for birthday invitations

    We had a farm themed party for another one of the Circus’ birthdays and I made this farm themed birthday invitation for it.

    Superhero Party Banner using PicMonkey

    Picmonkey tutorial for party decor

    When the Circus had a superhero party, I made this customizable superhero banner for the party.

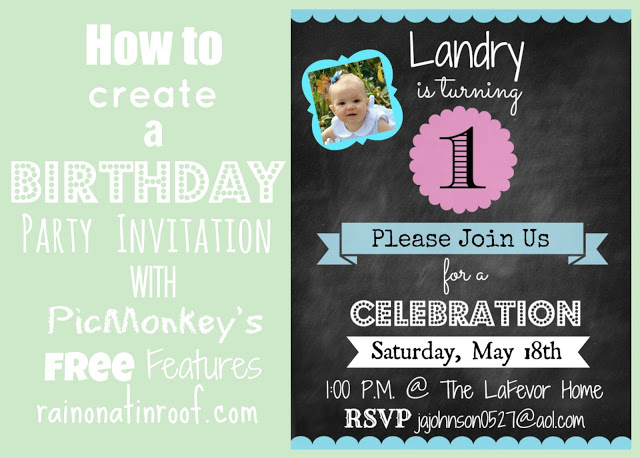
    Chalkboard Birthday Party Invitation 

    Picmonkey tutorials for making party invitations

    Last year, for the kid’s blue and pink 1st birthday party, I created her invitations in Picmonkey.

    Christmas Cards using PicMonkey

    Picmonkey tutorial for Christmas cards

    Christmas cards can be so expensive. Why not use Picmonkey to make your own and save a lot of dough?

    PicMonkey Tutorials for Creating Your Own Art, Graphics, and More

    Make your Own Wall Art

    How to Use PicMonkey to Make Your own Art

    When I was working on my master bedroom makeover last year, I needed new wall art, but didn’t want to spend a lot of money. I ended up making my own DIY Wall Art.

    Create Labels with PicMonkey

    How to use picmonkey to make labels

    Blissful Roots will show you how to make your own labels in Picmonkey.

    Make Recipe Cards

    Picmonkey tutorial for a recipe card

    Anyone else have a hot mess of a recipe box? Please don’t say its just me! Find out how to make a recipe card here and tame that hot mess!

    Make Printable Holiday and Gift Labels

    How to use picmonkey to make gift labels

    Don’t buy labels or gift tags again! Make your own with this tutorial from The Importance of Being Reese.

    Create Chalkboard Art and Printables

    How to use picmonkey to make chalkboard art

    Here’s another great tutorial for creating chalkboard art from House of Hawthornes.

    Picmonkey Tutorials for Bloggers

    Making Photos Pin-Worthy

    How to use Picmonkey for Bloggers

    Making your photos pin-worthy is super important for bloggers. These are my tips I use when editing photos with PicMonkey.

    Favorite Things Graphics

    Picmonkey Tutorial for creating graphics

    Honey We’re Home has a great tutorial for creating favorite things graphics.

    How to Make Watermarks with PicMonkey

    Picmonkey tutorial for creating watermarks

    I love this tutorial on creating a custom and transparent watermark.

    Are you ready to dive in and learn how to use Picmonkey so that you can follow some of these PicMonkey tutorials?

    pin-this-post

    Picmonkey Tutorials for Editing Photos, Invitations, Art and More

    You know you don’t wanna miss any of this crazy.

    Stalk Me Here:

    Pinterest / Facebook / Twitter / Instagram


    SaveSave

  • How to Hang a Heavy Picture: Easy and Sturdy

    How to Hang a Heavy Picture: Easy and Sturdy

    Hanging heavy pictures, art pieces, mirrors and more can be difficult. What kind of anchor to use, how to install it, etc. Well, I’m here to help and show you how to hang a heavy picture easily and securely. This is absolutely the best way to hang heavy pictures that I’ve ever found. 

    If you haven’t noticed, one thing the 70’s Landing Pad has a lot of that the Beloved Foreclosure didn’t is art – big art.

    This post contains affiliate links for your shopping convenience. Click here to read my full disclosure policy.

    How to Hang a Heavy Picture - Eyes Wall Art - Rain on a Tin Roof

    Wall Color / Art / Full Entryway Makeover

    I like big art and I cannot lie. 

    Figuring out how to hang heavy wall art though can sometimes be a problem. Before, I was always the girl that did her damnedest to find a wall stud behind the drywall to hang heavy pictures, mirrors, etc. on. I would even scoot whatever piece of furniture over a few inches to make it centered under the heavy object if I could find a stud for it. And there is absolutely nothing wrong with that.

    However, those studs haven’t always been exactly, or even close in some cases, where I needed them to be in The 70’s Landing Pad. I went to Home Depot planning to just buy some regular old heavy duty wall anchors to hang some of the pieces, but instead I found these Wall Driller Picture Hooks.

    Hanging Heavy Pictures

    Hanging Heavy Pictures - Cobra Wall Drillers - Rain on a Tin Roof

    It could very well be that I am the last person in the world to know about these things, but they have made my life so much easier when it comes to hanging a picture that I had to tell you about them. I found mine at Home Depot in brass, but you can also get them online. Each brass hook holds up to 60 lbs.

    The anchors and hooks are separate in the package.

    How to Hang Heavy Wall Art - Metal Wall Anchors for Drywall - Rain on a Tin Roof

    You put the hook and anchor together before screwing it into the wall.

    Best Way to Hang Heavy Pictures - Wall Driller Anchors for Drywall - Rain on a Tin Roof

    You can use a drill or screwdriver to fasten it to the wall.

    How to Hang a Large Picture in Drywall - Anchor in Drywall - Rain on a Tin Roof

    I’ve used both a drill and a screwdriver when putting these into the wall and either way works just fine.

    Then, just hang your art on it.

    Hanging a Picture in Drywall - art in bathroom - Rain on a Tin Roof

    Art / Wall Color / Faucet / Full Bathroom Makeover

    Most all of my art came with D-Rings attached on each side. For the piece above, I was able to run a heavy duty hanging wire from side to side through the d-rings and then hang the wire on the hook anchor.

    Some of my pieces however were too heavy to run the wire back and forth like the art in my dining room.

    Heavy Wall Art hung on Drywall - art in dining room - Rain on a Tin Roof

    Art / Glass Dining Table (similar one) / Chairs (similar ones) / Dining Room Tour

    For those pieces, I used two of the wall driller picture hooks spaced apart the same distance the d-rings were spaced apart on the back of the frame.

    Hanging Oversized Wall Art - Lion Art - Rain on a Tin Roof

    Art / Brass Unicorn (similar ones) / Living Room Tour

    The same was true of the Lion art in my living room.

    Hang a Heavy Mirror on Drywall - Bathroom Mirror - Rain on a Tin Roof

     Faucet / Full Master Bathroom Tour

    You can also use these to hang a heavy mirror. In my master bathroom, I didn’t have any hooks at all on the back of the mirror, so I bought d-rings and attached them to the back of the mirror, then attached the Wall Driller Picture Hooks to the wall and hung the mirror on them.

     Most all of these things have been up since around mid-May and none of them have budged a bit. Update! It’s now been nearly three years since I first used these anchors and they are still going strong!

    These anchors are my go-to for hanging heavy pictures and other heavy things on the wall now. Of course, finding a stud and drilling a screw into that and then hanging your heavy stuff is always the best way to go, but when that can’t happen, these hook anchors are the next best thing in my opinion.

    How to Hang a Large Picture on Drywall - Palm Print in Bedroom - Rain on a Tin Roof

    Palm Art / DIY Huge Wall Frame / Banana Leaves Pillow / Leopard Print Pillow / Wall Color / Full Master Bedroom Tour

    Also, this is not a sponsored post for the picture hooks in any way. I just found this product and thought it was great, so I wanted to tell you about it. 🙂

    Can you share any tips in the comments for how to hang a large picture?

    More wall art related posts you’ll want to see…

    How to Make a Huge Frame for Cheap – not too hard either!

    Best Sources for Affordable Wall Art – some of my go-to places for great art.

    DIY Wall Art with a Gift Bag – yep, a gift bag!

    Want to keep this post for later? Pin the image below!

    Secure and Easy Way to Hang Heavy Art - Eyes Oversized Art - Rain on a Tin Roof
    blog-signature-summer-15
    How to Hang Heavy Things | How to Hang Heavy Objects | How to Hang a Heavy Picture | How to Hang a Heavy Mirror | How to Hang Pictures
  • Best Sources for Affordable Wall Art and Favorites Under $50

    Best Sources for Affordable Wall Art and Favorites Under $50

    In case you didn’t know, I’m not an art connoisseur.

    Now a cheap beer connoisseur, I am.

    Ok, really just Miller High Life.

    Here’s how I decide what art to hang on my walls:

    I browse online and/or thrift stores.

    Ooooo, I like it.

    Look at the price tag.

    Ooooo, its cheap.

    Buy it.

    Ooooo, its expensive.

    Leave it.

    Pretty straightforward, no?

    While there may never be a priceless hand painted original piece of art hanging in my home, excluding the circus’ art, these pieces either already reside here or will at some point.

    Because they’re pretty.

    And cheap.

    And nothing beats pretty and cheap together.

    Best Sources for Affordable Wall Art & Favorites Under $50

    This post contains affiliate links. 

    1. Etsy

    Best Sources for Affordable Wall Art and My Favorite Picks Under $50 - Etsy

    Abstract / Tallulah Shaw / To The Night / Gemstones

    Etsy should probably be a given for anyone. Its packed with hundreds and hundreds of talented artists who thankfully sell their prints at affordable prices. Not only can you find actual prints, but you can find loads of printables to use as wall art for usually $5 or less. I don’t have that glorious abstract in my house yet, but you’d better believe I will soon. I love the colors. Tallulah Shaw is from the Janet Hill Studio. I love every single one of her pieces, but can’t choose just one or find the perfect place for it yet. The bottom two are both hanging on the black and white gallery wall in my living room.

    2. Kirkland’s

    Best Sources for Affordable Wall Art and My Favorite Picks Under $50 - Kirkland's

    Buffalo Canvas

    Ahh, Kirkland’s. I could sing of your glorious home decor deals for days. Not only can you snag super cheap and pretty accessories at Kirkland’s, but its also a great place for snagging wall art at an amazing price – like this big Buffalo Canvas for $25. Twenty-five freakin’ dollars.

    3. Society6

    Best Sources for Affordable Wall Art and My Favorite Picks Under $50 - Society6

    Cow Watercolor / Lips Watercolor / Banana Leaves / Donkey

    I just discovered Society6 when I started working on my gallery wall (I know- I was living under a rock), but its one of my new favorite places for art. Its a marketplace full of individual artists. You can buy their prints at great prices, but you can also get most of those prints on pillows, totes, and just about anything else you can dream up. I’m not kidding. Every print above, excluding the cow, is on my gallery wall. The cow will be someplace soon though. And a few family members may even get one for Christmas presents.

    4. Furbish Studio

    Best Sources for Affordable Wall Art and My Favorite Picks Under $50 - Furbish

    Ginger Jar / Everyone’s a Dumb Whore / Neon Headdress

    Ahhh, Furbish. You are like my go-to place for random colorfulness. I mean really, who wouldn’t want that dumb whore cross-stitch hanging in their office. And also, who thinks to cross-stitch dumb whore into something?! Genius, I say, genius! And a neon headdress? A NEON HEADDRESS.

    5. Waiting on Martha

    Best Sources for Affordable Wall Art and My Favorite Picks Under $50 - Waiting on Martha

    Lion Watercolor

    And then there’s Waiting on Martha. She’s full of a little bit of everything – wall art, yes, but also barware, bedroom decor and more. Have you ever seen a more precious lion?

    And my favorite source for frames…Target.

    Best Sources for Affordable Wall Art and My Favorite Picks Under $50 - Favorite Frame from Target

    Room Essentials White Wood Frame

    This simple white frame is my go-to for any style of art. This frame is the kind I used all around my gallery wall. It comes with a white mat and works great to highlight even the smallest pieces of art. If you aren’t into white, you can always spray paint it a different color. I opted to leave them all white for my gallery wall though.

    STUNNING Black and White Gallery Wall! Simple to do - such a great accent wall!

    Ok, spill the beans. What are your go-to art sources and faves? You know, we don’t keep secrets around here.

    You might also want to see…

    Free Printable Horse Art - color, black and white, watercolor - perfect for framing for wall art.Free Printable Horse Art

    These would be GORGEOUS framed - and so much cheaper than other art! They are FREE! Instant Art: Banana Leaves Watercolor Printables via RainonaTinRoof.com

    Free Banana Leaves Watercolor Printables

    pin-this-post-2

     Affordable Wall Art | Cheap Wall Decor | Cheap Wall Art | Where to Buy Wall Art | Where to Buy Wall Decor

    You know you don’t wanna miss any of this crazy.

    Sign up to get my posts delivered to your inbox here.

    Stalk Me Here:

    Pinterest / Facebook / Twitter / Instagram

    blog-signature-summer-15

    SaveSave

  • 10+ Gorgeous DIY Accent Wall Ideas for Just $30 or Less

    10+ Gorgeous DIY Accent Wall Ideas for Just $30 or Less

    Want to create a gorgeous focal point in your home? Have you thought about an accent wall? These DIY accent wall ideas bring the beauty but don’t require a lot of cash!

    Feature walls can be a total game changer for a room. Not only do they add character and beauty, but they can define a space and bring it to a whole other level – not that this happened in my dining room or anything lately. 😉

    Below you’ll find a few of my favorite easy and cheap accent wall ideas for multiple different areas in your home! The best part? Each one costs just $30 or less to complete!

    Easy Accent Wall Ideas

    Washed Out Stripes Wall

    DIY accent wall ideas- washed out blue stripes in a bathroom

    Bathroom Accent Wall

    A sample pot of paint. Yep. Just that, a ruler and some tape and you can create this washed out stripe look in your home!

    Object and Text Wall

    cheap accent wall ideas - combining objects and vinyl text on a wall

    Kids Room Wall

    This is one of the sweetest walls I’ve ever done. I mixed in objects and vinyl text lettering to create a feature wall especially for my daughter.

    Carpeted Wall

    easy accent wall - putting green astroturf carpet on a wall with pink accents.

    Putting Carpet on Walls

    Yes m’am, I did! Carpeted feature walls got a bad vibe back in the day, but I’m on a mission to change that! I put a $30 astroturf rug on a wall in my bedroom and it added the perfect amount of color and texture to the space.e

    Cane Inspired Feature Wall

    accent wall ideas -  green and white lattice bathroom wall

    Cane Inspired Accent Wall for $25 or Less

    This one might look a little complicated, but it’s actually quite easy! All you need is a little painter’s tape and paint, of course! This bathroom accent wall could be recreated in any space in your home.

    Painting One Wall

    create an accent wall by painting one wall only - blue feature wall against gray walls

    Blue Accent Wall

    You don’t always have to paint every wall or create a pattern on the walls – sometimes just painting one will do the trick!

    Gallery Wall that Hides the TV

    Accent Wall Ideas for Living Room - black and white gallery wall that hides the tv

    Black & White Gallery Wall

    This is still one of my favorite walls to date! I love this black and white gallery wall for two reasons. 1. It takes your wall art to a whole other level. 2. The television practically disappears into the wall.

    Wood Accent Wall

    Wood accent wall in a masculine bathroom

    DIY Wood Wainscoting Panels

    This is a cheap way to bring gorgeous stained wood walls into a room!

    Fun and Carefree Wall

    diy accent wall ideas - white wall with gold confetti on the wall.

    Confetti Accent Wall

    This easy confetti accent wall isn’t only easy and cheap to make, but its also fun. It adds a touch of whimsy to any space and is ridiculously easy to complete! This one is super budget friendly too – you can just use a bottle of craft paint for it!

    Classic Style Accent Wall

    cheap accent wall ideas - traditional black and white criss cross wall.

    Criss-Cross Accent Wall

    This criss-cross wall was a huge game-changer for my dining room! It helps to anchor the dining room with it’s traditional feel and pattern, but can easily work with color and modern decor as well.

    An Accent Ceiling

    accent wall on the ceiling - pink and white ceiling

    Pink Ceiling

    How about an accent ceiling? I painted my bathroom ceiling pink with faux white moldings. It adds a lot of interest to an otherwise all white bathroom. You can always opt for a different paint color to not make it seem as girly.

    Accent Squares

    easy accent wall - gray squares on a white wall

    Painted Wall Treatment on a Budget from Thistlewood Farms

    I love this simple graphic wall treatment from Karianne. And guess what? She did it with just a sample pot of paint!

    No Paint Accent Wall

    black and white accent wall using tape

    Striped Accent Wall without Paint from Homey Oh My

    This accent wall doesn’t even require paint! And isn’t that black and white classic?

    Stencil Wall

    white circles stenciled on a beige wall

    Circle Patterned Wall from Lilikoi Joy

    I love the circles on this one – adds a good dose of fun! You just switch it up with any kind of colors you prefer!

    Square on Squares Accent Wall

    squares on squares accent wall

    Graphic Statement Wall from AKA Design

    Squares are always a favorite of mine – and these make a bold statement, but are a simple pattern. This would be great in a modern home.

    Triangle Wall

    peel and stick triangles no paint accent wall

    Triangle Accent Wall from Upcycled Treasures

    Another one that doesn’t require paint! If modern is your style, this one might be perfect for your home too. Simply use peel and stick triangles to achieve the look!

    + Accent Wall

    Modern Accent Wall Idea

    Plus Signs Accent Wall from Knack Studios

    These plus signs or crosses are a fun and unexpected twist for another modern statement wall! You could easily create them with paint pens or electrical tape!

    Now go create an accent wall and come back and tell us all about it!

    Want more great ideas for your walls?

    Wall Paint Design Ideas with Tape – if you can tape it off, you can make it happen! You won’t believe some of these walls!

    DIY Indoor Lattice Wall – yes, lattice inside makes for a gorgeous wall treatment!

    Want to come back to these wall ideas later? Just pin the image below!

    Looking for BIG bang for your buck? Here are 9 Accent Walls for $30 or Less - includes lots of wall painting ideas, techniques and designs - and they are all DIY projects! Great painting ideas!

  • DIY Wall Decor with a Gift Bag

    DIY Wall Decor with a Gift Bag

    Guys, this may be one of my favorite Fifteen on Friday projects ever.

    Ok well, its right up there with the electrical tape lampshade, duck tape curtains, and lucite trays anyway.

    As you know, I am a huge fan of making my own DIY wall decor. I made my own prints with PicMonkey for my master bedroom, used the sassy printables on the sequined coat hangers, and  made my own silhouette art.

    This DIY modern art was by far one of the easiest home decor items I have ever created and I think it looks fab.

    And did I mention I made it with a gift bag?

    DIY Wall Decor with a Gift Bag via RainonaTinRoof.com #diy #walldecor #wallart #art #modernart (more…)

  • DIY Monogram Photo Art with All You Magazine

    DIY Monogram Photo Art with All You Magazine

    Heard of all you before? All you is a magazine dedicated to its title. Its all about you and how you can live a better life.

    Disclosure: This post is part of a social shopper marketing insight campaign with Pollinate Media Group® and All You, but all my opinions are my own. #lifeforless #pmedia

    All you shows you ways to save money while still living life to the fullest.  Saving money doesn’t have to mean that you go without or that you can’t have fun! All you shows you how to save money (and gives you lots of coupons to help) while still enjoying life! Each and every all you magazine includes numerous coupons, money saving ideas, frugal family activities, recipes, fun craft and decor ideas.

    A couple weeks back, I headed over to my local Dollar General store.

    all you magazine at Dollar General

    And what was staring back at me at the checkout line?

    all you magazine at Dollar General

    all you! That’s right, all you is now available at the Dollar General! July’s issue was loaded with affordable summer fashion, new recipe ideas, money-saving apps, and ways to erase your debt among other awesome things. As I was perusing the magazine, I stumbled upon an article about re-vamping thrifted frames and creating your own wall art, which made me think about a frame I had picked up on clearance  a couple months back. No, it wasn’t a thrifted frame, but it was a large frame on clearance for $5 because it had some dents and dings. The frame had just been sitting down in my craft room collecting dust. With the help from all you, I knew I could turn that frame into some great wall art. I gathered my supplies:

    Monogram Photo Art {rainonatinroof.com} #monogram #photo #art #diy

    I didn’t have one large photo that I wanted to frame, but the all you article was about thinking outside the box for wall art, so I decided to take  four – 4×6 black and white photos and form some monogram photo art with them against some wrapping paper.

    There was some paint that had been scraped off on one side of the frame, so I touched it up with some white acrylic paint. I wanted to add a little bling to the frame with gold Rub ‘N Buff, so I taped off the corners to keep clean edges and rubbed some Rub ‘N Buff on.

    Monogram Photo Art {rainonatinroof.com} #monogram #photo #art #diy

    I cut the wrapping paper to size by simply placing the glass on top of the paper and tracing the size onto the paper then cutting it out. I used photo mounts to attach the photos to the wrapping paper.

    Monogram Photo Art {rainonatinroof.com} #monogram #photo #art #diy

    And the end result:

    monogram photo art 2

    monogram photo art

    So, what do ya think?! Thanks all you for the inspiration!

    Looking for more easy wall decor? Check these out:

    How to Make a Silhouette the Easy Way – easy peasy!

    Sassy Fabric Covered Message Board – up the wow factor on those boring bulletin boards!

    Vintage Nursery Rhyme Art – so sweet and easy!

    Song Lyrics as Wall Art – turn your favorite song into art!

    DIY Wall Art with Picmonkey – learn how to make your own art!

    You know you don’t wanna miss any of this crazy.

    Sign up to get my posts delivered to your inbox here. 

    Stalk Me Here:

    Pinterest / Facebook / Twitter / Instagram

  • Tutorial: Frugal DIY Wall Art

    Tutorial: Frugal DIY Wall Art

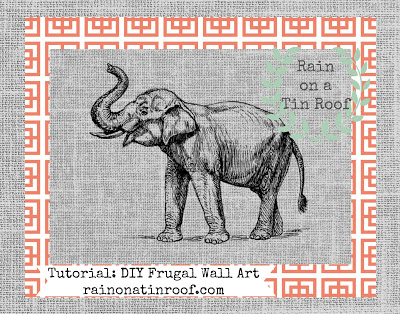
    After posting my DIY wall art for my master bedroom makeover, there were a few people who asked for a tutorial of how to make them. So here ya go, y’all.

    DIY Wall Art with Picmonkey Tutorial

    This post contains affiliate links for your shopping convenience. Click here to read my full disclosure policy.

    I did this all in Picmonkey.

    Supplies: 
    –Graphics / Images in .png format (.png gives the images a transparent background)
    –Backgrounds of your choice

    I bought images on Etsy from GraphicDreamz and from Graphique. When you order, just specify in the message that you would like the .png file.

    I bought backgrounds from Maishop Digital Art and Gidget Designs, both on Etsy.
    Okay, now down to business.
    What I did first, was size my backgrounds. I wanted all of these to be 11×14 prints (including backgrounds) in the end. I wanted to use two backgrounds, the coral and the linen to make the prints pop. See how the image below is on a linen background, the linen is on the coral pattern, and the coral is on the same linen background again.
    Tutorial for DIY wall art using Picmonkey.
    I also noted above what size crops to use for each background. The linen background that the elephant is on is 5×7, the coral is 8×10, and the back linen is 11×14. Just because I made these an 11×14 doesn’t mean I have to print them out that size. I just wanted standard dimensions to work with.
    To size your backgrounds:
    1. Go to Picmonkey.
    2. Select edit a photo near the top.
    3. Select whatever background you are using. I’m going to use my linen background first.
    4. Once the background appears, select the 1st button on the left under editor, which is the basic edits button.
    5. Select crop.
    6. In the drop down menu that says “no fixed proportions”, select the size you want to use. I’m doing my first linen background first, so I am selecting 5×7.
    Use Picmonkey to make cheap wall art.
    7. Look at the crop screen to the right on your background. If what is in the crop regions works for you, hit apply. If the crop regions do not include part of the pattern you want, then move around the box, but don’t make the box bigger or smaller.
    8. Save the background. Do not save it as the original file. I saved mine as “5×7 linen background”.
    9. If you are using multiple backgrounds, as I did, you will need to repeat these steps for each background, cropping them to your desired size. Example: I cropped the coral one to an 8×10 and the back linen one to an 11×14 and saved them accordingly.
    Now, you are going to add your image to your background. I put my image on my 5×7 linen background.
    To put your image on your background:
    1. Go to Picmonkey.
    2. Select edit a photo near the top.
    3. Select the background you want your image to go on, NOT the image. I selected my 5×7 linen background. ****At this point: if you are using a horizontal image and your background is vertical, you will need to rotate your background under the basic edits button and rotate. I did this with mine.***
    4. Click on the overlay button on the left (the fifth button down).
    5. Select Your Own at the top.
    6. Find the image on your computer you are wanting to use, highlight it, and click open. I’m using my elephant. Your screen should look something like this, once you choose your image.
    DIY Wall Art with Picmonkey
    7. Use the circles on the corners of the image to make it bigger and then position it in the center of the background.
    8. When you are satisfied, save the entire image. I saved mine as “elephant on linen.”
    At this point, if you are just doing one background, you’re done! However, if you are doing multiple backgrounds, continue on!
    To add a second background:
    1. Go to Picmonkey.
    2. Select edit a photo near the top.
    3. Select the background you want to put under the image you just made. (This should be one of the backgrounds you have already sized. Mine is the 8×10 coral background.) Rotate if needed.
    4. Click on the overlay button on the left (the fifth button down).
    5. Select Your Own at the top.
    6. Find the first background with your image on your computer that you just did (mine is the elephant on the linen background), highlight it, and click open.Your screen should look something like this, once you choose your image.
    DIY Wall Art with Picmonkey Tutorial
    7. Just like you did with your last one, size the image to where it is center on the new background.
    8. Save it when you are satisfied. I saved mine as “elephant both backs.”
    If you want to add a third background:
    1. Go to Picmonkey.
    2. Select edit a photo near the top.
    3. Select the background you want to put under (in the very back) the image you just made. (This should be one of the backgrounds you have already sized. Mine is the 11×14 linen background.) Rotate if needed.
    4. Click on the overlay button on the left (the fifth button down).
    5. Select Your Own at the top.
    6. Find the last background you just made that has your image and two backgrounds (mine is the “elephant both backs” file. highlight it, and click open. Your screen should look something like this, once you choose your image.
    Make your own wall art with Picmonkey.
    7. Just like you did with your last one, size the image to where it is center on the new background.
    8. Save it. So I would know this was the final one, I saved it as “elephant final”.
    And now you are done. It seems like it takes a long time, but it really doesn’t. You only size your backgrounds once and when you get the hang of it, you’ve done an entire print in no time. I think it took me about 30 – 45 minutes to make 10 complete prints.
    And this was the longest blog post. Ever. Good Grief.
    Now, some of you that are familiar with PicMonkey are thinking “Why in the world didn’t she just do an overlay on top of an overlay on top of an overlay???!!” “Is she crazy?”
    Duh. We all already knew that. I tried the overlay on top of an overlay, yada-yada-yada method. But it just would not work for me. It wouldn’t let me re-size the backgrounds and image like I wanted it. Maybe some of you can get it to work for you.
    Now, go buy cute graphics and backgrounds (I think I paid around $15 for backgrounds and 9 or 10 images) from Etsy and make your own wall art.
    I have to go get a beer. Because this was the longest blog post ever. I know I already said that, I just wanted to re-inforce it. Love y’all!

    You know you don’t wanna miss any of this crazy.

    Sign up to get my posts delivered to your inbox here. 

    Stalk Me Here:

    Pinterest / Facebook / Twitter /  Instagram

  • Song Lyrics as Wall Art

    Song Lyrics as Wall Art

    I love music. In fact, I don’t just love music, I live music. If you have ever read my About Me page, you know that my musical tastes are incredibly varied. I’m talking Patsy Cline one minute and KISS the next. Yep, I’m that girl. I even made my daughter a playlist before she was born to make sure she was raised up on the classics. The child has yet to listen to an actual lullaby or kids song. We have dance parties to Jason Aldean, Scissor Sisters, and Poison among others. The wheels on the bus what? Not here. So, obviously, music is very important to me.

    When I chose the graphics to use for my DIY bedroom wall art, for the most part, I chose images that were special or had a connection to my husband and I in some way. Besides those prints, I wanted to put something else that had a significant meaning up. What better than song lyrics? So, I took lyrics from our favorite song and put together a print on Picmonkey to use song lyrics as wall art.

    This post contains affiliate links for your shopping convenience. Click here to read my full disclosure policy.

    Song Lyrics as Wall Art
    Yes, people, our favorite song is “Your Love” by The Outfield. I’m not older than Grunt Labor, and we don’t know a Josie, but on our second date this song came on, I turned it up, he looked at me and asked, “Do you like this song?” I responded with, “Its my favorite.” He smiled devilishly and drove on. Music has the amazing power to take you back to a place in time and this one takes me back to that exact moment.
    Enough mushiness.
    To make this in Picmonkey, all I did was upload a linen background that I used from the master bedroom wall art, then I wrote in the first few lines of the song, using different fonts for each line. I added the wreath type image (I’m not quite sure what that’s called) as an overlay. It was a graphic I already had, and then just added text in the middle of it to put our initial. The banner on the bottom right was an overlay available through Picmonkey.
    Now, I just need a frame for this along with the other new wall art.
    Frugal frame ideas, anyone?

    Looking for more easy wall decor? Check these out:

    How to Make a Silhouette the Easy Way – seriously, super EASY!

    Sassy Fabric Covered Message Board – super fun bulletin board!

    Monogram Photo Art – monogram art using family photos!

    Vintage Nursery Rhyme Art – don’t toss those old nursery rhyme books!

    DIY Wall Art with Picmonkey – when you can’t find the art you want, you make your own!

    You know you don’t wanna miss any of this crazy.

    Sign up to get my posts delivered to your inbox here. 

    Stalk Me Here:

    Pinterest / Facebook / Twitter / Instagram

  • DIY Vintage Nursery Rhyme Prints

    DIY Vintage Nursery Rhyme Prints

    If you remember, I bought some vintage nursery rhyme books and made this cute tissue box cover for the nursery….

    Vintage Nursery Rhyme Tissue Box Holder
    I also chose 6 of the nursery rhymes to frame. I bought simple white frames at Micheal’s and used scrapbook paper as the background.
    Framed Vintage Nursery Rhyme
    Vintage Nursery Rhymes Framed
    Framed Vintage Nursery Rhymes - Nursery Art
    Vintage Nursery Rhyme Prints for Nursery Decor
    Simple, cute, and vintage. How can you go wrong with that combination?
    What do you think of the bambino’s vintage nursery rhymes framed prints?

    Looking for more easy wall decor? Check these out:

    How to Make a Silhouette the Easy Way – you seriously won’t believe how stinkin’ easy this is!

    Sassy Fabric Covered Message Board – a fun way to display family reminders!

    Monogram Photo Art – turn family photos into monogram art!

    Song Lyrics as Wall Art – take your favorite song lyrics and make them art!

    DIY Wall Art with Picmonkey – can’t find the art you want, make it then!

    You know you don’t wanna miss any of this crazy.

    Sign up to get my posts delivered to your inbox here. 

    Stalk Me Here:

    Pinterest / Facebook / Twitter / Instagram