Blog

  • Kitchen Tour {All About the Details}

    To get more decorating ideas and posts like this delivered to your inbox click here.

    Kitchen Tour {rainonatinroof.com} #kitchen

    This post contains affiliate links for your shopping convenience. Click here to read my full disclosure policy.

    **Update: There have been a couple questions about my faucet. It is Pegasus Lyndhurst Series by Glacier Bay. We’ve had it from the beginning of our re-model and love it! No problems with it at all!

    Ready for eye candy?

    I hope so.

    Today and tomorrow, myself, along with many other bloggers are showing you our kitchens.

    But not just our kitchens.

    The details of our kitchens.

    1095068_10152393916750288_1207316620_n

    Because we all know: its all about the details.

    Details pull a space together.

    Welcome to my kitchen tour!

    Kitchen Tour {rainonatinroof.com} #kitchen

    The thing that catches your eye first could possibly be those barstools.

    Kitchen Tour {rainonatinroof.com} #kitchen

    Yep, they are pretty fab.

    I Rub ‘N Buffed the lower ring.

    Kitchen Tour {rainonatinroof.com} #kitchen

    And painted on the blue stripes.

    The barstools are my favorite thing in the space.

    Wait, maybe I have more than one favorite thing.

    Because I really love my island as well.

    Kitchen Tour {rainonatinroof.com} #kitchen

    Kitchen Tour {rainonatinroof.com} #kitchen

    You can read more about how we built the island here.

    I refuse to ever move because I won’t be able to take the island with me.

    They may lay me out on it when I die.

    Maybe not, that would be weird.

    Kitchen Tour {rainonatinroof.com} #kitchen

    I am a firm believer in the power of fresh flowers.

    They can instantly add drama and welcome any guest into your home.

    I have a full-time gardner who works tirelessly to make sure I have beautiful, fresh flowers like these.

    His name is Grunt Labor.

    One time, he even planted a huge row of hydrangeas because while reading a magazine one day and drooling over hydrangeas, I said I don’t think I would ever leave my yard if I had hydrangeas like that.

    I came home one afternoon to see him planting 10+ hydrangea bushes.

    He said he figured if the hydrangeas were there and that meant I wouldn’t leave , it also meant I wouldn’t ever leave him.

    Oh, Grunt Labor, you are too valuable to leave.

    Who else would put up with my never-ending decor changes?

    Back to the kitchen tour, you know, I digress too much.

    Kitchen Tour {rainonatinroof.com} #kitchen

    I just whipped up this navy and white chevron tray this week.

    A super easy and fun project.

    There will be a tutorial soon. Hopefully.

    When Grunt Labor and I did the kitchen renovation, we kept the original cabinets and just updated them with paint and hardware from Ikea.

    We did however, remove one wall of cabinets to allow for some open shelving from once more, Ikea.

    Kitchen Tour {rainonatinroof.com} #kitchen

    Kitchen Tour {rainonatinroof.com} #kitchen

    I love the combination of the wood stained shelving against the subway tile.

    I display my “whiteware” on it.

    I refuse to pay over $5 for a piece of “whiteware” unless I absolutely love it.

    Speaking of subway tile, it is just the best – timeless and classic, it goes great with anything.

    Grunt Labor installed it as well – see, I told you he was valuable.

    Below the open shelving, sits the fruit basket.

    Kitchen Tour {rainonatinroof.com} #kitchen

    Which is really an old metal locker basket.

    I love these bad boys and anytime I see one for $10 or less, I buy it.

    One time, I walked into an old gym locker room and these were all along one wall.

    It took every ounce of self restraint I had not to run like a mad woman out of the building with as many as I could carry.

    I can see the headlines now:

    “Deranged Blogger jailed for Stealing Vintage Locker Baskets”

    How much time do you think I would get?

    It could be worth it.

    Just sayin.

    My sweet next door neighbor is moving.

    She has given me so many wonderful little treasures like this little vintage coffee holder.

    Kitchen Tour {rainonatinroof.com} #kitchen

    I’m not really a fan of the K-Cup spinner coffee holders and shelves.

    They aren’t very pretty at all.

    And I’m snobby when it comes to things like that.

    So, when she offered me this coffee holder, I jumped on it like stink on you-know-what.

    She also gave me some beautiful vintage mason jars – blue and clear.

    Lucky, lucky me.

    To store my cookbooks, I use metal locker baskets as well.

    Kitchen Tour {rainonatinroof.com} #kitchen

    Kitchen Tour {rainonatinroof.com} #kitchen

    They have been up for well over a year now and have never fallen.

    Go us.

    You can see the tutorial on how we hung these here.

    To store my cooking utensils, I use an old silver pitcher.

    Kitchen Tour {rainonatinroof.com} #kitchen

    I found this little gem at Goodwill for $3 one day.

    My heart soared, I tell ya.

    It adds a little bling to the counters.

    Thanks for coming along on the tour with me today.

    Kitchen Tour {rainonatinroof.com} #kitchen

    I hope you enjoyed it!

    If you really want to see how far my kitchen has come (it was a 1960s rancher style), see the full reveal here.

    Looking for kitchen island ideas? I’ve got ones you’ve never even thought of here!

    Desperately need a new kitchen countertop, but can’t afford one right now? What about one of these DIY countertop makeovers?

    Love white kitchens? Get more white kitchen inspiration here!

    Need more real life kitchen ideas? Find those here.

    Sign up to get my posts delivered to your inbox here. 

    You know you don’t wanna miss any of this crazy.

    Stalk Me Here:

    Pinterest / Facebook / Twitter / Instagram

    SaveSave

  • Restored Rocking Chair

    Restored Rocking Chair

    Its Summer Spruce-Up Wildcard time! Tomorrow is the wildcard link party and today, I’m sharing my wildcard project.

    Restored Rocking Chair {rainonatinroof.com} #rockingchair

    This Restored Rocking Chair.

    Rarely, do I ever spend a significant amount of money on an item for my home.

    I change my mind too much.

    We all know this.

    This rocking chair was the exception. (more…)

  • 16 DIY Lamp Makeovers and Ideas You Can Do Yourself!

    16 DIY Lamp Makeovers and Ideas You Can Do Yourself!

    In my opinion, one can never have enough great lamps. These DIY lamp ideas for lamp makeovers, building your own lamps, creating your own lampshades and more are sure to give you a “lightbulb” moment. 

    I have a serious obsession with lamps. In fact, many would say I’m a lamp hoarder.

    And they’re right. I totally am a lamp hoarder. I never leave a good one behind.

    One of my favorite things about lamps though, is that they can easily be made over or made from objects you might already have on hand. And just to prove my point, I thought I’d showcase some of my favorite lamp ideas.

    DIY Lamps

    Make a lamp out of a bottle.

    DIY Lamp

    Learn how easy it is to make a lamp out of an old bottle here!

    Make a lamp out of books! 

    DIY Lamp made from books

    Learn how to make a lamp out of books from The Shabby Creek Cottage!

    Give a tripod a second life.

    How to make a lamp from a tripod

    Breathe new life into an old music tripod with this tutorial from The Painted Hive on how to turn one into a lamp.

    Reach for some scrap wood. 

    DIY Lamp made from scrap wood

    If you have some salvaged or scrap wood lying around, you can turn it into a lamp with these instructions from Burlap & Denim.

    Lamp Painting and Lamp Makeover Ideas

    Reach for light and bright colors.

    Lamp painting

    How about a little lamp painting? This lamp got a breath of new life with pink, yellow and white. See how I did it here.

    Get your Kate Spade on.

    DIY Lamp Ideas

    Give an old lamp new life with a Kate Spade inspired twist!

    Go aqua!

    Lamp Makeover Ideas

    Add some bright blue to your life with this aqua spray painted lamp makeover idea!

    Grab your wrapping paper! 

    Thrift Store Lamp Makeover

    Update a basic lamp with a roll of cheap wrapping paper with this tutorial form At Home with the Barkers!

    DIY Lampshade Ideas

    Make your own lampshade!

    Lampshade Ideas - Make your own!

    How to Make Your Own Lamp Shade out of Any Fabric + DIY Lamp Finial

    Get creative with electrical tape! 

    Electrical Tape Lampshade Idea

    DIY Electrical Tape Lampshade

    Give cowhide a spin! 

    DIY Cowhide Lampshade Idea

    Learn how to recover an existing lampshade with faux cowhide here!

    Reach for some balsa wood.

    Lampshade Ideas - lampshade made from balsa wood.

    Give a lamp shade a modern twist with this DIY balsa wood lamp shade from Pomp and Circumstance.

    Got any trim lying around? 

    Lampshade Idea - add trim to bottom of shades.

    Give your lampshade a touch of class by trimming them out with greek key trim like Honey We’re Home Did.

    Give your lamps a vintage twist.

    Lamp Ideas - give a lamp a vintage look.

    Love the vintage shabby chic look? Then see how My Blessed Life made over this lamp.

    DIY Lamp Finial Ideas

    Give it a glam touch!

    DIY Lamp Finial

    Hands down, one of my favorite lamp ideas for dressing up your lamps is to top it off with a lamp finial. Give your lamps a touch of glam with this tutorial for how to make a crystal lamp finial!

    Agates are always a good idea.

    DIY Agate Lamp Final - pretty lamp idea

    If crystals aren’t your thing, then maybe agates are. How about topping off your lamps with one of these DIY Agate Slice Lamp Finials?

    Other Ideas for Dressing Up Your Lamps

    Everything is better with tassels.

    Lamp Ideas - add tassels to lamps.

    Make these lamp tassels in under five minutes to add a little somethin-somethin to your lamps!

    Add an unexpected pop of color.

    Lamp Ideas - Paint the cord for a pop of color.

    Give your lamp an unexpected twist by making the cord pop with this idea from Vintage Revivals.

    Have you done any of your own DIY lamp makeovers?

    Looking for more great DIY decorating ideas?

    7 Super Simple, Super Cute Electrical Tape Ideas – you’ll kick yourself if you don’t take a peek at these!

    14 Painted Rug Hacks – gorgeous rugs on a budget!

    17 Easy Crafts and DIY Projects under $10 – budget projects!

    20+ Duck Tape Crafts & Projects – duck tape, a crafter & DIYer’s best friend!

    pin-this-post

    DIY Lamp Ideas and Lampshade Ideas

    Sign up to get my posts delivered to your inbox here. 

    You know you don’t wanna miss any of this crazy.

    Stalk Me Here:

    Pinterest / Facebook / Twitter /Instagram

    SaveSave

    SaveSaveSaveSaveSaveSaveSaveSaveSaveSave

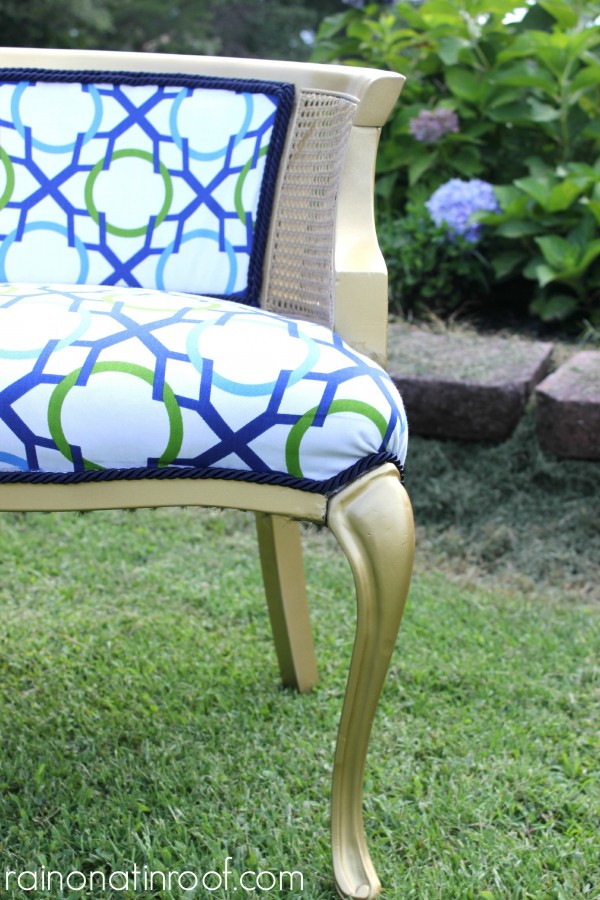
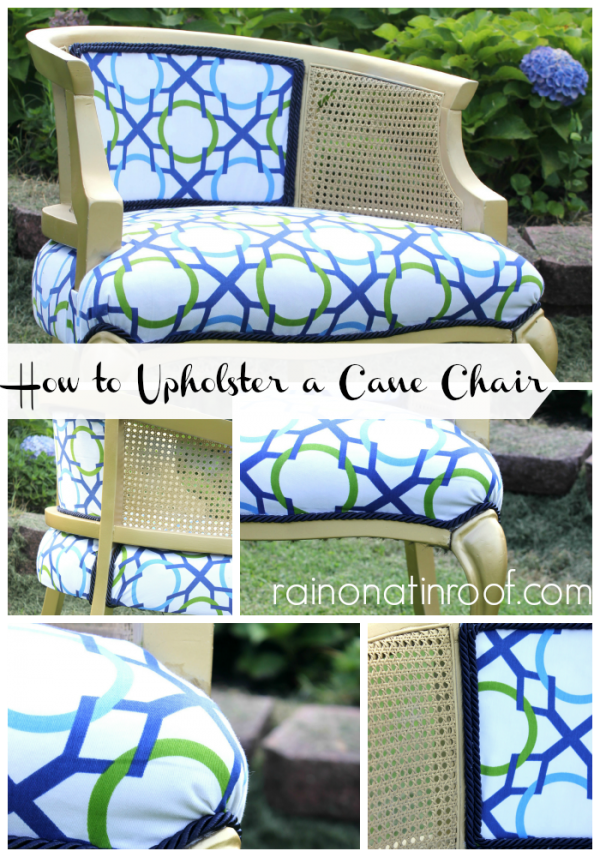
  • How to Upholster a Cane Chair

    How to Upholster a Cane Chair

    I thought re-upholstering this chair would be difficult.

    How to Upholster a Chair {rainonatinroof.com} #upholstery

    I was wrong.

    Shocking, I know.

    Now, I will teach you how to upholster a cane chair like this.

    Aren’t you so excited? (more…)

  • Toy Chest Makeover

    Toy Chest Makeover

    I’m not gonna lie. When HomeRight first contacted me and asked if I was interested in reviewing a paint sprayer, I was a bit skeptical.

    Disclosure: This post was sponsored by HomeRight, however all opinions are 100% mine. This post contains affiliate links for your shopping convenience. Click here to read my full disclosure policy.

    You see, I have purchased two paint sprayers in the last year and both have failed me. One would never spray quite right, it always spit out globs of paint despite me following the exact directions on thinning the paint. The other did fine the first time I used it and the next day, it would not work at all.

    See why I was skeptical?

    I can’t tell you how happy I am though, that I told HomeRight yes to reviewing their paint sprayer.

    Because this paint sprayer is a whole different ballgame.

    HomeRight Finish Max Paint Sprayer Review {rainonatinroof.com}

    As soon as I took it out of the box, I realized it was different. There were not near as many parts that go with this paint sprayer as opposed to others. I decided this old chest was the perfect thing to get started with using my new HomeRight Finish Max.

    Chest Makeover {rainonatinroof.com}

    Chest Makeover {rainonatinroof.com}

    It was also the perfect thing to start with because baby girl needs a toy chest. Like needed a toy chest six months ago. Enter toy chest makeover.

    This chest was given to me years ago by my great aunt who took it to college with her. And she is about to turn 100. So, yea, there’s some history here. Including lots of scuffs, scraped paint, dents and dings.

    But I love those dents and dings.

    Before painting the chest, I gave it a good sanding to remove loose paint and wiped it down with a tack cloth to pick up all the dust.

    One of the great things about the Finish Max is that it comes with this awesome tool, technical term is a viscosity cup) that helps you determine whether or not your paint needs to be thinned.

    HomeRight Finish Max Paint Sprayer Review {rainonatinroof.com}

    You fill up the funnel (viscosity cup) with paint and then count how many seconds it takes for the paint to empty out of the funnel. The instruction manual gives you the amount of time it should take for primer, enamel, etc. to run out of the funnel. If your paint doesn’t run out of the funnel in the given amount of time, it needs to be thinned. You just add more water until it reaches the stated time.

    After getting my paint consistency just right, I plugged this bad boy in and went to town.

    HomeRight Finish Max Paint Sprayer Review {rainonatinroof.com}

    I started off by giving the chest a couple thin coats of primer. Since this is the Finish Max paint sprayer, it focuses on quality, rather than quantity. The paint comes out very fine to create a beautiful finish, so it may take an extra coat to get full coverage. But, trust me, the final product is so worth it.

    After the chest got primed, it got another couple coats of white paint.

    To add some character, I stenciled on some cute little birds in pink and blue with a stencil from Royal Designs Studio.

    And that wire the birds are standing on….not paint. I just drew it on with a black sharpie.

    chest makeover 2

    Chest Makeover {rainonatinroof.com}

    Chest Makeover {rainonatinroof.com}

    Toy Chest Makeover {rainonatinroof.com}

    I can’t tell you guys how much easier this paint sprayer has made my furniture painting.

    It saves me so much time and creates a beautiful finish.

    I am in love.

    With a paint sprayer.

    Really, maybe one of you should go on and call that asylum.

    Want more toy box inspiration? See how I turned an old army locker into a toy box here.

    Worried about the clean-up? Don’t be! It takes less than 10 minutes to clean the sprayer and is easy! Get the lowdown on cleaning the Finish Max here.

    See more of my favorite tools and products for DIY projects here.

    And you can always see all my Furniture Makeovers Here.

    Sign up to get my posts delivered to your inbox here. 

    You know you don’t wanna miss any of this crazy.

    Stalk Me Here:

    Pinterest / Facebook / Twitter / Instagram

    SaveSave

  • Top 20 Coral Projects and Ideas for any Home

    Top 20 Coral Projects and Ideas for any Home

    I know what you’re thinking.

    Why am I doing a post on the top 20 coral projects when coral is such a spring and summer color and summer is almost over.


    Coral Decor | Coral Decorating Ideas | Coral Bedroom | Coral Bathroom | Coral Living Room | Coral DIY Decor

    Because I think that coral is a versatile color that can be used year round. It works great with other light and pastel colors, but pair it with navy or emerald, and it still works. And may just knock your socks off.

    That’s just my two cents. Take it or leave it.

    But do check out these awesome projects and ideas for coral inspiration. (more…)

  • Spray Painted Lamp Makeover

    Remember that fabulous coral and green striped table I showed you the other day?

    This lamp was its mate.

    It was on top of the table at the yard sale.

    Spray Painted Lamp Makeover {rainonatinroof.com} #spraypaint #lamp #makeover

    The lamp was actually overhauled before the table. I think when the table saw how fabulous the lamp was, it decided it should be just as fabulous, if not more.

    Have any of you called the asylum yet to come pick up the crazy lady who says her furniture has thoughts and feelings?

    One of you should probably get on that. I’ll start packing. (more…)

  • Table Makeover with Mod Podge and Wrapping Paper – Easy and Cheap

    Table Makeover with Mod Podge and Wrapping Paper – Easy and Cheap

    If you like fabulous furniture makeovers, you may want to sign up for my free email updates here. 

    I am so happy to be getting back in the groove of things and show you guys a project of mine.

    A colorful and favorite project of mine.

    A table makeover with Mod Podge and wrapping paper.

    Table Makeover with Wrapping Paper and Mod Podge | Side Table Redo | Side Table Makeover Ideas | Best Furniture Makeovers

    I never could have imagined that this table would end up so cute in the end.

    This post contains affiliate links for your shopping convenience. Click here to read my full disclosure policy.

    Great idea for fixing a too-far-gone tabletop! Wrapping Paper Topped Table Makeover via RainonaTinRoof.com

    I picked it up at a yard sale a few months back. Initially, I thought I would just do a quick flip of it. I was going to paint it a simple white and make the handle gold.

    The table decided it would not be a quick flip. No, no, no. It decided it had been forgotten for far too long and needed something more.

    After I had sanded it and attempted to fill the gouges and scratches with putty, the table top surface just would not become smooth.

    I gave up and tossed it to the side for a couple weeks until I was at Home Goods one day and found some gorgeous green and white striped wrapping paper. I bought the paper knowing it would look great on the table.

    After looking at the green in the wrapping paper, I decided the table needed some more color to go along with that pop of green. I pulled out the paint I used on my daughter’s dresser in the nursery and gave the legs and sides a couple coats of Salmon Pink by Behr. I painted the bottom shelf white. I didn’t want there to be too much of a good thing with the coral.

    Next, I brought the table inside and laid the wrapping paper over the top to get an idea of what size to cut it down to.

    Great idea for fixing a too-far-gone tabletop! Wrapping Paper Topped Table Makeover via RainonaTinRoof.com

    Sorry for the terrible lighting photo, but literally, that’s all I did, lay it on the table and cut it out.

    Once I cut it out, I put a coat of mod podge on the table top, laid the paper on top and gave the top a few coats of Mod Podge to protect it. I put the mod podge along the edges as well and pressed the paper under the top as I went.

    Great idea for fixing a too-far-gone tabletop! Wrapping Paper Topped Table Makeover via RainonaTinRoof.com

    I gave the handle a coat of gold spray paint.

    Where did she go, you ask?

    Oh, she only sold within 30 minutes of being listed.

    No, I’m not kidding. I told you she was fabulous.

    pin-this-post

    Table Makeover with Wrapping Paper and Mod Podge | Side Table Redo | Side Table Makeover Ideas | Best Furniture Makeovers

    Need more furniture makeover fixes? Head here.

    Looking for more projects where Mod Podge and beautiful papers work together wonderfully? 

    Easy Step Stool Makeover – turn a basic and blah stepstool into a shining star with colorful scrapbook paper and Mod Podge!

    Vintage Storybook Garland – an adorable garland for your Christmas tree!

    Easy Glitter Easy Bunny Art – a super cute Easter bunny decor piece!

    Sign up to get my posts delivered to your inbox here. 

    You know you don’t wanna miss any of this crazy.

    Stalk Me Here:

    Pinterest / Facebook / Twitter / Instagram

  • Wedding Vow Mad Libs Free Printable

    Wedding Vow Mad Libs Free Printable

    Looking for a fun game to play at that bridal shower you’re hosting? This wedding vow mad libs free printable is your easy answer!
    Hi Rain on a Tin Roof readers!
    I’m April, from House by Hoff, and I’m up to my eyeballs in wedding shower preparations!

    Perhaps, I should back up and explain…

     My sister is getting married this fall, and I’m throwing her a bridal shower tomorrow.  That’s right, as in the day after tonight…yikes!
  • 13 Ideas for Sprucing-Up Your Front Door & Entry

    13 Ideas for Sprucing-Up Your Front Door & Entry

    Oops. You did it again.

    You played with my mind.

    You guys, once more, gave me loads of inspiration during the Summer Spruce-Up Front Door & Entry Party.

    And yes, I’m singing Brittany Spears right now.

    Heaven, help us.

    Here are 13 ideas for sprucing-up your front door & entry area.

    I love the wreaths here and the simple ideas! 13 Ideas for Sprucing Up Your Front Door and Entry
    (more…)

  • House Tour: Vintage Modern Rustic DIY Renovated Rancher

    To get more decorating and DIY tips delivered straight to your inbox, subscribe for free here. 

    Update: See the updated home tour here! 

    Welcome to my Renovated Rancher House Tour! 

    Wow! They did a lot of renovations to this 70's Rancher! Rustic Modern Cottage Home Tour

    Renovated Rancher House Tour {rainonatinroof.com} #hometour

    A renovated brick rancher!

    Two years ago, Grunt Labor and I purchased a 1960s brick rancher. Was it our dream home? Negative. Was it in our dream neighborhood? Abso-freakin-lutley. And as they say, location is everything.

    We had lived in a brand-spankin-new home, but we just weren’t the strict neighborhood association type and it just didn’t feel like home. Plus, it was on the other side of town, away from both our jobs. So, when we found this house at our price-point (did I mention it was a foreclosure?) in a neighborhood we loved, we jumped on it. Of course, there was another offer on it as soon as we put ours in, but we got it!

    When my mother-in-law saw it, she cried. And not tears of joy, people. Bless her, she was so worried we were leaving our brand new house for a piece of crap. And she had a completely valid point. When we bought the house, the electricity and water was cut off, we really had no clue what all would have to be done. Not to mention all the updates we wanted to do. However, the water and electricity worked (besides some outlet updates), and there weren’t too many other surprises. So, enough of an intro, here’s the good stuff!

    This post contains affiliate links for your shopping convenience. Click here to read my full disclosure policy.

    Entryway:

    Renovated Rancher House Tour {rainonatinroof.com} #hometourThe entry table recently got a coat of white paint and gold detailing with Rub ‘N Buff. Its always fun to see people’s reaction to the Stag head. Most always ask if I killed it.

    See the updated entryway here! 

    Kitchen:

    Renovated Rancher House Tour {rainonatinroof.com} #hometour

    The kitchen got a makeover including new tile, counter-tops and a custom built island thanks to Grunt Labor. We kept the original cabinets, but gave them a coat of paint and new hardware.

    Be sure to check out my “Its all in the Details Kitchen Tour” for more kitchen goodness.

    And read about how we built the kitchen island here.

    Renovated Rancher House Tour {rainonatinroof.com} #hometour

    Summer 2013 Showcase of Homes {rainonatinroof.com} #hometour

    Our kitchen, living room, and dining room is one big open space. It used to be three separate rooms, but was just too confining, so a few walls had to go.

    Dining Room:

    Renovated Rancher House Tour {rainonatinroof.com} #hometour

    The table and chairs were my great aunt’s, which I revived with paint and love. The corner corner liquor cabinet was once my great grandmother’s china cabinet. I know, she is giving me an earful in Heaven right now.

    Renovated Rancher House Tour {rainonatinroof.com} #hometour

    See some of the updated dining room here! 

    Living Room:

    Renovated Rancher House Tour {rainonatinroof.com} #hometour

    If you have followed me for a while, you may have noticed that I have hardly every shown you any photos of my living room, with the exception of my gallery wall and grain sack striped bookcase. That’s because this room, ok, every room actually, but really this room, is a work in progress. I’m not a fan of my couch at all, but I do love my two new modern wingback chairs from IKEA.

    Renovated Rancher House Tour {rainonatinroof.com} #hometour

    The buffet turned media center came with the dining room table from my great aunt. It too got a coat of paint.

    Renovated Rancher House Tour {rainonatinroof.com} #hometour

    Summer 2013 Showcase of Homes {rainonatinroof.com} #hometour

    Summer 2013 Showcase of Homes {rainonatinroof.com} #hometour

    The white chairs were Craigslist finds that got a makeover, as well as the coffee table.

    Renovated Rancher House Tour {rainonatinroof.com} #hometour

    home tour 14

    See the updated living room here! 

    And don’t miss the 20+ living room ideas here for more inspiration!

    Master Bedroom:

    Renovated Rancher House Tour {rainonatinroof.com} #hometour

    After being in our home for nearly two years, the master bedroom was finally completed in March.Renovated Rancher House Tour {rainonatinroof.com} #hometour

    Renovated Rancher House Tour {rainonatinroof.com} #hometour

    Monograms and I have an unending love. If you ask this southern girl, monograms are a classic.

    Renovated Rancher House Tour {rainonatinroof.com} #hometour

    Summer 2013 Showcase of Homes {rainonatinroof.com} #hometour

    Renovated Rancher House Tour {rainonatinroof.com} #hometour

    The two pieces of furniture you will never find me painting is my dresser and chest of drawers in our master bedroom. They were my great uncle’s and have a beautiful finish that has held up beautifully for the last 50 years. Hopefully, they have 50 more. I did touch up the hardware with some Rub ‘N Buff though.

    Renovated Rancher House Tour {rainonatinroof.com} #hometour

    Renovated Rancher House Tour {rainonatinroof.com} #hometour

    I carved out a reading nook in the corner of our bedroom with a chair from Costco and DIY corbel shelving.

    Renovated Rancher House Tour {rainonatinroof.com} #hometour

    I made the wall art in the bedroom with PicMonkey and frugal graphics from Etsy.

    My Bathroom:

    Renovated Rancher House Tour {rainonatinroof.com} #hometour

    Grunt Labor and I have separate bathrooms. Its the key to a happy marriage. I promise.

    My bathroom got new marble tile, a new vanity and this built-in bathroom shelving:

    Renovated Rancher House Tour {rainonatinroof.com} #hometour

    The Nursery:

    Renovated Rancher House Tour {rainonatinroof.com} #hometour

    Baby girl’s nursery has a vintage feel. I combined thrift store finds and items from my childhood as well as Grunt Labor’s to use in her room.

    Renovated Rancher House Tour {rainonatinroof.com} #hometour

    Screened-In Porch:

    Renovated Rancher House Tour {rainonatinroof.com} #hometour

    The screened-in porch got an overhaul this spring and it is my new happy place.

    Renovated Rancher House Tour {rainonatinroof.com} #hometour

    Thank you so much for stopping by! What do ya think of my house tour?

    Wanna snoop around my home more? Right this way, please….

    Kitchen Reveal

    Screened-In Porch Makeover

    A Vintage Nursery

    DIY Bathroom Renovation

    Master Bedroom Makeover

    Sign up to get my posts delivered to your inbox here. 

    You know you don’t wanna miss any of this crazy.

    Stalk Me Here:

    Pinterest / Facebook / Twitter / Instagram

  • 10 Ralph Lauren Inspired Projects

    10 Ralph Lauren Inspired Projects

    The Ralph Lauren Soiree was another success for the Summer Style Series!

    Here are 10 Ralph Lauren inspired projects that stole the show!

    Get ready for navy overload!

    Love these classic style ideas! 10 Ralph Lauren Inspired Projects

    10 Ralph Lauren Inspired Projects

    10 Ralph Lauren Inspired Projects {rainonatinroof.com} #ralphlauren

    Ralph Lauren Monogrammed Shirt from Lucky Scarf

    10 Ralph Lauren Inspired Projects {rainonatinroof.com} #ralphlauren

    Ralph Lauren Aqua & White Striped Tray from May Richer Fuller Be

    10 Ralph Lauren Inspired Projects {rainonatinroof.com} #ralphlauren

    Ralph Lauren Inspired Barstools from Rain on a Tin Roof

    10 Ralph Lauren Inspired Projects {rainonatinroof.com} #ralphlauren

    Ralph Lauren Bedding from Southern State of Mind

    10 Ralph Lauren Inspired Projects {rainonatinroof.com} #ralphlauren

    Ralph Lauren Chest Makeover from Our Fifth House

    10 Ralph Lauren Inspired Projects {rainonatinroof.com} #ralphlauren

    How to get the Ralph Lauren Look from Craftivity Designs

    10 Ralph Lauren Inspired Projects {rainonatinroof.com} #ralphlauren

    Ralph Lauren Brickmaster Table from Effortless Style

    10 Ralph Lauren Inspired Projects {rainonatinroof.com} #ralphlauren

    DIY Nautical Inspired Ralph Lauren Drapes from Amy Krist Interiors

    10 Ralph Lauren Inspired Projects {rainonatinroof.com} #ralphlauren

    Ralph Lauren Denim from Pinterest Told Me To

    10 Ralph Lauren Inspired Projects {rainonatinroof.com} #ralphlaurenRalph Lauren Inspired Living Room from The Coconut Head

    Want more designer inspired projects?

    13+ Kate Spade Inspired Projects – if Kate is your thing, don’t miss these!

    8 Jonathan Adler Projects – modern and colorful!

    Love Lilly Pulitzer? Here are 10+ projects inspired by her! 

    You know you don’t wanna miss any of this crazy.

    Sign up to get my posts delivered to your inbox here.

    Stalk Me Here:

    Pinterest / Facebook / Twitter / Instagram

  • DIY Monogram Tray (A Great Gift Idea)

    DIY Monogram Tray (A Great Gift Idea)

    I loved how the first monogrammed tray I did turned out. Lindsay loved getting it for her birthday, and it is beautiful in her home. In fact, I loved it so much that I made another one for a friend who is getting married in October and I have one for myself in the works.
    DIY Monogram Tray
  • 40+ Gold Home Decor Projects

    40+ Gold Home Decor Projects

    Sign up here to get more posts like this one delivered to your email for free!  

    Gold is back, baby! And I am loving it!

    Here are 40+ gold home decor projects!

    This is a huge round-up, but there is some amazing inspiration to be had here!

    40+ gold home decor DIY Projects and Crafts | Easy Home Projects | Easy Crafts | Home Decor Ideas

    This post contains affiliate links. 

    How to Glitter Mason Jars via RainonaTinRoof.com #glitter #crafts #masonjar #modpodge

    Gold and Pink Glittered Mason Jars

    Those mason jars are only $3 each!

    Made from a $1 rubber snake! DIY Snake Bud Vase

    DIY Snake Bud Vase

    Yea, its a little weird, but you have to admit this snake bud vase using a heat gun is super creative.

    Sequined Coat Hangers via RainonaTinRoof.com #lifequotes #sequins #coathanger

    Gold Sequined Coat Hangers + Free Printable Quote Art

    Just when you thought a coat hanger couldn’t get any better…

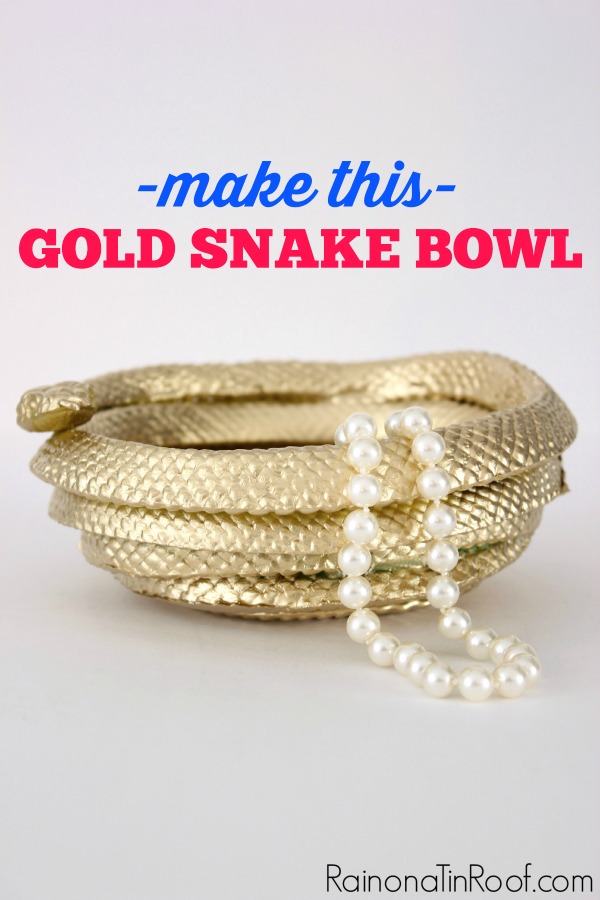
    Had no clue you could do something like this with a heat gun! So many possibilities! DIY Gold Snake Bowl via RainonaTinRoof.com

    DIY Golden Snake Bowl

    Another slightly weird, but creative project.

    40+ Gold Projects {rainonatinroof.com} #gold #DIY #craft

     Rub ‘N Buff Gold Corners

    Use Rub ‘N Buff to add a touch of gold detail to the corners of frames.

    40+ Gold Projects {rainonatinroof.com} #gold #DIY #craft

    DIY Decorative Horse Accessories

    Toy horses + Gold Spray Paint = Love.

    40+ Gold Projects {rainonatinroof.com} #gold #DIY #craft

    Blue & Gold Dipped Barstool

    40+ Gold Projects {rainonatinroof.com} #gold #DIY #craft

    Kate Spade Inspired Lamp Makeover

    40+ Gold Projects {rainonatinroof.com} #gold #DIY #craft

    Two Twenty One: Glitter State Art

    40+ Gold Projects {rainonatinroof.com} #gold #DIY #craft

    The Glitter Guide: DIY Gold Leaf Pots

    40+ Gold Projects {rainonatinroof.com} #gold #DIY #craft

    View Along the Way: Rub ‘N Buff Lamp Makeover

    40+ Gold Projects {rainonatinroof.com} #gold #DIY #craft

    Cosy Carolina: Gold Shade

    40+ Gold Projects {rainonatinroof.com} #gold #DIY #craft

    AKA Design: Gold Sharpie Animal Print Bowls

    40+ Gold Projects {rainonatinroof.com} #gold #DIY #craft

    An Extraordinary Day: Gold Clam

    40+ Gold Projects {rainonatinroof.com} #gold #DIY #craft

    Dimples & Tangles: Green & Gold Lamp Makeover

    40+ Gold Projects {rainonatinroof.com} #gold #DIY #craft

    Our Fifth House: Gold Chair

    40+ Gold Projects {rainonatinroof.com} #gold #DIY #craft

    Live Life Beautifully: Gold & White Bowls

    40+ Gold Projects {rainonatinroof.com} #gold #DIY #craft

    Worthing Court: Pops of Gold in the Dining Room

    40+ Gold Projects {rainonatinroof.com} #gold #DIY #craft

    A Pumpkin and a Princes: Gold Glitter Candles

    40+ Gold Projects {rainonatinroof.com} #gold #DIY #craft

    Suburble: Gold Jewelry Organizer

    40+ Gold Projects {rainonatinroof.com} #gold #DIY #craft

    Creative Soul Spectrum: DIY Elephant Key Hooks

    40+ Gold Projects {rainonatinroof.com} #gold #DIY #craft

    Burlap & Lace: Gold Dipped TV Console

    40+ Gold Projects {rainonatinroof.com} #gold #DIY #craft

    Jenna Beth: Gold Dinosaurs

    40+ Gold Projects {rainonatinroof.com} #gold #DIY #craft

    Honey Bear Lane: Gold Dipped Barstools

    40+ Gold Projects {rainonatinroof.com} #gold #DIY #craft

    Carissa Miss: Free Gold Glitter Animal Printables

    40+ Gold Projects {rainonatinroof.com} #gold #DIY #craft

    hi sugarplum: Gold Dot Vase

    40+ Gold Projects {rainonatinroof.com} #gold #DIY #craft

    Fabulous K: Gold and White Office

    40+ Gold Projects {rainonatinroof.com} #gold #DIY #craft

    Design + Fluff: Rub ‘N Buff Wall Treatment

    40+ Gold Projects {rainonatinroof.com} #gold #DIY #craft

    Cottage at the Crossroads: Gold Plaster Leaves

    40+ Gold Projects {rainonatinroof.com} #gold #DIY #craft

    Marty’s Musings: Gold Framed Map Print

    40+ Gold Projects {rainonatinroof.com} #gold #DIY #craft

    Girl in the Garage: Gold Dipped Feet

    40+ Gold Projects {rainonatinroof.com} #gold #DIY #craft

    Girl in the Garage: Black and Gold Mirror

    40+ Gold Projects {rainonatinroof.com} #gold #DIY #craft

    A Little Claireification: DIY Gold Home Decor

    40+ Gold Projects {rainonatinroof.com} #gold #DIY #craft

    Renew Redo: Rub ‘N Buff Chest of Drawers

    40+ Gold Projects {rainonatinroof.com} #gold #DIY #craft

    Making Lemonade: Gold Faux Bois Tray

    40+ Gold Projects {rainonatinroof.com} #gold #DIY #craft

    Just Paint It: Antique Gold Faux Finish

    40+ Gold Projects {rainonatinroof.com} #gold #DIY #craft

    AKA Design: Gold Glittered Ampersand Art

    40+ Gold Projects {rainonatinroof.com} #gold #DIY #craft

    Dimples and Tangles: Gold Accent Wall

    40+ Gold Projects {rainonatinroof.com} #gold #DIY #craft

    Fresh Idea Studio: Upcycle Ugly Art with Gold

    40+ Gold Projects {rainonatinroof.com} #gold #DIY #craft

    Our Fifth House: Rub ‘N Buff Greek Key Tray

    40+ Gold Projects {rainonatinroof.com} #gold #DIY #craft

    Atta Girl Says: Gilded Seashells

    40+ Gold Projects {rainonatinroof.com} #gold #DIY #craft

    Cuckoo 4 Design: Gold Monogrammed Greek Key Bookend

    40+ Gold Projects {rainonatinroof.com} #gold #DIY #craft

    Two Twenty One: DIY Gold Striped Vase

    Hope you are full of gold inspiration now!! I’m headed to break out my gold spray paint and Rub ‘N Buff!
    pin-this-post
     
    GOLD is back, baby!! Awesome ideas here - mostly easy DIYs that anyone can do! 40+ DIY Gold Projects via RainonaTinRoof.com

    Sign up to get my posts delivered to your inbox here. 

    You know you don’t wanna miss any of this crazy.

    Stalk Me Here:

    Bloglovin / Pinterest / Facebook / Twitter / Google+ / Instagram


    SaveSave

  • Ralph Lauren Inspired Barstools

    Ralph Lauren Inspired Barstools

    I have been waiting to show you these for a month. It has been so hard to keep them a secret…

    Barstool Makeover {rainonatinroof.com} #barstool #makeover

    Ralph Lauren Inspired Barstools {rainonatinroof.com} #ralphlauren #barstool #makeover

    This post contains affiliate links for your shopping convenience. Click here to read my full disclosure policy.

    What do you think? Ok, yes, they do have some Kate in them with that kelly green. But, don’t those blue and white stripes just totally make them Ralph?

    I am in love with them. Really, I’m in love with every project I’ve done for the Summer Soiree Style Series. I have truly surprised myself.

    Here’s what they looked like before:

    Ralph Lauren Inspired Barstools {rainonatinroof.com} #ralphlauren #barstool #makeoverJust your basic industrial vibe barstools. I didn’t dislike them, but I knew they could be better.

    After making my Kate Spade lamp, I knew I wanted more kelly green in my living room, and these barstools were the perfect pieces for it. I wanted the seat to be contrasting, but work well with the green, so I went for the classic Ralph Lauren navy blue stripes.

    This post contains affiliate links for your shopping convenience. Click here to read my full disclosure policy.

    First, I took the back rest apart from the seat, cleaned them up well, and set them up in my super hi-tech spray painting station.

    Ralph Lauren Inspired Barstools {rainonatinroof.com} #ralphlauren #barstool #makeover

    Ralph Lauren Inspired Barstools {rainonatinroof.com} #ralphlauren #barstool #makeoverThey got 2 coats of Rust-Oleum spray paint in Forest Green and a clear gloss topcoat, also Rust-Oleum. My go-to spray paint is always Rust-Oleum. Never once have I been unsatisfied with its results.

    While the stools were drying, I went to upholstering the seats with white fabric. I had to put a small nut and bolt through the seat to be able to tighten it down once I got it back on the stool. Originally , the seats had just been tacked down.

    Ralph Lauren Inspired Barstools {rainonatinroof.com} #ralphlauren #barstool #makeoverOnce the stools were dry, I put the seats back on. And where are those navy stripes, you ask? I didn’t have any navy and white striped material, so I taped off the seats and painted the navy stripes on.

    Ralph Lauren Inspired Barstools {rainonatinroof.com} #ralphlauren #barstool #makeoverIt took about 2 1/2 coats to get the blue evened out. I just used a sample pot of regular latex paint I had.

    Ralph Lauren Inspired Barstools {rainonatinroof.com} #ralphlauren #barstool #makeover

    I put Rub ‘N Buff along the bottom ring to add a pop of gold.

    Ralph Lauren Inspired Barstools {rainonatinroof.com} #ralphlauren #barstool #makeover

    And that’s it! It was simple and cheap and now I have amazeballs Ralph Lauren barstools. And you don’t. haha. I’m kidding. I’m not really that mean.

    Ralph Lauren Inspired Barstools {rainonatinroof.com} #ralphlauren #barstool #makeover

    Ralph Lauren Inspired Barstools {rainonatinroof.com} #ralphlauren #barstool #makeover

    Ralph Lauren Inspired Barstools {rainonatinroof.com} #ralphlauren #barstool #makeover

    Ralph Lauren Inspired Barstools {rainonatinroof.com} #ralphlauren #barstool #makeover

    Ralph Lauren Inspired Barstools {rainonatinroof.com} #ralphlauren #barstool #makeover

    Ralph Lauren Inspired Barstools {rainonatinroof.com} #ralphlauren #barstool #makeoverToo much green? I think not. Hmmmm….maybe I should have called these “Kate meets Ralph Barstools…” Too late now!

    Love designer inspired home projects? 

    Want Lilly Pulitzer Inspired projects – here are 10+ of them! 

    More Ralph Lauren style? See these projects then!

    More of a Jonathan Adler person? Right here are projects inspired by him!

    Kate Spade girl? This way then!

    Follow along so you don’t miss out:

    SaveSave

  • DIY Monogram Photo Art with All You Magazine

    DIY Monogram Photo Art with All You Magazine

    Heard of all you before? All you is a magazine dedicated to its title. Its all about you and how you can live a better life.

    Disclosure: This post is part of a social shopper marketing insight campaign with Pollinate Media Group® and All You, but all my opinions are my own. #lifeforless #pmedia

    All you shows you ways to save money while still living life to the fullest.  Saving money doesn’t have to mean that you go without or that you can’t have fun! All you shows you how to save money (and gives you lots of coupons to help) while still enjoying life! Each and every all you magazine includes numerous coupons, money saving ideas, frugal family activities, recipes, fun craft and decor ideas.

    A couple weeks back, I headed over to my local Dollar General store.

    all you magazine at Dollar General

    And what was staring back at me at the checkout line?

    all you magazine at Dollar General

    all you! That’s right, all you is now available at the Dollar General! July’s issue was loaded with affordable summer fashion, new recipe ideas, money-saving apps, and ways to erase your debt among other awesome things. As I was perusing the magazine, I stumbled upon an article about re-vamping thrifted frames and creating your own wall art, which made me think about a frame I had picked up on clearance  a couple months back. No, it wasn’t a thrifted frame, but it was a large frame on clearance for $5 because it had some dents and dings. The frame had just been sitting down in my craft room collecting dust. With the help from all you, I knew I could turn that frame into some great wall art. I gathered my supplies:

    Monogram Photo Art {rainonatinroof.com} #monogram #photo #art #diy

    I didn’t have one large photo that I wanted to frame, but the all you article was about thinking outside the box for wall art, so I decided to take  four – 4×6 black and white photos and form some monogram photo art with them against some wrapping paper.

    There was some paint that had been scraped off on one side of the frame, so I touched it up with some white acrylic paint. I wanted to add a little bling to the frame with gold Rub ‘N Buff, so I taped off the corners to keep clean edges and rubbed some Rub ‘N Buff on.

    Monogram Photo Art {rainonatinroof.com} #monogram #photo #art #diy

    I cut the wrapping paper to size by simply placing the glass on top of the paper and tracing the size onto the paper then cutting it out. I used photo mounts to attach the photos to the wrapping paper.

    Monogram Photo Art {rainonatinroof.com} #monogram #photo #art #diy

    And the end result:

    monogram photo art 2

    monogram photo art

    So, what do ya think?! Thanks all you for the inspiration!

    Looking for more easy wall decor? Check these out:

    How to Make a Silhouette the Easy Way – easy peasy!

    Sassy Fabric Covered Message Board – up the wow factor on those boring bulletin boards!

    Vintage Nursery Rhyme Art – so sweet and easy!

    Song Lyrics as Wall Art – turn your favorite song into art!

    DIY Wall Art with Picmonkey – learn how to make your own art!

    You know you don’t wanna miss any of this crazy.

    Sign up to get my posts delivered to your inbox here. 

    Stalk Me Here:

    Pinterest / Facebook / Twitter / Instagram

  • 10+ Flower Pot Ideas that are easy and frugal

    10+ Flower Pot Ideas that are easy and frugal

    I love it when flowers aren’t always planted in the usual containers. I think it makes them a little bit prettier.

    Here are some of my favorite flower pot ideas that are creative and pretty easy to make.

    Flower Pot Ideas | Flower Pot Crafts | DIY Flower Pots | Planter Ideas | DIY Planter Ideas | DIY Planter Pots

    Flower Pot Ideas

    DIY Cedar Planter Box 

    Just snap together this frame (I’m serious!), then clad it with cedar planks!

    Take the guesswork out of planters: Easy Tips for Beautiful Planters All Summer Long

    5 Tips for Beautiful Planters All Summer Long 

    Keep your planters gorgeous from beginning to end with these tips!

    Instead of paying $50 on a planter pot, buy a cheap one and dress it up with spray paint! Easy Painted Planter Pots | Gardening | Fiddle Leaf Fig | Geometric | Painting Patterns

    DIY Modern Planters

    Grab a can of spray paint and some painter’s tape to give boring planters a modern twist!

    DIY Succulent Book Planter via RainonaTinRoof.com #succulent #ad

    DIY Succulent Book Planter

    Give your indoor planters a fun twist by making them out of books!

    Teapot Planter - how adorable!

    Teapot Planter

    Simple, but so pretty! This teapot is very special to me. No matter what I put in it, the flowers always do great.

    Tips & Tricks for the Perfect Container Garden

    Tips & Tricks for the Perfect Container Garden

    How we create gorgeous container gardens – I’ve got a few little tricks!

    10+ Creative Planter Ideas {rainonatinroof.com} #planter #creative #round-up

    Make a Planter using an Old Drawer from Designs by Studio C

    How cool of a re-purpose is that??

    10+ Creative Planter Ideas {rainonatinroof.com} #planter #creative #round-up

    Rope Wrapped & Painted Terra Cotta Planters from House by Hoff

    This is such a simple upgrade to basic and cheap terra cotta planters.

    10+ Creative Planter Ideas {rainonatinroof.com} #planter #creative #round-up

    Upcycled Colander turned Succulent Planter from The Happy Housie

    Your drainage holes are already built in with this flower pot! How genius!

    10+ Creative Planter Ideas {rainonatinroof.com} #planter #creative #round-up

    DIY Polka Dot Planters from Southern Scraps

    Polka dots are one of the easiest patterns to paint and make everything fun! I love them on this planter!

    10+ Creative Planter Ideas {rainonatinroof.com} #planter #creative #round-up

    Crate Planter from Denise on a Whim

    Old crates make my heart flutter. Add a plant to it and I might faint.

    10+ Creative Planter Ideas {rainonatinroof.com} #planter #creative #round-up

    Spray Painted Tin Can Planters from Restoration Beauty

    This is a genius upcycling project! Turn tin cans into a flower pot!

    plantersb

    Summer Planters from Better with Age

    These summer planters are classic and beautiful.

    10+ Creative Planter Ideas {rainonatinroof.com} #planter #creative #round-up

    Galvanized Bucket Herb Planter from Boxy Colonial

    I am a sucker for anything galvanized. I love its look.

    10+ Creative Planter Ideas {rainonatinroof.com} #planter #creative #round-up

     DIY Flower Pot Wreath from Tried & Twisted

    This is a fun way to greet guests.

    10+ Creative Planter Ideas {rainonatinroof.com} #planter #creative #round-up

    Urban Garden Planters from Gallery 512

    These planters are rustic and beautiful, aren’t they?

    What are your creative flower pot ideas and planter ideas?

    Looking for more great outdoor inspiration? 

    13 Ideas for Sprucing Up Your Front Door and Entry – get ready to boost that curb appeal!

    10+ Fantastic Outdoor Projects – from easy furniture makeovers to swings made from pallets, it’s all here!

    9 Outdoor Living Spaces You’ll Never Want to Leave – get ready to be inspired!

    You know you don’t wanna miss any of this crazy.

    Sign up to get my posts delivered to your inbox here. 

    Stalk Me Here:

    Pinterest / Facebook / Twitter / Instagram

  • Blue & Gold Dipped Barstool

    Blue & Gold Dipped Barstool

    If you follow me on Facebook, you may know (and may be sick of) about my current love for all things gold.
    Gold Dipped Barstool Makeover with Spray Paint
    I don’t think its just me though, I am seeing it everywhere! I first saw this idea for a gold dipped barstool here.
    So, when Grunt Labor brought home this barstool, I immediately knew its fate.
    Simple Barstool Makeover
    First, I spray painted the bottom part of the legs and seat gold on my high-tech spray painting pedestals (a.k.a. flower pots and scrap wood). After the gold was on there, I put plastic wrap and tape around it to keep the blue spray paint from getting on the gold.
    Simple Barstool Makeover
    Easy Spray Painted Barstool Makeover
    I gave it a couple coats of Rustoleum Painter’s Touch in Aqua and finished it off with a gloss clear coat.
    Easy Barstool Makeover
    Easy Barstool Makeover with Spray Paint
    Gold Dipped Feet on Barstool
    I love the gold dipped legs! What do you think?
    Follow along so you don’t miss out:
  • 10+ Lilly Pulitzer Inspired Crafts and Projects

    10+ Lilly Pulitzer Inspired Crafts and Projects

    No one does colorful and summer better than the colorful summer queen herself, Lilly Pulitzer.

     Here are over 10 colorful DIY and craft projects that are Lilly worthy!

    So much color!! Perfect for summer! 10+ Lilly Pulitzer Inspired Projects

    Lilly Pulitzer Inspired Projects

    lilly pulitzer wreath 6

    Lilly Pulitzer Inspired Wreath

    Lilly Pulitzer Inspired Decorating

    Lilly Pulitzer Prep School from Commona-My House

    Lilly Pulitzer Inspired Tote
    DIY Summer Tote from Country Peony
    Lilly Pulitzer Hair Accessory Organizer from Our Fifth House
    Lilly Pulitzer Inspired Home Projects
    Lilly Pulitzer Inspired Decor

    Lilly Pulitzer No-Sew Monogram from Effortless Style

    Lilly Pulitzer Inspired Bar Cart Decor
    Lilly Pulitzer Inspired Cocktail Cart from Southern State of Mind
    Lilly Pulitzer Printable Quote
    Lilly Pulitzer Typographic Quote Art from May Richer Fuller Be
    Lilly Pulitzer Inspired Decor
    Lilly Pulitzer Inspired Dresser Makeover
    Looking for more great designer inspired projects? Here ya go!

    You like Ralph Lauren style? See these projects then!

    More of a Jonathan Adler person? Right here are projects inspired by him!

    Kate Spade girl? This way then!

    You know you don’t wanna miss any of this crazy.

    Sign up to get my posts delivered to your inbox here.

    Stalk Me Here:

    Pinterest / Facebook / Twitter / Instagram

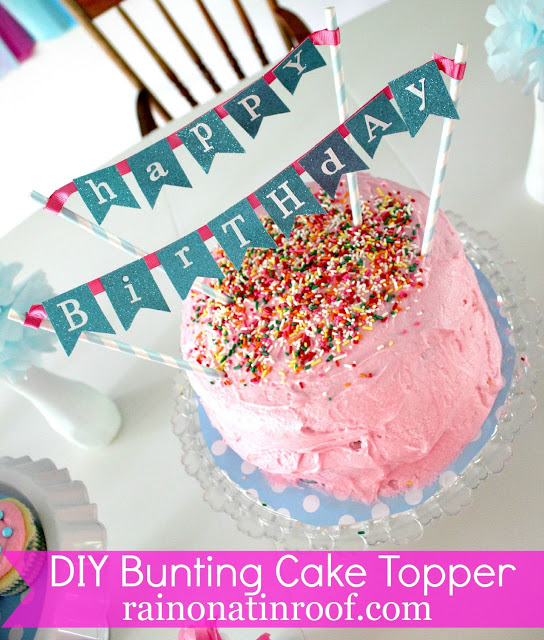
  • Easy DIY Cake Topper

    Easy DIY Cake Topper

    I love a good cake topper because it can completely take a cake to the next level. The most important part is how good the cake tastes, but we need a cute little cake banner topper too, right? This DIY cake topper can easily be made in under 30 minutes – and no fancy cutting machines required.

    The final post of the blue and pink birthday party crafts. I’m not even gonna lie, I am sick of all this party stuff. I was tired of it about 10 minutes after the party ended. And that was a month ago. But, this custom cake topper is adorable and simple to make, so I had to share. It’s perfect for the sweetest occasion. <– See what I did there. hehehehe.

    Pink and Blue Cake Banner Topper

    Please disregard the sloppiness of the icing on the cake there. That would be where part of the cake fell off (my fault) and where my wonderful mother-in-law did the best she could do to salvage my mistake. Bless her.

    This post contains affiliate links for your shopping convenience. Click here to read my full disclosure policy.

    DIY Cake Topper

    Materials Needed for This Sweet Bunting Banner: 
    – Cardstock in your choice of color (Mine came from Hobby Lobby)
    – Letter Stickers (These too came form Hobby Lobby)
    – Ribbon (I used this kind.)
    – Hot Glue
    – Straws or some other stick or tubular device-thing-a-ma-jig to attach the bunting to and stick in the cake

    Step 1

    You will need to sketch out a flag bunting shape to use as a template. I did this with a ruler. Once it is sketched out, cut out the template and trace as many letters as will be on your bunting on the back of the card stock (this keeps any lines from being seen on the front and if you have glitter card stock like I did, you can’t really draw on glitter.)

    DIY Cake Topper using bunting template

    Step 2

    Cut out all the little flags and attach your sticker letters on them.

    Cake topper banner using scrapbook paper and stickers.
     
    Of course, you can make the banner say anything you wish, not just “Happy Birthday.”
     
    Step 3
     
    Cut off 2 strips of ribbon. Make it longer than you think it should be to have plenty for error. Line up your flags on the ribbon. Place a small dot of hot glue on the back top of each flag and immediately stick it to the ribbon.
     
    Step 4
     
    Its time to attach the bunting to your straws or whatever you are sticking in the cake to hold the bunting up. All you do is take your ribbon and wrap it around the top of the straw securing it with hot glue.
     
     
    Cake Bunting Banner Topper in pinks and blues
     
    Now, go stick that birthday cake topper in your cake.
     
    DIY Cake Banner Topper made from scrapbook paper.
     
    What do you think of our cake topper banner? Have you done any creative cake banners or toppers before?
     
    Want another easy DIY project for your parties? See these posts then! You can easily switch up the colors on these to make them fit perfectly for your own party! 
     
    DIY Cupcake Pedestals – these literally take cupcakes to a whole other level!
     
    1st Birthday Photo Collage – a sentimental decoration that is perfect for all kinds of parties! 
     
    DIY Party Banner – again, this one is great for various kinds of parties!
     
    DIY Party Backdrop – easiest thing to make with the biggest impact!
     
    DIY Party Hat – if you’ve got five minutes to spare, you can do this! 

    SaveSaveSaveSave

  • Teapot Planter

    Teapot Planter

    I was hoping all my fun planters would be ready for some beauty shots by now, but they are not except for this one. And its my favorite anyway.

    Teapot Planter: Flower Pot made out of an old Teapot
    Its an old metal teapot planter. The best thing about it? I scoured it up from my Pap’s old toolshed. He used to keep random nuts, bolts, etc. in it. The flowers in this pot always do so well every year. (more…)
  • 1st Birthday Photo Collage (A Personal DIY Party Decoration)

    1st Birthday Photo Collage (A Personal DIY Party Decoration)

    Today, I have another DIY party decoration from the blue and pink 1st birthday party to share with you! This one is a big more personal and everyone loved seeing it at the party.
    I created a birthday photo collage with photos of the kid from her first year.
    Birthday Photo Collage

    Birthday Number Photo Collage

    For baby girl’s 1st birthday, I wanted to have something special to welcome everyone to the celebration. This birthday collage was perfect propped on the front porch. Naturally, there were many oooohhhhsss and ahhhhhhhsssss. I mean, I did it, so, it was fabulous. Oh, and the kid is pretty cute too.
    I started out with lots of pictures, an old barn door from the family farm, and painter’s tape. Seriously high tech stuff, y’all.
    Making a Birthday Number Photo Collage
    Before I started taping photos to the door, I laid them out in a “1” first to make sure I had enough photos and to decide exact placement.
    How to Make a Birthday Number Photo Collage
    After I had it mapped out on the floor, I started from the bottom and worked my way up.
    DIY Birthday Number Photo Collage
    I used a couple pieces of painter’s tape on the back of each photo.
    When I was finished with the “1” I decided to add a little bunting with card stock at the top of the door for some pops of color, and to incorporate the blue & pink theme.
    1st Birthday Picture Collage
    Birthday Number Photo Collage
    The birthday collage really was a big hit and another simple DIY party decoration. Everyone loved seeing how Landry has changed in the past year. The neighbors loved the door as well. They really had no choice since it sat on our porch for days after the party while I was lazy still recovering from the celebration. Now, the neighbors really adore the barn door with just the cute bunting at the top. I finally took the pictures off, but, the door has not yet moved. They may call the neighborhood association on me soon. Can someone bail me out?

    Have you done a photo collage for special occasions?

    Need more great party decoration ideas? Here you go…

    DIY Birthday Party Hat – so cute and only takes about 5 minutes to make!
    DIY Bunting Cake Topper – you’ll just need scrapbook paper, stickers and scissors!
    DIY Cupcake Pedestals – made from thrift store finds and you can use them over and over again!
    DIY Tablecloth Party Backdrop – THE absolute easiest and cheapest party backdrop!
    And you can always find my entire gallery of DIY party ideas here.
     You know you don’t wanna miss any of this crazy.

    Sign up to get my posts delivered to your inbox here. 

    Stalk Me Here:

    Pinterest / Facebook / Twitter / Instagram

  • A Vintage Inspired Nursery Makeover

    A Vintage Inspired Nursery Makeover

    Baby girl’s nursery has changed, and had a few little improvements since I last posted about it. So, I thought it might be fun to share some new photos with you! I didn’t want a nursery for her that would be full of brightly color characters. I wanted something more authentic, I guess you could say. So, I created a vintage nursery for her.
    A Vintage Nursery {rainonatinroof.com} #vintage #nursery

    A Vintage Nursery

    Vintage Inspired Nursery Makeover
    Vintage Inspired Nursery Makeover

    The dresser was a $75 Craigslist find. I sanded and painted it Salmon Pink by Behr. The mirror was another Craigslist find, $30, that was previously gold.

    Vintage Inspired Nursery Makeover

    I picked up a couple of vintage nursery rhyme books at an antique store and framed my favorites in simple white frames from Michael’s.  Read more about those here.
    I wanted the wall color to be something she could grow with. I took a paint swatch of some gray paint I loved to Home Depot and had them custom color match it with Behr paint.

    Vintage Inspired Nursery Makeover
    The coat rack is really just a piece of old barn wood from the family farm with a piece of molding on top and hardware from Lowe’s.
    Vintage Inspired Nursery Makeover
    I found the hamper at the Salvation Army for a whopping $2. It did not look anywhere near this cute when I got a hold of it. It had been painted yellow, which was peeling, and had this  horrendous floral pattern underneath that. I sanded it and sprayed it blue. The top wouldn’t take paint well, so I used fabric to cover it. Grunt Labor was way “wowed” by this. He thought it was the cutest thing ever. Score.
    Vintage Inspired Nursery Makeover

    I picked up an old chandelier at Habitat for Humanity ReStore and spray painted it the same color as the hamper and coat rack.

    Vintage Inspired Nursery Makeover
    The chair was another Craigslist find. I made something close to a slipcover for it (there’s a reason there is no close-up photo of the chair). I called about having a professional make one, but that was going to be in the ballpark of $300. Um, no, I will not pay $300 for a slipcover for a chair I paid $25 for and will probably get rid of in a few years….So, it got a makeshift slipcover and so far, so good.
    Vintage Inspired Nursery Makeover

    The bedding was purchased from Etsy. As soon as I saw it, I knew it was what I wanted for the room.

    Vintage Inspired Nursery Makeover
    I made the tissue paper pom-poms that hang in the corner. The artwork above the bookshelf was actually from the end of my crib when I was a bambino. The bookshelf used to sit in my grandparent’s den. I remember my crayons being stored in a cigar box on the bottom shelf for me to easily access them. Landry’s cigar box is already there, just waiting on crayons. She would totally eat them now. Go ahead and judge the cigar box crayon storage. I don’t really care what you think about it. Its not like there are cigars in the box. Wait – I better go check…..
    Vintage Inspired Nursery Makeover
    The Bambi wall art was in Grunt Labor’s nursery when he was little. I was over the moon when my mama-in-law broke out those bad boys!
    What do you think? The perfect amount of vintage nursery without it looking old?

    Need more nursery ideas? Here are nine ones that won’t break the bank!

    You know you don’t wanna miss any of this crazy.

    Sign up to get my posts delivered to your inbox here. 

    Stalk Me Here:

    Pinterest / Facebook / Twitter / Instagram

  • Lilly Pulitzer Inspired Wreath

    Lilly Pulitzer Inspired Wreath

    Our second style icon for the summer soiree…Lilly Pulitzer.

    Begin channeling bright floral prints, the sunshine, and all things fun.

    My Lilly project:

    DIY Lilly Pulitzer Inspired Wreath

    A Lily Pulitzer Inspired Wreath.

    And it may or may not be considered somewhat of a semi-fail…..I’ll explain in a bit…..

    The minute I saw that bright floral fabric – I immediately thought Lily and thanked God because I had no clue what I was going to do for my Lily project until I saw it. Just to be sure, I wasn’t delusional, I sent a picture of the fabric to my friend, Lindsay, with “Lily, right???” below the picture. She concurred that the fabric was most definitely Lily.

    Here’s what I used to make this wreath:

    DIY Lilly Pulitzer Inspired Wreath
    – Wreath Form

    – 1/4 – 1/2 yard of fabric (Mine came from Hobby Lobby)

    – Grosgrain Ribbon

    – Hot Glue Gun

    – Scissors

    – Bling (I used vintage brooches, old cheap rings and earrings.)

    Disregard the felt and pearls in the above photo. That was part of the fail. I told you, I’ll get there in a minute – I know you are dying to know.

    First, lay your wreath out on the fabric. I bought WAY too much fabric. I bought 1 yard and probably only used 1/4 – 1/2 a yard.

    Cut a small hole in the middle of fabric that is inside the wreath form and then triangle slits in the fabric that is inside the wreath form. That may not make sense, but check out the below pictures to see what I’m talking about.

    DIY Lilly Pulitzer Inspired Wreath
    DIY Lilly Pulitzer Inspired Wreath
    Begin wrapping the wreath with the triangles and securing them with hot glue.
    DIY Lilly Pulitzer Inspired Wreath
    DIY Lilly Pulitzer Inspired Wreath
    DIY Lilly Pulitzer Inspired Wreath
    Trim the excess fabric as needed.

    At this point, I tried making brightly colored felt flowers. FAIL. They looked horrendous.

    Plan B: Vintage brooches, old earrings and rings.

    DIY Lilly Pulitzer Inspired Wreath
    I just stuck the brooches right through the wreath form. I really love some of them, so I wanted to be able to easily pull them out and wear them if I wanted to one day. I used hot glue on the old earrings.

    At this point, I thought I was done. Wrong. When I put it up, there was styrofoam showing where I had cut the fabric.

    Plan C: Cover showing styrofoam with ribbon.

    DIY Lilly Pulitzer Inspired Wreath
    New problem: when the wreath is hanging the aqua ribbon just squishes up behind the wreath and looks horrible. Fantastic.

    Plan D: Cut strips from gift box to re-inforce the ribbon and make it stand up, rather than be squished.

    DIY Lilly Pulitzer Inspired Wreath
    DIY Lilly Pulitzer Inspired Wreath
    I cut two strips and hot-glued it behind the aqua ribbon.

    Another new problem: cardboard strip now shows on one side.

    Plan E: Glue aqua ribbon on other side of cardboard strip.

    DIY Lilly Pulitzer Inspired Wreath

    Finally, all systems are a go. Except for the fact that the ribbon still looks a little funny. But, at this point, I was done solving wreath problems. I was ready to move on to world peace.

    Lilly Pulitzer Wreath
    Lilly Pulitzer Inspired Wreath
    Lilly Pulitzer Wreath
    Lilly Pulitzer Wreath
    Lilly Pulitzer Wreath

    Complete fail?

    Semi-Fail?

    1/4 Fail?

    Would Lilly approve?

    Want more Lilly Inspired projects – here are 10+ of them! 

    You like Ralph Lauren style? See these projects then!

    More of a Jonathan Adler person? Right here are projects inspired by him!

    Kate Spade girl? This way then!

     You know you don’t wanna miss any of this crazy.

    Sign up to get my posts delivered to your inbox here.

    Stalk Me Here:

    Pinterest / Facebook / Twitter / Instagram