Blog
-

French Country Dresser Makeover {DIY Chalk Paint}
Like furniture makeovers? You may want to sign up for my free email subscription here.Just another Craigslist furniture makeover….A French country dresser makeover…
Isn’t she a beauty? I love love love the gray and white contrast. She had humble beginnings: -

Make This Adorable DIY Cupcake Holder for $5 or Less
You won’t believe how easy it is to make this DIY cupcake holder! Not only are these cupcake holders adorable, but they are also super easy to make, can be easily customized to fit your party decor and you can make them with items you find at the thrift store! Here’s how to make a cupcake stand that will wow your party crowd…
Yes, me again. Back with more DIY party decorations from the blue and pink birthday party extravaganza. This time, I’m super excited to share these DIY cupcake stands with you. I think they are just adorable and I made them using items I found at thrift stores!

This post contains affiliate links for your shopping convenience. Click here to read my full disclosure policy.
DIY Cupcake Stand
Materials and Supplies Needed:
- Candlestick Holders – doesn’t have to be a certain size or color, although I wouldn’t go too terribly tall with them. Can be wood, metal or whatever else.
- Old Baking Pans with Pretty Edges – old tart pans work great for this, or just about any round or square pan with fluted or pretty edges. I found mine at Goodwill.
- Liquid Nails or E6000 Glue or ProBond Glue (A glue that will adhere metal to wood. I used Liquid Nails.)
- Spray Paint Color of Your Choice – I opted for white so that I would have white cupcake stands that could work with lots of different party themes.
- Scrapbook Paper that coordinates with your party’s theme or colors
Steps
Step 1
Be sure that the candlesticks and baking pans are clean. Attach the old baking pans to the candlesticks using whichever glue you opted to go with. For me, my pans looked best flipped upside down on the candlestick with the fluted edges pointing down. It’s up to you, though!
Let the glue fully cure overnight.Step 2
Spray paint the cupcake stands with the color of spray paint you opted for. Let dry completely. You could also opt to spray paint the candlesticks and pans different colors before gluing if you wanted to go for a really colorful or contrasting look.
Step 3
After the cupcake holders are completely dry, cut a circle or square out of your coordinating scrapbook paper that is roughly the size of the top of your cupcake stand tops.
Place the paper on the top of the stand to add a little more pizzaz to the stands. You don’t have to glue it on, it should just sit on top of the stands. Then, for your next party, you can switch up the paper to work for that party’s theme.

Aren’t these just adorable little cupcake display ideas? And so easy and cheap to make!
The cost of this project:
• Baking Dishes: $1.50 each = $3 total
• Candlestick Holders: Free (my aunt was going to throw them away. hello?! Give them to the hoarder, please!)
• Spray paint and liquid nails were all on hand already!
$3 TOTAL!Bam! That’s what I call a deal!
Other great ideas you could do with these:
• Use as a cake stand or cake plate for smaller cakes.
• Make the stands using various sized baking pans and candleholders, then glue one on top of another to create a tiered cupcake stand or cupcake tower.Have you made your own cupcake stands before?
Looking for more great DIY party decor ideas?
DIY Party Decorations on a Budget – my best party decor that doesn’t break the bank, but still leaves guests oohing and ahhing.
How to Make a Party Hat – completely (and easily!) customizable for any event!
DIY Plastic Tablecloth Party Backdrop – don’t worry, you’re going to make those cheap tablecloths look so pretty!Want to remember these little cupcake stands for later? Just pin the image below!

Get more creative ideas on social media!
-

Party Background Tutorial with tablecloths for $5 (Video)
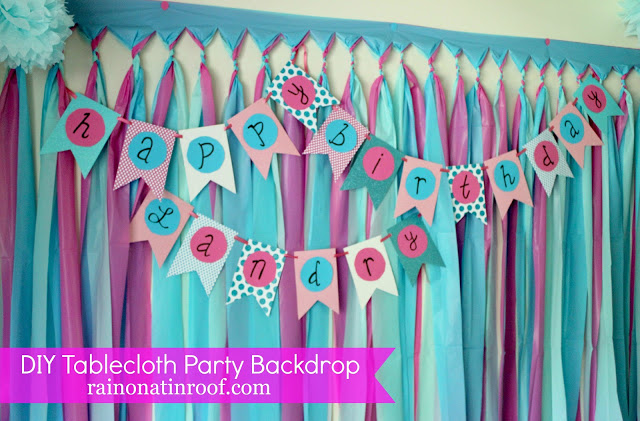
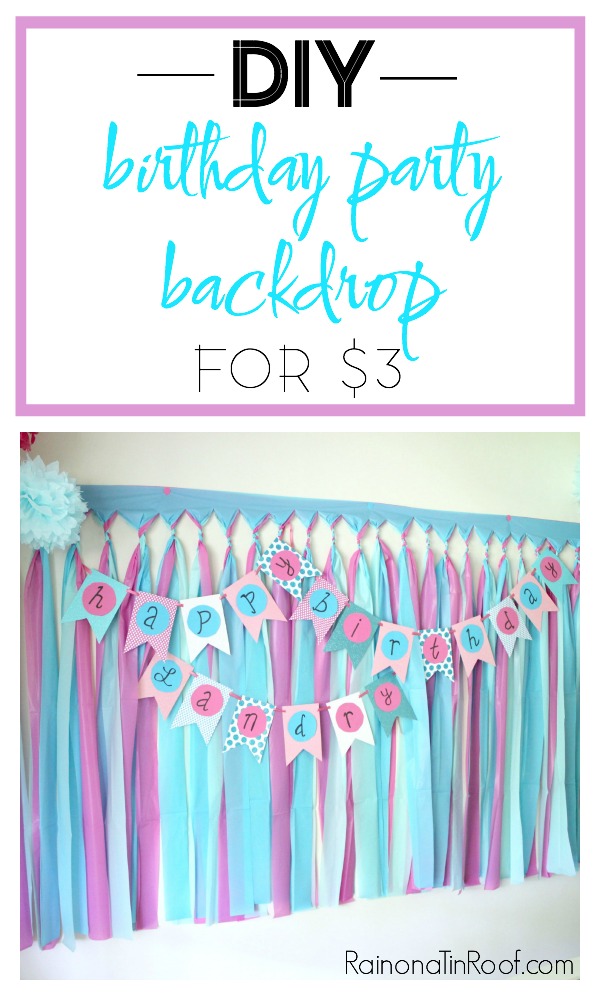
Looking for an easy party backdrop for an upcoming event? This one is your answer! This party background is super easy to make and costs just around $5 in supplies!
This is the easiest and cheapest party background. In the history of ever.
Really, I promise.
Would I lie to you?
Why absolutely not!
This is one of the many DIY party decorations I made for my daughter’s 1st birthday party and it was also probably the easiest, but yet the largest scale one!
Go figure, right?!

This party backdrop costs about $3 – $6 to make depending on how much you spend on your plastic tablecloths. You can buy the $1 tablecloths for it at the Dollar Tree or you could splurge a little and buy ones that are about $2 or $3 at Party City. It’s totally your choice and it’s totally customizable – you can choose whatever colors you want to for it. Personally, I got my tablecloths from Party City because they have a huge variety of colors.
To make this, you’ll need about an hour or so, but it’s an easy hour!Party Background
This post contains affiliate links for your shopping convenience. Click here to read my full disclosure policy.
Materials Needed:
- 3 Plastic Rectangle Tablecloths (colors of your choice, I paid $2 for each of mine at Party City.)
- 4-8 Thumbtacks or Pushpins
- Good Sharp Scissors
Steps
The video below will show you exactly how to make the party backdrop step-by-step. I’ve also included written instructions below the video as well.
[adthrive-in-post-video-player video-id=”yhS6773x” upload-date=”2016-08-16T14:38:10.000Z” name=”Rain on a Tin Roof – DIY Party Backdrop” description=”Make this less than $5 and very simple diy party backdrop to spruce up any party! All it takes is a little time and three plastic tablecloths.”]Step 1
Determine if you want your background to hang horizontally or vertically. The one shown in this post you are reading now is hung horizontally because it worked better that way for the space I was hanging it on. I have made these and hung them vertically though as well. You can see a vertically hung party backdrop I did for the sparkly horses birthday party here.Step 2
Once you decide which direction to hang it, open up one of your tablecloths and put it on the wall with thumbtacks. For mine hanging horizontally, it took 6 thumbtacks. Just start in one corner and tack it up as you go. Once you have the first tablecloth up, step back and decide if it needs to be leveled out in any places and adjust as needed. You can put the tablecloths in any order when it comes to color. In the end, all the colors basically mix together. If you’re really particular about one color showing more than the others, then put the one you want to show more as the last layer on top of the other tablecloths. There will be a little sliver of it that will show more at the very top.Step 3
After the first tablecloth is up, open up another one and layer it on top of the first one. I did this by removing one tack at a time, and then putting it back through both tablecloths. Repeat with the third and final tablecloth.Step 4
Next, take a pair of regular scissors and cut strips up to about 3-4 inches from the top of the tablecloths. You are going to cut all three tablecloths at once when you cut a strip. I didn’t even measure the width of my strips, I just eyeballed it. They were each probably around 3-4 inches wide.Step 5
Once all your strips are cut, you are going to braid each set of strips together. Start on one side of the backdrop, take your first set of strips (one of each color that you cut at the same time), and braid them together from the top down. You only want to braid down far enough to hold the strips together. You don’t have to start with a certain color and end with another one. Just braid each set together – once more, all the colors will blend together in the end. Here is how mine looked when I braided it after I had cut all the strips.
Once you have braided all your strips, you’re done!

Told you it was super simple!
The white thumbtacks were driving me crazy at the top, so I punched out balloon shapes from pink & blue card stock and put them over the tacks with square photo mounts.
DIY Party Backdrop: Helpful Tips, Tricks, and Questions Answered
Can I make this ahead of time and then take it to the party location and hang it up there?
Yes. What I would suggest doing is lay all the tablecloths on the ground, if you don’t want to put them on your wall. Put some heavy books or something similar along the top to keep them in place, then cut the strips and braid them as stated above. Once braided, you should just be able to pick it up and take it with you.Could I do this with more than three colors?
You bet! I did this same backdrop with six colors right here!Could I staple this together and then attach it to a wall with tape? The place the party is located at doesn’t allow thumbtacks in their walls.
I definitely think you could staple it together along the top. As for the tape, I would recommend using a wide width FrogTape. It’s strong, but shouldn’t take the paint off the walls.Have you ever made a DIY party background before?
See how I put a spin on this backdrop for the kid’s 2nd birthday by layering in more colors here!
Looking for more easy DIY party decorations?
Birthday Photo Collage – perfect for birthday parties, graduations, anniversaries and more!
DIY Party Banner – no fancy cutting machines required! You’ll just need scrapbook paper and scissors!
DIY Bunting Cake Topper – another one where you’ll just need some scrapbook paper!
DIY Cupcake Pedestals – so cute, yet made from thrift store finds!
DIY Party Hat – if you’ve got five minutes, you can make this adorable party hat!Want to come back to this birthday party backdrop idea later? Just pin the image below!
Hang out with us on social media!
Facebook | Instagram | Pinterest | Twitter
-

A Stylish Blue and Pink Birthday Party
We made it through year one. No serious injuries, no serious sickness, only busted her lip a few times, fell off the couch and bed a couple times, multiple bruises, and I only let her eat a clump of dirt once. We. Survived. It. Hallelujah.
To celebrate the big day, we threw a blue and pink birthday party. As much as I may or may not love the Care Bears and Strawberry Shortcake theme ideas, we went for a more stylish approach to the party: Blue & Pink.
With the exception of running out of gas for the grill and setting off the smoke alarm (luckily Grandma rigged it with a plastic bag), the party went great! But hey, at least we can tell her a funny story about her 1st birthday.This post contains affiliate links for your shopping convenience. Click here to read my full disclosure policy.
If you remember my birthday party inspiration board, you know I used a lot of ideas from Jamie at Better with Age and April at House by Hoff.
I loved Jamie’s cake for her little girl with all the sprinkles. I ended up not using the recipe she did, but still going for the sprinkle effect on top. I read that recipe and totally knew I was not a good enough baker to pull it off. She also put really cute sprinkles around the bottom of her cake, but once more, I am not very good at icing (Thank God my amazing mother-in-law was here to salvage the cake), so I opted to not attempt the sprinkles around the bottom.To top the cake off, I made the happy birthday banner for it.
The kid got her very own cake served on a silver platter. Spoiled much? Grunt Labor iced it because at that point in the day, I was done icing cakes and cupcakes and in desperate need of alcohol. These birthday parties are BEASTS! My hat is off to all you folks with multiple kids!
We also served cupcakes. I did use the same recipe Jamie did for her cupcakes, which can be found here.The white cupcake pedestals were thrifted finds I put together for less than $3 each. I’ll show you how to do those here.I completely stole the idea for the balloon cupcake toppers from April. She made flowers for her cupcake toppers and shows you how to make them here. I made the tissue paper flowers, similar to the ones April also made. They were very easy to make, a lot like my tissue paper pom-poms, just on a smaller scale.
We served pink lemonade and had some blue and pink striped straws for extra flair and decor.
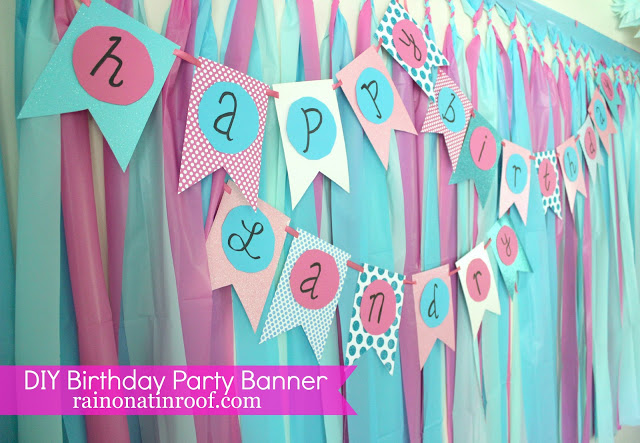
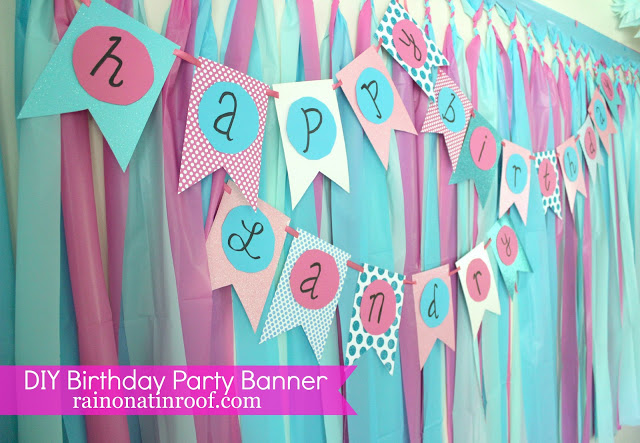
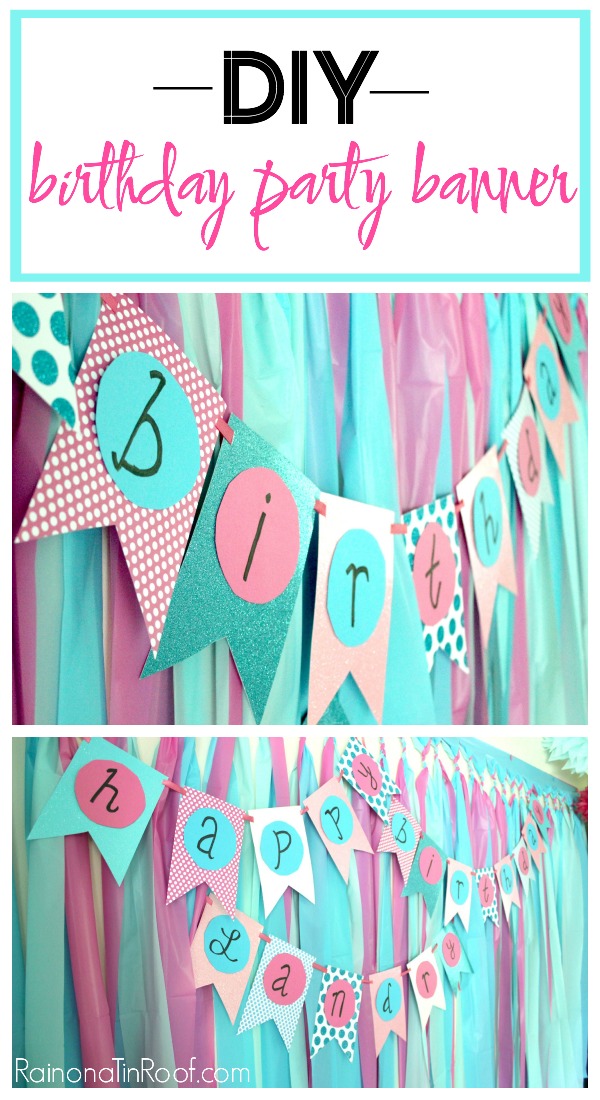
The backdrop is made from tablecloths – super easy, I’ll show you how to make it here – and I made the banner out of scrapbook paper – I’ll show you how to do that here! I threw together some of the tissue paper pom-poms to hang from the ceiling.
I decorated both chalkboards with birthday themes and the best chalkboard writing skills I could muster.
While scouring through the attic a couple months back, I found this Happy Birthday musical thing-a-ma-bob that was my Dad’s. I thought it fit perfectly with the theme, so I set it out as a little vintage touch. Sorry, Dad, I’m sure the “vintage” description makes you feel old.
I took an old barn door from my great grandfather’s farm and made a picture collage in the shape of a 1 to greet guests as they entered. See the full barn door tutorial here.Remember the super cute DIY party hat I made? That is how that turned out…See all my DIY party decorations and ideas here.You know you don’t wanna miss any of this crazy. -

13 {Inspired by} Kate Spade DIY Projects
This post contains affiliate links for your shopping convenience. Click here to read my full disclosure policy.These Kate Spade DIY Projects are sure to have you running for your gold and kelly green spray paint!
Here are 13 amazing {inspired by} Kate Spade projects to make your mouth water!13 Kate Spade Inspired Projects

Rain on a Tin Roof {Kate Spade Inspired Lamp Makeover}
My Life on the Divide {DIY Kate Spade Terry Flats}
Fresh Idea Studio {Kate Spade Inspired Chair Makeover}
May Richer Fuller Be {Kate Spade Inspired Gold Zig Zag Pitcher}
Embellish {Kate Spade Inspired Bow Necklace}
Southern State of Mind {DIY Kate Spade Inspired Tipsy Shoes}
Effortless Style {DIY Kate Spade Ampersand}
Pinterest Told Me To {Kate Spade Color & Pattern}
Our Fifth House {Kate Spade Inspired DIY No-Sew Tote Bag}
Lovely Scrolling {DIY Gold Chevron Desk Tray, Kate Spade Office}
Inspiration & Realisation {DIY Leather Bow Cuff Bracelet}
The Happy Homebodies {Kate Spade Inspired Dinner Party}Have you ever made a Kate Spade DIY project before?Need more designer knock-offs? Here you go!
You know you don’t wanna miss any of this crazy.
Sign up to get my posts delivered to your inbox here.
Stalk Me Here:
Pinterest / Facebook / Twitter / Instagram
-

Simple Screened-In Porch Makeover
I have teamed up with three other bloggers to bring you the Summer Spruce-Up Series. The series is all about sprucing-up our outdoor areas to get them ready for summer! What all of that means is that I had to get off my butt and get to work. Enter my screened-in porch makeover.

My screened-in porch had been so neglected until I was forced to tackle it (a good and needed forced, thanks gals). When we moved in two years ago, the last thing on our minds was the back porch. We were too busy with a kitchen, bathroom, and basically an overhaul of our entire house. I didn’t take a photo of the inside of the porch, but this was the outside, so you can get a pretty good idea of what it was like.

Rough, to say the least.
We finally got around to working on it about six months after we moved in.
But, then I got pregnant.
And lazy.
And tired.
So, for the last year and a half, our screened-in porch has set like this. Partially finished.


Grunt Labor had fixed the screening and added lattice to keep the dogs from getting in. We had also partially painted the woodwork, but that was it.
And now, within the last three weeks, it has finally gotten its long overdue makeover.

With the exception of the chaise lounge and rocking chair, we already had the patio furniture. I picked up the lounge at an antique store for $100. All of the furniture got a fresh coat of gloss black spray paint, which it was in desperate need of.
I am loving my outdoor chalkboard. We just bought a piece of pre-cut 4×8 plywood, slapped some chalkboard paint on it and nailed it up. The silver pail holds chalk.
We also purchased cushions from Home Depot for all the furniture.
I found that sweet little rocking chair at an antique store for $20. It was originally white and sporting some horrid circa 1991 floral fabric. I ditched that for some simple outdoor fabric that would match the new cushions.
Needless to say, that chaise lounge is this girl’s new favorite spot. Don’t sit in my chaise when I am present. It. Is. Mine.
I painted the floor the same color as the floor on the front porch. I finally got around to painting the rest of the trim / woodwork as well.
I love how all of the little decorative touches turned out. I really just threw some stuff together I had around the house. I made a monogrammed tray for us and put it in the middle of the table to hold napkins, condiments, and such. I pulled the lantern from the guest bedroom, since it will soon undergo a makeover.
I had these mason jars in the cabinet, with the hanging wire already attached. Luckily, the hooks were already in the ceiling as well, otherwise these boys may not have made it out. Right now, they have pebbles in them. And someday when I remember, I will pick up some candles for them.
We have had the chandelier for a few years now. I found it as-is at a yard sale for $3. Yes, I’ll take it.
We switched out the previous light fixture which was rusted and haunted-house-scary-looking for this one. I found it at Lowe’s on clearance for $25. Yes, I will take that as well.
Another favorite part of the porch for me is this clock. It is an old one with an electrical cord to make it run. I picked it up at an antique store for $15 a few years back. It still works, but there isn’t an electrical outlet on the porch. I wrapped the cord around the back, set the clock to 5:00, hung it up and then got myself a beer. 🙂
The tray was another yard sale find for $3. I gave it a coat of spray paint. Obviously, not a good one, considering there are bubbles on the side, but, hey, its outside, who cares? I pulled the metal pitchers from my open shelving, which recently got a makeover.
The screened-in porch is my new favorite place. It’s always 5:00 there, it’s a great outdoor dinner space, an awesome place to relax, keeps the kid contained, and did I mention it’s always 5:00 there?Update: See our now-colorful screened in porch makeover HERE!More outdoor projects you just might want to see:
How to Stain Wood Outdoors the Easy Way (Lattice Makeover in an hour) – super easy with a big impact!
Staining Pressure Treated Wood – No Waiting Required – for realz, no waiting!
Mailbox Makeover in less than an hour – another easy, but big impact project!
Wanna snoop around my house more? Head here.You know you don’t wanna miss any of this crazy. -

Simple and Cheap Kate Spade Inspired Lamp Makeover
I am so flippin’ excited to show you this lamp. I. Love. It. Even Grunt Labor loves it. First, I must thank Heather from Southern State of Mind for inviting me to co-host the Summer Soiree Style Series which made me start thinking Kate Spade, which made me think Kelly Green, which led to “Hmmm……a kelly green lamp……hmmmmm……” and it all resulted in this beauty.
Kate Spade Inspired Lamp Makeover
This post contains affiliate links for your shopping convenience. Click here to read my full disclosure policy.Honestly, I shocked myself, y’all. I would have never dreamed I could pull this off. I originally got this lamp from my aunt and it looked like this then.
Initially, I wanted to put polka dots on the lamp base, but I didn’t feel like I could do that very well with all the curves and shapes on the lamp. I did tape off a strip along the base to keep some of the gold before painting it.
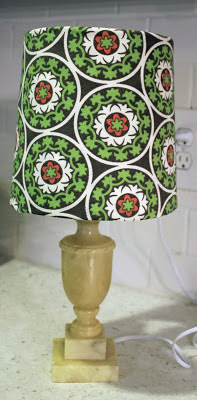
I used Rustoleum’s Meadow Green for the base and finished it off with a gloss top-coat.Before I had even started on the lamp, Jamie from Better With Age and I had been emailing each other and talking about the soiree. I told her I was stressing out about what projects to do and she had said, “Oh, Kate Spade is easy. Do something with polka dots, like a lampshade.” And so when the polka dots on the lamp base didn’t work out, I turned to Jamie’s idea of a polka dotted lamp shade. Thank. You. Jamie.
I picked up an $8 lampshade from Target, FolkArt Metallic Gold Acrylic Paint, and a round-sponge-thing-a-ma-bob. I said a little prayer (because I hate paying retail for something and then not being able to take it back when it doesn’t work) and went to polka-dotting.
And it worked. And I thanked God and had a beer, because I was a nervous wreck putting those polka dots on that shade.
I took it upstairs to show Grunt Labor my handy-work. His response: “Wow. Go put it somewhere where we can’t mess it up. And by we, I mean me. That lamp is great.”
Its a keeper. I guess he is too, if he likes the Kate Spade lamp.Love a great lamp makeover, a DIY lamp or just general lamp ideas? Don’t miss these 16 lamp ideas and makeovers then!You can also learn how to make your own DIY lampshade right here and find out how to make gorgeous agate slice lamp finials here! -

How to Make Your Photos PinWorthy with PicMonkey
When I wrote the post on How to Grow Your Blog with Pinterest, I touched on making your photos pin-worthy. You should have at least one photo in your post that is made specifically for Pinterest.

This post contains affiliate links for your shopping convenience. Click here to read my full disclosure policy.
As you guys already know, Pinterest is huge. Huge. Huge. Pinterest is all about photos (we knew that, Jenna!), and as bloggers, our photos can make or break us!
As bloggers, we want our photos to be pinned and re-pinned over and over again! So, how do we get readers to pin our photos? We must make them pin-worthy!
Let me give you an example of a non-pin-worthy photo:

And a pin-worthy photo:

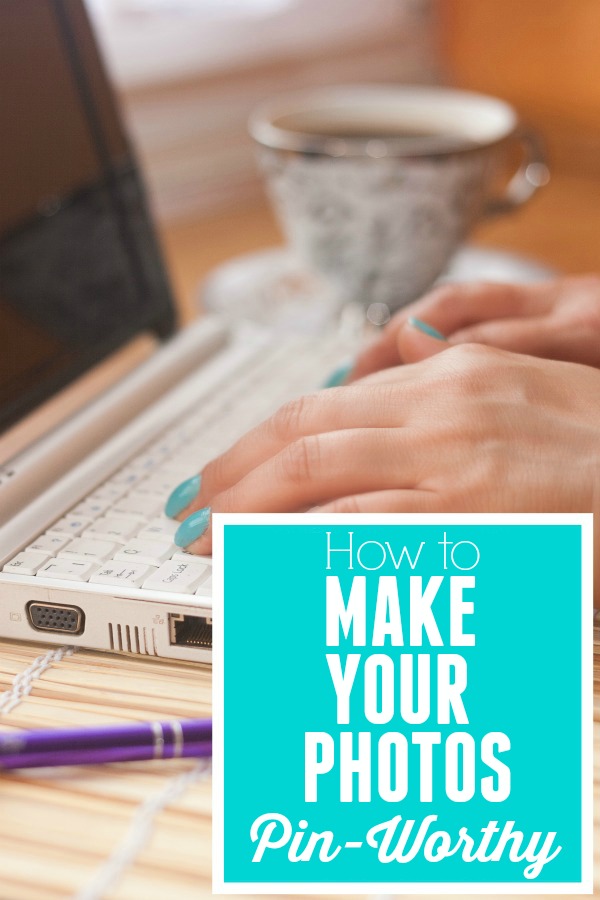
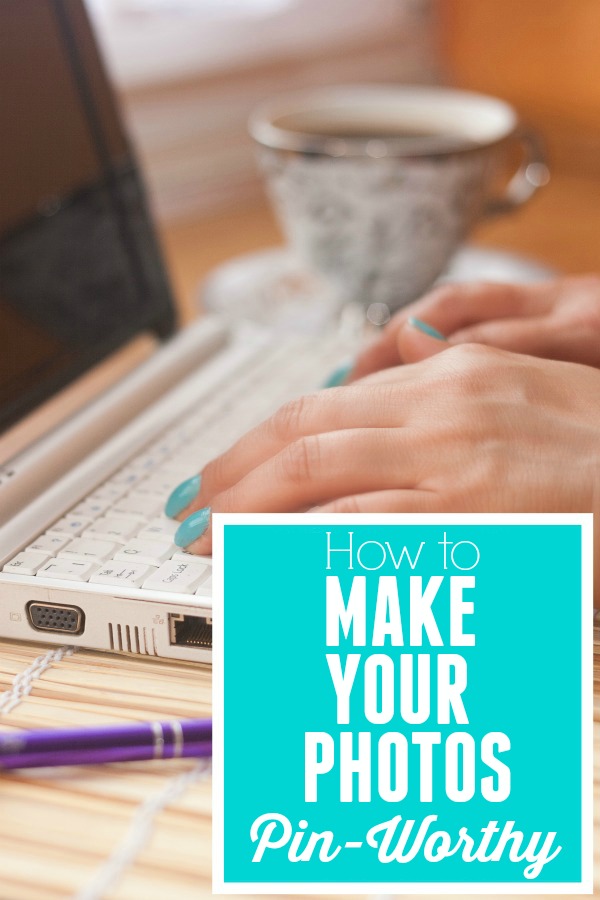
See the difference? The pin-worthy photo is bright, clear, and sharp. I added an overlay with the project name over it so that people would know what that pin would lead them to and I also added a watermark with my blog url in the bottom corner. This image is also vertical – vertical photos do better on Pinterest, rather than horizontal ones.
Having great photos will not only help grow your blog through Pinterest, but it will keep readers interested in your post, and other posts on your blog.
Here are the steps I take when getting my photos ready for a blog post, and eventually to go on Pinterest. I use PicMonkey features to do all the edits.
How to Make your Photos PinWorthy
Step One:
Open up your photo in Picmonkey. Under Basic Edits, go to Exposure and adjust the levels as needed. Just play with the levels of each item until your photo looks good. Each photo is different, so there is no exact recipe for this. I usually increase the brightness a bit (especially if the photo is dark to begin with), I will increase the highlights a tad, and the contrast a bit as well. Sometimes, I increase the shadows, but not a whole lot. It tends to make the photo too dark.
Step Two:
Under Basic Edits, go to Colors. Adjust the saturation and temperature as needed. Typically, if you started out with pretty good color, you may not need to adjust these levels at all.
Step Three:
This is when I add my overlays. First, I add the label overlay that usually states the post / project title. Go to the overlays button, the 5th button down on the left. Picmonkey has lots of different labels you can use for this. I typically use one of the banners under Scrapbooky or something under Geometric. If there is some empty space on the photo to start with, I skip the overlay and write the text directly on the photo. Select which one and click on it. Position it where you want it on the photo. Use the bubbles on the corners to size it. You can use the overlay box that pops up beside it to change the color.
Step Four:
Now, you need to add text to your overlay. Go to the text button on the left side, the fourth button down. Click add text. Type your text in the box. Change the color and size with the text box that pops up. Change your font with the menu on the left. When you have your text like you want, drag the text box on top of the overlay.
Step Five:
At this point, you can create another overlay with text that says your blog’s name using the same steps you did above.
Step Six:
Save your photo.
That’s it! Not too hard, especially once you get the hang of PicMonkey!
Do you have any tips for making your photos pin-worthy?
READ MORE OF THE GROW YOUR BLOG SERIES:
7 Things Your Blog Needs to Keep Readers Coming Back
How to Grow Your Blog with Pinterest
You know you don’t wanna miss any of this crazy.
Sign up to get my posts delivered to your inbox here.
Stalk Me Here:

-
5 Simple Crafts Anyone Can Do
Got a little time on your hands? Ok, probably not, but here are some cute and simple crafts that are worth making some time for!

Paper Dahlia from Stars & Sunshine
Flower Bucket Trash Can from The Adventures of Marlo and Bill
DIY Clothespin Magnets from Little Shop of Treasures
Polka Dot & Burlap Bunting from R&R Workshop
Napkins into Scrapbook Paper from Blissful Roots
Go get craftin’!
Want more easy craft ideas? Take a look at these…
20+ Duck Tape Crafts and Projects – who knew Duck Tape could do so much?!
7 Super Simple, Super Cute Electrical Tape Crafts – so much fun and so easy!
-

DIY Birthday Hat for less than $5 in 15 minutes
Can’t find the perfect party hat for the big bash? Don’t fret! Make your own DIY birthday hat in no time using this tutorial for how to make a party hat out of paper! It’s super easy using the provided party hat template!
As you all probably know by now, there is a big birthday party to be had. Baby girl is turning one. Of course, she must have a party hat. I would not settle for your typical birthday hat you can buy at a party store. Those are fine and dandy, but no, no, no. I wanted something that she would really hate me for later in life. That’s how I roll. So, along with all the other DIY party decorations, I made this birthday party hat for her.

Yes, this should do. This birthday hat was surprisingly VERY simple to make. Here’s how to do it…
How to Make a Birthday Hat
This post contains affiliate links for your shopping convenience. Click here to read my full disclosure policy.
Materials Needed:- Birthday Hat Template (can be found here)
- Scissors
- Cardstock Paper in Color / Patterns of Your Choice
- X-Acto Knife
- Hot Glue Gun
- Items for decorating the hat (optional) – I used a pom pom maker to make pom poms for embellishing the hat.
- Ribbon or Elastic String
Steps
Step 1
Print the party hat template noted above, then cut out the template.

Step 2
Place the template over the paper you are making your party hat out of.
I found this super cute blue glitter dots scrapbook paper at Hobby Lobby.Trace around the template onto your party hat paper, then cut it out.
Use the X-Acto knife to make slits on the cardstock paper where the template notes.Step 3Wrap the scrapbook paper into a cone shaped hat and stick the tab in the slot. I did have to make my slot a bit longer than the template had. I also hot glued under the tab to secure it once it was in the slot.Step 4If you want to embellish your birthday hat further, then do so now.I used my Pom-Pom maker to make pom poms to add to the hat.
Some people make these with forks, but I have always used my makers. I used the large green one for the pom-pom on top of the hat. I also made 6 small poms with the pink one to place around the bottom edges of the party hat. I just hot-glued those bad boys right on the hat.Step 5For our straps, I bought some pink ribbon and made a small slit on each side of the party hat. I tied a knot on the inside of the hat to secure the ribbon.
You could also hot glue the ribbon or elastic string to the inside bottom edge to secure the hat onto the party guy or gal.
And of course, we had to give the first birthday hat a test run…Yep, you can already see the disbelief and resentment in her face. Score.Any DIY Party Hats in your future?
See another version of this party hat here and loads more party ideas are here. Make sure you don’t miss this easiest ever and cheapest ever DIY party backdrop using plastic tablecloths either!Want to come back here later? Just pin the image below!
You know you don’t wanna miss any of this crazy.Sign up to get my posts delivered to your inbox here.
Stalk Me Here:
-

How to Create an Invitation in PicMonkey
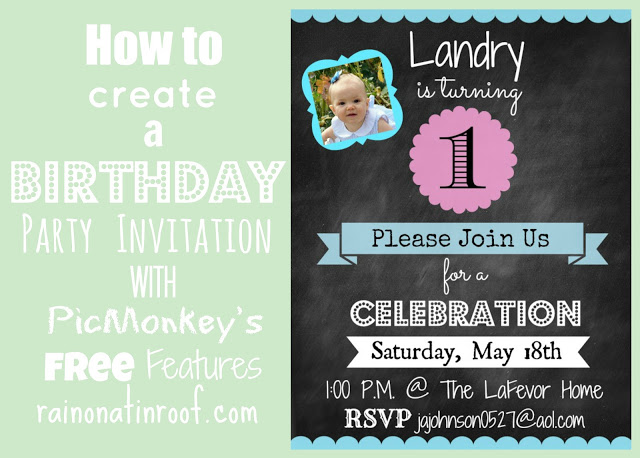
Learn how to make your own party invitations with this PicMonkey invitation tutorial! You can customize it with any colors or fonts of your choice.
This post contains affiliate links for your shopping convenience. Click here to read my full disclosure policy.
With the kid’s 1st birthday quickly approaching, I realized I had better get some invitations made for her birthday party.
As many of you already know, I am a big PicMonkey fan. I love all the cool things it lets you do with photos. And for just $6 a month, it is well worth the money since you can save boatloads on creating your own invitations, holiday cards and more and not pay retail for them! If you don’t have a Picmonkey subscription yet, you can get a free trial by clicking here.
I have used PicMonkey for my master bedroom wall art, my blog design, and to make my pictures “pin-worthy,” among other things. So, with the help of Picmonkey, I whipped up some pretty stellar invitations for the kiddo’s birthday.
Picmonkey Invitation Tutorial
Isn’t it adorable? The birthday party theme” is pink and blue, thus why those pops of color in the invitation.This invitation was pretty simple to make. Here’s how I created this Picmonkey invitation:Step 1The first thing you want to do is upload an image for your background. I used a chalkboard background I found for free here.Step 2Next, add any other overlays you want to use. I added the blue borders I found here. The banners and labels were all found on PicMonkey. I put where you can find them in the image below.
Step 3Now, its time to add your text. All you do is add the text box and place it where you want it on the image. I put what fonts I used in the image below.
Step 4Once you have your Picmonkey invitation how you want it, save it. At this point, you can opt to print it off locally or you can go to Picmonkey Print and print from there – one stop shop.What kind of Picmonkey invitations will you whip up?
Want to see other party invitations I’ve made with Picmonkey…
Colorful Polka Dots Invitation – a basic party invitation that’s great for any party!
Farm Birthday Party Invitation – perfect for your next hoedown!
Need more party ideas? Here you go:
How to Make a Superhero Party Banner with Picmonkey – easy and you can switch it up to match your party’s decor!
DIY $5 Party Backdrop – so stinkin’ easy, cheap and an awesome party decoration!

-
7 Things Your Blog Needs to Keep Readers Coming Back
This is part of the Grow Your Blog Series. Read more posts from the series here.
If you want your blog to grow, you need your readers to come back for new posts on a frequent basis. There are some things you can do to help ensure they do come back. Some of these are repeats from the 12 Tips to Grow Your Blog, but I felt they should be mentioned here again because they are so important.

7 Things Your Blog Needs to Keep Readers Coming Back
Contact Page
Have a clear, easy to find page or space on your blog where people can contact you via email or social media. I have my email on my “About Me” page, my “Start Here” page, and my “Advertise” page.
Great “About Me” Page
I love getting to know the person whose blog I’m reading! Anytime I visit a new-to-me blog and I just love it, I want to find out more about the person who is behind the awesome blog! It doesn’t have to be your life story. If I put my whole life story on my about me page, it would be wayyy too long, bore you in some places, and drop your jaw in others. I will be honest, I am not good at “About Me-s” at all! So, I use photos in my About Me page to help tell my story. Lauren, over at The Thinking Closet wrote a great post about revamping your “About Me” page. Check it out here.Clear Categories / Labels
Make sure you categorize every post with your labels. Keep your categories clear. Example categories may include: DIY, Crafts, Makeovers, etc. Display your Categories/Labels on your sidebar where they can be easily seen. Mine are in the cloud format, rather than the list. This is just a personal preference. I like how it makes the labels bigger that have more posts.Social Media Buttons
I said it in the 12 Tips to Grow Your Blog, and I’m sayin it again. Make sure you have social media buttons where they are easily seen on your blog. This allows people to quickly follow you and stay up to date on your posts.Easy to Read Titles, Fonts, & Colors
Don’t use fancy, swirly hard to read fonts. You may be able to read them just fine, but others may not. Use fonts that can be easily read and keep your colors basic! Don’t use reds, yellows, blues and other colors for the majority of your posts. Its hard to read, and will keep many people from finishing reading a post.Turn Word Verification OFF
Make sure Word Verification is turned OFF on your blog! This is when the box pops up after someone writes a comment asking them to type in the letters and/or numbers. It is so annoying and will keep many people from leaving you comments! To change your comment settings (on Blogger) go to Settings > Posts & Comments and its all there.Keep Your Blog Clean and Easy to Navigate
Do not clutter up your sidebars! Keep everything neat and organized. Have a section designated for sponsors, ads, etc. Also, your sidebar is prime real estate! Use it to showcase your most popular posts to keep people around on your blog longer! Make it easy for people to find something they are looking for. Have pages designated for certain topics (I have Seasonal Decorating, Home Tour, etc.) Have a search bar for people to easily search your blog.READ MORE OF THE GROW YOUR BLOG SERIES:
7 Things Your Blog Needs to Keep Readers Coming Back
How to Grow Your Blog with Pinterest

You know you don’t wanna miss any of this crazy.
Sign up to get my posts delivered to your inbox here.
Stalk Me Here:
-

Master Bedroom Makeover (Neutral, Yet Beautiful)
This was the room that got put off for a very long time. When we purchased the foreclosure, the last thing on our minds was the bedroom. I am thrilled to announce that our Master Bedroom Makeover is finally complete.

This post contains affiliate links for your shopping convenience. Click here to read my full disclosure policy.
Master Bedroom Makeover
It is finally done. We’ve been in this house almost two years, and the master was always put off on the makeover list. I am so happy to have it done and I’m pretty sure Grunt Labor might be more excited than I am because he doesn’t have to listen to me whine about not finding the right curtains or pillows, or frames. Poor guy. Here is the master bedroom makeover reveal:

Here is a before:
I cringe.I actually kept a lot of elements from the before, I just re-arranged some things and made them over. The wall color also stayed the same. I’m still not 100% happy with the wall color, but I did not want to paint this room.Here’s what I did:Reading Nook
I took a little corner of the room and turned it into a reading nook. Grunt Labor found that chair at Costco and the table was a Craiglist find that I made over with DIY chalk paint.DIY Corbel Shelving
I added a DIY Corbel Shelf above the reading nook. This shelf was super simple to make. Read more about it here.Bedding
The bedding got a serious makeover. We kept our headboard – love it way too much to part ways. We chose a simple white comforter from Dillard’s and bought some frugal accent pillows.Frugal DIY Wall Art
I created some frugal DIY wall art with images and backgrounds I bought from Etsy. I made it all using Picmonkey. Did you notice the frames in the reveal photo? I found those at Target for $5 each!!! They were white, but I sprayed them gold! Read about the art here.Rub ‘N Buff Hardware Makeover
I used the amazing Rub ‘n Buff to transform the hardware on our dresser and chest of drawers. Read how easy it was here.
Overall, I’m very pleased with the makeover! Grunt Labor was very hesitant about the gold in the curtains and me spray painting the wall frames gold. But after it was all done, he said: “I’m not a gold guy, but I really like it in here.” SCORE.
What do you guys think? Successful master bedroom makeover?Update: The master bedroom has underwent another mini-makeover! See it here!Need more real-life bedroom ideas – be sure to see this post with great out-of-the-box bedroom ideas that are totally doable!Want to snoop in my house more? Right this way, please… -

How to Make Money Blogging (10 Ways to get you started)
Let’s admit it. If you blog, you want to learn how to make money blogging. Yes, I very much enjoy sharing my projects, and reading about all the amazing things you guys do! And I LOVE all the awesome blogging friends I have met through my blog. But, a little money wouldn’t hurt. I do have a slight, ok, huge crafting and thrifting addiction!
We’ve talked about 12 Tips to Grow Your Blog, How to Grow Your Blog with Pinterest, and How to Grow Your Blog with Giveaways. Now, let’s talk about how to make money blogging. If you are just starting out, this is going to be great for you!

How to Make Money Blogging
This post contains affiliate links.
I’m breaking this down into three basic ways to make money blogging: Ad Networks, Affiliate Networks, and Sponsored Post Networks. Of course, you can always make money by having sponsors that advertise on your blog, but I thought I would keep this post more about networks you can sign up with to make money.
Ad Networks
You would place code from these networks onto your sidebar that would then show ads. You would be paid when people look at those ads and/or click on them.
Google AdSense
This is probably the most popular ad network out there. When I first started my blog, I really didn’t think all that much about ads, so they were just randomly placed on my blog. I have moved them to the top of my blog and it has really increased my clicks. They won’t payout until you have $100 in earnings.
This is another very popular ad network. You’ve probably seen these ads on the top of sidebars and the BlogHer TV roll above blog headers. Your blog has to meet certain requirements before you can run their ads and the ads must be placed above the fold. No other ads can be above the fold as well. I have signed up to be social influencer with them, but not an ad publisher yet. Go here for more information.
Content.ad is a related posts network. If you look at the bottom of my blog posts, you will see something that says “What’s Popular Now.” Some of those are my posts, some are other posts through Content.ad. When someone clicks on one of those other posts, I get a small commission. If someone clicks on one of my posts, I get another page view. Its a nice little win-win situation.
More basic ad networks:
Affiliate Networks
ShareASale
This network connects you with online merchants. Once you have signed up with ShareASale, you can apply to become an affiliate with merchants of your choice. There are MANY options, and good ones – one of my favorites on there is Wayfair. You can then place the merchants banners on your blog and insert links into blog posts. When someone clicks on an ad or link, your referral code will be embedded and earn you money if they make a purchase. Sign up for ShareASale here.Amazon Affiliates
Amazon has pretty much any product ever made, so its pretty easy to find some to promote. You can create a widget that displays products of your choice, get banners, and create links embedded with your referral code to put in blog posts. Go here to sign up.CJ Affiliates is very similar to Share-A-Sale. It has quickly become one of my favorite affiliate networks. It features some well known brands like CB2, Minted, World Market and more. Sign up here and use Referral Code 4390477.
Reward Style is another affiliate program that is one of my favorites. It is more geared toward fashion and home goods and includes brands such as Etsy, Target and more.
VigLink is a great affiliate network because with it, you don’t have to search for merchants to see if they have an affiliate program or not. You just put the regular old link in your post and if the merchant does have an affiliate program with VigLink, VigLink will automatically turn the link into an affiliate link. Sign up for VigLink here.
Paid Posts Networks
Clever Girls Collective
They connect brands with bloggers to do paid blog posts. I’ve seen brands such as P&G, Allstate, Hanes, etc. Go here for more details.Sits Girls
They basically do the same thing as Clever Girls. I have not noticed as many opportunities with them as I have with Clever Girls, but its worth it to sign up. I have heard that when opportunities do come around, they are pretty good. Go here for more details.After signing up with IZEA, you will receive leads to paid post opportunities. You can decide if you want to pursue the lead and negotiate price. The price the lead starts out is based on your numbers in Google Analytics. You have to have this set up on your blog before IZEA will accept you. There are many types of different brands. Sign up for IZEA here.
TapInfluence is one of my favorite sponsored post networks. They will send you direct offers when they think you are a good fit for a campaign. Almost all of the offers I have received from them have been perfect fits. You can decline an offer if you don’t think its right for you. Once more, they will require you to connect your Google Analytics account. Go here for more details.
READ MORE OF THE GROW YOUR BLOG SERIES:
7 Things Your Blog Needs to Keep Readers Coming Back
How to Grow Your Blog with Pinterest

You know you don’t wanna miss any of this crazy.
Sign up to get my posts delivered to your inbox here.
Stalk Me Here:
Pinterest / Facebook / Twitter / Instagram
-

Rub ‘n Buff Hardware Makeover
This was my first adventure with Rub ‘n Buff.
A Rub ‘n Buff hardware makeover.
This post contains affiliate links for your shopping convenience. Click here to read my full disclosure policy.
It won’t be my last! If you haven’t heard of Rub ‘N Buff, it is this little tube of amazingness that is like a paint / paste / cream. You can get it in various shades of gold, pewter, silver, etc.All you do is squeeze a small portion out, I mean SMALL, a little goes a LONG way, and rub it on whatever you want to make gold, silver, etc. Let it dry, then buff. That simple.
My dresser and chest of drawers pulls in the master needed some help. I tried to polish the brass, but that did nothing. They needed a total overhaul.

Some of them were even a little rusty, so I sanded those first. And the after:
After I applied the Rub ‘n Buff, and rubbed and buffed, I did sand them a tad. The gold was a bit too “BAM” for me.
What da ya think?The Master Bedroom is finally complete. Wanna see the whole shebang? Right this way, please…Master Bedroom RevealNeed more ideas for restoring your furniture hardware or making new hardware? See these…How to Clean and Restore Your Hardware with One Product – you won’t believe the difference!Three Easy Ways to Update Your Furniture Hardware – before you replace it, see if you can update it!DIY Faux Crystal Knobs – make your own crystals, then turn them into knobs! It’s easier than you think!DIY Selenite Knobs – easily turn beautiful selenite stones into furniture knobs!Like what you see?Follow along: -

How to Grow Your Blog with Giveaways
Chelsea, from Married Filing Jointly has joined me today to give you guys the lowdown on using giveaways to grow your blog! Thanks so much, Chelsea! Be sure to check out her blog after you read this awesome post.
If you want to ensure that you get a bunch of page views, and are looking for new followers, an excellent way to gain them is by organizing a blog giveaway. Blog giveaways attract a high traffic volume and also help make your blog more popular all while sharing about a product or service with readers.How to Grow Your Blog with GiveawaysWhat Are Giveaways?If you are a relatively new blogger, you may not know anything about hosting a giveaway. Giveaways are small contests that are organized by bloggers. They aim at increasing awareness and publicity of their blog. To win an item, you can ask people to like your page, post comments, interact, etc. You can also give your opinions about the product you are giving away and ask people to visit an Etsy shop where the product is sold, Facebook page, etc. After people have entered into your giveaway and left comments, you can randomly pick a winner and send them their prize.Having a promotional giveaway is great for your advertisers as well, as doing so greatly helps them promote their business. It’s a fact that when an individual receives a free product or service and they love the product, they are more likely to buy it the next time around, and also become a loyal fan and follower of your blog.Setting up a GiveawayAlthough there are many ways to go about setting up a giveaway, I usually start by having a company who is willing to offer up a product as a giveaway to my readers. Often this is done in cohesion with a product review. For example, either I will contact a company or a company will contact me and ask me to review a product on my site. In turn they will send me a free product to review. I always start by asking the company if they would also be interested in hosting a giveaway on my blog as this will increase the amount of people who read my review post. The product can vary in price. Sometimes, the company offers a product and sometimes they offer a giftcard to their store. Either way is fine.
You can always purchase an item you think your readers would like to giveaway as well.
If a company contacts you about doing a blog post about their company, ask them to sponsor a giveaway! It will give their post more views!Once you have the company and product selected you can set up the giveaway. Although there are several ways to go about setting up a giveaway I use Rafflecopter, which is a free service that tracks all your entries for you and will automatically select a winner for you at the end of the giveaway. Once I embed the Rafflecopter html code into my post, I go ahead and write the review of the product and make the post live.Then I begin to advertise. The key to hosting a giveaway is in the advertising. I post updates on Facebook, Twitter, and Google + daily to remind those who follow me to enter to win. When you tweet out a reminder make sure you hashtag #giveaway.There are tons of websites out there that advertise blog giveaways for free. Enter your post in as many of these websites as possible. Sites include Someday Crafts Giveaway Directory and Blog Giveaways.
Another great idea is to have an entry (on the Rafflecopter) for when participants share the giveaway on their Facebook, blog, Twitter, etc. This gives your giveaway more exposure, in turn giving your blog more exposure.One important fact to point out is to be sure to only host giveaways for products and services your readers would like. For example, I would not want to post a giveaway and review of a stroller since I do not have kids yet.When used properly, giveaways are a wonderful way to gain followers and advertise great products!
What are your giveaway tips? -

How to Grow Your Blog with Pinterest
Pinterest is big. Wait, let me rephrase. Pinterest is ginormous. Really guys, its huge. A LARGE portion of my blog traffic is due to Pinterest. That’s why I told you to pin your own photos in the 12 Tips to Grow Your Blog post! Because Pinterest is so big, its a great source for growing your blog!
Here’s how to grow your blog with Pinterest.
First off, in order to grow your blog with Pinterest, you need “pin-worthy” photos in your posts. Take a look at most of the pins on your boards. Don’t you have pins that are clear, focused, cropped, and bright? Your photos can make or break you on Pinterest.I’ve been working hard to really make my photos pin-worthy lately. Here’s an example of a photo from a 2011 blog post about a lamp makeover:
And here is a photo from later on in my blogging career about another lamp makeover:
See the difference? The latter photo is bright, clear, and sharp. I added an overlay with my blog title on it and a banner with the title of the blog post.Having great photos will not only help grow your blog through Pinterest, but it will keep readers interested in your post, and other posts on your blog.A few more things you need to do to ensure you grow your blog as much as possible with Pinterest:- Make sure you have a “Pin It” button on each photo in a blog post. You can read about doing this in my 12 Tips to Grow Your Blog post.
- Having Pinterest followers is VERY important. Make sure there is a place on your blog where readers can find your Pinterest account and follow along. I have the social media buttons on the top of my sidebar.
- Pin your own photos! I talked about this in my 12 Tips post, but wanted to remind you! Pin your photos onto more than one of your boards. Some people only follow certain boards and not all of them. Like for my lamp makeover post, I would pin it on my Rain on a Tin Roof board (just for my blog posts) and on my DIY board.
- Add a Pinterest Tab to your Facebook page. This will allow people who like your Facebook page to see that you have a Pinterest account, look at your pins and follow you. Go here to learn how to install it. My Facebook fan page is shown below with the Pinterest tab.

- If you haven’t converted your personal Pinterest account to a business account, do it now. This allows your url to be seen on your Pinterest profile (like you see on mine below). Go here to convert your account.

- Did you know you can see what people pin from your site? Yep, you can! Get ready to stalk this page! Go to: http://pinterest.com/source/YOURBLOGURLHERE Make sure you include the dot com. For example, when I want to see what people are pinning from my site I type in http://pinterest.com/source/rainonatinroof.com. Go see what people are pinning from your blog, it will give you an idea of what people like from your blog and what you could post more about.
- Don’t just pin photos from your blog. Share the love! Pin things you truly like or that describe you. It helps your followers know what kind of person you are.
Read more of the Grow Your Blog Series:
7 Things Your Blog Needs to Keep Readers Coming Back

-
12 Tips for Growing your Blog
Since December I have been trying really hard to build and grow my blog into something great. I started this blog back in August 2011. I was going full speed ahead (although my photos from those posts are definitely lacking), and then I got pregnant. I felt miserable and blogging was the last thing on my mind. I would post every now and then, but with no regularity. But this past December, I decided to do this blogging thing all the way. I love doing it, and I love following other amazing blogs and getting great ideas – its my passion.
So, back at the start of December, I had around 40 GFC followers, 20 feed subscribers, not even close to 100 facebook followers, and about 100 Pinterest followers. (I don’t do Twitter – I know, I must be the only one in the world who doesn’t. I just can’t take it on right now.) Now, as of this post I have 170 GFC followers, 92 feed subscribers, 330+ Facebook followers, and 366 Pinterest followers. I’m not bragging. I am no where near MANY other amazing blogs. But, I am proud of the growth of my blog in the past three months. I still have a LONG way to go! All of the tips below are things I have done, and still do, to grow my blog in the past three months.

Tips for Growing your Blog
1. Post on a Regular Basis
Do not make my mistake. When I got pregnant, I rarely posted at all. My blog was stagnant. If you want your blog to grow, you have to post on a regular basis! This doesn’t mean you have to post every single day.
At least, I ain’t got time for that! There’s a nine month old running around here, a house to clean, and dinner to cook! I try to post at least three times a week, usually 3-4 times a week.2. Add a “Pin it” Button after your images.Y’all, Pinterest is HUGE – and getting bigger everyday! Do not underestimate the power of the pin! TONS of my traffic (and from what I’ve read, many other blogs traffic) comes from Pinterest. By having a “Pin It” button on every image, it makes it easy for readers to pin your image, and then their followers see it, re-pin, visit, and the cycle continues.
3. Pin Your Own Posts
That’s right, I said it. People follow you on Pinterest because they like what you pin. What you pin is probably similar to what you post! Pin your posts! Your followers will re-pin and their followers will re-pin and the beautiful cycle mentioned above ensues!4. Social Media Buttons
Have social media buttons placed where followers can easily see them and use them to follow along. Mine are on the top of my sidebar. You can get free social media buttons in all different colors here.5. USE Social Media
Put links to your posts on your Facebook page, Tweet it, share it on Google+. Show “teaser” post photos on Facebook. And once more, pin your images!6. Put the Best Image at the Top of Your Post
I made this mistake when I started blogging. I would do a “before and after” project, and always show the before at the beginning, which one would normally do, except in blogging, and the after at the end of the post. You need to show readers your “after” photo first though, to draw them in and make them want to read about how you got to the “after.”7. Highlight your Most Popular / Best Posts on your Sidebar
That sidebar is prime real estate! Put an image with a link to the post. This keeps readers on your blog longer, which means they might follow along if they keep seeing your amazing work!8. Link Parties, Link Parties, Link Parties
Link up your posts, people! This gets your blog and posts out there for potential readers to see! You can’t just post something, walk away, and expect readers to come check it out. You have to promote it!9. Visit, Visit, Visit
Don’t go link up at a party and not visit other posts! How rude!
Couldn’t resist Stephanie’s famous line from Full House. Anyway, you want people to come view your posts, so shouldn’t you view theirs as well?! You don’t have to visit other posts right that second, but do go back and try to visit a few and leave a nice comment.
10. Comment, Comment, Comment
Leave a comment for the link party host saying thanks. Comment on the links you visit. Comment, comment, comment! When you comment on someone else’s blog, they are more likely to come visit your blog, and possibly follow (especially if you follow them). When someone comments on your blog, respond to the comment, go visit their blog, and comment! Everyone LOVES comments!Another important thing about comments – make sure word verification is turned OFF on your blog! This is when the box pops up after someone writes a comment asking them to type in the letters and/or numbers! No one wants to deal with that when leaving a comment! If you are worried about getting comments from spammers, set your comment settings to where no anonymous users can comment. To change these settings (on Blogger) go to Settings -> Posts & Comments and its all there.
11. Guest Post at other Blogs
If you see an opportunity to guest post at another blog, go for it! When you post at another blog, some of their readers will visit your blog, and may become followers.12. Swap Buttons or Links with Other Blogs
Many bloggers love to swap buttons and links! This gives you some advertisement and them as well! Check out blog’s advertise pages to see if they swap buttons or email them. Include swap buttons or links on your sidebar under a “Blogroll.”I hope that these tips help you out in growing your blog! I am not an expert, by any means, but these are just a few little things I’ve learned in the past few months and thought it might be helpful to you!
If you have any tips, I would LOVE to hear them! Please leave a comment!
Read more of the Grow Your Blog series:
7 Things Your Blog Needs to Keep Readers Coming Back
How to Grow Your Blog with Pinterest
You know you don’t wanna miss any of this crazy.Sign up to get my posts delivered to your inbox here.
Stalk Me Here:
-

Canvas Glitter Bunny
Y’all, this might be the cutest dang thang I’ve ever made….
I know, right. I told ya. Cute.Easter is one holiday that I was lacking decorations in. Not anymore. After this quick project, and a trip to the Goodwill (a “finds” post coming soon) I am set. It’s just a matter of getting all the decorations off my dining room table and actually using them to decorate around the house. Anyway, after seeing these two adorable bunny projects, I knew I had to have a bunny of my own.
To make my canvas glitter bunny I used:-Canvas from Goodwill-Scrapbook Paper-Bunny Silhouette-Spray Paint-Modge Podge-Glitter
First, I spray painted that old canvas with gray primer, then a blue color I had. This was the first time I had spray painted canvas and it worked perfectly!I printed off a bunny silhouette I found online.
Source I just opened it in word and made it pretty big. That chick comes with it too, but when I made the bunny bigger, it kicked the chick’s butt right off the page. But, yes, I know, that chick is too cute as well. Another easter project? Hmmmmm….
I taped the bunny silhouette on the scrapbook paper and cut it out, then mod podged it on the canvas.
At this point, I was just gonna add the white pom pom on its butt and call it a day, but then I saw my glitter and BAM, the glitter bunny was born. I just wiped mod podge all over the bunny silhouette with my finger and sprinkled glitter on.
For the bunting, I just used twine and some old scrapbook paper I had lying around. I also happened to have the white pom pom lying around. I just hot glued those bad boys on.Have you done any Easter crafts lately? I’d love to see them!Looking for another easy Easter decoration – take a look at these DIY Easter Bunny Vases then – they are SO cute! -

Tutorial: Frugal DIY Wall Art
After posting my DIY wall art for my master bedroom makeover, there were a few people who asked for a tutorial of how to make them. So here ya go, y’all.
This post contains affiliate links for your shopping convenience. Click here to read my full disclosure policy.
I did this all in Picmonkey.
Supplies:
–Graphics / Images in .png format (.png gives the images a transparent background)
–Backgrounds of your choiceI bought images on Etsy from GraphicDreamz and from Graphique. When you order, just specify in the message that you would like the .png file.
I bought backgrounds from Maishop Digital Art and Gidget Designs, both on Etsy.Okay, now down to business.What I did first, was size my backgrounds. I wanted all of these to be 11×14 prints (including backgrounds) in the end. I wanted to use two backgrounds, the coral and the linen to make the prints pop. See how the image below is on a linen background, the linen is on the coral pattern, and the coral is on the same linen background again.
I also noted above what size crops to use for each background. The linen background that the elephant is on is 5×7, the coral is 8×10, and the back linen is 11×14. Just because I made these an 11×14 doesn’t mean I have to print them out that size. I just wanted standard dimensions to work with.To size your backgrounds:1. Go to Picmonkey.2. Select edit a photo near the top.3. Select whatever background you are using. I’m going to use my linen background first.4. Once the background appears, select the 1st button on the left under editor, which is the basic edits button.5. Select crop.6. In the drop down menu that says “no fixed proportions”, select the size you want to use. I’m doing my first linen background first, so I am selecting 5×7.

7. Look at the crop screen to the right on your background. If what is in the crop regions works for you, hit apply. If the crop regions do not include part of the pattern you want, then move around the box, but don’t make the box bigger or smaller.8. Save the background. Do not save it as the original file. I saved mine as “5×7 linen background”.9. If you are using multiple backgrounds, as I did, you will need to repeat these steps for each background, cropping them to your desired size. Example: I cropped the coral one to an 8×10 and the back linen one to an 11×14 and saved them accordingly.Now, you are going to add your image to your background. I put my image on my 5×7 linen background.To put your image on your background:1. Go to Picmonkey.2. Select edit a photo near the top.3. Select the background you want your image to go on, NOT the image. I selected my 5×7 linen background. ****At this point: if you are using a horizontal image and your background is vertical, you will need to rotate your background under the basic edits button and rotate. I did this with mine.***4. Click on the overlay button on the left (the fifth button down).5. Select Your Own at the top.6. Find the image on your computer you are wanting to use, highlight it, and click open. I’m using my elephant. Your screen should look something like this, once you choose your image.
7. Use the circles on the corners of the image to make it bigger and then position it in the center of the background.8. When you are satisfied, save the entire image. I saved mine as “elephant on linen.”At this point, if you are just doing one background, you’re done! However, if you are doing multiple backgrounds, continue on!To add a second background:1. Go to Picmonkey.2. Select edit a photo near the top.3. Select the background you want to put under the image you just made. (This should be one of the backgrounds you have already sized. Mine is the 8×10 coral background.) Rotate if needed.4. Click on the overlay button on the left (the fifth button down).5. Select Your Own at the top.6. Find the first background with your image on your computer that you just did (mine is the elephant on the linen background), highlight it, and click open.Your screen should look something like this, once you choose your image.
7. Just like you did with your last one, size the image to where it is center on the new background.8. Save it when you are satisfied. I saved mine as “elephant both backs.”If you want to add a third background:1. Go to Picmonkey.2. Select edit a photo near the top.3. Select the background you want to put under (in the very back) the image you just made. (This should be one of the backgrounds you have already sized. Mine is the 11×14 linen background.) Rotate if needed.4. Click on the overlay button on the left (the fifth button down).5. Select Your Own at the top.6. Find the last background you just made that has your image and two backgrounds (mine is the “elephant both backs” file. highlight it, and click open. Your screen should look something like this, once you choose your image.
7. Just like you did with your last one, size the image to where it is center on the new background.8. Save it. So I would know this was the final one, I saved it as “elephant final”.And now you are done. It seems like it takes a long time, but it really doesn’t. You only size your backgrounds once and when you get the hang of it, you’ve done an entire print in no time. I think it took me about 30 – 45 minutes to make 10 complete prints.And this was the longest blog post. Ever. Good Grief.Now, some of you that are familiar with PicMonkey are thinking “Why in the world didn’t she just do an overlay on top of an overlay on top of an overlay???!!” “Is she crazy?”Duh. We all already knew that. I tried the overlay on top of an overlay, yada-yada-yada method. But it just would not work for me. It wouldn’t let me re-size the backgrounds and image like I wanted it. Maybe some of you can get it to work for you.Now, go buy cute graphics and backgrounds (I think I paid around $15 for backgrounds and 9 or 10 images) from Etsy and make your own wall art.I have to go get a beer. Because this was the longest blog post ever. I know I already said that, I just wanted to re-inforce it. Love y’all!Looking for more easy wall decor? Check these out:
How to Make a Silhouette the Easy Way
You know you don’t wanna miss any of this crazy.
Sign up to get my posts delivered to your inbox here.
Stalk Me Here:
-

DIY Decorative Horse Accessories
Have you guys noticed all these decorative animal home accessories that are out lately? Like this…
Or this one from Target that I have been eyeing for the past month…..
Well, I couldn’t spend $30+ on one of these when I knew I would probably get tired of it soon. So, I decided to make my own decorative horse accessories.
When I bought these little guys at the 127 yard sale months ago, my friend, Lindsay looked at me like I had gone bat-shit crazy.
I had a plan, though. They would become something magical. That was in August. So, it only took 6 months for them to become something magical. Whoops.First, I spray painted them metallic gold. Gold makes everything magical.
I cut some old 2x4s we had into small rectangles. Then, I took that fabulous wrapping paper from Target that I put in the back of my liquor cabinet, and wrapped the 2x4s in it.
I used hot glue to seal the wrapping paper around the wood. I wanted it to stay put. Then, I just glued the horses on top. Just a dot on each horse’s foot.
I thought about using them as bookends, but when I tried that, they were just too small against the books, so they just sit on top of the books now.
By the way, these babies cost a quarter each, the wood was just lying around our house, I already had the spray paint, and the wrapping paper was $0.50 a roll and I barely used any of it for this. So less than $1 for both of these studs!
Magical, right?Looking for more great DIY home accessories? Don’t miss these then:How to Make Faux Crystals – then turn them into finials, knobs, magnets and more!How to Make Lamp Tassels – adorn your lamps with these colorful little tassels that you can make in five minutes!DIY Agate Slice Lamp Finials – so easy to make and so pretty!DIY Selenite Knobs – turn beautiful selenite stones into pretty knobs for your furniture!Like what you see?
Follow along: -

Gray and White French Country Chest
Remember the small gray table in my master bedroom reading nook?This french country chest below was also part of that Craigslist haul where Grunt Labor was counting the farm animals. It has turned out to be one of my absolute favorite pieces I’ve ever done.
This post contains affiliate links for your shopping convenience. Click here to read my full disclosure policy.It started out like this:
For me, it was easy to see through those horrendous painted flowers and awful 1980s(?) yellow-y color to see the beautiful curves underneath. She is also solid wood, so it was a no-brainer that Grunt Labor would be loading it up in the truck for me.I mixed up the same Benjamin Moore Trout Gray chalk paint recipe that I did for the table and covered the entire piece in it.I really wanted this baby to pop, and I love the combination of white and gray for contrast, so I grabbed a sample pot of some white color I have (sorry I don’t know the name!) and made some more chalk paint. I painted the grooves along the legs white and the handles the same color. When it was all done, I gave it 3 coats of Minwax Polycrylic Spray.No sanding for rustic-ness, I wanted pure, clean, contrast.

Isn’t she grand? Unfortunately, I can’t keep this beauty. There is no room for it at my house!Want to see more DIY chalk painted pieces? Here you go…DIY Numbered Chest – features a cool way to add detail to furniture pieces with numbers!DIY Gray Chalk Paint Table – simple, but adorable!French Country Dresser Makeover – two-toned love going on here!Two Toned Rustic Dresser – with a DIY shelf that took the place of a missing drawer!