Category: DIY Projects

Budget DIY projects to give your home a high-end custom look, but on a budget.

  • DIY Modern Rustic Bookshelf

    DIY Modern Rustic Bookshelf

    Need a little more storage space in your home? Why not build a bookcase? This rustic bookshelf also has a gorgeous modern feel. It’s a simple DIY project that can easily be customized to your home’s style. 

    I am not a builder, y’all.

    I usually come up with amazing build projects and think they are going to be really easy and I can totally do it – then I have to call in Grunt Labor at some point for help.

    But this modern rustic bookshelf is so easy to build, Bill and I did it all by ourselves.

    Well, we did have Grunt Labor on standby.

    After Bill had decided what he wanted in his room makeover, I found this bookshelf over at Waiting on Martha.

    Rustic Bookshelf on animal print wall - Rain on a Tin Roof

    via

    I thought it would work perfect for his room, so I tracked down where it was from…All+Modern…and it was $1000.

    One Thousand Dollars.

    I’m sorry, but I just don’t know if I could ever bring myself to pay $1K for a bookshelf.

    On top of that, the bookshelf was quite a bit larger than what we needed or could even fit in the space. After looking at it though, I was totally like, we can build that. I sent an image of the shelf to Bill and asked if he liked it. His response was “That’s awesome.” So the next day, we went and bought our materials and came up with our own DIY bookshelf version for less than $50.

    Rustic Bookshelf DIY in a masculine bedroom - Rain on a Tin Roof

    It is seriously an easy build ya’ll and I am so thrilled with how well it turned out.

    Rustic Bookshelf DIY

    This post contains affiliate links for your shopping convenience. Click here to read my full disclosure policy.

    Materials Needed:

    Tools Needed:

    Cut List:

    • Five – 2″ x 10″ x 36″ (Cut the 2″ x 10″ x 10′ down into five 36″ long pieces.)
    • Four – 2″ x 10″ x 9 1/2″ (Cut the 2″ x 10″ x 10′ down into four 9 1/2″ long pieces.)
    • Eight – 2″ x 2″ x 6 1/2″ (Cut the 2″ x  2″ x 8′ down into eight 6 1/2″ long pieces.)
    • Eight – 2″ x 2″ x 9 1/2″ (Cut the 2″ x 2″ x 8′ down into eight 9 1/2″ long pieces.)

    Steps

    Step 1:

    Make all the cuts noted above.

    DIY Bookshelf - cutting the wood - Rain on a Tin Roof

    Step 2:

    Set aside the 2″ x 10″ cuts. Gather the 2″ x 2″ cuts, wood glue, nail gun and clamps.

    How to Build a Bookshelf - cutting the shelf supports - Rain on a Tin Roof

    Create a square using two of the 2″ x 2″ x 6 1/2″ pieces and two of the 2″ x 2″ x 9 1/2″ pieces as shown below. Put wood glue on all the joints and clamp.

    DIY Bookcase - assembling the shelf supports - Rain on a Tin Roof After clamping, nail the pieces together. Do not remove the clamps yet. We waited a few hours before removing the clamps to ensure the glue dried properly.

    Repeat this three more times to create a total of four “open” squares. These will become your shelf supports.

    After each square is completed and dried, paint or stain the squares the color of your choice.

    Step 3:

    Take one of the 2″ x 10″ x 36″ pieces and drill three pilot holes along the left end of the board.

    Drilling the holes for the rustic bookshelf - Rain on a Tin Roof

    After drilling the pilot holes, come back with a larger drill bit that is the size of the screws head and drill out just a little bit over the pilot hole – this is so you can countersink your screw and give the shelf a more finished look.

    On the same board, come in 9″ on the other end of the board and drill two more holes the same way you did above, however you only need one on each side of the board as shown below.

    Drilling pilot holes in the shelves for the DIY rustic bookshelf - Rain on a Tin Roof

    Step 4:

    Using the wood screws and drill, place one of the 2″ x 10″ x 9 1/2″ pieces on the end of the board where you drilled three pilot holes and secure it from the bottom of the longer 2″ x 10″ piece. Place one “open square” on top of the place where you drilled two pilot holes and secure this piece with wood screws from the bottom as well as shown in the image below.

    Assembling the diy bookshelf from the ground up - Rain on a Tin Roof

    It comes in really handy to have someone on standby to hold the pieces as you secure them.

    Step 5:

    Place one of the 2″ x 10″ x 36″ pieces on top of the pieces you just fastened together.

    Repeat the same process with the pilot holes and fastening the pieces together with the screws, however this time, you will be doing this from the top.

    The arrows in the image below indicate where your pilot holes and screws should go.

    How to Build a Bookcase - attaching the shelves - Rain on a Tin Roof

     Step 6:

    Place an open square and a solid square on the second shelf you just fastened together as shown below.

    How to Build a Rustic Bookshelf - attaching the supports - Rain on a Tin Roof

    Once more, you are going to drill pilot holes, then fasten the pieces together with screws as you did before. This time you will be coming up from the bottom. This is where we found that a right angle drill came in handy.

    DIY Rustic Bookcase - using a right angle drill - Rain on a Tin Roof

    It was easier to get the right angle drill into the tight spots, rather than the full size drill.

    Step 7:

    Place a 2″ x 10″ x 36″ piece on top of the open square and solid square you just fastened together.

    DIY Modern Rustic Bookshelf - assembling - Rain on a Tin Roof

    Repeat the pilot hole and fastening process as you did with the other shelves.

    Next, you will add on another open square and solid square, however you are alternating the location of each with each new shelf you add as you can see in the image above.

    Continue fastening on shelves and squares until you have no more left. You can also alter the size of the shelf by adding more or less shelves.

    Step 8:

    After the shelf is assembled, stain or paint it the color of your choice. I did this after the shelf was assembled, however, I should have done it before – would have been much easier!

    Modern Rustic Bookshelf DIY in a black and white bedroom - Rain on a Tin Roof

    $50 DIY bookshelf vs. $1000 bookshelf. I’ll take the $50 any day of the week.

    DIY Rustic Modern Bookshelf Build - guitar beside bookshelf - Rain on a Tin Roof

    Have you ever made a DIY bookshelf before?

    Want more easy DIY projects and decor ideas?

    See the full Masculine Bedroom Makeover – this shelf is used in here!

    How to Build Wall to Wall Shelves – built-in shelving that is easy, easy, easy to make and super functional.

    Power Tools 101 Series – Learn how to use a drill, saw and more – perfect for beginning DIYers!

    Want to remember this post? Pin the image below!

    How to Build a Modern Rustic Bookshelf - easy DIY project - Rain on a Tin Roof

    blog-signature-summer-15

    You know you don’t wanna miss any of this crazy.

    Sign up to get my posts delivered to your inbox here.

    Stalk Me Here:

    Pinterest / Facebook / Twitter / Instagram

    DIY Modern Rustic Bookshelf Build against a black wall - Rain on a Tin Roof

    SaveSave

  • DIY Cedar Planter Box using a Snap Together Frame

    DIY Cedar Planter Box using a Snap Together Frame

    Add some curb appeal to your home with this DIY cedar planter box. These cedar planter box plans use a SnapFence frame that literally snaps together, making this a simple build even for new DIYers. If cedar isn’t your thing, you can easily customize the frame with a different material.

    I am always a sucker for a great planter or flower pot. I couldn’t snatch up a swan planter quick enough at a yard sale the other day even though the guy selling it made sure to point out how badly the paint was chipping. I’ve also been on the lookout for a donkey flower pot ever since I spotted the most adorable one at a yard sale, but sadly they weren’t for sale.

    I also love a great planter box that can pull double duty as an address marker.

    This post is sponsored by SnapFence. All opinions are 100% mine.

    DIY Cedar Planter Box with Shrubs

    Isn’t this one great? This DIY cedar planter was made using SnapFence components, which are rails and connections made of PVC that is built to withstand the elements and make outdoor building projects a whole lot easier.

    Cedar Planter Box DIY

    This post contains affiliate links for your shopping convenience. Click here to read my full disclosure policy.

    For reference, the overall dimensions of my cedar planter box is 24″ high x 18″ deep x 36″ long.

    Materials and Tools Needed: 

    Steps

    Step 1: Assemble the SnapFence frame.

    Cedar Planter Box DIY Frame Materials

    Use the instructions found here to assemble the SnapFence frame for the planter. Working from the bottom up, use a rubber mallet to secure all the rails into the connectors. The video below shows how easy it is to build the frame.

    [adthrive-in-post-video-player video-id=”skCLhoqb” upload-date=”2018-10-02T11:50:16.000Z” name=”DIY Cedar Planter Box using SnapFence” description=”Add some curb appeal to your home with this DIY cedar planter. These cedar planter box plans use a SnapFence frame that literally snaps together, making this a simple build even for new DIYers. If cedar isn’t your thing, you can easily customize the SnapFence frame with a different material.”]

    If you aren’t a video person, then you can use the photos below as a guide.

    Cedar Planter Box Plans - constructing the frame.

    Literally, the instructions lay out exactly how to connect the frame. It took me less than 10 minutes to assemble the frame.

    If you’re curious about how well the rails and connections truly stay snapped together, well I can assure you, they are pretty darn tight. In order for me to get both the video and photos of the process for you, I had to put the frame together, then take it apart and put it together all over again. (Yes, if I were a smart person, I would have stopped to take photos the first time around, but I forgot.) Anywho, I had to really bang on some of the rails and connections with my rubber mallet in order to get the frame broken down. This stuff is very well made and very secure when it’s put together.

    Step 2: Attach the cement board.

    Once you have your frame in place, use the included screws to attach the cement board (concrete board / backer board / whatever you want to call it) to the SnapFence frame.

    DIY Cedar Planter - assembling the side panels.

    Step 3: Finish the Planter Box.

    At this point, you can choose to stucco the planter box, paint it or whatever else your little heart desires. I opted to clad mine with cedar planks.

    You’ll want to start with the short sides of your planter box.

    Place two uncut cedar planks along the bottom of each long side, flush against the cement board.

    Building a cedar planter box.

    Measure the distance between the two planks and cut five cedar planks down to this size. For each cut, use a new cedar picket. Don’t cut again from the same picket. Instead, set these pickets aside and they will be long enough for the long sides of the cedar planter box.

    Lay the planter box on the opposite short side you are working on.

    Applying cedar to a planter box.

    Lay one of your cut cedar planks on the bottom of the short side. You want it to go past the cement board but not extend past the SnapFence PVC feet. Think of the cedar planks as “floating” just above the ground. Make sure there is roughly the same amount of plank hanging over on each side where the long side planks will eventually be placed.

    Put Fuze It on the back of the cedar plank, then clamp into place.

    DIY wooden planter box using cedar.

    Take the rest of your cut exterior wood boards, apply Fuze It to each of those, then line them up and lay them out across the rest of the exposed cement board on this side, pressing each firmly in place as you go.

    Applying cedar boards to the diy planter.

    Once you have them all in place, place a few heavy objects on top to help the glue get a good bond with the cement board.

    Step 4

    After a few hours, repeat Step 3 on the other short side of the cedar planter box.

    Step 5

    After both short sides have been clad with cedar planks, use the same process to cover the long sides of the planter box with cedar. This time when measuring to cut the cedar planks, you’ll just measure from end to end of the cedar boards on either short side, rather than between them.

    DIY Cedar Planter Box with House Numbers

    Attach house numbers to the front of the planter if you wish.

    Place the planter wherever you wish. I think it would look great beside a mailbox, on the front porch or near a garage.

    Related: 10+ Creative Flower Pot Ideas

    Cedar Planter Box DIY with shrubs planted in it.

    Fill with plants and enjoy! I opted to go with tall boxwoods for our planter. With big planter boxes like this, I like to always have something in them that will stay green all year long and then add in annuals as the seasons change. This cedar planter would also be great for planting bulbs in. If you don’t want to fill the entire planter with soil, then fill the bottom of the planter with plastic bottles and jugs to take up space.

    If you want to protect the wood, then apply a coat or two of exterior water seal.

    You can also use Snapfence post ground pilings that can be attached to the bottom connections and anchored into the ground. I opted to forgo those as after I got the entire thing put together it was pretty heavy as is – I couldn’t lift it by myself. I knew that filling it with dirt was only going to make it even heavier and keep it in place, so I didn’t think I needed those.

    I love DIY planter boxes because you can customize them to your home’s exterior. This one is no different. If the cedar look isn’t your thing, you can absolutely go another route! Just think of the SnapFence frame as your blank canvas. 😉 SnapFence also makes lots of other Snap n Build kits like pet enclosures, garden walls, fence kits and more. And yep, you just snap ’em together. 🙂

    What would you cover your planter frame with?

    Want more outdoor project ideas and tips?

    Creating a Cut Flower Garden – perfect for beginners!

    DIY Painted Planter Pots – take basic planters and kick ’em up a notch!

    Want to remember this planter for later? Just pin the image below!

    Cedar Planter Box Plans using a Snap Together Frame
  • DIY Kids’ Play Table with Storage

    DIY Kids’ Play Table with Storage

    If you’ve got basic DIY skills, then you can easily make this kids play table in one weekend – and your kiddos will forever be grateful! On top of that, this activity table for kids with storage can easily be customized to fit the interests of your own individual child!

    I first must start by saying that Grunt Labor gets all the building credit for this one. While I helped with the final touches, the table might not be done if it weren’t for him. We had told the Circus we would build her one when she got a play horse stable for her birthday and two months later, we still hadn’t done it. Things had just been crazy with the guest bathroom and bedroom remodel. So one day while I was working away on those two spaces, Grunt went out in the garage and built this kids farm play table in just a few hours.

    kids play table

    It can actually be any kind of activity table for kids. We went with the farm theme because that’s the kind of stuff the Circus loves to play with. If your kid is more into Legos, the jungle or something else, it could totally be that instead. You’d just want to replace our “grass” with lego bases or jungle-esque stuff – whatever your kid likes.

    DIY Kids’ Activity Table with Storage

    This post contains affiliate links for your shopping convenience. Click here to read my full disclosure policy.

    For reference, our kids’ play table is 41 1/2″ x  39 1/2″. You can alter the dimensions below to make your activity table bigger or smaller as desired.

    Materials & Tools Needed for Table Construction:

    Cut List

    Using the circular saw, make the following cuts.

    • Cut the 2″ x 4″s into the following lengths:

    • 4 pieces – 20 1/2″ long (legs)
    • 2 pieces – 26 7/8″ long (frame around table)
    • 2 pieces – 48″ long (frame around table)
    • 1 piece – 45″ long (support underneath table)

    • Cut the 1″ x 2″s into the following lengths:

    • 2 pieces – 48″ long (rim around table)
    • 2 pieces – 31 1/2″ long (rim around table)

    • Cut the plywood down to 30″ x 48″.

    Steps

    Step 1

    Gather the 2″ x 4″ pieces that make up the frame of the table (2 – 26 7/8″ long pieces and 2 – 48″ long pieces) and the 2″ x 4″ piece that is the middle support (45″ long piece) underneath the table.

    Arrange the 2″ x 4″ frame pieces in a rectangle and place the 45″ long support piece in the middle. Use wood screws to attach the 2″ x 4″s together where each 2″ x 4″ meets.

    kids activity table with storage

    The photo above shows two support pieces. Ignore that. This was actually from the first round of Grunt making the table and it was way too big. He ended up disassembling it and making it to the dimensions noted in this post. The photo will help you get a visual though of how to construct the frame of the table.

    Step 2

    Attach the 2″ x 4″ leg pieces (the 20 1/2″ long pieces) to each corner of the frame using wood screws.

    activity table for kids

    Be sure that the 2″ x 4″ leg is flush with the bottom of the 2″ x 4″ frame you are attaching it to and also pushed into the corner of the frame. You can use clamps to hold it in place while you are screwing it to the frame.

    Go ahead and attach the casters at this time as well.

    kids farm table

    Step 3

    Flip the table over and put it on the ground. Place the plywood on top of the 2″ x 4″ frame you’ve just constructed. Attach it to the frame with wood screws all around the edges and in the middle where that middle support is.

    Step 4

    Attach the 1″ x 2″ pieces around the edges of the plywood using finish nails and a hammer or a nail gun.

    kids farm play table

    The bottom of the 1″ x 2″ should be flush with the plywood. This will create a rim around the activity table to keep things from falling off.

    Step 5

    Attach cup hooks to the sides of the 2″ x 4″ frame to hang bins from for storage.

    diy kids play table

    Our storage containers came from The Dollar Tree.

    How to Make It Into a Kids’ Farm Table

    As I said, you can customize the top of the activity table to meet your own child’s interests and needs. Here’s how we made ours a farm play table…

    Materials & Tools Needed

    Step 1

    Do the painting and staining first. We painted the legs and 2″ x 4″ frame white and stained the 1″ x 2″ rims so they looked like fencing. The only thing we didn’t paint first was the pond.

    Step 2

    Cut your green material down to the size of the plywood base and attach it to the table. We did this with a staple gun along the edges. You could also glue it if you wish.

    Step 3

    Determine where you want the pond to be on the kids’ farm table. Outline it using a pen or marker, then cut out that portion of the green material using an X-Acto knife. Once the green material is cut away, carefully paint that exposed portion of the plywood blue to resemble a pond.

    diy kids activity table with storage

    Step 4

    Place your faux trees wherever you desire. Ours wouldn’t stay standing very well, so we hot-glued them down.

    diy activity table for kids

    And that’s it!

    diy kids farm table

    The Circus has loved playing with her farm table. She had all her Schleich paraphernalia up on it and set up before we could even put the finishing touches on it. I’m glad we finally got it done for her.

    Having it on wheels is especially nice because it’s so movable.

    diy kids farm play table

    Will you be adding an activity table for kids to your to-do list?

    With Christmas just around the corner, this could be a great gift idea!

    You might also want to see…

    Drop Down Desk for Kids

    DIY Kids Wall Mounted Desk with Storage

    This is such an easy build! Any beginning DIYer could complete these! How to Build Wall to Wall Shelves in an hour for $50

    How to Build Wall to Wall Shelves

    How to Build a Children’s Stage with Hidden Dress-Up Storage

    Pin This Post

    kids play table with storage


  • Washed Out Stripes Bathroom Accent Wall

    Washed Out Stripes Bathroom Accent Wall

    This isn’t your typical striped accent wall. Instead of bold, solid stripes, these are toned down, washed out stripes to create a gorgeous blue accent wall. You can easily recreate this look with any colors of your choosing and have your own gorgeous bathroom accent wall in a day’s time. 

    As you guys well know, if I see a pattern/design/look, etc. that I fall in love, I’m usually going to try my best to mimic that design with paint and Frogtape. There have been countless times where I’ve scared Grunt Labor to death jumping out of bed to pause the television so I could snap a picture of it because I saw a design I knew I could pull off with Frogtape.

    There have also been times when I come to an abrupt halt on the sidewalk to snap a photo of the same kind of thing.

    I’ve also slammed on my breaks for the same thing.

    I think one reason why I’m so drawn to pulling off these patterns and designs with paint and Frogtape is because it’s such a huge bang for your buck. Huge. Often times, those designs I see are completely made out of wood mouldings. Don’t get me wrong, I love a room full of beautiful mouldings (and have some plans for that in my own dining room), but that gets pricey quick, plus there’s a lot of work that goes into installing moulding. A great striped accent wall, or any kind of painted and patterned accent wall for that matter, though might set you back $50 at most. Bang for your buck.

    When I was looking around for inspiration and ideas for the guest bathroom, I stumbled upon this image. I fell in love with the shiny finishes and the blue stripes on the walls. I loved how they weren’t completely solid. From what you just read above, I’m sure that you can figure out what my first thought was – “I can do that with Frogtape.”

    And so I did.

    bathroom accent wall

    I did opt to do two smaller stripes per section, rather than larger ones as I wanted these stripes to mesh really well with the rest of the space and not take over the show. I also opted for a lighter shade of blue as well. This bathroom accent wall turned out to be perfect for this space because it brought just the right amount of color and pattern into the room.

    The actual painting of the stripes takes no time at all, it’s the measuring and taping that does take some time, but it’s worth it. All in all, these were started and finished in the same day.

    DIY Washed Out Striped Walls

    This post is sponsored by Frogtape, however all opinions are 100% my own. Affiliate links included in this post.

    Materials and Supplies Needed: 

    • Frogtape – 1″ and 1.5″ sizes
    • Measuring Tape
    • Level (the longer the better)
    • Pencil
    • Plastic Putty Knife, Credit Card or something to smooth down edges of tape
    • Paint Color of Your Choice – My striped walls have Sleek White as the base color in a satin finish and the stripes are Peaceful Blue in satin. I only needed a sample size pot of the blue for this.
    • Paint Brush
    • Scrap Piece of Cardboard

    Step 1

    The first thing you’ll need to consider is the base color for your striped walls. I had already painted this bathroom in a slightly off-white color called Sleek White.

    Striped Accent Wall

    If you’ve already got a paint color on your walls that will work well with your stripe color, then proceed to step 2. If you want to switch out that base color though, do so first. Wait at least three days after painting before taping off the walls for the stripes, so that the paint on the walls have enough time to cure.

    Step 2

    Time to start measuring and taping off the walls! For reference, my walls from floor to ceiling in this space were 82.” Even if your walls are a little taller or shorter than mine, I think you should still be ok using the measurements I’ll give you, as I measured down some before even starting the pattern.

    Measure down 5″ from the ceiling and mark it. Do this several times along the length of your wall.

    Place your level on the wall along the marks you made. Make sure you’re level, adjust if needed, then draw a line along the level over the entire wall.

    Striped Walls

    If you look closely, you can see my line in the photo above. The line doesn’t have to be dark or heavy, just enough for you to see it.

    Run 1.5″ Frogtape along this line. The bottom of the tape should be on this line – therefore the tape is in part of that 5″ down measurement and not below it. Make sense?

    Painting Stripes on Walls

    Step 3

    Measure 2″ down from the bottom of the tape you just applied to the wall and mark it. Do this several times along the length of the wall.

    Place the level along your marks. Make sure it’s level, adjust as needed, then draw a line along the level just as you did before.

    Apply the 1″ Frogtape along this line over the entire length of the wall. The top of this tape should be at the 2″ mark.

    Blue Accent Wall

    If you placed your tape correctly, you should have about 2″ between both strips of tape.

    Step 4

    Measure 2″ down from the bottom of the piece of tape you just applied to the wall and mark it with your pencil. Do this several times along the entire length of the wall.

    Place the level along the marks, get it level, then draw a line with your pencil along the level.

    Bathroom Accent Wall

    Apply 1.5″ Frogtape along this line. The top of this tape should be along the line you just drew.

    Again, the measurement between the pieces of tape here should be about 2″.

    Step 5

    Measure 6″ down from the top of the piece of tape you just applied and mark it. Do this several times along the length of the wall.

    Place your level along the marks, level it, and draw a line along the level.

    Apply 1.5″ Frogtape along this line. The bottom of the tape should be along this line.

    Striped Accent Wall

    Step 6

    Repeat steps 3-5 working your way down the wall.

    Striped Walls

    I know it sounds a little tedious and complicated, but it’s really not all that bad. Once you get those first couple of rows completed, then you should have the hang of it pretty well.

    Painting Stripes on Walls

    Step 7

    Once you have all the tape applied to the wall, place a piece of tape on each of the thicker stripes. You will not paint these areas.

    Blue Accent Wall

    Also, remember to run some of the 1.5″ Frogtape along the corners of the walls to keep the blue from getting on the connecting walls.

    Step 8

    Use a plastic putty knife or credit card and firmly press along all edges of the tape to completely seal it.

    Bathroom Accent Wall with Washed Out Stripes

    Painting Stripes on Walls

    Step 9

    Grab the paint for the stripes, a paintbrush and a piece of cardboard you can use to wipe paint on.

    To paint the stripes on the wall, you are going to use a dry brush technique.

    Striped Accent Wall using Dry Brush Technique

    Dip the paintbrush into the paint. Wipe the brush on both sides along the edges of the paint jar/can as you bring it back out, then brush the excess paint off on the piece of cardboard. Just do a few swipes on the cardboard until you see that the color isn’t as “solid” as it was when you first swiped it on the cardboard.

    Brush your paint onto the outlined stripes on the wall.

    Striped Walls in the Bathroom

    The beautiful thing about this way of painting stripes on walls is that you don’t do multiple coats and you don’t have to worry about brush strokes. It’s perfectly fine if the paint is heavier in some places and lighter in others – that’s how it’s supposed to look! On top of that, if you didn’t get your stripes perfectly level, you really don’t notice because the paint isn’t super bold.

    If you decide you want it darker in some places, add more paint. If you put the brush on the wall and it’s too much paint for your liking, then have a wet cloth on standby and just wipe it right off.

    Step 10

    Immediately, after painting the stripes, remove the Frogtape from the wall.

    Painting Stripes on Bathroom Walls

    You will probably have some pencil marks along the wall. Lightly take a Magic Eraser to those and they will come right off. Just don’t rub too hard, because those things will take off paint. If it takes off a little paint, that will be fine as you won’t even notice since these are washed out stripes anyway.

    Blue Accent Wall in the Bathroom

    Chrome Ring Pulls / Oval Knobs / Faucet / Mirror, Similar Here and Here

    The blue accent wall is the perfect compliment to the white cabinetry, shiny fixtures and hardware.

    Bathroom Accent Wall with Washed Out Blue Stripes

    I especially love how it worked so well as the backdrop for the mirror.

    Striped Accent Wall with Washed Out Blue Stripes

    Faucet / Mirror, Similar Here and Here

    The blue really helped to bring out the color and pattern in the mirror frame.

    Striped Walls with Washed Out Blue Stripes

    Ginger Jar + Fern Art Print / Frame

    I didn’t want to get too much going on in here against the wall, so I opted for a small art print in a frame that compliments the mirror frame nicely. And every room needs some touch of green too, right?

    Do you see a bathroom accent wall with washed out stripes in your future?

    You might also want to see…

    Blue and White Bathroom with Washed Out Stripes

    The Complete Blue and White Bathroom Remodel

    Accent Wall Ideas

    Wall Painting Ideas and Paint Designs Anyone Can Do

    Pin This Post

    Painting Stripes on Walls with a Washed Out Effect


  • DIY Louvered Closet Door Makeover | Big Bang for Your Buck

    DIY Louvered Closet Door Makeover | Big Bang for Your Buck

    Louvered doors are dated and a complete pain to paint. Try this DIY louvered closet door makeover to squash both those problems! You won’t believe how much bang for your buck you’ll get with this project!

    As most of you know, I spent a large part of July busting ass to get the guest bedroom and bathroom inhabitable for Brandon and Caitlin when they came to visit. I did succeed in having everything painted and cleaned and looking pretty good by the time they got here, but there are still a few things to check off the list in each of those spaces before I’m completely done.

    This little makeover though that I did on the closet door in the guest room is by far one of the best “bangs for your buck” that I tackled in there and really probably one of the best bangs for your buck I’ve ever done.

    DIY Louvered Closet Door Makeover

    Can you believe that difference??? Ignore the odd paint job in the before picture – long story.  I probably spent about $25 on this louvered door makeover – see, I told you – huge bang for your buck. And if you have even just a little bit of woodworking/cutting knowledge, then the project itself is pretty easy!

    DIY Louvered Door Makeover

    I didn’t want to paint all those slats.

    Louvered Closet Door Ideas

    That’s exactly what sparked this closet door idea/makeover.

    I went down to the guest room to take some measurements, plot out some ideas and I ended up in the floor staring at that damn door already tired from just thinking about how much of a pain it was going to be to paint. Yes, I could have used my paint sprayer on it, but that would have meant taking the door off the hinges, finding a place to set it up in the garage, taping and covering everything else in the garage so it wouldn’t get paint on it and then sweating my rear end off while painting it because it was July. In the south. And as I’ve told you before, August in the south is just a notch below hell- July isn’t too far behind, friends. That was a lot of work and sweating for just one door.

    So then I started thinking about how I could get rid of those slats. Cutting them out crossed my mind, but then you’d have to find something to cover those empty spots. After closer inspection, I decided I could just cover the louvered part with luan and trim it out to look all purty.

    Louvered Door Makeover

    And it worked.

    How to Cover Louvered Doors

    This post contains affiliate links for your shopping convenience. Click here to read my full disclosure policy.

    Supplies and Tools Needed

    • Luan Panel(s) – How many you need will depend on the size of the louvered areas on your door. Measure from edge to edge of where the louvered portions begin and end. Take that measurement to the store to determine what size and how many luan panels you need. We used two project size luan panels for our door.
    • Decorative Moulding/Trim – Measure all sides of the louvered areas you’ll be covering. Add a foot or two to this measurement (in case you cut a piece too short – happens to the best of us ?) and buy that much trim.
    • Circular Saw
    • Miter Saw or Miter Box and Hand Saw
    • Brad/Finish Nailer and/or Finish Nails and Hammer
    • Caulk and Caulk Gun
    • Spackling or Wood Filler
    • Paint – The white on all the doors and trim throughout our house is Bit of Sugar by Behr.

    Steps

    Step 1

    If you haven’t already done so, measure the louvered area(s) you wish to cover on your door. Cut the luan panels down to this size using a circular saw. If you want to make this even easier on yourself, then take your measurements to the hardware store with you and have them cut the panels for you!

    After the panels are cut, use either a finish nailer or finish nails and a hammer to attach the panel to the doors.

    How to Cover Louvered Doors

    Put a nail in every corner, about 3-4 nails along the long edges and 2-3 more along the short edges.

    As you put the nails in, you can slightly angle them toward the door frame or you can go through the slats themselves. Just check the back of the door and nip off any nails that stick through the back.

    Closet Door Ideas

    Step 2

    Measure from edge to edge the top portion of the area you covered with luan. Cut your decorative trim a few inches longer than this measurement using a miter saw or miter box and hand saw, making 45 degree angle cuts at each end. I prefer to make these pieces longer then go back and cut off a little at a time until I get it just right. If you aren’t comfortable making angled cuts like that, then go with a flat trim instead of a decorative one and do straight cuts. This will give you more of a craftsman look on your door.

    Install that piece of trim with your finish nailer once you get it to the right length. Repeat with the opposite end, then do the sides measuring from the longest to longest end of the trim you installed.

    DIY Closet Door Makeover

    Step 3

    Once you get all the trim cut and installed, fill the nail holes with spackling or wood filler and caulk all the seams and edges.

    Louvered Closet Door Makeover

    If you have any small gaps where your trim joins, these can usually be caulked and you’ll never be able to tell.

    Step 4

    Paint it all! I gave our door two coats of paint.

    Covering Louvered Closet Doors

    It also got a shiny new doorknob.

    Closet Door Ideas: Louvered Closet Door Makeover

    Also, remember to leave the door open for a few days to fully cure. Yours truly forgot about that and that’s why there’s that little tiny piece of blue paint rearing its ugly head from where a bit of the white stuck to the door frame. #duhjenna

    What do you think? Pretty great bang for your buck, right?

    You might also want to see…

    DIY Painted and Patterned Doors – a great way to add interest with only paint!

    How to Paint Trim and Doors – the ultimate guide to a professional paint job, but you did it!

    Want to remember this post for later? Just pin the image below!

    How to Cover Louvered Doors - an easy DIY Louvered Door Makeover
    Gift Ideas Signature
  • What kind of paint do I use on that? Types of Paint and When to Use Them

    What kind of paint do I use on that? Types of Paint and When to Use Them

    A trip to your local hardware store to select paint can often become overwhelming. There are lots of different types of paint out there and knowing which type of paint to choose for a project can get confusing. Use this guide to learn about the different types of paint and which would be the best paint for furniture, wood, plastic, metal and laminate surfaces.

    I really thought that all the information to know about painting furniture was out there in internet land for everyone to see and no one needed to hear anymore from me besides the occasional furniture makeover, on the subject. However, I get questions all the time asking what kind of paint for certain kinds of furniture, when to sand / when not to sand pieces, when to prime / when not to prime, and so on. Apparently, people still have questions on this topic and I’m cool with that. It gives me something to write about that I love writing about. So to answer one of those questions, this post is all about what kind of paint to use on what surface.

    Types of Paint

    This post contains affiliate links for your shopping convenience. Click here to read my full disclosure policy.

    Best Paint for Wood

    Generally, you can use just about any kind of paint on wood surfaces, whether it’s wood furniture, wood trim or other wood surfaces.

    Best Paint for Wood

    Navy End Table painted with Velvet Finishes / Coral End Table painted with Latex Paint

    Oil-Based Paint

    Oil-based paint is great for furniture makeovers in terms of durability over time. However, it’s not as easy to deal with as latex and other specialty furniture paints are. With an oil-based paint, you absolutely must make sure you use a high-quality paint brush that will work with oil-based paint. Generally, it just works better to brush oil-based paint on, rather than rolling it. Oil-based paint is also known to have fewer brush strokes as well. Clean-up for oil-based paint is not a picnic. You have to use mineral spirits or paint thinner to clean your brushes and any paint off you as well. Most oil-based paints won’t require an additional topcoat though.

    Types of Paint: Oil Based Paint

    One really important thing to note with oil-based paint is that it should not be painted directly over latex paints. If you really want to use oil-based paint over latex, then first sand it, prime it with a water-based primer and then use your oil-based paint.

    Latex Paint

    Types of Paint: Latex Based Paint

    Your basic latex paint that you can find at local home improvement stores is also fine to paint wood surfaces with. Generally, it is much easier to work with than oil-based paints, however the durability over time isn’t as great, but it’s not bad by any means. If you paint something with a semi-gloss or gloss sheen, then you may not need an additional polycrylic topcoat depending on much use your surface will get. If you paint something with a latex paint that has a flat, eggshell or satin sheen, I would definitely finish up with a polycrylic topcoat for added protection. If you’re looking for low sheen, go with the satin polycrylic. Latex paint can be cleaned up with soap and water. One thing to note with latex paint is that brush strokes are more likely. To minimize these as much as possible always use a good, high quality paintbrush and mix in a little Floetrol – it’s like magic in a bottle for eliminating brush strokes.

    Best Paint for Wood Furniture: Speciality Paints

    Specialty Paints

    Since furniture painting has become such a big deal, there have been a number of specialty paints created specifically for painting furniture. Many of these make furniture painting easier in some way or another that oil-based and latex paints don’t always offer.

    Velvet Finishes Paint

    It’s no secret around here that I often use Velvet Finishes for my furniture projects.

    Best Paint for Furniture

    Velvet Finishes has a built-in topcoat and usually does not require sanding or priming unless the piece has a shiny or glossy finish on it before painting. If your piece is glossy, you can use their Ready product on it before painting, which is a spray primer that you just spray on, let it sit, then wipe off.

    Chalk Paint

    Many people love chalk paint. I’m not one of those people. I don’t detest it, but it’s just not my cup of tea. Most chalk paints don’t require you to prime or sand your piece before painting, which is great. Most chalk paints do require you to give it some sort of topcoat though. Many people use wax to seal it.

    Milk Paint

    I’ve never personally used milk paint, so I certainly can’t speak to how well it works myself, but I have heard good things about it from others. I think most people go with milk paint when they are looking to achieve a farmhouse effect on their furniture.

    Types of Paint for Laminate Surfaces

    Painting laminate furniture and surfaces is a whole other beast. It can be done, but not super easily. To paint laminate furniture, I think you should always prime the piece first. I’ve used Zinnser Primers for this and have had good results.

    Types of Paint: Zinsser Primer

    I have painted laminate pieces before without priming them first and it didn’t turn out so hot.

    Latex Paints

    After priming your piece, you can follow up with at least two coats of latex paint. Just like I noted above, use a good brush and Floetrol to prevent brush strokes.

    My personal pick for latex paint that you can buy at your local home improvement store is Behr paint. I’ve always gotten good results with it and while it is a little more expensive than other brands, I think it’s well worth it.

    Oil Based Paints

    You can also use oil-based paints over laminate if you first prime it. Using an Oil Based paint would provide more durability over the long run.

    Velvet Finishes

    I have used Velvet Finishes over laminate furniture before and it did pretty well. I still suggest using a good primer on it first though.

    Topcoat It

    With laminate furniture, I highly suggest giving it some extra protection. Give it a couple coats of Polycrylic after you finish painting it to really try and protect that surface.

    Types of Paint: Polycrylic Topcoats

    Even if you follow all these steps, there will most likely come a time down the road when your painted piece of laminate furniture will chip or the paint may start to peel away. This is just the nature of painting laminate furniture.

    Types of Paint for Plastic Surfaces

    Types of Paint: Spray Paint for Plastic Surfaces

    Plastic Planters Spray Painted with Geometric Designs

    Spray Paint

    Hands-down, anytime I have something plastic to paint, I head for the spray paint. It’s the easiest way to get the paint on there without brush strokes and gives pretty good adhesion on plastic pieces. Prime the piece first with a spray paint primer (especially if it’s really shiny) and then follow up with a few coats of spray paint. I’ve used Rust-Oleum, Krylon and Design Masters spray paint and have been pleased with all of them.

    Types of Paint for Metal Surfaces

    I generally go with one of two paints when it comes to metal surfaces: Oil-Based Paint or Spray Paint. If it’s a big metal piece that I’m painting, I’ll go with oil-based paint like I did with my metal handrail. If it’s something metal that’s smaller, I’ll go with spray paint.

    Types of Paint for Metal Surfaces

    Metal Stair Railings painted with Oil-Based Paint / Spray Painted Metal Laundry Hamper 

    Oil-Based Paint

    Oil-Based paints bond really well to metal surfaces. You can use it in a paint sprayer if you want to or brush it on, which is what I tend to do. Just remember, and I know I’ve said this like 2.1 million times now, always use a good, high quality paintbrush! It really does make a world of difference when painting. One thing to remember when you are painting something with oil-based paint that’s bigger in scale is to work in sections. You can’t easily go back over places to touch them up after you’ve already put one coat of paint on. While oil-based paint takes longer to dry, that also means your finish gets messed up if you try to go back over a part that is partially dried. My personal pick for oil-based paint is Behr’s.

    Spray Paint

    If you’ve got something smaller that’s metal, let’s say a lamp or something, then I would head for the spray paint aisle. It’s just easier to work with and will still provide great adhesion and durability. I used spray paint on that metal laundry hamper you saw above.

    Types of Paint for Upholstered Surfaces

    So you’ve been considering painting some upholstery, eh? This is a topic that many people seem to have mixed feelings on. I have painted an upholstered chair before, however it was a chair that wasn’t going to get a whole lot of use, therefore I wasn’t too worried about the comfort of it.

    Types of Paint for Upholstered Surfaces

    Chair Upholstery painted with Velvet Finishes Paint

    In that one instance, I used Velvet Finishes paint for the upholstery. I think it took about three coats to fully cover the upholstery. Upholstery does suck up a lot of paint, so be prepared to paint on multiple coats.

    Those are my picks for the best types of paints for wood, laminate, metal, plastic and upholstery surfaces.

    Do you have any favorites or other questions?

    Now that you’ve read all the nitty-gritty details, you might find it useful to have a one-page guide on what kind of paint can be used on what kind of surface – lucky for you, I’ve made one just for you! Click below to get access to it! 

    Types of Paint Quick Reference Guide

    If you’ve got any other painting questions at all, please leave your questions in the comments!

    Need more painting help?

    Click on any of the links below to get my opinion. (Which by no means is a professional opinion. I’ve only painted, oh, say 2.4 million pieces of furniture. Ok, that’s stretching it a bit.)

    Types of Paint to Use on Kitchen Cabinets – I’ve painted cabinets five times now. Here’s my take on which paints to use.

    Painting 101: Topcoats and When to Use Them – topcoats can be confusing, right? This guide breaks them all down.

    Must-Have Tools and Supplies for Painting Furniture – my tried and true tools of the trade.

    My Best Tips and Tricks for Painting Furniture – from over 10+ years of painting.

    FAQ: Painting Furniture – all the questions I’ve ever been asked about painting in one.

    blog-signature-summer-15
    pin-this-post-2
    Types of Paint - Best Paint for Wood Furniture

    SaveSave

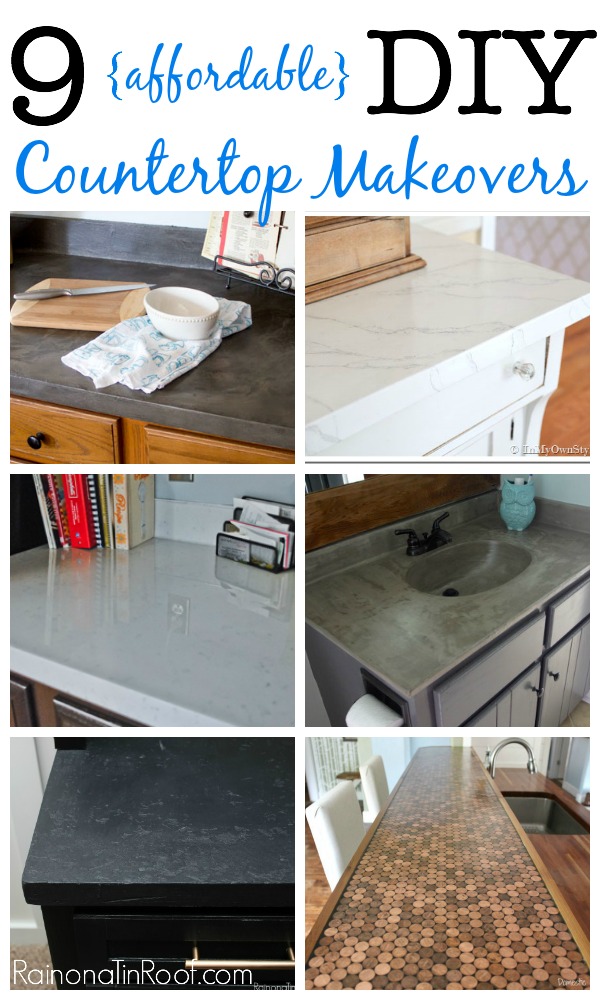
  • DIY Countertops: Upholstered Countertop for Built In Cabinets and Other Ideas

    DIY Countertops: Upholstered Countertop for Built In Cabinets and Other Ideas

    Countertops are one of those things that can creep up on ya and take a big bite out of your project budget fast. These DIY countertop ideas for built in cabinets are creative and easy on your wallet. 

    When I installed the built in cabinetry in my recent office makeover, the one thing I didn’t worry too much about was what I would do for a countertop. I just assumed I’d be able to pop a 1″ x 12″ across the top of the cabinet run, paint it and call it a day.

    Wrong.

    Never ever ever expect anything to go smoothly when it comes to home projects.

    DIY Countertop Ideas - Upholstered Countertop

    As it turned out, the wall I was installing my built-ins on had a huge hump in it that I had to work around. This caused a major hiccup in the countertop department.

    Here’s the thing though.

    Not everyone is going to have a huge hump that some drywall guy thought looked decent enough forty years ago. So if you are planning to install built in cabinets somewhere in your home, first, I’m going to give you some ideas for the countertops that will work if you don’t have a huge hump in your wall, which you most likely won’t. 🙂 And then, I’m going to show you how I worked around my little problem and made an upholstered countertop for my built-ins, in case you have that problem too. And even if you don’t have a big hump in your wall (lucky you!), you can still do the upholstered countertop if you like it!

    First off, if you have no clue as to what I’m talking about when referring to my office built-ins, then read this post first.

    Affiliate links included in this post.

    Countertop Ideas for Built In Cabinets

    Idea #1: Use two 1″ x 8″s or a combination of other 1″ boards.

    If the cabinets you purchased for your built-ins are like mine, stock wall cabinets, then the tops of them are right around 12″ deep. While one would think, you could just go buy a 1″ x 12″ at your local hardware store, cut down the length to fit and nail it in place, you would be wrong, because a 1″ x 12″ is actually not 12″ wide, but only 11 1/4″ wide, therefore, you would have a gap left to fill on top of your cabinets.

    The solution to this would be to purchase two 1″ x 8″s, cut them down to the length of your cabinet span, place them side by side on top of your cabinets, secure them in place, then fill holes and gaps and paint. 1″ x 8″s are actually 7 1/4″ inches wide, so you would have a total 14 1/2″ to cover those cabinets, leaving you with a nice overhang.

    You could also use a combination of other 1″ boards like 1″ x 3″, 1″ x 4″, 1″ x 6″ – just depends on what you want the countertop to look like and how many boards you want to cut.

    If you have access to a local lumber mill that mills their own lumber, then you may be able to contact them and have them custom cut a piece, such as a 1″ x 14″ just for you.

    Idea #2: Custom Laminate or Stone Countertop

    You could go to your local home improvement store or stone store and have them come out, measure and cut a custom size countertop for your built-ins. They would be able to give you a single slab of countertop in the exact measurements you would need. This is going to be a pricier option though.

    Idea #3: DIY-ish Laminate Countertop

    You can purchase in-stock laminate countertops at your local home improvement store, then cut them down to the size you need for your built-ins. If you went with true base cabinets, this would just be a matter of cutting down the length of the countertop. If you went with wall cabinets like I did for your built-ins though, you would need to cut down the width and length of the countertop, which can be a little more tedious. This option isn’t as pricey as custom laminate or stone counters, but would probably run you around $75 – $100 depending on what size you needed. We installed some built-in cabinetry using base cabinets in the sitting area of our bedroom and this is what we opted to do there. You can see how it turned out here.

    Idea #4: Faux Stone Countertop using an Old Laminate Countertop

    If you’ve got a local Habitat for Humanity or another store that sells building and housing materials that have been removed from homes, then you could go there and find a piece of laminate countertop that would fit your built-in, then turn them into “soapstone” counters using this DIY method that I did in one of our previous homes.

    Idea #5: Plywood Countertop

    If your cabinet run isn’t longer than a piece of plywood (8 ft.), you could take your measurements to your local Home Depot or Lowe’s, get a piece of their high quality sanded 3/4″ plywood and have them cut it down to the size of your built-ins – remember to leave a little for overhang. Go home, install it on the cabinets using a finish nailer, fill holes, caulk and then paint or stain it. If you buy the good quality sanded plywood, this should give you a pretty good looking, smooth countertop for your built-ins.

    Idea #6: Perpendicular 1″ x 3″s or Beadboard

    This idea is courtesy of the one and only Wayne. Wayne is Nicky’s dad and he is my go-to guy for when I run into any snags when it comes to any home project. The man knows everything. I called Wayne over to come and help me troubleshoot the cabinets and counter of my built-ins when I realized that I had the huge hump in my wall. He had the idea to take multiple beadboard panels (the small ones that fit together tongue and groove style) or 1″ x 3″ pieces, cut them down to where there was a 1 1/4″ overhang and then put them perpendicular on the top of the cabinets. So instead of having just a couple of long pieces of boards as the counter, you would have lots of pieces going along the cabinet top that almost created a shiplap type look. You could paint or stain the pieces after you installed them all.

    This idea would also work if you have a hump in the wall because you would be custom fitting each individual piece of wood. The only reason I opted to not go with this solution was because I thought it might give the built-ins more of a farmhouse look and my office definitely is not farmhouse. We all know how I feel about shiplap.

    Alas, those ideas either wouldn’t work for my built-ins due to the large hump in the wall or they just weren’t my style. So, I created an upholstered countertop for my built-ins. If you’re interested in that option, here’s how I did mine.

    How to Make an Upholstered Countertop for Built In Cabinets

    Materials & Tools Needed

    Please note, If you don’t have a big hump in the wall like I did, then you can skip some of these steps. 🙂 You could just cut a piece of plywood to size, attach it to your cabinet tops and skip to step #3.

    Steps

    Step 1: Install the 1″ x 6″ or 1″ x 8″

    First, cut a 1″ x 6″ or 1″ x 8″ down to the length of your built-ins (wall to wall or however long your complete built-in is, filler pieces included.) Place that piece on the front edge of your cabinet tops, slightly overhanging it over the cabinet edges by 1 1/4″ or so. Make sure your overhang measurement is the same over the whole span of your built-in, then nail the 1″ x 6″ into place.

    Countertop Ideas

    This is going to allow you to have a smooth countertop front that will have an even overhang all the way across.

    Step 2: Install the Plywood Pieces Against the Wall

    Next, take 3/4″ plywood and cut it into pieces that are the length, plus a little (measure to about the middle of the gap between the cabinets that are side by side), of each individual cabinet. For the width, cut the plywood at the biggest measurement between your wall and the 1″ x 6″.

    Countertop for Built In Cabinets

    Place the plywood piece along the back of the cabinet tops, then using a carpenter’s pencil, run it along the wall on the back of the plywood piece.

    Cheap Countertop Ideas

    This is called scribing. It’s going to give you the shape of your wall so you can custom fit that piece of plywood to it. Once you’ve scribed, use a jigsaw or circular saw to cut along the line you drew. Repeat until the piece fits and attach it to the cabinet tops using a brad nailer or a hammer and finish nails.

    DIY Countertops

    Repeat this whole process with the plywood pieces until you’ve covered the entire span of your built-ins.

    Step 3: Upholster the Countertop

    Lay your upholstery material out along your countertop – this is the material I used. Pull a little bit of excess up around the back and the edges.

    Countertops Ideas - Upholstering a Countertop

    Cut a piece of lattice trim to the length of your countertop span. Place the trim along the back of the countertop, on top of the upholstery material.

    DIY Upholstered Countertop

    Attach the lattice trim to the wall where studs are using a finish nailer or finish nails. As you attach the trim, push it down firmly both onto the upholstery material and against the wall.

    Trim off the excess material along the front edge of the countertop, leaving enough overhang to staple under the countertop.

    Upholstered Countertop for Built In Cabinets

    Pull tightly on the front of the upholstery and staple it under the overhang of the countertop. Trim any excess material as needed.

    Cut two lattice strips to the length coming out from the end corners of each wall to the edge of the countertop. With these, repeat the same process you did with the lattice piece on the back.

    Step 4: Install Quarter Round Trim (Optional)

    If you still have any gaps around where the lattice trim and the upholstered countertop meet, you can cut quarter round trim and install it along those areas. I did have to do this because I still had some gaps to contend with. Quarter round is very flexible though, so it easily curved into all those gaps and closed them.

    Step 5: Paint the Trim

    Fill any holes in the lattice trim and quarter round with spackling or wood filler. If you have any gaps along the wall, caulk those. Paint the trim whatever color you wish. I opted to go with the color of my built-in cabinets.

    Cheap Countertop Ideas - DIY Upholstered Countertop

    The upholstery I used for my countertop is a faux leather crocodile pearl, so it wipes easily, but also has a little shine to it.

    DIY Countertops - How to Upholster a Countertop

    And so the saga of the built-ins ends.

    Thank ya, Jesus.

    Can you add any DIY countertop ideas to this list?

    If you haven’t seen how I installed the built-in cabinetry, you can read how to do that right here.

    You might also want to see…

    Home Office Makeover with Budget-Friendly DIY Projects: An Office Makeover on a Budget with lots of Office DIY Decor

    Complete Home Office Makeover

    Yes, please! Great DIY countertop makeovers that are doable and affordable!

    More DIY Countertop Makeovers

    Pin This Post

    Countertop Ideas - Upholstering a Countertop on Built In Cabinets

  • DIY Built-In Cabinets using Stock Wall Cabinets

    DIY Built-In Cabinets using Stock Wall Cabinets

    By far, one of the best things I did when I completed my office makeover was installing built in cabinets. They gave me loads more of hidden storage. I can just close the cabinet doors on all that clutter! These DIY built in cabinets were made using unfinished wall cabinets as base cabinets.

    When I first showed you my office makeover back in March, I said that I was so mad at myself for not doing it sooner because I felt like having an office that was organized and beautiful made me much more productive. The more I thought about it though, the more I am kind of glad I waited a while to whip this space into shape. Granted, I shouldn’t have waited two years, but waiting did help me to pinpoint a few things that I knew I needed to add or change in my office to make it more functional – these built-in wall cabinets being one of those things.

    Built In Cabinets using Stock Cabinets - Blue cabinets against wall - Rain on a Tin Roof

    I have a pretty good size closet in here, but it holds all my craft supplies. I desperately needed something that would both store and hide away all the paperwork, files, etc. that go along with running your business from your house. The solution to that were these DIY built-in cabinets using stock cabinets. Since I was short on floor space in this room, I ended up buying stock wall cabinets and used them as base cabinets for these built-ins. With a little bit of work, these stock cabinets look custom built for this space. 

    Using Prefab Cabinets for Built-Ins

    This post contains affiliate links for your shopping convenience. Click here to read my full disclosure policy.

    Obviously, since these built in wall cabinets were made for a certain space in my house, my measurements won’t match up exactly to yours. I’m going to list out everything I used and how I installed the cabinets and trimmed them out, but keep in mind, this is a project that will vary by size depending on where you are actually installing your built-in cabinets.

    Supplies & Tools Needed for the Built-In Cabinets

    Steps

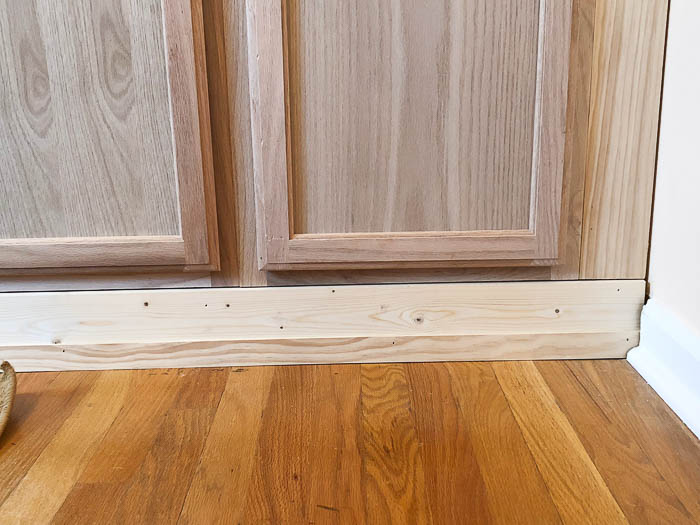
    Step 1: Remove Existing Baseboard

    Before building or installing anything, you’ll want to remove the existing baseboard that is in the space where you’ll cabinets will go.

    DIY Built In Cabinets - preparing the space - Rain on a Tin Roof

    To do this, you should be able to use a small pry bar and hammer along the back wall the cabinets will sit against. For the sides, come out about 12″ from the corner of the wall, mark it and then use an oscillating saw going in at that mark to cut out that portion of the baseboard instead of having to remove the whole thing. Be sure to check the depth of your stock cabinets first though – they might be different than mine!

    Using Prefab Cabinets for Built Ins - Removing the baseboard - Rain on a Tin Roof

    The photo above was taken after the cabinets were installed, but I wanted you to have an idea of what I was talking about with the oscillating saw. They are really a great little tool to have.

    Step 2: Build a Frame for the Cabinets to Sit On

    Since these are wall cabinets, they are shorter than typical base cabinets. If you just install them without putting them on a base, they are going to feel really small in a room and you’re going to be bending over more than you should. To bring the height of the cabinets up, build a base for them consisting of 2″ x 4″s and plywood.

    You will want your frame to be as long as the space you are installing your cabinets in and as deep as your cabinet bottoms, about 12″. Again though, be sure to double check the depth of your cabinets.

    Built In Wall Cabinets - making a base - Rain on a Tin Roof

    I found it easiest to first assemble a basic 2″ x 4″ rectangle frame, put it in the space, then add in more 2″ x 4″ supports.

    Add 2″ x 4″ supports every 16″ inches. You’ll want to drill a pilot hole first, then attach the pieces with your screws to keep from splitting the wood.

    DIY Built In Office Cabinets - building a base and supports for the cabinets - Rain on a Tin Roof

    I screwed the supports along one side of the frame first, flipped it, then put the screws in on the other side. Being able to push the frame against the wall while attaching the screws made it easier to get the screws in.

    DIY Built Ins with Stock Cabinets - attaching the cabinet base to the wall - Rain on a Tin Roof

    To finish off the base for the cabinets, you’ll want to cut out either one full piece of 3/4″ plywood or multiple pieces to fit and cover the top of the 2″ x 4″ base. Attach the plywood with screws to the 2″ x 4″ base.

    Installing DIY Office Wall Cabinets - Rain on a Tin Roof

    It’s perfectly fine to piece together scraps of plywood you have on hand here, as long as they are all 3/4″. You won’t be able to see this part once the cabinets are installed.

    Step 3: Set the Cabinets in Place

    Bring your cabinets in and set them up however you wish on the base. Most likely, you’ll want to space them out so that you have a relatively even amount of empty space at each end of the cabinets.

    Built In Office Cabinets using Unfinished Wall Cabinets - putting on the base - Rain on a Tin Roof

    Once you have everything how you want it, remove the end cabinets. You’ll need to add small wood blocks along the front side edge of each end cabinet that is closest to the wall.

    Home Office Cabinets - filling the end gaps - Rain on a Tin Roof

    The blocks don’t have to be a certain size. I just pulled out a piece of scrap wood I had. Attach it just behind that edge lip. Put a little glue on it and then nail it to the side of the cabinet. You’ll attach your filler pieces of wood to these little wood pieces once your cabinets are installed.

    Step 4: Install the Cabinets

    Put your end cabinets back in place. Check to make sure the cabinets are where you want them. Use a stud finder and mark where the studs are on the wall just above the tops of your cabinets.

    I had a spot/hump on my wall that stuck out more than the rest of the wall. Knowing that I couldn’t push the cabinet back any farther into that area, but that I would be able to use wood shims to pull the other cabinets out more if needed, I started by installing the cabinet that butted up to that hump in the wall.

    You can see in the photo below what I’m talking about.

    Built In Cabinets - installing on the wall and shimming - Rain on a Tin Roof

    Attach the cabinets to the wall with screws. The key to installing the cabinets is to make sure that each cabinet bottom is even with the cabinet base you built and that each individual cabinet meets up nicely to the cabinets beside it. This may mean that some cabinets aren’t flush with the wall. Use wood shims as shown above to make the cabinets meet the wall and allow a screw to hold it all together.

    Step 5: Install the Filler Pieces

    If you had gaps on the ends of the cabinets, now is the time to cut those filler pieces to the length of the cabinets and nail them to the small wood blocks you attached to the cabinet ends.

    DIY Built in Wall Cabinets using Unfinished Stock Cabinets - Rain on a Tin Roof

    I used a finishing nail gun, but you could also use a hammer and finish nails. I was able to use a 1″ x 4″ on each end of my cabinets as filler pieces. Of course, yours may be different depending on how much empty space you had at the end.

    Step 6: Trim Out the Base

    You don’t want the exposed 2″ x 4″ frame to be what you see at the bottom of the cabinets. You want that to look more built-in and finished.

    Cut your piece of 1″ x 4″ to the length of your cabinet run and attach it to the base just where the cabinet bottom ends and the plywood base begins. You can use a finish nailer or a hammer and finish nails for this.

    DIY Built In Cabinet Plans using Prefab Cabinets - Rain on a Tin Roof

    You’ll still have a small gap at the bottom. To cover this, cut a piece of lattice strip wood to the length of your cabinet run and nail it on top of the 1″ x 4″ near the bottom to where it meets the floor.

    Step 7: Painting the Built-Ins

    Fill all your nails holes with spackling or wood filler. Caulk any gaps along the edges, between cabinets and the trim, then prime and paint.

    Because these were unfinished oak cabinets and I wanted the grain of the wood to show as little as possible, I did two coats of primer and three coats of paint.

    DIY Built In Office Cabinets - Blue Cabinets against Peach Wall - Rain on a Tin Roof

    If you don’t care too much about the grain showing, you can easily get by with one coat of primer and two coats of paint.

    For the paint, I do suggest opting for a semi-gloss or gloss finish, so that you can easily wipe it clean as needed.

    DIY Built Ins Using Stock Cabinets - Blue cabinets with upholstered countertop - Rain on a Tin Roof

    I found these cute marble like knobs to top off my built-in office cabinets with – they were a steal!

    And then there’s the countertop. Because this is already such a long post, I put the how-to for the countertop into another post. You can read about countertop ideas for the built-ins here and how I upholstered my countertop as well.

    Do you have any plans for adding built in office cabinets to your home? 

    Need more home office inspiration?

    The Full Office Makeover– see the full before and after of my office space including all the budget DIY projects that went into it. 

    DIY Chippendale Desk– can you believe I actually built my desk? It’s a really simple build and won’t cost more than around $100. 

    DIY Wall Mounted Drop Down Desk with Storage– short on space? This wall mounted desk is a great solution!

    12 Stylish and Comfortable Office Chairs – it’s hard to find a chair that fits both criteria, right? Well, I’ve found 12 that do!

    Want to save this project for later? Pin the image below!

    DIY Built In Office Cabinets using Unfinished Stock Wall Cabinets - Rain on a Tin Roof
  • DIY Wall Mounted Desk with Storage

    DIY Wall Mounted Desk with Storage

    Have a small space where you’d like to fit in a wall mounted desk? Need a little storage there too? You’re in the right place then! This DIY wall mounted desk is a simple build that folds down to reveal space for your computer or writing and hidden storage.

    This project has only been completed for a month or so and I can already confidently say that it is hands-down the Circus’ most favorite thing I’ve ever made her – a wall mounted drop down desk.

    DIY Wall Mounted Desk - with storage and writing space - Rain on a Tin Roof

    Y’all, she is at this desk everyday. In fact, before I could even get photos of it, I had to give it a good wipe down because she’d already gotten marker ink and glue on it from her various art projects.

    And from a mama’s point of view, it is so nice to have all her art supplies (sans paint because we ain’t letting her run wild with paint just yet) in one place. And to be able to just close it all up and hide the mess is the icing on the cake.

    DIY Fold Down Desk - folded up - Rain on a Tin Roof

    This DIY desk can easily be made to work for both kids and adults. For adults, you’ll just want to raise up the mounting height a bit and possibly increase the overall size of the desk. For me though, even as an adult the size is more than adequate.

    This post contains affiliate links for your shopping convenience. Click here to read my full disclosure policy.

    DIY Fold Down Desk

    Supplies and Tools Needed

    Cut List

    Make the following cuts using either a miter saw or circular saw.

    1. Cut the 1″ x 8″ x 8′ piece of wood into the following lengths:

    • Two pieces that are 28″ long
    • Two pieces that are 17 7/8″ long

    2. With the remaining 1″ x 8″ piece of wood that is left, cut four small squares. These don’t have to be perfect at all.

    3. Using a circular saw, cut the 3/4″ plywood project panel down to 28″ x 19 1/2″.

    4. Using a circular saw, cut the pegboard project panel down to 26 3/8″ x 17 7/8″.

    Steps

    Step 1

    Gather your measured and cut four 1″ x 8″ pieces, drill and longer wood screws.

    Drop Down Desk Assembly - Rain on a Tin Roof

    Arrange the boards as shown below.

    Drop Down Wall Desk - putting together the frame - Rain on a Tin Roof

    Attach each longer 1″ x 8″ piece to each shorter 1″ x 8″ piece at the end of each board using two screws on each board. Drill a pilot hole first and then drill your screws in.

    To keep these pieces from ever coming apart, you can also apply wood glue along the edges of the boards before attaching together with screws if you wish. We did not do this, as I do think it’s strong enough as is, but if you’ve really got a rough and tumble kiddo, this could be a good idea.

    Step 2

    Lay your cut plywood panel on top of the 1″ x 8″ frame to make sure it fits properly. It should cover the entire frame.

    Building a diy wall mounted desk with storage. Rain on a Tin Roof

    Adjust as needed.

    Step 3

    If you plan to paint your desk, go ahead and do so now. The Circus wanted two colors, so we painted the frame Tropical Sea and the drop down portion of the desk Yellow Groove.

    How to Make a DIY Fold Down Desk - mounts to wall - Rain on a Tin Roof

    After the yellow was dry, she also made a design with tape to block off a few areas to paint the Tropical Sea on as well.

    Painting the DIY Wall Desk - Rain on a Tin Roof

    Step 4

    Get your cut piece of pegboard, the four small 1″ x 8″ square pieces you cut and the longer wood screws.

    Pegboard in back of drop down desk - Rain on a Tin Roof

    Place a square in each corner of the backside of the desk frame. Drill a pilot hole and then fasten the square wood piece to the desk frame with one of your longer screws.

    Assembling the drop down wall desk - Rain on a Tin Roof

    After you’ve attached all four wood pieces, place your cut pegboard piece through the front of the desk frame and attach it to each wood square using a smaller wood screw.

    Wall Mounted Desk with Storage Building Plans

    Step 5

    Lay your drop down desk front on it’s face directly in front of the desk frame.

    Attach the frame and desk front together by using the 90 degree surface hinges.

    DIY Desk plans for a wall mounted desk -  Rain on a Tin Roof

    Step 6

    Get both your left hand lid support hinges and your right hand lid support hinges. Attach each following the package directions.

    Building Plans for a Wall Mounted Desk - Rain on a Tin Roof

    An important thing to note here is that you might have to play with these right and left hinges a bit. For me, the lower portion that goes on the drop down front needed to be scooted in a bit more than what the package directions said (as you can see from my holes above!). This could vary from different brands of hinges. If you do have to play around with it and end up with a few holes, just fill with wood filler, sand and paint over them.

    Step 7

    Attach the magnetic latches at the top of the drop-down desk frame and lid using the mounting instructions on the package.

    Tutorial for building a wall desk - Rain on a Tin Roof

    Step 8

    Attach whatever pretty knob you’ve decided to go with on the top front of your drop-down desk.

    Step 9

    Determine where you want to hang your new DIY drop down desk. To do this, I had the Circus sit on the seat I knew she would be using at the desk and then held the desk up to see where it would be best to hang it for her. Make a mark on the wall where you want it to hang.

    Grab a stud finder and mark all the studs in that area.

    On the back of the desk, measure the area between the top two wood squares you attached in the corners. Cut your 1″ x 2″ furring strip to that length or slightly less than.

    Space Saving DIY Wall Mounted Flip Down Desk - Rain on a Tin Roof

    Place the furring strip on the wall and attach it to the wall where studs are using your drill and the longer wood screws.

    Attaching the Wall Mounted Desk to the Wall - Rain on a Tin Roof

    Use a level to check for levelness before placing the second screw into the furring strip and wall.

    Step 10

    Place the drop down desk on top of the furring strip. Using your longer wood screws, attach the desk to the furring strip you just attached to the wall. I put three screws along the back of our desk top as shown below.

    Small Space DIY Wall Mounted Fold Down Desk - Rain on a Tin Roof

    Drop it down and enjoy!

    Fold Down Desk Plans - Rain on a Tin Roof

    She absolutely loves this thing.

    Wall Mounted Flip Down Desk Plans - Rain on a Tin Roof

    We used pegboard hooks to organize and hang most of her art supplies.

    Tutorial for a Space Saving Wall Mounted DIY Desk - Rain on a Tin Roof

    The two purple baskets are part of this set of pegboard baskets that we spray painted. The other baskets are from the Dollar Tree.

    DIY Wall Mounted Drop Down Desk with Storage - Rain on a Tin Roof

    We also placed a few other Dollar Tree baskets along the bottom to hold colored pencils, crayons and random other art supplies.

    Hands down, this space saving wall desk is the best thing I’ve built for the kid so far!

    Have you made a DIY wall desk before? Need one anywhere? 🙂

    Want more great ideas for your kids?

    DIY Dress Up Closet– so easy to make and they will love it!

    Easiest Ever DIY Lemonade Stand– great for those budding entrepreneurs!

    Easy DIY Children’s Stage with Hidden Dress-Up Clothes Storage– they will love you forever for making this one!

    If you’d like to save this diy desk build to refer back to later, pin the image below!

    Fold Down Wall Desk Plans - Rain on a Tin Roof
  • DIY Chippendale Desk

    DIY Chippendale Desk

    I almost gave up on this idea no less than 10 times.

    I mulled over tons of different options and ideas for how to build this chippendale desk for weeks.

    Nearly every idea I came up with seemed to eventually hold up a bright red STOP sign.

    I would go back to the drawing board. Sometimes, I would even go straight to my computer and start searching for a desk I could buy because I just didn’t think this idea was going to work out.

    But I kept coming back to it. I just couldn’t leave the vision I had in my head of this chippendale beauty behind.

    And then magically, it was like it all came together. It was more than a light-bulb moment.

    Actually, it was just a hell of a lot of back and forth in my head, troubleshooting, mulling over all the different ways it could possibly be done and then making Grunt be my sounding board for all the above.

    But I did it.

    Yes, I.

    I built this little baby all by myself.

    DIY Chippendale Desk - an easy diy desk plan that has a high end look but costs less than $100 to make.

    At first glance, that might seem like a big deal, but I assure you if I can do this, anyone can.

    And don’t fret – you don’t have to make those chippendale panels yourself…

    DIY Chippendale Desk

    This post contains affiliate links for your shopping convenience. Click here to read my full disclosure policy.

    Supplies & Tools Needed

    Cut List

    • Using your circular saw, cut the sheet of plywood into two pieces:

    • 1 piece should be 29″ x 48″ – this is going to be the front panel of your desk.
    • 1 piece should be 29 7/8″ x 48″ – this is going to be the top of your desk.

    • Using either your circular saw or a miter saw, cut the 1″ x 4″ x 6′ into two pieces that each measure 28 3/4″ long.

    • Using either your circular saw or a miter saw, cut the 1″ x 2″ x 6′ down to 46 5/8″ long.

    If you don’t want to do the cutting yourself, then usually your local hardware store will cut them for you.

    Steps

    Step 1

    First, you’re going to need to reinforce your chippendale panels. When I first pulled my panels out of the wrapping, I quickly noticed that some of the fretwork wasn’t super secure. To keep all the fretwork in place, you want to put wood glue between all the joints.

    How to Make a Chippendale Desk from readymade chippendale panels - an easy desk plan idea.

    Just squeeze a little bit of glue where every joint is, as noted above, then rub your finger over the joint to push the glue into the joint. Once that side of the chippendale panel is dry, flip it over and do the same thing to the other side. It might not seem like this is going to make a huge difference, but it really does. Wood glue is serious stuff.

    Do this with both chippendale panels, front and back. Let the glue fully dry before proceeding to the next step.

    Step 2

    Now, you’re going to be attaching feet to the chippendale panels.

    Lay both chippendale pieces down with the inside facing up. You’ll also need both of your cut 1″ x 4″ pieces (the 28 3/4″ long pieces) now too.

    DIY Chippendale Desk - easy DIY desk build.

    Run wood glue along the inside edge of the chippendale panel that is 28 3/4″ long. Be sure you are gluing on the right edge – the chippendale panels are not perfect squares!.

    DIY Chippendale Desk - easy DIY desk build.

    Place your cut 1″ x 4″ pieces along where you just ran your glue and secure it with a finish nailer or with finish nails using a hammer.

    DIY Chippendale Desk - easy DIY desk build.

    Stand your panels up.

    Easy Desk Idea - build a chippendale desk from readymade chippendale panels.

    Let this dry completely before moving on to the next step.

    Step 3

    Now, you’re going to attach the front solid panel of the desk.

    Stand both chippendale panels up on their feet. Attach corner braces along the sides and foot of each panel as shown below.

    How to Make a Chippendale Desk from readymade chippendale panels - an easy desk plan idea.

    You’ll use single hole corner braces, the 3/4″ inch ones along the chippendale panel and one double hole corner brace, the 1 1/2″ ones, where the foot is.

    Place the 29″ x 48″ piece of 3/4″ plywood in front of the brackets, then attach the brackets to the plywood panel.

    An important thing to note – before attaching the brackets to the plywood panel, make sure the screws aren’t too long and won’t go through the front of the plywood. Some brackets come with longer or shorter screws than others. If your screws are going to be too long for the plywood panel, then just go to the hardware store and buy shorter screws that have about the same size screw head as the ones that came with your brackets.

    How to build a chippendale desk for less than $100.

    Step 4

    Now, you’re going to put on the desk top.

    Start by attaching four single hole braces (3/4″ braces) along the top edge (shown below) of the front panel of plywood you just attached.

    DIY Chippendale Desk

    Attach two more single hole braces (3/4″ braces) to each chippendale side panel along the top, as shown below.

    DIY Chippendale Desk

    Lay your 29 7/8″ x 48″ piece of plywood on top of the front panel of plywood and the side chippendale panels making sure everything is even and squared up how you want it, then just like you did with the front plywood panel, attach the top plywood panel to the corner braces you just installed.

    Easy Desk Ideas: How to build a chippendale desk from readymade chippendale panels.

    Step 5

    Now, for a little added support in the back of the desk, you are going to attach your cut 1″ x 2″ wood piece that you cut down to 46 5/8″ long just along the inside top at the back of your desk.

    DIY Desk Idea - Make a chippendale style desk easily.

    Place it so that it meets up with that inside frame of the chippendale panel.

    Easy DIY Chippendale Desk

    Attach the 1″ x 2″ to the desk using the 1 1/2″ double hole corner braces on each side as shown in the image above.

    Step 6

    Caulk any gaps in the desk to give it a nice clean finished look. I caulked all along the places where the plywood met the chippendale panels.

    Step 7

    Prime and paint the desk.

    I opted to prime my desk before painting it so the raw wood wouldn’t soak up too much of the paint. I was very glad I did because it allowed me to only need one coat of the oil-based paint, which we all know isn’t great fun to work with.

    DIY Chippendale desk - priming.

    That was after the primer coat.

    And the finished DIY Chippendale Desk….

    How to Build a Desk: Easy DIY Chippendale Desk Plan

    Desk Chair / Leopard Print Rug (similar) 

    Isn’t she a beaut? It is the perfect size for my smaller office with the perfect touch of interest.

    Easy DIY Desk Plan - How to Build a Chippendale Desk

    So – do you think you’ll give this easy desk plan a whirl?

    You might also want to see…

    How I DIYed those Built In Cabinets:

    DIY Built In Office Cabinets

    The Full Office Makeover:

    Home Office Makeover with Budget-Friendly DIY Projects: An Office Makeover on a Budget with lots of Office DIY Decor

    Budget-Friendly DIY Office Makeover

    Really great list of 12 Stylish and Comfortable Office Chairs - most are very affordable as well! Great desk chairs!

    12 Stylish and Comfortable Office Chairs

    If you want to come back to this project later, just pin the image below!

    DIY Chippendale Desk - an easy diy desk idea that looks high-end but is less than $100.

  • DIY Clothes Rack for Garage Sales

    DIY Clothes Rack for Garage Sales

    Got a garage sale coming up? Learn how to make a clothes rack for a yard sale below! This simple to build DIY clothes rack for garage sales is great for not only secondhand sales, but excess clothes storage as well!

    Yard sale season is so close, I can almost taste it.

    Nearly every Friday come spring, the Circus and I will load up and hit all the area yard sales.

    And then on Saturday morning, we’ll do it again, courtesy of our chauffeur, Grunt Labor.

    And of course, my friends and I have become quite popular for our own yard sales as well.

    You have read The Yard Sale Chronicles post, right?

    At least two or three times a year, we all get together and host a yard sale, generally at my house. We hang out in the garage in our matching t-shirts drinking beer, Arbor Mist or Sangria if we’re lucky enough to get Kathryn to make it that day. We laugh and carry on and on more than one occasion, we’ve had customers ask if they can hang out with us for the rest of the day just for the entertainment.

    Yard sale days are a big deal around here.

    And since we’ve done it so much now, we just keep getting better and better at them. We have great signs, our shit is organized and mostly priced.

    And we all make a little money just for putting our shit for sale in the driveway, hanging out together and drinking.

    If that isn’t a win-win situation, then I don’t know what damn well is.

    My friend Jason recently had the grand idea of hosting a Secondhand Market. Basically, it was kind of like an upscale yard sale indoors. He did a great job organizing it and it went extremely well.

    At our yard sales, we generally hang a dowel rod between one of the garage door openings to hang clothes on, but for the Secondhand Market, I knew we would need clothes hanging storage that would stand alone. I made some DIY clothes racks that were a super simple build and to top them off, I also made printable size dividers to use for the sale.

    DIY Clothes Racks - perfect for extra hanging clothes storage, yard sales and kid's closets. Rain on a Tin Roof

    I’m sharing both the instructions for the homemade clothes rack and the printables with you!

    How to Make a Clothes Rack for a Yard Sale

    This post contains affiliate links for your shopping convenience. Click here to read my full disclosure policy.

    How to Make a Clothes Rack For a Yard Sale from 2x4s - Rain on a Tin Roof

    These are a super simple build and inexpensive as well. I made three different sizes (height wise) of these racks. I’m sharing the instructions for the shortest one, 4′ tall, below. The other two I made were 4 1/2′ tall and then 5′ tall. You can make taller ones, simply by cutting your 2″ x 4″ end posts to whatever your desired height is.

    Tools & Supplies Needed:

    Steps

    Step 1

    Make your cuts first. Cut the 2″ x 4″ pieces down to the following lengths:

    • 2 – 48″ long pieces
    • 8 – 10″ long pieces

    I used my miter saw to cut my pieces, but you can use a circular saw as well.

    If you want to cut your dowel rod down to a certain length, you can do that now as well. I bought mine at 8 feet long and opted to leave them that long.

    Step 2

    Take each of your 48″ long 2″ x 4″ pieces and mark 1 1/2″ down on one end of each piece. Using your drill and the 1 1/4″ hole saw drill bit, drill out a hole at each mark you made. This will be the top of your clothes rack where each dowel rod will slide into.

    Making a diy clothes rack for yard sales.

    Step 3

    Take one of the 48″ long 2″ x 4″ pieces and lay it flat against the ground. On the opposite end of where you drilled out your hole, attach one of the 10″ long 2″ x 4″ pieces perpendicular, but lined up on one edge of the 2″ x 4″ as shown below.

    Making homemade clothes racks for garage sales. Rain on a Tin Roof

    I did this using my nail gun because it was close by and made the job go super fast. A good ol’ hammer and nails or wood screws will do the trick as well though.

    Turn the 48″ long 2″ x 4″ on its side. Line up another 10″ long 2″ x 4″ piece and attach it as shown below.

    Homemade clothes racks for garage sales. Rain on a Tin Roof

    Turn it again. Attach another 10″ piece.

    Hanging clothes on DIY Clothes Racks for yard sales. Rain on a Tin Roof

    Repeat one more time.

    Extra Clothes Storage: How to Make a Clothes Rack - Rain on a Tin Roof

    You should have four feet on your 48″ long 2″ x 4″.

    Making a clothes rack for garage sales. Rain on a Tin Roof

    Repeat this process with the other 48″ long 2″ x 4″.

    Step 4

    Slide the dowel rod through the top holes of each 2″ x 4″.

    DIY Clothes Rack for Hanging Clothes at Garage Sales - Rain on a Tin Roof

    That’s all there is to the clothes racks!

    How to Hang Clothes at a Garage Sale - clothes on racks - Rain on a Tin Roof

    How to Hang Clothes at a Garage Sale

    Once you get all your clothes on the racks, if the dowel rod is sagging in the middle, then just move your end leg pieces in more.

    Garage Sale Clothes Rack - Rain on a Tin Roof

    This will stabilize the clothes rack and you’ll still have plenty of hanging room on the ends and in the middle.

    When hanging clothes, it’s always a great idea to divide the clothing by gender (male/female), adult sizes, and children’s sizes. On top of that, it’s even better if you divide it by size. This makes it much easier for your yard sale customers to browse through the clothing and find what may fit them, instead of them getting frustrated that everything is so unorganized.

    To organize and divide the clothing, be sure to grab this set of free printable size dividers right here!

    Print off as many sets as you’ll need for organizing the clothing. I have a set for adult men, adult women, little boys and little girls clothing.

    Yard Sale Clothes Rack - Rain on a Tin Roof

    I hope you’ll find the racks and size dividers helpful for selling more at your next yard sale!

    More posts you might find helpful:

    The Best Yard Sale Tips – all the things I’ve learned about hosting yard sales for the better part of a decade.

    How I Made $2K+ in Two Months Selling Our Clutter – find out my tips for getting the most money for your clutter!

    Want to remember these clothes racks for later? Pin the image below then!

    Homemade Clothes Racks for Yard Sales and Extra Storage - Rain on a Tin Roof
    Gift Ideas Signature

    SaveSave

  • Best Paint for Cabinets

    Best Paint for Cabinets

    Ready to give your kitchen cabinets a coat of paint? That’s great! It can be stressful determining what kind of paint to use on cabinets though, right? This guide lays out the best paint for cabinets and the pros and cons of each, as well as my personal experience with each.

    I get multiple painting questions every week. I thought I had covered most all painting topics with my Complete Guide to Painting Anything, but getting those questions tells me that I haven’t. And that’s totally ok! That’s what I’m here for – to answer as many of your DIY questions as I can or be helpful in other ways.

    I’ve had quite a few questions about painting cabinetry – both kitchen cabinets and bathroom vanity cabinets, so I thought I would go over the different types of paint you can use for painting cabinets.

    As I always say with posts like this, I am not a professional painter. While I have painted more things than I could ever possibly count, I don’t have a piece of paper that certifies I have a degree in painting. 😉 I have painted around 10 sets of kitchen cabinets, bathroom vanities, etc. though with multiple different types of paints so I have learned a little bit.

    This post contains affiliate links for your shopping convenience. Click here to read my full disclosure policy.

    What Kind of Paint to Use on Kitchen Cabinets

    There are various types of paint that can be used on kitchen cabinets, bathroom cabinets, etc. The main ones being:

    Oil-Based Paint

    Latex Paint

    Alkyd Paint

    Cabinet Painting Kits

    I’ve used each of these, as well as others, when painting cabinets in the past. Here’s my experience with each.

    Best Paint for Kitchen Cabinets

    Let’s start with the first time I painted cabinets…

    Rust-Oleum Cabinet Transformations Kit

    Best Paint for Cabinets - White Rustic Kitchen - Rain on a Tin Roof

    When we bought the Beloved Foreclosure, I didn’t really have much knowledge about painting cabinetry at all. However, our kitchen cabinets there were in great need of a makeover. Since I was such a novice and since this was before the days of Pinterest and I had no idea people actually wrote blogs about painting cabinets, I felt better about having a kit that would guide me step-by-step along the way. I used a Rust-Oleum Cabinet Transformations Kit to paint all the cabinets in the kitchen. The kit walked me through everything and it was easy to do, yet time consuming. The kit even came with a deglosser to use for priming the cabinets to paint.

    Pros:

    Walks you through everything step-by-step, usually no sanding required, everything you need sans the paintbrush is in the box. Easy cleanup.

    Cons: 

    There were brush strokes in the finish. More expensive than just buying each product in the kit individually.

    Durability:

    Pretty good. If I remember correctly, this finish stayed on the cabinets for about 2 years before I decided that I wanted a different look. I don’t remember lots of scratches or the paint peeling off.

    Would I use the kit again? 

    Yes, if I still didn’t have much knowledge about painting cabinetry, but since I know everything about painting that I do now, I wouldn’t spend my money on the kit, instead I would just buy the paint, deglosser, and whatever else I needed separately as it would be cheaper and just the same.

    You can read more about this kitchen remodel here.

    Velvet Finishes Paint

    What Kind of Paint to Use on Kitchen Cabinets - Navy and White Kitchen - Rain on a Tin Roof

    When I decided I wanted a different look for our kitchen cabinets at the Beloved Foreclosure, I used Velvet Finishes paint on them. At that point, I had used Velvet Finishes on lots of furniture pieces and wanted to give it a whirl on my cabinets. Before painting the cabinets, we removed the shiny finish with Ready (a spray on primer/deglosser), then painted the cabinets and finally finished them off with a topcoat of Protect.

    Pros: 

    Definitely one of the easiest paints to use, good variety of colors to choose from. Easy cleanup of brushes / paint supplies.

    Cons: 

    This paint is more expensive than regular paint you get from a local hardware store. There were some brushstrokes in the finish, but that could have been due to the fact that the previous finish had brushstrokes.

    Durability:

    Good. Before we moved out of that house, there were a few scratches in the paint here and there on our cabinets. I will say that we are tough on our house, so some of that could be due to us.

    Would I use it again?

    Yes, but I think I am more partial to it for furniture rather than larger projects like cabinets.

    You can read more about my kitchen cabinet painting experience with Velvet Finishes here.

    Latex Paint (Satin, Semi-Gloss, Gloss Finishes)

    What Kind of Paint to Use on Cabinets - Purple Bathroom Vanity - Rain on a Tin Roof

    I have used regular latex paint on bathroom vanities multiple times. I tend to lean toward semi-gloss and gloss finishes for the paint as it holds up better to wear and tear and you don’t always have to use a topcoat with it. If you use a satin finish latex paint, then I suggest giving it a topcoat of polycrylic as well for added protection. When priming your surface before using this kind of paint, you’ll want a shine-free surface. You can sand to get this or use a deglosser. I also like to give cabinets a coat of primer, such as KILZ or Zinnser after sanding/deglossing and before painting when using latex paints. I think it helps to give the paint a better grip on the cabinets.

    Pros: 

    Definitely the cheapest route, but do choose a good quality latex paint. My go-to is usually Behr. Can use Floetrol with the paint to prevent brush strokes. Easy clean-up. Can usually wipe any spills right off the cabinet with a wet cloth.

    Cons: 

    Latex paints are more prone to scratching and peeling off more so than other paints. There are more steps involved with priming and top coating as well.

    Durability:

    Ok, if you aren’t going to be giving the cabinetry super hard use. The durability is even better if you top it with a polycrylic topcoat.

    Would I use it again?

    Yes. I actually opted to use Behr Premium Plus Semi-Gloss Latex paint on the cabinets I installed in my office.

    You can read more about the bathroom makeover that includes the vanity pictured above here.

    Alkyd Paint

    What Type of Paint for Kitchen Cabinets - Black Cabinets in Kitchen - Rain on a Tin Roof

    When we bought the 70’s Landing Pad, it was obvious the kitchen cabinets needed a new paint job. Honestly, they really need to be replaced, but that wasn’t in the budget then and still isn’t quite yet. A paint job had to work for now. I did a lot of research and had heard about an Alkyd paint called Benjamin Moore Advance that was supposed to be great for cabinets. I decided to give it a whirl. It’s durability is supposed to be like that of an oil-based paint, but it goes on like a latex paint. Before painting the cabinets, I still had to degloss them all before painting. No topcoat is needed with this paint though.

    Pros:

    Easy cleanup. No topcoat needed. No brush strokes.

    Cons:

    More expensive than regular latex paint. Smelly, but not as much as oil-based paint.

    Durability:

    I do think this paint is more durable than regular latex paints, but I don’t think it is as durable as oil-based paint. We don’t have any big scratches in the finish or anything like that on our cabinets that are painted with it, but there are some spots around the cabinet knobs where the paint is wearing off.

    Would I use it again?

    Yes. Behr has actually came out with an Alkyd paint now as well and I used it on my daughter’s playroom stage here.

    You can read about our kitchen remodel where I used this paint here.

    Oil-Based Paint

    Best Paint for Kitchen Cabinet - Oil Based Paint on Cabinets - Rain on a Tin Roof

    I used oil-based paint on the bathroom vanity cabinet in our guest bathroom. This was the first time I ever used oil-based paint on cabinetry and I have to say – I was impressed.

    No, oil-based paint is not the easiest paint to work with, it’s smelly and the clean-up afterward isn’t super fun either, but it’s hard to beat the durability of oil-based paint. This paint dries to a hard finish that’s hard to scratch off. If you need to wipe up any dirt or marks, just use a damp cloth. On top of that, oil-based paint leaves virtually no brush strokes.

    I have also used oil-based paint on my office desk and it has held up wonderfully. My desk works hard and I’m not always nice to it, but the paint has stood strong.

    Pros: 

    Most durable. No brush marks. Usually takes fewer coats than other paints.

    Cons: 

    Smelly, clean-up.

    Durability:

    Very.

    Would I use it again?

    Absolutely.

    You can see more of this bathroom makeover where I used oil-based paint on the vanity cabinet here.

    Stain + Polyurethane

    Types of Paint for Cabinets - Stain on Bathroom Vanity Cabinet - Rain on a Tin Roof

    If you’re looking to go with the wood grain look instead of the painted look, then you’re probably going to be using stain. I have stained cabinets before and have been very happy with the results. I stained the vanity in our master bathroom and it has held up extremely well. Of course, if you want to stain your cabinets, they will either need to be already unfinished cabinets or be stripped. You can read more about stripping pieces here. If you stain something, you will want to topcoat it with a polyurethane to keep it from fading and protect the piece. Stains themselves don’t have much protection in them.

    Pros:

    Probably a little cheaper than using some of the more expensive paints. No brush stokes.

    Cons: 

    If you have to strip your pieces, it’s going to take some time and might be more difficult depending on how much you have to strip off.

    Durability:

    Pretty durable.

    Would I use it again?

    Yep.

    One thing to keep in mind when painting cabinets is that any paint is going to chip over time. That is just the nature of the beast. The key is choosing the best paint for your project and yourself that will keep that from happening as long as possible.

    If you’ve got any other cabinet painting questions or anything you can add from personal experience, please drop it in the comments below!

    What type of paint for kitchen cabinets have you used before?

    Looking for more painting help or DIY kitchen ideas?

    Painting 101: The Complete Guide to Painting Anything – all your questions answered.

    DIY Kitchen Island – we made this out of old barn wood and salvaged porch posts.

    If you’d like to refer to this post in the future, pin it below!

    Kinds of Paint to Use on Cabinets - paint for kitchen and bathroom cabinets - Rain on a Tin Roof

    Gift Ideas Signature


    SaveSave

  • How to Build a Kids Stage with Dress-Up Clothes Storage

    How to Build a Kids Stage with Dress-Up Clothes Storage

    This kids stage is the perfect addition to your child’s playroom or bedroom! The DIY stage is a simple build that will provide loads and loads of fun and entertainment for years to come…

    All I ever wanted to be was either Reba McEntire or Dolly Parton.

    I mean really, that isn’t too much to ask, is it?

    I didn’t think so either.

    When my singing voice never quite caught up with my dreams, I decided I would be ok being a Modern Day Minnie Pearl. I mean, Minnie Pearl. She was amazing. And funny as shit. I could do that.

    Well that never panned out either.

    So when the Circus started falling in love with music, singing and dancing up a storm, and became quite fond of the one and only Dolly, I basically decided that when it came to music and singing, she could have whatever her little heart desired and maybe by the grace of God, she would end up with a good singing voice and I would get to live out my country music dreams vicariously through her.

    Yep. I’m that mom.

    And so the idea of a stage all her own was born.

    DIY Children's Stage - easy build for your child's playroom, also has hidden dress-up clothes storage.

    We call it Landry’s Lounge.

    I am also quite fond of alliteration, but that’s for another blog post.

    She even has a “backstage” where she can select from a variety of outfits to suit her performance needs.

    How to Build a Stage - dress-up clothes storage - Rain on a Tin Roof

    This is a pretty simple build, but you’re working with heavier lumber, so I do advise you have two people on deck for moving the stage into place. I’m going to provide you with the dimensions of our stage, however you can easily change the dimensions to fit your own needs. We wanted the Circus’ stage to fit and fill one side of her playroom, wall to wall, thus how we came up with our stage dimensions.

    How to Build a Stage

    This post contains affiliate links for your shopping convenience. Click here to read my full disclosure policy.

    Tools & Supplies 

    As a point of reference, our stage is 48″ x 57″. The list below is for a stage that size. You can easily modify our dimensions to fit your own needs.

    For the Actual Stage:

    For the Stage Header / Sign:

    For the Hidden Dress-Up Storage and Curtains:

    Side note: you could totally build this with 2x4s instead of 2x6s. We wanted her stage elevated more than 2x4s would give us though, thus why we went with 2x6s.

    Steps

    To make the playroom stage:

    Step 1

    Cut your 2″ x 6″ pieces to size using a circular saw or miter saw. You’ll need the following lengths:

    • 2 cut at 48″
    • 5 cut at 54″ (You will have to sister two pieces of 2″ x 6″ together to get one of these.)

    Assemble the pieces as shown below:

    DIY Stage - assembling the stage - Rain on a Tin Roof

    Step 2

    Attach the outside pieces together first by screwing two  3″ construction screws in at all the corners.

    Playroom Stage - assembling the corners of the stage - Rain on a Tin Roof

    Step 3

    Attach the inside pieces by screwing two 3″ constructions screws in along the outside pieces thru to the inside pieces. Use screws to also sister the two separate 2″ x 6″ pieces together.

    Step 4

    Lay the frame on top of the sheet of plywood and trace around it onto the plywood.

    Playroom Stage - cutting the top of the stage - Rain on a Tin Roof

    Use a circular saw to cut along the traced line.

    Step 5

    Use more construction screws along the corners and edges to attach the plywood to the frame.

    Small Stage for Playroom - attaching the top of the stage - Rain on a Tin Roof

    Step 6

    Paint it!

    Kids Stage for Playroom - painting the stage - Rain on a Tin Roof

    Like I said above, we used Behr’s Alkyd paint. I knew this thing would take a beating from the Circus and had actually planned on using oil-based paint which is super durable. However, the paint guy talked me into trying the Alkyd paint since it acts like oil-based paint in terms of durability but goes on like latex. It does have a smell though. It’s not as smelly as oil-based, but enough that I didn’t let the Circus sleep in her room for a couple of nights while this thing was still curing. She chose the purple paint color which is called Just a Fairytale. We did two coats of the paint.

    Step 7

    Cut the 1″ x 10″ x 8′ down to the length of your stage front. You will also have to cut down the height of this piece as well to match the height of your stage so that you don’t have a lip on the front of your stage which equals hurt kiddos. With the dimensions of our stage, we cut the 1″ x 10″ x 8′ down to 57″ long and 8″ tall. Paint this piece as well and then attach it to the front of the stage with finish nails and a hammer or a nail gun. We also added glittered wood stars to ours, which we just attached with hot glue.

    That’s it for the actual stage part!

    To make the stage header / sign:

    Step 1

    Cut your 1″ x 10″ x 8′ down to the width of your stage or the width from wall to wall if you are making your stage like ours.

    Step 2

    Paint and embellish it. We added wooden stars coated with gold glitter, and the sign that reads Landry’s Lounge. We hot-glued the stars on and then once the header was hung, I attached the Landry’s Lounge sign with a nail gun.

    Step 3

    Use corner braces to attach the sides of the board to the wall on each edge. If you aren’t going wall to wall, you can attach the braces on the board and then onto the ceiling above.

    To create the hidden dress-up storage and curtains:

    Step 1

    Install the shower curtain tension rod toward the back of the stage at a height your child can easily reach.

    How to Build a Stage with Hidden Dress-Up Clothes Storage - curtain hiding clothes - Rain on a Tin Roof

    Step 2 

    Run one of the tension rods through two of the curtain panels. Hang that curtain tension rod higher up on the wall, almost to the ceiling and slightly in front of the shower curtain tension rod. This will allow the curtains to cover up the play clothes when they are closed. It also creates a pretty backdrop as well.

    Kids Playroom DIY Stage - open curtains on stage - Rain on a Tin Roof

    Step 3

    For the curtains in the front of the stage, run two panels through a tension rod, then install it just behind the stage header.

    We opted for the yellow curtains (more colors also available!) because they complimented the purple so well. Now, these aren’t something I would hang up to block out light because they are thin, but for this little budding performer and her stage, they are perfect.

    We also replaced what was a single bare bulb light fixture with this chandelier to make it a bit more glam. The Circus picked it out and lord help us all, she is totally champagne taste on a beer budget.

    She got her microphone for Christmas and we have all had the best time playing with it. It also has a speaker attached to it that can hook to Bluetooth.

    Building a Kids Stage in a Playroom - Curtains Closed - Rain on a Tin Roof

    Fingers are crossed that this is just a small investment towards stardom. 😉

    But it’s ok too if she just decides to live a simple life. I mean, I might be a little bitter, but it’ll be ok. 😉

    Will you be creating a small stage for a playroom?

    More kiddo related posts you should see…

    How to Build Wall-to-Wall Shelving – these are perfect for toy storage!

    DIY Dress-Up Closet – this is made from a bookcase!

    How to Create an Object and Text Feature Wall – perfect decor addition to their bedrooms that display their fun personality!

    If you want to save this post to look at later, you can pin it here:

    How to Build a Small Stage for a Playroom - with hidden storage - Rain on a Tin Roof

    Gift Ideas Signature

    SaveSave

    SaveSaveSaveSave

  • How to Paint Baseboards

    How to Paint Baseboards

    Painting baseboards and all trim in general can be a tedious, time consuming task. After remodeling four homes, I’ve learned a few tips for all that tedious trim painting. Here are my tried and true methods for how to paint baseboards quickly. 

    When you decide to renovate a house, you pretty much know that the renovation will include painting just about every single room.

    But when you see that house the first couple of times, you are too caught up in the potential to realize just how much painting there is to do – and not just painting of walls, but also of ceilings. And baseboards. And basically all trim. And all doors. Oh and then all cabinets.

    And that’s when you want to go in a corner and cry and hide and ask yourself why, why, why did we do this to ourselves??? 

    Oh ok, that’s just me. 

    No it’s not. Admit it. You’ve been there or at least been in a similar situation. 

    Every single room, every single door, cabinet, baseboard and piece of trim have to be painted in the 70’s Landing Pad.

    Now, I wasn’t too concerned about how much time it would take to paint the walls – rolling doesn’t take too long. The same was true of the doors and cabinets – I would be able to spray a good portion of those with my paint sprayer.

    All the trim though – particularly all the miles and miles and miles of baseboards were causing a touch of anxiety.

    But get this – in the end, it took me about 30 minutes (minus drying time) to paint all the baseboards in the living room, dining room, and hallway of the 70’s Landing Pad. Let me give you an idea of how much baseboard that is:

    Living Room

    Painting Baseboards

    Dining Room

    How to Paint Baseboards Fast

    HallwayPainting Baseboards Fast

    That’s a heck of a whole lot of baseboards to paint. What I did in this case may not be ideal for everyone. Don’t worry though – I’m going to give you a few different methods for painting baseboards and you can determine which is best for you and your home.

    How to Paint Baseboards With a Paint Sprayer

    If you only have one small room to paint baseboards in or if you’re painting trim in a room full of carpet and furniture, then a paint brush is going to be your best option. Go on and skip ahead to method #2. If you have a ton of baseboards to paint though and you’re also ripping up carpet, then this might be for you. This method works best when you also have to paint the walls in the room as well.

    Supplies:

    Steps

    Step 1: Prep Work

    For us, we are having to replace all the flooring in the 70’s Landing Pad. When we pulled up the old flooring, we realized that when the house was built, the baseboards had been put right on top of the subfloor, instead of putting them about 1/4″ above the subfloor to allow room to slide new flooring under. Since this was the case, we carefully pulled off all the old baseboards, then put it right back on the wall, but 1/4″ higher. We actually used a scrap piece of our new flooring to place under the baseboard for measurement, then tacked it on to the wall.

    If you are not replacing your flooring, but still have miles and miles and miles of baseboard to paint, then you could take off your baseboards, mark where each one goes on the back and cover that with a piece of painter’s tape. Then, take the baseboards outside and use a paint sprayer to spray them (I’ll get to the specifics of that in a bit.)

    Fill any nail holes with wood putty, let dry and sand smooth (there’s a tutorial here for filling holes). If you have a gap between the top of your baseboard and the wall, fill it with caulk, smooth it and let it dry.

    Take all outlet covers off and tape over the outlets.

    Vacuum up any dust, dirt or debris that is surrounding the baseboards.

    Step 2: Get your paint and paint sprayer ready.

    Painting Baseboards with a Paint Sprayer

    The best paint for baseboards are ones with a semi-gloss or gloss finish. These are the most durable and scrubbable. These areas tend to get beat up quite easily and semi-gloss is easier to clean than flat, satin or eggshell sheens. Get out your paint sprayer and fill up the cup about 1/2 – 3/4 full, then thin your paint down to the correct consistency. There’s a guide here for thinning your paint.

    Adjust the spray pattern to be vertical by turning the air cap on the front of the sprayer as shown below.

    How to Paint Baseboards with a Paint Sprayer

    When the “wings” as I call them are horizontal, the paint will spray in a vertical pattern.

    Step 3: Paint the baseboards.

    Plug in the sprayer. Hold the Finish Max about 10 inches away from the baseboard.

    Tips for Painting Baseboards

    Pull the trigger and start painting. Stay in constant motion, but moving slowly across the baseboard. Don’t stay in one place for too long.

    How to Paint Baseboards Fast with a Paint Sprayer

    You can see how the paint will get on the wall and floor as well. This is why I said if you aren’t replacing the flooring or painting the wall, to pull the baseboards off and spray them outside. When you put them back up, fill the nail holes and touch up those spots with a brush. It will still save you loads of time if you have a lot of baseboard to paint.

    Let the paint fully dry before doing another coat. I did two coats total.

    If you did get some drips from staying in one place too long, then simply run your paintbrush over those before it dries.

    Tips for Painting Baseboards Fast

    I plan on using this method again in the master bedroom before laying the new carpet and in multiple rooms downstairs as well.

    How to Paint Baseboards with a Brush

    If you aren’t in the middle of a big home remodel and painting baseboards with a sprayer isn’t ideal for you, then you can still get a great finish on your baseboards with a good ol’ paintbrush.

    Supplies:

    Steps

    Step 1: Prep Work

    Fill nail holes with wood putty if needed, then let dry and sand smooth.

    If you have a gap or any cracks between the top of your baseboard and the wall, fill it with caulk, smooth it and let it dry. Do the same in corners where the baseboards meet.

    Wipe down all the baseboards with a wet cloth to remove any dust and dirt.

    Tape off the wall just above the baseboard and the carpet below the baseboard. You can also put plastic down on the ground if you’re worried you might get paint on your flooring.

    Step 2: Prepare your paint. 

    Mix the Floetrol with your paint as the instructions say to on the bottle. The Floetrol is excellent for reducing brush strokes in your paint finish after it dries. If this isn’t something you’re worried about, you may skip this step.

    Step 3: Paint the baseboards.

    Dip your paintbrush only about 2/3s of the way up the brush into the paint. Remove excess paint from the brush by gently wiping the brush along the sides of the paint tray or container.

    Brush the paint onto the baseboards in long even strokes. Do not go back and forth. Go in one direction.

    Step 4: Repeat.

    After the first coat is dry, give the baseboards a second coat if needed. After the final coat of paint, immediately remove the tape from the wall and floor to prevent the new paint from peeling off the baseboards.

    Have any tips or tricks you can add for painting baseboards?

    You might also want to see…

    How to Paint Trim and Doors: A step-by-step guide for painting trim and doors including what kind of paint to use, what the best tools are and how to get a professional paint job.

    How to Paint Doors and Trim

    pin-this-post-2

    Painting Baseboards

    blog-signature-summer-15

    You know you don’t wanna miss any of this crazy.

    Sign up to get my posts delivered to your inbox here.

    Stalk Me Here:

    Pinterest / Facebook / Twitter /  Instagram

    Disclosure: This post was a collaboration with HomeRight. However, all opinions and baseboard painting hacks are 100% mine.

  • Simple Home Security with Blink

    Simple Home Security with Blink

    This post is brought to you by Blink Home Video Security. However, all opinions are 100% mine and I completely own up to being a scaredy cat sometimes. 

    Nearly a year ago, Grunt Labor went on a camping trip. He left on a Thursday after work. Nicky called later that evening to check on me and Landry. When I saw his number on my screen, my first thought was “Oooo. Wonder if I can talk him into coming over for a slumber party if I supply all the beer and 80’s country music?”

    I am not a big fan of being alone over night.

    Yes, I am 32 years old and yes, sometimes I am a big scaredy cat.

    When I’m flying solo for a night, I hear every single little creak the house makes. And then my mind plays tricks on me and makes up more noises for me to hear that aren’t really there. And usually some shadows too.

    That night, I toughed it out though and didn’t make Nick come over.

    But I did sleep with a hammer under the bed. Because ya know, I would totally have enough time to reach under the bed, feel around for it and then sling it into the face of an attacker who was standing over my bed.

    Pair my occasional scaredy-catness with a string of recent car thefts and break-ins in our neighborhood and I was most definitely ready for a little extra peace of mind when it came to home security.

    Enter Blink.

    Simple Home Security with Blink - easy DIY install home security system with no wires or monthly fees.

    When they reached out to me and asked if I might be interested in partnering together to talk about their wireless, simple install, no monthly fees home security system, I was like, Oh yea, I’m your girl.

    We went with a two camera indoor system and two Blink XT outdoor cameras.

    Simple Home Security with Blink - no wires, no fees, home security.

    The install is super simple. There are zero wires involved. All you need is Wi-Fi and a smartphone.

    Simple Home Security with Blink - no wires, no fees, home security.

    You start by downloading the Blink app on your smartphone, launch it and then it walks you through everything. It took me about five minutes to get it set-up and then you just place your cameras wherever you would like them in your house. Since we got two indoor cameras, we put one upstairs and one downstairs.

    Simple Home Security with Blink - just place cameras around your home and sync the system to your phone.

    The one upstairs is on the bar cart between the living and dining rooms and covers that whole area and down the hallway.

    Simple Home Security with Blink - wireless cameras can go anywhere and have batteries that last up to two years.

    You literally just set the camera on a surface and you’re done. The indoor cameras do come with mounts if you want to mount it on the wall, but I found it easier and just as good to find a place for it to sit. It’s just a sleek little square so it blends in nicely with the decor.

    Downstairs, I put the other interior camera on top of the fireplace.

    Simple Home Security with Blink - wireless cameras that can be set up anywhere and pair with your phone.

    Each camera comes with two batteries that last up to two years. The Blink app on your phone monitors not only your home, but also the battery life in each camera so you’ll know when to change them.

    Simple Home Security with Blink - put the wireless cameras anywhere in your home.

    Outside, we used an included mounting bracket to install an exterior camera in the corner of one of our garage door openings.

    Simple Home Security with Blink - install exterior cameras to protect against car theft and break-ins.

    It’s hard to even see it, right? It’s right up there in the corner. You just need a screwdriver to install the brackets and then you can move it around and angle it however you wish. The cameras all have motion detection so if someone does try to break into our cars, we’ll get a notification from our Blink app on our phone just as soon as they walk into the driveway.

    The Blink XT cameras also make for a great way to send love over the wi-fi signal…

    He’s a keeper. 🙂

    We installed another exterior camera on one of the front porch columns.

    Simple Home Security with Blink - install exterior cameras for protection against package theft.

    P.S. Check out my wreath holder sans wreath. Bless my heart. I should really hang something there. 

    This camera is angled to look right at the steps and front door area where packages are normally dropped off. With the holiday season quickly approaching and therefore the crazy amount of visits we’ll be getting from the USPS, UPS and FedEx guys, I wanted to be able to see when packages were dropped off so that I could get them in quickly to protect against package theft this season. We have had a delivered package stolen once before and it was a huge pain to deal with.

    If we’re away on vacation or at the farm, or wherever, all we have to do is open the Blink app on our phone and we’re home – well, virtually anyway. We can literally see our house while we’re not there and that is pretty cool. If we get a notification of activity, we can see what’s up and if need be, call the authorities and have it all on video.

    Ready to learn more about Blink? Head right here!

    Gift Ideas Signature

    Pin This PostSimple Home Security with Blink - set up cameras inside and outside your home that sync to your phone.

    SaveSave

    SaveSave

    SaveSave

  • One Stop Workshop: DIY Mobile Workbench + Pegboard Organization

    One Stop Workshop: DIY Mobile Workbench + Pegboard Organization

    This is a sponsored conversation written by me on behalf of True Value. The opinions and text are all mine.

    As you know, I’ve been on a purge streak lately. I’ve said good riddance to so much clutter in our house that I’m actually a little embarrassed by just how much we had. Quickly followed by the purging, a huge wave of motivation to get more organized arrived.

    I mean, when you’ve cleaned out so much stuff, you don’t want to end up once more as a finalist for your own television show about your hoarding tendencies, right? So to prevent that and the sheer embarrassment of realizing just how much junk you had, you organize it.

    And just let me tell you, organizing feels so good.

    I just can’t even begin to tell you the amount of satisfaction I have gotten out of seeing a space come to its full organized potential. I don’t care how nerdy it makes me sound. 

    And let me just show you the latest shining example of this organization spree that took place in our garage.

    Create a one-stop workshop in your garage with this DIY Mobile Workbench and Pegboard Organization Ideas.

    Just look at that, y’all! I can actually find the tools I need when I need them. I’m not scrounging around through tool boxes and bags or banging my head on metal shelves in the tiny cramped closet in our garage that once held so many of our tools.

    The sad thing about this whole thing is that we had this pegboard in our garage from the beginning.

    Create a one-stop workshop in your garage with this DIY Mobile Workbench and Pegboard Organization Ideas.

    We just never utilized it to its full potential. I’m equally ashamed and giving myself a swift kick in the rear end about that fact. Now, I can find things. I don’t have multiples of things I don’t need in various locations of the same room. And did you notice my new workbench?

    Create a one-stop workshop in your garage with this DIY Mobile Workbench and Pegboard Organization Ideas.

    I made that.

    Well, I didn’t actually make the metal cabinetry part because I’m not that good, but I made those cabinets into a mobile workbench. That’s right – it can go anywhere and it was so easy to do. I’m not going to lie – after this space was completed, I actually just sat there and stared at it awhile. It makes me so happy, I just want to get out there and jump into a new building project.

    Here’s how we made it all happen with the help of some products from True Value…

    One-Stop Workshop: Pegboard Organization + DIY Mobile Workbench

    Pegboard Organization

    1. Get pegboard on the walls. 

    If you don’t have pegboard in your garage or workspace already, get some up. Like I said, we already had this in our garage when we bought the house, but had never utilized it. Pick up some pegboard panels and 2 x 4s from your local True Value. Determine where you want to hang your pegboard and locate the studs in that wall. Either nail or screw up the 2 x 4s along the studs, then attach the pegboard to the 2 x 4s with nails or screws.

    2. Lay out tools and determine what hooks and accessories you need. 

    Next, I suggest laying out all the tools you want to get up on the pegboards and determine what kind of pegboard hooks and accessories will work best for hanging those items.

    Create a one-stop workshop in your garage with this DIY Mobile Workbench and Pegboard Organization Ideas.

    For our pegboard, I bought the following from True Value:

    3. Get the tools on the pegboard.

    I found that working from the bottom up works best. This is kind of a game where you just have to play around with the location of some of your tools and determine what fits best where.

    Create a one-stop workshop in your garage with this DIY Mobile Workbench and Pegboard Organization Ideas.

    If you go with a paper towel holder, keep it lower for easy access. I suggest doing the same with the utility shelf as well.

    Hanging multiples of the same tool types helps to save on space and utilize those hooks to their maximum potential. I did this with all of our rolls of tape, hammers, scrapers and more.

    Create a one-stop workshop in your garage with this DIY Mobile Workbench and Pegboard Organization Ideas.

    Use two single hooks, one on each side, for longer tools such as levels.

    Organize your screwdrivers by type and put any single random tools that will fit in the 3-in-1 tool holder.

    Create a one-stop workshop in your garage with this DIY Mobile Workbench and Pegboard Organization Ideas.

    I grouped my clamps together by size and hung them up on single heavy-duty 8 and 10 inch hooks.

    Create a one-stop workshop in your garage with this DIY Mobile Workbench and Pegboard Organization Ideas.

    For the power tools, I used either two 6, 8, or 10 inch hooks to hold each power tool up deepening on its size.

    For easy access to small parts such as washers, nuts, bolts, screws, nails, etc., I put the small parts storage cabinet in the lower corner of the pegboard and attached it with screws that went into the 2 x 4s holding the pegboard up. The video below for the DIY mobile workbench also touches on the pegboard organization.

    DIY Mobile Workbench

    Create a one-stop workshop in your garage with this DIY Mobile Workbench and Pegboard Organization Ideas.

    You’ll Need: 

    • Two – Five Drawer Tool Chests on Wheels
    • One sheet of 3/4 inch plywood, cut into the following sizes:
      • Two pieces cut to 26 1/4″ x 17 3/4″
      • One piece cut to 53 1/2″ x 18″
    • Drill
    • 1 1/4″ or 1 1/2″ Screws

    Step 1

    Lay a piece of the plywood cut to 26 1/4″ x 17 3/4″ into the top of each tool chest. Each chest has a rim along the top that will keep the wood from sliding out.

    Step 2

    Lay the long piece of plywood cut to 53 1/2″ x 18″ across both smaller sheets of plywood and the tool chests. Line up everything up nicely.

    Step 3

    Using either 1 1/4″ or 1 1/2″ screws and your drill, connect all three pieces of wood together. Put a screw in each of the four corners of each tool chest.

    That’s it! I told you it was simple!

    Create a one-stop workshop in your garage with this DIY Mobile Workbench and Pegboard Organization Ideas.

    A few tips and ideas for the workbench: 

    • If you want to make the workbench top completely permanent, then before putting the smaller pieces of plywood on the tool chests, apply an adhesive such as Liquid Nails to the top of the chests, then put the plywood on top of that.
    • You can also opt to leave the larger piece of plywood off the top and have two smaller mobile workbenches as well. This was initially our plan, but in the end we wanted to have the option for both a smaller and a larger workbench.
    • If you ever want to remove the workbench top to transport it a farther distance, separate the chests or store it away, you can leave the top together and simply lift it off the tool chests as one piece.

    Alright guys, I’m off to plot out my next project that puts this baby to use!

    Do you have any great garage organization ideas to share? 

    Pin This Post

    Create a one-stop workshop in your garage with this DIY Mobile Workbench and Pegboard Organization Ideas.

    This is a sponsored conversation written by me on behalf of True Value. The opinions and text are all mine.


    SaveSaveSaveSaveSaveSaveSaveSaveSaveSaveSaveSaveSaveSaveSaveSaveSaveSaveSaveSaveSaveSaveSaveSave

  • NuCore Flooring: How It’s Holding Up After A Year

    NuCore Flooring: How It’s Holding Up After A Year

    Multiple times a week, I get questions about the NuCore flooring we put down throughout the living room, dining room and kitchen in our house. Apparently, it’s become a very popular option in flooring. NuCore is an engineered floor, that looks like hardwood, but is actually a tough top layer of luxury vinyl adhered to a stable, rigid, and waterproof core.

    I don’t always get to answer those questions in a timely manner, so in an effort to be able to answer people’s questions more efficiently and to also give an update as to how well it has held up after a year, I decided writing a post about it was the best way to go.

    Just so we’re clear, this post is in no way sponsored by Floor and Decor, which sells NuCore Flooring. They did provide me with the flooring last year in exchange for two product review posts, but this post was not part of that deal.

    I figured the best way to go about this was in Q & A format, so I’ve gathered all the questions I get about NuCore and answered them below. Let’s get down to it, shall we?

    This post contains affiliate links for your shopping convenience. Click here to read my full disclosure policy.

    NuCore Waterproof Flooring: How It’s Holding Up After a Year

    Q: How do you install it? 

    A: I actually wrote a post about just that, which you can find it here. You can also watch the short video below as well, the post will go into more detail.
    [adthrive-in-post-video-player video-id=”EmAIvJzB” upload-date=”Wed Jun 29 2016 14:23:39 GMT+0000 (Coordinated Universal Time)” name=”Rain on a Tin Roof – How to Install NuCore Flooring” description=”How to Install NuCore Flooring by Rain on a Tin Roof”]

    In a nutshell, it’s pretty easy to install.

    Q: About how long did install take?

    A: Of course this is going to depend on the size of the room you are installing it in, but once you get the hang of installing it, it goes pretty fast. My husband worked on ours after work for about two hours a day. On average, he was probably able to complete one good sized room done in 2-3 days time, so that’s about 4-6 actual work hours.

    Q: How do you install it on stairs?

    A: You can install a few planks on the stairs and then fit the edges with the coordinating stair noses that are offered. What we opted to do though, was replace our old stair treads with actual hardwood treads. We used the stair noses on the edges of where the top floor dropped off to the stairs.

    NuCore Flooring Review: Here's how this waterproof, vinyl plank flooring performed, one year later.

    The photo above shows NuCore on our landing and then a stair nose at the edge.

    Q: Can you install this on top of existing tile?

    A: Yes. That being said, you would want to make sure the tile was level and in good condition.

    Q: How thin is it?

    A: 6.5mm

    Q: What do I do if the transition from NuCore to another flooring in my home is of varying heights?

    A: You should be able to use a coordinating reducer to make the transition smoother.

    Q: How does this stuff stay in place without gluing it down? 

    A: NuCore is a floating tongue and groove installation. The more you snap together, the heavier it becomes, which helps to keep it in place. We also put quarter round trim around the baseboard and edges of the NuCore once it was installed to give it a finished look. This of course also helps to keep it in place.

    Q: Do your floors need to be even for the install to be easy?

    A: I don’t think they would have to be perfectly level, but you would want them pretty level. If the levelness varies by room, you could always use transitions and reducers in those areas.

    Q: Did you lay down any kind of barrier or just install it directly on the floor?

    A: No, we didn’t lay down a barrier underneath, just installed it straight on top of the floor. The flooring has cork on it which also helps as a sound barrier.

    Q: Can you lay down a barrier underneath NuCore? 

    A: The flooring specifically says you don’t have to put any sort of underlayment or barrier under the flooring, however if you prefer to do so anyways, I would suggest asking the folks at Floor & Decor who sell NuCore.

    Q: Is the flooring renter-friendly or would it ruin the floor underneath? 

    A: It shouldn’t ruin the floor underneath, as you aren’t having to put down a barrier underneath it or nail it down.

    Q: My concern is that the cork backing might show imperfections in the sub floor over time. Do you have any places in your sub floor that is showing up after a year of being installed?

    A: I haven’t noticed any places like that. There is one place where there had been two different subfloors and they didn’t meet up quite right. I can tell where that spot is when I walk on it, but not when I look at it.

    Q: How can floors with joints be waterproof?

    A: I am by no means an expert on answering this question. I’m not the creator of this product, an engineer or a scientist who could tell you the specifics on how that works. In my personal opinion, I would assume since this flooring has tongue and groove joints, that keeps water from seeping through. Of course, you do have to make sure that your joints are tight when you install it. That being said, the core of the flooring is also waterproof as I noted above.

    Q: So is it really waterproof? 

    A: Yes, at least with the water issues we have had. Shortly after moving in, we had a major dishwasher leak. The drain was clogged up and the water came out all in our floor. The end edge of the NuCore flooring buts up to the dishwasher of course and we never had an issue with the floor buckling, deteriorating or anything else because of the water. Now of course, we didn’t let the water sit there for hours to just see what happened, but all in all, no issues. Our dog also had a few accidents on the NuCore and the flooring didn’t seem to absorb any of the urine at all.

    Just as a little extra information, this is what one reader left as a comment on one of my previous posts about NuCore: “It’s the material that the flooring is made of that makes it water proof. I put a sample of NuCore halfway in a bucket of water overnight along with other flooring samples and the NuCore was the only one that came out undamaged.”

    Q: Any thoughts on if it feels like vinyl? It looks really nice, but walking on it in shoes, socks, bare feet, does it feel cheap or “plasticky”?

    A: Personally, I don’t think it feels cheap or plasticky. I always associate a vinyl floor with a slick feel and a shiny look and I don’t think that NuCore has either one of these.

    Q: Does the flooring have any physical texture?

    A: Yes, there is some texture to the flooring. It’s not too deep that it would catch and hold dirt and dust, but it does give it a little more character.

    Q: Does it scratch easily?

    A: It doesn’t scratch easily, but our flooring has gotten some scratches. You have to hunt for them though. The scratches aren’t white, but brown in color, so they blend in with the floor.

    The scratches on our flooring was from our boxer dog. As she got older, she lost control of her back legs and they would often fall out from her under her, which caused some scratching on the floor and then caused her to try and get a better grip on the floor to get back up.

    NuCore Flooring Review: Here's how this waterproof, vinyl plank flooring performed, one year later.

    You can hardly see any of the scratches on the floor in our living room, dining room, or hallway. The only place you can really see them well are right in front of really well-lit places. The photo above was taken in front of our all glass sliding door. The scratches aren’t very noticeable or deep, you have to look for them. I noted some of the ones above with the arrows.

    Q: Has it dented easily? Have you noticed denting or divots where chairs or furniture have been sitting on it?

    A: No, we haven’t had any dents at all.

    Q: Have you had any problems with it splitting at the seams?

    A: We have one place where a seam popped. I think it is mainly due to the fact that we put a very large and heavy piece of furniture right beside that seam though. And when I say a large and heavy piece of furniture, I’m talking about a piece of furniture that my husband refers to as “the steel box.” It’s super heavy.

    Q: Does it muffle sound well? 

    A: This is something I haven’t really paid that much attention to, so I might not be the best person to answer it. That being said, if I haven’t noticed it, maybe it means it does muffle sound pretty well. I think that the cork backing helps to absorb some of the sound. We live in a split-level house and the NuCore is installed primarily on the upper level. With the exception of spending some time in our den on the lower level, I’m not down there very much to determine if it does or does not muffle the noise significantly.

    Q: Does it make a click-clack noise when the dogs walk across the floor?

    A: Yes, the dogs paws and toenails do make that sound as they walk across the floor.

    Q: Will it break under pressure of heavy furniture?

    A: We haven’t had any pieces break, but we did have that one seam pop up as noted above.

    Q: What do you clean NuCore with? 

    A: At first, I was using Mop n’ Glo, but then someone commented on one of my NuCore posts saying that Floor and Decor suggested not using that to clean it with as it could yellow it. So, I switched to just Swiffer Wet Pads. I usually go over it first with my Shark vacuum using the hardwood floor attachment (which is awesome), then the Swiffer Wet Pad.

    Q: Is it ok to get your house sprayed for bugs with the NuCore? Will the flooring be ok being exposed to the spray? 

    A: I’ve had our house sprayed once every three months for pests since we’ve moved in and there has never been an issue with the spray damaging the flooring.

    Q: Where do you buy NuCore and how much does it cost?

    A: You can purchase NuCore at Floor & Decor and it costs about $2.40 – $3.00 a square foot.

    Our overall thoughts:

    We are really pleased with our flooring. I’ll be the first to say that we give our floors a beating. There’s me, Grunt Labor, the Circus, and a dog. We live in our house, we don’t tiptoe around it and this stuff has held up. We have dropped tools on the floor, drug things across it, and with the exception of those scratches from the dog, it’s held up. We have two more places in our house that we still need to update the flooring in and we’re considering NuCore for those places as well. Grunt Labor is really pushing for it because of how easy it is to install. The only other type of flooring we might put in those places would be tile. Either way, both places see a lot of foot traffic and potential water – one is the laundry room, the other a long hallway between our garage and den and both are in the lower level of our house, which is partially underground, since our house is a split-level.

    Read more NuCore Flooring Reviews in the comments.

    If you’ve installed NuCore before, please add your thoughts on it in the comments as well.

    More posts about NuCore:

    How to Install NuCore Flooring – this was a DIY project for us and this is how we we did it.

    Why We Opted for NuCore Flooring – why we went for this flooring over others.

    Want to be able to quickly refer back to this post? Pin the image below. 

    NuCore Flooring Review: Here's how this waterproof, vinyl plank flooring performed, one year later.

    SaveSaveSaveSaveSaveSave

  • A Diamond In the Rough

    A Diamond In the Rough

    Disclosure:  This post was sponsored, and paid for, by SunTrust Mortgage. All opinions are my own.

    When we found the 70’s Landing Pad, it was not perfect…by any stretch. In fact, it was downright ugly inside and out. 

    The 70's Landing Pad

    We weren’t necessarily looking for a new home, but this one was in the perfect location. We wanted to get my in-laws moved closer to us either by finding a home that would fit us all in it or finding a home for them in our current neighborhood. We looked at lots for building a house for all of us, we looked at a couple of homes that would house us all and we looked at houses for them in our neighborhood. Nothing though was quite right. 

    As it turns out though, the 70’s Landing Pad was just right for us, after a little work, and our previous house was just right for them, after they made some changes to it. 

    Funny how things work out, right? 

    If you’ve been around here for the last two years or so, you may remember just how much work the 70’s Landing Pad needed. A lot. And most all of that work had to be done by us because there was a tight budget. With the exception of the master bathroom remodel and some drywall work, we DIYed everything in this house. That would include a kitchen remodel, bathroom remodel, new flooring throughout, painting every single wall, and a hundred other small things. I get tired just thinking about it still. But you know what? It was so totally worth it. 

    That’s what our kitchen looked like when we first got it. 

    And this is where we’re at now. 

    It took time, and a seven man band of friends and family to get it done, but it’s now completely “us.” 

    With a little Johnny and June thrown in. 😉 

    The hall bathroom was another project that we DIYed…

    With the exception of the new tile flooring, the rest of the makeover was just paint. We painted the existing vanity and switched out the hardware and faucet and then of course painted the walls as well. We also upgraded the old lighting fixtures. The updates were pretty easy, but had a big impact. 

    We also DIY-ed some reconfiguring of the master bedroom. 

    This bedroom is honestly too big. Don’t get me wrong, it’s nice, but a lot of the space was just wasted. We ended up taking part of the bedroom and turning it into a closet and turning the previous closet, which was conveniently located on the backside of my daughter’s room into a playroom for her.

    It took time, but we were able to take the not-so-perfect home and make it the perfect home for our family.

    While we DIYed a lot on this house, we did leave things like plumbing and drywall work to the pros as that’s not our specialty. I think whenever you take on a whole house remodel, it’s important to identify what you know you can do yourself, what you think you can learn to do and what most definitely needs to be left to a pro and then budget accordingly.

    All that being said, when you’re looking for a new home, try to look past that ugly wallpaper circa 1993 and the disgusting puke green paint that graces the master bedroom and instead envision it with your own personal touches. Those rooms are just waiting for your magic touch. 😉 

    When you’re ready to purchase that diamond in the rough, you can start at SunTrust Mortgage where their team of experts can help you find the right kind of mortgage that fits your lifestyle. They have a whole library of resources and tools to help turn that lump of coal into a diamond. 

    If you’re a new home buyer, then also snag this Guide to Home Buying here that walks you through the process step-by-step. Then, start dreaming and scheming  about that new house! 

    You can take the full “before” tour of our 70’s Landing Pad here and then see how far we’ve come here. 


    Comments submitted may be displayed on other websites owned by the sponsoring brand.

    SaveSave

    SaveSaveSaveSave

    At SunTrust Mortgage, we make it a priority to learn all about your unique circumstances. Confidence starts with a conversation. 

    Talk with a SunTrust Mortgage expert today. 

    This post was sponsored, and paid for, by SunTrust Mortgage. All opinions are my own.

  • DIY Kitchen Banquette

    DIY Kitchen Banquette

    Disclosure: This project was in partnership with Behr Paint, however all opinions are 100% my own. Affiliate links may be included in this post. 

    I really like building things. I’m not an expert in it by any means, but I’m pretty good at basic builds. I’ve most definitely mastered the art of those built-in shelves I make, as I’ve done three sets of them now. 🙂

    As I’ve said before, my Pap did a lot of woodworking. Now he was the expert. Unfortunately, by the time I wanted to learn about that stuff, he had already hung up his hat in that department, but I think that feeling I get when I feel a little sawdust against my palms comes from him.

    In our kitchen remodel, we ripped out cabinetry in one corner and knew we were going to eventually build banquette seating there for a breakfast nook. This is what it looked like when we first got the house:

    The Kitchen Before

    Well when it finally came time to build that banquette seating, I was all about doing it myself. I drew up the plans, I did the measurements, bought the supplies, started putting it together – everything. I think in the back of my head I thought that if I could just do this one project all by myself and it turn out ok, that somewhere my Pap would give me a nod, a big grin and say “Good job.”

    I really picked the wrong project for that validation I thought I needed.

    This banquette is not a difficult build for two people. It is a difficult build for one person, as Grunt Labor so lovingly pointed out to me when he came home one day and found me with glassy eyes, drinking a beer, staring at the halfway completed banquette that wasn’t anywhere near square. I felt like such a failure, but he was right, it wasn’t a one person job.

    Learn how to build a basic kitchen banquette or corner bench with this DIY Kitchen Banquette tutorial - makes great built-in seating.

    Palm Print Pillow / Tiger Stripe Pillow / Malachite Pillow

    In order to get this thing square and level and all that other good stuff, you need one person holding the lumber steady and level while the other is screwing it together.

    So, after dropping all of my crazy notions into the bottle of beer I was drinking, Grunt Labor, Nicky and I all ended up putting the banquette together. Grunt and I built the bases, then Nicky came over to help with the cutting of the panels to go on the front and sides of the banquette because I was wrapped up in getting the rest of the house ready for an upcoming party. It truly takes a three man effort around here often and I am so damn lucky that God saw fit to give me two husbands for the heavy lifting and mopping up of my emotional breakdowns.

    Learn how to build a basic kitchen banquette or corner bench with this DIY Kitchen Banquette tutorial - makes great built-in seating.

    Pendant Light

    I may not have gotten that nod from my Pap that I was hoping for, but I’m damn sure certain I got a big ole’ belly laugh from him.

    You can find the full tutorial for how to build the banquette on Behr’s Designer Stories. Just remember, this one calls for reinforcements. 🙂

    And if you want to see our full kitchen remodel, it’s here.

    Black, White and Brass Kitchen Remodel | High End Kitchen on a Budget | Black and White Kitchen Ideas | Black and White Kitchen Design

    Pin This Post

    Learn how to build a basic kitchen banquette or corner bench with this DIY Kitchen Banquette tutorial - makes great built-in seating.

    Disclosure: This project was in partnership with Behr Paint, however all opinions are 100% my own. 

    SaveSaveSaveSave

  • How to Make Crystal Magnets

    How to Make Crystal Magnets

    Hopefully you’re not too sick of these crystal projects yet. I have just this one and one more up my sleeve to share with you soon!

    This is another easy, ten minutes or less total craft for using the faux crystals.

    Learn how to make crystal magnets with this tutorial for DIY crystals! These dress up a refrigerator and would make a great housewarming gift as well!

    Crystal Magnets!

    Refrigerators deserve to have a little bit of bling in their lives too, right? That grocery shopping list won’t look quite so daunting when it’s in place on the fridge with one of these babies!

    How to Make Crystal Magnets

    Affiliate links included in this post. 

    Tools & Supplies

    Learn how to make crystal magnets with this tutorial for DIY crystals! These dress up a refrigerator and would make a great housewarming gift as well!

    Steps

    Step 1

    Make your faux crystals first. Let them dry overnight before applying them to the magnets.

    Step 2

    Apply E6000 glue to the side of the magnet that will go against the crystal.

    Learn how to make crystal magnets with this tutorial for DIY crystals! These dress up a refrigerator and would make a great housewarming gift as well!

    Place the crystal firmly on top of the glue and set aside to let it dry.

    The next day you can put your magnets into action.

    Learn how to make crystal magnets with this tutorial for DIY crystals! These dress up a refrigerator and would make a great housewarming gift as well!

    I really love how much they pop against our black refrigerator.

    Learn how to make crystal magnets with this tutorial for DIY crystals! These dress up a refrigerator and would make a great housewarming gift as well!

    I think these would be a great little housewarming present for someone as well. You could also use them in an office too!

    You might also want to see…

    Crystal Finials | DIY Crystal Lamp Finial | How to Make Lamp Finials | How to Make Crystals | DIY Faux Crystals | DIY Lamp Finial

    How to Make a Crystal Lamp Finial

    DIY Faux Crystal Vase | DIY Vase Ideas | DIY Vase Decor | Vase Decorating Ideas | Faux Crystal DIY | DIY Faux Crystals | How to Make Crystals

    DIY Crystal Vase

    How to Make Faux Crystal Knobs | Furniture Hardware DIY | Furniture Hardware Ideas | How to Make Crystal Geodes | How to Make Knobs

    DIY Crystal Knobs

    Learn how to make crystal magnets with this tutorial for DIY crystals! These dress up a refrigerator and would make a great housewarming gift as well!

    SaveSave

  • 17+ PicMonkey Tutorials, Tips, and Projects

    17+ PicMonkey Tutorials, Tips, and Projects

    Picmonkey is an online resource for editing photos, creating collages and graphics, making your own watermark, invitations and much more! Not only will you learn Picmonkey photo editing with these Picmonkey tutorials, but you’ll also learn how to make so much more with it!

    This post contains affiliate links. 

    If you have been around here for long enough, you may have heard me chat about Picmonkey – the way I edit pictures online. But the question is, what all can it really do? The short answer: everything. The long answer: collages, recipe cards, labels, tags, and so much more….

    How to Use PicMonkey

    First things first, right? Head to PicMonkey. If you don’t already have an account, go ahead and create one. PicMonkey used to be free, but with upgrades you can buy. Now, it does cost $5.99 a month to use the service. In my opinion, it’s completely worth it. If you’re not sure though about going ahead and signing up for a paid account, I totally get it. You can do a free trial by clicking here.

    Now, onto actually using PicMonkey. Here are some basic PicMonkey tutorials.

    The Beginner’s Guide

    Picmonkey Tutorial for Beginners

    If you haven’t done much with PicMonkey before, then you should probably start with this beginner’s guide.

    PicMonkey Photo Editing Tutorials

    Editing Baby Pictures with PicMonkey

    Picmonkey Photo Editing - Babies

    This Picmonkey tutorial from We Lived Happily Ever After is a great guide for editing not only baby photos but other photos as well. Seriously, look at that photo! Gorgeous! This gal knows her PicMonkey!

    30 Second Edits on PicMonkey

    Editing Photos with PicMonkey

    Ummm, seriously, do you see the difference in those two photos? Yes, people. PicMonkey can do that with its photo edits. Creative Cain Cabin will show you how to make these 30 second edits. 

    Create Collages with PicMonkey

    How to Use PicMonkey

    Sweet C Designs has the deets on making collages with Picmonkey.

    PicMonkey Tutorials for Making Your Own Cards, Invitations, Party Decor and More

    Birthday Party Invitation using PicMonkey

    Picmonkey Tutorial for Party Invitations

    For the kid’s second birthday, I made this fun party invitation on PicMonkey.

    Farm Party Invitation Using PicMonkey

    Picmonkey tutorial for birthday invitations

    We had a farm themed party for another one of the Circus’ birthdays and I made this farm themed birthday invitation for it.

    Superhero Party Banner using PicMonkey

    Picmonkey tutorial for party decor

    When the Circus had a superhero party, I made this customizable superhero banner for the party.

    Chalkboard Birthday Party Invitation 

    Picmonkey tutorials for making party invitations

    Last year, for the kid’s blue and pink 1st birthday party, I created her invitations in Picmonkey.

    Christmas Cards using PicMonkey

    Picmonkey tutorial for Christmas cards

    Christmas cards can be so expensive. Why not use Picmonkey to make your own and save a lot of dough?

    PicMonkey Tutorials for Creating Your Own Art, Graphics, and More

    Make your Own Wall Art

    How to Use PicMonkey to Make Your own Art

    When I was working on my master bedroom makeover last year, I needed new wall art, but didn’t want to spend a lot of money. I ended up making my own DIY Wall Art.

    Create Labels with PicMonkey

    How to use picmonkey to make labels

    Blissful Roots will show you how to make your own labels in Picmonkey.

    Make Recipe Cards

    Picmonkey tutorial for a recipe card

    Anyone else have a hot mess of a recipe box? Please don’t say its just me! Find out how to make a recipe card here and tame that hot mess!

    Make Printable Holiday and Gift Labels

    How to use picmonkey to make gift labels

    Don’t buy labels or gift tags again! Make your own with this tutorial from The Importance of Being Reese.

    Create Chalkboard Art and Printables

    How to use picmonkey to make chalkboard art

    Here’s another great tutorial for creating chalkboard art from House of Hawthornes.

    Picmonkey Tutorials for Bloggers

    Making Photos Pin-Worthy

    How to use Picmonkey for Bloggers

    Making your photos pin-worthy is super important for bloggers. These are my tips I use when editing photos with PicMonkey.

    Favorite Things Graphics

    Picmonkey Tutorial for creating graphics

    Honey We’re Home has a great tutorial for creating favorite things graphics.

    How to Make Watermarks with PicMonkey

    Picmonkey tutorial for creating watermarks

    I love this tutorial on creating a custom and transparent watermark.

    Are you ready to dive in and learn how to use Picmonkey so that you can follow some of these PicMonkey tutorials?

    pin-this-post

    Picmonkey Tutorials for Editing Photos, Invitations, Art and More

    You know you don’t wanna miss any of this crazy.

    Stalk Me Here:

    Pinterest / Facebook / Twitter / Instagram


    SaveSave

  • How to Make a Crystal Lamp Finial

    How to Make a Crystal Lamp Finial

    This crystal project might just be my favorite project to come out of the faux crystal tutorial I shared a couple of weeks ago.

    A crystal lamp finial.

    Learn how to make lamp finials with this tutorial for how to make a crystal lamp finial. It also shows you how to make your own faux crystals.

    You guys know that I’m a big details person and one of my favorite places to add those little wonderful pops of detail is with lamp finials.

    It’s just damn glorious.

    And no, I’m not being too dramatic. 

    Here’s how to make these little beauties…

    How to Make a Crystal Lamp Finial

    Affiliate links included in this post. 

    Tools & Supplies

    Learn how to make lamp finials with this tutorial for how to make a crystal lamp finial. It also shows you how to make your own faux crystals.

    Steps

    Step 1

    After you’ve made your crystals, let them fully dry overnight before making the finials.

    When the crystals are ready, apply a dollop of E6000 glue to the finial base, then carefully push the crystal onto the glue.

    Learn how to make lamp finials with this tutorial for how to make a crystal lamp finial. It also shows you how to make your own faux crystals.

    Step 2

    Leave the finial upright and let it fully dry overnight. You can nestle the finial in a small bowl of uncooked rice to stabilize it and keep it from falling over while it’s drying.

    The next day you can screw it onto your lamp top.

    Learn how to make lamp finials with this tutorial for how to make a crystal lamp finial. It also shows you how to make your own faux crystals.

    I’m completely smitten.

    You could also use these crystals to just embellish plain lamp bases or lampshades if your lamp doesn’t allow you to use a finial. Just use the glue to attach them to the lamps or shades as you wish!

    You might also want to see…

    How to Make Faux Crystal Knobs | Furniture Hardware DIY | Furniture Hardware Ideas | How to Make Crystal Geodes | How to Make Knobs

    DIY Faux Crystal Knobs

    DIY Agate Slice Lamp Finials: GORGEOUS - and simple to make! / DIY Projects / Crafts / Home Decor Projects

    How to Make Agate Slice Lamp Finials

    Learn how to make lamp finials with this tutorial for how to make a crystal lamp finial. It also shows you how to make your own faux crystals.

    *Affiliate links may be contained in this post. That just means that if you click on one of those links and buy something, I may receive a small commission, but you won’t pay a dime more.

    SaveSaveSaveSaveSaveSave

  • DIY Faux Crystal Vase

    DIY Faux Crystal Vase

    I’ve got another quick little 10 minute faux crystal project for you today! I really love these little things – they are so pretty and simple to make!

    This time around, I used one of the faux crystals to embellish a simple vase. You may already have one of these vases lying around!

    Embellish plain vases with these faux crystals! Use this tutorial for a DIY Faux Crystal Vase to make your own in 10 minutes or less!

    Doesn’t the crystal just add a simple touch of glam to the vase?

    DIY Faux Crystal Vase

    Affiliate links included in this post. 

    Tools & Supplies

    Embellish plain vases with these faux crystals! Use this tutorial for a DIY Faux Crystal Vase to make your own in 10 minutes or less!

    StepsStep 1

    After you’ve made your faux crystal(s), let them fully dry overnight before applying them to your vase. Choose a side on your vase to put the crystal on and make sure it is clean. If you wipe it off, be sure to let it dry before applying the crystal.

    Step 2

    Apply E6000 glue to the backside of the crystal and firmly push it into place on the vase.

    Embellish plain vases with these faux crystals! Use this tutorial for a DIY Faux Crystal Vase to make your own in 10 minutes or less!

    Keep the vase on it’s side and allow the glue to dry overnight.

    Embellish plain vases with these faux crystals! Use this tutorial for a DIY Faux Crystal Vase to make your own in 10 minutes or less!

    Fill with your favorite flowers!

    Embellish plain vases with these faux crystals! Use this tutorial for a DIY Faux Crystal Vase to make your own in 10 minutes or less!

    I really love the simple, but chic look these faux crystals add to the vase – and it’s such an easy project! If you have a taller vase, you could line multiple crystals up vertically as well.

    What favorite flowers would you use to fill these DIY Faux Crystal Vases?

    You might also want to see…

    How to Make Faux Crystal Knobs | Furniture Hardware DIY | Furniture Hardware Ideas | How to Make Crystal Geodes | How to Make Knobs

    How to Make Faux Crystal Knobs

    Crystal Finials | DIY Crystal Lamp Finial | How to Make Lamp Finials | How to Make Crystals | DIY Faux Crystals | DIY Lamp Finial

    How to Make a Crystal Lamp Finial

    How to Make Crystal Magnets | DIY Crystal Magnets | DIY Crystal Crafts | Easy Crafts | How to Make Crystals DIY | Crystal Magnets

    How to Make Crystal Magnets

    It's so easy to DIY your own and much cheaper than buying one already made! DIY Lucite Handrail | Acrylic Handrail | Lucite Home Decor | Stairwell

    DIY Lucite Handrail

    Embellish plain vases with these faux crystals! Use this tutorial for a DIY Faux Crystal Vase to make your own in 10 minutes or less!

    *Affiliate links may be contained in this post. That just means that if you click on one of those links and buy something, I may receive a small commission, but you won’t pay a dime more. 

    SaveSave

  • DIY Faux Crystal Knobs

    DIY Faux Crystal Knobs

    I am a details person. I love little knick-knacks and those small things that make a statement. As a prime example, I have way too many brass lions because I just can’t stand to leave one behind at thrift stores. I think all those little details really help to set a space apart and even give a nod to your personality in a room.

    These DIY faux crystal knobs are one of those small details that give a big impact.

    I made these using the tutorial for the DIY faux crystals I wrote about earlier in the week.

    Give your furniture doors and drawers a touch of affordable glam with these easy to make DIY faux crystal knobs! It will take less than 10 minutes!

    How to Make Faux Crystal Knobs

    This post contains affiliate links for your shopping convenience. Click here to read my full disclosure policy.

    Tools & Supplies

    Give your furniture doors and drawers a touch of affordable glam with these easy to make DIY faux crystal knobs! It will take less than 10 minutes!

    Steps

    Step 1

    After you’ve made your faux crystals, be sure to let them fully dry overnight before making your knobs.

    To make the knobs, all you need to do is apply E6000 glue to the flat knob base, then firmly push the crystal onto the base.

    Give your furniture doors and drawers a touch of affordable glam with these easy to make DIY faux crystal knobs! It will take less than 10 minutes!

    Leave the knobs upright and let them dry overnight. If you’re worried about your knobs knocking over, then nestle them into a bowl of rice. I did this when I made selenite knobs and it worked like a charm.

    The next day you can attach the crystal knobs to your furniture!

    Give your furniture doors and drawers a touch of affordable glam with these easy to make DIY faux crystal knobs! It will take less than 10 minutes!

    That’s all you have to do to make these beauties! Almost too good to be true, right?

    You get bonus points if you attach them to a really colorful piece of furniture that just makes those crystals sing. 😉

    Stay tuned because there are more DIY faux crystal projects coming your way!

    You might also want to see..

    DIY Selenite Knobs - These are GORGEOUS! Plus, they cost LESS than $1 per knob to make! / DIY Hardware / Gem Knobs / Gem Hardware / Stone Knobs / Stone Hardware

    How to Make Selenite Knobs

    DIY Faux Crystal Vase | DIY Vase Ideas | DIY Vase Decor | Vase Decorating Ideas | Faux Crystal DIY | DIY Faux Crystals | How to Make Crystals

    DIY Faux Crystal Vase

    Crystal Finials | DIY Crystal Lamp Finial | How to Make Lamp Finials | How to Make Crystals | DIY Faux Crystals | DIY Lamp Finial

    How to Make a Crystal Lamp Finial

    Give your furniture doors and drawers a touch of affordable glam with these easy to make DIY faux crystal knobs! It will take less than 10 minutes!