Author: Jenna

  • How to Build a Kids Stage with Dress-Up Clothes Storage

    How to Build a Kids Stage with Dress-Up Clothes Storage

    This kids stage is the perfect addition to your child’s playroom or bedroom! The DIY stage is a simple build that will provide loads and loads of fun and entertainment for years to come…

    All I ever wanted to be was either Reba McEntire or Dolly Parton.

    I mean really, that isn’t too much to ask, is it?

    I didn’t think so either.

    When my singing voice never quite caught up with my dreams, I decided I would be ok being a Modern Day Minnie Pearl. I mean, Minnie Pearl. She was amazing. And funny as shit. I could do that.

    Well that never panned out either.

    So when the Circus started falling in love with music, singing and dancing up a storm, and became quite fond of the one and only Dolly, I basically decided that when it came to music and singing, she could have whatever her little heart desired and maybe by the grace of God, she would end up with a good singing voice and I would get to live out my country music dreams vicariously through her.

    Yep. I’m that mom.

    And so the idea of a stage all her own was born.

    DIY Children's Stage - easy build for your child's playroom, also has hidden dress-up clothes storage.

    We call it Landry’s Lounge.

    I am also quite fond of alliteration, but that’s for another blog post.

    She even has a “backstage” where she can select from a variety of outfits to suit her performance needs.

    How to Build a Stage - dress-up clothes storage - Rain on a Tin Roof

    This is a pretty simple build, but you’re working with heavier lumber, so I do advise you have two people on deck for moving the stage into place. I’m going to provide you with the dimensions of our stage, however you can easily change the dimensions to fit your own needs. We wanted the Circus’ stage to fit and fill one side of her playroom, wall to wall, thus how we came up with our stage dimensions.

    How to Build a Stage

    This post contains affiliate links for your shopping convenience. Click here to read my full disclosure policy.

    Tools & Supplies 

    As a point of reference, our stage is 48″ x 57″. The list below is for a stage that size. You can easily modify our dimensions to fit your own needs.

    For the Actual Stage:

    For the Stage Header / Sign:

    For the Hidden Dress-Up Storage and Curtains:

    Side note: you could totally build this with 2x4s instead of 2x6s. We wanted her stage elevated more than 2x4s would give us though, thus why we went with 2x6s.

    Steps

    To make the playroom stage:

    Step 1

    Cut your 2″ x 6″ pieces to size using a circular saw or miter saw. You’ll need the following lengths:

    • 2 cut at 48″
    • 5 cut at 54″ (You will have to sister two pieces of 2″ x 6″ together to get one of these.)

    Assemble the pieces as shown below:

    DIY Stage - assembling the stage - Rain on a Tin Roof

    Step 2

    Attach the outside pieces together first by screwing two  3″ construction screws in at all the corners.

    Playroom Stage - assembling the corners of the stage - Rain on a Tin Roof

    Step 3

    Attach the inside pieces by screwing two 3″ constructions screws in along the outside pieces thru to the inside pieces. Use screws to also sister the two separate 2″ x 6″ pieces together.

    Step 4

    Lay the frame on top of the sheet of plywood and trace around it onto the plywood.

    Playroom Stage - cutting the top of the stage - Rain on a Tin Roof

    Use a circular saw to cut along the traced line.

    Step 5

    Use more construction screws along the corners and edges to attach the plywood to the frame.

    Small Stage for Playroom - attaching the top of the stage - Rain on a Tin Roof

    Step 6

    Paint it!

    Kids Stage for Playroom - painting the stage - Rain on a Tin Roof

    Like I said above, we used Behr’s Alkyd paint. I knew this thing would take a beating from the Circus and had actually planned on using oil-based paint which is super durable. However, the paint guy talked me into trying the Alkyd paint since it acts like oil-based paint in terms of durability but goes on like latex. It does have a smell though. It’s not as smelly as oil-based, but enough that I didn’t let the Circus sleep in her room for a couple of nights while this thing was still curing. She chose the purple paint color which is called Just a Fairytale. We did two coats of the paint.

    Step 7

    Cut the 1″ x 10″ x 8′ down to the length of your stage front. You will also have to cut down the height of this piece as well to match the height of your stage so that you don’t have a lip on the front of your stage which equals hurt kiddos. With the dimensions of our stage, we cut the 1″ x 10″ x 8′ down to 57″ long and 8″ tall. Paint this piece as well and then attach it to the front of the stage with finish nails and a hammer or a nail gun. We also added glittered wood stars to ours, which we just attached with hot glue.

    That’s it for the actual stage part!

    To make the stage header / sign:

    Step 1

    Cut your 1″ x 10″ x 8′ down to the width of your stage or the width from wall to wall if you are making your stage like ours.

    Step 2

    Paint and embellish it. We added wooden stars coated with gold glitter, and the sign that reads Landry’s Lounge. We hot-glued the stars on and then once the header was hung, I attached the Landry’s Lounge sign with a nail gun.

    Step 3

    Use corner braces to attach the sides of the board to the wall on each edge. If you aren’t going wall to wall, you can attach the braces on the board and then onto the ceiling above.

    To create the hidden dress-up storage and curtains:

    Step 1

    Install the shower curtain tension rod toward the back of the stage at a height your child can easily reach.

    How to Build a Stage with Hidden Dress-Up Clothes Storage - curtain hiding clothes - Rain on a Tin Roof

    Step 2 

    Run one of the tension rods through two of the curtain panels. Hang that curtain tension rod higher up on the wall, almost to the ceiling and slightly in front of the shower curtain tension rod. This will allow the curtains to cover up the play clothes when they are closed. It also creates a pretty backdrop as well.

    Kids Playroom DIY Stage - open curtains on stage - Rain on a Tin Roof

    Step 3

    For the curtains in the front of the stage, run two panels through a tension rod, then install it just behind the stage header.

    We opted for the yellow curtains (more colors also available!) because they complimented the purple so well. Now, these aren’t something I would hang up to block out light because they are thin, but for this little budding performer and her stage, they are perfect.

    We also replaced what was a single bare bulb light fixture with this chandelier to make it a bit more glam. The Circus picked it out and lord help us all, she is totally champagne taste on a beer budget.

    She got her microphone for Christmas and we have all had the best time playing with it. It also has a speaker attached to it that can hook to Bluetooth.

    Building a Kids Stage in a Playroom - Curtains Closed - Rain on a Tin Roof

    Fingers are crossed that this is just a small investment towards stardom. 😉

    But it’s ok too if she just decides to live a simple life. I mean, I might be a little bitter, but it’ll be ok. 😉

    Will you be creating a small stage for a playroom?

    More kiddo related posts you should see…

    How to Build Wall-to-Wall Shelving – these are perfect for toy storage!

    DIY Dress-Up Closet – this is made from a bookcase!

    How to Create an Object and Text Feature Wall – perfect decor addition to their bedrooms that display their fun personality!

    If you want to save this post to look at later, you can pin it here:

    How to Build a Small Stage for a Playroom - with hidden storage - Rain on a Tin Roof

    Gift Ideas Signature

    SaveSave

    SaveSaveSaveSave

  • How To Get a Layered Caribbean Blue Look When Painting Furniture

    How To Get a Layered Caribbean Blue Look When Painting Furniture

    This post is sponsored by Velvet Finishes, however all opinions are 100% mine. Affiliate links are included in this post.

    Rarely do furniture projects go as planned around here.

    In fact, they often go full speed ahead, jump the track and end up over the bridge in the opposite direction of where I had intended it to go.

    But then there are those few.

    Those few little pieces that when I’m working on them, it’s just like they whisper to me, “But what if…”

    And sometimes that “what if” ends in a big ball of fire.

    But sometimes, every once in a while, those “what ifs” end in something pretty cool.

    How to get a layered Caribbean Blue Look When Painting Furniture

    From far away, this little table might not look like much.

    But it’s not just a blue painted table, y’all. Look a little closer…

    Easy furniture painting technique - create a Caribbean Blue finish by layering colored glazes.

    It’s actually a blue-green table that I’m calling Caribbean Blue. See all that glorious color layering going on there? It was so easy to do.

    And I’m going to show you just how easy.

    How To Get a Layered Caribbean Blue Look When Painting Furniture

    How to get a layered Caribbean Blue Look When Painting Furniture - the supplies.

    Step 1

    My table looked like this to begin with:

    How to get a layered Caribbean Blue Look When Painting Furniture - the table before.

    It was a remnant from Grunt’s Grandmother’s estate sale. It had a few dings and dents as much old furniture will, but it had pretty good bones. I started by cleaning and deglossing it at the same time with Velvet Finishes Ready. Simply spray it on, let it sit a minute or two, then wipe it clean with paper towels or an old towel.

    Step 2

    Like I said, I had a different plan originally for this table. I was going to paint it in Velvet Finishes Baroque and then outline it so to speak, along all the lines and corners with white. So, I started by giving it about two coats of the Baroque.

    How to get a layered Caribbean Blue Look When Painting Furniture - first coat of paint.

    I just painted it on with a good paintbrush. It covered really well and stuck to the table nicely. The photo above is after the first coat.

    Step 3

    Once I got finished with the Baroque, was when the table whispered to me.

    You know – the “What if….”

    And so my mind wondered to making some colored glazes to layer on top of the green.

    And then I thought about how well blues and greens often go together, so I pulled out my Handsome and Modern paints and started mixing up glazes.

    How to get a layered Caribbean Blue Look When Painting Furniture - mixing the colored glaze.

    I started with Handsome. Making colored glazes is super easy with Velvet Finishes. All you do is add a little bit of their Enhance Clear Glaze to a plastic cup, add a little paint to it and mix.

    How to get a layered Caribbean Blue Look When Painting Furniture - mixing the colored glaze.

    Since this was a small table, I didn’t need much of either at all. I added a splash of glaze, then a trickle of paint and mixed.

    Then, you just paint it on with your paintbrush.

    How to get a layered Caribbean Blue Look When Painting Furniture - applying the colored glaze.

    The photo above shows one layer of the Handsome. Work in small sections. If you get more than you like in one spot, just wipe it up with a cloth.

    You can add as many layers as you wish. I ended up doing one layer of the Handsome glaze, then two layers of the Modern glaze to get my Caribbean Blue look. I made the Modern glaze the same way as the Handsome, just switching out the Handsome color for Modern, which is a lighter and brighter blue than the Handsome.

    How to get a layered Caribbean Blue Look When Painting Furniture - easy furniture painting technique.

    The Enhance Glaze also works as a topcoat, so you’ve got some added protection built-in there.

    How to get a layered Caribbean Blue Look When Painting Furniture

    If you prefer to have more green than blue, then you could flip-flop my instructions and paint the blue on first, then come back with green glazes.

    Easy furniture painting technique - create a Caribbean Blue finish by layering colored glazes.

    I think it has a worn and weathered type look, but in a modern way. What do you think?

    You might also want to see…

    How to Create a Beachy Colored Look with Paint – gorgeous layered, washed out color.

    How to Make Furniture Glaze in Any Color – yep, ANY color! And it’s easy!

    How to Paint a Plaid Pattern without Measuring – All you need is tape!

    Gift Ideas Signature

    Pin This Post

    How to get a layered Caribbean Blue Look When Painting Furniture - easy way to paint furniture by layering on colored furniture paint glazes.

    SaveSave

  • How to Paint Baseboards

    How to Paint Baseboards

    Painting baseboards and all trim in general can be a tedious, time consuming task. After remodeling four homes, I’ve learned a few tips for all that tedious trim painting. Here are my tried and true methods for how to paint baseboards quickly. 

    When you decide to renovate a house, you pretty much know that the renovation will include painting just about every single room.

    But when you see that house the first couple of times, you are too caught up in the potential to realize just how much painting there is to do – and not just painting of walls, but also of ceilings. And baseboards. And basically all trim. And all doors. Oh and then all cabinets.

    And that’s when you want to go in a corner and cry and hide and ask yourself why, why, why did we do this to ourselves??? 

    Oh ok, that’s just me. 

    No it’s not. Admit it. You’ve been there or at least been in a similar situation. 

    Every single room, every single door, cabinet, baseboard and piece of trim have to be painted in the 70’s Landing Pad.

    Now, I wasn’t too concerned about how much time it would take to paint the walls – rolling doesn’t take too long. The same was true of the doors and cabinets – I would be able to spray a good portion of those with my paint sprayer.

    All the trim though – particularly all the miles and miles and miles of baseboards were causing a touch of anxiety.

    But get this – in the end, it took me about 30 minutes (minus drying time) to paint all the baseboards in the living room, dining room, and hallway of the 70’s Landing Pad. Let me give you an idea of how much baseboard that is:

    Living Room

    Painting Baseboards

    Dining Room

    How to Paint Baseboards Fast

    HallwayPainting Baseboards Fast

    That’s a heck of a whole lot of baseboards to paint. What I did in this case may not be ideal for everyone. Don’t worry though – I’m going to give you a few different methods for painting baseboards and you can determine which is best for you and your home.

    How to Paint Baseboards With a Paint Sprayer

    If you only have one small room to paint baseboards in or if you’re painting trim in a room full of carpet and furniture, then a paint brush is going to be your best option. Go on and skip ahead to method #2. If you have a ton of baseboards to paint though and you’re also ripping up carpet, then this might be for you. This method works best when you also have to paint the walls in the room as well.

    Supplies:

    Steps

    Step 1: Prep Work

    For us, we are having to replace all the flooring in the 70’s Landing Pad. When we pulled up the old flooring, we realized that when the house was built, the baseboards had been put right on top of the subfloor, instead of putting them about 1/4″ above the subfloor to allow room to slide new flooring under. Since this was the case, we carefully pulled off all the old baseboards, then put it right back on the wall, but 1/4″ higher. We actually used a scrap piece of our new flooring to place under the baseboard for measurement, then tacked it on to the wall.

    If you are not replacing your flooring, but still have miles and miles and miles of baseboard to paint, then you could take off your baseboards, mark where each one goes on the back and cover that with a piece of painter’s tape. Then, take the baseboards outside and use a paint sprayer to spray them (I’ll get to the specifics of that in a bit.)

    Fill any nail holes with wood putty, let dry and sand smooth (there’s a tutorial here for filling holes). If you have a gap between the top of your baseboard and the wall, fill it with caulk, smooth it and let it dry.

    Take all outlet covers off and tape over the outlets.

    Vacuum up any dust, dirt or debris that is surrounding the baseboards.

    Step 2: Get your paint and paint sprayer ready.

    Painting Baseboards with a Paint Sprayer

    The best paint for baseboards are ones with a semi-gloss or gloss finish. These are the most durable and scrubbable. These areas tend to get beat up quite easily and semi-gloss is easier to clean than flat, satin or eggshell sheens. Get out your paint sprayer and fill up the cup about 1/2 – 3/4 full, then thin your paint down to the correct consistency. There’s a guide here for thinning your paint.

    Adjust the spray pattern to be vertical by turning the air cap on the front of the sprayer as shown below.

    How to Paint Baseboards with a Paint Sprayer

    When the “wings” as I call them are horizontal, the paint will spray in a vertical pattern.

    Step 3: Paint the baseboards.

    Plug in the sprayer. Hold the Finish Max about 10 inches away from the baseboard.

    Tips for Painting Baseboards

    Pull the trigger and start painting. Stay in constant motion, but moving slowly across the baseboard. Don’t stay in one place for too long.

    How to Paint Baseboards Fast with a Paint Sprayer

    You can see how the paint will get on the wall and floor as well. This is why I said if you aren’t replacing the flooring or painting the wall, to pull the baseboards off and spray them outside. When you put them back up, fill the nail holes and touch up those spots with a brush. It will still save you loads of time if you have a lot of baseboard to paint.

    Let the paint fully dry before doing another coat. I did two coats total.

    If you did get some drips from staying in one place too long, then simply run your paintbrush over those before it dries.

    Tips for Painting Baseboards Fast

    I plan on using this method again in the master bedroom before laying the new carpet and in multiple rooms downstairs as well.

    How to Paint Baseboards with a Brush

    If you aren’t in the middle of a big home remodel and painting baseboards with a sprayer isn’t ideal for you, then you can still get a great finish on your baseboards with a good ol’ paintbrush.

    Supplies:

    Steps

    Step 1: Prep Work

    Fill nail holes with wood putty if needed, then let dry and sand smooth.

    If you have a gap or any cracks between the top of your baseboard and the wall, fill it with caulk, smooth it and let it dry. Do the same in corners where the baseboards meet.

    Wipe down all the baseboards with a wet cloth to remove any dust and dirt.

    Tape off the wall just above the baseboard and the carpet below the baseboard. You can also put plastic down on the ground if you’re worried you might get paint on your flooring.

    Step 2: Prepare your paint. 

    Mix the Floetrol with your paint as the instructions say to on the bottle. The Floetrol is excellent for reducing brush strokes in your paint finish after it dries. If this isn’t something you’re worried about, you may skip this step.

    Step 3: Paint the baseboards.

    Dip your paintbrush only about 2/3s of the way up the brush into the paint. Remove excess paint from the brush by gently wiping the brush along the sides of the paint tray or container.

    Brush the paint onto the baseboards in long even strokes. Do not go back and forth. Go in one direction.

    Step 4: Repeat.

    After the first coat is dry, give the baseboards a second coat if needed. After the final coat of paint, immediately remove the tape from the wall and floor to prevent the new paint from peeling off the baseboards.

    Have any tips or tricks you can add for painting baseboards?

    You might also want to see…

    How to Paint Trim and Doors: A step-by-step guide for painting trim and doors including what kind of paint to use, what the best tools are and how to get a professional paint job.

    How to Paint Doors and Trim

    pin-this-post-2

    Painting Baseboards

    blog-signature-summer-15

    You know you don’t wanna miss any of this crazy.

    Sign up to get my posts delivered to your inbox here.

    Stalk Me Here:

    Pinterest / Facebook / Twitter /  Instagram

    Disclosure: This post was a collaboration with HomeRight. However, all opinions and baseboard painting hacks are 100% mine.

  • A Colorful Christmas Home Tour

    A Colorful Christmas Home Tour

    Yesterday, I shared a home tour of our farmhouse all decked out with its Christmas decor. Today, I’ve got a holiday home tour of the 70’s Landing Pad and it’s pretty different from the farmhouse…

    While both are filled with decorations full of memories and many vintage, this one is quite a bit more colorful. I love both equally.

    If you’re coming over from Carmel at Our Fifth House, welcome! Carmel has been of my favorite bloggers for a while now. I’ve always admired her knack for creating such beautiful spaces that echo her and her family’s personalities. And also, a big thanks to Marti from A Stroll Thru Life for hosting this home tour blog hop – be sure to take a peek at her holiday home tour filled with some gorgeous touches of gold.

    Like I said in my post yesterday, stress and I were BFFs when it came to Christmas decorating this year – until I finally realized how stupid being stressed about decorating for the holidays was. After that, I decided to go simple. For the most part, I used all the decorations I already had and just threw ’em around. 😉 I hope you enjoy my take on Christmas decorating this year…

    This post contains affiliate links for your shopping convenience. Click here to read my full disclosure policy.

    A Colorful Christmas Home Tour

    The Living Room

    A Colorful Christmas Home Tour - simple holiday decorating ideas full of color!

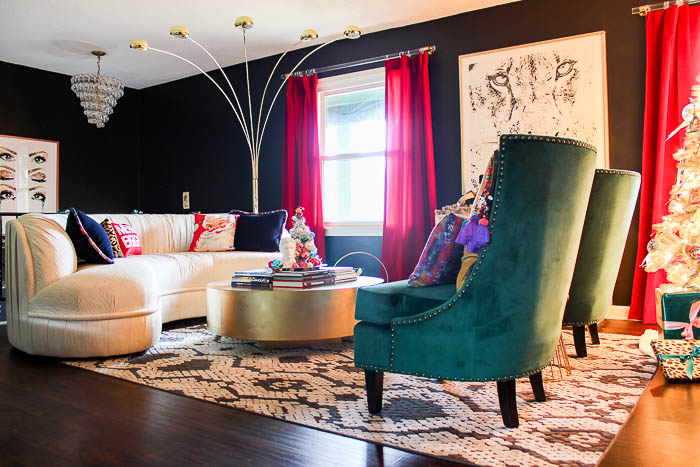
    Last year was our first year in the 70’s Landing Pad and while I love, love, love my black walls, I was worried that the Christmas decorations wouldn’t mesh too well with them. Well, I was wrong – they were perfect, in my opinion anyway. I loved how all the colors just bounced off the walls and this year was no exception.

    A Colorful Christmas Home Tour - simple holiday decorating ideas full of color!

    Sofa (similar) / Coffee Table (similar) / Floor Lamp / Red Drapes

    A Colorful Christmas Home Tour - simple holiday decorating ideas full of color!

    Winking Santa Pillow

    A Colorful Christmas Home Tour - simple holiday decorating ideas full of color!

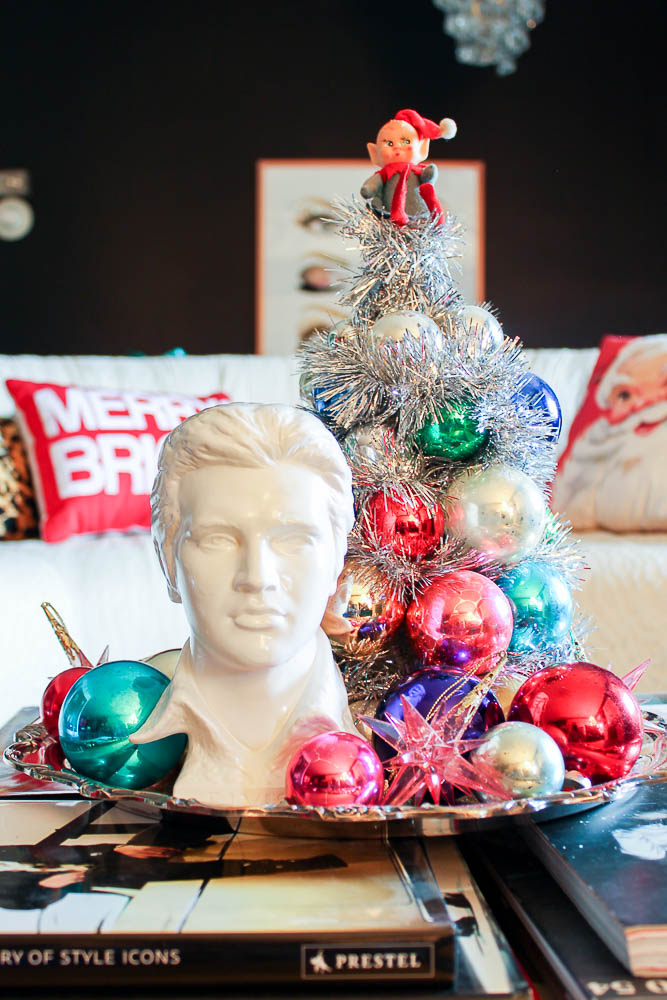
    Elvis Bust (similar ones) / DIY Ornament Tree

    Elvis always has to make an appearance in my Christmas home tour every year. This little bust is one of my favorite finds ever. This year, he is nestled beside some vintage glass ornaments and my DIY glass ornament tree.

    A Colorful Christmas Home Tour - simple holiday decorating ideas full of color!

    A Colorful Christmas Home Tour - simple holiday decorating ideas full of color!

    A Colorful Christmas Home Tour - simple holiday decorating ideas full of color!

    Lion Art

    A Colorful Christmas Home Tour - simple holiday decorating ideas full of color!

    I used a few of my ornament clusters together in the middle of the bar. You’ll also see lots of wrapped gifts popping up everywhere. Around here, our gifts also double as decor!

    A Colorful Christmas Home Tour - simple holiday decorating ideas full of color!

    Brass Unicorn (similar ones)

    I created the ornament drink stirrers just like I did with the skull drink stirrers from Halloween – I love the added pop of color from them and the fun they add to this area.

    A Colorful Christmas Home Tour - simple holiday decorating ideas full of color!

    A Colorful Christmas Home Tour - simple holiday decorating ideas full of color!

    Green Chairs / Mustard Pillows with Tassels / Multi-Colored Pillows

    A Colorful Christmas Home Tour - simple holiday decorating ideas full of color!

    A Colorful Christmas Home Tour - simple holiday decorating ideas full of color!

    Vintage Santas are probably my favorite vintage decorating item. I like to scatter them all around.

    A Colorful Christmas Home Tour - simple holiday decorating ideas full of color!

    A Colorful Christmas Home Tour - simple holiday decorating ideas full of color!

    Our tree is filled with ornaments that are special to us. They don’t match, but they make us smile.

    A Colorful Christmas Home Tour - simple holiday decorating ideas full of color!

    A Colorful Christmas Home Tour - simple holiday decorating ideas full of color!

    DIY Vintage Storybook Bunting Garland

    A Colorful Christmas Home Tour - simple holiday decorating ideas full of color!

    The Kitchen

    A Colorful Christmas Home Tour - simple holiday decorating ideas full of color!

    Last year, I had hung little wrapped gifts over each of the cabinet doors. I wasn’t super crazy about them, so this year I cut up some faux greenery, added in glittery faux leaves, a ribbon and ornament and used those for the cabinet doors.

    A Colorful Christmas Home Tour - simple holiday decorating ideas full of color!

    Faucet

    A Colorful Christmas Home Tour - simple holiday decorating ideas full of color!

    I like how the black cabinet doors make them pop.

    A Colorful Christmas Home Tour - simple holiday decorating ideas full of color!

    I also added in a few more touches of a light pink color around the house in our Christmas decor. The color had that vintage pink look I see on lots of vintage glass ornaments and those are always my favorite color there, so I thought why not incorporate it in more. Who says pink can’t be used during Christmastime?

    A Colorful Christmas Home Tour - simple holiday decorating ideas full of color!

    A Colorful Christmas Home Tour - simple holiday decorating ideas full of color!

    Lucite Wine Bottle Holder

    A Colorful Christmas Home Tour - simple holiday decorating ideas full of color!

    Stirring the Pot Towel

    A Colorful Christmas Home Tour - simple holiday decorating ideas full of color!

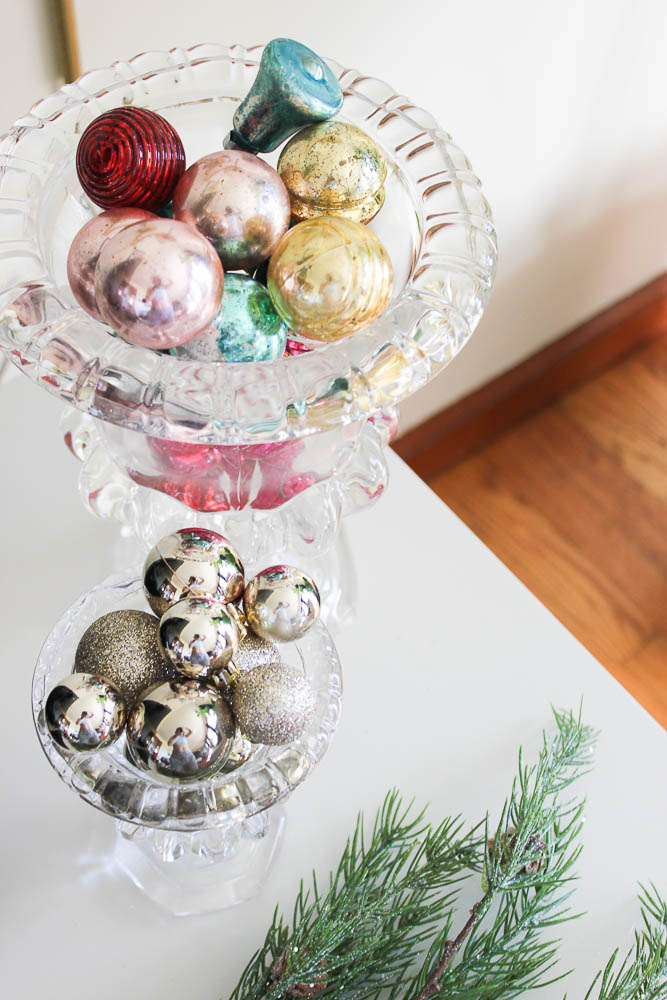
    And of course, we had to have at least one thing sporting my go-to-never-fail holiday decorating method of filling things with glass ornaments. 😉

    A Colorful Christmas Home Tour - simple holiday decorating ideas full of color!

    A Colorful Christmas Home Tour - simple holiday decorating ideas full of color!

    Free Gone with the Wind Printable + DIY Lucite Frame

    A Colorful Christmas Home Tour - simple holiday decorating ideas full of color!

    The Dining Room

    A Colorful Christmas Home Tour - simple holiday decorating ideas full of color!

    Bar Cart / Record Player

    I love how this bar cart turned out all decorated. The metallics that were already on it play perfectly with all the color from the decorations.

    It was all simple decorations though – a glittery leaf garland from JoAnn’s, an ornament cluster on the edge, ornaments filling a champagne bucket, a few gifts and vintage thrifted camels.

    A Colorful Christmas Home Tour - simple holiday decorating ideas full of color!

    Art Above Bar Cart

    A Colorful Christmas Home Tour - simple holiday decorating ideas full of color!

    How to Make Lamp Tassels / How to Make Ornament Clusters 

    My DIY lamp tassels also managed to fit perfectly into the mix.

    A Colorful Christmas Home Tour - simple holiday decorating ideas full of color!

    Red Velvet Drapes / Rug / Glass Table (similar)

    I kept the dining room table super super simple by just using a gold table runner, filling a silver platter with ornaments and flanking it with greenery.

    A Colorful Christmas Home Tour - simple holiday decorating ideas full of color!

    Ivy Art Print

    I did come up with a quick idea for displaying Christmas cards this year…

    A Colorful Christmas Home Tour - simple holiday decorating ideas full of color!

    I used some ribbon to string up a Christmas tree on the wall and then used paper clips to put on the cards. I’m not 100% sold on it yet – what do you think?

    A Colorful Christmas Home Tour - simple holiday decorating ideas full of color!

    The Den

    A Colorful Christmas Home Tour - simple holiday decorating ideas full of color!

    Rug / White Christmas Tree

    Last year, we didn’t have a Christmas tree in the den. That is where Santa comes though and I really wanted to get one in there this year. The budget wouldn’t allow for spending too much on one though. I went with this white one that was only $40 (now on sale for $26!) and I was so pleasantly surprised at how good it looked!

    A Colorful Christmas Home Tour - simple holiday decorating ideas full of color!

    Black Chesterfield Sofa

    A Colorful Christmas Home Tour - simple holiday decorating ideas full of color!

    The Circus really wanted colored lights on this tree and I was totally on board with that. To maximize that fun, colorful effect even more, we pulled lots of our more colorful ornaments to use for this tree.

    A Colorful Christmas Home Tour - simple holiday decorating ideas full of color!

    A Colorful Christmas Home Tour - simple holiday decorating ideas full of color!

    A Colorful Christmas Home Tour - simple holiday decorating ideas full of color!

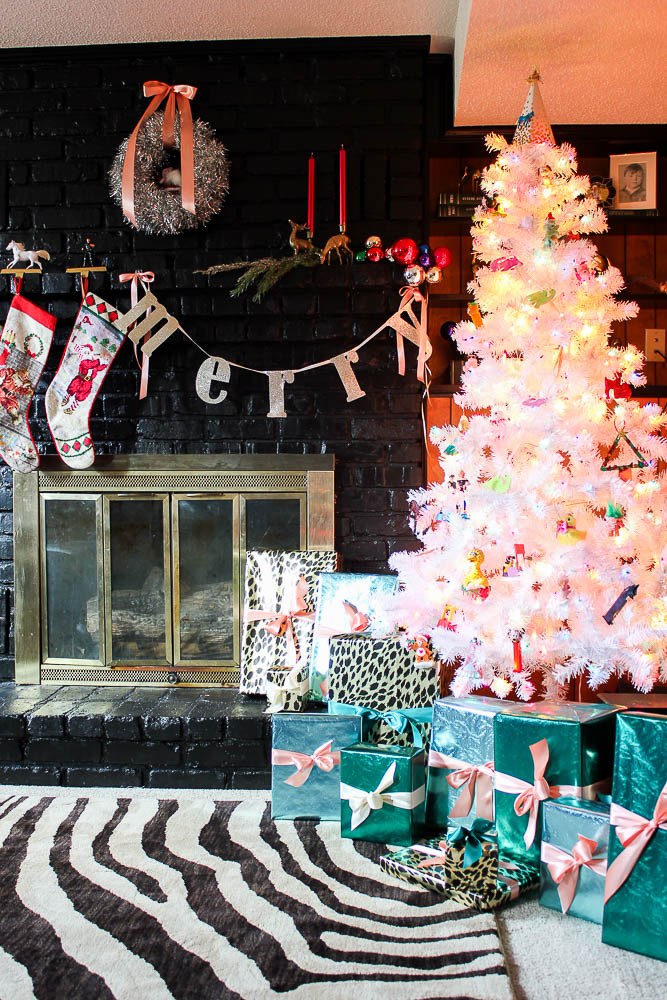
    I think this room has an overall playful Christmas feel and I think that’s perfect for this space since the Circus spends so much time here.

    A Colorful Christmas Home Tour - simple holiday decorating ideas full of color!

    A Colorful Christmas Home Tour - simple holiday decorating ideas full of color!

    DIY Santa Tinsel Wreath

    A Colorful Christmas Home Tour - simple holiday decorating ideas full of color!

    DIY Character Stocking Holders

    Our character stocking holders are of course making a comeback this year – these are too fun not to use!

    A Colorful Christmas Home Tour - simple holiday decorating ideas full of color!

    A Colorful Christmas Home Tour - simple holiday decorating ideas full of color!

    A Colorful Christmas Home Tour - simple holiday decorating ideas full of color!

    A Colorful Christmas Home Tour - simple holiday decorating ideas full of color!

    And of course, we must have a copy of the The Night Before Christmas somewhere around here to read – vintage copies preferred. 😉

    That’s it for our colorful Christmas tour! I shared all the Christmas decor from the farm yesterday, which you can see here if you like!

    I’m the last stop on the tour today; up next tomorrow is Heather from Setting for Four. She always has some gorgeous glam style going on.

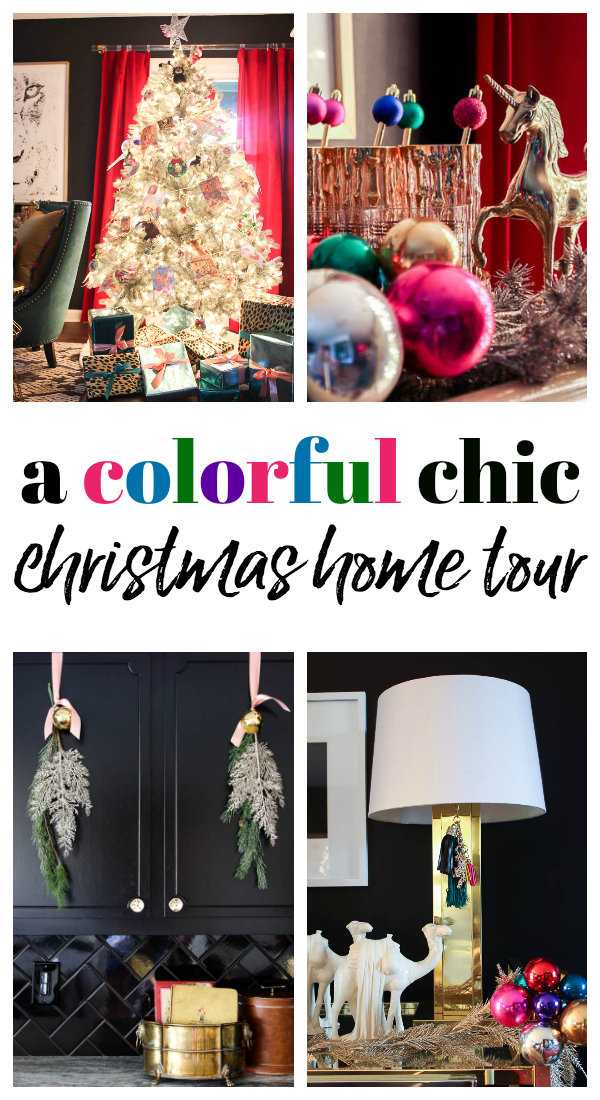
    Pin This Post

    A Colorful Chic Christmas Home Tour - simple holiday decorating ideas full of color!

    SaveSave

    SaveSaveSaveSave

    SaveSave

    SaveSaveSaveSave

    SaveSave

    SaveSave

    SaveSave

  • Vintage Inspired Farmhouse Christmas Tour

    Vintage Inspired Farmhouse Christmas Tour

    I’m going to be honest, y’all.

    Christmas decorating this year was stressful.

    I’m sure that part of it was due to the fact that I was decorating both the 70’s Landing Pad and the farmhouse, but there were some serious moments of wanting to huddle myself in a corner and cry it out.

    And maybe I did.

    Here’s the thing though.

    Decorating for Christmas shouldn’t be like that.

    It should be fun and bring a smile to your face and only a good tear or two to your eye.

    What it all came down to for me this year was that I was trying too hard.

    I was trying to make things better than they were last year. Prettier than they were. More elaborate than they were and on and on and on.

    And that was just stupid.

    And with the farmhouse, I really just wanted my entire family to walk in there and see their faces light up and remember all the wonderful Christmases past that were spent there. If you’re new here and hopping over from The Turquoise Home or another stop on the Seasonal Simplicity Home Tour, the farmhouse was my late grandparent’s home and we’ve been remodeling/updating it since May. Read more about it here.

    And that’s kind of when it hit me.

    My grannie didn’t have that house elaborately decorated each Christmas. She didn’t spend countless hours each year meticulously hanging decorations in every room.

    And you know what?

    Those Christmases were still the best.

    So instead of trying to outdo myself at the farm for Christmas, I instead turned on some good country music by way of the still-going-strong-after-30-years-under-the-cabinet radio and just scattered some holiday decor around.

    There are still more decorations than she ever would have put up, but I think she’d be ok with that. While there are more, they’re simple. And special. And many are filled with memories of Christmases past.

    Affiliate links may be included in this post, which means if you purchase something through one of those links, I may earn a small commission, but you won’t pay a dime more.

    Let’s start outside…

    Vintage Inspired Farmhouse Christmas Tour - full of simple Christmas decorating ideas inspired by vintage holiday decor.

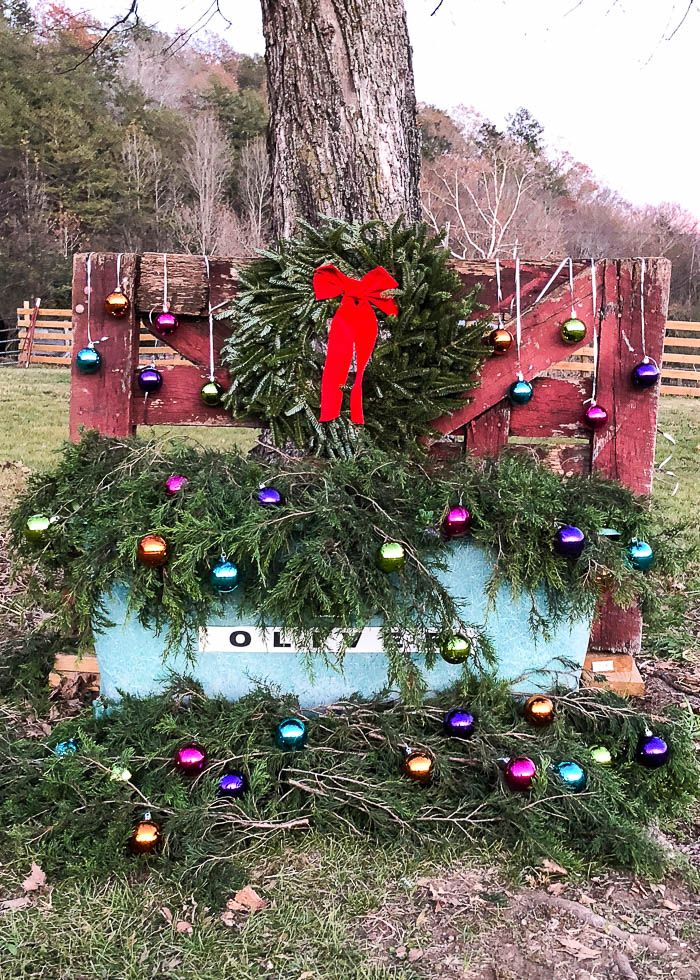
    The only exterior decorating we did was this little set-up which is right at the end of the driveway. I put the Oliver planter together for the fall and just switched things up around it for the holidays.

    The Kitchen

    Because at the farmhouse, friends always come through the back door where the kitchen is, let’s go there next. Please keep in mind that this remodel is still in progress! The kitchen floors are pretty rough at the moment, the cabinets need to be sanded and re-polyed and when I took these photos, we didn’t yet have our stove and dishwasher in!

    Vintage Inspired Farmhouse Christmas Tour - full of simple Christmas decorating ideas inspired by vintage holiday decor.

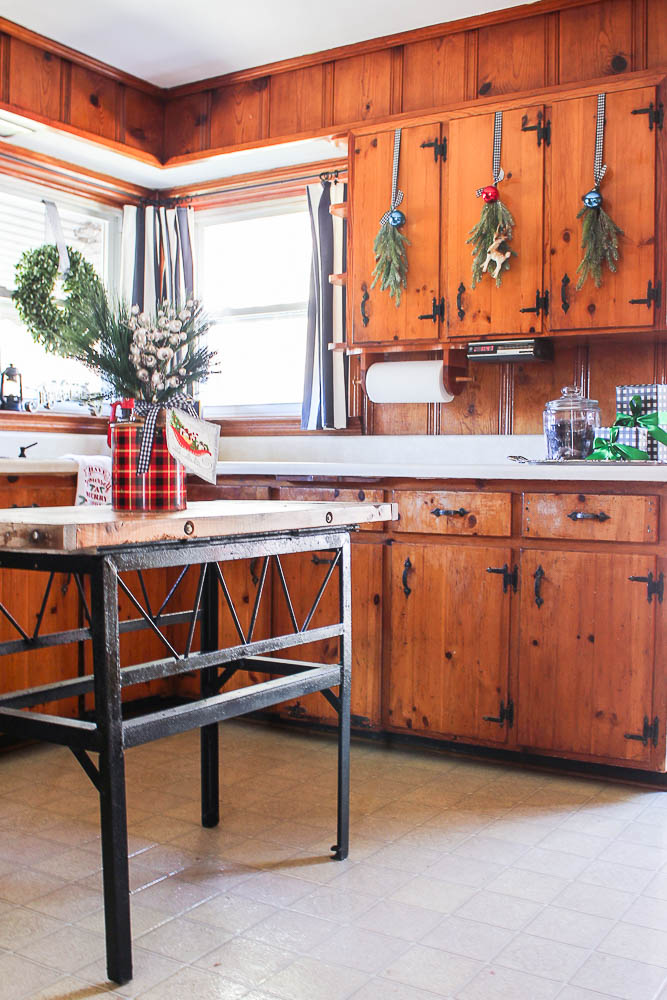
    One thing that I did know for certain when I started thinking about Christmas decorations for the farm was that I wanted to drape some sort of greenery over the cabinet doors because they would pop off those knotty pine cabinets and I wanted to scour the basement for some of the old thermoses and lanterns you’ll see to use for decor.

    Vintage Inspired Farmhouse Christmas Tour - full of simple Christmas decorating ideas inspired by vintage holiday decor.

    I love how this little thermos turned out. I just popped some greenery and an accent pick in it, then wrapped a vintage Christmas image around it. There are a slew of vintage Christmas images that you can print online for free. Just google them. That’s where I found this one and all the other ones you’ll see in this tour. To make them pop just a little more, I gave the edges a touch of glitter.

    Vintage Inspired Farmhouse Christmas Tour - full of simple Christmas decorating ideas inspired by vintage holiday decor.

    Vintage Inspired Farmhouse Christmas Tour - full of simple Christmas decorating ideas inspired by vintage holiday decor.

    Boxwood Wreath / Twig Deer Head (similar) 

    I hung a couple of faux boxwood wreaths in the windows for the season. The twig deer head that my mother-in-law gave me for Christmas one year also fit perfectly in here. The old lantern was in the basement. I also love how the buffalo check pattern fits in so nicely here – I think we might have to incorporate some of that in here long term!

    Vintage Inspired Farmhouse Christmas Tour - full of simple Christmas decorating ideas inspired by vintage holiday decor.

    Of all the things I found/used for decorating this Christmas, this lantern below is my favorite.

    Vintage Inspired Farmhouse Christmas Tour - full of simple Christmas decorating ideas inspired by vintage holiday decor.

    I had no idea, but as I cleaned it up, I found my Pap’s name etched into the top of it there. I literally squealed when I saw that. I think it might have to find a more permanent home rather than the dark basement to be displayed after the holidays as well.

    Vintage Inspired Farmhouse Christmas Tour - full of simple Christmas decorating ideas inspired by vintage holiday decor.

    Vintage Inspired Farmhouse Christmas Tour - full of simple Christmas decorating ideas inspired by vintage holiday decor.

    Isn’t it funny how a fancy silver tray also works perfectly in such a country type kitchen?

    Vintage Inspired Farmhouse Christmas Tour - full of simple Christmas decorating ideas inspired by vintage holiday decor.

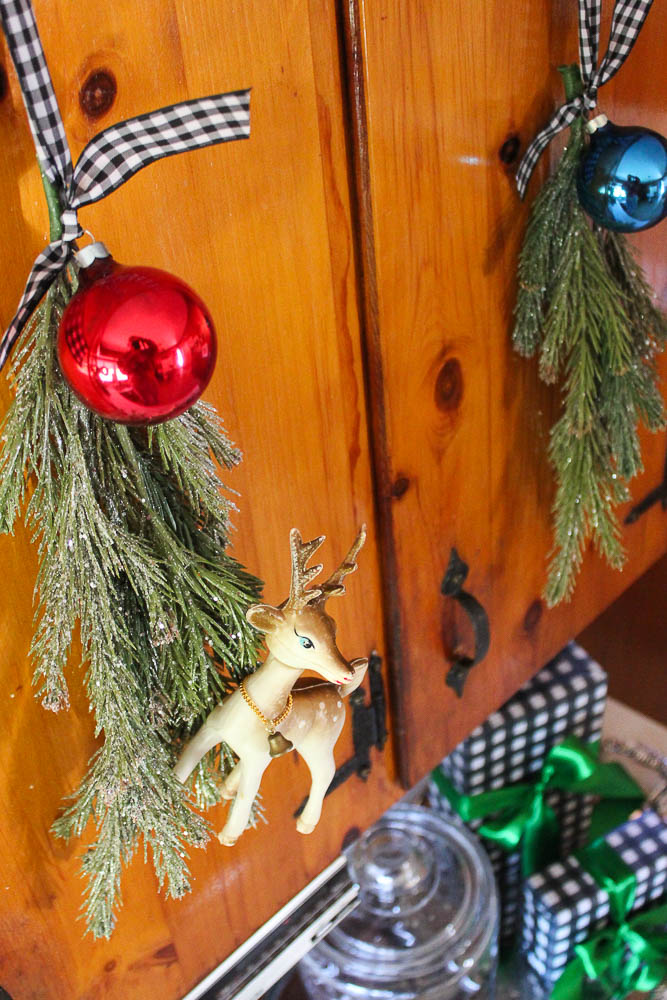
    For the cabinet decorations, I just cut up a garland I purchased at Michael’s, attached ribbon, tied on glass ornaments and hung them over the cabinet doors. For the middle ones, I had these vintage deers that added a bit more to the mix.

    Vintage Inspired Farmhouse Christmas Tour - full of simple Christmas decorating ideas inspired by vintage holiday decor.

    They’re another favorite little vintage Christmas piece of mine.

    Vintage Inspired Farmhouse Christmas Tour - full of simple Christmas decorating ideas inspired by vintage holiday decor.

    Inside, I only decorated in the kitchen and living room – keeping it simple – so the living room is next….

    The Living Room

    Vintage Inspired Farmhouse Christmas Tour - full of simple Christmas decorating ideas inspired by vintage holiday decor.

    Vintage Inspired Farmhouse Christmas Tour - full of simple Christmas decorating ideas inspired by vintage holiday decor.

    Christmas Tree / Blue Chair / Pedestal Table / Cream Lamp / Vintage Ornament Wall Art

    Unfortunately, because of allergies, we can’t do real Christmas trees. However, I still wanted a Christmas tree for the farm that looked like I had just went out in the woods and chopped it down. I was so excited when I found this one. While it did look exactly like what I wanted online, I was worried about what it would actually look like when I got it out of the box and up. It turned out to be perfect though! And it didn’t cost an arm and a leg!

    Vintage Inspired Farmhouse Christmas Tour - full of simple Christmas decorating ideas inspired by vintage holiday decor.

    Santa Art / Let it Snow Pillow / Blue Chair

    Vintage Inspired Farmhouse Christmas Tour - full of simple Christmas decorating ideas inspired by vintage holiday decor.

    Santa Wall Art

    While I generally stick to only vintage Santas for holiday decor, this one really won me over. He had a vintage, jolly look to him that I couldn’t pass up.

    Vintage Inspired Farmhouse Christmas Tour - full of simple Christmas decorating ideas inspired by vintage holiday decor.

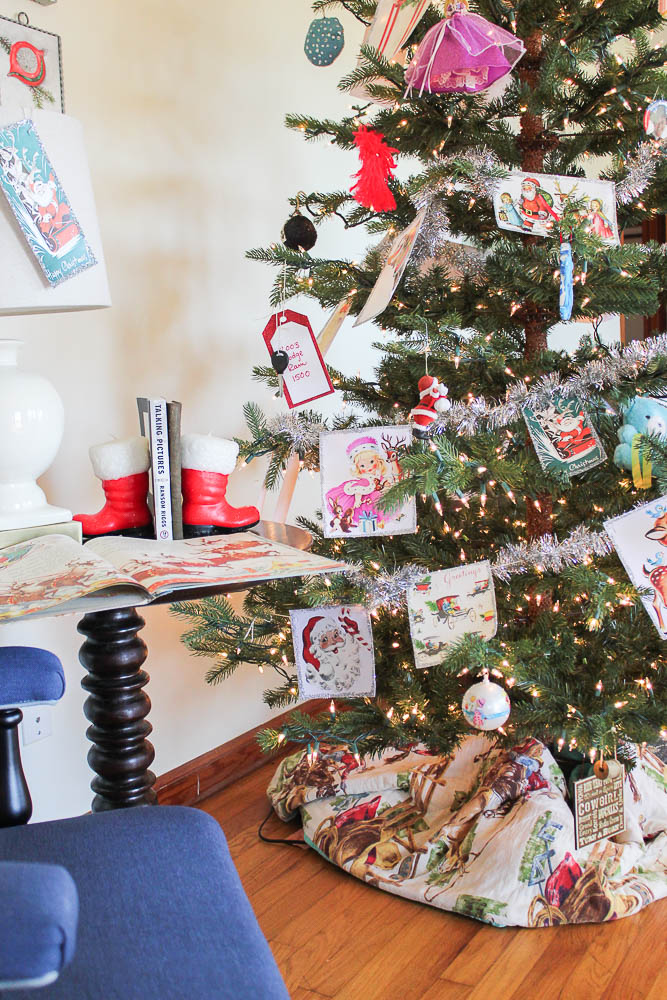
    When we cleaned out the basement here, I found another one of those cowboy blankets that I love so much. There used to be three total and one is still MIA, but it was another squealing moment when I found this one. Instead of a traditional tree skirt, I used it to wrap around the base of the Christmas tree.

    Vintage Inspired Farmhouse Christmas Tour - full of simple Christmas decorating ideas inspired by vintage holiday decor.

    Vintage Inspired Farmhouse Christmas Tour - full of simple Christmas decorating ideas inspired by vintage holiday decor.

    If you’ve seen one of my Christmas home tours before, then you might remember that we don’t do designer-worthy, color-coordinated Christmas trees around here. We only put ornaments or decorations on our trees that have a special meaning or that we just absolutely love for some reason. With having a whole new tree to decorate at the farm and having added another one to our 70’s Landing Pad this year, I wasn’t sure we would have enough ornaments to cover all three trees.

    Vintage Inspired Farmhouse Christmas Tour - full of simple Christmas decorating ideas inspired by vintage holiday decor.

    I was totally wrong though. We had plenty. I did buy a few new ones for here like a vintage looking reindeer that the Circus loved and we also made that bunting garland out of vintage Christmas images we found online, but other than that, this Christmas tree is sporting special ornaments collected over the years. We’ve got the Ninja Turtles from back in the day, plastic toy keys that my dad, uncle and myself all played with when we were kids, real car keys, and of course – small stuffed animals that my Grannie put on her tree for me every year.

    Vintage Inspired Farmhouse Christmas Tour - full of simple Christmas decorating ideas inspired by vintage holiday decor.

    Mini Radio Flyer Wagon

    The wooden sled was my father-in-law’s when he was a child. It worked perfectly with that other beloved cowboy blanket that was my dad and uncle’s when they were kids. Both the Santa and stocking are vintage finds from over the years. The little vintage melted plastic popcorn Christmas tree peeking out was my Grannie’s. Radio Flyer is on loan from the Circus.

    Vintage Inspired Farmhouse Christmas Tour - full of simple Christmas decorating ideas inspired by vintage holiday decor.

    Vintage Inspired Farmhouse Christmas Tour - full of simple Christmas decorating ideas inspired by vintage holiday decor.

    Rug / Ottoman / TV Stand / Wall Sconces / Botanical Art

    Vintage Inspired Farmhouse Christmas Tour - full of simple Christmas decorating ideas inspired by vintage holiday decor.

    I love vintage Christmas storybooks and anytime I find one at a good price, I snatch it up.

    Vintage Inspired Farmhouse Christmas Tour - full of simple Christmas decorating ideas inspired by vintage holiday decor.

    Rug / Ottoman / Wing Chair / TV Stand / Wall Sconce / Botanical Art

    I kept it simple around this area by just draping some greenery over the TV stand and filling some platters and vases with ornaments.

    Vintage Inspired Farmhouse Christmas Tour - full of simple Christmas decorating ideas inspired by vintage holiday decor.

    Large Vase / Small Vase 

    The larger vase is filled with vintage glass ornaments from Grunt’s grandparent’s home that we recently cleaned out. His grandmother just died last week, so they are even more special now. My father-in-law says these are ones that were with them when they lived in Okinawa where his dad was stationed at the time.

    Vintage Inspired Farmhouse Christmas Tour - full of simple Christmas decorating ideas inspired by vintage holiday decor.

    Vintage Inspired Farmhouse Christmas Tour - full of simple Christmas decorating ideas inspired by vintage holiday decor.

    Vintage Inspired Farmhouse Christmas Tour - full of simple Christmas decorating ideas inspired by vintage holiday decor.

    Rug / Ottoman / Wing Chairs / Curtains

    Vintage Inspired Farmhouse Christmas Tour - full of simple Christmas decorating ideas inspired by vintage holiday decor.

    Pedestal Table / Wing Chair / Cow Pillow 

    Vintage Inspired Farmhouse Christmas Tour - full of simple Christmas decorating ideas inspired by vintage holiday decor.

    Cream Lamp

    One thing my Grannie always put out every Christmas was her ceramic Christmas tree. This one isn’t hers, but one very similar that I bought years ago because it made me think of her. Putting it at the farm was fitting. I also found a couple of old Christmas cards of theirs that I put in a tray to display during the holidays. I’m on the hunt for more! And to jazz up the lamps a little more, I draped some of those vintage Christmas images over the shades as well.

    That’s it for the farm; I’ll have our 70’s Landing Pad Christmas tour up tomorrow. Hope to see you back then!

    Up next on the Seasonal Simplicity home tour is Maison de Pax. I guarantee you that Rachel and her holiday decorating will take your breath away! You can also see the full list of tour participants below and hop around to them!

    Pin This Post

    Vintage Inspired Farmhouse Christmas Tour - full of simple Christmas decorating ideas inspired by vintage holiday decor.

    SaveSave

  • Gifts for New Homeowners

    Gifts for New Homeowners

    One of my favorite types of gifts to buy are gifts for new homeowners. I love selecting something for them that they will find incredibly useful for their new place or something that is more meaningful and decorative for their new home. These gift ideas for new homeowners that you’ll find below range from useful to meaningful – and there’s something here for every budget. 

    I love it when someone on my holiday gift list has purchased a new house within the year. One of my favorite things to do is buy them something I think would be perfect for them and their new place. Ya know, home stuff is kind of my thing. 😉

    Sometimes I go more decorative, sometimes I go more functional and sometimes I go more meaningful. Either way, I always try to put a lot of thought into what they might need/want for their new home. These gift ideas for new homeowners vary – some are pretty, some are handy and some, maybe a little sappy. And I just bet there’s something here for that new homeowner on your list!

    Some brands provided products and/or compensation for inclusion in this gift guide. However, all thoughts and opinions are 100% my own. This post contains affiliate links for your shopping convenience. Click here to read my full disclosure policy.

    Gift Ideas for New Homeowners

    A Yearly Reminder of Their New Home…

    Gifts for New Homeowners - Personalized Christmas tree ornament.

    Door Christmas Ornament / Key Personalized Ornament

    As you may know, I’m big on meaningful Christmas tree ornaments. I’m not a fan of color coordinated ornaments that look pretty, but there’s no meaning behind them. I love getting new homeowners ornaments that note the year they moved into their home. Both this door ornament and key ornament from Personalized Planet can be customized with the year and person’s name.

    Give them peace of mind…

    Gift Ideas for New Homeowners - Blink Home Security, also a great gift idea for renters!

    Blink Indoor Home Security / Blink Outdoor Home Security

    You might have read my post on Tuesday about our new wireless, zero monthly fee, syncs to our phone security system. We absolutely love it. The whole time I was setting up our Blink system all I could think was I wish these had been around when I first started living on my own! It would have saved this girl many sleepless nights. There’s no doubt in my mind that a new homeowner (or even a new renter since this system is portable!) would love to receive one of these simple install security systems for Christmas. You can read more about our experience with this system here.

    A Pretty Basket full of Useful Goodies

    Gifts for Homeowners - gift basket filled with useful home items.

    Basket / Wall Driller Anchors / Paintbrush / Velvet Finishes Paint / Hammer / Nail Pack / Frogtape / Drill / Screwdriver Set

    Last year, one of my dear friends bought her first home. God love her, she doesn’t know much about tools and didn’t have any to her name. For Christmas, I bought her a pretty gold basket and then filled it with different “home” items that would be useful to her. This idea is great for any budget as you can customize it with however much you can spend. I didn’t get her the drill pictured above, I love her, but not that much. 😉 haha, but if you did have the budget to include one power tool in the basket, I’d go with the drill for sure. Some of my favorite things to include in these baskets are my favorite wall anchors, a good paintbrush, a small jar of a pretty color of paint to kick start their creativity, a trusty hammer with a variety sized nail pack, Frogtape and a good screwdriver set.

    Give them a head start on proper home maintenance…

    Gifts for New Homeowners - Filter Easy Subscription

    Filter Easy Air Filter Subscription

    This one will take a little bit of undercover work and probably require you to have a spare key to the new homeowner’s place, but they will thank you for your sleuthing when these filters come every few months to remind them to change their air filters out. If this is their first home, there’s a chance there isn’t going to be much extra money to cover a new AC/heating unit if it breaks down. Help them prolong the life of their current unit by regularly switching out those air filters. That’s where the sleuthing comes in – you’ll need to figure out what size filters they need! We use FilterEasy ourselves and love it. If you’ve never tried it before and want to before you gift it to someone, you can use this link to get a free trial plus free shipping!

    Something pretty to hang on all those bare walls…

    Gifts for New Homeowners - Framed Art

    Leopard Art / Springsteen Street Sign Art

    If they are just starting out in a new home, then they might have a whole lot of blank wall space and not a lot of money in the budget for art. Fix that problem for them by buying them a special piece of art that’s just perfect for them. The two pieces above came from Society6 – one of my favorite places for art. They have a huge selection. When you’re deciding what kind of art to get them, think about their personality, likes, favorite bands, musicians, places they’ve been, etc. The Springsteen Street Sign art is for the Man of Questionable Honor this Christmas. He has two major loves in his life – his wife and Bruce. When I saw that Springsteen art, I knew Brandon had to have it.

    As for the leopard art, well I personally don’t think you can ever go wrong with a great animal print for a gift. Think about the recipient’s characteristics and then find a gorgeous piece of animal art that coincides with that. You can see all the art that Society6 has here.

    Something to pretty up their front door

    Gifts for New Homeowners - a great wreath.

    Wreath with Wood Monogram Plaque

    This wreath can be displayed more than just at Christmas time. The greenery just sets off that monogram beautifully. They’ll appreciate having something that makes their home look more welcoming and that gives it a touch more of personalization.

    A way to keep everything organized

    Gifts for New Homeowners - Home Base Binder

    Home Base Binder 

    This home base binder is the ultimate way to manage every aspect of your household. It contains spots for family emergency information, business cards, home projects, meal and spending planning. It’s a great way to get those new homeowners off on the right foot.

    Did someone say pom poms?

    Gifts for New Homeowners - a cozy blanket.

    Pom Pom Throw Blanket

    This one is most definitely going to be more for the new homeowners who are ladies, but isn’t this pom pom throw blanket just adorable? Not only does it look soft and cozy, but I think it would add a great touch of homey-ness to a space that’s new to someone. This one is from The Apollo Box.

    A Pretty, but special throw pillow

    Gifts for New Homeowners - a special throw pillow.

    Cow Watercolor Throw Pillow

    Help them decorate their home with a great throw pillow. Just like with the art, I suggest going with something that will be meaningful to them – a reminder of a trip, their childhood home, a special memory between the two of you. I went with this cow watercolor pillow because it reminds me of my Pap. (I’m sure some of you had already guessed that one!) This beauty is also from Society6 and you can see all of their pillow options here.

    A place to welcome…and wipe their feet…

    Gifts for New Homeowners - Personalized Doormat

    Personalized Home State Doormat

    In my opinion, every house needs a good doormat. It’s most likely going to be one of the first things that guests see when they enter the house. This doormat can be personalized with both the homeowners name and state.

    A Great Basket

    Gifts for New Homeowners - a welcome basket.

    Welcome Basket

    This basket could have so many uses. First off, it’s pretty. 🙂 But also, it could be used as a mail or other miscellaneous items catch-all when you walk through the door, it could be a magazine holder or you could hang it on your front door. It’s one of those gifts that’s both pretty and functional.

    Are they ready to cook?

    Gifts for New Homeowners - Favorite Recipes Book

    Favorite Recipes Book

    If they are just starting out on their own, they may need a few good, easy recipes to keep them from spending all their money on eating out or frozen pizzas. I have a friend who is in desperate need of a few easy-get-me-in-the-right-direction-recipes and she’ll be getting this favorite recipes book filled with a few good recipes to get her going.

    Something they can take with them when they have to leave that first home…

    Gifts for New Homeowners - A Custom House Portrait

    Custom Home Portraits

    Yes, I’ve already included this idea in another gift guide this year, but I felt it fitting here as well. Have a custom home portrait made of their home that they’ll always be able to take with them even when they have to leave that house. You can find the option above here and Etsy has a ton of different options and price points to choose from too.

    Any other great gift ideas you have for homeowners?

    Still looking for that perfect gift for someone else on your list? These might just help…

    Gifts for the Impossible Man
    Funny Gift Ideas
    Gifts for Kids That Aren’t Toys
    Gift Ideas for Friends
    Unique Gifts for Someone Who Has Everything Already
    Gifts for Drinkers
    Best Gifts for People Who Travel
    Gifts for Sarcastic Friends
    Gifts for Grandparents
    Gifts for Book Lovers
    Gifts for People Who Love Music
    Unique Personalized Gifts
    Gifts that Keep Giving
    Gifts for Her
    Gifts for Couples
    Gifts for Creative People
    Gifts for Foodies, Cooks and Entertainers
    Gifts for DIYers

    If you want the inside track for special offers and gift ideas available exclusively to Rain on a Tin Roof readers, then you’ll want to sign up for my Holiday Gift Guide Email Subscription here or below. It’s totally free!

    Pin This Post

    Gifts for New Homeowners - lots of gift ideas for every budget.

    SaveSaveSaveSave

    SaveSaveSaveSaveSaveSave

    SaveSave

    SaveSaveSaveSaveSaveSaveSaveSave

  • Simple Home Security with Blink

    Simple Home Security with Blink

    This post is brought to you by Blink Home Video Security. However, all opinions are 100% mine and I completely own up to being a scaredy cat sometimes. 

    Nearly a year ago, Grunt Labor went on a camping trip. He left on a Thursday after work. Nicky called later that evening to check on me and Landry. When I saw his number on my screen, my first thought was “Oooo. Wonder if I can talk him into coming over for a slumber party if I supply all the beer and 80’s country music?”

    I am not a big fan of being alone over night.

    Yes, I am 32 years old and yes, sometimes I am a big scaredy cat.

    When I’m flying solo for a night, I hear every single little creak the house makes. And then my mind plays tricks on me and makes up more noises for me to hear that aren’t really there. And usually some shadows too.

    That night, I toughed it out though and didn’t make Nick come over.

    But I did sleep with a hammer under the bed. Because ya know, I would totally have enough time to reach under the bed, feel around for it and then sling it into the face of an attacker who was standing over my bed.

    Pair my occasional scaredy-catness with a string of recent car thefts and break-ins in our neighborhood and I was most definitely ready for a little extra peace of mind when it came to home security.

    Enter Blink.

    Simple Home Security with Blink - easy DIY install home security system with no wires or monthly fees.

    When they reached out to me and asked if I might be interested in partnering together to talk about their wireless, simple install, no monthly fees home security system, I was like, Oh yea, I’m your girl.

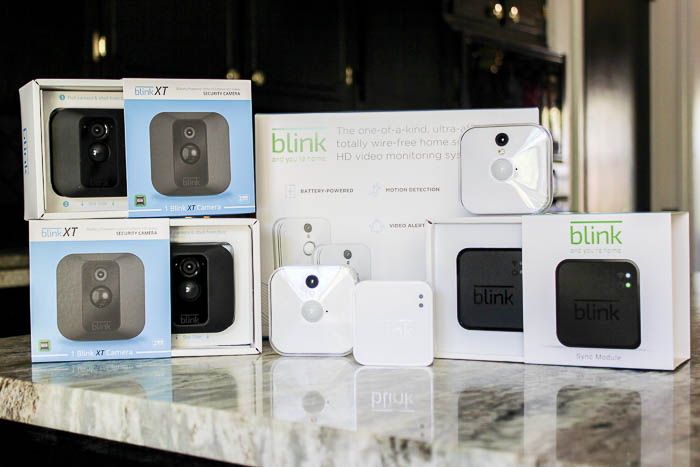
    We went with a two camera indoor system and two Blink XT outdoor cameras.

    Simple Home Security with Blink - no wires, no fees, home security.

    The install is super simple. There are zero wires involved. All you need is Wi-Fi and a smartphone.

    Simple Home Security with Blink - no wires, no fees, home security.

    You start by downloading the Blink app on your smartphone, launch it and then it walks you through everything. It took me about five minutes to get it set-up and then you just place your cameras wherever you would like them in your house. Since we got two indoor cameras, we put one upstairs and one downstairs.

    Simple Home Security with Blink - just place cameras around your home and sync the system to your phone.

    The one upstairs is on the bar cart between the living and dining rooms and covers that whole area and down the hallway.

    Simple Home Security with Blink - wireless cameras can go anywhere and have batteries that last up to two years.

    You literally just set the camera on a surface and you’re done. The indoor cameras do come with mounts if you want to mount it on the wall, but I found it easier and just as good to find a place for it to sit. It’s just a sleek little square so it blends in nicely with the decor.

    Downstairs, I put the other interior camera on top of the fireplace.

    Simple Home Security with Blink - wireless cameras that can be set up anywhere and pair with your phone.

    Each camera comes with two batteries that last up to two years. The Blink app on your phone monitors not only your home, but also the battery life in each camera so you’ll know when to change them.

    Simple Home Security with Blink - put the wireless cameras anywhere in your home.

    Outside, we used an included mounting bracket to install an exterior camera in the corner of one of our garage door openings.

    Simple Home Security with Blink - install exterior cameras to protect against car theft and break-ins.

    It’s hard to even see it, right? It’s right up there in the corner. You just need a screwdriver to install the brackets and then you can move it around and angle it however you wish. The cameras all have motion detection so if someone does try to break into our cars, we’ll get a notification from our Blink app on our phone just as soon as they walk into the driveway.

    The Blink XT cameras also make for a great way to send love over the wi-fi signal…

    He’s a keeper. 🙂

    We installed another exterior camera on one of the front porch columns.

    Simple Home Security with Blink - install exterior cameras for protection against package theft.

    P.S. Check out my wreath holder sans wreath. Bless my heart. I should really hang something there. 

    This camera is angled to look right at the steps and front door area where packages are normally dropped off. With the holiday season quickly approaching and therefore the crazy amount of visits we’ll be getting from the USPS, UPS and FedEx guys, I wanted to be able to see when packages were dropped off so that I could get them in quickly to protect against package theft this season. We have had a delivered package stolen once before and it was a huge pain to deal with.

    If we’re away on vacation or at the farm, or wherever, all we have to do is open the Blink app on our phone and we’re home – well, virtually anyway. We can literally see our house while we’re not there and that is pretty cool. If we get a notification of activity, we can see what’s up and if need be, call the authorities and have it all on video.

    Ready to learn more about Blink? Head right here!

    Gift Ideas Signature

    Pin This PostSimple Home Security with Blink - set up cameras inside and outside your home that sync to your phone.

    SaveSave

    SaveSave

    SaveSave

  • Two-Tiered Table Makeover | How to Remove the Top Tier

    Two-Tiered Table Makeover | How to Remove the Top Tier

    This post is sponsored by Velvet Finishes, however all opinions are 100% mine.

    I see these little two-tiered end tables all the time at thrift stores and yard sales. For the most part, I tend to pass them by. Some are pretty nice, but I’ve just never been a big fan of the whole two-tiered aspect of these tables. I know it was hot back in the day, but just not up my alley.

    I don’t know why taking the top tier off though never occurred to me before now.

    I guess I needed to see one of these little guys that had really great lines.

    Two Tiered Table Makeover - How to remove the top tier! Such a great diy furniture makeover idea!

    Like this Mid-Century Modern style one that I happened upon at a local thrift store.

    At first glance, I was like, “Oh man, I wish it wasn’t two-tiered.”

    Then, I thought, “Wait! I bet I can cut that off!”

    So I snatched it up, brought it home and got to work.

    And it was so much easier than I ever thought it would be.

    Two-Tiered Table Makeover | How to Remove the Top Tier

    Tools & Supplies

    Steps

    Step 1

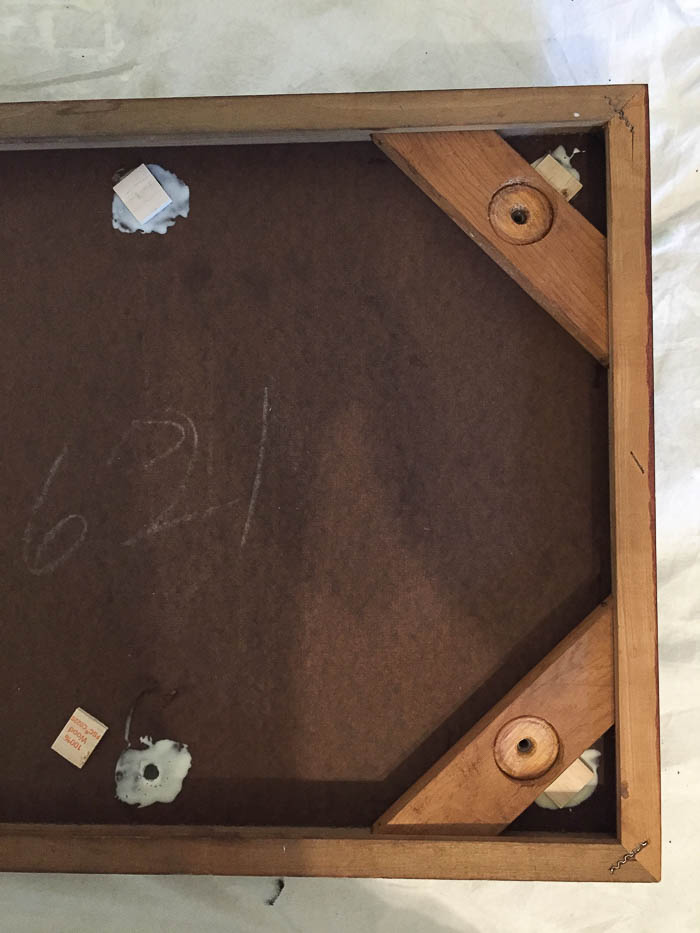
    Flip the table over and look for where the top tier is attached. Using a screwdriver, wrench or your hands, remove the screws or bolts holding the tier on.

    Two Tiered Table Makeover - covering the old holes.

    Mine had four nuts and bolts holding it in place. I was able to just unscrew them with my hands. I also unscrewed the legs of the table just to get those out of the way while I was working on it.

    Step 2

    Find four small pieces of wood that will cover the holes where the screws had been.

    Two Tiered Table Makeover - covering the old holes.

    I had a paint stick on hand so I just cut four small pieces from it.

    Step 3

    Place wood glue around the holes on the underside of the table, then place a small piece of wood over each hole pressing it firmly into place.

    Two Tiered Table Makeover - covering the old holes.

    Let these sit for at least a few hours.

    Step 4

    Flip the table over and fill the holes on top where the tier had once been with wood filler.

    Two Tiered Table Makeover - covering the old holes.

    Since these holes are pretty deep, you’re probably going to have to fill the holes a few times. I found it best to fill the hole, let dry, sand smooth, repeat. I did this about three times before the holes were even with the table.

    Step 5

    Once the wood filler is dry, smooth and even, you’re ready to start prepping and painting.

    Two Tiered Table Makeover - painting supplies.

    This table had a really shiny finish on it. In order for the paint to get the best adhesion, that finish needed to go before applying the paint. To do that, I used Ready.

    Two Tiered Table Makeover - prep it with Ready to remove old shiny finish.

    Ready is a spray primer / deglosser. You just spray it on, let it sit for a few minutes, then wipe it clean with a towel. Ready also cleans away dust at the same time. For this table, I had to do three rounds of Ready to get the shine gone.

    Step 6

    Let the table fully dry and then you’re ready to paint.

    Two Tiered Table Makeover - paint it

    I opted to go with Luxurious for the table top. It’s black, but not a super deep black. I was leaving the legs as they were so I knew black would go well with those stained legs. I did two coats of Luxurious on the table. This Velvet Finishes paint has great coverage – I know this is a small table, but I bet I didn’t use more than 1/2 –  3/4 of a cup of paint.

    Step 7

    After the Luxurious paint was dry, I gave the table a coat of Protect.

    Two Tiered Table Makeover - topcoat.

    Velvet Finishes paint already has a topcoat built-in, but since this little table might see a lot of action as a coffee table, end table, etc., I wanted to go on and give it some added protection. All you need is one coat of Protect and you just brush it right on.

    After the table was dry, I put the legs back on just as they were. They weren’t in too bad of condition and y’all know I love a good paint and stain combination anyway.

    Two Tiered Table Makeover - How to remove the top tier! Such a great diy furniture makeover idea!

    I think removing that top tier makes the table much more functional. It can be a great coffee table for a smaller room, it could still be an end table / side table, or it could even be a bench!

    Two Tiered Table Makeover - How to remove the top tier! Such a great diy furniture makeover idea!

    Sidenote: That Seventies Glamour book is one of my all-time faves. 😉 It has a totally corny cover, but the photos inside are awesome. 

    Two Tiered Table Makeover - How to remove the top tier! Such a great diy furniture makeover idea!

    Two Tiered Table Makeover - How to remove the top tier! Such a great diy furniture makeover idea!

    I won’t be so quick to pass up those little two-tiered tables anymore! What about you?

    You might also want to see…


    How to Turn a Side Table Into a Bench– one of my all time fave hacks!

    Mid-Century Modern Dressing Table Makeover in a Day – such a beauty that still gives a nod to it’s 60’s roots!


    Pin This Post

    Two Tiered Table Makeover - How to remove the top tier! Such a great diy furniture makeover idea!

    SaveSave

  • How to Hang Shutters on Brick: Detailed Guide for Installing Vinyl Shutters

    How to Hang Shutters on Brick: Detailed Guide for Installing Vinyl Shutters

    If you’re looking for a DIY home improvement project that will add value and curb appeal to your home, then consider installing vinyl shutters on your home! You might just be surprised at how much they add to your home. Below, you’ll find a step-by-step guide for how to hang shutters on brick.

    This post / project has been six months in the making. Six months.

    It should not take an average person six months to get shutters installed on their home.

    But apparently, we’re not average. We ran into a few hiccups.

    Last week, I revealed our new front yard landscape makeover. We went from this:

    How to Hang Shutters on Brick

    To this:

    Shutters on Brick House

    Mid-America Shutters provided me with shutters for our home. However, opinions and installation struggles are 100% mine. This post contains affiliate links for your shopping convenience. Click here to read my full disclosure policy.

    One of the big changes there besides the landscaping was the replacement of our old windows and shutters.

    Yes, we still have to get the hideous green painted over, but it takes time, y’all. And money. 😉

    Now windows, that’s not a DIY job – not for us anyway. The shutters though, I was pretty confident we could tackle. We had discussed painting the old louvered ones, but I really wanted a paneled shutter and seriously, who wants to paint all those louvers anyway? Not me.

    We went with standard raised panel shutters from Mid-America.

    How to Hang Shutters

    I knew the classic style wouldn’t date easily and it would also go well with our brick house exterior.

    For the color, we opted for Midnight Blue. I wanted something with a little color that would also go well with the brick, the beige-grey window trim and the white windows. Midnight Blue fit that bill perfectly. We’re also planning to paint our garage doors this color to bring it around to that side of the house too.

    Eventually, all the green trim will be replaced with that beige-grey window trim color as well, so it will all go nicely together. Mid-America also offers lots of different length options in their shutters, which was great for us since we have both tall and short windows. The finish is supposed to stand up really well over time too, which was a must for us since our home gets so much direct sunlight.

    So let’s talk about the vinyl shutter installation. This was where we ran into some issues – not the fault of the shutters at all, but, how should I put this, installer error. 😉

    How to Install Shutters on Brick

    Tools and Supplies Needed:

    *It’s also important to note that this job is best done with two people.

    Steps

    Step 1

    Remove your old shutters. Que the first hiccup for us.

    When we went to remove our old shutters, we discovered that nearly all of the screw heads on the old shutters were stripped. So, we had to pry the old shutters off, then twist the screws out one by one with pliers. Oh what fun! Hopefully, yours won’t be that way though.

    Step 2

    Remove a set of shutters from the box and hold one shutter up on one side of the window you are putting it on.

    How to Install Shutters on Brick

    Place it were you want it – if you get paneled ones like we did, one panel is slightly longer than the other and it should be on the bottom.

    Place a level on top of the shutter, level it up, then mark a spot on both sides at the top and bottom of the shutter where you want the shutter fasteners to go. We just eyeballed this. The shutter fasteners are the same color as the shutters so they blend in really well and you can’t tell if you’re off by a little bit or not. If you can place the fasteners where they will go into mortar rather than brick, thus, you will drill into the mortar, rather than brick, it will make your job easier.

    Step 3

    Installing Shutters on Brick

    Take the shutter and using your regular drill, drill a 1/4″ hole using the 1/4″ regular drill bit in each of your marked spots.

    Step 4

    Put your shutter back in place and make sure it’s level once more. Now, you need two people for this part. You’re going to drill pilot holes into the brick/mortar for your shutter fasteners.

    While one person is holding the shutter in place, the other should use the hammer drill to go through the holes you just made with the regular drill and make small holes to mark where the holes should go in the brick / mortar.

    Hanging Shutters

    Que our second hiccup. The hammer drill is a must for drilling into brick and mortar. We did not know this. We tried to use our regular corded drill at first and it flat out didn’t work. There were tears, there were words. It was stressful. After some research, we decided a hammer drill might work better – total game changer.

    Step 5

    Remove the shutter and use the hammer drill to finish drilling out the holes you just marked in the brick.

    Installing Vinyl Shutters

    Step 6

    After you’ve drilled all the holes in the brick with the hammer drill, place a shutter fastener into each of the holes in the shutter.

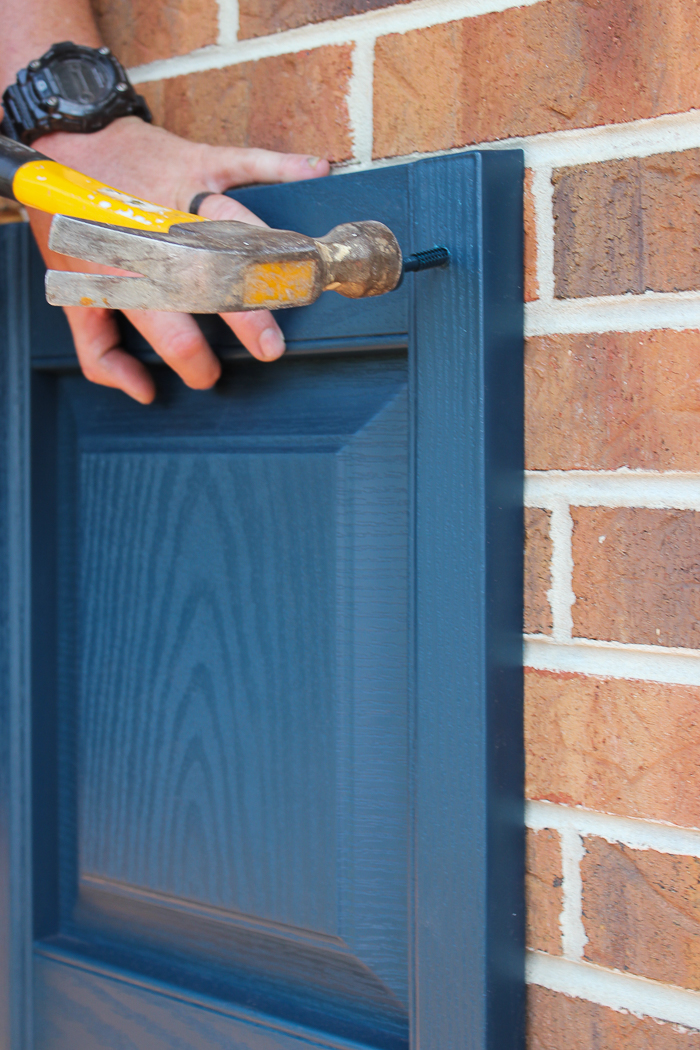
    How to Install Vinyl Shutters

    Line up the fasteners with the holes in the brick, then gently tap the fasteners in with a hammer to attach the shutter to your home’s exterior.

    That’s it! The installation is actually really simple, you just have to have the right tools, which was our problem.

    Those fasteners are serious business too – the shutters don’t budge at all once they are held in with the Shutter-Lok Fasteners.

    How to Install Shutters

    Another thing to note is that we used four fasteners on the lower, shorter windows, one in each corner, but six on the higher, longer windows, one in each corner and one on each side of the middle of the shutter.

    Don’t the shutters look great, though? I love, love, love the midnight blue – it was exactly the color that the house needed!

    Step by Step Guide for Installing Vinyl Shutters on Brick

    Now, just to nix that green and paint the trim around the door!

    Looking for more home improvement projects to boost curb appeal? 

    Here’s a DIY Cedar Planter Box that is great for both flowers and displaying your house numbers.

    If you have lattice anywhere on your home, here’s an easy lattice refresh technique!

    Don’t miss this mailbox makeover I did in less than an hour.

    And here are 13 ideas for sprucing up your front door and entry.

    Want to come back here later? Just pin the image below! 

    How to Hang Vinyl Shutters on Brick Exteriors

    Hanging Shutters on Brick Houses

  • Gift Ideas for Your Blunt Friend

    Gift Ideas for Your Blunt Friend

    Your blunt friend. The one who tells it like it is – and usually in an inappropriate manner. Where would we be without them? Here’s a list of great gifts for sarcastic friends that they are sure to appreciate. 

    Want more great gift ideas that are both thoughtful and affordable this holiday season? Then be sure to sign up for my holiday gift idea emails! Sign up here! 

    This is always one of my favorite gift idea lists to write. Probably because I’m blunt myself. And snarky. And sarcastic. And those all just go wonderfully together, no?

    I’m willing to bet you’re one of those people too since you hang out around here with me. And that probably means you’ve got friends on your Christmas gift list that are like that too. Same here.

    I’ve searched the internets high and low and here are some of the best gift ideas for our blunt friends  that I’ve found. Cheers to the blunt, sarcastic beast in us all!

    This post contains affiliate links for your shopping convenience. Click here to read my full disclosure policy.

    Funny Gift Ideas for Sarcastic Friends

    Sassy Golden Girls Items

    Gifts for Sarcastic Friends

    Can’t Sit With Us T-Shirt / Dorothy in the Streets. Blanche in the Sheets. Mug

    I went down a Golden Girls rabbit hole last week. One search on Amazon had me rolling! My Great Uncle and I used to watch the Golden Girls and I forgot just how much I liked their sassiness. I love both this t-shirt and the mug. You can also get a Dorothy in the Streets. Blanche in the Sheets. t-shirt. These are especially great gifts for your sassy friend!

    Funny & Rude DoormatsGifts for Your Sassy Friend

    Hope you Brought Beer Doormat / Warrant Doormat / Welcome Bitches Doormat / Filthy Animal Doormat

    This whole Etsy store is full of hilarious doormats. I had a hard time picking just four. I think I want the Hope You Brought Beer one for my house. I mean just because I drink cheap beer doesn’t mean I share it. 😉

    Blunt T-ShirtsFunny Gift Ideas

    Say What Everybody Else is Thinking T-Shirt / Classy T-Shirt / No Filter T-Shirt

    Help your blunt friends warn people about their problem with one of these t-shirts.

    Anything Anne TaintorGreat Gifts for Sarcastic Friends

    Anne Taintor Flask / Give a Damn Notepad / Anne Taintor Coin Purse

    I’m sure you’ve heard of Anne Taintor or seen her products before, but to me they just never get old. She pairs vintage style photos with sarcastic comments to make for fantastic little gift items. These are more good gifts for that sassy friend of yours!

    Inappropriate PillowsFunny Gifts for Your Sassy Friend

    WTF Pillow / Greek Key WTF Pillow / Lollipop Dipped in Psycho Pillow (no longer available)

    Now who wouldn’t appreciate a good WTF (Why that’s fantastic! 😉 ) pillow? And have you ever seen a more classier one than that greek key version? It’s also reversible. One side has WTF and the other has XOX. When the preacher stops by for a visit, you can just flip that bad boy around.

    WTF Did you Say?!? GameFunny Gift Ideas for Your Sarcastic Friend

    WTF Did You Say?!? Game

    Last year, I included the Cards Against Humanity game as one of the gift ideas for sarcastic people. Hands down, it’s one of the funniest and most inappropriate games to play. I just discovered this new game, WTF Did You Say?!?, and it promises to be “bigger & bolder” than Cards Against Humanity. If that’s the case, even I can’t imagine how unmoral it’ll be. 😉 Of course, I’ve already ordered it for our next game night here.

    The Official Dictionary of Sarcasm

    Great Gift Ideas for Sarcastic Friends

    The Official Dictionary of Sarcasm

    For all your blunt and sarcastic friends who really want to make sure they can always one-up you, get them The Official Dictionary of Sarcasm. Just be prepared with comebacks, folks.

    Cards Against Humanity

    Good Gifts for Sassy Friends

    Cards Against Humanity Game

    The Cards Against Humanity Game. Have you played it? You should. However, it’s definitely not for the faint of heart. If they’ve already got the game, check to see if they have the expansion packs. Those make great gifts as well.

    Hustlin’ Pouch

    Great Funny Gift Ideas for Friends

    Everyday I’m Hustlin’ Pouch

    For the lady on your list who busts a** daily, this pouch will be perfect for her.

    Inappropriate Coasters

    Gifts for Sarcastic FriendsInappropriate Coasters

    Inappropriate coasters for inappropriate people. Needless to say – I have these and love them.

    Say it Sarcastically Mug

    Gifts For Sassy FriendsSay It Sarcastically Mug

    Let’s be sarcastic together, darling. Is there any other way to be? This mug and I say no.

    Do Epic Shit Print

    Funny Gift Ideas

    Do Epic Shit Print

    Do epic shit print. Because we should all be reminded that we are capable of changing the world with our epic-ness. 😉

    What funny gift ideas for sarcastic friends can you add to this list?

    Find the perfect gift for someone else on your list by clicking any of the other gift ideas below!

    Gifts for the Impossible Man
    Funny Gift Ideas
    Gifts for Kids That Aren’t Toys
    Gift Ideas for Friends
    Unique Gifts for Someone Who Has Everything Already
    Gifts for Drinkers
    Best Gifts for People Who Travel
    Gifts for Grandparents
    Gifts for Book Lovers
    Gifts for People Who Love Music
    Gifts for New Homeowners
    Unique Personalized Gifts
    Gifts that Keep Giving
    Gifts for Her
    Gifts for Couples
    Gifts for Creative People
    Gifts for Foodies, Cooks and Entertainers
    Gifts for DIYers


    Don’t forget to sign up for the holiday gift ideas email subscription as well! You’ll only get 1-3 emails a week (usually no more than two unless there’s like a super awesome sale somewhere) with gift ideas and great sales so that we aren’t all in debt out the wazoo after the holidays. 😉 Use the form below to sign up or sign up here! 

    pin-this-post-2

    Gifts for Sarcastic Friends

    SaveSave

  • Holiday Gift Giving. It’s my thing.

    Holiday Gift Giving. It’s my thing.

    Today is November 1st.

    For me, that means a couple of things.

    1. It’s, for the most part, socially acceptable to bring out the Christmas decorations.
    2. It’s time to kick off the holiday gift-giving season. Ok, I’ve already bought a few gifts.

    Now. Before you start throwing tomatoes at me, let’s get a few things straight.

    I’m not discounting Thanksgiving. I’m not forgetting Thanksgiving. I’m not saying it’s any less important than Christmas. In fact, I love Thanksgiving. Every year after I’ve stuffed my face full of ham and dressing and pecan pie, I get a warm and fuzzy feeling inside.

    And no, it’s not due to all the food I just ate.

    Well, maybe partially.

    It’s because I look around, take it all in, and think about just how truly blessed I am. And then I’ll probably toast to that fact and Mom and I will polish off that bottle of wine.

    I love Thanksgiving.

    I love Christmas too.

    And did you see my house decked out for Halloween? Obviously, I love Halloween.

    I really don’t know that I have a favorite holiday because I love them all, but I do have a favorite practice –

    Gift Giving.

    Holiday Gift Giving - the best thoughtful and unique gift ideas at affordable prices!

    It’s my thing. It’s my jam. And believe it or not, it’s not all the pretty decorations at Christmas that gets me all giddy inside, but all the gift giving. While I love for my house to look on point for the holiday season, I am even more passionate about finding a thoughtful and perfect gift for everyone on my holiday gift list. I absolutely love seeing faces light up when they open gifts from the LaFevor clan.

    When Grunt and the Circus got their matching Carhartts.

    When we gave Mom and Dad a custom drawing of their previous home. 

    Anyone with me?

    If you’ve been around here during past holiday seasons, you know I always try to come up with unique holiday gift ideas for every kind of person and every kind of budget on my and your lists and share them with you…

    Over 20 Unique Gift Ideas for Music Lovers - this is a GREAT list for gift ideas!

    Unique Gift Ideas for Music Lovers

    Have a friend who loves their libations? This list of Gift Ideas for People Who Love to Drink will definitely have something they will love!

    Gift Ideas for People Who Love to Drink

    The Ultimate Holiday Gift Guide / Gift Ideas for People Who Have Everything / Gift Ideas for Hard to Buy For People

    Gifts for the Person Who Has It All

    This year won’t be any different. I’ve got gift ideas to share with you for the usual suspects – her, him, the person who has everything already, but I’ve also got gift ideas to share with you for the adventurers, the smarty pants, new homeowners and more. There is something to fit into every budget size – unless you’re dropping $1K on each person on your list. In that case, can I get added to your gift list? 😉

    I’ll be sharing all of the gift ideas throughout November.

    If you want the inside track though to special offers and gift ideas available exclusively to Rain on a Tin Roof readers, then you’ll want to sign up for my Holiday Gift Guide Email Subscription as well.

    If you sign up, then from now throughout the holiday season, you’ll get 1-3 emails from me per week, typically just one or two, unless there is a really great sale somewhere, filled with gift ideas, special offers and discount codes to shops I’ve partnered with this holiday season and more. It’s completely free! You can sign up using the box above or through this link.

    After you sign up, you’ll be directed to our gift ideas page. You should also receive an email with a link to confirm your subscription – make sure you confirm so you can get the emails!

    I’ll be back next week with lots of unique gift ideas, until then, you can take a gander at holiday gift ideas from previous years here – most all of the items are still available!


    SaveSave

  • Farmhouse Updates

    Farmhouse Updates

    Disclosure: Mohawk Home provided me with two rugs for the farmhouse, however all opinions are mine. Affiliate links may be included in this post, which means if you purchase something through one of those links, I may earn a small commission, but you won’t pay a dime more.

    It’s been a little slow going at the farm lately. Well, not slow going with us – the last few times we’ve been there, we’ve worked just about all day everyday doing something, just not something at the house.

    We’ve built a fence, rounded up cattle, worked cattle, cleaned out the toolshed and took full advantage of the last day of burning season among other things.

    While the house is still a bit of a hot mess inside, the exterior isn’t looking as shabby as it once did.

    Outdoor Fall Decorations at the Farm using materials found in the barns!

    I did manage to raid every shed on the farm and put together this little “fallscape” in the front yard at the house. And that fence behind it is the one we built. 🙂

    We’ve already finished the living room and bathroom, but the rest of the interior is still a work in progress. Here’s where we’re at right now…

    The Kitchen

    Farmhouse Updates: The Kitchen

    I’ve already went over my plans for the kitchen in this post and I’ve gotten a few things marked off! I made the navy and white striped curtains you see hanging in the windows – my old treadle sewing machine didn’t fail me there!

    Farmhouse Updates: The Kitchen

    I cleaned up and painted the old table I had found in a shed and am using it for an island. It’s not really a great height for the green barstools, but it will do for now.

    Farmhouse Updates: The Kitchen

    I also managed to get the gallery wall going, although a few of the frames have yet to actually be filled. Another thing I’m planning for this space is a boot tray and a skinny catch-all table. The back door is right there at the kitchen, so everything seems to get dropped here. I’m hoping a skinny console-type table along the wall under the art will help to catch some of that clutter. Work boots get dropped here too, so I’m planning on building a tray for those to hopefully keep most of the dirt in one place.

    The Dining Room

    Farmhouse Updates: The Dining Room

    The dining room, bless her heart, she’s all gorgeous on the floor and then as you work your way up, it kind of goes downhill. The walls are freshly painted, and I have a pretty vignette going on with the old sewing machine that you saw in our fall home tour and we have the new Mohawk home rug in there, but the rest of the space, it’s just been put on hold. I have to work on the chandelier – a few of the lights aren’t working there and the crystals have to be scrubbed thus why it’s naked right now.

    My plan is to do some wainscoting and paint the lower half of the walls a creamy white at some point. I want the dining room to have a really timeless design and I think that should do it.

    Farmhouse Updates: The Dining Room

    And then there’s the table that is beat all to hell with four white dining chairs and two black ones. Bless its heart. This table has definitely seen better days. My original plan was to strip it, but it has a crack in one of the legs and I’m just afraid it might not have a lot of fight left in it. Either way, I do plan on having a stained table in here at some point – chair design and color are still TBD. 😉

    Farmhouse Updates: The Dining Room

    I do love the rug though. It is the Providence Bickford Rug from Mohawk Home. The colors in it work perfectly with he hardwood floors and I think it will shine even more when there is white wainscoting on the walls and a few more accent colors brought in to compliment it. I’ve got my little elephant in here right now. I would like for him to stay, but not sure if he’ll work in the end. Can you believe he was only $5 at a yard sale?! I was on him like stink on you know what.

    The Den

    Farmhouse Updates: The Den

    The den is currently the catch-all room for things we know we want to use at the farmhouse, but aren’t 100% where they are going yet. For this room, we have decided that we’ll put a lot of family mementos in here. That old trunk was actually Grunt’s grandparents trunk that was shipped back to the States after they were stationed overseas. We’re going to make it into a coffee table for this space. I’m also dreaming of some pretty green, maybe velvet?, drapes for in here. I think a deep green might go well with the paneling.

    Circus’ Room

    Farmhouse Updates: The Circus' Room

    We did some rearranging in the Circus’ room when we were there last weekend. Her beds had been on the left wall on either side of the toy box, but it was just taking up too much space. Grunt worked his magic and came up with this plan which works much better. I’ve already shared the Boho Cowgirl Bedroom plans for this room and we have marked a few items off the list. The overall goal was to make the red blend in, rather than stand out and of course, to create a room the Circus loved. I bought the new bedding I had been eyeing and love all the colors it brings into the space. We’ve got a dresser for her that I’m going to paint a turquoise blue and it will go where the toy chest is now. Instead of having a toy chest, we’re going to create toy storage under her beds.

    The Master Bedroom

    Farmhouse Updates: The Master Bedroom

    Besides the two rooms that are already done, the master bedroom might be the room that’s the next closet to being finished. The curtain panels in here really softened the navy walls.

    Farmhouse Updates: The Master Bedroom

    The dresser area came together pretty easily. The dresser and mirror were both hand-me-downs that ended up going perfectly here. The lamp was a thrift store find. And then there are more photo frames that actually need photos in them. Apparently, that’s my thing.

    The rug in here also really helped to soften the walls.

    Farmhouse Updates: The Master Bedroom

    It is called Perfection Sea and is also from Mohawk Home. It’s got a traditional, but slightly feminine feel that I think this space needed.

    That’s all I’ve got for now! Hopefully, I’ll be able to put in some real decorating time here over the holidays. What do you think so far though?

    You can see the farmhouse before here and the completed living room and bathroom here.

  • Our Front Yard Landscape Makeover

    Our Front Yard Landscape Makeover

    It is much overdue, but our home’s exterior has finally started getting the facelift it so desperately needs.

    We have wanted to update the exterior of the 70’s Landing Pad from the time we bought it…but there wasn’t anything necessarily wrong with it then – it was just flat out ugly.

    Landscape Before

    And so instead of updating the exterior, we put our resources toward the interior where there were a lot of fixes that needed to be made.

    Then earlier this year, a storm came through and caused some roof damage, which led to a new roof. Close on the heels of the new roof came new windows, quickly followed by new shutters and new landscaping.

    Front Yard Landscape Makeover

    We still have to get rid of that green trim color, but doesn’t it look so much better?

    I’m sure the neighbors really appreciate it too because for a while, it looked like this in our front yard…

    Disclosure: This post is in partnership with Proven Winners, however all opinions are 100% mine. 

    Landscape Before

    Grunt Labor was over all the overgrown shrubbery one day and so he and Nicky did what they do best and hooked a chain to each shrub, then pulled them out.

    And then weeds grew and grew and grew until we were able to finally tackle the space this month…

    Front Yard Landscape Makeover

    Front Yard Landscape Makeover

    And while these plants are still babies so to speak, I think it looks so much better already and I can’t wait to see them grow and really highlight the house. Let’s get down to the details of re-landscaping this space, shall we?

    Prepping the Beds

    Like I said earlier, all of the old shrubbery had been pulled out. Before we planted the new stuff, we dug up the monkey grass that was on the lower end of the house and then sprayed all the weeds to kill them.

    After the weeds were all dead, we pulled out the larger ones and Grunt ran our tiller through it all.

    Front Yard Landscape Makeover

    After that, I came back through, smoothed it all out with a rake, then covered everything with weed paper.

    Front Yard Landscape Makeover

    Planning the Beds

    I worked with Proven Winners on this project and they were so great about helping us figure out a plan that would work well with our home and lifestyle in terms of what colors would go best with the brick, our home’s location and how much sun it gets, getting low maintenance plants, etc.

    With the exception of night time and a few hours in the morning, the front of our home has the sun beating down on it all day. We also live in Tennessee where it’s hot and humid often, so all of our plants and shrubs were chosen with those things in mind. So if you have a place in your yard that has similar conditions, this is a great list of plants and shrubs to get your landscaping wheels a turnin’.

    Sun Lovin’ Shrubs

    Since my plants are still babies, I’ve linked below to what they will look like as they mature.

    Shiny Dancer Viburnum

    Front Yard Landscape Makeover - Shiny Dancer Viburnum

    I really love the deep, but shiny green on the Shiny Dancer Viburnum. In the spring, it will have white flowers.

    Emerald Envy Viburnum

    Front Yard Landscape Makeover - Emerald Envy Viburnum

    We have an Emerald Envy Viburnum on each end of the house. These too will have white flowers in the spring.

    Fire Light Hydrangea

    Front Yard Landscape Makeover - Fire Light Hydrangea

    Hydrangeas are my favorite. In fact, Grunt Labor planted me a whole row of them one time and you can read about that story here. Anywho, I was really excited to get a hydrangea in the mix here. And I’ve even got a flew blooms on this one! This one is a Fire Light Hydrangea. It starts with white flowers in the summer and they age to red.

    Pearl Glam Callicarpa

    Front Yard Landscape Makeover - Pearl Glam Callicarpa

    This one is a Pearl Glam Callicarpa. It may not look like much now, but it gets white flowers in the summer that turn to purple fall berries and the berries are beautiful – such a gorgeous color of purple!

    Arctic Sun Dogwood

    Front Yard Landscape Makeover

    This Arctic Sun Dogwood will have gorgeous yellow and coral stems in the winter.

    Laced Up Elderberry

    Front Yard Landscape Makeover - Laced Up Elderberry

    This is a Laced-Up Elderberry. The leaves have kind of a deep purple hue with a lacy look to them.

    Infiniti White Lagerstroemia

    Front Yard Landscape Makeover - Infiniti White Lagerstroemia, a dwarf, low-growing crape myrtle.

    Grunt Labor is a big fan of crape myrtles, so I was also excited to get these, which are Infiniti White Dwarf Low-Growing Crape Myrtles.

    Scentsation Honeysuckle

    Front Yard Landscape Makeover - Scentsation Honeysuckle

    This is a Scentsation Honeysuckle. They will be trained up the porch columns and will have very fragrant, yellow flowers in the early summer.

    Sun Lovin’ Perennials

    We of course wanted to have mostly shrubs in the front that would always have some sort of foliage interest throughout the year, however, we are big fans of perennials too that come back each spring with gorgeous flowers, so we mixed some of those in the plan as well.

    Decadence Lemon Meringue BaptisiaFront Yard Landscape Makeover - Decadence Lemon Meringue Baptisa

    These Decadence Lemon Meringue Baptisia came in a small little container, but promise big, beautiful yellow flowers.

    Cat’s Meow Nepeta

    Front Yard Landscape Makeover

    After seeing what these Cat’s Meow Nepeta look like when they are in bloom, I cannot wait to see them next spring!

    Color Spires Crystal Blue Salvia

    Front Yard Landscape Makeover - Color Spires Crystal Blue Salvia

    This Color Spires Crystal Blue Salvia will have a spiky look with light blue blooms in the summer.

    Primo Black Pearl Coral Bells

    Front Yard Landscape Makeover - Primo Black Pearl Coral Bells

    I’ve always been a fan of these coral bells – I love that deep hue.

    Opening Act White Phlox

    Front Yard Landscape Makeover - Opening Act White Phlox

    Phlox has always been another favorite of mine, so I was happy to get these Opening Act White Phlox in the ground here as well.

    Magic Show White Wands Veronica

    Front Yard Landscape Makeover - Magic Show White Wands

    I don’t think I have ever saw these before, but this Magic Show White Wands really does look a little magical when they bloom.

    Fruit Punch Maraschino Dianthus

    Front Yard Landscape Makeover - Fruit Punch Maraschino Dianthus

    I’ve never had any of these perennials before, but I’ve always thought they were so adorable. They are Fruit Punch Maraschino Dianthus. They have little red flowers that will pop up.

    Planting the Beds

    Once everything got here, I brought all the plants around front and started placing them in the beds where they would go without actually planting them first.

    Front Yard Landscape Makeover

    This helped me to see if I had too many perennials in one spot, some shrubs too close together, some too close to the house, etc. Once I got everything where I wanted it, I planted them.

    Over 40 shrubs and perennials all in one day.

    Because I am a rock star. Or because I’m insane. Most likely the latter.

    The neighbor literally came out and told me I was going to kill myself.

    I laughed in the face of this so called planting danger.

    I also drank a lot afterwards. 😉

    Anywho, when you’re planting in a bed with weed paper that is down, just use a box cutter to cut an X or circle in the weed paper, then dig your hole, put the plant in and fill back in with dirt.

    After everything was in the ground, we put mulch down all over the bed to help retain moisture and of course, to make it look pretty.

    Front Yard Landscape Makeover

    I see a weed that’s gotten through the weed paper there on the edge though. Womp, womp, womp.

    And don’t forget to water!

    Front Yard Landscape Makeover

    We’re looking forward to seeing these babies grow!

    Front Yard Landscape Makeover

    And also getting rid of that hideous green paint…

  • 13 Disney World Tips for the Average Family

    13 Disney World Tips for the Average Family

    If you saw any of my Instagram stories last week, you probably saw where we were at Disney World!

    This was our second trip to Disney with the Circus. We took her two years ago around Christmastime when she was three and she’s five now. I have to say, it was still just as magical this time around as it was last. I’m not ashamed to admit that I did get a little teary-eyed when I saw Cinderella’s castle that first day. I never went as a child, so I think I’m allowed to be a little sappy about the whole experience now, right?

    While we had planned to take the Circus to Disney again in the future, it was my father-in-law who asked earlier in the year when we were all going back and therefore, started the wheels a spinnin’ for this trip to happen. A huge thank you to my in-laws for taking us all!

    Even though, this was just our second time going to Disney, I felt like this trip went so much smoother than our first one. We learned a lot that first time around, so we were much better prepared for this trip.

    You might have noticed that I titled this post Disney World Tips for the Average Family. Average being the key word there. We know lots of people that go to Disney multiple times a year. My hat is off to them because that would be just more than I could handle. They are total pros at Disney World and all that it entails. I could never keep up with them. That being said, these are the things that us average folk have learned what and what not to do when it comes to Disney World.

    And if you have no plans of doing Disney, then by all means feel free to just browse through the photos of our trip below and tell me how cute the Circus is. 😉

    Disney World Tips for the Average Family

    Where to Stay & Eat

    1. Stay at a Disney Resort on the monorail if you can.

    If you want to have easy access to all the Disney parks, dining and everything at Disney Springs, then you will definitely want to stay in a Disney resort. Personally though, we highly suggest staying at a resort on the monorail. Resorts on the monorail are a little more expensive than other Disney resorts, but they make travel to the Magic Kingdom and Epcot so freakin’ easy. If you eat at restaurants in any of the resorts on the monorail, you can also easily get to them. There are three resorts on the monorail: The Contemporary, The Polynesian and The Grand Floridian. We stayed at the Grand Floridian this time around.

    Disney World Tips for the Average Family - save time, money, your sanity and have a better family vacation with these Disney tips!

    The Magic Kingdom was just one monorail stop up from the Grand Floridian. To get to Epcot, we just took the monorail three stops up, switched trains and then we were right there at Epcot. You do have to ride a bus to anywhere else you might want to go, but having such easy access to the Magic Kingdom and Epcot, where we spent three of our days there, was awesome. We only had to take buses to Disney Springs and Animal Kingdom.

    If you don’t stay at a resort on the monorail, then Disney does have buses at all the resorts that run regularly throughout the day which will take you to all the Disney parks, Disney Springs and other Disney hotels. We stayed at Pop Century the first time we went and used the bus system the whole time we were there. Pop Century wasn’t bad, it just wasn’t as convenient as being on the monorail. I will say that the food and beds were both much better at The Grand Floridian than they were Pop Century though.

    2. Never pay full price for your trip. 

    Disney always has some sort of deal(s) they are running. All of their current offers can be found here. Even after we had already booked our trip using a special offer, we got a coupon in the mail for an extra percentage off (I can’t remember the exact amount) and we were able to get that additional discount. Grunt also works with Disney travel consultant, so she helped us book everything. She knows her stuff, so that made the booking process go smoother as well – especially with that first trip when we didn’t know much.

    3. Get the Disney Dining Plan and book your dining reservations as soon as possible.

    In our family’s opinion and in the opinion of multiple other families I’ve spoken with, getting the Disney Dining Plan is the way to go. I think it is roughly $70 per person 10 years or older per day and $25 per person 3-9 years old per day. The plan consists of two snacks, one quick service meal, and one table service meal for each person each day. You also get a mug at the start of your stay which you get unlimited refills on throughout your stay.

    For us, we tended to use our snacks as our breakfast. Snacks could roughly be anything in the parks or at a quick service restaurant that are a single serving such as fries, a cinnamon roll, a cup of yogurt, a piece of fruit, etc. A snack can also be an ice cream bar, a drink, etc. Each resort has a quick service restaurant so we would have our “snacks” there in the morning, then head out to a park.

    Think of a quick service as a meal at a fast food restaurant, except the food is better. 🙂 There is at least one quick service restaurant at every resort and lots in every park.

    The table service meals are sit-down meals. These are the ones you need to make reservations for as soon as you can. You can start making your reservations for table service meals 180 days out from your reservation. Do it then! These are the restaurants where there is usually also character dining, so they fill up fast. This trip we went to:

    The Crystal Palace

    This is inside the Magic Kingdom. Pooh, Tigger, Piglet and Eeyore are here, but my kid was not a fan of them. The food was great!

    1900 Park Fare

    1900 Park Fare is located inside The Grand Floridian. This is where you will find Cinderella, Prince Charming, the evil stepsisters and evil stepmother.

    Ohana

    Ohana is inside the Polynesian resort. Lilo, Stitch, Mickey and Pluto are here, but only for breakfast.

    On our last trip we also went to the Tusker House (inside Animal Kingdom) and Chef Mickey’s (inside the Contemporary resort). Both of those had some of the original Mickey characters – Mickey, Minnie, Goofy, Donald, Pluto, Daisy, etc. and both were super yummy.

    Before Your Trip

    4. Download the Disney app.

    I didn’t have the app on my phone for our last trip, only Grunt Labor did, but this time around, I did have it and I loved it. On the app, you can see what you have coming up, easily change your Fast Passes, see where characters are in every park, what wait times are for rides, etc. It’s like your own personal guidebook to Disney World.

    5. Custom t-shirts are fun.

    I didn’t know that custom t-shirts for Disney World were a thing until when we went the first time and Grunt was like, “We have to get Disney shirts made for the Circus!” Apparently, most people have Mickey or Minnie ears or the Cinderella castle or the princesses or whatever put on t-shirts and then put their names on it too. That’s what we ended up doing for the Circus’ shirts on our first trip.

    This trip though, we went a different route.

    I just wasn’t really a fan of the Mickey or Minnie ears and then the name under it. Every person and their mama had one in the park and I wanted the Circus’s to be more unique. So the Circus and I talked it over and decided what her favorite characters were, then we came up with some designs for a custom t-shirt for her everyday. And then I jumped on that train too and had my own t-shirts made as well.

    On our way down to Disney, we both wore our Beauty and the Beast inspired shirts.

    The next day, the Circus was meeting Ariel, so she wore her little mermaid shirt with her monogram on it.

    We were also meeting Tiana (my favorite) that day, so I wore my Tiana inspired shirt.

    On the day we went to Animal Kingdom, the Circus wore her “Working on my Roar” shirt and I wore my Bare Necessities tee.

    The next day we went to Epcot and I wasn’t really sure who or what we would be doing, so I wore my Mary Poppins shirt and the Circus wore her Cinderella shirt. The Circus also wore her Cinderella shirt the night we had dinner at 1900 Park Fare when she got to meet Cinderelly, as she calls her.

    And on the last day there, we both wore our “Boo” shirts that were Minnie Mouse inspired.

    *A huge thank you to my friend, Ashley who made all our t-shirts for us!

    6. Book the Bibbidi Bobbidi Boutique ASAP.

    If you have a little girl who wants to get the full princess experience, then you might want to take them to the Bibbidi Bobbidi Boutique, where fairy godmothers in training transform them into a princess.

    There are three different packages to choose from and we went with the full-on-make-me-a-princess-package. That package is $200, so not cheap, but Grunt and I were talking about it and it actually isn’t too bad of a deal if you were going to buy your little one a princess dress at Disney anyway. We paid about $80 for a princess dress for the Circus the first time we went. At the Bibbidi Bobbidi Boutique with the package we got, the Circus got a princess dress of her choosing, a matching wand and crown, her hair styled, makeup done and polished nails. She also went home with a goody bag that was filled with a Cinderella carriage necklace, makeup, nail polish, and other knick-knacks. Of course, she also got the full princess experience. That was the only “souvenir” she got from us though while were there.

    The Bibbidi Bobbidi Boutique books up super fast though. There are two locations at Disney World – one in the Magic Kingdom at Cinderella’s castle and one in Disney Springs. You can book your appointment up to a year in advance.

    7. Book your FastPass+ rides 30 – 60 days in advance.

    With your park ticket purchases, you will also get three fast passes per day per person for rides. These are one hour time slots that allow you to go the ride you have your fast pass for and bypass the line. You can book these right in the app. If you aren’t staying at a Disney resort, you can book the FastPasses 30 days in advance. If you are staying in a resort, you can book them 60 days in advance.

    While You’re There

    8. Splurge on PhotoPass.

    As you go around to the different parks, you will see lots of Disney cast members with cameras taking photos of visitors. They are usually also wherever character meeting spots are. This is part of their PhotoPass program. After they take your photos, they will scan your band and the photos will automatically be put into your PhotoPass.

    You can purchase all your photos from your trip for $200. Most all of the photos in this post are from our PhotoPass purchase. For us, it is really worth it because you don’t have to lug your good camera around and you can really enjoy the experience, rather than trying to get a photo every time you turn around.

    To get your money’s worth, every time you see a PhotoPass cast member with a camera, just stop and have your picture made.

    9. Get to the park early to ride.

    If you can, get up and be at the park when it opens. Doing this allowed us to get in line ASAP at Epcot to meet Anna and Elsa. If we hadn’t been there earlier, then I don’t know that the Circus would have gotten to see them.

    The first day we went to the Magic Kingdom, we went straight in to Adventureland – it was essentially dead. We were able to get right on Aladdin’s Magic Carpet ride and then the Jungle Cruise, both with zero wait.

    We were even able to switch the FastPass+ that we had originally gotten for the Jungle Cruise on another ride. After those rides, we headed toward Fantasyland and stopped at It’s a Small World, once more with zero wait time.

    The second day we were at Disney, we went straight to the Fantasyland area and rode the teacups, Dumbo and the Barnstormer with zero to very little wait time.

    10. Epcot is a great place for meeting characters.

    I didn’t really know what to expect at Epcot as I had never been before. I knew adult beverages were in abundance there (YAY!) and there were some rides we wanted to do, but as it turned out it was a really great place to meet characters as well. As you walk through the different countries, you will see signs where Snow White, Jasmine, Belle and other characters will be throughout the day.

    These wait lines were so much smaller than ones at the Magic Kingdom! And with Snow White, you got to take a photo with her right at her wishing well.

    She was pretty proud of that lipstick stain. 🙂

    11. Divide and Conquer.

    We were lucky on our trip because we had a team of four adults who just wanted the Circus to have a great time and experience everything she wanted to. For that reason, we would all divide and conquer a lot if need be. One of us would go stand in line for a ride or another character meet and greet, while another one stayed with the kid or did something else. Pa totally won the award for dividing and conquering this trip. I can’t tell you how many lines he jumped in a line so the Circus could meet a princess. 🙂

    12. See a parade in the Magic Kingdom. 

    The first trip we took to Disney World, I didn’t really care to see any of the parades in the Magic Kingdom. I just figured, it’s a parade, what’s so great about it.

    I was wrong.

    They are truly magical.

    Disney World Tips for the Average Family - save time, money, your sanity and have a better family vacation with these Disney tips!

    Try to see at least one parade in the Magic Kingdom – I think there is always one or two per day. You’ll get to see lots of characters you might not get to see otherwise. The music is fun and the performers are all so talented.

    13. Don’t miss the fireworks at the Magic Kingdom. 

    By all means, make it a point to see the fireworks show at the Magic Kingdom at least once during your stay. On our first trip, we were in the park to see them. This time around, we saw them just after dinner at the Polynesian resort one night. I think that I almost liked seeing them more at a resort off the monorail, than actually in the park. The resort still played the music that went along with the fireworks and the Circus and I had plenty of room to dance around on the grass during them.

    Obviously, we had a great trip! I hope you do too if you go!

    You might also want to see…

    If you're not a fan of crowded Florida beaches, then you should definitely give an Isle of Palms Beach Vacation in South Carolina a try. It's about 30 minutes outside of Charleston and has beautiful beaches, great places to stay and eat. Best of all, this beach is never too crowded! South Carolina beaches are the best!Isle of Palms Beach Vacation

    Things to Do in Chattanooga, Tennessee - a great spot for families!

    A Chattacation: Things to Do in Chattanooga, TN

    Pin This Post

    Disney World Tips for the Average Family - save time, money, your sanity and have a better family vacation with these Disney tips!

  • Spooky Halloween Home Tour

    Spooky Halloween Home Tour

    Affiliate links may be included in this post, which means if you purchase something through one of those links, I may earn a small commission, but you won’t pay a dime more.

    To round out this week of all things Halloween, I thought I’d give you a tour of our Halloween decorated home in all it’s spooky goodness.

    I haven’t had a chance to decorate the exterior entry yet (it’s still so hot here!), but here’s where we are inside….

    Won’t you come in, my pretty?

    A home eerily decorated for Halloween with lots of easy and affordable halloween decorations. #halloween #halloweendecor

    Free Printable Potion Labels and Spell Book Cover / Creepy Cloth / Potion Bottles

    A home eerily decorated for Halloween with lots of easy and affordable halloween decorations. #halloween #halloweendecor

    Creepy Cloth / Potion Bottles

    A home eerily decorated for Halloween with lots of easy and affordable halloween decorations. #halloween #halloweendecor

    Eyes Art / Sofa (similar) / Coffee Table (similar) / Floor Lamp / Red Drapes

    A home eerily decorated for Halloween with lots of easy and affordable halloween decorations. #halloween #halloweendecor

    Lion Art / Green Chairs

    A home eerily decorated for Halloween with lots of easy and affordable halloween decorations. #halloween #halloweendecor

    Dollar Tree Skulls Makeover

    A home eerily decorated for Halloween with lots of easy and affordable halloween decorations. #halloween #halloweendecor

    DIY Mohawk Lollipop Holder 

    A home eerily decorated for Halloween with lots of easy and affordable halloween decorations. #halloween #halloweendecor

    Black and Orange Straws 

    A home eerily decorated for Halloween with lots of easy and affordable halloween decorations. #halloween #halloweendecor

    DIY Skull Drink Stirrers

    A home eerily decorated for Halloween with lots of easy and affordable halloween decorations. #halloween #halloweendecor

    Large Skulls / Black Glitter Branches

    A home eerily decorated for Halloween with lots of easy and affordable halloween decorations. #halloween #halloweendecor

    Sofa (similar) / Coffee Table (similar) / Floor Lamp / Red Drapes

    A home eerily decorated for Halloween with lots of easy and affordable halloween decorations. #halloween #halloweendecor

    Large Skulls / Black Glitter Branches

    A home eerily decorated for Halloween with lots of easy and affordable halloween decorations. #halloween #halloweendecor

    Bar Cart / DIY Witch’s Hat

    A home eerily decorated for Halloween with lots of easy and affordable halloween decorations. #halloween #halloweendecor

    Free Double Double Toil and Trouble Printable / DIY Ampersand Pumpkin

    A home eerily decorated for Halloween with lots of easy and affordable halloween decorations. #halloween #halloweendecor

    A home eerily decorated for Halloween with lots of easy and affordable halloween decorations. #halloween #halloweendecor

    Bar Cart / DIY Witch’s Hat / DIY Ampersand Pumpkin

    A home eerily decorated for Halloween with lots of easy and affordable halloween decorations. #halloween #halloweendecor

    Dining Table / Red Drapes

    A home eerily decorated for Halloween with lots of easy and affordable halloween decorations. #halloween #halloweendecor

    DIY Dollar Tree Skull Candleholder

    I think it’s safe to say we are ready for Halloween here!

    I’ll be taking the next week off to spend time with Grunt Labor and the Circus over their fall breaks. Keep up with our fall break adventure on my Instagram stories! See ya back here after that!


    SaveSaveSaveSaveSaveSaveSaveSave

    SaveSave

    SaveSave

    SaveSaveSaveSave

  • Double Double Toil and Trouble Free Halloween Printable

    Double Double Toil and Trouble Free Halloween Printable

    Get instant easy Halloween decor by snagging this free printable Double Double Toil and Trouble quote art!

    As I’ve already said this week, I’ve been enthralled with ghosts and witches since I can remember. I started watching scary movies at a far younger age than I probably ever should have. But I turned out alright. 😉

    One of my favorite Halloween movies as a small child was Double Double Toil and Trouble, with yes, Mary Kate and Ashley Olsen. Now, I’m not a Mary Kate and Ashley fan really, but the whole storyline of that movie with Sophia being trapped by her evil twin, Agatha in the mirror just reeled me.

    And while it was William Shakespeare thru his witches that first coined the Double Double Toil and Trouble line, it was first introduced to me by that movie.

    And every Halloween when I take out my witch’s hat to hand out candy in, it’s that line that I say over and over again.

    This post contains affiliate links for your shopping convenience. Click here to read my full disclosure policy.

    Double Double Toil and Trouble Quote Art Printable

    So I decided it was finally time to hang it on the wall.

    How to Get the Double Double Toil and Trouble Free Printable

    If you’re one of my email subscribers, then you can snag the Double Double Toil and Trouble printable for free in my printable library! Remember, the password is going to be at the bottom of the last email you received from me, which was probably about this post!

    If you aren’t already a Rain on a Tin Roof subscriber, you can subscribe here now or click the image below to signup.

    Free Halloween Printable - Double Double Toil and Trouble

    Once you sign up and confirm your subscription, you’ll get a confirmation email. In that email are instructions for accessing the printable library to get this free printable and all my other free printables.

    Tips for Printing and Hanging the Double Double Toil and Trouble Printable

    This piece is made to be printed out on a piece of 8 1/2″ x 11″ paper. I suggest using card stock.

    You will probably have a small amount of white around the edges of the print. Just cut that off if you don’t like it. I left mine because it was going on a white mat and frame anyway, so you can’t tell too much and also, I don’t have the ability to cut a straight line.

    I opted to tape my printable to the outside of a frame that already had a piece of art in it. Since it’s for Halloween, it’s only going to be out for a month, so I didn’t see a reason to totally frame it behind glass for that month. If you do want to frame it in an 8×10 frame, then just scale the print down to where it is centered on your sheet of paper before centering it. This will leave more white space.

    Double Double Toil and Trouble Free Halloween Printable

    Ampersand Pumpkin Tutorial Here

    This is also the year the Circus will be introduced to Double Double Toil and Trouble. So far, she’s loved all the other classics I’ve made her watch, so I have high hopes for this one too. 😉

    Fire Burn & Cauldron Bubble!

    Looking for more great halloween decorating ideas? I’ve got ya…

    Easy Halloween Decorations – all my favorite DIY halloween projects that are easy and affordable!

    Easy DIY Dollar Tree Skull Candleholder– one of my favorite Halloween decorations I’ve ever made!

    DIY Skull Drink Stirrers in Five Minutes – so simple, so fun and perfect for parties!

    Free Printable Spell Book Cover and Potion Labels – now what kind of Halloween decor would it be without a spell book and potions?!

    Want to come back and snag this printable later? Just pin the image below to remember it!

    Double Double Toil and Trouble Quote Free Halloween Printable

    SaveSaveSaveSaveSaveSaveSaveSave

    SaveSave

  • Free Printable Spell Book Cover and Potion Labels

    Free Printable Spell Book Cover and Potion Labels

    Time to cook up some spells this Halloween! We can’t do that without our spell book and potions, right? Use this free printable spell book cover and potion labels to complete your Halloween decorating – and cast a spell or two!

    Grunt Labor is totally weirded out by my love for witches, ghosts and such. If I’m reading a book about any sort of spooky thing like that, I usually catch him rolling his eyes a time or two.

    Luckily, he’s let me drag him through ghost tours in Savannah and Marie Laveau’s grave in New Orleans.

    I have loved witches and ghosts ever since I can remember, even as a little kid. They’ve never scared me, only intrigued me.

    This Halloween with my decorations, I really went for more authentic-like spooky decor, rather than cutesy stuff. I have a few cute things here and there, but I really upped the legit spooky factor this year – this spell book and potion vignette being one of those things…

    This post contains affiliate links for your shopping convenience. Click here to read my full disclosure policy.

    Spell Book Cover and Potion Labels Printable Files

    P.S. I had a really bad lighting situation going on when I photographed this, so just overlook the graininess of some of these photos!

    I took a little corner in our entryway and created this little Halloween nook. I bought “potion bottles” and then created the labels. I’m offering these labels as a free printable if you’re one of my email subscribers.

    Potion Labels Free Printables

    Why yes, that is real bat blood. Not Karo syrup mixed with red food coloring. 

    And powdered werewolf bone. It doesn’t taste like flour at all.

    That monster mash….oh my. It tastes slightly familiar though – maybe water mixed with green food coloring?

    The snake venom. Very syrupy…perhaps with a little yellow coloring.

    And the grave dirt. Who knew we had a grave right in our front flower bed?

    You can also snag the Spells, Enchantments and Curses printable spell book cover for free as an email subscriber as well.

    Spell Book Cover Free Printable

    A girl who loves witches and spells as much as I do, needs a proper spell book, right? 😉

    How to Get the Printable Potion Labels + Spell Book Cover

    To get access to my Printable Library, which contains both the potion labels and the spell book cover, you’ll need to be a subscriber of Rain on a Tin Roof. If you aren’t already a subscriber, you can subscribe here now.

    Printable Potion Labels and Spell Book Cover

    Once you sign up and confirm your subscription, you’ll get a confirmation email. In that email are instructions for accessing the printable library to get these free printables and other free printables.

    Already a subscriber? Look at the bottom of the last email you received from me. There, you should find instructions for accessing the printable library.

    Tips for Printing the Potion Labels

    Free Printable Potion Labels

    There are actually three more surprise potion labels included on the printable that I didn’t use on my potion bottles, so there ya go!

    I suggest printing the labels out on a piece of card stock, then just cut out around the labels.

    I took a piece of jute twine, positioned it in a half circle behind the label, then hot-glued both ends to the back of the label to make it where I could hang the labels on the bottles.

    Tips for Printing the Spell Book Cover

    Free Printable Spell Book Cover

    The spell book cover is designed to be printed out on a piece of 8 1/2″ x 14″ legal size paper. Also, mine printed out lighter than what the design shows, so just be aware of that.

    The trick to the spell book cover is finding a book that it best fits around. Cut the cover out after you print it, then grab a few books and see which one fits the cover best. The book I used still shows some of the front cover’s edges and didn’t wrap entirely around the back of the book, but that didn’t matter since it doesn’t show. To hold the cover in place, I just put tape on the back of the cover and taped it to the book.

    Happy Spell Casting!

    Looking for more fun Halloween decorating ideas?

    Simple DIY Halloween Decorations – all my favorite (and super easy!) Halloween decor ideas!

    Easy DIY Dollar Tree Skull Candleholder– such a fun piece to make and one of my favorites!

    DIY Skull Drink Stirrers in Five Minutes– super easy and super fun for parties!

    Double Double Toil and Trouble Free Printable Halloween Art – fire burn and cauldron bubble! You must have this to complete your Halloween spell casting scene!

    Want to come back later and snag this? Just pin the image below so you don’t forget!

    Free Printable Spell Book Cover and Potion Labels

    SaveSaveSaveSaveSaveSaveSaveSave

    SaveSave

    SaveSave

    SaveSave

  • Traditional Nautical Farmhouse Bathroom Renovation

    Traditional Nautical Farmhouse Bathroom Renovation

    I partnered with Hayneedle on this bathroom project, however all opinions are 100% mine.

    My grandparent’s bathroom never changed while I was growing up. It always sported the same blue and black wall tile, the wall-mounted sink from the 50’s and a once-white-yellowed with time laundry hamper.

    The Bathroom Before

    Above that laundry hamper was a picture of a ship on the ocean with big white sails. I looked at that picture when my Grannie gave me a bath as a kid. I looked at that picture every time I dried my hands at the sink. That picture always got my attention no matter how many times I saw it.

    I don’t know whatever happened to that picture, but I’d sure like to see it again.

    That picture, along with the blue and black tile of the old bathroom was part of the inspiration for that same bathroom’s new look.

    A traditional nautical farmhouse bathroom renovation that has a touch of farmhouse style mixed with a traditional and nautical feel.

    Light Fixture / Mirror / Vanity / Faucet / Towels / Towel Ring

    While I wish the bathroom could have stayed forever the way my childhood’s eye still sees it, most of it was beyond repair. The wall tile was falling off and cracking in multiple locations, the medicine cabinet had become a rusty mess, the sink was leaking and couldn’t be fixed and the floor had water damage. Here’s our easy fix for coving the damaged bathroom walls. 

    A traditional nautical farmhouse bathroom renovation that has a touch of farmhouse style mixed with a traditional and nautical feel.

    Shower Curtain / Roman Shade / Towel

    But to channel a little bit of that bathroom from my memory, I set out to give the bathroom a bit of a nautical vibe reminiscent of that ship that once hung on the wall and also a traditional feel that would weather well over time and go with the rest of the house’s style.

    A traditional nautical farmhouse bathroom renovation that has a touch of farmhouse style mixed with a traditional and nautical feel.

    We also added in wood tones with the doors, flooring and crown that can be seen throughout the rest of the house and also reminds me so much of my Pap.

    You can see the full bathroom remodel on Hayneedle’s blog today and see all the products I used in the renovation here. Please hop over there and tell me what you think!


    Pin This Post

    A small farmhouse bathroom remodel that has a touch of farmhouse style mixed with traditional.

    SaveSaveSaveSave

    SaveSave

  • DIY Skull Drink Stirrers in Five Minutes

    DIY Skull Drink Stirrers in Five Minutes

    I will be formally declaring this week as the week of all things Halloween.

    Well, I’ll be formally declaring that here on this blog because ya know, that’s all I really have control over, although technically I feel I deserve much more say-so in this world. 😉 Don’t you think so too?

    With the exception of Tuesday (which is when I’m planning to share the farmhouse’s bathroom remodel!), I’ll have a new, easy and cheap Halloween craft and/or printable for ya here on the blog each day!

    So, happy all things Halloween week minus one day!

    As I said last week, in the post about my DIY creepy skull candleholder, I have finally regained my creative surge for fall – it just doesn’t include orange pumpkins and leaves.

    It includes skulls, ghosts, witches and other wonderful things of that nature.

    Like these skull drink stirrers…

    DIY Skull Drink Stirrers in Five Minutes - an easy Halloween decoration!

    This post contains affiliate links for your shopping convenience. Click here to read my full disclosure policy.

    I love these little guys! They are freaky and spooky and creepy and that just makes my Halloween heart happy!

    It literally took about five minutes to make these little gems for Halloween.

    Tools & Supplies Needed:

    DIY Skull Drink Stirrers in Five Minutes - an easy Halloween decoration!

    Steps

    Step 1

    Using the X-Acto knife, cut a hole that is slightly smaller than your straw end in the bottom of each of the mini-skull heads.

    DIY Skull Drink Stirrers in Five Minutes - an easy Halloween decoration!

    Step 2

    Insert a straw into each of the holes you made with the X-Acto knife.

    DIY Skull Drink Stirrers in Five Minutes - an easy Halloween decoration!

    That’s it!

    Your skull heads should fit on the straws pretty snug as long as you didn’t make your holes too big. If you did make some too big, then put a bead of hot glue around where the skull and straw meet.

    Next year, you can either make them all over again, or ask people who use the stirrers to simply pop the skull head off before tossing the stirrer, then you can wash them and use them to make more stirrers next year.

    DIY Skull Drink Stirrers in Five Minutes - an easy Halloween decoration!

    Cheers to Halloween!

    Looking for more Halloween projects?

    Easy DIY Dollar Tree Skull Candleholder – this gives any room an eery glow.

    Halloween Decor on a Budget – all my favorite Halloween decor I’ve done!

    Free Double Double Toil and Trouble Halloween Printable Art – instant Halloween decor!

    Free Printable Spell Book Cover and Potion Labels – can’t be without your spell book on Halloween!

    Want to come back for the how-to later? Just pin the image below!

    DIY Skull Drink Stirrers in Five Minutes - an easy Halloween decoration!

    SaveSave

    SaveSave

  • Easy DIY Dollar Tree Skull Candle Holder

    Easy DIY Dollar Tree Skull Candle Holder

    This skull candle holder won’t cost more than $5 to make and won’t take but about 10 minutes to put together. I’m willing to bet, it’s going to be one of your favorite Halloween decorations this year!

    It finally happened.

    It took giving up for it to finally happen, but it happened.

    When I finally gave myself permission to not stress out about fall decorating, it was then that my heart reminded me what I really loved most about fall.

    Halloween.

    I love witches. And ghosts. And haunted houses. And basically anything else that screams creepy and/or haunted.

    I’m that girl.

    And while walking through the Halloween decor at the Dollar Tree, I slowly felt that vaguely familiar feeling creeping back into me again – the need to go all out for Halloween.

    And that made me all giddy inside like Tilly Witch when she finally remembered how to be a witch again.

    And so I bought nearly all the skulls the Dollar Tree had in both glitter and non-glitter varieties. And then I headed over to Michael’s and proceed to buy even more Halloween things and then asked the clerk if she could check the back for more.

    I was back. 

    I came home and then turned our living room into Halloween amazingness.

    But before we jump into a whole house Halloween tour, let’s first start with this creepy DIY skull candle holder!

    This post contains affiliate links for your shopping convenience. Click here to read my full disclosure policy.

    Skull Candle Holder

    Definitely creepy, right?

    It’s so easy to make – you won’t believe it!

    DIY Skull Candle Holder

    Tools & Supplies Needed:

    DIY Skull Candle Holder

    Steps

    Step 1

    Using the X-Acto knife, cut out an “X” into the top of each skull.

    How to Make a Halloween Skull Candle Holder

    Step 2

    Arrange the skulls in a triangle type formation and hot-glue them together where each one touches. It’s totally ok to go overboard with the glue here as it will just look like wax droppings from candles.

    Let the hot glue fully dry, then stick a candle into each X that you made with the X-Acto knife. Apply a good bit of hot glue where the candle and skull meet.

    In the photo below, you can see both where I applied the hot glue to connect the skulls and where I secured the candles.

    Halloween Skull Candleholder from Dollar Tree Skulls

    I layered in some creepy cloth from the Dollar Tree under the skulls as well to add a bit more to this cheap and easy Halloween table centerpiece.

    If you wanted to add a sparkly touch to your candle holder, you could also glitter the eye sockets of the skulls.

    Skull Candle Holder DIY

    The Circus has insisted on eating dinner by light of the skull candleholder every night since I’ve made it. I’m cool with that. She’s beginning to love all things Halloween and spooky like her mama. 😉

    This also makes a great table centerpiece for a spooky Halloween party!

    Who else is ready to just skip all this fall leaves and pumpkin decorating and just go straight for the spooky stuff?

    Want more great Halloween decorating ideas and projects?

    Easy Halloween Decor DIY Projects – loads of great Halloween crafts that won’t cost a fortune and are simple to make!

    DIY Skull Drink Stirrers in Five Minutes – so easy and so fun for a party!

    Free Printable Double Double Toil and Trouble Halloween Art – instant decor!

    Free Printable Spell Book Cover and Potion Labels – one can’t be without their spell book on Halloween!

    Dollar Tree Skull Upcycle– see how I upcycled these same skulls a different way!

    Looking for some spooky books to read? Be sure to see my list of The Best Ghosts, Witches and Such Books!

    Want to come back later? Just pin the image below!

    Dollar Tree Skull Candle Holder

    SaveSaveSaveSave

    SaveSave

  • Mid-Century Modern Dressing Table Makeover

    Mid-Century Modern Dressing Table Makeover

    This post is sponsored by Velvet Finishes, however all opinions are 100% mine. Affiliate links may be included in this post, which means if you purchase something through one of those links, I may earn a small commission, but you won’t pay a dime more.

    This project is the kind of project that keeps me going sometimes. It’s just another furniture makeover. Nothing groundbreaking. Nothing phenomenal. I won’t be able to fill up my retirement account with it.

    But this little mid-century modern dressing table makeover made me feel a little bit better about the past few weeks I’ve been having.

    Mid-Century Modern Dressing Table Makeover - a painted and stained furniture makeover combination with Velvet Finishes.

    About four out of five projects I’ve had on my to-do list either didn’t happen, didn’t go as planned at all or just flat out went up in smoke.

    And then this little piece came along and renewed my hope in my DIY self.

    I started with this…

    Before: Mid-Century Modern Dressing Table Makeover - a painted and stained furniture makeover combination with Velvet Finishes.

    I’ve had this piece for a while and found her at a rummage sale. Judging from the holes on top of her and space in the middle, I think she was once a beautiful mid-century modern dressing table with a mirror across her top.

    Now, I’m not usually one to paint wood that’s in good condition. The funny thing about this piece was that her top and sides were in really rough condition, lots of nicks, scratches and of course, those holes on top where a mirror once was, but the drawers were in excellent condition. Oh, the glorious drawers – aren’t the details on them just beautiful!

    So I thought about it for a while and knowing that I really didn’t want to cover up those drawers with paint that were in great condition, I instead opted to just paint the top and sides of this piece and leave the drawers untouched.

    And it turned out perfectly – went off without a hitch – in just a day.

    See how my faith was restored now?

    Mid-Century Modern Dressing Table Makeover

    Tools & Supplies

    Mid-Century Modern Dressing Table Makeover - a painted and stained furniture makeover combination with Velvet Finishes.

    I used:

    Steps

    Step 1

    First, I filled those holes on top of the table and fixed any deep scratches, dents and dings that were there as well. I used wood filler and sandpaper to smooth it out. There’s a tutorial here for how to fill holes.

    Step 2

    Next, I removed the drawers and taped off around the edges of the trim that went around those – I wanted to keep that part stained as well.

    Mid-Century Modern Dressing Table Makeover - a painted and stained furniture makeover combination with Velvet Finishes.

    Basically, I just wanted to paint the exterior frame of the table. I also ran FrogTape along the upper part of the legs to make sure I didn’t accidentally get paint on them.

    Step 3

    This piece had a bit of shiny topcoat left on it where I was planning to paint, so I needed to remove that in order to get my paint to adhere well to the surface there. To do this, I used Ready.

    Mid-Century Modern Dressing Table Makeover - a painted and stained furniture makeover combination with Velvet Finishes.

    I just sprayed it on the top and sides of the table, let it sit for a few minutes, then wiped it down with a clean cloth. This removes the shine and cleans at the same time. I was careful not to get the Ready on any part that wasn’t getting painted though.

    Step 4

    After that, I gave the piece two coats of Velvet Finishes Handsome, which is a perfect navy color.

    Mid-Century Modern Dressing Table Makeover - a painted and stained furniture makeover combination with Velvet Finishes.

    I just brushed the color right onto the piece with one of the Reviver series paint brushes. Paint glides on really smoothly with these brushes.

    Step 5

    Since stained wood has so many different variations in its finish, I didn’t want a stark contrast between the navy painted top and sides and the stained drawers on this piece. So to add more dimension to the painted portions, I applied Enhance Dark Glaze to the painted portions after the paint had dried.

    Mid-Century Modern Dressing Table Makeover - a painted and stained furniture makeover combination with Velvet Finishes.

    The glaze is really simple to apply.

    Mid-Century Modern Dressing Table Makeover - a painted and stained furniture makeover combination with Velvet Finishes.

    You just brush it on, let it sit for a minute or two, then gently wipe the excess away.

    Mid-Century Modern Dressing Table Makeover - a painted and stained furniture makeover combination with Velvet Finishes.

    You want to wipe it away very lightly. I ended up doing two rounds of the Enhance glaze to get the look I wanted.

    Mid-Century Modern Dressing Table Makeover - a painted and stained furniture makeover combination with Velvet Finishes.

    Similar Gun Bookends

    Enhance Glaze also works as a topcoat, so even though Velvet Finishes paint already has a topcoat built-in, this piece will have even more added protection. Isn’t the depth the glaze added gorgeous? I love it with the Handsome paint.

    Mid-Century Modern Dressing Table Makeover - a painted and stained furniture makeover combination with Velvet Finishes.

    Similar Snakeskin Lamp

    I think this piece would make a great media console.

    Mid-Century Modern Dressing Table Makeover - a painted and stained furniture makeover combination with Velvet Finishes.

    Similar Snakeskin Lamp / Similar Gun Bookends

    Cheers to a project finally going off without a hitch, friends!

    You might also want to see…

    How to Turn a Side Table into a Bench

    How to Make Furniture Glaze in Any Color

    Pin This Post

    Mid-Century Modern Dressing Table Makeover - a painted and stained furniture makeover combination with Velvet Finishes.

    SaveSaveSaveSaveSaveSave

    SaveSaveSaveSave

    SaveSave

    SaveSaveSaveSave

    SaveSaveSaveSave

  • Five Free Fall Mums Watercolor Printables

    Five Free Fall Mums Watercolor Printables

    I am so excited about how this little project turned out, ya’ll! It’s not really a project, I suppose, but either way, I’m excited about it.

    If you’re coming over from Robb Restyle, welcome! I just love Kristy’s Cool Nights printable – so perfect for fall!

    If you saw my fall home tour, then you know I gave myself a hard time about not being on top of my fall game. Well, I finally said screw it when it came to fall decorating and just threw a few pumpkins out and called it good.

    Isn’t it funny though how sometimes when you stop trying so hard you end up getting exactly what you were trying to get?

    Or something like that. 

    Well that’s how these fall mums watercolor printables came to be.

    My friend, Laura from The Turquoise Home asked myself and a few of our other blogger friends to join in on a fall printable blog hop. With all my fall woes, I wasn’t sure I could come up with anything.

    But after a little ego boosting from some friends, I managed to come up with this…

    Free Fall Mums Watercolor Printables - free and easy fall decor!

    And I am tickled pink over it, ya’ll! I mean, it’s not a Monet or anything, but for someone who totally wasn’t feeling all the fall decor, I was excited about how it turned out.

    In fact, so excited that I came up with four more…

    Free Fall Mums Watercolor Printables - free and easy fall decor!

    The ADHD just totally kicked in and I was all gung-ho about it.

    Wait, is gung-ho even a saying where you live?

    Free Fall Mums Watercolor Printables - free and easy fall decor!

    Not only did I create five different watercolor scenes, but I also did two different font variations on each of them.

    Free Fall Mums Watercolor Printables - free and easy fall decor!

    And you can get all of them fo’ free! 

    Free Fall Mums Watercolor Printables - free and easy fall decor!

    What can you do with them?

    Well, for starters, print them off. 😉 I suggest printing on card stock, which is what I did. I usually either take or upload all my color printing things like this to Staples print center.  With these, I told them to center each image on a piece of 8.5 x 11 card stock paper and then print them off. Then you can frame them, display them on a clipboard or use them to cover up a hole in your wall. Basically, whatever your little heart desires to do with them.

    Besides the font variations, I am also giving you the watercolor file itself without any text in case that’s your shot of whiskey.

    How to Get the Printables

    You can get all five of the fall mums printables by subscribing to the Rain on a Tin Roof email subscription right here.

    Once you’re subscribed, you’ll receive an email with instructions on how to access my free printable library and that is where you will find all of these fall printables.

    If you’re already a subscriber, then just look at the last email you got from me, which is probably the email that had the link to this post, scroll to the bottom of the email and you’ll find the instructions there for accessing the printable library!

    I really hope you guys love these little things as much as I do.

    Happy Printing! 😉

    Looking for more great printable art? Snag these then!

    Free Printable Horse Art – gorgeous horses to grace your walls.

    Printable Cow Art – who knew cows could be so pretty?

    Find Her Jesus, Keep Her Well Art – for the little girls in your life.

    Want to come back later? Just pin the image below!

    Free Fall Mums Watercolor Printables - free and easy fall decor!

    Free Fall Printables

    SaveSave

    SaveSaveSaveSaveSaveSaveSaveSaveSaveSaveSaveSave

  • Fall at the Farmhouse

    Fall at the Farmhouse

    Affiliate links may be included in this post. 

    Hey, ya’ll! Today, I’m sharing my fall home tour with five other bloggers in this year’s Fall Home Tours hosted by Marty from A Stroll Thru Life. If you’re popping over from 11 Magnolia Lane or another stop on the tour or from anywhere else, welcome!

    I’m going to be brutally honest today.

    Simple Fall Decor Ideas for the Home - decorating the living room for fall.

    Rug / Sofa (similar) / Ottoman / Botanical Art Prints / TV Stand / Nailhead Wing Chairs / Red Pillows

    While I absolutely love this time of the year – it’s my favorite by far, it can often make me feel a little inadequate.

    Everywhere I look, everyone has these beautifully decorated and thoughtful homes for fall and I’m just over here like, “How did you ever find time to do that?” Not to mention, “How in the hell did you even come up with that?”

    Simple Fall Decor Ideas for the Home - decorating the living room for fall.

    Rug / Ottoman / TV Stand / Botanical Prints / Wall Sconces (I painted mine gold.)

    Don’t get me wrong – I think everyone who has those gorgeous fall homes, folks that are a part of this tour included, are just flat amazing. My hat is off to you. I bow down in your presence. I commend you. I am not worthy to be alongside you on this tour. Please tell me your secrets.

    Simple Fall Decor Ideas for the Home - decorating the living room for fall.

    Sofa (similar) / Art Above Sofa / Blue Pillow / Mini Radio Flyer Wagon

    I think on Pinterest there are approximately 3,263 gorgeous fall wreaths made of all sorts of things, 6,328 ways to decorate a pumpkin and no less than 2,846 beautiful fall mantels out there. I mean, those aren’t actual statistical numbers, just what my overwhelmed mind tells me. 

    Simple Fall Decor Ideas for the Home - no carve pumpkin decorating ideas.

    I love most all of those thousands of fall decorating ideas. They are beautiful and those people who made them should get a damn fall decorating award. But as I browse through all that, I usually end up just wanting to find the closet corner to crawl into and cry. And if we’re being honest, probably drink too.

    Simple Fall Decor Ideas for the Home - no carve pumpkin decorating ideas.

    Wall Sconces (I painted mine gold.)

    I feel like I’ve been in a bit of a slump lately, or maybe for the last few Falls, and it’s like my creativity in that department just hit a wall. I walk the seasonal aisles of all the local craft stores just hoping to get some spark of creativity and there’s nothing. Zero. Zip. Nada. The ship has sailed and I don’t know if it’s ever coming back home. I mean, I was never a brilliant fall decorator, but I’ve been coming up shorter a little more every year.

    Simple Fall Decor Ideas for the Home - decorating the dining room for fall.

    DIY Ribbon Wrapped Pumpkins

    So I finally did the one thing that I know exactly how to do best.

    I said screw it.

    Simple Fall Decor Ideas for the Home - no carve pumpkin decorating ideas.

    I didn’t come up with one single new fall craft or decorating idea or anything of the sort. I pulled out the painted pumpkins and fall garland from years past and threw ’em around.

    And that was it.

    It’s good enough.

    Simple Fall Decor Ideas for the Home - decorating the dining room for fall.

    DIY Glittery Fall Garland

    When I start seeing real pumpkins around here to buy, I’ll get some of those too, and the Circus and I will paint them and carve them and glitter their stems. It won’t be anything groundbreaking, but we’ll have fun doing it and we’ll enjoy them.

    And isn’t that all that really matters in the end?

    [show_shopthepost_widget id=”2809940″]

    Next stop on the fall home tours today is Hymns and Verses!


    SaveSave

    SaveSave

    SaveSave

  • Seeing Red. The Circus’ Farmhouse Bedroom Plans

    Seeing Red. The Circus’ Farmhouse Bedroom Plans

    I didn’t want to be that mom.

    That mom who never let her kid have the kind of room they wanted.

    That mom who didn’t give her kid any creative freedom when it came to decorating their room.

    I really really didn’t want to be that mom.

    This is where not being that mom got me…

    The Bedroom Now

    A bright red room I’m not quite sure what in the hell to do with.

    The Circus insisted on having a red room at the farm. Absolutely could not be swayed any other way, folks.

    So I will say that the 1st photo above was taken in very bad lighting, so that picture might be making it seem a little worse than it actually is. And nothing is really on the walls yet. And everything else is just thrown into the room haphazardly.

    But still.

    It’s a whole lot of red. And I love red. It’s one of my favorite colors. But this red, y’all. I just don’t know.

    I’m trying though. I’m putting forth an effort to make this red work because this little girl loves this red. So here’s what I’ve come up with…

    Disclosure: Affiliate links may be included in this post. Minted provided me with the art for this room. All opinions are 100% mine.

    Colorful Boho Cowgirl Girls Bedroom Design

    Chandelier / Horse Art / Lucky Girl Art / Bedding / Curtains / Blue Paint / Purple Paint / Coral Paint

    I’m calling it a Colorful Boho Cowgirl Bedroom. I need something that sounds halfway legit to keep me going here, folks. 

    My general thought is that I need to make that red paint the backdrop, instead of the focal point, much like I do with the black walls in the living room and dining room at The 70’s Landing Pad. In this case, I figure the way to do that is to add in other colors that work with the red, some white and eye catching patterns.

    Colorful Boho Cowgirl Girls Bedroom Design: Colors and Textiles

    Light Blue Color / Purple Color / Coral Color / Bedding

    I found this colorful floral bedding from Target and the red that’s on the walls seems to go well with the red in the bedding. Since the bedding also has so many other colors, I figure I can pull multiple other colors from it as accents throughout the room that will also work well with the red. I matched up Velvet Finishes colors to some of the colors in the bedding, so I think I’m going for using the Boheme (light blue), Stately (purple) and Exotic (coral) as those accent colors. I’ve got to paint her toy chest and bookshelf in this space, plus a few other odds and ends, so hopefully those colors will work with some of those things. I’m actually thinking that what I might do is create a plaid sort of pattern with those three colors plus white on her toy chest. We’ll see….

    Colorful Boho Cowgirl Girls Bedroom Design: Textiles

    Bedding / Tassel Trim Curtains

    I had already let her pick out curtains for her windows and she chose these tassel trimmed ones from Target and they go perfectly with the bedding so there’s one win at least.

    Colorful Boho Cowgirl Girls Bedroom Design: Art

    Lucky Girl / Desolate

    We’ve already got our art for the space too – she chose Desolate and I chose Lucky Girl for her room. Both came from Minted, so we were able to customize the size and frames. We got both frames in the rustic-y indigo color you see around the horse print above. The horse print is large, so it will definitely help with taking some of the attention away from the red too.

    Colorful Boho Cowgirl Girls Bedroom Design: DIY Tassel Fringe Lighting

    Tasseled Chandelier

    This isn’t the actual light fixture I’m going with, but….wait for it….I’m going to attempt to DIY a similar version of this one. Yes, I’m crazy, and no, don’t hold your breath on this one. It may not work at all, but I’ve got a plan, so I’m going to give it a whirl. This one is beautiful, but out of our budget, and I’d prefer it be a little more playful for the Circus’ room anyway.

    So what do you think? Have you ever pulled off a red room before? Any ideas or tips you want to share? I am all ears!