This post is sponsored by Velvet Finishes, however all opinions are 100% mine. Affiliate links may be included in this post, which means if you purchase something through one of those links, I may earn a small commission, but you won’t pay a dime more.
This project is the kind of project that keeps me going sometimes. It’s just another furniture makeover. Nothing groundbreaking. Nothing phenomenal. I won’t be able to fill up my retirement account with it.
But this little mid-century modern dressing table makeover made me feel a little bit better about the past few weeks I’ve been having.

About four out of five projects I’ve had on my to-do list either didn’t happen, didn’t go as planned at all or just flat out went up in smoke.
And then this little piece came along and renewed my hope in my DIY self.
I started with this…

I’ve had this piece for a while and found her at a rummage sale. Judging from the holes on top of her and space in the middle, I think she was once a beautiful mid-century modern dressing table with a mirror across her top.
Now, I’m not usually one to paint wood that’s in good condition. The funny thing about this piece was that her top and sides were in really rough condition, lots of nicks, scratches and of course, those holes on top where a mirror once was, but the drawers were in excellent condition. Oh, the glorious drawers – aren’t the details on them just beautiful!
So I thought about it for a while and knowing that I really didn’t want to cover up those drawers with paint that were in great condition, I instead opted to just paint the top and sides of this piece and leave the drawers untouched.
And it turned out perfectly – went off without a hitch – in just a day.
See how my faith was restored now?
Mid-Century Modern Dressing Table Makeover
![]()
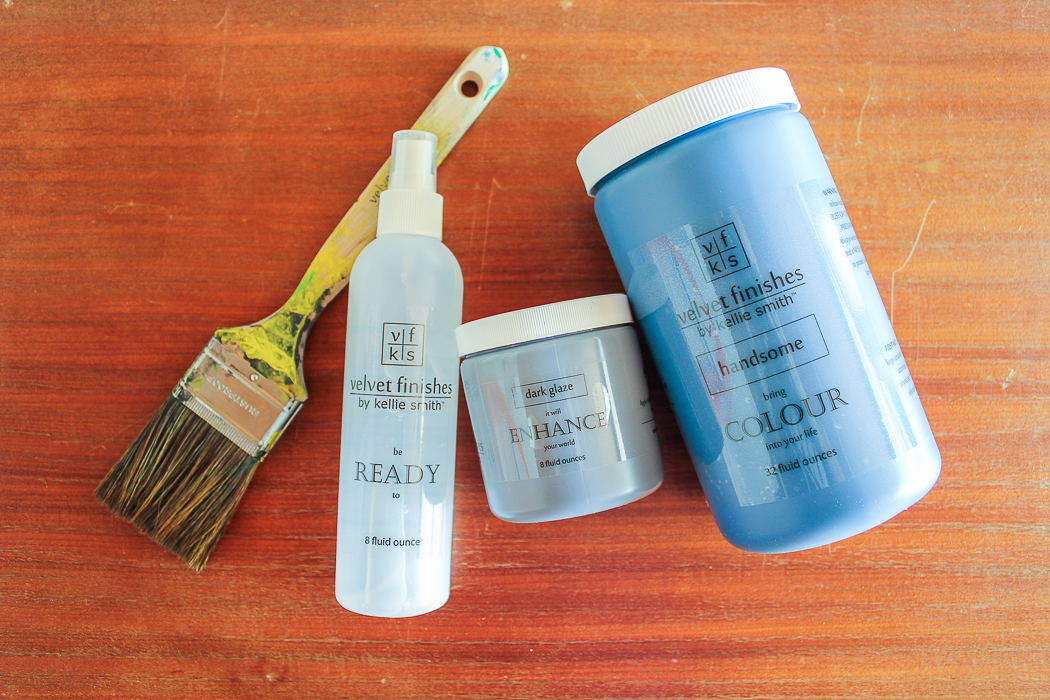
I used:
- Velvet Finishes Ready
- Velvet Finishes Handsome
- Velvet Finishes Enhance Dark Glaze
- The Reviver Paint Brush
- Painting and Staining Rags
- FrogTape
- Wood Putty and Sandpaper (if you have any nicks, scratches or holes to repair)
![]()
Step 1
First, I filled those holes on top of the table and fixed any deep scratches, dents and dings that were there as well. I used wood filler and sandpaper to smooth it out. There’s a tutorial here for how to fill holes.
Step 2
Next, I removed the drawers and taped off around the edges of the trim that went around those – I wanted to keep that part stained as well.

Basically, I just wanted to paint the exterior frame of the table. I also ran FrogTape along the upper part of the legs to make sure I didn’t accidentally get paint on them.
Step 3
This piece had a bit of shiny topcoat left on it where I was planning to paint, so I needed to remove that in order to get my paint to adhere well to the surface there. To do this, I used Ready.

I just sprayed it on the top and sides of the table, let it sit for a few minutes, then wiped it down with a clean cloth. This removes the shine and cleans at the same time. I was careful not to get the Ready on any part that wasn’t getting painted though.
Step 4
After that, I gave the piece two coats of Velvet Finishes Handsome, which is a perfect navy color.

I just brushed the color right onto the piece with one of the Reviver series paint brushes. Paint glides on really smoothly with these brushes.
Step 5
Since stained wood has so many different variations in its finish, I didn’t want a stark contrast between the navy painted top and sides and the stained drawers on this piece. So to add more dimension to the painted portions, I applied Enhance Dark Glaze to the painted portions after the paint had dried.

The glaze is really simple to apply.

You just brush it on, let it sit for a minute or two, then gently wipe the excess away.

You want to wipe it away very lightly. I ended up doing two rounds of the Enhance glaze to get the look I wanted.

Enhance Glaze also works as a topcoat, so even though Velvet Finishes paint already has a topcoat built-in, this piece will have even more added protection. Isn’t the depth the glaze added gorgeous? I love it with the Handsome paint.

I think this piece would make a great media console.

Similar Snakeskin Lamp / Similar Gun Bookends
Cheers to a project finally going off without a hitch, friends!
You might also want to see…
How to Turn a Side Table into a Bench
How to Make Furniture Glaze in Any Color


SaveSaveSaveSaveSaveSave

~Monica~ says
Curious if you did anything to the drawers to clean them up a bit? What product do you use to clean dingy wood surfaces?
What an interesting piece and that colour added to it just made it awesome! Turned out amazing! My favourite part are the legs, such a neat design!
Jenna says
Nope, I didn’t do a thing to the drawers besides wiping them down with a dust cloth. They were in excellent condition.
Brigitte says
Just beautiful! And those LEGS!! ! Swoon! I love the color you put on it, the piece really pops with the color of the drawers against what you painted. Another win!
Jenna says
Thanks so much, Brigitte! I love those legs too!
Pam S says
That piece, my fine feathered friend, would make a great ANYTHING!!! Go ahead, ask me if I’m coveting your MCM furniture! (I am)
Jenna says
haha!! Thanks, girl!
Shirley says
Great job Jenna! It would have been a shame to paint the drawers but the blue on the top & sides really enhances it. You have styled it lovely.
Jenna says
Thanks so much, Shirley! I felt the same way about the drawers!
Susan the Farm Quilter says
It turned out great!! The top almost looks like you stained it blue with the depth the wax finish gave it!! Have you ever played with Unicorn Spit?
Jenna says
Thanks, Susan! I love the depth that glaze added! I haven’t ever even heard of Unicorn Spit, but it sounds interesting!
Deirdre says
Wow! This is gorgeous! Love the lamps too.
Jenna says
Thanks, Deirdre! Those lamps are some of my faves!
Anne Coles says
I just love it! Haven’t had any good weather to be able to do some painting, as yet. Maybe next week!
Jenna says
Thanks, Anne! I know how that goes! It’s been nearly too hot here to do any painting – I just drip sweat in my paint! haha! I think it’s finally supposed to cool down soon though and I am ready!
Bonnie Schafer says
What a fabulous piece, Jenna! This kind of reminds me of an office desk too – the chair spaces were smaller back then, but the legs are slender – wow – nice pice of furniture for sure!
Great job!!
Jenna says
Same here, Bonnie! I tested it out to see if it would work as a desk, but I found myself hunching over too much. 🙁
Samantha says
Love how this turned out!! I’ve been looking for a piece like this(that’s in my budget) for a while. It’s beautiful!
Jenna says
Thanks, Samantha! I really love the way it looks too!
Patty says
OMG, that turned out so dang gorgeous. That blue is so beautiful and then you topped it with the glaze and how gorgeous is that. Great job Jenna.
Jenna says
Thanks, Patty! I really love the combination too!
Victoria @DazzleWhileFrazzled says
So awesome! We are constantly on the look for such cool MCM pieces. Love the addition of the blue paint and the fact that you got the project done in a day!! Our projects tend to linger in the garage, 😮 Visiting from Happiness Is Homemade party.
Jenna says
Thanks so much, Victoria!
Claire says
I love the colour that you have chosen and the way you have done this paint on the top and edges.
Jenna says
Thanks, Claire!
Trisha @ Blowing Away Out West says
I really like how you kept the vintage feel by not completely repainting it. Also, love, love, love the navy!
Jenna says
Thanks so much, Trisha!
Karen Jerread says
Absolutely love what you did with this piece but then I am be a bit partial!– mwb.
Jenna says
hahaha!! Thanks, Karen!