Author: Jenna

  • 3 Days in New Orleans with Kids: Day 2

    3 Days in New Orleans with Kids: Day 2

    Ready for a visit New Orleans but not sure it would be a family friendly trip? Not so fast – there are plenty of kid friendly activities in the Big Easy! Here’s how to fill 3 days in New Orleans with kids!

    This is Day 2 of our kid friendly three days in New Orleans itinerary. If you missed Day 1 – see it here!

    Is it bad that we’ve only been back from New Orleans for a couple weeks and I’m already plotting our next trip? #itsmyfavorite

    I am getting a bit of a fix though reliving the trip through these posts, so thanks for allowing me to do that, y’all. 💜

    Day two highlights included the one-of-a-kind cemeteries you can only see in NOLA, Mardi Gras fun and some of the most delicious Italian food I’ve ever had – yep, Italian in New Orleans!

    Background information if you haven’t read the Day 1 itinerary:

    We have one kid and at the time of this trip, she was seven. She’d been on multiple trips before this one and is a great little traveler. New Orleans is a walking city, so if your kid(s) isn’t up for some walking, I wouldn’t recommend this trip. Of course, if you have kids that are younger or older or have more than one kid, you can change this itinerary up to best fit your needs.

    And as I also said before, this trip itinerary includes things that kids and adults will both enjoy!

    What to Do in New Orleans with Kids

    See Day 1 Things to Do in New Orleans with Kids HERE!

    Day 2 – Cemetery Tour, Hop On/Off Bus, and Mardi Gras World

    7:00 am CST
    Wake up and get ready.

    7:30 / 7:45am-ish
    Breakfast at Cafe du Monde in the French Market.
    Yes, breakfast at Cafe du Monde again. Why? Cafe du Monde. duh.

    You can of course opt to go have breakfast elsewhere – I hear there are some fabulous brunch spots in NOLA, but Cafe du Monde was just always easiest and convenient for us. And beignets. We can’t get enough beignets.

    8:45am CST
    Head to the Gray Line Tour Lighthouse Office to take a cemetery tour!

    9:00am CST
    Cemetery and Voodoo Tour

    3 Days in New Orleans

    Whether you’re into cemeteries, ghosts, and voodoo or not, you have to take a stroll through one of New Orleans’ Cities of Dead.

    What to Do In New Orleans with Kids

    We did the Cemetery and Voodoo Tour of St. Louis Cemetery No. 1 via Gray Line New Orleans.

    Kid Friendly Things to Do in New Orleans

    St. Louis No. 1 is one of the oldest cemeteries in New Orleans and is actually closed to the public. You can only get in if you are with a tour group or have family buried there.

    There is nothing else on earth like a New Orleans cemetery. They are fascinating, beautiful and full of history.

    3 Days in New Orleans with Kids

    The cemeteries in New Orleans are one of the first things that I fell in love with there.

    Three Days in New Orleans Itinerary

    There are many highlights in St. Louis No. 1 to see and learn about, one among them being the tomb of Marie Laveau, the Voodoo Queen.

    Visit New Orleans Cemeteries

    If you can only tour one cemetery while you’re here, make it this one.

    St. Louis No. 1 Cemetery in New Orleans

    I will say, the Circus wasn’t as into the cemetery tour as I thought she’d be. She liked seeing it, but it was hot and gets even hotter in the cemetery with it being enclosed by concrete walls. So that’s something to keep in mind if you want to do the cemetery tour with kids.

    11am CST
    Cemetery Tour Ends. Head to the Hop-On Hop-Off Bus Station.

    For the rest of this day, until it was time to head to dinner, our crew did the Hop-On Hop-Off Bus tour around the city. We walked to Stop #5 to get our tickets and board the bus.

    I know – it’s super touristy, but if you’ve never been in New Orleans before, it is a really great way to get an overview of the city and an idea of the city layout.

    Since it is a hop on – hop off style tour, you can choose to get off and on at any of the tour stops. You can opt to buy single day passes or multiple day passes. This is helpful if you want to just ride and get your bearings on the first day, then use your ticket the next day to take advantage of the hopping on and off and visiting sites along the route.

    There are 19 stops along the route. You can see them all here, but below are some of our picks for family friendly stops!

    • Stop #1: Jackson Square
      – Cafe du Monde
      – St. Louis Cathedral
      – The Presbytere – amazing Mardi Gras and Hurricane Katrina exhibits.
    • Stop #2: French Market
      – Shopping, food vendors
    • Stop #4: Treme
      – Backstreet Cultural Museum – we did not get to visit this, but it’s definitely on my list for next time. I think the kid would have loved seeing all the Mardi Gras Indian memorabilia.
    • Stop #7: Riverfront
      Again, two more places we didn’t get to see, but kids would love!
      – Audubon Butterfly Garden and Insectarium
      – Audubon Aquarium
    • Stops #11 – #13: Garden District and Magazine Street
      – There are loads of fantastic little shops and places to eat along Magazine Street. There are also gorgeous houses to take in as well. We all enjoyed strolling down Magazine. A couple of our favorite shops along Magazine are Nola Couture (their candles smell divine!) and Fluerty Girl.
    • Stop #16: Mardi Gras World
      Mardi Gras World is a must for kids – they will love it!
    Family Friendly Activities in New Orleans

    This is literally where Mardi Gras comes to life!

    Kid Friendly Activities in New Orleans

    Mardi Gras World is where most all the floats for Mardi Gras are made. It is so cool to be up close and personal with these beauties.

    Blaine Kerns Mardi Gras World

    The Circus loved learning about how all the floats and characters are made and then walking around and seeing them.

    There are also great little photo ops as well. 😉

    After leaving here, all I heard from the kid for the rest of the trip was when are we going to Mardi Gras?! One day kid, one day.

    Mardi Gras World with Kids in New Orleans

    6pm CST
    Dinner at Irene’s.

    Oh Irene’s. We love you so! You might not think Italian when you think New Orleans food, but Irene’s will change your frame of mind! You can’t go wrong with anything on the menu and be sure to save room for their cheesecake – to die for! This is a nice restaurant, so make sure your kid(s) is up to being on their best behavior here. Reservations are also recommended.

    See Day One’s Itinerary HERE!
    See Day Three’s Itinerary HERE!

    Feel free to add any kid friendly things to do in New Orleans in the comments!

    Ready for more adventure?
    Jimmy Carter Sunday school – take a trip down to Georgia and attend former President Jimmy Carter’s Sunday school service!

    Disney World Tips for the Average Family – for those of us who aren’t super hardcore all things Disney. 😉

    A Weekend in Nashville – the birthplace of country music and so much more!

    Want to remember this itinerary for later? Just pin the image below!

    What to Do in New Orleans with Kids

    Keep up with our adventures on social media:

    Facebook | Instagram | Pinterest | Twitter

  • Things to Do in New Orleans with Kids

    Things to Do in New Orleans with Kids

    It’s not all about Mardi Gras in The Big Easy! New Orleans is actually a pretty kid-friendly city! This New Orleans itinerary will show you plenty of things to do in New Orleans with kids!

    I have been in love with New Orleans since I was 13.

    There is no other city quite like it and every last bit of it has my heart.

    If I had it my way, I’d whisk away to The Big Easy at least once every month or so. They do call it The Big Easy for a reason and it just seems like every little worry on my mind melts away when I’m there. Maybe it’s also the abundance of alcohol. I don’t know and I don’t care either way.

    Needless to say, I was most definitely the most excited person about our recent family trip to New Orleans. It had been far too long since I’d set foot in my beloved city and I was super pumped to get to introduce the Circus to NOLA.

    While there are obviously NOLA things you aren’t going to do with the family when you’re there, say like bar hopping along Bourbon, there are so many more wonderful things here that are family friendly.

    And really, to me anyway, New Orleans is so much more than Bourbon Street. In fact, it’s not even near the top of my list of my favorite things to do in the city.

    We were able to spend three full days in the city. For our trip, I set down and planned out each day – something I’ve never done before when it’s just me and Grunt. I think creating itineraries when traveling someplace like this with kids is key though. You know your kids best and know when they might need downtime factored in somewhere or how long they may or may not last at a museum. Having a schedule – a flexible one preferably – always a good idea with kids.

    Another thing to note specifically about our itinerary: We have one kid and she was seven at the time of this trip. She’s proved herself a great traveler countless times. I knew she could do New Orleans without any problems. I say all that, so you know the factors I considered when planning out our itinerary. Obviously, if you’ve got more than one kiddo and/or younger or older kiddos, you may want to change this up a bit.

    And all that being said, this itinerary and most all the things we did in New Orleans this round are things that are great for both kids and adults. Even Grunt Labor said he discovered new things he hadn’t previously.

    Things to Do in New Orleans with Kids

    Family Fun in New Orleans

    Where We Stayed

    The Troubador

    While I adore the French Quarter, we didn’t want to stay there with the kid in tow. If you’ve ever stayed in the Quarter before, you know how noisy it can get at night. I wanted the kid to be able to sleep well each night so she would have enough energy for the next day. Therefore, we went with a hotel in the Central Business District – The Troubador.

    New Orleans Itinerary - The Troubadour

    The Troubadour is a boutique style hotel, so the decor was gorgeous and there was a touch of NOLA in every room. It was about a 20 minute walk to the French Quarter or an 8-10 minute Uber/cab ride depending on the traffic.

    New Orleans - Where to Stay

    We went with the Troubie room, which was plenty for us. There were two queen size beds and the bathroom was spacious. We also ate at Jayne, the restaurant located inside the hotel, the night we arrived since it was so late, and it was delish! They also have a great rooftop bar that overlooks the city. We didn’t get to enjoy that since we had the kid in tow, but it looked amazing.

    Transportation

    We flew into New Orleans and took an Uber from the airport to our hotel. We did the same thing when leaving out. Throughout the trip, we walked or took an Uber if our destination was out of walking distance or the weather wasn’t cooperating.

    You can of course rent a car if you’d like, but it’s really not all that necessary if you do the things we did or similar ones. Even if you want to go out to River Road to tour a plantation or take a swamp tour, most of those tour companies provide transportation.

    New Orleans Kids Activities

    On to the fun! We had three full days in New Orleans. I’m going to break each day’s activities down into individual posts to keep from writing a book on our trip. 😆 I’m also going to include the timelines for our days, but of course when you go to plan your own trip, you can change those up to your liking! FYI – New Orleans is on Central Standard Time.

    Day 1 – Swamp/Bayou Tour & City Park

    7:00 am CST
    Wake up and get ready.

    7:30 / 7:45am-ish
    Breakfast at Cafe du Monde in the French Market.

    You can walk or Uber, but either way, one simply cannot go to New Orleans without eating beignets at Cafe du Monde!

    The Circus’ exact words were, “Oh my gosh! You guys weren’t kidding about how good these were!”

    There’s usually some live jazz going on outside of Cafe du Monde, so be sure to take that in as well!

    8:15am CST
    Head to the Gray Line Tour Lighthouse Office to take a swamp tour!

    On the walk there, enjoy the sights of Jackson Square. It was rainy this first day there, but a rainy day in New Orleans is still better than a sunny day anywhere else! P.S. Early morning is the best time to get pictures around the city – there’s hardly anyone else around blocking your shots!

    On your way to the Lighthouse office, you can also walk along the Mississippi River and enjoy the sights there as well…

    Along the Mississippi River in New Orleans

    8:30AM CST
    Depart for a Swamp and Bayou Tour.

    We did the early bird Swamp and Bayou tour through Gray Line Tours. There are other tour times throughout the day, the early bird just worked best for us. Gray Line will drive you out to where the tour will start, so no need to worry about transportation.

    New Orleans Swamp Tour Family Friendly

    Everyone in my crew really enjoyed the swamp and bayou tour. There weren’t a whole lot of people in our boat, so everyone could get up and move around to see better – and yes, there were alligators!

    Kid Friendly Swamp Tour in New Orleans

    And did you know they eat marshmallows?

    Alligators in Swamp Tour in New Orleans

    The Circus loved that of course, and all the scenery was just really beautiful.

    Swamp and Bayou Tour in New Orleans

    The boat captain even had his baby alligator on board and while the Circus didn’t care to hold it, Grunt did.

    12:30pm CST
    Arrive back in the French Quarter from the swamp tour.

    12:45pm – 1:45pm CST
    Have lunch in the quarter.

    We had lunch at Cafe Maspero, which was just about a five minute walk from where the Gray Line bus dropped us off. It was yummy! We highly recommend the Fried Alligator to start with – the Circus loved it as well! Grunt and I split the Roast Beef Po’ Boy and it was great too. It was a great little lunch spot!

    2pm CST
    Uber or Taxi to City Park.

    2:20pm – 5pm CST
    Enjoy City Park!

    Oh City Park, we love you and there isn’t a kiddo out there who won’t love City Park! City Park is huge and there are lots of things to do here for both adults and kids, but we stuck to the main attraction for kids – Storyland and Carousel Gardens Amusement Park.

    Family Fun in New Orleans - City Park

    Storyland is a playground filled with storybook sculptures.

    Kids can go and play on/in these sculptures.

    New Orleans Itinerary - Storyland

    Dads may also find their magic slipper. 😆

    Storyland was truly a magical little place – we loved seeing all the classic stories come to life!

    We also had lots of fun in the Carousel Gardens Amusement Park which is within the same area as Storyland.

    Carousel Gardens Amusement Park in New Orleans - Kid Friendly

    There are 17 rides in the amusement park ranging from little kiddie rides to a roller coaster. The roller coaster is a smaller scale one and the Circus was easily able to meet the height requirements for it.

    New Orleans Kids Activities - Carousel Gardens Amusement Park

    We all enjoyed the rides here!

    Before you leave City Park, you must have a Snoball. Just like with beignets, not having a snoball in New Orleans would be a sin! These at City Park were delish!

    5-5:15pm CST
    Uber or taxi to dinner.


    If you’re eating someplace nearby City Park, obviously you might not need transportation. For dinner on our first night there, we ate at Brennan’s in the French Quarter.

    Brennan’s has been on my “eat at” list for a while now. We’d never made it there on any of our other trips to New Orleans, so this time since I was killing it in the trip planning department, I made reservations ahead of time.

    New Orleans Itinerary - Dinner at Brennan's

    Brennan’s is on the higher end when it comes to restaurants. It’s not super fancy – the kid went there wearing what you see in the picture above and I wore what I had on at the park too. Men can’t wear athletic shorts though, so take note. If you’ve got more than one kiddo or younger kids, this might not be a good choice for you. The Circus has been to nice restaurants before, so she knew to be on her best behavior.

    I have to say, absolutely every single thing at Brennan’s was wonderful. From the maître d’, to the servers and of course – the food! Everyone was so sweet to the kid. The maître d’ had her go out to the courtyard as soon as we got there so she could see the turtles and then they had a whole conversation about it while we waited on our table.

    Turtles at Brennan's in New Orleans - things to do in New Orleans with kids

    When one of the servers went to go feed the turtles later, he even stopped at our table to take the kid to feed them too!

    And the food! 😋 I had duck, Grunt had rabbit and the Circus had grilled chicken. It was all divine. The Circus ate all of her’s, a good bit of mine too and then asked if I could please add duck to our menu at home! 😆 Keep dreaming, kid. We had the signature dessert here as well – Bananas Foster. Brennan’s is the original creator of the dish!

    After dinner, everyone was pretty tired, so we walked back to the hotel and called it a day. What a day it was though. 💜

    Day Two New Orleans Itinerary HERE!
    Day Three New Orleans Itinerary HERE!

    Are you planning to visit New Orleans soon?

    Looking for more ideas for your next adventure?

    Must Do’s in New Orleans – other things to get into in The Big Easy.

    Our New York and Boston Trip – with the kid in tow!

    The Whistle Stop Cafe and More – yep, a Fried Green Tomatoes road trip!

    Want to come back to this itinerary later? Just pin the image below!

    Things to Do in New Orleans with Kids or Without Them

    Find us on social media:

    Facebook | Instagram | Pinterest | Twitter

  • Cozy Outdoor Fall Nights: Everything you need and it’s on sale!

    Cozy Outdoor Fall Nights: Everything you need and it’s on sale!

    We were welcomed back from our fall break trip to New Orleans with glorious fall weather! I don’t know about where you’re at, but here in Tennessee, we were all living through the summer that wouldn’t end. I wasn’t sure if we were ever going to get a reprieve.

    My crew has been dreaming of cooler mornings and nights for a while, so we are thrilled it’s finally here.

    This post is in partnership with Bed Bath and Beyond. All content and opinions expressed here are my own.

    And just in time for fall, Bed Bath and Beyond® is having a fantastic Holiday Weekend Sale! You can score everything you need for crisp fall mornings and cozy fall nights all on sale right now!

    Summer seasonal items are hugely discounted during the sale, so we took advantage of that and got a modular sectional sofa for our screened-in porch (now if we can only get that porch screening done!).

    Our set is part of the All-Weather Wicker Aluminum Woven Patio Furniture Collection. It has a good neutral base so that you can dress it up with pillows and throws in just about any color or pattern.

    Since it comes in individual pieces, you can make it as big or as small as you like and rearrange it whenever you want. It also comes with clips to keep all the pieces together once you decide on your arrangement. The clips are easily removable though, so you can mix it up easily if you need to. The sale saved us hundreds on this set!

    If you’re needing new outdoor furniture, but this style isn’t for you, there are lots more options also on sale  – take a peek here! Snatch it up while you can!

    On top of the already great sale prices, you can also get an additional 20% off your entire order + free shipping if you’re a Beyond+® member – more details on that here! And you can use that discount online or in-store!

    Also on sale are these cozy velvet throws – We’re big fans. 🙂 They are perfect for chilly fall mornings and nights. These make fantastic gifts as well – it’s not too late to start thinking about holiday gifts, folks!

    Did you also notice our treats? KitchenAid Stand Mixers and Analon cookware are both on sale so you can easily whip up all those wonderfully warm sweet fall treats.

    For those of us that prefer something warm to go with those cookies, select Nespresso machines are 20% off!

    If you want to make your own coffee shop worthy beverages at home, this is the ticket. Go ahead and treat yourself or snag one for that coffee loving person on your gift list. 

    There are so many great deals going on right now – something for every budget, y’all. 

    Here are more sale items that caught my eye:

    UGG Wanderlust Travel Blanket, $20 – Zips up and comes with a strap for easy transport. Perfect for keeping tucked in your car for adventuring or for those outdoorsy people on your list!

    Colorful Turkish Beach Towels, $16 – Beautiful beach towels at 60% off. Add a monogram to it and you’ve got yourself a one-of-a-kind!

    Over the Door Mega Mirrored Cabinet, $100 – If you need jewelry storage, but are short on space. This bad boy is your answer!

    Cast Iron Dutch Ovens, $20 – $50 – I don’t know if I’d make it through fall and winter without my dutch oven. It is the perfect pot for making soups. 

    6 ft. Beach Umbrella, 40% off – now is most definitely the time to snag a new outdoor umbrella or any other summer essentials you need for next year!

    Let me know what deals you find in the comments!

  • 15+ Easy & Cheap Halloween Decoration Ideas

    15+ Easy & Cheap Halloween Decoration Ideas

    If you want to wow guests with your Halloween decor, but don’t have a lot of time or money, then these Halloween decoration ideas are for you! Who said cheap Halloween decorations can’t be fab too?!

    We just got back from spending a few days in New Orleans and that only put me more in the Halloween spirit. I love New Orleans all the time – it’s my favorite – but being down there during October with everyone getting into the Halloween spirit was a real treat.

    Halloween Decoration Ideas

    This was the Circus’ first trip to New Orleans and she has now proclaimed it her favorite as well. I can now consider my parenting style a complete success. 🙂

    I haven’t had time to photograph the whole house for Halloween and share all our Halloween decorations, but I was able to snap a few favorite scenes and setups around the house.

    My Halloween decoration ideas are easy to copy and/or put your own unique twist on. So many of my decorations have either been DIYed, thrift store finds or twists on Dollar Tree halloween items, so they are really affordable too.

    This post contains affiliate links for your shopping convenience. Click here to read my full disclosure policy.

    Cheap Halloween Decorations

    1. Create a Witch’s Workspace

    Cheap Halloween Decorations

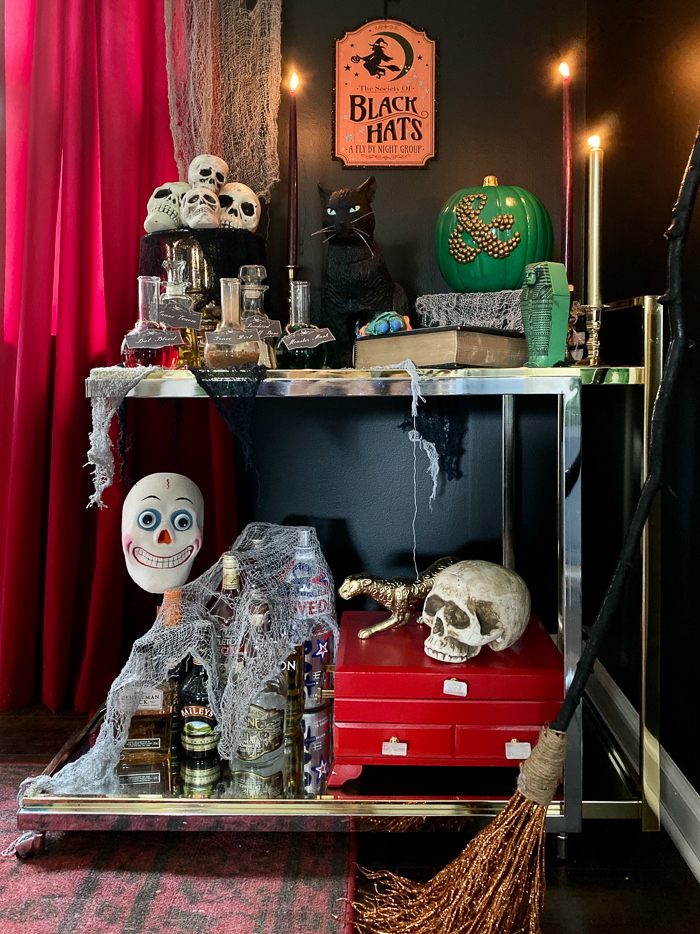
    This is always one of my most favorite parts of decorating for Halloween – creating a space for the house witch to mix up her potions.

    I clean off my bar cart for this, throw creepy cloth and candles about and lots of skulls. And don’t forget the witch’s broom, of course – here’s how I made that one above.

    Cool Halloween Decorations

    Of course, potions are a must as well. Grab these free printable potion labels to adorn your own potion bottles. For the actual bottles, I have these and a few ones I’ve found at thrift stores as well. Just always be on the lookout for creepy/older looking glass bottles.

    2. Put skulls anyplace you can stick ’em.

    You may have noticed the mounded skulls coming out of my champagne bucket on the witch’s table. I love to use my “everyday” decor and even serving pieces during this time of year and fill them up with creepy skulls or other Halloween items.

    Cheap Halloween Decoration Ideas

    No reason to spend a fortune here. Most all my skulls are from the Dollar Tree.

    Indoor Halloween Decorating Ideas

    Just having them peek out in random spots throughout the house is always fun.

    P.S. Don’t worry about polishing all that brass and silver – it looks creepier with a little tarnish!

    Easy Halloween Decorations

    This year I put one up in between two windows using a command strip. It looks down on us as we’re eating dinner. 😆

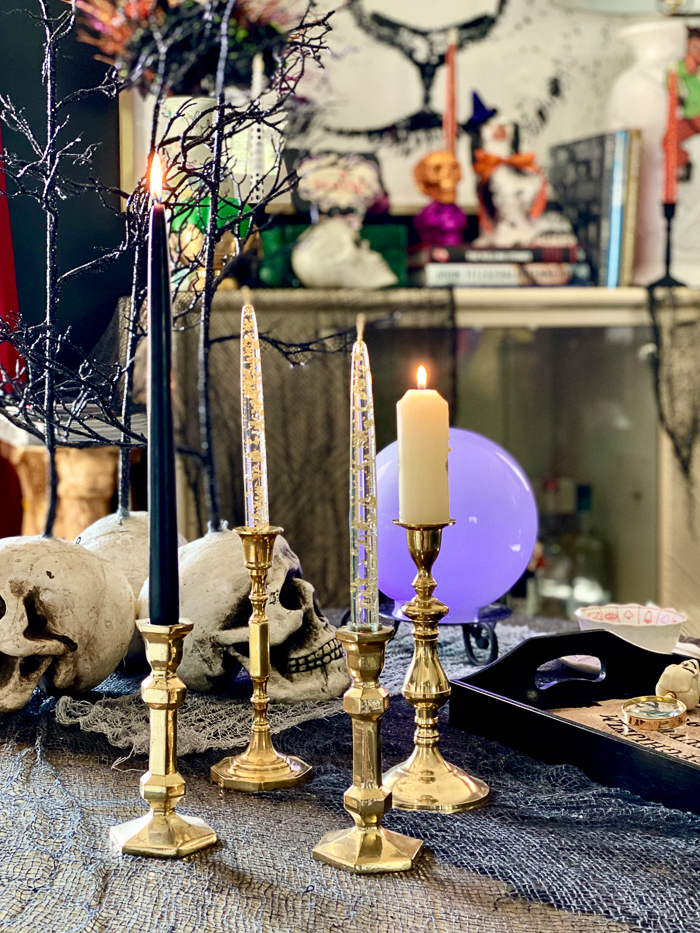
    3. Pull out all your candles.

    Halloween Decorations with Candles

    Literally. Pull out every single candle you own and put them all around your house. Grouped together or solo, they add an instant Halloween feel to a space.

    Halloween Decorations

    Again, don’t worry with polishing the candlestick holders!

    4. And then embellish those candles.

    Easy Halloween Decoration Ideas with Candles

    I found this fantastic washi tape this Halloween season and snatched it up as fast as I could. I cut out single eyes and placed them on a few candles throughout my decor. The tape is also great for embellishing books, trays, etc. for the season.

    5. Creepy Cloth is your BFF.

    Cheap Halloween Decoration Ideas

    Another Dollar Tree staple here – creepy cloth.

    Cool Halloween Decoration Ideas

    This stuff instantly makes anything Halloween ready. I like to drape it over tables to create a spooky base and then layer on more Halloween decor.

    Halloween Decorating Ideas with Creepy Cloth

    I also like to put it over things that I want to keep close at hand – liquor – but want to spook up a bit. 🙂

    6. Load up on creepy “beings.”

    Throughout the year, I’m always on the hunt for anything that would work well in my Halloween decor – ok, basically any seasonal decor. 😂

    Easy Indoor Halloween Decorating Ideas

    The pumpkin man and mummy were both yard sale finds. They work great on my witch’s table.

    Easy Decorating Ideas for Halloween

    Of course, no witch is complete without her black cat. This cat was an addition to our Halloween decor courtesy of the Circus.

    Cheap Decorating Ideas for Halloween

    I made this mohawk lollipop holder several years ago and it always makes an appearance for Halloween. It adds a little punk touch to the decor and the kids love getting suckers out of the “head.”

    7. Get regular “beings” in the Halloween spirit.

    Fun Decorating Ideas for Halloween

    If it has a head, it’s going to get some form of Halloween treatment around here. This bust got adorned this year with my DIY witch hat.

    Colorful Decorating Ideas for Halloween
    Glittery Halloween Decorations

    Both the Buddha and the Staffordshire dog got mini-witch’s hats.

    Easy Ideas for Halloween Decorating

    I topped the rest of the busts with witch’s hats and one – with devil horns. 😬

    8. Make art spooky.

    Simple Halloween Decorating Ideas

    Again, I like to work with my everyday decor rather than switching everything out. I put a mini-skull over the head of the lady in this art print with a command strip.

    Printable Halloween Decorations

    I covered another art print with this printable Double Double Toil and Trouble art.

    9. There’s something always watching…

    Cool Halloween Decoration

    I bought a few of these eye picks and stick them anywhere I can. This one is popping out of a flower arrangement.

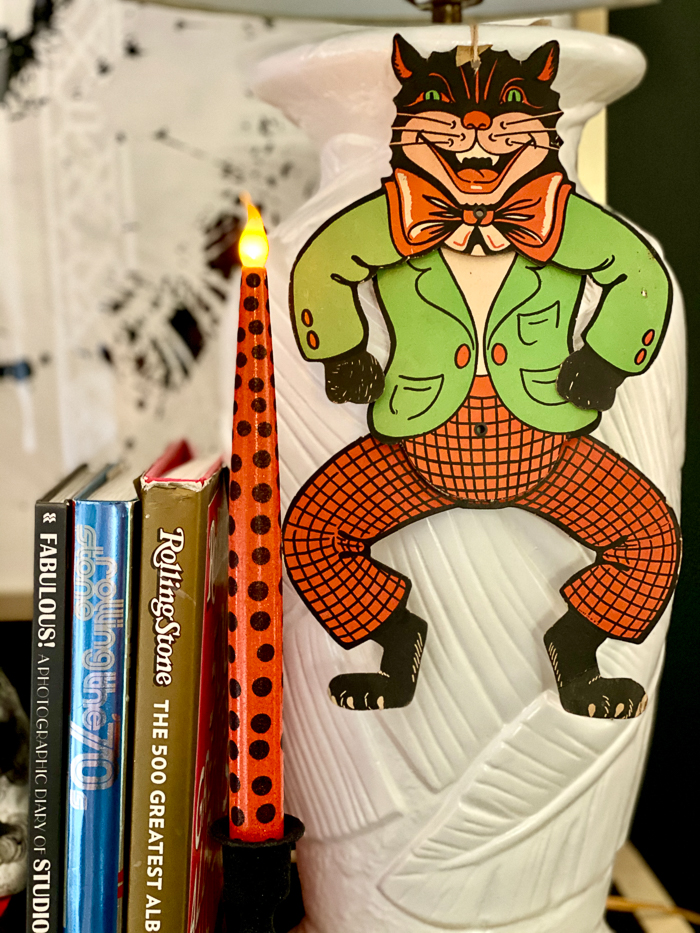
    10. Vintage Halloween cut-outs are the best.

    Vintage Halloween Decorations

    If you can get your hands on vintage or vintage-style Halloween cutouts, snatch them up. They are THE best for creepy Halloween decor. I have a couple that belong to my husband’s grandparents and I adore them. My father-in-law remembers his mom hanging them up when they were young, so these are pretty special to us. Fun fact: this one still has the price tag on the back of it – a whopping $0.09! This set isn’t vintage, but it has a vintage feel and I like them as well.

    11. Be on the hunt for weathered or old looking books all year long.

    Spooky Halloween Decorations

    While the book above may look old, it’s actually new and a yard sale find! Works perfect for Halloween!

    12. Elevate with books and candleholders.

    Glam Halloween Decorations

    Speaking of books – I like to use them all over during Halloween and really anytime in general to elevate other items.

    Colorful Halloween Decorating Ideas

    Sometimes I leave them as is and sometimes, I cover them with creepy cloth….

    Halloween Decoration Ideas using Candles

    I stacked lots of books together here and covered with creepy cloth to elevate the DIY ampersand pumpkin and give it more of a presence.

    Halloween Decorating Ideas for Busts

    I will also use spare candleholders to elevate smaller items like these little Halloween heads or even mini pumpkins.

    13. Create a psychic / fortune telling table.

    Psychic Table for Halloween

    This year, I transformed my coffee table into a creepy fortune telling space.

    Fortune Telling Table for Halloween

    I layered on creepy cloth, a few candles in varying heights, my skull tree and the “tools of the trade”…

    Spooky Halloween Table

    …my DIY Ouija Board, DIY Glowing Crystal Ball and a tea leaf reading cup and saucer I found at a thrift store.

    Creepy Glam Halloween Decorating

    This is one of my favorite scenes this year and Grunt loves it too.

    14. Toss Witch’s Brooms wherever you can.

    Using Witch's Brooms for Halloween Decorations

    I think it’s looks a little more authentic if you just lean them up against walls in random locations – kind of like the witch just walked in and dropped her broom. Tutorial for these witch’s brooms is here.

    15. Don’t forget the spell book.

    Printable Spell Book for Halloween

    In this girl’s opinion, Halloween isn’t complete without a spell book! Grab an old book and this printable spell book cover to create your own!

    16. Flowers are for Halloween too….

    Skull Vase for Halloween

    Creepy flowers anyway – and lots of black leaves and bright filler picks. 🙂

    Create this skull vase by carving out the back of a styrofoam skull and placing the vase within the cut-out section.

    Halloween Decorating with Skulls

    17. Embellish basic skulls.

    Dollar Tree Skulls Halloween Decor

    A super simple trick I’ve been doing for years is buying skulls from the Dollar Tree and then dressing them up just a bit with glitter and/or spray paint. On the one above, I simply added purple glitter to his eyes for a touch of glam.

    Using skulls for Halloween decorations

    I’ve also upgraded skulls by painting them and then placing them on candlestick holders with hot glue – tutorial for that here.

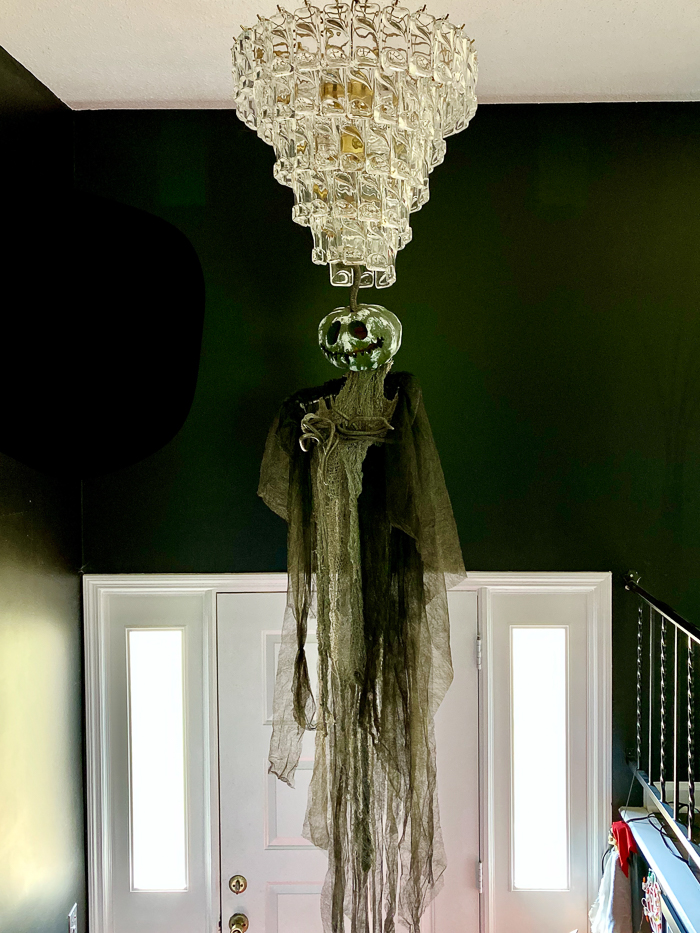
    18. Hang something from above…

    Hanging creepy things from the ceiling for Halloween

    I love to hang Halloween decor from the ceiling whenever I can. This creepy guy – another thrift store find – is hanging from the chandelier right when you enter our front door.

    Do you have any go-to cool Halloween decorations?

    Want more ideas for Halloween? Be sure to see these….

    DIY Glowing Cauldron – a fantastic outdoor or indoor Halloween decorating idea!

    DIY Halloween Coasters – creepy, glam Halloween coasters with spooky skulls, snakes and more!

    Easy DIY Halloween Decorations – more simple and cheap Halloween decoration ideas you can make yourself!

    Want to remember these halloween ideas for later? Just pin the image below!

    Easy and Cheap Halloween Decorating Ideas

    Follow on social for more Halloween fun:

    Facebook | Instagram | Pinterest | Twitter

  • Weekend Halloween Decorating Inspiration

    Weekend Halloween Decorating Inspiration

    We’re five days into October – is your home in Halloween mode yet?

    As most of you know, mine is – and it’s been there for a while!
    *insert evil laugh*

    I still have more halloween decorating ideas to share with you, but today I thought I’d share some of my own favorites from years past and some from other bloggers. All of our styles are a little different, so if my Halloween style isn’t to your liking, some of these might just be…

    Easy DIY Halloween Decorations

    If you’re looking for simple, but unique Halloween decorations to add to your Halloween arsenal, take a peek at these easy DIY halloween decorations. There are 15 different halloween decorating projects there ranging from printables to Dollar Tree halloween crafts and more. Make your own witch’s broom that sparkles, your own spell book with a printable, a creepy skull candle holder or something else!

    3 Ways to add Halloween to Your Fall Decor

    I don’t really do any decorating for just fall. My “fall” decor is my Halloween decor. 😂 I just found that when I went to go put up my Halloween decorations I was always having to put away lots of my fall decor because the two didn’t work together. However, Brendt from She Gave it a Go is a pro at effortlessly mixing the two together. I love her ideas for adding Halloween style to your fall decor – some just as simple as using key colors! Read about her Halloween-Fall Decor Ideas here.

    Fun Halloween Porch

    So I really stepped my outdoor halloween decorating game up this year. I can’t wait to show ya’ll, but in the meantime I’ve got a couple other gal’s outdoor halloween decor to give you some ideas. I love this fun Halloween porch from Kelly at The Tattered Pew. It has just the perfect amount of spook, but it also has a super fun Halloween feel that any trick-or-treaters are going to love walking up to!

    Frightful Front Porch

    Merichelle from We’re the Joneses went with a chic, modern Halloween decor feel on her Halloween porch. It’s definitely spooky with lots of black, but the shiny black tones add a glam feel and the punches of purple take it to the next level. I don’t think there’s a witch who wouldn’t mind “sitting a spell” here.

    Now plot out your plan of attack and get your house Halloween ready!

    Keep up with our Halloween shenanigans on social media:

    Facebook | Instagram | Pinterest | Twitter

  • DIY Glowing Cauldron for Halloween

    DIY Glowing Cauldron for Halloween

    Something’s brewing! And it only takes five minutes to whip up! Add a witch’s touch to your Halloween decorations with this glowing cauldron!

    You know what I love?

    Something that can pull double duty.

    And in it’s time, this pot has done a fantastic job of pulling double duty.

    While we don’t know it’s age for sure, but we’re guessing closer to 100 years than not, it’s produced cracklins, rendered lard, and probably done countless other tasks that are lost with generations who have passed on.

    For the last few decades, it was sitting in a basement, and guessing from the tiny shredded pieces of paper found in the bottom of it when I pulled it out, it has also served to keep a mouse or two warm at night. The lengths I will go to for a good Halloween decoration.

    Proving it’s double duty value, this Halloween season, the ancient black pot is parading around as a witch’s glowing cauldron.

    This post contains affiliate links for your shopping convenience. Click here to read my full disclosure policy.

    glowing cauldron

    So cool, right?

    How to Make a Cauldron Glow

    Materials and Supplies Needed

    • Cauldron – if you can’t get your hands on the real thing, there are lots of plastic and ceramic ones out at stores right now for Halloween
    • Green Christmas Lights
    • Five Yards of White Tulle
    • Fillers for Your Cauldron (see below.)

    Steps

    Step 1

    If you have a cauldron similar in size to mine or larger, you’ll want to fill in the bottom of it with materials to push all the glowing goodness to the top.

    Misting Witch Cauldron for Halloween

    I mashed some Target boxes all into mine. Super technical, folks.

    Step 2

    Arrange the green lights on top of the fillers or in the base of a smaller cauldron.

    Smoking Cauldron for Halloween

    Step 3

    Loosely twirl the tulle around in the pot on top of the lights.

    DIY Glowing Cauldron

    You just want it fluffed in the cauldron. Don’t stuff it down in there.

    Step 4

    Turn on your lights…

    Glowing Witch's Cauldron for Halloween

    You glow girl!

    How fun is that for Halloween?

    Want more easy Halloween decorations?

    DIY Magic Crystal Ball – this one really glows too!

    DIY Ouija Board Tray – serve up some drinks with that goodness brewing in the cauldron!

    Easy Halloween Decorations – all my easiest DIY creations I’ve whipped up for Halloween!

    Want to remember this one for later? Just pin the image below!

    Witch's Glowing Cauldron

    Follow along on social media for more Halloween decorating ideas:

    Facebook | Instagram | Pinterest | Twitter

  • DIY Halloween Coasters

    DIY Halloween Coasters

    Don’t serve up Halloween cocktails without these creepy-glam Halloween coasters! Your guests will be impressed, but only you’ll know how easy they were to make using a free printable!

    No detail left untouched around here when it comes to Halloween!

    I shared the how-to for my Ouija Board Tray the other day for serving drinks up on and today, here are some fantastic Halloween coasters you can make for guests to rest their drink on!

    Halloween Coasters

    This post contains affiliate links for your shopping convenience. Click here to read my full disclosure policy.

    I love how creepy these turned out, yet still have a bit of glam with the floral touches. So, we’ll call them creepy-glam coasters.

    How to Make Halloween Coasters

    Materials and Supplies Needed:

    Materials for Making Halloween Coasters

    Steps

    Step 1

    Get the printables for the coasters.

    You can get the printable from my Printable Library. To access the printable library, you’ll need to be an email subscriber to Rain on a Tin Roof. 

    If you’re already an email subscriber, go to the Printable Library here and enter the password which you can find at the bottom of the latest email from me, which would most likely be about these coasters. Scroll down until you see the printable coaster images, download and print it using the links.

    If you’re not already an email subscriber to Rain on a Tin Roof, simply click here and sign up. After signing up, you’ll receive an email to confirm your subscription. After doing this, you’ll be directed to the Printable Library where you can download the coaster printables and then print.

    Printing Notes

    The coaster images are made to be printed on standard size 8.5″ x 11″ paper. I suggest using card stock for printing for sturdier images and better color quality.

    Step 2

    Paint the coasters. I did three coats of spray paint.

    Step 3

    Cut out the images for the coasters.

    Free Printable Halloween Images to Make Coasters

    The images were made to be slightly bigger than the coasters I used. Depending on the size of your coasters, you may have to trim a bit more or less off the edges. Just hold your coaster over your images and trace around it, then cut it out. No rocket science degree required.

    Step 4

    Apply Mod Podge onto all the coasters.

    Halloween Coasters using Unfinished Wood Coasters

    Immediately following this, place one of the coaster images on each of the coasters, then put another coat of Mod Podge over the coaster.

    Apply printable to coaster.

    Let dry.

    Step 5

    Apply two more coats of Mod Podge to each coaster. Let dry, then serve up some drinks.

    DIY Halloween Coasters

    Wickedly good Halloween drinks, that is.

    Halloween Coasters using Free Printables

    Cheers, witches! 😉

    Halloween one of your favorite holidays too? Don’t miss some of my favorite DIY Halloween decorations then:

    DIY Skull Drink Stirrers – easy to make and perfect to accompany these coasters

    Glowing Crystal Ball – it really glows!

    Ouija Board Tray – not for summoning spirits, but great for serving them.

    Want to come back and make these coasters later? Just pin the image below!

    DIY Halloween Coasters using Free Printables

    Follow on social media for more glimpses of our Halloween decor:

    Facebook | Instagram | Pinterest | Twitter

  • DIY Ouija Board Halloween Tray

    DIY Ouija Board Halloween Tray

    If you love the spooky feeling a ouija board can add to your Halloween decor, then this is the project for you! This DIY ouija board Halloween tray adds a creepy touch and is also great to use as a serving tray at your Halloween party!

    So I got a comment on the blog post about my witch costume the other day from a lady quoting scripture about how the Lord will put an end to witchcraft, fortune tellers, pagan cities and the such.

    Folks, it’s the Halloween season. I’m not out here dancing around nude in the dark offering up my soul to the devil. I just love a damn good witch costume and Halloween.

    I mean, we all know I need prayer for a whole lot of things but my witch costume and halloween decorations aren’t one of them.

    All that being said, this ouija board tray will not be used to summon spirits. And even if I wanted to, I’m not sure the thick coat of Mod Podge I put on the bad boy would even let any spirits through.

    This tray however can be seen throughout this glorious Halloween season adorning my coffee table, serving drinks, and just generally satisfying all my Halloween decorating dreams. 😆

    Halloween Tray

    This post contains affiliate links for your shopping convenience. Click here to read my full disclosure policy.

    Isn’t it spooky? It looks old and creepy and I love it for all that and more.

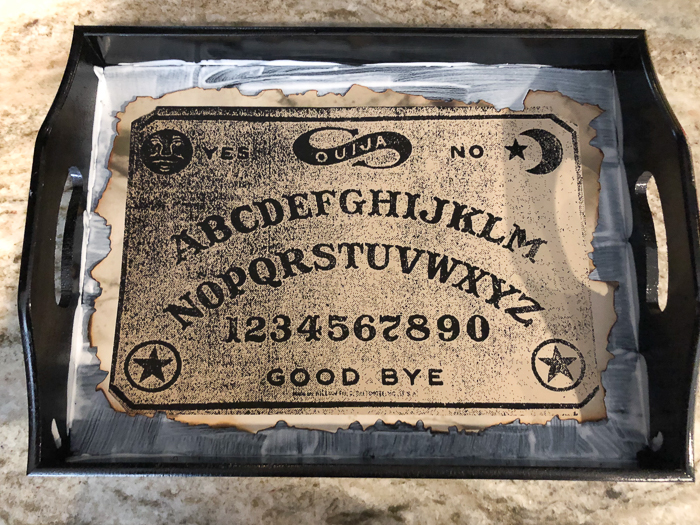
    This tray is easily made using a pre-fab tray, a printable I’ve got for you and a couple other things.

    DIY Ouija Board Halloween Serving Tray

    Materials and Supples Needed:

    Ouija Board Decor

    Steps

    Step 1

    Print out the Ouija Board Printable.

    You can get the printable from my Printable Library. To access the printable library, you’ll need to be an email subscriber to Rain on a Tin Roof.

    If you’re already an email subscriber, go to the Printable Library here and enter the password which you can find at the bottom of the latest email from me, which would most likely be about this tray. Scroll down until you see the ouija board printable, download and print it using the links.

    If you’re not already an email subscriber to Rain on a Tin Roof, simply click here and sign up. After signing up, you’ll receive an email to confirm your subscription. After doing this, you’ll be directed to the Printable Library where you can download the ouija board and then print.

    Printing Notes

    I used this public domain ouija board image and created two different sizes from it to use for the tray. If you go with the same tray size I used, I would recommend using the 8.5″ x 14″ size that I made. If you go with a smaller tray, you can use the 8.5″ x 11″ size. Both are available for download in my printable library.

    Step 2

    Paint the tray. I did two coats of spray paint.

    Step 3

    Cut out the printable.

    Halloween Serving Tray

    If you go with the same size tray and printable I used, the printable is going to be longer than the tray. To cut it out, I just placed the printable in the tray, then creased where I should cut.

    Now, I am not recommending that you do the next part exactly how I did it. I don’t want none of you coming back and blaming me for burning yourself.

    Ouija Board Printable

    After I cut the printable down some, I burned some of the paper along the edges to give it an authentic spooky Halloween look. Again, I don’t recommend you do this. If you do it, you are doing so at your own risk.

    Step 4

    Apply a good coat of Mod Podge onto the bottom of the tray, then immediately place the ouija board on top of it.

    DIY Ouija Board Halloween Tray

    Apply a coat of Mod Podge over the ouija board.

    DIY Halloween Serving Tray

    Let dry, then add 1-2 more coats of Mod Podge. I did three coats total.

    As you can see, I had a couple of wrinkles in my paper. I tried to get them out, but failed. However, in the end, I think it just added more to the overall “old” look of the project.

    Ouija Board Halloween Serving Tray

    Oooo, I just love it!

    Ouija Board Decor DIY

    Isn’t it so fun for Halloween?

    I’m off to give this thing a whirl and see who all I can conjure up!

    Just kidding!

    Will you be adding this touch of ouija board decor to your Halloween home?

    Want more Halloween projects to get your house creepy-fied?

    How to Make a Glowing Crystal Ball – it will take you all of five minutes!

    DIY Skull Sconce – using items from the Dollar Tree!

    Printable Spell Book Cover and Potion Labels – turn any book into a “spell book!”

    Want to come back to the instructions for this tray later? Just pin the image below!

    DIY Halloween Tray

    Follow on social media for more Halloween decorating ideas!

    Facebook | Instagram | Pinterest | Twitter

  • Magic Crystal Ball: How to Make a Fortune Teller Crystal Ball for Halloween

    Magic Crystal Ball: How to Make a Fortune Teller Crystal Ball for Halloween

    This magic crystal ball really GLOWS! And guess what, it only requires three things and takes just about five minutes to make! Get ready to be the belle of the Halloween ball with this fortune teller crystal ball – no one will ever believe you made it yourself!

    Oh man, oh man, oh man! Am I excited about this new little piece of Halloween decor I’ve added to the collection this year!

    I love for my Halloween decorations to look as real as possible. Real as in super spooky, authentic looking pieces that’d you see if you rolled up into the Sanderson sisters house.

    And this one, well this one fits all that criteria.

    It’s a glowing crystal ball.

    Folks, it really glows! And it is probably one of the easiest Halloween decorations I’ve ever made!

    This post contains affiliate links for your shopping convenience. Click here to read my full disclosure policy.

    Magic Crystal Ball

    How fun is that? I just keep expecting to see a spirit’s face emerge within the ball any moment now. 😉

    How to Make a Crystal Ball

    Materials Needed:

    fortune teller crystal ball materials
    • White Globe Glass Light Shade – like the one found here; you can buy the globe separately in-store.
    • Battery Powered LED String Lights in Purple – I used these.
    • Batteries for String Lights – the ones I used needed two AA batteries.
    • Holder / Platform for the Globe – I used a pillar candle holder I found at a thrift store.

    Steps

    Step 1

    Remove the LED lights from the package and insert the batteries.

    Wind the string lights into a circle.

    how to make a crystal ball

    Step 2

    Turn on the string lights. Place the string lights and battery pack through the opening on the bottom of the glass globe. The lights should go more into the globe and the battery pack should be at the base opening of the globe.

    While holding the battery pack still inside the globe, lower and tilt the globe onto whatever you are using for your globe holder. As you’re putting the globe down, you can carefully let go of the battery pack. It will sit just fine on the holder; you just don’t want it banging around in the globe while you’re putting it on it’s holder.

    diy crystal ball

    That’s it! So easy, right?

    diy fortune teller ball

    I love the purple glow this fortune teller ball gives off. It’s just perfect for Halloween and looks great beside my spell book (grab that printable spell book cover here if you haven’t already!)

    Will you being gazing into a DIY crystal ball this Halloween?

    Ready to up your Halloween game this year? Take a look at these then…

    DIY Witch Brooms – sparkly, spooky and made with items from your backyard and the Dollar Tree!

    DIY Witch Costume – my take on a witch – spooky, but glam!

    Easy DIY Halloween Decorations – a collection of some of my easiest and most favorite Halloween decorations!

    Want to come back to these glowing crystal ball instructions later? Just pin the image below!

    Witch Crystal Ball for Halloween Decoration

    Keep up with our Halloween shenanigans on social media:

    Facebook | Instagram | Pinterest | Twitter

  • DIY Witch Costume: Homemade Witch Costume Tutorial

    DIY Witch Costume: Homemade Witch Costume Tutorial

    Ready to cast spells in style this Halloween? That’s exactly what you’ll be doing in this DIY witch costume! You’ll need a couple of thrift store finds, some tulle and a few other basic materials to whip up this homemade witch costume!

    The Circus and I were chatting about our Halloween costumes the other day. When I showed Grunt a picture in the direction I was thinking about going, his response was, “Oh yea, I forgot how extra you are at Halloween.”

    Halloween is mine and the kid’s jam. Go big or go home.

    Last year, the Circus had three different Halloween costumes and I did two different variations of a witch costume – one more fancied up for our Halloween party and one more laid back for trick or treating.

    DIY Witch Costume

    In my opinion, a good witch costume is always a winner at Halloween. And while there are some great store bought Halloween costumes out there, I feel like a DIY costume always kicks things up a notch or two.

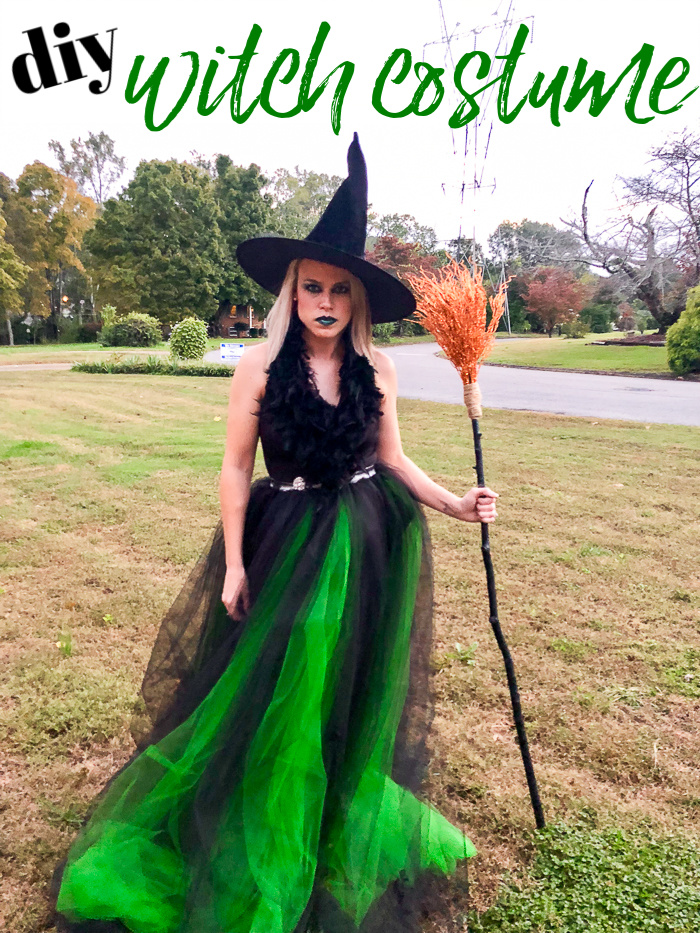
    I put together this halloween costume with a couple of thrift store finds, an easy-to-make tulle skirt and a few other fanciful accessories.

    This post contains affiliate links for your shopping convenience. Click here to read my full disclosure policy.

    DIY Witch Costume for Adults

    I’m going to break this down by top, skirt, makeup and accessories.

    For the Witch’s Top

    You’ll Need:

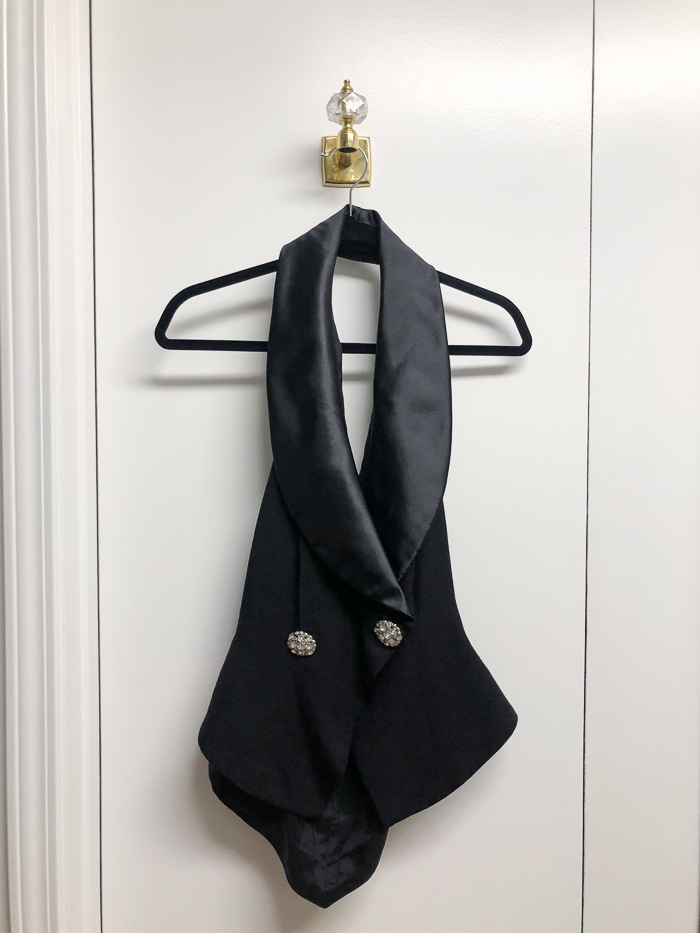
    • The top portion of a halter-style top two piece formal dress or another black fancy-ish top. (See below for more details and ideas.)
    • Black Feather Boa
    • Safety Pins

    For the top I found a black formal two piece dress with a halter style top.

    I see these kind of dresses at thrift stores all the time. If you can’t find one though, just keep your eyes open for a fancier style black top.

    To embellish the top, wrap the feather boa around the halter neck securing with safety pins. If there’s excess boa, then you can snip it off or tuck it into your skirt.

    If you can’t find a halter style top, you could still easily embellish the neckline with a feather boa, just follow along the neckline and secure with safety pins.

    For the Witch’s Skirt

    Folks, I’m not a seamstress. That being said, if I can make this skirt, anyone can.

    You’ll Need:

    • Tulle – lots of it. 😀 I used green and black strips. I had a total of 20 strips that were 48″ long and 58″ wide. You can adjust as needed – more details below.
    • 2 inch Wide Elastic Band that will fit snugly around your waist when sewn together – more details below. You can buy this by the yard at fabric stores.
    • Needle and Black Thread
    • Black Slip – this is the one I used.

    Step 1

    Sew your elastic band together, end to end, to create the waist of your skirt. Hold the band around your waist to determine how big to make it. This isn’t rocket science, you want the band to fit snugly around your waist so your skirt doesn’t fall, but not too tight that your uncomfortable.

    Step 2

    Cut your tulle into strips. I left the width of the tulle alone, I just cut strips that were 48″ long. You can cut these strips longer or shorter depending on your height. For reference, I’m about 5′ 3″. Again, I did twenty strips total – more black than green. I wanted the green to pop against the black, thus why I did fewer of those.

    Step 3

    Turn your sewn-together elastic band inside out.

    Take a tulle strip and gather it together at the top, then sew it to the band.

    This doesn’t have to be perfect. It doesn’t have to be pretty. When you’re done sewing all the strips to the inside of the band, you’re going to flip it right side out and no one is ever going to see your elementary sewing skills.

    Continue sewing tulle strips to the skirt until your satisfied with how it looks.

    Step 4

    This really isn’t a step, but it’s an important part of the outfit, unless you’re planning to moon someone.

    When you go to wear the skirt, be sure to wear a black slip under it. Obviously, the tulle strips don’t form a solid covering around your rear end, so the slip takes care of this.

    For the Witch’s Makeup

    I opted to go with greens and black for my makeup to keep with the green and black in my skirt. You can of course go with whatever colors you’d like. For my more casual take on this costume, I did purples and greens.

    Full disclosure: I am not a makeup guru, folks. I’m not even that good with it. I have no idea how to contour and all that other shit. So trust me, this is not complicated. I just played around with mine and added/blended/wiped away, etc., until it looked good. I did find that more is definitely more with this look though – it is Halloween, right?

    To get a look similar to mine, you’ll need:

    • Your Usual Primer, Foundation, Concealer, etc.
    • Eyeshadow Primer – this is the one I always use.
    • Shimmery Green Eyeshadow – I used this one in Jade.
    • Shimmery Black Eyeshadow – I used this one in Black Knight.
    • Eyebrow Mascara – I used this one in Brunette.
    • Mascara – your usual. This one is my new favorite because I have zero smudging with it.
    • Blush – I just used my usual blush, which is this one in Pink.
    • Highlighter – I used this one and it’s my all-the-time favorite.
    • Black Cream Lipstick – I used this one in Go Rogue.
    • Black Lipliner – I used this one.
    • Green Cream Lipstick – I used this one in Out of This World.

    Step 1

    Apply your primers, concealers and foundation as usual.

    Step 2

    Apply eyeshadow primer and let dry. Apply black eyeshadow on your eyelid. Come back with green eyeshadow around the edges of your eyelid and onto your brow bone blending out. Add more black or green to create more depth/color or to however you like it.

    Line your eyes, top and bottom, with heavy black eyeliner. Lightly smudge out the eyeliner using the black eyeshadow, then go lightly over the eyeliner again with a little of the green eyeshadow.

    Apply eyebrow mascara. Apply a couple coats of lash mascara. You’ve got lots of eyeshadow going on here, so don’t skimp on the layers of eyebrow and eyelash mascara, folks.

    Step 3

    Apply blush

    Step 4

    Apply highlighter along the bridge of your nose, above your Cupid’s bow, the center of your forehead, your cheekbones and chin. I just used my finger to do this as it made it a bit more defined than using a brush.

    Step 5

    Apply black lipliner heavily around your lips.

    Apply black lipstick all over your lips, but more heavily along the edges.

    In the center of your lips, apply the green lipstick. Blend as needed. You’re going for a fading of black to green look here.

    For the Witch’s Accessories

    You’ll need:

    • A witch’s hat of course!
    • A broom
    DIY Witch Costume

    I just went with a classic witch hat for this costume. You can find these all over the place during Halloween.

    For my broom, I used one of the DIY witch’s brooms I made, which honestly, I love more than any other store bought witch brooms I’ve found.

    That’s it! Pretty basic stuff, but packs a serious punch when put together!

    And what’s on tap for this Halloween? You’ll just have to wait and see….it does include a fur coat though, and black and white hair. 😉

    Have you made your own witch costume before?

    Ready to get in the Halloween spirit? Be sure to see these then…

    Dollar Tree Skulls Candleholder – one of my favorite Halloween decorations and it uses stuff from the Dollar Tree!

    Free Printable Spell Book Cover – every witch needs her a spell book, right?!

    DIY Skull Drink Stirrers – and every witch needs a drink stirrer topped with the skull of those poor unfortunate souls… haha!

    Easily come back to this costume tutorial later by pinning the image below!

    Keep up with our Halloween shenanigans on social media:

    Facebook | Instagram | Pinterest | Twitter

  • 20 High Style-Low Budget Knock Off Decor Projects

    20 High Style-Low Budget Knock Off Decor Projects

    We’ve all been there – what we want isn’t what our pocketbook will allow. Bummer, right? Well these knock off decor DIY projects will give your home that high end look you love, without hurting your wallet.

    Just about anytime I find something for my home that I love but has a steep price tag, I always ask myself, “Can I make that somehow?”

    More often than not, the answer is, “No, silly girl.”

    But sometimes, every once in a while, the answer is, “Girl, yes!”

    And so I do.

    Here are some of my best knock-off decor projects that saved me a wad of cash but gave me the look I wanted.

    This post contains affiliate links for your shopping convenience. Click here to read my full disclosure policy.

    Knock Off DIY Building Projects

    Why spend a fortune buying it when you can build it (simply!) and for a lot less?!

    Knock Off Decor

    DIY Chippendale Desk

    You can buy this one for over $1500 or you can make my version for about $100.

    Home Decor Knock Offs

    Oversized Wall Frame for $25

    Custom framing can be expensive – except when you DIY it. Find out how…

    Home Decor Knock Off Projects

    Modern-Rustic Bookshelf

    The inspiration bookshelf for this project was over $1K. Mine? About $50.

    Home Improvement Knock Off Projects

    Add instant WOW factor to your home with these projects.

    Knock Off Decor Projects

    How to Cover Dated Louvered Doors

    $25. That’s about all it will cost to update those dated doors – look at this before you spend all that money replacing interior doors!

    Home Decorating Knock Off Projects

    Faux Stone Countertops

    Ugly laminate counters? No problem! Use this tutorial to transform those eyesores to stone beauties! The cost? About $15.

    High End Knock Off Projects for the Home

    DIY Lucite Handrail


    Buy one here for about $300 or put together your own using my tutorial for about $100. You won’t believe how gorgeous these things are.

    Home Decor Knock Offs

    A few of my favorite home accessories and decorating projects that didn’t cost me an arm and a leg.

    DIY Knock Offs

    How to Make Faux Jadeite

    Love the look of jadeite, but not willing to pay the high price tag? Use this tutorial to scratch your jadeite itch.

    DIY Knock Off Projects for the Home

    Kate Spade Inspired Wall

    Ever visited a Kate Spade store and seen that gorgeous wall behind the counter? Here’s my take on that…

    Knock Off Lamp Finials

    DIY Agate Slice Lamp Finials

    I adore pretty lamp finials, but they can be pricey. This one though – a fraction of the cost of the real thing.

    Knock Off Home Decor Projects

    DIY Golden Snake Bud Vase

    A couple years back, there were some gorgeous gold snake home accessories out there – alas, they were out of my budget. My solution? A trip to the Dollar Tree’s toy aisle…

    DIY Knock Off Decor

    DIY Golden Snake Bowl

    Another project made possible with the help of the Dollar Tree toy aisle – and of course, a little spray paint. This bowl is a perfect catch-all for around the house.

    DIY Home Decor Knock Offs

    Mohawk Lollipop Holder

    I adore Jonathan Adler’s line of home decor, however much of it is out of my price range – like this lollipop holder. So I made my own…

    DIY Home Decor Knock Off Projects

    DIY Selenite Knobs


    I love taking my home decorating to a whole other level with fancy knobs on furniture. These selenite knobs didn’t have a big price tag at all though…

    DIY Knock Off Decor Projects

    DIY Bottle Lamp


    You’ve seen lamps like this one before and you’ve also seen the price tag on them. Did you know it’s easy to make your own though?

    Knock Off Cowhide Projects

    I love both the look of cowhide in home decor, but also because it reminds me of home.

    Cowhide Rug Knock Off

    DIY Cowhide Rug

    I love, love, love a great cowhide rug, but they are so expensive. So I took a chance and made my own – and I love how it turned out!

    Knock Off Cowhide Lampshade

    DIY Cowhide Lampshade

    Did you see these at Pottery Barn? Upwards of $100 per shade! Mine though? It just costs about $15 or so!

    Knock Off Crystal Projects

    I love using crystals in my home decor. In fact, I love them so much that I found a way to make my own faux crystals and then I used them to embellish all sorts of things around the house.

    Crystal Knock Offs

    Crystal Embellished Vase

    Make any boring vase look like a million bucks with this project!

    DIY Crystal Knob Knock Offs

    DIY “Crystal” Knobs

    Add serious wow factor to doors with these beauties!

    Crystal Lamp Finial Knock Off

    How to Make a Crystal Lamp Finial

    I can never get enough good finials in my life! I love the glam touch this one adds to lamps.

    Faux Crystal Magnets Knock Off

    How to Make Crystal Magnets


    Refrigerators deserve a touch of glam too! These crystal magnets do the job perfectly!

    Knock Off Lucite Projects

    Lucite is another one of my favorite interior design elements. Again, high price tag though – here are some knock off lucite decor projects I did.

    Knock Off Lucite

    DIY Lucite Trays

    Less than $5 and oh so so so simple!

    Knock Off Lucite Frame

    DIY Lucite Frames

    Easy to make and you can snag that free printable too!

    Will you be adding any of these knock off decor projects to your list?

    Looking for more budget-friendly, high style ideas for your home?

    Seven Wall Treatments that Pack a Serious Punch – and not a one of ’em is shiplap!

    9 DIY Countertop Makeovers – budget friendly countertop makeover ideas!

    Classic Black and White DIY Projects for Your Home – black and white is always right!

    7 Super Simple, Super Cute Electrical Tape Crafts for Your Home – yep, using electrical tape!

    Want to come back to this list of ideas later? Just pin the image below!

    Knock Off Decor Projects

    Get more ideas on social media:
    Facebook | Instagram | Pinterest | Twitter

  • Easy Red Carpet Party Backdrop

    Easy Red Carpet Party Backdrop

    Throwing a VIP themed party? Here’s an inexpensive and simple to make red carpet party backdrop. Your guests will have a ball posing in front of this!

    Now that the Circus’ bathroom is finished and I’m finally able to come back up for air, I’m working to get caught back up on posting and finishing projects I’ve had on my list for a while now.

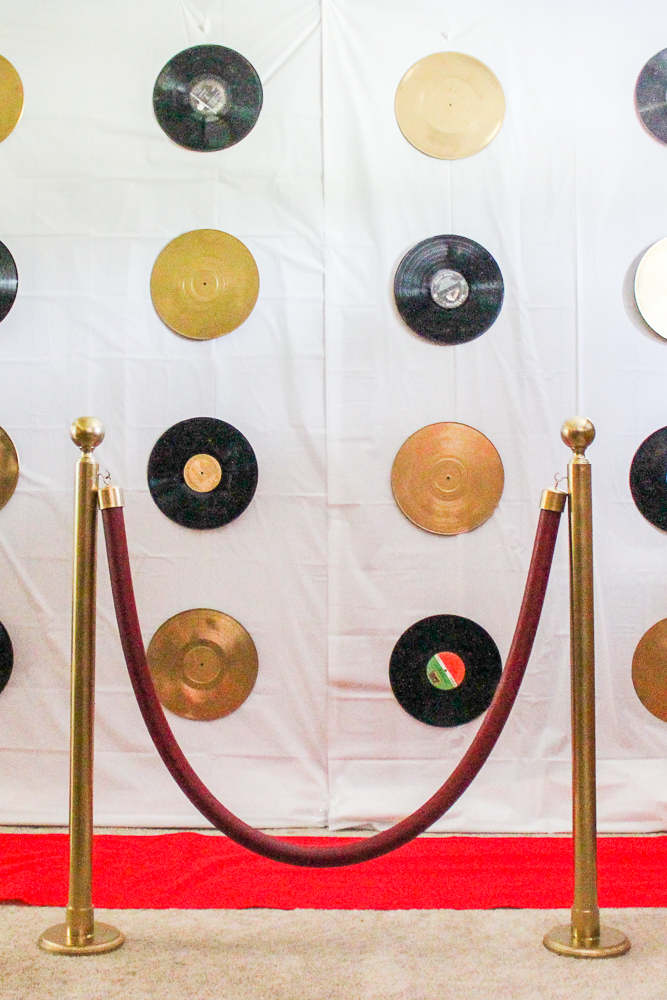
    This fun little vinyl record backdrop was part of the Circus’ VIP/Music Awards themed birthday party.

    Red Carpet Party Backdrop

    The backdrop was really simple to make and it was a super fun photo op to have for all the kids.

    This post contains affiliate links for your shopping convenience. Click here to read my full disclosure policy.

    DIY VIP Party Backdrop

    Supplies Needed

    Steps

    Step 1

    Prep the records.

    I opted to do a mix of black and gold records. If you want to do the same, spray paint some of the albums gold and let dry before preceding.

    Step 2

    String the records together.

    Lay 4-5 records on the floor with the side that you want to be seen facing down. Space the albums out evenly, then string fishing line from each album to the next, along the centers of the albums and securing with hot glue. Leave plenty of string above the top of the first album for hanging.

    Note: I used four albums per vertical row. If you have taller ceilings, you may want to use more. I also alternated between gold and black albums. I did four vertical rows total of albums along about an 8 foot span of wall.

    Set the strung albums aside after gluing.

    Step 3

    Hang the tablecloths.

    Using push pins, hang the white tablecloths at the top of your walls. Secure down along the sides with tape as needed.

    Note: I doubled up on tablecloths because I was covering a darker wall and didn’t want it to show through.

    Step 4

    Attach the command hooks.

    Determine where you will hang your vertical album rows. Make a mark at the top of the tablecloths in each location, then cut a small slit in the tablecloths at this spot.

    Attach the command hook to the wall underneath the tablecloths by putting the command hook through the slit.

    Step 5

    Hang the records.

    Hang each row of records from the command hooks. Use tape if needed to keep the records from moving. I found that mine were heavy enough to stay in place without tape.

    VIP Party Backdrop

    Top it all off with a red carpet and stanchions.

    The kiddos had a ball posing in front of this backdrop!

    This would be a super fun background for a music awards viewing party too! What do you think?

    Looking for more VIP party ideas?

    Here’s our full red carpet party complete with loads of party ideas!

    Make these DIY microphones for fun party props!

    And these free printable VIP passes add a special touch!

    Want to come back to these instructions later? Just pin the image below!

    VIP Red Carpet Party Background

    Hang out with us on social media!

    Facebook | Instagram | Pinterest | Twitter

  • The Circus’ Colorful Bathroom Makeover Reveal

    The Circus’ Colorful Bathroom Makeover Reveal

    Never in this life would anyone have expected me to have dog wallpaper in my house.

    I’m just not a dog person. I never really have been. I was never the kid who wanted to cuddle with a dog. I hate when dogs jump on me. A dog lick disgusts me. I can’t stand the feeling.

    That being said, I did come to love Grunt’s dogs that came with him as part of the “package” and got attached. After Zoe died though, I decided that was it for me. We have another dog, but as both my husband and daughter will tell you – it’s their dog, not mine.

    So, when my child came out of the womb and subsequently fell in love with just about every dog that came her way and laid on the dog’s bed right there in the middle of them, you can imagine how many times I cringed.

    The Circus loves dogs. Loves all animals really. And it’s all good, I think that’s great – she won’t get the side eye like the lot of ya’ll are all probably giving me right now since I’ve now said I’m not a dog person.

    Needless to say when she picked out the fancy pug dog wallpaper for her bathroom, it was most definitely not the direction I would have went in. But alas, here we are.

    While photographing the bathroom on Monday, this non-dog lover even decided if the Circus didn’t like her new bathroom, then I would happily take it – pug dogs and all.

    She liked it though. 🙂

    If you haven’t been following this whole bathroom makeover series, here’s what we started with…

    Total 180, right? Here’s everything we did…

    This post contains affiliate links for your shopping convenience. Click here to read my full disclosure policy.

    Moldings + Wallpaper

    Curvy Wall Moldings / Pug Dog Wallpaper / Tile Flooring

    The lower 2/3s or so of the bathroom walls got beautiful new moldings all around. I didn’t want to cover all the wall space with the wallpaper as this isn’t a huge bathroom so I didn’t want it to take over the space. Installing the moldings and painting it all white really opened up the space and added some gorgeous architectural interest. I used these prefab moldings all along the walls, then installed a chair rail and thicker baseboard.

    After the trim, I hung the pug dog wallpaper. It’s traditional pre-pasted wallpaper, which I find much easier to hang than the temporary sticker-type wallpaper. The only snag I ran into here was realizing I was going to run out about halfway through and then discovering the wallpaper was out of stock when I went to order a new roll. #leaveittome Luckily though, I was able to piece together some strips in a couple of inconspicuous spots.

    The tile didn’t change. We had just replaced that a few years back and it worked well with everything in the space.

    The Vanity

    Vanity

    The old vanity got replaced with a slightly smaller one from Signature Hardware with both good hidden storage and good open storage on the bottom.

    The vanity is the Everett Console Vanity in Elderberry from Signature Hardware and it gave this space so much more of an open feel. It’s extremely well made and even comes with soft close doors and drawers. We went with the solid white quartz countertop for the vanity. It was the safe bet for not clashing with the floors and other elements of the space. And isn’t that purple color fun? I love the extra color it brought into the space.

    The white and yellow oversized vase is a thrift store find! I hauled it back from my thrifting adventures while we were at the beach. $7 for it and I love how perfectly it fit in here. I filled it with some faux tropical leaves and birds of paradise flowers for an extra punch of color and texture.

    Brass Faucet + Fixtures

    Devonshire Single Handle Faucet

    Throughout the bathroom, we went with brass in terms of the faucet and fixtures. This was the Circus’ choice, although I am very glad she wanted gold. She is her mama’s child in some ways. 🙂 We used the Kohler Devonshire line from Build.com for the faucet, towel hooks, toilet paper holder, toothbrush holder, etc.

    Hand Towel Ring / Monogrammed Hand Towel (similar)

    The fixtures have classic curves that work well with the trim throughout the space.

    Since she is a southern girl and loves a good monogram just as much as I do, I had a monogrammed hand towel made for the space as well. Isn’t it pretty?

    Mirror + Lighting

    Mirror / Pendant Lights

    Continuing with the feminine curves in this space, we went with a curvy mirror and pendant lights.

    Hands down, this mirror from Build.com is one of the best mirrors I’ve ever had. Obviously, it’s a beauty, but y’all, this mirror came with a paper hanging template that makes hanging the mirror a breeze. And if that isn’t enough, the hardware that it comes with for hanging is easily adjustable in case you need to level out the mirror any once it’s up!

    Mirror / Pendant Lights

    The pendant lights have an “I Dream of Jeannie” kind of feel to me. They let plenty of light through without being completely clear, which I like b because then you can’t really tell when the globes have fingerprints all over them! ha!

    They are also real beauties when they’re all lit up.

    Mirror / Pendant Lights

    The Toilet

    Toilet / Toilet Lever / Toilet Paper Holder

    When we first started talking about this makeover, I hadn’t planned on switching out the toilet in here, but the more the design came together, I realized just how great a curvy, pretty toilet would look in here. This toilet is also from the Devonshire collection by Kohler at Build.com and we absolutely love it. It was also pretty simple to install. We topped it off with the coordinating brass toilet lever.

    Did you catch the vertical toilet paper holder? When I went to install it, it wasn’t going to fit very well over the wall moldings, so I tried it vertically and it worked perfect. I love the different look it gives too.

    Shower Curtain, Rod and Hooks

    Shower Curtain / Gold Tassel Trim (similar) / Brass Shower Curtain Rod

    I’m sure you already spied this beauty in the mirror reflection. I can’t tell you how much in love both myself and the Circus are with this shower curtain! It’s the Gingko shower curtain from Signature Hardware and the colors in it are gorgeous. To really bring out the yellows in the curtain and throughout the room, I had a gold tassel trim sewn around the edges.

    We also seriously upped our shower rod game with this brass beauty and coordinating brass shower curtain rings from Signature Hardware.

    Accessories

    Rug / DIY Step Stool Makeover

    The Circus has been a little jealous of my palm step stool I made for our master closet ever since I made it. In fact, she’s tried to jack it a time or two. I told her I would make her a custom step stool for her bathroom and so she picked out the paper for this step stool – she’s having a moment with pineapples. This is a super simple DIY project and completely transforms basic step stools into gorgeous and still useful decorative items. Here’s how to makeover your own step stool.

    The colorful rug brought together every single color (and then some!) in the space and also added some much needed color to the floor. 🙂

    Y’all know I’m a big fan of adding a more personal piece of art to a space when I can. The Circus loves music from Mamma Mia (therefore she loves ABBA – winning!) and Super Trouper is one of her favorite songs, so I whipped up this little piece of art for her bathroom.

    I had another piece of art to go in here too, but once the wallpaper was up and all the fixtures in place, there really wasn’t a place for it. I don’t think this bathroom is lacking though.

    Neither does the kid. 🙂

    What do you think?

    Now go see what all the other Primp and Pamper gals did with their bathrooms! Y’all are going to be filled with loads of bathroom makeover inspiration after you see all this!

    Jeweled Interiors | PMQ for Two | House Homemade | Effortless Style | Haneen’s Haven | Kaleidoscope Living

  • Primp and Pamper Bathroom Update: Week 3

    Primp and Pamper Bathroom Update: Week 3

    Another week of the bathroom makeover and another week of me not getting as much done as I’d planned on. 😜

    But…

    We do have fully painted trim and walls and……wallpaper!

    Wall Trim / Flooring / Wallpaper / Vanity

    I spent part of Sunday and all of Labor Day hanging wallpaper. I forgot how much of a chore it can be.

    I also realized that I was going to run short about halfway through. I hopped on my computer to order another roll and of course, it’s out of stock. Leave it to me.

    So, I did some very strategic wallpaper hanging and managed to get everything covered, albeit there are a couple of places where the design doesn’t exactly meet up, but they are in inconspicuous places.

    Wall Trim / Flooring / Wallpaper / Vanity

    I think the moldings have turned out beautifully since it’s all painted now. The vanity is set and the countertop is on – just have to put up that backsplash piece. Today is my first full day of actually being able to work without interruption this week, so I’m hoping I can get the new mirror and new pendant lights hung by the end of the day!

    Tomorrow, I’m going to be dropping off some art to get re-matted for the space.

    I found this at Goodwill for a whopping $3 and knew it was perfect for the space. The purple in the flower will tie in nicely with the vanity. It just needs a new frame and mats!

    I’m also working on some custom art for the space as well. I’m channeling my inner Super Trouper and creating some ABBA inspired art for the Circus since they are one of her favorite bands.

    If you want to see the full design plan, read this post!

    TO-DO LIST UPDATE

    • Remove old vanity and toilet. 

    • Install chair rail, wall moldings, etc. 

    • Paint from chair rail down – in progress!

    • Hang wallpaper above chair rail.

    • Switch out pendant lights.

    • Install new vanity, faucet, toilet, etc.

    • Hang new mirror.

    • Add trim to shower curtain – hopefully picking up tomorrow!

    • Install new shower curtain rod and hang new shower curtain.

    • Gussy Up the Step Stool

    • Revamp, Create and Hang Art

    Still a lot to do, but it HAS to be finished by next Thursday, so let’s see how well I work under pressure. 😜

    Be sure to see what all the other gals are up to this week!

    Jeweled Interiors | PMQ for Two | House Homemade | Effortless Style | Haneen’s Haven | Kaleidoscope Living

    Find me on social media!

    Facebook | Instagram | Pinterest | Twitter

  • Bathroom Primp & Pamper: Week 2 Update

    Bathroom Primp & Pamper: Week 2 Update

    Unfortunately, I haven’t gotten as much done in the bathroom this past week as I would have liked to. Womp womp womp.

    There have been a few unexpected things that got added to my list, some things taking longer than expected and as I told my paint guy yesterday – “If I could actually get everything I need here the first time, instead of too much of one thing and not enough of another, I’d already be done.” So there’s also been numerous supply runs.

    If you’re catching up and missed the before pictures and plan for this space, read this post first!

    A big thanks to our official sponsors of the Primp and Pamper Bathroom Makeover, Build.com and Signature Hardware.

    Here’s this week’s progress pictures…

    So molding is all on the wall. There’s one coat of edging done around all the molding and the glorious elderberry vanity has been dry fitted for the space. Big thanks to Wayne for coming over and helping me rework some plumbing to make everything fit nicely within the vanity back. If you don’t have a Wayne in your life, you need to get one. He’s saved my butt on home projects more times than I can count.

    Here’s the look we’re going for…

    The molding and paint are what is taking a big ol’ chunk of time. It’s one of those projects where there is no fast way out – you just have to be patient and take your time. And have a six pack on hand – but only for painting and not the actual molding install. Don’t nobody want to see crooked trim. 😉

    I’m really excited to get that vanity permanently in place, the new toilet set and all the fabulous brass fixtures installed for this space.

    As I said last week, the kid had a say in everything that’s going into the space.

    The Big Fixture Changes

    Signature Hardware Everett Console Sink in Elderberry

    This will add a great pop of color to the bottom half of the room against all the white moldings. I’m really impressed with how well this vanity is made. It’s constructed of solid wood (heavy wood!) and has soft close hardware for the doors and drawers – which if you have kids, that’s definitely something you need!

    If you’re in the market for a pop of color vanity, then do take a gander at these options from Signature Hardware – I’m quite partial to the Emerald Green and Ruby Red finishes. In fact, I could very easily plot out a whole master bathroom makeover around either of those gorgeous colors. Hubba hubba.

    Devonshire Toilet

    A new toilet for this bathroom wasn’t necessarily on the list when we set out to do this makeover. However, the more glam the Circus got with this bathroom, the more I was like, a pretty toilet would look fantastic in here. I always like to opt for good reliable brands when it comes to bathroom fixtures like this. Our toilet came from Build.com. Build has an impressive selection of home improvement products in every category from top brands – like this beauty. And yes, I just called a toilet beautiful.

    The Midas Touch Updates

    The kid wanted gold and she’s getting gold..

    Devonshire Brass Fixtures

    All of the plumbing fixtures, towel holders, toilet paper holders, etc. are from Build as well. I am a stickler for having coordinating styles throughout a space when it comes to these things and Build offers just about any bathroom accessory you could need in countless brands and collections.

    Curvy Brass Mirror + Pendants

    I was never really crazy about the pendants we put up when we switched them out the first time. Needless to say, I’m super pumped to get these in the space. They have a kind of retro vibe to me and remind me of I Dream of Jeannie. The curves on the mirror are a nice compliment to the curves on the toilet as well. These came from Build as well – they literally have everything for your entire home improvement project.

    More Color Splashes

    Gingko Leaf Shower Curtain

    This shower curtain from Signature Hardware is going to add more color to the room opposite the vanity. The gingko leaves are a purple/deep blue color which will coordinate nicely with the vanity and wallpaper. I’m adding the tassel around the edges to bring out the yellow in the shower curtain more and also the yellow in the wallpaper.

    Tessera Rug

    And finally, this rug will help to bridge everything together. The gray tiles on the floor are staying which do help to anchor all the color, but there still needs to be something there so the floor doesn’t stick out like a sore thumb. This rug sports colors from everything in the space!

    The To-Do List Update

    As I said, I haven’t gotten near as much done as I’d planned on getting done this past week. The good news is though that I have put a big dent in one of the most time-consuming projects within the space – the wall moldings are up, holes filled, edges caulked and almost one full coat of paint on them.

    • Remove old vanity and toilet. 

    • Install chair rail, wall moldings, etc. 

    • Paint from chair rail down – in progress!

    • Hang wallpaper above chair rail.

    • Switch out pendant lights.

    • Install new vanity, faucet, toilet, etc.

    • Hang new mirror.

    • Add trim to shower curtain – I’ve dropped this off with my seamstress! Can’t wait to get it back; it looked so pretty when I laid it all out!

    • Install new shower curtain rod and hang new shower curtain.

    • Gussy Up the Step Stool

    • Revamp and Hang Art

    Check back next week for the final stretch!

    Be sure to see what everyone else is up to as well!

    Jeweled Interiors | PMQ for Two | House Homemade | Effortless Style | Haneen’s Haven | Kaleidoscope Living

    Hang out with me on social media!

    Facebook | Instagram | Pinterest | Twitter

  • Hold Onto Your Britches Season

    Hold Onto Your Britches Season

    This post is in partnership with i​Robot​®. While this was a sponsored opportunity, all content and opinions expressed here are my own.

    I’m not sure where August has gone. One day I’m dropping the kid off for her first day back to school, thinking about all the work I’ve got to get caught up on this month before my crazy season starts and now, we’re just a few days away from September – and guess who isn’t caught up on any of that work.

    With September upon us, we are in full-on Halloween prep mode. The Circus and I are plotting out our Halloween costumes (currently thinking Cruella and dalmation), making new Halloween decorations, putting it all out, and are planning our Halloween party.

    October is of course filled with Halloween festivities and then also two trips for us.

    Then we’ll quickly move into November – hello Thanksgiving, two concerts and another trip.  

    And finally – Christmas is really just around the corner. I don’t need to tell you how insane December can get with all the decorating, gift buying and holiday parties.

    And of course, on top of all that we have the weekly shuttling around to riding lessons, dance lessons, etc. 

    Busy is very often our normal. This time of the year though, it’s elevated to “hold onto your britches boys and girls.” 

    Besides having a husband who is always willing to take anything off my plate he can, I’m also happy to now have an in-house dynamic duo to take care of some of the cleaning and at least make things around the house a little less hectic.

    This pair takes care of both the vacuuming and mopping. 

    I got the iRobot® Roomba® i7+ this summer (we call her Greta) and she was a godsend – you can read about that here. Just when I thought it couldn’t get any better though, Betty went and proved me wrong.

    Betty is my new iRobot® Braava jet® m6 – and after one run, it’s clear she does a better job mopping than I ever have. 

    Crazy, right? What you’re seeing there is one clean unused mopping pad and what one mopping pad looked like after it mopped just three rooms in my house. 

    I hung my head in shame and also jumped for joy at the same time when I saw this.

    The iRobot® Braava jet® m6 is designed to clean all well-sealed floors. Just put on one of the cleaning pads and it does its thing. Betty can do full on Wet Mopping or Dry Sweeping. 

    The Wet Mopping Pads feature wicking fibers help tackle sticky messes and kitchen grease. Dry Sweeping Pads use electrostatic force to capture dirt, dust and pet hair. 

    Betty has a Low Profile Design so that she can easily clean under furniture and other hard-to-reach places. 

    She also mops snugly right up against corners and edges. 

    Just like my iRobot® Roomba i7+, the m6 also uses Imprint™ Smart Mapping. Betty learns my home’s floor plan, remembers the rooms and determines the best way to clean. This also means she can decipher my kitchen from my living room or my office from my bathroom and so on. And that means I can choose which rooms to have her mop. I can also set up a mopping schedule for Betty. It’s all right within the iRobot® Home App.

    The Braava jet® m6 robot mop can dry sweep as well, however I prefer to do all my sweeping and vacuuming with my Roomba® i7+. In fact, these two can actually communicate with each other. 

    The two use Imprint™ Link Technology and with a couple taps on your phone using the iRobot® Home App, when Greta finishes vacuuming, she automatically tells Betty to mop. Boom. How awesome is that? Fully automated floor cleaning. 

    Right now thru September 7th, you can save up to $150 on select iRobot® floor care robots – including the Braava jet® m6 robot mop. This is the perfect time to treat yourself and take a little something off your plate during the upcoming “hold onto your britches” season. 

    Godspeed my friends. May we all come out of this season only marginally crazier than we were before – because really, we all know not to expect much more.

  • Black and White Dining Room Mini-Makeover

    Black and White Dining Room Mini-Makeover

    Sometimes living in black and white isn’t so boring and this black and white dining room proves it! You just need a few shots of color to add into the mix! Don’t miss the decorating ideas in this glam dining room!

    When I showed you the new room dividers between my dining and living room, you may have noticed that the whole room got a bit of an update.

    The dividers led to some reshuffling of furniture, which led to adding a few things in, taking a few things out and in the end, me being much more pleased with how our dining room looks.

    Remember last week when I shared the plan for the Circus’ bathroom makeover and how I told you that I felt like we just got rooms finished ok enough when we remodeled? Well, the dining room was one of those spaces.

    Black and White Dining Room Makeover

    I basically threw paint on the walls, my stuff in there and called it a day.

    Glam Dining Room

    Let’s all be honest – it was lacking.

    I did love the bones and some of the larger things though like the black paint, the oversized art, my chandelier, curtains, rug. Those things. But there wasn’t much else in ways of personality in here.

    It’s better now though.

    This post contains affiliate links for your shopping convenience. Click here to read my full disclosure policy.

    Glam Dining Room

    Black and White Dining Space

    Red Drapes / Rug / Art Piece / Dining Chairs (similar) / Wall Color

    The dining area is still primarily black and white, but filled with pops of color and wonderful textures and character. Obviously, a big part of that is owed to the room dividers.

    The really great thing about this little mini-makeover/falling in love with my dining room thing though is that, with the exception of the room dividers and the plants, I hardly spent any money on this space. I shopped my house and closets for most of the “new” things and then landed a couple great secondhand finds.

    Glam Dining Room Makeover

    Red Drapes / Rug / Dining Chairs (similar)

    If you haven’t seen how I did those yet, don’t miss it – DIY Room Dividers here!

    Black and White Dining Area

    I had actually switched out both my dining room table and chairs a while back. I really loved my glass dining room table, but it started to freak me out a little. The Circus has obviously grown since we first got the table and as she bounced and moved around more while eating, if she pushed against it, the glass top would slide some. Going from zero to 100 as I always do, I could just see the top sliding off and hurting someone. So when the bestie was selling a wood dining room table at our last yard sale for $25, I grabbed it.

    I also didn’t dislike my old dining room chairs. But they were low and I felt like I wanted chairs with more of a presence in the room. My friend Carol didn’t want these anymore, so I happily took them off her hands. I may recover them at some point, but I’m good with the off white they are right now.

    Glam Dining Area

    Palm / Art Print / Acrylic Floor Lamp (similar)

    When I hung the divider on the left side of the dining room, it made the bar cart that was here feel way too squished in. Thus prompting a small furniture shuffle. I moved the lamp that had been in the corner over here and switched out the lampshade. Funny enough, I was thisclose to ditching this lamp altogether because I just never felt like it looked “right.” Well, after shopping my own house and giving that lamp shade a whirl, I fell in love with that lamp.

    The leopard was my first world’s longest yard sale purchase this year. After seeing him from the car, I made a quick turnaround and practically ran down the street to get to him. He was only $10!

    Modern Dining Room

    Palm / Art Print / Acrylic Floor Lamp (similar)

    I left the small art piece I already had in the space right where it was. I’ve always loved this piece and I think it works well here. A palm plant added the perfect touch of color and texture to this little area too.

    Contemporary Dining Room

    The bar cart moved to one of the back corners of the dining room.

    Black and White Dining Room with Pops of Color

    Yellow Lamp (similar) / Bar Cart / DIY Lamp Tassels / Red Flatware Chest Details

    I don’t know that it had really been living up to its potential in its old home either. I rearranged, edited, and added some things to the cart.

    Yellow Lamp in Black and White Dining Room

    Yellow Lamp (similar) / DIY Lamp Tassels

    I wanted to work some more color into the space beside just the reds in the curtains and rug and this lamp did the job beautifully. I had bought it as part of a set at a rummage sale last spring. I think I paid $5 for the set, maybe? I just know it was a hell of a deal, because I practically bounced away from that sale. The other one is in my office. I also crowned this beauty with one of my lamps tassels for an extra touch of color and fun.

    Pops of Color in Dining Room

    Red Flatware Chest Details

    My recently remade silverware chest finally found it’s home on the bottom of the bar cart. After its makeover, the chest still didn’t have a home and I hated it because I loved it so much. Even Grunt felt bad for it having come such a long way and no place to rest. haha. It’s happy now though.

    Black and White Design

    Moving to the other side of the room, I kept my oversized artwork on the wall. I still love this print as much as when I first got it and it does a great job of covering lots of wall space and adding more interest to the dining space.

    Black and White Decor

    I moved the high marble top table over to this corner. I’ve always loved this table – it’s a family hand me down – but it always looked lonely by itself before or overpowered whatever I put on it. I decided to try out one of my larger busts on it and that worked out perfectly. Then, I just layered in another palm for more color and texture and finally my little elephant table that needed a new home since it had to leave my office to make space for my Roomba.

    What do you think of the dining room’s new look?

    Black and White Room Decor

    I’ll leave you with this shot of flowers from my cut flower garden. This is probably the last good bunch to come from it this year. We’ve been through a heat wave here and have had very little rain on top of that – needless to say, the garden isn’t doing so good right now.

    Want more easy decorating ideas that don’t break the bank?

    5 Ways to Decorate Your Home on a Tiny Budget – I’m a firm believer in the power of thrift store decor. 🙂

    How to Decorate with Black Walls – ready to paint the walls black, but not sure where to go after that? Don’t miss this post then!

    6 Decorating Ideas to Distract from Popcorn Ceilings – got popcorn ceilings? Before you go to all the trouble of scraping them off, try a few of these ideas first!

    Knotty Pine Walls Decorating Ideas – before you reach for that paintbrush to paint over it, look at these ideas for decorating with your knotty pine! You might just fall in love with it!

    Want to hang on to these dining room decorating ideas for later? Just pin the image below!

    Black and White Room

    Follow on social media:

    Facebook | Instagram | Pinterest | Twitter

  • Bathroom Primp & Pamper: The Circus’ Bathroom Before Pics and Plans

    Bathroom Primp & Pamper: The Circus’ Bathroom Before Pics and Plans

    When we bought the 70’s Landing Pad, we were very much focused on getting it remodeled as quickly as possible and getting in.

    While waiting to close, I remember having grand design plans for nearly every space in the house, but when we finally closed and as we worked on replacing flooring, gutting bathrooms, etc., those designs kind of dwindled down to the basics and not the full vision I had seen in my mind.

    Budget can also have a way of dwindling those plans and we spent far more on the house in that initial remodeling phase than we had planned on doing – and we spent it far faster too.

    After months of working on the house, we were tired and ready to get in the house and have a break.

    And so, things got “done enough.” Rooms were “complete” but, in my opinion, some were just a little “ok.”

    My daughter’s bathroom was one of those just “ok” rooms.

    I’m happy to say though, that I’ll be re-doing this “ok” room over the next few weeks along with some other fantastic gals who are making over their own bathrooms.

    The Before

    As I said, this is my daughter’s bathroom, who I refer to as “The Circus.” As many of you who have been around here for a while know, that nickname fits her well.

    What does not fit her well is her current bathroom situation.

    Sure, there’s a colorful vanity but there’s not much else in here that reflects her personality.

    I mean, this is the kid who requested “shiny red shoes like Dolly Parton’s” for Christmas. She insisted on leaving Santa a margarita. Her little plastic animal bull lives in the fairy house. When I showed her matching Mom + daughter leopard print swimsuits the other day, her exact words to me were, “Order them. You can never go wrong with leopard print.” And that’s just the tip of the iceberg, y’all.

    So yea, her bathroom is lacking. A lot.

    This post contains affiliate links for your shopping convenience. Click here to read my full disclosure policy.

    The Vision

    Toilet / Brass Hardware / Wall Trim / Flooring / Wallpaper / Vanity / Faucet / Mirror / Pendant Lights

    I included the Circus in every decision of this bathroom design. Now that being said, there were some things where I gave her two options rather than endless ones. I mean, I’d like to have this thing done in the allotted timeframe and not in 10 years.

    Also, the one stipulation of this makeover was that the tile floor stay. I do like the tile and we had just retiled this room a few years ago when we moved in. If it ain’t broke – and in this case, if it still looks good – don’t fix it.

    The jumping off point was the wallpaper. The first thing I asked her was what she wanted in her bathroom and she said dogs. So I pulled up loads of different dog wallpaper and let her choose one.

    From there, I would pull things I thought would work well in the space and then let her make the decision on which color, design, product, finish, etc. to go with.

    The Source List

    A big thanks to our official sponsors of the Primp and Pamper Bathroom Makeover, Build.com and Signature Hardware.

    Just about everything for this bathroom came from Build.com or Signature Hardware. I was thrilled to find so many great (and colorful!) options from both places.

    Bellevue Natural Brass Pendants – the Circus was insistent about using gold/brass tones throughout the space. She might be her Mama’s child after all. 😂

    Manor Born Wallpaper – fancy dogs are going on the wall, y’all.

    Quoizel Gold Monarch Mirror – when this mirror got here, I opened it up to make sure it had shipped ok, and y’all, it comes with a template for hanging it on the wall. How come all mirrors don’t come with that?

    Kohler Devonshire Single Handle Faucet & Coordinating Devonshire Hardware Accessories – more gold, shiny gold.

    VitaElegante Tile – this is the tile we installed a few years back. It’s a good neutral tile that has a bit of a modern feel.

    Ginkgo Leaf Shower Curtain – this shower curtain is even more gorgeous in person. The bits of yellow you see are much more noticeable and bright when you get your hands on it.

    Ashford Wall Moldings – I didn’t want to go floor to ceiling with the wallpaper in here for a few reasons. 1. It’s a small space and I didn’t want to overwhelm it all with wallpaper. 2. My kid is rough and tumble so I didn’t want to risk papering the lower half of the walls and then she somehow ripping or tearing it at some point. So I’ll be adding moldings to the lower 2/3s or so of the bathroom.

    Kohler Devonshire Toilet – yep, she’s getting a fancy toilet.

    Surya Tessera Rug – this will add some more color to the floor.

    Signature Hardware Everett Console Sink in Elderberry – another star of the show here. We love this vanity for both it’s great organized storage and of course, it’s playful color. I’m so happy to see Signature Hardware stepping up to the plate with gorgeous color on their very well made vanities!

    The To-Do List

    If you follow me on Instagram and watched my stories, you might have seen that I’ve already gotten a bit of a start on the bathroom.

    • Remove old vanity and toilet.

    • Install chair rail, wall moldings, etc.

    • Paint from chair rail down – can’t decide if I just go solid white here, y’all or paint it this Dandelion Wish color that is the same mustardy yellow in the wallpaper. What do y’all think?

    • Hang wallpaper above chair rail.

    • Switch out pendant lights.

    • Install new vanity, faucet, toilet, etc.

    • Hang new mirror.

    • Add trim to shower curtain – adding a fun tassel trim to the shower curtain.

    • Install new shower curtain rod and hang new shower curtain.

    • Gussy Up the Step Stool – The Circus wants a fun step stool like the one I did for our closet, so she’s picked out a design for it.

    • Revamp and Hang art – I’ve found some great secondhand art pieces for this space; just have to switch out some mats and paint some frames.

    Heaven help, I’m tired just typing all that. Ok, I have to get to work, so y’all go see what plans these other talented ladies have and be sure to check back next week for our progress!

    Jeweled Interiors | PMQ for Two | House Homemade | Effortless Style | Haneen’s Haven | Kaleidoscope Living

    Keep up with the makeover on social media!

    Facebook | Instagram | Pinterest | Twitter

  • Free Printable VIP Pass

    Free Printable VIP Pass

    Use this free printable VIP pass for your next special event, party or just for your kiddos to have fun with! Simply print, cut out and place in a lanyard!

    Another fun little thing I did for the Circus’ Red Carpet Birthday Party were these VIP Passes. These were for kids only, so it was an extra little touch that hopefully made them feel special and of course, like a VIP – which of course, they are!

    Free Printable VIP Pass

    Creative Commons red carpet image used for this printable found here. I replaced the stars with more red carpet.

    Aren’t they fun? As soon as each kiddo walked through the door, they got one of these.

    If you’ve got your own event coming up where these would be handy or want a fun little treat for partygoers, then you can easily whip out your own VIP Badges by downloading the free printable file I made for these.

    This post contains affiliate links for your shopping convenience. Click here to read my full disclosure policy.

    VIP Badge Free Printable

    Please note, these are for personal use only. Print as many passes as you wish, but you may not print and resell or sell the printable file.

    To get the printable VIP pass file, you’ll need to be a Rain on a Tin Roof email subscriber. It’s free and I don’t usually send out anymore than 2-3 emails a week – just when I publish new posts.

    Sign up below to get on the email list and to also gain access to the printable VIP badge file.

    Once you’ve subscribed and confirmed your subscription, you’ll be sent to a page where you can download the file. As a Rain on a Tin Roof Roof subscriber, you’ll also be able to snag all the other free printables in my printable library.

    Already a Rain on a Tin Roof email subscriber? You can put your email address in the form above and it should immediately take you to the download page for the VIP pass. You won’t be signed up twice for my emails though. You can also find a link to the file in my Printable Library if you’d rather go that route. Look at the bottom of the last email you got from me for the password.

    VIP Pass Printing Info and Tips

    • There are eight VIP passes per sheet of 8.5″ x 11″ paper.
    • The passes are on a black background that covers the entire sheet of paper. This will obviously take some ink. I highly suggest taking this to a printing center like Staples so you don’t use all your ink. Personally, I always take my stuff like this to Staples because I don’t even own a color printer. haha!
    • Printing on card stock or photo paper will be best. Photo paper will give you a more glossy sheen if you go that route. I had mine printed on card stock.

    Making the VIP Passes Look Legit

    Like how I worded that? haha.

    To give the passes a “real deal” look, after cutting each one out, I placed it in a lanyard.

    Printable VIP Badge

    I bought this pack of lanyards for our passes. Of course, you can go with whatever your little heart desires.

    Have fun with these – they could even just be a fun little addition to your kiddo’s dress up ensembles!

    Want more ideas for a great party?

    Get all the full Red Carpet party details right here.

    Check out these fun play microphones I made for the party here.

    And there are boo-koos of all sorts of great party ideas here!

    Want to remember this one? Just pin the image below!

    VIP Pass Printable

    Keep up on social media:

    Facebook | Instagram | Pinterest | Twitter

  • How to Cover Damaged Bathroom Walls on a Budget

    How to Cover Damaged Bathroom Walls on a Budget

    Looking for a simple and super affordable way to cover damaged bathroom walls left behind by old wall tile? We’ve been there too. We had little budget and lots of damaged wall in one of our bathrooms. Our solution cost us less than $100 – and it looks great!

    It seems I’m becoming quite productive since my crew has returned to school. Case in point: this blog post. This was a project we completed over two years ago, alas I never actually got around to sitting down and writing the post.

    Back in June, I taught a local workshop on remodeling your bathroom on a budget. I included this project in it and as I was writing up the presentation, it was then I realized I had never actually posted about it. Go me!

    So, if you’re looking for a super affordable, easy to accomplish solution for bathroom walls (or potentially any walls) damaged from tile or that may have huge gaping holes in them for other reasons, here ya go.

    Cover Damaged Bathroom Walls

    When we got the farmhouse, the bathroom looked like this:

    How to Cover Old Wall Tile

    I knew that before even laying eyes on it, the bathroom was going to need to be updated. It hadn’t been in that great of condition when my grandfather passed nearly 20 years ago. As you can see, the tiles were coming off the wall – and in multiple places, not just in that one place you see there.

    While I would have loved to retile the walls, that simply wasn’t in the budget. However, something still had to be done about those damaged walls left from the full removal of the tiles.

    This post contains affiliate links for your shopping convenience. Click here to read my full disclosure policy.

    Budget Friendly DIY Fix for Damaged Walls

    Materials & Tools Needed

    Project Notes

    • You’ll need enough luan, baseboard and lip molding to cover your damaged walls.
    • For us, the luan panels had to sit on top of the baseboard in order to reach far enough up the wall to cover all the damaged areas. This meant we had to buy a little wider baseboard as well. This can vary from space to space. Measure your space before buying and cutting. You may even be able to install your luan panels first, then your baseboard in front of the panel if you have a shorter area of damaged walls.
    • If you are installing new flooring in the space, you’ll want to install the flooring first, then do this project.

    Steps

    Step 1

    If you haven’t done so already, remove all the old tile and any trim or baseboard from your walls.

    Easy Fix for Bathroom Walls with Old Wall Tile

    I don’t have a photo of the space after I removed all the tile, but you can get an idea from above just how rough everything was once I started digging in.

    Step 2

    Using a stud finder, locate and mark all the studs along the walls.

    Step 3

    Using a miter saw, cut your baseboard to size and install it around your space.

    Step 4

    Using a circular saw, cut the luan panels down to the length of your walls.

    Apply construction adhesive to the back of the panels.

    Attach the panels to the walls where studs are located using finish nails and a hammer or a nail gun.

    Push firmly along areas where there are no studs and just the construction adhesive.

    How to Fix Damaged Bathroom Walls

    Step 5

    Cut your top molding down to size and install it over the top of the luan panels so that it lips over the panels a bit.

    Step 6

    If you have an area where two pieces of luan had to be used on one span of wall, use a small piece of wall trim to cover the seam. You could use a simple piece of lattice molding for this. This wasn’t the case for us as it was a small bathroom and we didn’t have any walls longer than 8 ft.

    Step 7

    Caulk all the corner seams where the panels meet. Caulk along where the baseboard and luan panels meet. Caulk along where the top piece of trim meets the wall.

    Fill any nail holes and sand smooth.

    Step 8

    Prime everything and then paint!

    Small Bathroom Budget Remodel

    Light Fixture / Mirror / Vanity / Faucet / Towel Hook / White Towels with Blue Stripes

    We painted the top half of the walls a creamy white and then the luan panel portion of the walls in Shipyard.

    Covering Old Wall Tile in a Bathroom

    Light Fixture / Mirror / Vanity / Faucet / Towel Set

    We spent a little less than $100 for all the materials to cover the damaged portion of the bathroom walls – waaaaayyyy cheaper than replacing the tile!

    For all of you wondering how it’s held up: Since I’m just now getting around to writing this post two years after we did it, I can say it’s held up really well. Everything is still in place just as it was. To clean the luan paneled portion of the walls, I just wipe it down with a wet washcloth – my kid is notorious for banging her toothbrush multiple times against the sink edge after brushing her teeth resulting in little white dots everywhere.

    What do you think of this solution for covering damaged walls?

    You can also see where we did a similar version of this project, but stained the panels here!

    Looking for more budget friendly fixes for your home?

    Here are more bathroom remodeling ideas on a budget.

    Here are nine DIY countertop makeovers.

    Here’s an easy $25 solution for covering those ugly dated louvers on doors.

    And here’s another budget bathroom remodel you might get some ideas from!

    Want to come back to this project later? Just pin the image below!

    Covering Up Bathroom Wall Tiles

    Are you following on social media?

    Facebook | Instagram | Pinterest | Twitter

  • Easy DIY Room Divider

    Easy DIY Room Divider

    Looking for an easy way to divide a space without it being permanent? This DIY room divider screen might just be your answer! It’s super simple to make and it’s easily removable!

    I know many people are all about “open concept” when it comes to homes these days. People want their kitchen, living and dining areas to all be together and open and “flowy”.

    Me? Not so much.

    That being said, the main living area at our previous home, the Beloved Foreclosure, was open concept. In fact, we tore down a couple walls to make it that way. The kitchen, living and dining room were all open to another. For that house, it was best that way though – the rooms felt really closed in otherwise.

    I really love having a little division between my kitchen and living room now though. I can jam out to my heart’s content while cooking dinner and not bother a soul.

    While our kitchen at the 70’s Landing Pad is it’s own space, separated by walls, from the living room and dining room, the living room and dining room open up to one another. It’s obvious that they are meant to be two different “rooms,” but there are no walls.

    For a while, I’ve been wanting to separate this space more. Not put up walls, but have a more clear definition of where the living room ends and the dining room begins. I wanted to be able to “fancy up” the dining room a bit more than the living room without it looking like I had only gussied up part of the space and never did anything with the rest.

    Enter gorgeous room dividers.

    DIY Room Divider

    Rug / Art Piece / Dining Chairs (similar)

    These hanging room dividers were the perfect solution to my dilemma. Best of all, they are super easy to make (I used prefab panels!) and they are easily removable if you ever need to take them down for any reason.

    O’verlays provided the panels for this project, however all opinions are 100% my own. This post contains affiliate links for your shopping convenience. Click here to read my full disclosure policy.

    DIY Hanging Room Divider

    Materials Needed

    *A note about the panels: If you get your panels from O’verlays, you’ll want to contact them for a custom panel. Your panel(s) will need to be about 1 1/2″ – 2″ shorter than your ceiling height. You’ll also want to get the 1/2″ thick panels so they will be a bit more sturdy than the usual panel thickness. You can choose the width of your panels depending on your room and taste.

    *For reference, I have 8′ ceilings and my panels are 94 1/8″ tall x 12 1/4″ wide and 1/2″ thick.

    Steps

    Step 1

    O’verlays come painted white. If you would like your panels a different color, go ahead and paint them first.

    Lady with Chickens Art

    Step 2

    Install screw eyes on the top edge of each panel. Place a screw eye 1″ in from the outer edge on each side.

    If you get wider panels than mine are, you may want to put in more than two screw eyes per panel.

    Step 3

    Place drywall anchors in the ceiling where you will hang your panels. The anchors should be the same distance apart as the screw eyes you just installed are.

    Using a framing square will help you keep the anchors in line with one another.

    Step 4

    Screw a cup hook into each of the anchors.

    Hang the panel on the hooks by placing the screw eyes at the top of the panels onto the hooks.

    Red Drapes / Rug / Art Piece / Dining Chairs (similar)

    Not only did these create a visual separation of the two spaces, but they added a gorgeous touch of drama and architectural detail to the space.

    Red Drapes / Rug / Dining Chairs (similar) / Bar Cart

    You may have noticed that they even prompted a little mini dining room makeover – I’ll share that soon!

    If you ever want to take them down, just slide them off the hooks.

    Isn’t this such an easy way of separating spaces without big effort or serious construction? What do you think of them?

    Looking for more big impact, little effort projects?

    DIY Louvered Closet Door Makeover – cover up those dated, dust-catching louvers easily!

    DIY Lucite Handrail – huge wow factor, easy project!

    How to Make Laminate Countertops Look Like Stone – easy and will just cost you around $20!

    Want to easily come back to this project later? Just pin the image below!

    Are you keeping up with use on social media?

    Facebook | Instagram | Pinterest | Twitter

  • DIY Kids Microphones – Great party favors!

    DIY Kids Microphones – Great party favors!

    This easy-to-make kids microphone will make any little guy or gal feel like the star of their own show! These are perfect for everyday play, but also make great party favors as well! Best of all – this toy microphone is simple and affordable to make.

    Since summer has ended and both of my crew members are back at work and school, I’m finally getting around to sharing how I made everything come together for the Circus’ VIP Red Carpet Birthday Party.

    One of my favorite projects from the party were these kids microphones.

    kids microphone tutorial

    The little partygoers had a ball singing with them at the party and they doubled as party favors they could take home as well! Bonus – these toy microphones are super easy to make!

    Play Microphone Tutorial

    This post contains affiliate links for your shopping convenience. Click here to read my full disclosure policy.

    Materials Needed

    toy microphone supplies

    Steps

    Step 1

    Spray paint all the PVC pipe black.

    play microphone tutorial

    I found it easiest to attach screws to a scrap piece of wood and stand the pipe on them to spray paint.

    Step 2

    While the spray paint is drying, glitter the eggs.

    how to make a kids play microphone

    To do this, place a toothpick in the narrow end of each egg. Apply Mod Podge, then immediately cover the egg with glitter.

    To dry the eggs, I placed each toothpick through a cardboard box to keep them elevated.

    Step 3

    After the pipes are dry, put a good bit of hot glue or another adhesive along one end of the pipe as shown below.

    diy kids toy microphone

    Put some adhesive a little bit inside the pipe as well.

    Place an egg, narrow end down, into each microphone pushing firmly.

    Let the glue dry.

    Step 4

    microphone party favors

    Once the glue has had enough time to dry, give each microphone a couple of coats of clear gloss top coat spray paint. This will help to seal all the glitter to the egg and keep it from falling off so much.

    Let dry and then rock out!

    We placed the microphones on our VIP table for the kids to grab as soon as they made their entrance into the party lounge.

    DIY Play Microphones

    Ice buckets were perfect for corralling them all!

    Need more great party ideas?

    Looking for more Red Carpet party ideas? See our entire VIP Red Carpet Party here!

    Make these VIP Passes for your next event with this free printable!

    Need an easy party backdrop? This DIY Party Background is easy to make and only costs around $5!

    Want to DIY as many party decorations as you can! That’s my jam too! Don’t miss these simple DIY party decorations on a budget!

    Want to come back to these instructions later? Just pin the image below!

    DIY Toy Microphones

    Are you following along on social media?

    Facebook | Instagram | Pinterest | Twitter

  • My Go-To Bags for Stress Free Family Travel + Packing Tips

    My Go-To Bags for Stress Free Family Travel + Packing Tips

    As you all know, my little family loves to take a trip. Since the kid was a baby, we’ve always done our usual yearly and sometimes bi-yearly beach trip. As she’s gotten older though, we’ve been able to expand destinations that include a bit more exploring – there was no one happier than her mama when we went to Boston and this kid happily skipped along the Freedom Trail asking a zillion questions.

    We love our week long beach trips just as much as our adventuring trips or quick 2-3 day road trips as well. 

    While I most definitely have not mastered the art of remembering every little thing when we go somewhere, I have learned a lot and therefore, packing for trips and exploring has gotten much less stressful. Here are my best packing tips and go-to bags that save my sanity.

    This post is sponsored by Baggallini, however all opinions are 100% my own. Click here to read my full disclosure policy.

    Traveling with Kids: Packing Tips + Essential Bags

    Combine suitcases whenever possible. 

    Unless the kid is feeling uber-independent, I always put both her and my clothes, toiletries, etc. together in one suitcase or travel bag. Having the one piece of luggage for both of us means there’s one less thing to keep up with and carry, plus it helps to keep me from overpacking – which I’m getting better at with every trip. 

    Speaking of overpacking…

    Don’t stress too much on clothing. You’re going on a trip to enjoy yourself, not to put on a fashion show. Choose comfortable clothing that includes a few key pieces you can easily dress up if needed. 

    The same is true for kids. They will be much better behaved and enjoy the trip more if they are in comfortable clothes.

    For kids, and also helpful for adults, pack outfits together. I always pack the Circus’ clothes with her outfits put together, shirts on top of pants. That way when she goes to put something on, she knows what goes together. 

    And always always always, throw in a light jacket or cardigan. I can’t tell you how many times I’ve gotten to the beach and while I thought I’d never need a long sleeve piece of clothing in June, I was wrong. 

    While I haven’t bought them yet, I have heard wonderful things about packing cubes. I’m hoping to get a set or two before our trip to New Orleans and test them out.

    Always have a backup outfit on hand.

    From the time Mama told her story about getting to Europe and their luggage not making it over when they did, I always try to have a spare change of clothes for both me and the kid within easy reach when traveling. 

    Baggallini 3-in-1 Convertible Backpack - great for overnight trips and a carry on.

    My Baggallini 3-in-1 Convertible Backpack works perfect for this. It will easily hold a change of clothes for both me and the kid as well as a toiletry bag. It also has a sleeve on the back that allows it to easily slide over your luggage handle. Since it can hold a change of clothes and toiletries, it’s also one of my go-to bags for quick overnight trips.

    There are multiple interior pockets for optimal organization as well as quick access pockets on the front and room for a water bottle and umbrella on the sides. 

    Family Travel Tips

    I like to use those interior pockets to pack meds that could be needed on the trip like allergy medicine, Tylenol, etc. so they are within easy reach.

    The removable wristlet that comes with the 3-in-1 Convertible Backpack is super handy as well. 

    Baggallini Detachable Wristlet

    It will easily hold a few cards, lip gloss and another essential or two. Its strap clips to a hook inside the bag, so no digging around for your wallet – you always know right where it’s at. The wristlet is also RFID blocking – so no one can easily steal your credit card info just by standing next to you.

    Since it’s a 3-in-1 bag, it’s very versatile. It can go from tote to backpack to crossbody with a quick couple of clicks. 

    Packing Tips for Family Travel

    So when you get where you’re going, you can switch it to backpack mode, load the exploring essentials and be on your way. 

    The 3-in-1 Convertible Backpack is also water resistant, which makes it perfect for summer trips to water parks. We loaded it up the other day for a quick trip to the fountains at a local park.

    3-in-1 Convertible Backpack - goes from backpack to tote to crossbody in one click.

    Don’t forget snacks. 

    If you’re traveling with kids, you know they often end up needing a snack at the most inconvenient times. Be sure to stash some snacks in your tote and keep it within easy reach on road trips and while flying.

    Keep them entertained.

    Anytime we go on a trip, whether driving or flying, I always pack a new coloring or activity book and crayons for the Circus to help keep her occupied. 

    This is also the time to take advantage of technology. We load the iPad up with a couple movies that she can watch as well.

    If you’re traveling with a baby or toddler that really isn’t into all that yet, consider buying a new small toy to take with you and surprise them with it on the plane or in the car. 

    Tuck away a crossbody bag.

    Anytime we go somewhere, I like to throw in a great crossbody bag that can hold just the essentials while I’m out and about.

    Packing Tips for Family Trips

    My favorite crossbody is the Baggallini Take Two Bryant Crossbody. It has two zippered pockets and two exterior pockets to hold the essentials.

    Baggallini Bryant Take Two Crossbody

    This bag also has RFID blocking card slots built-in to keep your cards safe. It’s lightweight and water resistant as well.  

    Baggallini Crossbody - converts to wristlet.

    I love having the Take Two Bryant Crossbody when I travel because it keeps my hands completely free. It’s also my go-to bag for thrift stores and yard sales so I can easily dig for those deals.

    If we go out to dinner and I want it to be a bit more “fancy,” I just take the crossbody strap off and replace it with the wristlet strap.

    Baggallini Wristlet - versatile bag for travel.

    Don’t sweat the mishaps.

    Above all, have fun! There are going to be mishaps, there might even be meltdowns. Take a break, regroup and then get going again. It’s all about enjoying new places and making memories with the family. 

    Our next family adventure is New Orleans in the fall – where are you headed to next?

    Want to come back to this post later? Just pin the image below!

    Best Bags for Travel

    Keep up with us on social media:

    Facebook | Instagram | Pinterest | Twitter

  • Tips for Snagging the Best Deals on Woot + My Scores

    Tips for Snagging the Best Deals on Woot + My Scores

    This post is sponsored by W​oot​. While this was a sponsored opportunity, all content and opinions expressed here are my own. This post contains affiliate links for your shopping convenience. Click here to read my full disclosure policy.

    A couple of weeks ago, I told you about Woot – one of my go-to places for snatching up products at deep discounts that I can’t always buy at my go-to thrift stores. 🙂 I also told you about their upcoming birthday week and all the great deals they would be having. 

    Well, I kept a close eye on their site in case they had anything we’d been holding out on purchasing or in case I saw any great potential gift items for the holidays. I ended up walking away from their birthday week with a few fantastic bargain purchases….

    T-fal 14 Piece Cookware Set for $84

    The majority of the pots and pans we had been cooking with were from Grunt’s bachelor days. They were in rough condition, but I had just been dealing with it, putting off a cookware purchase as long as I could – I mean, I’m not a gourmet chef and so I’d rather spend my money on something more fun than cookware. Haha! However, the hubs has taken over a good portion of the cooking this summer. I know, right?! #score He’s cooked the whole family breakfast just about every morning and he’s also mastered the art of Taco Tuesday. A week or so into summer, he noted how bad some of our skillets were and that they were interfering with perfecting his newfound love for making omelets. 

    Of course I didn’t want to give him any reason to quit cooking for us, so I moved new cookware to the top of my list. Am I right or am I right?

    So, when I saw the T-fal cookware set pop up as one of Woot’s daily deals, I snagged it.

    This set normally goes for $140 bucks, so buying it for $84 was a deal. And even though cooking isn’t my favorite thing to do, I’m actually pretty excited about this new set. It actually making me want to cook is yet to be determined still.

    Kitchen Knife Sharpener for $5

    Is it obvious how much we put off kitchen related purchases? These knives were wedding presents when we got married nine years ago – and they’ve never once been sharpened since. This knife sharpener was part of Woot’s Totally Fun Pricing deal. There were various items that launched with a price of $1 and then increased in price as the items sold out at the lower price. I wasn’t quick enough to get the sharpener at $1, but I was quick enough to get it at $5 – saving me 77% off the retail price!

    Weighted Blanket for $60

    While Grunt and I have been talking about getting one of these for ourselves, this weighted blanket was actually purchased as a gift for my mother-in-law. 

    It was another daily deal during Woot’s birthday week. There were lots of different size, weight and color options to choose from. The one we went with would have normally been $110, so we saved about 45% getting it on Woot. These things are legit weighted, y’all. I was so surprised when I got it out of the box. They are super soft too. We might have to get one for ourselves sooner rather than later.

    And…a Bag of Crap

    You might remember Bags of Crap from my earlier post about Woot. The bags cost $10 and are a random collection of stuff put in a box and sent to you (shipping included in cost). You literally have no clue what you’re going to get. If you have kids or grandkids, you might be familiar with “Blind Bags.” Well, these are blind bags for adults. 

    Everything you see above was what came in our Bag of Crap. As you can see, it truly is completely random. It had everything from a stuffed monkey to car fuses. A few of our favorite items included a Darth Vader World’s Greatest Dad glass, the monkey of course was a favorite with the Circus, there was a nice wallet type phone case, a hummingbird feeder and some cool containers for meal prep.

    Tips for Snagging the Best Deals on Woot

    Woot can get overwhelming with all the new daily deals and all the other promotions they run. Add limited quantities on top of that and it can be a little more stressful. Here are a few tips I’ve discovered for snagging deals on Woot…

    Download the Woot app on your phone. 

    They’ll send you alerts as new daily deals and other items launch.

    Check Woot daily. 

    If you can, take 3 minutes out of your morning routine and hop on Woot to see if there’s anything new you need. 

    Pull the trigger. 

    If there’s something you need that goes on sale at a great price, don’t hesitate. There are often limited quantities of what Woot sells. 

    Think long term.

    Y’all know I love gift giving season, so when I’m shopping on Woot I try to keep people on my gift list in mind and potential gifts they would love. 

    What deals have you gotten from Woot?