Tag: paint

  • What kind of paint do I use on that? Types of Paint and When to Use Them

    What kind of paint do I use on that? Types of Paint and When to Use Them

    A trip to your local hardware store to select paint can often become overwhelming. There are lots of different types of paint out there and knowing which type of paint to choose for a project can get confusing. Use this guide to learn about the different types of paint and which would be the best paint for furniture, wood, plastic, metal and laminate surfaces.

    I really thought that all the information to know about painting furniture was out there in internet land for everyone to see and no one needed to hear anymore from me besides the occasional furniture makeover, on the subject. However, I get questions all the time asking what kind of paint for certain kinds of furniture, when to sand / when not to sand pieces, when to prime / when not to prime, and so on. Apparently, people still have questions on this topic and I’m cool with that. It gives me something to write about that I love writing about. So to answer one of those questions, this post is all about what kind of paint to use on what surface.

    Types of Paint

    This post contains affiliate links for your shopping convenience. Click here to read my full disclosure policy.

    Best Paint for Wood

    Generally, you can use just about any kind of paint on wood surfaces, whether it’s wood furniture, wood trim or other wood surfaces.

    Best Paint for Wood

    Navy End Table painted with Velvet Finishes / Coral End Table painted with Latex Paint

    Oil-Based Paint

    Oil-based paint is great for furniture makeovers in terms of durability over time. However, it’s not as easy to deal with as latex and other specialty furniture paints are. With an oil-based paint, you absolutely must make sure you use a high-quality paint brush that will work with oil-based paint. Generally, it just works better to brush oil-based paint on, rather than rolling it. Oil-based paint is also known to have fewer brush strokes as well. Clean-up for oil-based paint is not a picnic. You have to use mineral spirits or paint thinner to clean your brushes and any paint off you as well. Most oil-based paints won’t require an additional topcoat though.

    Types of Paint: Oil Based Paint

    One really important thing to note with oil-based paint is that it should not be painted directly over latex paints. If you really want to use oil-based paint over latex, then first sand it, prime it with a water-based primer and then use your oil-based paint.

    Latex Paint
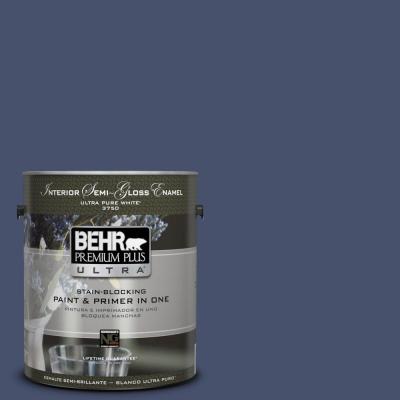
    Types of Paint: Latex Based Paint

    Your basic latex paint that you can find at local home improvement stores is also fine to paint wood surfaces with. Generally, it is much easier to work with than oil-based paints, however the durability over time isn’t as great, but it’s not bad by any means. If you paint something with a semi-gloss or gloss sheen, then you may not need an additional polycrylic topcoat depending on much use your surface will get. If you paint something with a latex paint that has a flat, eggshell or satin sheen, I would definitely finish up with a polycrylic topcoat for added protection. If you’re looking for low sheen, go with the satin polycrylic. Latex paint can be cleaned up with soap and water. One thing to note with latex paint is that brush strokes are more likely. To minimize these as much as possible always use a good, high quality paintbrush and mix in a little Floetrol – it’s like magic in a bottle for eliminating brush strokes.

    Best Paint for Wood Furniture: Speciality Paints

    Specialty Paints

    Since furniture painting has become such a big deal, there have been a number of specialty paints created specifically for painting furniture. Many of these make furniture painting easier in some way or another that oil-based and latex paints don’t always offer.

    Velvet Finishes Paint

    It’s no secret around here that I often use Velvet Finishes for my furniture projects.

    Best Paint for Furniture

    Velvet Finishes has a built-in topcoat and usually does not require sanding or priming unless the piece has a shiny or glossy finish on it before painting. If your piece is glossy, you can use their Ready product on it before painting, which is a spray primer that you just spray on, let it sit, then wipe off.

    Chalk Paint

    Many people love chalk paint. I’m not one of those people. I don’t detest it, but it’s just not my cup of tea. Most chalk paints don’t require you to prime or sand your piece before painting, which is great. Most chalk paints do require you to give it some sort of topcoat though. Many people use wax to seal it.

    Milk Paint

    I’ve never personally used milk paint, so I certainly can’t speak to how well it works myself, but I have heard good things about it from others. I think most people go with milk paint when they are looking to achieve a farmhouse effect on their furniture.

    Types of Paint for Laminate Surfaces

    Painting laminate furniture and surfaces is a whole other beast. It can be done, but not super easily. To paint laminate furniture, I think you should always prime the piece first. I’ve used Zinnser Primers for this and have had good results.

    Types of Paint: Zinsser Primer

    I have painted laminate pieces before without priming them first and it didn’t turn out so hot.

    Latex Paints

    After priming your piece, you can follow up with at least two coats of latex paint. Just like I noted above, use a good brush and Floetrol to prevent brush strokes.

    My personal pick for latex paint that you can buy at your local home improvement store is Behr paint. I’ve always gotten good results with it and while it is a little more expensive than other brands, I think it’s well worth it.

    Oil Based Paints

    You can also use oil-based paints over laminate if you first prime it. Using an Oil Based paint would provide more durability over the long run.

    Velvet Finishes

    I have used Velvet Finishes over laminate furniture before and it did pretty well. I still suggest using a good primer on it first though.

    Topcoat It

    With laminate furniture, I highly suggest giving it some extra protection. Give it a couple coats of Polycrylic after you finish painting it to really try and protect that surface.

    Types of Paint: Polycrylic Topcoats

    Even if you follow all these steps, there will most likely come a time down the road when your painted piece of laminate furniture will chip or the paint may start to peel away. This is just the nature of painting laminate furniture.

    Types of Paint for Plastic Surfaces

    Types of Paint: Spray Paint for Plastic Surfaces

    Plastic Planters Spray Painted with Geometric Designs

    Spray Paint

    Hands-down, anytime I have something plastic to paint, I head for the spray paint. It’s the easiest way to get the paint on there without brush strokes and gives pretty good adhesion on plastic pieces. Prime the piece first with a spray paint primer (especially if it’s really shiny) and then follow up with a few coats of spray paint. I’ve used Rust-Oleum, Krylon and Design Masters spray paint and have been pleased with all of them.

    Types of Paint for Metal Surfaces

    I generally go with one of two paints when it comes to metal surfaces: Oil-Based Paint or Spray Paint. If it’s a big metal piece that I’m painting, I’ll go with oil-based paint like I did with my metal handrail. If it’s something metal that’s smaller, I’ll go with spray paint.

    Types of Paint for Metal Surfaces

    Metal Stair Railings painted with Oil-Based Paint / Spray Painted Metal Laundry Hamper 

    Oil-Based Paint

    Oil-Based paints bond really well to metal surfaces. You can use it in a paint sprayer if you want to or brush it on, which is what I tend to do. Just remember, and I know I’ve said this like 2.1 million times now, always use a good, high quality paintbrush! It really does make a world of difference when painting. One thing to remember when you are painting something with oil-based paint that’s bigger in scale is to work in sections. You can’t easily go back over places to touch them up after you’ve already put one coat of paint on. While oil-based paint takes longer to dry, that also means your finish gets messed up if you try to go back over a part that is partially dried. My personal pick for oil-based paint is Behr’s.

    Spray Paint

    If you’ve got something smaller that’s metal, let’s say a lamp or something, then I would head for the spray paint aisle. It’s just easier to work with and will still provide great adhesion and durability. I used spray paint on that metal laundry hamper you saw above.

    Types of Paint for Upholstered Surfaces

    So you’ve been considering painting some upholstery, eh? This is a topic that many people seem to have mixed feelings on. I have painted an upholstered chair before, however it was a chair that wasn’t going to get a whole lot of use, therefore I wasn’t too worried about the comfort of it.

    Types of Paint for Upholstered Surfaces

    Chair Upholstery painted with Velvet Finishes Paint

    In that one instance, I used Velvet Finishes paint for the upholstery. I think it took about three coats to fully cover the upholstery. Upholstery does suck up a lot of paint, so be prepared to paint on multiple coats.

    Those are my picks for the best types of paints for wood, laminate, metal, plastic and upholstery surfaces.

    Do you have any favorites or other questions?

    Now that you’ve read all the nitty-gritty details, you might find it useful to have a one-page guide on what kind of paint can be used on what kind of surface – lucky for you, I’ve made one just for you! Click below to get access to it! 

    Types of Paint Quick Reference Guide

    If you’ve got any other painting questions at all, please leave your questions in the comments!

    Need more painting help?

    Click on any of the links below to get my opinion. (Which by no means is a professional opinion. I’ve only painted, oh, say 2.4 million pieces of furniture. Ok, that’s stretching it a bit.)

    Types of Paint to Use on Kitchen Cabinets – I’ve painted cabinets five times now. Here’s my take on which paints to use.

    Painting 101: Topcoats and When to Use Them – topcoats can be confusing, right? This guide breaks them all down.

    Must-Have Tools and Supplies for Painting Furniture – my tried and true tools of the trade.

    My Best Tips and Tricks for Painting Furniture – from over 10+ years of painting.

    FAQ: Painting Furniture – all the questions I’ve ever been asked about painting in one.

    blog-signature-summer-15
    pin-this-post-2
    Types of Paint - Best Paint for Wood Furniture

    SaveSave

  • How to Coordinate Paint Colors Throughout Your House

    How to Coordinate Paint Colors Throughout Your House

    I can’t begin to tell you how many times I’ve attempted to select a paint color and it has ended in either tears, drinking or both.

    Usually both.

    Throwing of hands in the air, slamming of fists on tables and/or walls is typical as well.

    Obviously, buying sample pots of paint and testing those out on your walls is the way to go, but if I bought a sample pot of paint for every color I thought may work, I would have a closet full of sample paint pots.

    One of my biggest challenges is often coordinating paint colors throughout my house – thus why there is a lot of black and white in my home. However, a few months back I went to a meet-up at the Behr paint headquarters in Atlanta and had an ‘Ah ha’ moment.

    Also, Behr isn’t paying me to tell you this, I just think that everyone in America should know this so we don’t all spend a combined $1 trillion dollars on paint samples and/or doctor’s bills that resulted from hitting walls after still not being able to find a paint color after 20 freakin’ samples.

    How to Coordinate Paint Colors

    This post contains affiliate links for your shopping convenience. Click here to read my full disclosure policy.

    Seriously, you’re gonna love me for all time after I tell you this.

    Ok, this is the Behr color center at Home Depot.

    how-to-coordinate-paint-colors-behr-color-center

    The color center is broken down into eight horizontal rows.

    How to Coordinate Paint Colors Throughout Your House - oh my goodness, I SO wish I would have known about this trick sooner!! It would have saved me so much time and paint samples!

    Rumor has it that every paint color within rows one and two coordinate with each other. The same is true of rows three and four, rows five and six and rows seven and eight.

    How to Coordinate Paint Colors Throughout Your House - oh my goodness, I SO wish I would have known about this trick sooner!! It would have saved me so much time and paint samples!

    Therefore, if you select paint colors from within the same row group (i.e. rows 1 & 2 or row 3 & 4 or row 5 & 6 or row 7 & 8), then all those colors will coordinate or harmonize well throughout your house.

    I know, right, mind blown. Or at least mine was.

    So I tested their theory. I went to Home Depot and randomly grabbed paint chips from the various rows, noting what rows they came from. These are all paint chips from rows one and two:

    How to Coordinate Paint Colors Throughout Your House - oh my goodness, I SO wish I would have known about this trick sooner!! It would have saved me so much time and paint samples!

    Y’all. They weren’t lying. The top picture consists of all the color cards I got from those two rows and the bottom images are just cards I pulled out to show that the theory really is true.

    Now, not everyone loves that much color. Here are paint chips from rows five and six – more muted tones:

    How to Coordinate Paint Colors Throughout Your House - oh my goodness, I SO wish I would have known about this trick sooner!! It would have saved me so much time and paint samples!

    Once more, they all harmonize well together.

    I also grabbed some color cards from rows seven and eight:

    How to Coordinate Paint Colors Throughout Your House - oh my goodness, I SO wish I would have known about this trick sooner!! It would have saved me so much time and paint samples!

    And those worked too! As you work your way down the color center, the colors tend to get less bright. I failed to get color cards from rows three and four as the employees started looking at me a little funny, so I just took what paint chips I had and ran.

    Isn’t that so cool? While I will always love a good black and white paint combination, I am so glad to know this little trick because it will come in handy at the 70’s Landing Pad since I haven’t figured out all the paint colors there just yet.

    Did you know about this? Please don’t tell me I’ve been living under a rock for the last 10+ years of my painting life!

    Here are more home decorating posts you’ll find helpful too…

    How to Make a Moodboard for Room Designs – making these boards are easy and they are great for helping you determine what will and won’t work in your design!

    Decorating on a Budget – 5 Ways for Decorating Your Entire Home on a Tiny Budget!

    6 Decorating Ideas to Distract from Popcorn Ceilings – before you make a mess and go scraping them off, read this first!

    Free Printable Project Planner – a printable planner that will help you plot out your next room makeover and stay on budget.

    blog-signature-summer-15

    You know you don’t wanna miss any of this crazy.

    Sign up to get my posts delivered to your inbox here.

    Stalk Me Here:

    Pinterest / Facebook / Twitter /Instagram

    pin-this-post-2

    Coordinate Paint Colors Throughout Your Home | Home Painting Ideas | Home Paint Colors | Home Paint Schemes | Paint Colors for Home

    SaveSave

  • 10+ Gorgeous DIY Accent Wall Ideas for Just $30 or Less

    10+ Gorgeous DIY Accent Wall Ideas for Just $30 or Less

    Want to create a gorgeous focal point in your home? Have you thought about an accent wall? These DIY accent wall ideas bring the beauty but don’t require a lot of cash!

    Feature walls can be a total game changer for a room. Not only do they add character and beauty, but they can define a space and bring it to a whole other level – not that this happened in my dining room or anything lately. 😉

    Below you’ll find a few of my favorite easy and cheap accent wall ideas for multiple different areas in your home! The best part? Each one costs just $30 or less to complete!

    Easy Accent Wall Ideas

    Washed Out Stripes Wall

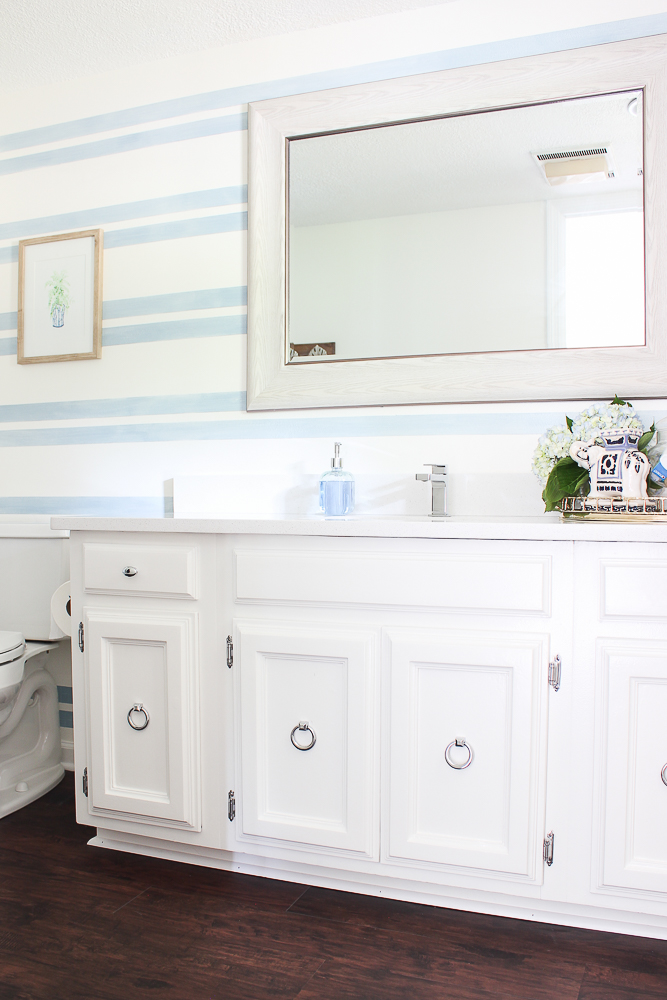
    DIY accent wall ideas- washed out blue stripes in a bathroom

    Bathroom Accent Wall

    A sample pot of paint. Yep. Just that, a ruler and some tape and you can create this washed out stripe look in your home!

    Object and Text Wall

    cheap accent wall ideas - combining objects and vinyl text on a wall

    Kids Room Wall

    This is one of the sweetest walls I’ve ever done. I mixed in objects and vinyl text lettering to create a feature wall especially for my daughter.

    Carpeted Wall

    easy accent wall - putting green astroturf carpet on a wall with pink accents.

    Putting Carpet on Walls

    Yes m’am, I did! Carpeted feature walls got a bad vibe back in the day, but I’m on a mission to change that! I put a $30 astroturf rug on a wall in my bedroom and it added the perfect amount of color and texture to the space.e

    Cane Inspired Feature Wall

    accent wall ideas -  green and white lattice bathroom wall

    Cane Inspired Accent Wall for $25 or Less

    This one might look a little complicated, but it’s actually quite easy! All you need is a little painter’s tape and paint, of course! This bathroom accent wall could be recreated in any space in your home.

    Painting One Wall

    create an accent wall by painting one wall only - blue feature wall against gray walls

    Blue Accent Wall

    You don’t always have to paint every wall or create a pattern on the walls – sometimes just painting one will do the trick!

    Gallery Wall that Hides the TV

    Accent Wall Ideas for Living Room - black and white gallery wall that hides the tv

    Black & White Gallery Wall

    This is still one of my favorite walls to date! I love this black and white gallery wall for two reasons. 1. It takes your wall art to a whole other level. 2. The television practically disappears into the wall.

    Wood Accent Wall

    Wood accent wall in a masculine bathroom

    DIY Wood Wainscoting Panels

    This is a cheap way to bring gorgeous stained wood walls into a room!

    Fun and Carefree Wall

    diy accent wall ideas - white wall with gold confetti on the wall.

    Confetti Accent Wall

    This easy confetti accent wall isn’t only easy and cheap to make, but its also fun. It adds a touch of whimsy to any space and is ridiculously easy to complete! This one is super budget friendly too – you can just use a bottle of craft paint for it!

    Classic Style Accent Wall

    cheap accent wall ideas - traditional black and white criss cross wall.

    Criss-Cross Accent Wall

    This criss-cross wall was a huge game-changer for my dining room! It helps to anchor the dining room with it’s traditional feel and pattern, but can easily work with color and modern decor as well.

    An Accent Ceiling

    accent wall on the ceiling - pink and white ceiling

    Pink Ceiling

    How about an accent ceiling? I painted my bathroom ceiling pink with faux white moldings. It adds a lot of interest to an otherwise all white bathroom. You can always opt for a different paint color to not make it seem as girly.

    Accent Squares

    easy accent wall - gray squares on a white wall

    Painted Wall Treatment on a Budget from Thistlewood Farms

    I love this simple graphic wall treatment from Karianne. And guess what? She did it with just a sample pot of paint!

    No Paint Accent Wall

    black and white accent wall using tape

    Striped Accent Wall without Paint from Homey Oh My

    This accent wall doesn’t even require paint! And isn’t that black and white classic?

    Stencil Wall

    white circles stenciled on a beige wall

    Circle Patterned Wall from Lilikoi Joy

    I love the circles on this one – adds a good dose of fun! You just switch it up with any kind of colors you prefer!

    Square on Squares Accent Wall

    squares on squares accent wall

    Graphic Statement Wall from AKA Design

    Squares are always a favorite of mine – and these make a bold statement, but are a simple pattern. This would be great in a modern home.

    Triangle Wall

    peel and stick triangles no paint accent wall

    Triangle Accent Wall from Upcycled Treasures

    Another one that doesn’t require paint! If modern is your style, this one might be perfect for your home too. Simply use peel and stick triangles to achieve the look!

    + Accent Wall

    Modern Accent Wall Idea

    Plus Signs Accent Wall from Knack Studios

    These plus signs or crosses are a fun and unexpected twist for another modern statement wall! You could easily create them with paint pens or electrical tape!

    Now go create an accent wall and come back and tell us all about it!

    Want more great ideas for your walls?

    Wall Paint Design Ideas with Tape – if you can tape it off, you can make it happen! You won’t believe some of these walls!

    DIY Indoor Lattice Wall – yes, lattice inside makes for a gorgeous wall treatment!

    Want to come back to these wall ideas later? Just pin the image below!

    Looking for BIG bang for your buck? Here are 9 Accent Walls for $30 or Less - includes lots of wall painting ideas, techniques and designs - and they are all DIY projects! Great painting ideas!

  • 14 Painted Rug Hacks

    14 Painted Rug Hacks

    I love a good hack, especially a good hack that is so much cheaper than the real thing. Painting a basic rug is an affordable way to get exactly the look you want without paying a fortune on a rug that may get grape Kool-Aid spilled on it only minutes after you put it down. Yea, you know what I’m talking about.

    14 Painted Rug Hacks

    DIY Painted AstroTurf Rug Tutorial via RainonaTinRoof.com #diy #rug #homedecor #outdoordecor

    Painted Astroturf Rug from Rain on a Tin Roof

    14 Painted Rug Hacks that you CANNOT miss! Paint rugs to get a prettier higher end look without spending a fortune!

    Fruit Welcome Mat from The House that Lars Built

    14 Painted Rug Hacks that you CANNOT miss! Paint rugs to get a prettier higher end look without spending a fortune!

    Pink and White Patterned Painted Rug from Rappsody in Rooms

    14 Painted Rug Hacks that you CANNOT miss! Paint rugs to get a prettier higher end look without spending a fortune!

    Cabana and Nautical Rug from Made in a Day

    14 Painted Rug Hacks that you CANNOT miss! Paint rugs to get a prettier higher end look without spending a fortune!

    Monogram Welcome Mat from Thistlewood Farms

    14 Painted Rug Hacks that you CANNOT miss! Paint rugs to get a prettier higher end look without spending a fortune!

    Chevron Painted Rug from Cape Twenty Seven

    14 Painted Rug Hacks that you CANNOT miss! Paint rugs to get a prettier higher end look without spending a fortune!

    Stenciled Circle Rug from Tatertots & Jello

    14 Painted Rug Hacks that you CANNOT miss! Paint rugs to get a prettier higher end look without spending a fortune!

    Navy Painted Rug from  Little Black Door

    14 Painted Rug Hacks that you CANNOT miss! Paint rugs to get a prettier higher end look without spending a fortune!

    Black and White Stripes Painted Rug from  Adventures of an Almost 40 year old Intern

    14 Painted Rug Hacks that you CANNOT miss! Paint rugs to get a prettier higher end look without spending a fortune!

    Polka Dot Rug from  A Beautiful Mess

    14 Painted Rug Hacks that you CANNOT miss! Paint rugs to get a prettier higher end look without spending a fortune!

    Spray Painted Herringbone Rug from  Park House Love

    14 Painted Rug Hacks that you CANNOT miss! Paint rugs to get a prettier higher end look without spending a fortune!

    Trellis Painted Rug from Pudel-Design

    14 Painted Rug Hacks that you CANNOT miss! Paint rugs to get a prettier higher end look without spending a fortune!

    Yellow Starburst Painted Rug from  Adventures of an Almost 40 year old Intern

    Want another great rug hack? Don’t miss this DIY Cowhide rug – no painting required on it!

    Do you have any ideas for painted rugs?

    DIY Painted Rug Ideas | DIY Painted Rug Tutorials | Painted Rug DIY | DIY Painted Rug | DIY Painted Rug Outdoor

    Happy hacking!

    You know you don’t wanna miss any of this crazy.

    Sign up to get my posts delivered to your inbox here. 

    Stalk Me Here:

    Pinterest / Facebook / Twitter / Instagram

  • Painted Porch Floor

    Painted Porch Floor

    Last week, I showed a little sneak peek of this project when you saw the leopard print table.

    I’ve been sitting over here antsy as all get out to show you the whole project.

    I’m pretty pumped about how this painted porch floor turned out.

    Painted Porch Floor via RainonaTinRoof.com #porch #summer #diy

    Last year, I did a makeover on the screened-in porch. Well, really it was like a semi-makeover. I painted the floor, bought new seat cushions, made a chalkboard, and that was about it.

    After adding on the deck this year, I really wanted to make this space more colorful, and an extension of our living area. So far, I’ve spruced up the chandelier, added a buffet table, and now this floor. There is still more to come, y’all, and with every change, I love this space even more!

    Here’s how I did my floor:

    Painted Porch Floor

    Disclosure: This post is sponsored by FrogTape, however all opinions and my love of black, white, and green are 100% my own. This post contains affiliate links for your shopping convenience. Click here to read my full disclosure policy.

    First, you want to start out with a clean floor. My old floor color was brown and I wanted to do a white, black and green color scheme, so the brown had to go. I cleaned the floor really well first, then painted on two coats of white exterior paint.

    Painted Porch Floor via RainonaTinRoof.com #porch #summer #diy

    Now, before you even think about putting that tape down, I want you to wait a minimum of seven days to let the paint fully cure.

    I know – it really stinks waiting that long, but trust me, you need to. You see, at first, I did not wait seven days. I waited three days and put the tape down, then when I pulled it up, some of the paint came with the tape. The paint hadn’t fully cured. So, I repainted the entire floor with another two coats of white paint and didn’t touch it for a week.

    Go have yourself a cocktail or two (per day of course), and just wait the seven days for it to fully dry. You’ll thank me later.

    Let’s all hum the Jeopardy theme in our head while we pretend that we just waited seven days for the paint to fully cure…….

    Ok, seven days later, we’re ready to tape. My concrete is very old school. Remember, I am dealing with a 1960s Rancher here. Needless to say, the concrete was uneven in places and had multiple bumps and divets, and just plain not smooth – anywhere really.

    Regular tape wouldn’t work – the paint would have bled through. To combat this, I used FrogTape for Textured Surfaces.

    Painted Porch Floor via RainonaTinRoof.com #porch #summer #diy

    It has a two part system – tape and liquid PaintBlock.

    The first thing you will do is measure out your sections. I did 28 1/2 inch wide sections – that width took up the entire porch floor, which was perfect. After measuring and marking out your sections, run the tape along the edge of each section.

    Painted Porch Floor via RainonaTinRoof.com #porch #summer #diy

    Next, run a damp cloth around the edge of the tape. This helps to activate the PaintBlock technology.

    Painted Porch Floor via RainonaTinRoof.com #porch #summer #diy

    Like I said, this tape is a two part system. Next, you will take the bottle of liquid PaintBlock sealer and apply it to the edges of the tape. Shake the bottle well, then remove the cap and replace it with the included brush applicator.

    Painted Porch Floor via RainonaTinRoof.com #porch #summer #diy

    Apply it generously along the seal, going back and forth to overlap. It goes on milky, but dries clear. Let it dry for 15 minutes and then paint! Remove the tape when the final coat of paint is dry to the touch.

    Painted Porch Floor via RainonaTinRoof.com #porch #summer #diy

    Don’t worry about the liquid PaintBlock keeping paint from adhering places where there was no tape – it just seals the tape edge.

    Painted Porch Floor via RainonaTinRoof.com #porch #summer #diy

    Isn’t is crazy how just three simple colors in stripes work so well together? No fancy pattern, just stripes, but an awesome impact.

    And I still got sharp paint lines even with the un-eveness of my concrete!

    I do recommend that you follow the rule of seven days after applying the rest of your paint colors as well. Don’t move any furniture back in until you are sure that baby is dry!

    Painted Porch Floor via RainonaTinRoof.com #porch #summer #diy

    I love the combination of the black, white, and green! Its the perfect shot of color, but allows me to work in many more colors – which are coming soon!

    Have you done a painted porch floor before?

    See the completed porch HERE!

    You know you don’t wanna miss any of this crazy.

    Sign up to get my posts delivered to your inbox here. 

    Stalk Me Here:

    Pinterest / Facebook / Twitter / Instagram

    I’m participating in the summer celebration!! Don’t miss all the other summer projects below and come back Thursday to link up with us! 

    250x250

    Here are even more ideas to kick off your summer in style…

    Monday…

    Tuesday…

    SaveSave