Tag: built-ins

  • DIY Countertops: Upholstered Countertop for Built In Cabinets and Other Ideas

    DIY Countertops: Upholstered Countertop for Built In Cabinets and Other Ideas

    Countertops are one of those things that can creep up on ya and take a big bite out of your project budget fast. These DIY countertop ideas for built in cabinets are creative and easy on your wallet. 

    When I installed the built in cabinetry in my recent office makeover, the one thing I didn’t worry too much about was what I would do for a countertop. I just assumed I’d be able to pop a 1″ x 12″ across the top of the cabinet run, paint it and call it a day.

    Wrong.

    Never ever ever expect anything to go smoothly when it comes to home projects.

    DIY Countertop Ideas - Upholstered Countertop

    As it turned out, the wall I was installing my built-ins on had a huge hump in it that I had to work around. This caused a major hiccup in the countertop department.

    Here’s the thing though.

    Not everyone is going to have a huge hump that some drywall guy thought looked decent enough forty years ago. So if you are planning to install built in cabinets somewhere in your home, first, I’m going to give you some ideas for the countertops that will work if you don’t have a huge hump in your wall, which you most likely won’t. 🙂 And then, I’m going to show you how I worked around my little problem and made an upholstered countertop for my built-ins, in case you have that problem too. And even if you don’t have a big hump in your wall (lucky you!), you can still do the upholstered countertop if you like it!

    First off, if you have no clue as to what I’m talking about when referring to my office built-ins, then read this post first.

    Affiliate links included in this post.

    Countertop Ideas for Built In Cabinets

    Idea #1: Use two 1″ x 8″s or a combination of other 1″ boards.

    If the cabinets you purchased for your built-ins are like mine, stock wall cabinets, then the tops of them are right around 12″ deep. While one would think, you could just go buy a 1″ x 12″ at your local hardware store, cut down the length to fit and nail it in place, you would be wrong, because a 1″ x 12″ is actually not 12″ wide, but only 11 1/4″ wide, therefore, you would have a gap left to fill on top of your cabinets.

    The solution to this would be to purchase two 1″ x 8″s, cut them down to the length of your cabinet span, place them side by side on top of your cabinets, secure them in place, then fill holes and gaps and paint. 1″ x 8″s are actually 7 1/4″ inches wide, so you would have a total 14 1/2″ to cover those cabinets, leaving you with a nice overhang.

    You could also use a combination of other 1″ boards like 1″ x 3″, 1″ x 4″, 1″ x 6″ – just depends on what you want the countertop to look like and how many boards you want to cut.

    If you have access to a local lumber mill that mills their own lumber, then you may be able to contact them and have them custom cut a piece, such as a 1″ x 14″ just for you.

    Idea #2: Custom Laminate or Stone Countertop

    You could go to your local home improvement store or stone store and have them come out, measure and cut a custom size countertop for your built-ins. They would be able to give you a single slab of countertop in the exact measurements you would need. This is going to be a pricier option though.

    Idea #3: DIY-ish Laminate Countertop

    You can purchase in-stock laminate countertops at your local home improvement store, then cut them down to the size you need for your built-ins. If you went with true base cabinets, this would just be a matter of cutting down the length of the countertop. If you went with wall cabinets like I did for your built-ins though, you would need to cut down the width and length of the countertop, which can be a little more tedious. This option isn’t as pricey as custom laminate or stone counters, but would probably run you around $75 – $100 depending on what size you needed. We installed some built-in cabinetry using base cabinets in the sitting area of our bedroom and this is what we opted to do there. You can see how it turned out here.

    Idea #4: Faux Stone Countertop using an Old Laminate Countertop

    If you’ve got a local Habitat for Humanity or another store that sells building and housing materials that have been removed from homes, then you could go there and find a piece of laminate countertop that would fit your built-in, then turn them into “soapstone” counters using this DIY method that I did in one of our previous homes.

    Idea #5: Plywood Countertop

    If your cabinet run isn’t longer than a piece of plywood (8 ft.), you could take your measurements to your local Home Depot or Lowe’s, get a piece of their high quality sanded 3/4″ plywood and have them cut it down to the size of your built-ins – remember to leave a little for overhang. Go home, install it on the cabinets using a finish nailer, fill holes, caulk and then paint or stain it. If you buy the good quality sanded plywood, this should give you a pretty good looking, smooth countertop for your built-ins.

    Idea #6: Perpendicular 1″ x 3″s or Beadboard

    This idea is courtesy of the one and only Wayne. Wayne is Nicky’s dad and he is my go-to guy for when I run into any snags when it comes to any home project. The man knows everything. I called Wayne over to come and help me troubleshoot the cabinets and counter of my built-ins when I realized that I had the huge hump in my wall. He had the idea to take multiple beadboard panels (the small ones that fit together tongue and groove style) or 1″ x 3″ pieces, cut them down to where there was a 1 1/4″ overhang and then put them perpendicular on the top of the cabinets. So instead of having just a couple of long pieces of boards as the counter, you would have lots of pieces going along the cabinet top that almost created a shiplap type look. You could paint or stain the pieces after you installed them all.

    This idea would also work if you have a hump in the wall because you would be custom fitting each individual piece of wood. The only reason I opted to not go with this solution was because I thought it might give the built-ins more of a farmhouse look and my office definitely is not farmhouse. We all know how I feel about shiplap.

    Alas, those ideas either wouldn’t work for my built-ins due to the large hump in the wall or they just weren’t my style. So, I created an upholstered countertop for my built-ins. If you’re interested in that option, here’s how I did mine.

    How to Make an Upholstered Countertop for Built In Cabinets

    Materials & Tools Needed

    Please note, If you don’t have a big hump in the wall like I did, then you can skip some of these steps. 🙂 You could just cut a piece of plywood to size, attach it to your cabinet tops and skip to step #3.

    Steps

    Step 1: Install the 1″ x 6″ or 1″ x 8″

    First, cut a 1″ x 6″ or 1″ x 8″ down to the length of your built-ins (wall to wall or however long your complete built-in is, filler pieces included.) Place that piece on the front edge of your cabinet tops, slightly overhanging it over the cabinet edges by 1 1/4″ or so. Make sure your overhang measurement is the same over the whole span of your built-in, then nail the 1″ x 6″ into place.

    Countertop Ideas

    This is going to allow you to have a smooth countertop front that will have an even overhang all the way across.

    Step 2: Install the Plywood Pieces Against the Wall

    Next, take 3/4″ plywood and cut it into pieces that are the length, plus a little (measure to about the middle of the gap between the cabinets that are side by side), of each individual cabinet. For the width, cut the plywood at the biggest measurement between your wall and the 1″ x 6″.

    Countertop for Built In Cabinets

    Place the plywood piece along the back of the cabinet tops, then using a carpenter’s pencil, run it along the wall on the back of the plywood piece.

    Cheap Countertop Ideas

    This is called scribing. It’s going to give you the shape of your wall so you can custom fit that piece of plywood to it. Once you’ve scribed, use a jigsaw or circular saw to cut along the line you drew. Repeat until the piece fits and attach it to the cabinet tops using a brad nailer or a hammer and finish nails.

    DIY Countertops

    Repeat this whole process with the plywood pieces until you’ve covered the entire span of your built-ins.

    Step 3: Upholster the Countertop

    Lay your upholstery material out along your countertop – this is the material I used. Pull a little bit of excess up around the back and the edges.

    Countertops Ideas - Upholstering a Countertop

    Cut a piece of lattice trim to the length of your countertop span. Place the trim along the back of the countertop, on top of the upholstery material.

    DIY Upholstered Countertop

    Attach the lattice trim to the wall where studs are using a finish nailer or finish nails. As you attach the trim, push it down firmly both onto the upholstery material and against the wall.

    Trim off the excess material along the front edge of the countertop, leaving enough overhang to staple under the countertop.

    Upholstered Countertop for Built In Cabinets

    Pull tightly on the front of the upholstery and staple it under the overhang of the countertop. Trim any excess material as needed.

    Cut two lattice strips to the length coming out from the end corners of each wall to the edge of the countertop. With these, repeat the same process you did with the lattice piece on the back.

    Step 4: Install Quarter Round Trim (Optional)

    If you still have any gaps around where the lattice trim and the upholstered countertop meet, you can cut quarter round trim and install it along those areas. I did have to do this because I still had some gaps to contend with. Quarter round is very flexible though, so it easily curved into all those gaps and closed them.

    Step 5: Paint the Trim

    Fill any holes in the lattice trim and quarter round with spackling or wood filler. If you have any gaps along the wall, caulk those. Paint the trim whatever color you wish. I opted to go with the color of my built-in cabinets.

    Cheap Countertop Ideas - DIY Upholstered Countertop

    The upholstery I used for my countertop is a faux leather crocodile pearl, so it wipes easily, but also has a little shine to it.

    DIY Countertops - How to Upholster a Countertop

    And so the saga of the built-ins ends.

    Thank ya, Jesus.

    Can you add any DIY countertop ideas to this list?

    If you haven’t seen how I installed the built-in cabinetry, you can read how to do that right here.

    You might also want to see…

    Home Office Makeover with Budget-Friendly DIY Projects: An Office Makeover on a Budget with lots of Office DIY Decor

    Complete Home Office Makeover

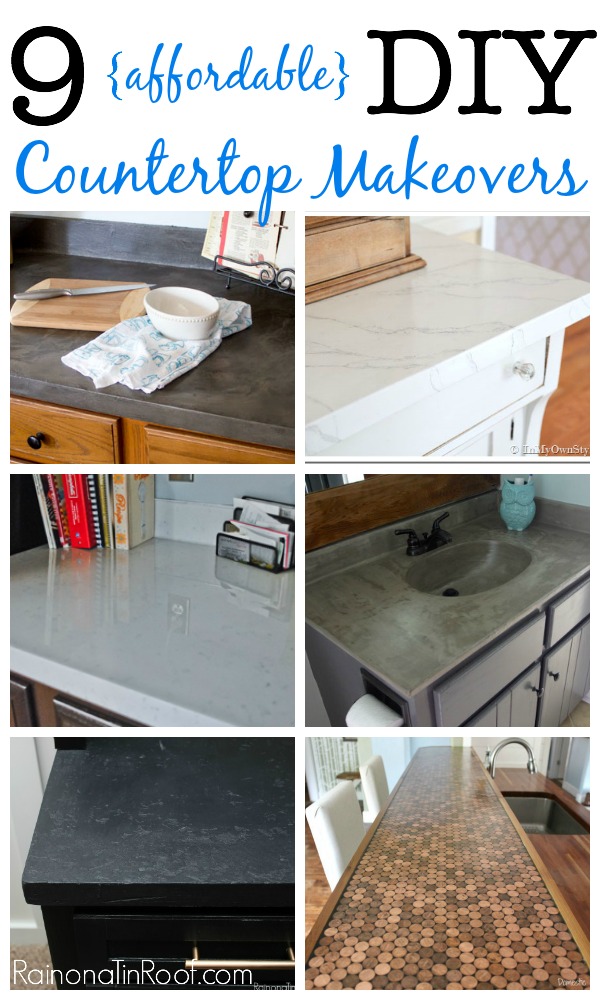
    Yes, please! Great DIY countertop makeovers that are doable and affordable!

    More DIY Countertop Makeovers

    Pin This Post

    Countertop Ideas - Upholstering a Countertop on Built In Cabinets

  • DIY Built-In Cabinets using Stock Wall Cabinets

    DIY Built-In Cabinets using Stock Wall Cabinets

    By far, one of the best things I did when I completed my office makeover was installing built in cabinets. They gave me loads more of hidden storage. I can just close the cabinet doors on all that clutter! These DIY built in cabinets were made using unfinished wall cabinets as base cabinets.

    When I first showed you my office makeover back in March, I said that I was so mad at myself for not doing it sooner because I felt like having an office that was organized and beautiful made me much more productive. The more I thought about it though, the more I am kind of glad I waited a while to whip this space into shape. Granted, I shouldn’t have waited two years, but waiting did help me to pinpoint a few things that I knew I needed to add or change in my office to make it more functional – these built-in wall cabinets being one of those things.

    Built In Cabinets using Stock Cabinets - Blue cabinets against wall - Rain on a Tin Roof

    I have a pretty good size closet in here, but it holds all my craft supplies. I desperately needed something that would both store and hide away all the paperwork, files, etc. that go along with running your business from your house. The solution to that were these DIY built-in cabinets using stock cabinets. Since I was short on floor space in this room, I ended up buying stock wall cabinets and used them as base cabinets for these built-ins. With a little bit of work, these stock cabinets look custom built for this space. 

    Using Prefab Cabinets for Built-Ins

    This post contains affiliate links for your shopping convenience. Click here to read my full disclosure policy.

    Obviously, since these built in wall cabinets were made for a certain space in my house, my measurements won’t match up exactly to yours. I’m going to list out everything I used and how I installed the cabinets and trimmed them out, but keep in mind, this is a project that will vary by size depending on where you are actually installing your built-in cabinets.

    Supplies & Tools Needed for the Built-In Cabinets

    Steps

    Step 1: Remove Existing Baseboard

    Before building or installing anything, you’ll want to remove the existing baseboard that is in the space where you’ll cabinets will go.

    DIY Built In Cabinets - preparing the space - Rain on a Tin Roof

    To do this, you should be able to use a small pry bar and hammer along the back wall the cabinets will sit against. For the sides, come out about 12″ from the corner of the wall, mark it and then use an oscillating saw going in at that mark to cut out that portion of the baseboard instead of having to remove the whole thing. Be sure to check the depth of your stock cabinets first though – they might be different than mine!

    Using Prefab Cabinets for Built Ins - Removing the baseboard - Rain on a Tin Roof

    The photo above was taken after the cabinets were installed, but I wanted you to have an idea of what I was talking about with the oscillating saw. They are really a great little tool to have.

    Step 2: Build a Frame for the Cabinets to Sit On

    Since these are wall cabinets, they are shorter than typical base cabinets. If you just install them without putting them on a base, they are going to feel really small in a room and you’re going to be bending over more than you should. To bring the height of the cabinets up, build a base for them consisting of 2″ x 4″s and plywood.

    You will want your frame to be as long as the space you are installing your cabinets in and as deep as your cabinet bottoms, about 12″. Again though, be sure to double check the depth of your cabinets.

    Built In Wall Cabinets - making a base - Rain on a Tin Roof

    I found it easiest to first assemble a basic 2″ x 4″ rectangle frame, put it in the space, then add in more 2″ x 4″ supports.

    Add 2″ x 4″ supports every 16″ inches. You’ll want to drill a pilot hole first, then attach the pieces with your screws to keep from splitting the wood.

    DIY Built In Office Cabinets - building a base and supports for the cabinets - Rain on a Tin Roof

    I screwed the supports along one side of the frame first, flipped it, then put the screws in on the other side. Being able to push the frame against the wall while attaching the screws made it easier to get the screws in.

    DIY Built Ins with Stock Cabinets - attaching the cabinet base to the wall - Rain on a Tin Roof

    To finish off the base for the cabinets, you’ll want to cut out either one full piece of 3/4″ plywood or multiple pieces to fit and cover the top of the 2″ x 4″ base. Attach the plywood with screws to the 2″ x 4″ base.

    Installing DIY Office Wall Cabinets - Rain on a Tin Roof

    It’s perfectly fine to piece together scraps of plywood you have on hand here, as long as they are all 3/4″. You won’t be able to see this part once the cabinets are installed.

    Step 3: Set the Cabinets in Place

    Bring your cabinets in and set them up however you wish on the base. Most likely, you’ll want to space them out so that you have a relatively even amount of empty space at each end of the cabinets.

    Built In Office Cabinets using Unfinished Wall Cabinets - putting on the base - Rain on a Tin Roof

    Once you have everything how you want it, remove the end cabinets. You’ll need to add small wood blocks along the front side edge of each end cabinet that is closest to the wall.

    Home Office Cabinets - filling the end gaps - Rain on a Tin Roof

    The blocks don’t have to be a certain size. I just pulled out a piece of scrap wood I had. Attach it just behind that edge lip. Put a little glue on it and then nail it to the side of the cabinet. You’ll attach your filler pieces of wood to these little wood pieces once your cabinets are installed.

    Step 4: Install the Cabinets

    Put your end cabinets back in place. Check to make sure the cabinets are where you want them. Use a stud finder and mark where the studs are on the wall just above the tops of your cabinets.

    I had a spot/hump on my wall that stuck out more than the rest of the wall. Knowing that I couldn’t push the cabinet back any farther into that area, but that I would be able to use wood shims to pull the other cabinets out more if needed, I started by installing the cabinet that butted up to that hump in the wall.

    You can see in the photo below what I’m talking about.

    Built In Cabinets - installing on the wall and shimming - Rain on a Tin Roof

    Attach the cabinets to the wall with screws. The key to installing the cabinets is to make sure that each cabinet bottom is even with the cabinet base you built and that each individual cabinet meets up nicely to the cabinets beside it. This may mean that some cabinets aren’t flush with the wall. Use wood shims as shown above to make the cabinets meet the wall and allow a screw to hold it all together.

    Step 5: Install the Filler Pieces

    If you had gaps on the ends of the cabinets, now is the time to cut those filler pieces to the length of the cabinets and nail them to the small wood blocks you attached to the cabinet ends.

    DIY Built in Wall Cabinets using Unfinished Stock Cabinets - Rain on a Tin Roof

    I used a finishing nail gun, but you could also use a hammer and finish nails. I was able to use a 1″ x 4″ on each end of my cabinets as filler pieces. Of course, yours may be different depending on how much empty space you had at the end.

    Step 6: Trim Out the Base

    You don’t want the exposed 2″ x 4″ frame to be what you see at the bottom of the cabinets. You want that to look more built-in and finished.

    Cut your piece of 1″ x 4″ to the length of your cabinet run and attach it to the base just where the cabinet bottom ends and the plywood base begins. You can use a finish nailer or a hammer and finish nails for this.

    DIY Built In Cabinet Plans using Prefab Cabinets - Rain on a Tin Roof

    You’ll still have a small gap at the bottom. To cover this, cut a piece of lattice strip wood to the length of your cabinet run and nail it on top of the 1″ x 4″ near the bottom to where it meets the floor.

    Step 7: Painting the Built-Ins

    Fill all your nails holes with spackling or wood filler. Caulk any gaps along the edges, between cabinets and the trim, then prime and paint.

    Because these were unfinished oak cabinets and I wanted the grain of the wood to show as little as possible, I did two coats of primer and three coats of paint.

    DIY Built In Office Cabinets - Blue Cabinets against Peach Wall - Rain on a Tin Roof

    If you don’t care too much about the grain showing, you can easily get by with one coat of primer and two coats of paint.

    For the paint, I do suggest opting for a semi-gloss or gloss finish, so that you can easily wipe it clean as needed.

    DIY Built Ins Using Stock Cabinets - Blue cabinets with upholstered countertop - Rain on a Tin Roof

    I found these cute marble like knobs to top off my built-in office cabinets with – they were a steal!

    And then there’s the countertop. Because this is already such a long post, I put the how-to for the countertop into another post. You can read about countertop ideas for the built-ins here and how I upholstered my countertop as well.

    Do you have any plans for adding built in office cabinets to your home? 

    Need more home office inspiration?

    The Full Office Makeover– see the full before and after of my office space including all the budget DIY projects that went into it. 

    DIY Chippendale Desk– can you believe I actually built my desk? It’s a really simple build and won’t cost more than around $100. 

    DIY Wall Mounted Drop Down Desk with Storage– short on space? This wall mounted desk is a great solution!

    12 Stylish and Comfortable Office Chairs – it’s hard to find a chair that fits both criteria, right? Well, I’ve found 12 that do!

    Want to save this project for later? Pin the image below!

    DIY Built In Office Cabinets using Unfinished Stock Wall Cabinets - Rain on a Tin Roof
  • The Man Cave: Built-Ins Makeover

    The Man Cave: Built-Ins Makeover

    He’s waited almost four years.

    He thought it was going to happen in the winter of 2011 after I got knocked up.

    We tore down paneling, had drywall and carpet put in, and added moldings.

    We successfully made it less scary – and then moved onto the kid’s nursery.

    And the man cave became a dumping ground.

    It was a waste of space.

    And I hate wasted spaces.

    That’s one reason I don’t like vaulted ceilings because I think they waste too much space, but that’s another blog post, now isn’t it?

    Finally, Grunt Labor is getting his man cave.

    One makeover at a time.

    We started with the Vintage Radio turned Bar Cabinet, and now we just finished the Built-Ins Makeover.

    Wow! Big change - love the black on black. Man Cave Makeover: The Built-Ins

    Disclosure: This post was a collaboration with Build.com, however all opinions and lack of completing the man cave makeover in a timely manner, are 100% mine.

    When we first bought the beloved foreclosure, this room (in our basement) was covered in paneling and had stepped right out of 1975 – or somewhere thereabouts. The built-in unit was there, but it was on the other side of the room, which I guess technically means its not a built-in, but whatever. Here’s what it looked like then:

    Built-Ins Before

    The way the built-in was placed wasn’t ideal for us. As soon as you walked down the stairs, it was right there in your face. When I got knocked up and we realized that we’d better put this reno into overdrive and tore down the paneling and everything else, we moved the built-in to the other side. Grunt Labor took out the middle drawers and made them shelves. I threw some white paint on it and the countertop and called it a day.

    I was growing a human inside me. I had no energy for anything else.

    Eventually, it looked like this:

    man-cave-before

    We started to use it more, but it wasn’t how Grunt wanted it.

    And lord knows, he deserves something of his own around here.

    As fate would have it, Build.com contacted me a couple months back and asked if I wanted to work together on a project. I told Grunt Labor about it and he immediately started scouring their site…plotting out his man cave.

    The end result was this:

    Wow! Big change - love the black on black. Man Cave Makeover: The Built-Ins

    This space is now officially his. Well, except for the kid’s toys on the other side of the room. 🙂

    Grunt has been dying for a refrigerator down here for months – the vintage radio turned bar cabinet I made him just wasn’t enough for him apparently.

    Wow! Big change - love the black on black. Man Cave Makeover: The Built-Ins

    He found this refrigerator on Build and left the rest to me. The refrigerator was actually taller than the cabinets we had, so we had to raise them – it was much easier than I thought and I’ll be showing you just how easy it was in another post.

    The refrigerator holds a ton of drinks and keeps them super duper cold.

    Wow! Big change - love the black on black. Man Cave Makeover: The Built-Ins

    Obviously, we painted the entire unit as well. Before painting the cabinets and drawers, we added moldings around the edges to cover up the old design and give it a bit more of a modern look.

    The countertop got a makeover as well.

    Faux Stone Countertops. Man Cave Makeover: The Built-Ins

    It’s now sporting a faux stone look – you will die when you see how freakin’ easy it was to create this look. Not. Even. Kidding.

    I picked out new hardware too. I went for simple modern rose gold pulls on the drawers and lion head pulls on the doors.

    Wow! Big change - love the black on black. Man Cave Makeover: The Built-Ins

    The school’s mascot where Grunt teaches at is a lion, so they were only fitting.

    We had one issue with one of the drawer pulls – a screw broke off inside the handle and we couldn’t get it out. I contacted Build and they had me a new one delivered in just a few days. They have great customer service and even great customer resources including how-to videos, PDF instructions and more.

    Wow! Big change - love the black on black. Man Cave Makeover: The Built-Ins

    I did a lot of rearranging and editing on the shelves as well. Those vintage locker baskets are hiding DVDs.

    I made a little vignette as a tribute to Grunt Labor’s grandpa as well. I think it may be my favorite part of the whole makeover.

    Vignette for Grandpa - put old stamps in a shadow box.

    The stamps were his grandfather’s and we found them in one of his old tool boxes that Grunt got. We’ve had them for a couple years now and I knew I wanted to do something special with them, but it took me a while to figure out what. I finally mounted them all in a shadow box along with a stamped paper of each one. I put the little brass golf ball there because that is one of Grunt Labor’s memories of his grandpa – him swinging golf clubs in the backyard.

    Just a few more things to do and this man cave will be complete…he’s forcing me to paint a Tennessee Vols checkerboard table. I’m a Bama fan. If you’re from the south and know football, you know what this means. Send more cheap beer.

    Looking for more “manly” home decor ideas? See these then…

    Masculine Bedroom Makeover

    DIY Half-Bath Remodel

    The Jungle Room

    You know you don’t wanna miss any of this crazy.

    Sign up to get my posts delivered to your inbox here.

    Stalk Me Here:

    Pinterest / Facebook / Twitter / Instagram

    pin-this-post

    Wow! Big change - love the black on black. Man Cave Makeover: The Built-Ins