Category: Home Tour

  • In an unexpected twist…we bought a house. Meet the 70’s Landing Pad.

    In an unexpected twist…we bought a house. Meet the 70’s Landing Pad.

    You read that right. And no, its not April Fools Day or anywhere close to it.

    We bought a house.

    And it was completely unexpected. 

    If you’ve been around here for more than a minute, you know our love for our current home, The Beloved Foreclosure runs deep. We never really expected to leave it. We even put in a pool and new patio this summer, had plans to completely re-do the Circus’ room and were even considering adding on an addition – we love our house.

    Now, let’s switch gears for a minute. We’ve known for the past couple of years that my in-laws wanted to move down to Chattanooga after my father-in-law retired to be closer to the Circus – well closer to us too, but let’s face it, mostly they wanted to be closer to the Circus. When we found this out, we looked at lots to build a house on that would be big enough for both our families and we also looked at existing homes that would hold us all as well. I am one of the few who loves her in-laws and would happily have them in the same house as us. We actually found one, but couldn’t work a deal out with the sellers. Finally, we all decided that our best shot would be to find them a house in our neighborhood – we love our neighborhood and if we couldn’t find a great house for all of us, then we wanted to stay in the neighborhood. The problem with that is that there are few smaller, one story homes in our neighborhood that would work for them. We found one that we thought would work, but they couldn’t even get an offer in before the house was already under contract – good houses tend to move fast in our neighborhood. We also kept our eyes open for a house for us and if we found one, then my in-laws would take our house.

    We never really thought the latter would happen. We always expected to find a house for them – not us.

    We were wrong.

    A house came up for sale just up the street from us that was good for us. We looked at it, made an offer, and had a contract on it.

    And then one thing led to another, and things were progressing way too slowly and to us, it just seemed like a sign that this wasn’t the house for us. So, we backed out of the contract.

    And when we backed out of the contract, another house went up for sale in our neighborhood. And it was actually better for us and our needs than the other one. We took that as another sign. We had it under contract within a little over a week and just closed on it last Friday.

    We are calling our new home The 70’s Landing Pad.

    It is definitely rocking the 70’s vibe and it is our landing pad – we have no intentions of leaving, y’all.

    Here’s the tour of the new pad. Let’s all go ahead and put on our rose colored glasses for this one- that’s the only way I’m coping with all the work that has to be done.

    You think I’m joking. Just wait.

    The 70's Landing Pad: Before

    Welcome to the 70’s Landing Pad.

    As you can probably tell from the photo – it is a split foyer. I will say that I haven’t always been a big fan of split foyers, but I don’t detest this one.

    Entryway / Foyer

    The 70's Landing Pad: Before

    We will be updating the railings as well as all light fixtures, flooring and paint throughout the house.

    Living Room

    The 70's Landing Pad: Before

    The living room is just off the entryway. Totally diggin’ that blue carpet. #nope

    Dining Room

    The 70's Landing Pad: Before

    And the dining room is just off the living room and kitchen. The living room and dining room are fully open to one another.

    The Kitchen

    The 70's Landing Pad: Before

    And then there’s the kitchen. And all the wallpaper I have to remove. And cabinets I have to paint. And hardware I have to replace.

    #overwhelmed

    And why in the world are there vanity lights over the cabinets???

    The Hall Bathroom

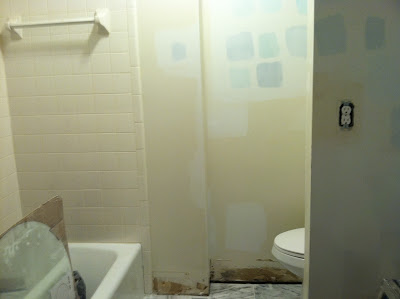
    The 70's Landing Pad: Before

    Oh look. More wallpaper! YES! #winning #not

    Sorry – I don’t know why I’m using hashtags so frequently in this post. I think its just one of my favorite ways to be a smartass.

    My Office

    The 70's Landing Pad: Before

    Technically, this is a bedroom – but it is tiny for a bedroom. So, it’s going to become my office, which Bill is very happy about because I will no longer be invading his space at all.

    Also, I do realize we did just makeover Will’s entire room and my office space. When we started that, we had no idea we were going to be moving. If I would have known, trust me, I would have waited to do all that at the new house. The good news though is that everything we did to his room here will work perfectly at the new house too. So essentially, he’ll have the same room there as he did here, with the exception that my office won’t be in there.

    The Circus’ Bedroom

    The 70's Landing Pad: Before

    The Circus’ Bedroom is about the same size as it is here. However, we are going to be making it a little bigger – I’ll show you how in a minute.

    Also, there is hardwood in two rooms in the entire house – only TWO! Why, why, why couldn’t the builders have just kept that stuff going throughout??? What was the point of just putting it in two of the bedrooms?

    #SMH #WTF

    The Master Bedroom

    The 70's Landing Pad: Before

    And then there’s the master bedroom.

    That I have no idea what I’m going to do with. It has more space than we could ever need. There’s a sitting area, which will be nice, but honestly I could make another sitting area elsewhere in the room. Since this room is right beside the Circus’ room, we are actually going to take some of the space from it and give it to the Circus. We just really don’t need this much.

    The 70's Landing Pad: Before

    It’s nice to have so much space, but honestly, it’s one of those things where the additional space could have been used (and been more functional) elsewhere.

    The Master Bath

    The 70's Landing Pad: Before

    I’m also referring to this little gem as the tunnel. Because that’s what it is – one long tunnel. And it doesn’t make much sense. There is no shower in this bathroom – only a tub. #WTH This also goes back to my thoughts on how all that space in the master could have been more functionally used.

    I have no clue what to do in this space. #shelaughsinsanely

    Let’s move downstairs, shall we?

    The Den / Man Cave

    The 70's Landing Pad: Before

    This area will function as both the family room and man cave. As of right now, we aren’t going to put a TV in the living room, so this is where I’ll get my weekly dose of Shonda Rhimes. Once drywall is up, some painting and new carpet is down, I think it will be cozy.

    Grunt Labor’s Office

    The 70's Landing Pad: Before

    This bedroom, which will function as Grunt Labor’s office, is just off the den. I’m not quite sure how he got the larger office area since he doesn’t even work from home, but whatevs.

    I’m kidding. I had to say that so that when he reads this he’ll say something about me throwing him under the bus, which I do sometimes do on rare occasion just because I feel its my God given right to mess with him. #amiwrong #nope

    Really though, he gets the bigger office because he will eventually be getting his dad’s furniture from his office and all of it wouldn’t fit in the smaller office upstairs.

    #thethingsyoudoforlove

    Laundry Room

    The 70's Landing Pad: Before

    Grunt Labor is also very excited to have his own laundry room. You do know that he does our laundry, right? He calls it his “woman’s work.” He doesn’t mean it to be an anti-feminist remark. I’d give him a swift kick in the rear if he did. And also, he can call it whatever the hell he wants to as long as I don’t have to do the laundry.

    #insertevillaughhere

    The Half Bath

    The 70's Landing Pad: Before

    This bathroom kind of gives me the heebie-jeebies. It’s just off the den area. It’s T-90 (tiny and when I say it like T-90, I mean really tiny) and everything just looks so ugly and dirty, it freaks me out a bit. #slightgermophobe

    The Guest Room / Bill’s Room

    The 70's Landing Pad: Before

    This room is quite a bit larger than Bill’s room now. I think it was actually unfinished basement space at one time. It even has its own bathroom…

    The 70's Landing Pad: Before

    Once you get past the wallpaper, countertop and awful flooring, it isn’t half bad.

    The Backyard

    The 70's Landing Pad: Before

    And y’all – we have a pool.

    A real life in-the-ground pool.

    That was filled in a couple years ago because the owners just got tired of dealing with it. WHAT?! WHY WHY WHY?!

    #sheripsherhairout

    I seriously thought Grunt might just cry when he heard that was the only reason it was filled in. He thinks there might be hope for it yet though. Anyone got a backhoe?

    If you didn’t put your rose colored glasses on, you can tell there is a whole lotta work to be done. I won’t lie – I am overwhelmed. I am also excited because I know this house – at the risk of sounding cliche – is kinda perfect for us. I’m also very grateful that we found a house so we can get my in-laws down here and have them close by. They won’t be moving down for a while, so we are going to be able to stay in our Beloved Foreclosure while working on the 70’s Landing Pad.

    As we come up with plans for the house remodeling, I’ll be posting them and I fully expect you to give your opinions. A girl can’t do this kind of shit alone.

    Send prayers. Send happy thoughts. Send reinforcements. And most importantly – send booze.


    blog-signature-summer-15

    You know you don’t wanna miss any of this crazy.

    Sign up to get my posts delivered to your inbox here.

    Stalk Me Here:

    Bloglovin / Pinterest / Facebook / Twitter / Google+ / Instagram

  • $50 Bathroom Makeover

    $50 Bathroom Makeover

    I’ve said it before and I’ll say it again.

    Sometimes the best room makeovers are the ones that are unplanned. 

    Totally random, flying by the seat of your pants, out of the blue unplanned.

    It happened in my living room.

    It started with a black and white gallery wall, which led to a new rug, which led to new curtains.

    And suddenly, I finally had a living room I loved.

    And now its happened with the bathroom.

    But the best part is that this random, little out of the blue makeover cost me just $50.

    All that was needed was a little paint, a shower curtain, and some rearranging.

    So. As my former students would say, “What had happened was….”

    $50 Bathroom Makeover - A little paint and a new shower curtain can go a long way!

    This green cane inspired accent wall.

    $50 Bathroom Makeover - A little paint and a new shower curtain can go a long way!

    And that prompted me to paint the pink ceiling white because it was clashing too much with the green.

    And then I switched out the fabric under the sink that hides the pipes.

    And then that black and white goodness led to this black and white shower curtain from Target.

    $50 Bathroom Makeover - A little paint and a new shower curtain can go a long way!

    And I nixed the shower cornice to keep it all light, bright and airy.

    $50 Bathroom Makeover - A little paint and a new shower curtain can go a long way!

    P.S. – That shower curtain is on sale for less than $20 at Target® right now! 

    And then I did a bit of editing and rearranging on the built-in shelves above the throne.

    $50 Bathroom Makeover - A little paint and a new shower curtain can go a long way!

    I added my little neon man…

    $50 Bathroom Makeover - A little paint and a new shower curtain can go a long way!

    I mean really, isn’t he just darling?

    And finally, I topped off my toilet paper supply with Quilted Northern® from Target® – stylish, but forgettable toilet paper.

    Because who wants to remember their toilet paper experiences?

    P.S. You can get a coupon for $3 off Quilted Northern® at Target® here. Go on. You know you want to run and get that shower curtain too.

    pin-this-post-2

    $50 Bathroom Makeover - A little paint and a new shower curtain can go a long way!

    Do you have any tips for a budget friendly bathroom makeover? 

    The makers of Quilted Northern® use our 100 years of experience to craft a toilet paper that works so well you can forget your bathroom experience. Because the best bathroom trips are the ones you don’t remember.

    This is a sponsored conversation written by me on behalf of Quilted Northern®. The opinions and text are all mine.

  • Kitchen Makeover: Take Two

    Kitchen Makeover: Take Two

    Hi. My name is Jenna.

    I’m a recovering neutral decorator. 

    Yes friends, there was a time when I turned solely to whites and beiges for decorating.

    I knew no better. I thought I liked it. I thought it was my style.

    I was so damn wrong.

    As soon as I spray painted my first piece kelly green, there was no going back.

    And then I discovered the no-fail combo of kelly green and navy and it was as if the design gods smiled down upon me and showered me with their wisdom.

    Ok, maybe that was a little much, but you get the idea.

    I am a color girl.

    And when we renovated the beloved foreclosure I opted for beiges, whites, and light blues.

    And they were pretty. I’m not bashing on beige.

    But they weren’t me. 

    So slowly but surely, every room in this house has gotten re-made over.

    The kitchen was especially in need of color. This is what it looked like before we added in some glorious color (besides the barstools.)

    Kitchen Before

    Now, if you really want to see how far its come, as in how many walls we knocked down and the re-arranging we did, you can see the initial kitchen renovation here.

    It was a pretty kitchen. I liked it. It got me in Better Homes and Gardens and for that, I will always love that kitchen….but it wasn’t this kitchen.

    Modern Kitchen • Navy and White Painted Cabinets • DIY Island • Kelly Green & Brass Accents

    And this kitchen, I love.

    I would also like to take this moment to say how appreciative I am of the italics and bold features for fonts. It makes writing so much fun. Obviously, I’m a big fan.

    All that being said, I’m sure you are wondering why you are seeing my kitchen. Again. You already saw the finished results in the spring and summer home tours.

    Well the thing is, I’ve been meaning to do a post on how we got this beloved new kitchen for about oh, five months or so now. But my friend Kellie, who helped me paint my cabinets, just had to do a video about it and then I just had to wait until she had the video in just perfect viewing condition before she would let me post.

    Ok, I might have just thrown her under the bus a little there. She can handle it though. 

    So finally, here are more pretty kitchen pictures including details about the makeover and a video at the end.

    Modern Kitchen • Navy & White Painted Cabinets • Brass Hardware

    All of the kitchen cabinets got painted. We used Velvet Finishes Minimalistic on the top and Velvet Finishes Handsome on the bottom.

    Modern Kitchen • Navy & White Painted Cabinets • Brass Hardware

    The weather was horrendous the week that we opted to do this – so much so that Grunt Labor was even off work due to it one day – so we painted everything inside.

    Modern Kitchen • White Painted Cabinets • Brass Hardware

    The old black hardware just didn’t jive with the navy, so I got all new knobs, pulls, and hinges from D. Lawless Hardware. I think it works perfectly with both the white and navy.

    Modern Kitchen • Navy & White Painted Cabinets • Brass Hardware

    The old faucet was oil-rubbed bronze which definitely wasn’t jiving either. After a long search, we settled on the Delta Trinsic in Champagne Bronze.

    Modern Kitchen • Open Shelving • Navy Painted Cabinets

    Mohawk Lollipop Holder / Scales of Justice (similar) / Vintage Letters (similar) / Antlers (similar) / Red Glasses (similar)

    The open shelving also got a coat of Minimalistic. The rustic wood color that it was before clashed. I also did some editing on the shelves and rearranging. Personally, my favorite thing about the shelving is the contrast between the mohawk lollipop holder, my grandmother’s red glasses and the deer antlers I had to skin myself.

    If that’s not character, I don’t know what is.

    Modern Kitchen • DIY Island • Kelly Green Barstools

    Brass Bowl (similar) / Bar Stools

    The barstools remained the same – I am still mad over the kelly green – but the DIY kitchen island did get a nice fresh coat of white paint and some re-decorating as well.

    Kellie has more images of us actually painting the cabinets – go let her have it because she harassed me the whole time about how I never vacuumed my rug. I swear, I wasn’t mean to her at all to cause her to do such a thing.

    Of course, I’m not lying.

    And here’s the video of the whole shebang…I look very odd in the beginning because I was trying my damnedest not to laugh. There’s no doubt in my mind that the camera man was never happier when he was finally done with us.

    You might also want to see…

    Types of Paint To Use on Cabinets - list of paints that are good for painting kitchen or bathroom cabinets.

    Types of Paint to Use on Cabinets

    pin-this-post-2

    Modern Kitchen • Navy & White Painted Cabinets • DIY Island • Kelly Green and Brass Accents

    You know you don’t wanna miss any of this crazy.

    Sign up to get my posts delivered to your inbox here.

    Stalk Me Here:

    Bloglovin / Pinterest / Facebook / Twitter / Google+ / Instagram

    blog-signature-summer-15

  • Summer Home Tour: The Details Make The Space

    Summer Home Tour: The Details Make The Space

    It doesn’t matter how many times I paint a piece of furniture or upholster a chair – if the accessories around it don’t look good, the furniture or chair won’t shine and the space will fall short.

    The details make the space. 

    It took me a really long time to realize that.

    And a lot of backaches and wasted paint. 

    I get it now though – and even if we are just talking about decorating – the pain was worth the reward.

    As dramatic as that sounds. 

    So this summer home tour is about the details.

    The quirky little objects that I love.

    That some may find ugly.

    Or even tacky.

    But for me, they make my space a reflection of my family.

    And that’s all that matters.

    So if you love it or hate it, either way, I don’t care.

    Because we love it.

    And its how we fly our freak flag.

    Welcome to our freak show.

    This post contains affiliate links for your shopping convenience. Click here to read my full disclosure policy.

    A fun and easy to do confetti wall treatment. Summer Home Tour: The details make the space.

    Entryway / Confetti Accent Wall

    The entryway hasn’t changed since the last home tour.

    That’s good considering I just made it over in February. 

    Its still full of fun with the confetti accent wall. Guests feel like they are walking right into a party and turn around to go buy booze.

    Or at least that’s the effect I wish it had on them. 

    Eclectic but Modern Living Room. Summer Home Tour: The details make the space.

    Living Room

    You just saw the completed living room on Tuesday, so it definitley hasn’t changed since then.

    Ain’t nobody got time fo’ that.

    Here are my favorite details from the space though…

    A fun book atop a navy end table. Summer Home Tour: The details make the space.

    The Perfect Navy End Table

    The perfect navy end table paired with Kate Spade’s Places to Go, People to See Book and a faux snakeskin lamp I scored at Bargain Hunt for $5.

    P.S. I’d be lying if I said that book always sat open, perfectly placed like that. You and I both know the  circus would have it turned into a sticky apple juice mess in 2.0 seconds flat. 

    Coral paired with Kelly Green. Summer Home Tour: The details make the space.

    Kelly Green Curtains

    The coral lamp against the kelly green curtains and the pop of glam the pillow adds to the gray chair – I just can’t quit you. Oh and the tray, can’t forget the giraffe print tray.

    In my opinion, every room should have a little animal print.

    Roar.  

    A vintage bull planter. Summer Home Tour: The details make the space.

    My new favorite thing in the giraffe tray is the vintage bull planter.

    Right beside the metallic angel wing.

    Whoever told you that a bull, giraffe, and angel made a bad combination was lying.

    Add a simple pop of color to a boring console table. Summer Home Tour: The details make the space.

    I’m also quite smitten with the new pop of coral on the console table.

    And the $2 brass duck that was supposed to have went out of style in 1989.

    A dramatic, but easy to make black and white gallery wall. Summer Home Tour: The details make the space.

    Black & White Gallery Wall / Stripped & Re-Stained Buffet

    And then there’s the gallery wall. The gallery wall that is almost a sin because its so damn pretty.

    Almost. 

    Sconces on a gallery wall. Summer Home Tour: The details make the space.

    Let’s be honest though.

    Without the art and the sconces, its just a black wall with a white border.

    And that’s just boring. 

    Let’s not dismiss the bowl of cotton and lilies either.

    And then there’s the kitchen.

    Navy and White Kitchen. Stunning. Summer Home Tour: The details make the space.

    Kitchen Makeover / Barstools / Island

    The navy and white kitchen in all its glory.

    Its the stuff dreams are made of.

    Navy and White Kitchen. Summer Home Tour: The details make the space.

    Hardware

    But the hardware is so good, I refer to it as hardware porn.

    I’m nothing if not blunt.

    Navy and White Kitchen. Summer Home Tour: The details make the space.

    Faucet

    The faucet is right behind the hardware porn show.

    Navy and White Kitchen with Quirky Elements. Summer Home Tour: The details make the space.

    Mohawk Lollipop Holder

    And to top the kitchen off, we have open shelving that consists of a mohawk lollipop holder, antlers, the scales of justice and my grandmother’s red glasses among other things.

    I’m also nothing if not random.

    A bold accent wall in the dining room. Summer Home Tour: The details make the space.

    Criss-Cross Accent Wall / Blue and White Buffet / Entire Dining Room

    The dining room hasn’t changed one bit.

    Oh wait – I’m lying. 

    I did move the corner cabinet into the living room and painted it red, but didn’t have time for photos so you’ll have to stick around for that one. 😉

    Nothing else has changed. Seriously, I’m not lying this time.

    What do you think? Are you a details person?

    Either way, keep flying your freak flag.

    pin-this-post

    A gorgeous home tour, but also a breath of fresh air! Decorate with what you love! Summer Home Tour: The details make the space.

    SaveSave

  • Collected Modern Living Room

    Collected Modern Living Room

    After four years of living in the beloved foreclosure, the living room is finally done.

    For now anyways. 

    It may have taken four years, but I can finally say that I know my style and I love my living room.

    Of course, its all subject to change on a whim.

    For now, I’m calling it the Collected Modern Living Room.

    I’m sure that isn’t the correct design technical term for this living room, but I don’t care. 

    Its a mix of vintage and thrifted pieces that have received a facelift with some modern elements.

    The PERFECT combination of modern and vintage elements! Collected Modern Living Room

    Disclosure: Frosting Home Decor provided me with curtains for my living room. However, all opinions and love of the color Kelly Green are 100% mine.

    You saw the super big change – the black and white gallery wall – in my spring home tour, but the whole space wasn’t finished yet. It needed curtains – and a couple other things I didn’t know it needed. 

    Modern Living Room Ideas: Black & White Gallery Wall

    Black & White Gallery Wall

    For example, I had no idea it needed the handsome end table.

    Living Room Decor Ideas: Paint an end table a bold, but classic hue.

    The Perfect Navy End Table

    But after I saw it in the living room, I knew this table and I could never part ways.

    I also ended up adding a punch of color to the console table.

    Easy way to add a pop of color to a space - paint "frames" around drawers and furniture surfaces!

    Punch of Color Console Table

    The icing on the cake was the window treatments.

    Living Room Design Ideas: Kelly Green Curtains with Coral Lamps

    I searched high and low for the perfect green curtains – I was even about to make my own – when I found these kelly green panels.

    Modern Living Room - love the kelly green curtains against the coral lamps!

    I am crazy over how they look against the coral lamps. They bring in that punch of green that is throughout the rest of my house as well.

    Modern Living Room - love the kelly green curtains against the coral lamps!

    I’m off to lounge on the couch and watch cartoons with the circus while gazing around my finally finished living room.

    What do you think of the new collected-modern living room? 

    Looking for more living room ideas? Don’t miss these 20+ gorgeous living room ideas that will have you planning your own living room makeover!

    You know you don’t wanna miss any of this crazy.

    Sign up to get my posts delivered to your inbox here.

    Stalk Me Here:

    Pinterest / Facebook / Twitter / Instagram

    pin-this-post

    Whoa. This living room is stunning - the perfect combination of modern style mixed with vintage pieces. Modern Living Room 

  • Spring Home Tour: Design Ideas for Small Budgets

    Spring Home Tour: Design Ideas for Small Budgets

    You guys.

    You guys.

    No really, you guys.

    So much has changed since the last time I did a full home tour.

    Especially my living room. And my kitchen.

    I’m almost pee-my-pants excited to show you.

    And now that I think about the things that have changed in the past two months, I realize I have no clue how it all got done and that I must be insane.

    Oh wait, we already knew that.

    Even though, I know you’ve already seen the entryway, let’s start there since its still new-ish.

    Disclosure: Kirkland’s provided me with a gift card to do a little shopping for my home tour. However, all opinions are 100% mine.

    Confetti Style Entryway: Spring Home Tour

    Entryway Makeover / DIY Confetti Wall

    I still love the entryway so much. Its light, bright, and most importantly – fun.

    The living room….

    Wait for it…

    Wait for it…

    Vintage Modern Rustic Living Room: Spring Home Tour

    Boom.

    Such a big difference from last time, right?

    There’s a new rug, the red buffet has been stripped, and my most favorite new feature of the living room – the black and white framed gallery wall.

    Black and White Framed Accent Wall: Spring Home Tour

    Stripped & Restained Buffet / Black & White Gallery Wall

    Living Room: Spring Home Tour

    There is still a lot of gold, green, navy, and red in this space. Those are my favorites. 

    Vintage Modern Living Room: Spring Home Tour

    IKEA Tarva turned Drink Bar / DIY Cowhide Rug

    I love all the black and white that anchors it as well.

    Black and White Gallery Wall: Spring Home Tour

    The gallery wall turned out far better than I ever could have dreamed.

    Fo Realz. I never thought I could make anything that pretty. 

    The gray chair is sporting a new shimmery gold pillow, that’s a new white bust as well, and yes, those sconces are new on the wall. The pouf ottoman is new-to-the-space. I may or may not have stolen it from the man cave…..shhhhhh…..

    Black and White Gallery Wall: Spring Home Tour

    Same thing with the pink ottoman – except I stole it from my office. Moving pieces around is my favorite way to decorate. I was tickled pink to find the gold sphere for a whopping $13.

    Let’s move on to the kitchen…

    Navy and White Kitchen with a DIY Island: Spring Home Tour

    Kitchen Makeover / DIY Kitchen Island / Green & Navy Barstool Makeover

    Spot anything different??

    NAVY CABINETS!

    I die. 

    Navy and White Kitchen: Spring Home Tour

    And pretty new brass hardware…

    I die again.

    Me, overdramatic? Whatever…

    I loved my kitchen before.

    Now, I love my kitchen. Painting the base cabinets navy and adding that brass hardware made it 100% Jenna…and Grunt Labor too..he really likes it..

    Navy, White, and Brass Kitchen: Spring Home Tour

    Coffee Station & 10+ Kitchen Ideas

    The entire kitchen got a makeover in three days. It was a total whirlwind and there’s no way I could have done it alone. Kellie, who makes Velvet Finishes, actually came with her crew to pitch in and filmed it all! All that will be posted soon too.

    After the cabinets were done, I did some editing and redecorating on the open shelving.

    Open Shelving in the Kitchen: Spring Home Tour

    Knock-Off Jonathan Adler Mohawk Lollipop Holder

    The Knock-Off Jonathan Adler Mohawk Lollipop Holder graces the top of the shelving. I added a few more touches of brass with the eagle thing (no clue what its called, but it was $1 at a thrift store) and the brass bowl on the bottom. I also switched up the clear glasses for my Grannie’s red ones. I can’t believe I didn’t have those babies showcased before. I love ’em. The antlers didn’t make it into the new gallery wall in the living room, so I hung them in the kitchen. The touch of rustic they add is perfect for the space.

    And the dining room…

    Black and White Dining Room: Spring Home Tour

    Not much is different here. I am plotting to strip the table and stain it to connect the space with the living room more.

    Dining Room: Spring Home Tour

    That would be an ice bucket holding those roses, ’cause I’m a genius like that. You may have seen that tray when I instagrammed it. Its Jonathan Adler and was $4 at Burlington. Score.

    Dining Room: Spring Home Tour

    Navy, White, & Gold Buffet

    I’m still quite smitten with the buffet makeover. Its perfect for tying in the navy cabinets in the kitchen, since that whole space is open.

    Black and White Accent Wall / Buffet Makeover: Spring Home Tour

    Criss-Cross Accent Wall

    Everyone who has entered my house for the first time since the Criss-Cross Accent Wall was completed can’t get over the fact that it isn’t wall paper – its paint. And then they totally can’t believe it when I tell them it actually wasn’t that hard.

    More on the Dining Room…

    Last but not least, the master bedroom…

    Pop of Color with the bedding. Spring Home Tour

    Very little has changed in here since the master bedroom mini-makeover. I did switch out the white lamps for mid-century modern style lamps like you see above. The shape of those lamps pulled me in and had me buying them in five minutes flat.

    Stacks of books for decorating: Spring Home Tour

    I added another of the gold pillows to the reading nook and to make the books look less like clutter and more like decor, I topped them off with faux peonies. I’m usually not a faux flower person, but these were really cute and I adore the black and white striped pot.

    More on the Master Bedroom…

    I didn’t include the kid’s room, guest bedroom + office, and bathroom in the tour since nothing has really changed there at all. You can tour them here though if you https://ovo188exp.com/ haven’t seen them before.

    You know you don’t wanna miss any of this crazy.

    Sign up to get my posts delivered to your inbox here.

    Stalk Me Here:

    Pinterest / Facebook / Twitter / Instagram

    pin-this-post

    Great and Realistic Design Ideas for Small Budgets: Home Tour

  • The funnest entryway you ever did see, even if it is mine

    The funnest entryway you ever did see, even if it is mine

    I’m not sure that funnest is actually a word. I googled it after saying it over and over in my head a hundred times and still couldn’t get a clear answer as to whether or not it is a word.

    I finally just went with my redneck instincts and left it in the title.

    Keep in mind, I used to teach middle school Language Arts.

    Those poor children.

    So I know I didn’t tell you I was doing an entryway makeover.

    Here’s the thing.

    I hadn’t really planned on doing an entryway makeover.

    And then it all just kind of happened.

    Story of my life. 

    The Fun and Easy Entryway Makeover

    Disclosure: This post was a collaboration with Kirkland’s. All opinions and sporadic makeovers are 100% mine.

    Before we start this makeover process, let’s take a moment to look at the before so that we can really appreciate the after:

    Entryway Before

    I didn’t hate the entryway before. I loved that navy wall, but that navy wall was really making the space dark.

    Furthermore, the circus would barely miss hitting her head on the corner of that table as she tornadoed down the hall.

     Really, I could just say that I did this whole makeover for her safety. Right?

    Quit shaking your head at me.  

    So, as my former students would say, what had happened is…

    The Fun and Easy Entryway Makeover

    These prints. 

    That’s how it all started.

    I went into Kirkland’s a few weeks ago and lo and behold they were on sale for $13 a piece.

    And did you see how big they are?

    It would have been a sin to leave them behind at that price, so I bought all four designs:

    The Elephant One

    The Leopard One

    The Zebra One 

    The Giraffe One

    And then I got home and realized that I had grossly misjudged how much all four of them together on the wall would overpower the bench (I’ll get to the new bench in a minute).

    I was forced to pick favorites.

    The elephant and leopard won.

    Actually, my pick was the leopard and giraffe, but the circus screamed when I attempted to take the elephant off the wall, so that decided that.

    Sidenote: they are all still only $13 as of the writing of this post.

    And then there was the bench.

    The Fun and Easy Entryway Makeover

    You see, while I was in Kirkland’s I also happened upon this bench.

    And I’d been thinking I wanted a bench to put in place of the table.

    And this bench was a nice neutral, which meant it would work with my ever-changing decor.

    And it had nailhead trim.

    And nailhead trim kind of makes me all warm and fuzzy inside.

    So it came home with me too.

    And then I got it all home and I said to myself, “Self, this wall color has to go.”

    The Fun and Easy Entryway Makeover

    And Self concurred.

    Self deems it the “confetti wall” and you can read how Self and I did it here.

    And after the wall was finished, the bench placed in front of it, the art above it, I shopped my own house for the pillows, fur throw, and painted plant basket.

    Because I’m good like that.

    But then I realized the old light fixture no longer worked there.

    Yep, even I can make this one! $25 Easy DIY Light Fixture

    So I made a new super easy DIY light fixture for only $25.

    And that is how this entryway makeover came to be.

    Looking for more fun room design inspiration? 

    Mudroom – Laundry Room Makeover – complete with a wall of swimmers. Seriously.

    Home Office Makeover – where color and Burt Reynolds collide. 🙂

    DIY Master Closet Makeover – colorful tassels and black and white stripes – oh my!

    You know you don’t wanna miss any of this crazy.

    Sign up to get my posts delivered to your inbox here.

    Stalk Me Here:

    Pinterest / Facebook / Twitter / Instagram

    pin-this-post

    The Fun and Easy Entryway Makeover

  • Vintage Modern Rustic Dining Room Tour

    Vintage Modern Rustic Dining Room Tour

    There is always that one room that I don’t get along with.

    It never likes anything I do. It never feels quite right.

    I will rearrange furniture, add this accessory, take away this, paint that – and it always ends with me throwing my hands in the air, saying screw it, and having a drink.

    The dining room was that room.

    Emphasis on the was.

    Once I finally decided to stop worrying so much about it, it evolved into a space that I love.

    It now has that same Vintage-Modern-Rustic vibe that the rest of the house has.

    Vintage Modern Rustic Dining Room Tour via RainonaTinRoof.com #homedecor (more…)

  • Preppy meets Hollywood Regency Bathroom Makeover

    Preppy meets Hollywood Regency Bathroom Makeover

    I never intended to do an entire bathroom makeover when I started this a couple months ago.

    It really hasn’t been that long since the last bathroom makeover.

    I just wanted a bit more color.

    It started with the ceiling.

    I thought to myself, “Self, you should scrape off the popcorn and paint the ceiling pink.”

    Self responded with a very enthusiastic, “YES.”

    So I did.

    But then the gray paint on the walls didn’t go with the pink very well like I thought it would.

    So I painted the walls.

    And then I realized the vanity had these weird yellowy patches on it.

    So I painted the vanity.

    And then I looked at the old shower curtain – it could be a bit more stylish.

    So I made a new shower curtain and cornice.

    And then I thought to myself, “Self, what about some new artwork?”

    You can guess what Self said.

    That non-makeover escalated quickly.

    Friends, welcome to my new Preppy meets Hollywood Regency Bathroom that wasn’t supposed to be.

    Preppy meets Hollywood Regency Bathroom Makeover via RainonaTinRoof.com #bathroom

    (more…)

  • Colorful Screened-In Porch Makeover

    Colorful Screened-In Porch Makeover

    As I write this post, I am sitting in the most colorful space in my home.

    I dare you to step into the screened-in porch and not be happy.

    Double Triple Dog Dare You. 

    And if you do step out here, and you aren’t happy, I’ve got a cheap beer for ya and a kid is bound to turn the corner at any moment riding a plastic pink flamingo.

    Heck, you just smiled as you read that last sentence, didn’t you?

    Sweet friends, who put up with way too much craziness from me, welcome to my back porch.

    Colorful Porch Makeover (because I like to drink cheap beer in colorful places) via RainonaTinRoof.com #porch #outdoors #porchdecor #diy #decorating (more…)

  • Ranch Style House Tour

    Ranch Style House Tour

    **Updated Home Tour is HERE!**

    There have been a lot of changes around here lately.

    Like a lot.

    A guest bedroom and office makeover, a mini-master bedroom makeover, and lots of little projects in between all that.

    Needless to say, this gal is exhausted and a vacation can’t come soon enough.

    I was asked to be a part of the Spring Parade of Homes and thought that this would be the perfect time to update my full home tour, seeing as how so many things have changed. The last full home tour I did was last summer. You can see it here.

    If you are popping over from May Richer Fuller Be, or another blog in the parade, welcome! And if its your first time here, prepare yourself for snarky comments, witty jokes that may not seem so witty to you, and many references to cheap beer and possibly 80’s hair bands.

    Just wanted to give you the full disclosure before you begin the tour.

    Our home is a 1969 Ranch Style House and we love it.

    Rancher Remodel | Ranch Style Homes | Ranch House | Rancher Homes | Renovated Rancher House Tour | Remodeled Rancher House

    (more…)

  • Chic Guest Bedroom and Office Reveal

    Chic Guest Bedroom and Office Reveal

    Sometimes, I must think I’m Wonder Woman.

    At the beginning of every week, I create a list of what I need / want to get accomplished.

    The list is usually one full page of my large planner long and somehow I think I will be able to do all this stuff within the week.

    The only time I get to work on my projects and the blog is a few hours each day before the kid wakes up and after she goes to sleep, and for 4 1/2 hours two days a week while she is at preschool.

    I must be crazy.

    Not every item on that list ever gets checked off.

    Needless to say, I had planned on showing this completed guest bedroom and office space to you months ago.

    Yea, right.

    Whatever voice in my head telling me that was insane.

    You have seen some projects from it already, but you haven’t seen the whole enchilada.

    Guest Bedroom + Office Reveal {Guest Bedroom Ideas} via RainonaTinRoof.com #guestbedroom #bedroom #office #homeoffice (more…)

  • Master Bedroom Mini-Makeover

    Master Bedroom Mini-Makeover

    So, remember a few weeks back when I created this whole master bedroom inspiration board?

    Remember how we were looking at building on a new master suite?

    Exactly one day after that post published, we met with a contractor. We walked him around the house, showed him what we wanted to do, and then he gave us a heartfelt smile and said, “It won’t work. I’ve never seen a house more stuck than yours.”

    Seriously?

    Yes. I kid you not.

    Now, we really don’t need a new master suite. We really don’t need anymore space at all, though it would be nice. And honestly, we could live in less than we have and we are are truly blessed to have what we do have.

    And that was a lot of “haves” in the last sentence.

    But, I figured if I’m not going to get a new master suite, I’m at least going to give the current one a mini-makeover. And what better time to show you that master bedroom makeover and share with you my master bedroom ideas than on the last round of What’s Your Style.

    This post contains affiliate links for your shopping convenience. Click here to read my full disclosure policy.

    Master Bedroom Ideas {A Mini-Makeover} via RainonaTinRoof.com #masterbedroom #bedroom #makeover #homedecor #interiordesign

    (more…)

  • Accent Wall: Rich Navy Entryway

    Hi, my name is Jenna and I’m an over-analyzer.

    The last time I over-analyzed something was just yesterday this morning.

    I am easy going on many things. Most of the time, I’m just a “It is what it is” kind of girl.

    But then, I start thinking about fabric and paint swatches and should I place this brass golf ball here or maybe here or maybe it needs to be on top of a vintage book…

    Sheesh…. it never ends.

    Case in point: The new rich navy accent wall in my entryway.

    Rich Navy Accent Wall via RainonaTinRoof.com #homeright #richnavy #accentwall

    Rich Navy Accent Wall

    Disclosure: This post is sponsored by HomeRight. Y’all know how I roll though, all opinions and over analyzations are 100% mine. This post contains affiliate links for your shopping convenience. Click here to read my full disclosure policy.

    This was one of the quickest and most simple projects I have ever done, yet it took me around two months to decide what I wanted to do with the wall.

    It went something like this in my head:

    Maybe I should stencil that tiger stripe on the wall from my bar cart makeover.

    No, maybe I should do wide stripes.

    No, stripes are everywhere.

    Maybe I should do more faux moldings.

    Maybe I should do a different stencil.

    Maybe I should do vertical stripes.

    Maybe, maybe, maybe……

    Then one day, while in a stare down with said wall, telling it that it would not beat me on this, it dawned on me.

    Why not just do one single, simple, solitary color for the accent wall?

    And then as if it were meant to be, my brain responded with navy.

    Seriously? It took two months to figure that out. Geez.

    Once the decision was made, I tested out a few navy shades and went with Rich Navy by Behr. I used my and it took no time at all to do this wall.

    Rich Navy Accent Wall via RainonaTinRoof.com #homeright #richnavy #accentwall

    That’s the same PaintStick I used on my Repose Gray walls, except its a smaller version and doesn’t twist, you just push it.

    Push it real good.

    Sorry, I couldn’t resist a little Salt ‘N Pepa action there.

    The PaintStick Mini is great for small jobs and tight spaces (and its only $15!) – exactly what that accent wall was.

    Rich Navy Accent Wall via RainonaTinRoof.com #homeright #richnavy #accentwall

    Everything just seems to pop beautifully off the navy.

    Rich Navy Accent Wall via RainonaTinRoof.com #homeright #richnavy #accentwallThe Rich Navy is also a perfect contrast to the Repose Gray in the rest of the main living area.

    Rich Navy Accent Wall via RainonaTinRoof.com #homeright #richnavy #accentwallThe moral of this story is don’t over-analyze. Seriously, y’all. Save yourself time. Sometimes the easiest and most dramatic look can be achieved with one color and one fabulous tool. My accent wall is the perfect example.

    If you liked this accent wall, you may like my Leopard Print Accent Wall as well.

    Need more accent wall ideas? I’m your girl – here are a slew of different ideas for painting your walls in all sorts of gorgeous colors and patterns!

    You know you don’t wanna miss any of this crazy.

    Sign up to get my posts delivered to your inbox here. 

    Stalk Me Here:

    Pinterest / Facebook / Twitter / Instagram

    SaveSave

  • Vintage Modern Rustic Kitchen Tour

    Vintage Modern Rustic Kitchen Tour

    Are you tired of my kitchen yet?

    If I were you, I may be tired of my kitchen.

    But, here’s hoping you aren’t tired of my kitchen.

    Because, its the second round of the What’s Your Style series, which means we are talking kitchens.

    So today, I’m sharing a little bit more about my Vintage Modern Rustic Kitchen.

    There are a few changes since the last time you saw it.

    Rustic Kitchen | White Kitchen | Kitchen Remodel | Kitchen Ideas | DIY Kitchen Ideas | Painted Kitchen Cabinets | DIY Kitchen IslandVintage Modern Rustic Kitchen

    This post contains affiliate links for your shopping convenience. Click here to read my full disclosure policy.

    During the first round of What’s Your Style, we determined that my style was Vintage-Modern-Rustic.

    And that shockingly, it all works together.

    I showed you my living room (something I never thought would happen) and we chatted about all the different elements.

    Today, let’s chat about the kitchen.

    Obviously, the most rustic piece in my kitchen is the island.

    Vintage Modern Rustic Kitchen via RainonaTinRoof.com #vintage #modern #rustic #kitchen #whatsyourstyle

    As you know, Grunt Labor and I built the island ourselves (sans the countertop). I painted it a crisp white, but left the bottom shelf of barn wood untouched. I love that look of barn wood mixed with clean white paint.

    Vintage Modern Rustic Kitchen via RainonaTinRoof.com #vintage #modern #rustic #kitchen #whatsyourstyleThe barstool makeover‘s brought them a bit more in the modern realm.

    And did you notice the new addition over the island?

    Vintage Modern Rustic Kitchen via RainonaTinRoof.com #vintage #modern #rustic #kitchen #whatsyourstyleI finally found some pendant lights I loved. They are much more modern than the light fixture over the sink, which may get switched out soon.

    Vintage Modern Rustic Kitchen via RainonaTinRoof.com #vintage #modern #rustic #kitchen #whatsyourstyleOf course, my kitchen would not be complete without a touch of cotton somewhere.

    Vintage Modern Rustic Kitchen via RainonaTinRoof.com #vintage #modern #rustic #kitchen #whatsyourstyleAnd intricate hand iced cookies. Why, yes, I did make those. And no, I’d  never lie to you about something like perfectly iced cookies. *evil laugh*

    Isn’t the little vintage plate the cookies are on adorable? I have a small set of those that were my aunt’s. The cream and sugar set go well with the vintage coffee jar.

    Vintage Modern Rustic Kitchen via RainonaTinRoof.com #vintage #modern #rustic #kitchen #whatsyourstyle

    The open shelving has a bit of a rustic touch with the stained wood, but not as much as the island.

    Vintage Modern Rustic Kitchen via RainonaTinRoof.com #vintage #modern #rustic #kitchen #whatsyourstyleI will say that I love all the “white-ware,” but I’m not quite sure its still working for me. It may get changed soon.

    Vintage Modern Rustic Kitchen via RainonaTinRoof.com #vintage #modern #rustic #kitchen #whatsyourstyleThe metal basket cookbook storage is another vintage touch.

    Vintage Modern Rustic Kitchen via RainonaTinRoof.com #vintage #modern #rustic #kitchen #whatsyourstyleMy mother-in-law bought me this fabulous caddy from Pottery Barn. Its probably supposed to be used outside, but it is perfect to corral all the clutter on the countertops.

    Vintage Modern Rustic Kitchen via RainonaTinRoof.com #vintage #modern #rustic #kitchen #whatsyourstyleIn the last kitchen tour, many people asked about my faucet. We bought it at Lowe’s and it was only $100 – a great price for a faucet. It has held up perfectly.  To me, it has an old farmhouse feel which works well with the island, but it contrasts nicely against the classic subway tile backsplash.

    Vintage Modern Rustic Kitchen via RainonaTinRoof.com #vintage #modern #rustic #kitchen #whatsyourstyleI use a modern wood container to hold my salt, pepper, olive oil, etc. by the stove. Its easy access and makes the necessities a bit prettier. The same goes for the silver pitcher – a Goodwill find. I’m not quite sure what the round piece of wood is from that is behind it all. I picked it up at one of my favorite local shops because I thought it would be a nice contrast with the backsplash.

    That’s it. My Vintage Modern Rustic Kitchen in a nutshell.

    Do you have any vintage, modern, or rustic elements in your kitchen?

    Need more kitchen ideas and inspiration? Be sure to see these then…

    Love white kitchens? Then get more white kitchen inspiration here!

    Need kitchen island ideas? Here are 7 Kitchen Island Ideas you haven’t thought of…

    Ready to paint your kitchen cabinets? Then be sure to read this post about all the different types of paint for cabinets and details on each.

    Want more general kitchen ideas? Then see these 10+ Kitchen Ideas for Decorating, Organizing, and Storage

     You know you don’t wanna miss any of this crazy.

    Sign up to get my posts delivered to your inbox here. 

    Stalk Me Here:

    Pinterest / Facebook / Twitter / Instagram

    SaveSave

  • Vintage Modern Rustic Living Room

    Vintage Modern Rustic Living Room

    As I told you a couple weeks ago when I introduced this series, it has taken me a long time to really figure out what style(s) I truly love.

    At my old farmhouse, my style was 100% shabby chic. It went with the house, and at that time I loved it.

    When Grunt Labor and I moved in together, he was definitely not the shabby chic type and we ended up with more of a modern-casual home. We even went to a big furniture chain and bought an entire new bedroom suit (I cringe thinking of it now) that we both thought we loved.

    Less than a year later, we sold it.

    Our current home, the beloved rancher, has been the house that has taught me what my style truly is – not to say it won’t change a little over time.

    It always does.

    My style is a mix of Vintage, Modern, and Rustic that somehow all work well together and allow me to keep those family heirlooms that tell a story.

    Here’s my Vintage Modern Rustic Living Room where we spend most of our time. Quite a few things have changed since the last home tour.

    Vintage Modern Rustic Living Room | Living Room Ideas | Living Room Decor | Living Room Decor on a Budget | Living Room Wall Decor (more…)

  • Kitchen Tour {All About the Details}

    To get more decorating ideas and posts like this delivered to your inbox click here.

    Kitchen Tour {rainonatinroof.com} #kitchen

    This post contains affiliate links for your shopping convenience. Click here to read my full disclosure policy.

    **Update: There have been a couple questions about my faucet. It is Pegasus Lyndhurst Series by Glacier Bay. We’ve had it from the beginning of our re-model and love it! No problems with it at all!

    Ready for eye candy?

    I hope so.

    Today and tomorrow, myself, along with many other bloggers are showing you our kitchens.

    But not just our kitchens.

    The details of our kitchens.

    1095068_10152393916750288_1207316620_n

    Because we all know: its all about the details.

    Details pull a space together.

    Welcome to my kitchen tour!

    Kitchen Tour {rainonatinroof.com} #kitchen

    The thing that catches your eye first could possibly be those barstools.

    Kitchen Tour {rainonatinroof.com} #kitchen

    Yep, they are pretty fab.

    I Rub ‘N Buffed the lower ring.

    Kitchen Tour {rainonatinroof.com} #kitchen

    And painted on the blue stripes.

    The barstools are my favorite thing in the space.

    Wait, maybe I have more than one favorite thing.

    Because I really love my island as well.

    Kitchen Tour {rainonatinroof.com} #kitchen

    Kitchen Tour {rainonatinroof.com} #kitchen

    You can read more about how we built the island here.

    I refuse to ever move because I won’t be able to take the island with me.

    They may lay me out on it when I die.

    Maybe not, that would be weird.

    Kitchen Tour {rainonatinroof.com} #kitchen

    I am a firm believer in the power of fresh flowers.

    They can instantly add drama and welcome any guest into your home.

    I have a full-time gardner who works tirelessly to make sure I have beautiful, fresh flowers like these.

    His name is Grunt Labor.

    One time, he even planted a huge row of hydrangeas because while reading a magazine one day and drooling over hydrangeas, I said I don’t think I would ever leave my yard if I had hydrangeas like that.

    I came home one afternoon to see him planting 10+ hydrangea bushes.

    He said he figured if the hydrangeas were there and that meant I wouldn’t leave , it also meant I wouldn’t ever leave him.

    Oh, Grunt Labor, you are too valuable to leave.

    Who else would put up with my never-ending decor changes?

    Back to the kitchen tour, you know, I digress too much.

    Kitchen Tour {rainonatinroof.com} #kitchen

    I just whipped up this navy and white chevron tray this week.

    A super easy and fun project.

    There will be a tutorial soon. Hopefully.

    When Grunt Labor and I did the kitchen renovation, we kept the original cabinets and just updated them with paint and hardware from Ikea.

    We did however, remove one wall of cabinets to allow for some open shelving from once more, Ikea.

    Kitchen Tour {rainonatinroof.com} #kitchen

    Kitchen Tour {rainonatinroof.com} #kitchen

    I love the combination of the wood stained shelving against the subway tile.

    I display my “whiteware” on it.

    I refuse to pay over $5 for a piece of “whiteware” unless I absolutely love it.

    Speaking of subway tile, it is just the best – timeless and classic, it goes great with anything.

    Grunt Labor installed it as well – see, I told you he was valuable.

    Below the open shelving, sits the fruit basket.

    Kitchen Tour {rainonatinroof.com} #kitchen

    Which is really an old metal locker basket.

    I love these bad boys and anytime I see one for $10 or less, I buy it.

    One time, I walked into an old gym locker room and these were all along one wall.

    It took every ounce of self restraint I had not to run like a mad woman out of the building with as many as I could carry.

    I can see the headlines now:

    “Deranged Blogger jailed for Stealing Vintage Locker Baskets”

    How much time do you think I would get?

    It could be worth it.

    Just sayin.

    My sweet next door neighbor is moving.

    She has given me so many wonderful little treasures like this little vintage coffee holder.

    Kitchen Tour {rainonatinroof.com} #kitchen

    I’m not really a fan of the K-Cup spinner coffee holders and shelves.

    They aren’t very pretty at all.

    And I’m snobby when it comes to things like that.

    So, when she offered me this coffee holder, I jumped on it like stink on you-know-what.

    She also gave me some beautiful vintage mason jars – blue and clear.

    Lucky, lucky me.

    To store my cookbooks, I use metal locker baskets as well.

    Kitchen Tour {rainonatinroof.com} #kitchen

    Kitchen Tour {rainonatinroof.com} #kitchen

    They have been up for well over a year now and have never fallen.

    Go us.

    You can see the tutorial on how we hung these here.

    To store my cooking utensils, I use an old silver pitcher.

    Kitchen Tour {rainonatinroof.com} #kitchen

    I found this little gem at Goodwill for $3 one day.

    My heart soared, I tell ya.

    It adds a little bling to the counters.

    Thanks for coming along on the tour with me today.

    Kitchen Tour {rainonatinroof.com} #kitchen

    I hope you enjoyed it!

    If you really want to see how far my kitchen has come (it was a 1960s rancher style), see the full reveal here.

    Looking for kitchen island ideas? I’ve got ones you’ve never even thought of here!

    Desperately need a new kitchen countertop, but can’t afford one right now? What about one of these DIY countertop makeovers?

    Love white kitchens? Get more white kitchen inspiration here!

    Need more real life kitchen ideas? Find those here.

    Sign up to get my posts delivered to your inbox here. 

    You know you don’t wanna miss any of this crazy.

    Stalk Me Here:

    Pinterest / Facebook / Twitter / Instagram

    SaveSave

  • House Tour: Vintage Modern Rustic DIY Renovated Rancher

    To get more decorating and DIY tips delivered straight to your inbox, subscribe for free here. 

    Update: See the updated home tour here! 

    Welcome to my Renovated Rancher House Tour! 

    Wow! They did a lot of renovations to this 70's Rancher! Rustic Modern Cottage Home Tour

    Renovated Rancher House Tour {rainonatinroof.com} #hometour

    A renovated brick rancher!

    Two years ago, Grunt Labor and I purchased a 1960s brick rancher. Was it our dream home? Negative. Was it in our dream neighborhood? Abso-freakin-lutley. And as they say, location is everything.

    We had lived in a brand-spankin-new home, but we just weren’t the strict neighborhood association type and it just didn’t feel like home. Plus, it was on the other side of town, away from both our jobs. So, when we found this house at our price-point (did I mention it was a foreclosure?) in a neighborhood we loved, we jumped on it. Of course, there was another offer on it as soon as we put ours in, but we got it!

    When my mother-in-law saw it, she cried. And not tears of joy, people. Bless her, she was so worried we were leaving our brand new house for a piece of crap. And she had a completely valid point. When we bought the house, the electricity and water was cut off, we really had no clue what all would have to be done. Not to mention all the updates we wanted to do. However, the water and electricity worked (besides some outlet updates), and there weren’t too many other surprises. So, enough of an intro, here’s the good stuff!

    This post contains affiliate links for your shopping convenience. Click here to read my full disclosure policy.

    Entryway:

    Renovated Rancher House Tour {rainonatinroof.com} #hometourThe entry table recently got a coat of white paint and gold detailing with Rub ‘N Buff. Its always fun to see people’s reaction to the Stag head. Most always ask if I killed it.

    See the updated entryway here! 

    Kitchen:

    Renovated Rancher House Tour {rainonatinroof.com} #hometour

    The kitchen got a makeover including new tile, counter-tops and a custom built island thanks to Grunt Labor. We kept the original cabinets, but gave them a coat of paint and new hardware.

    Be sure to check out my “Its all in the Details Kitchen Tour” for more kitchen goodness.

    And read about how we built the kitchen island here.

    Renovated Rancher House Tour {rainonatinroof.com} #hometour

    Summer 2013 Showcase of Homes {rainonatinroof.com} #hometour

    Our kitchen, living room, and dining room is one big open space. It used to be three separate rooms, but was just too confining, so a few walls had to go.

    Dining Room:

    Renovated Rancher House Tour {rainonatinroof.com} #hometour

    The table and chairs were my great aunt’s, which I revived with paint and love. The corner corner liquor cabinet was once my great grandmother’s china cabinet. I know, she is giving me an earful in Heaven right now.

    Renovated Rancher House Tour {rainonatinroof.com} #hometour

    See some of the updated dining room here! 

    Living Room:

    Renovated Rancher House Tour {rainonatinroof.com} #hometour

    If you have followed me for a while, you may have noticed that I have hardly every shown you any photos of my living room, with the exception of my gallery wall and grain sack striped bookcase. That’s because this room, ok, every room actually, but really this room, is a work in progress. I’m not a fan of my couch at all, but I do love my two new modern wingback chairs from IKEA.

    Renovated Rancher House Tour {rainonatinroof.com} #hometour

    The buffet turned media center came with the dining room table from my great aunt. It too got a coat of paint.

    Renovated Rancher House Tour {rainonatinroof.com} #hometour

    Summer 2013 Showcase of Homes {rainonatinroof.com} #hometour

    Summer 2013 Showcase of Homes {rainonatinroof.com} #hometour

    The white chairs were Craigslist finds that got a makeover, as well as the coffee table.

    Renovated Rancher House Tour {rainonatinroof.com} #hometour

    home tour 14

    See the updated living room here! 

    And don’t miss the 20+ living room ideas here for more inspiration!

    Master Bedroom:

    Renovated Rancher House Tour {rainonatinroof.com} #hometour

    After being in our home for nearly two years, the master bedroom was finally completed in March.Renovated Rancher House Tour {rainonatinroof.com} #hometour

    Renovated Rancher House Tour {rainonatinroof.com} #hometour

    Monograms and I have an unending love. If you ask this southern girl, monograms are a classic.

    Renovated Rancher House Tour {rainonatinroof.com} #hometour

    Summer 2013 Showcase of Homes {rainonatinroof.com} #hometour

    Renovated Rancher House Tour {rainonatinroof.com} #hometour

    The two pieces of furniture you will never find me painting is my dresser and chest of drawers in our master bedroom. They were my great uncle’s and have a beautiful finish that has held up beautifully for the last 50 years. Hopefully, they have 50 more. I did touch up the hardware with some Rub ‘N Buff though.

    Renovated Rancher House Tour {rainonatinroof.com} #hometour

    Renovated Rancher House Tour {rainonatinroof.com} #hometour

    I carved out a reading nook in the corner of our bedroom with a chair from Costco and DIY corbel shelving.

    Renovated Rancher House Tour {rainonatinroof.com} #hometour

    I made the wall art in the bedroom with PicMonkey and frugal graphics from Etsy.

    My Bathroom:

    Renovated Rancher House Tour {rainonatinroof.com} #hometour

    Grunt Labor and I have separate bathrooms. Its the key to a happy marriage. I promise.

    My bathroom got new marble tile, a new vanity and this built-in bathroom shelving:

    Renovated Rancher House Tour {rainonatinroof.com} #hometour

    The Nursery:

    Renovated Rancher House Tour {rainonatinroof.com} #hometour

    Baby girl’s nursery has a vintage feel. I combined thrift store finds and items from my childhood as well as Grunt Labor’s to use in her room.

    Renovated Rancher House Tour {rainonatinroof.com} #hometour

    Screened-In Porch:

    Renovated Rancher House Tour {rainonatinroof.com} #hometour

    The screened-in porch got an overhaul this spring and it is my new happy place.

    Renovated Rancher House Tour {rainonatinroof.com} #hometour

    Thank you so much for stopping by! What do ya think of my house tour?

    Wanna snoop around my home more? Right this way, please….

    Kitchen Reveal

    Screened-In Porch Makeover

    A Vintage Nursery

    DIY Bathroom Renovation

    Master Bedroom Makeover

    Sign up to get my posts delivered to your inbox here. 

    You know you don’t wanna miss any of this crazy.

    Stalk Me Here:

    Pinterest / Facebook / Twitter / Instagram

  • A Vintage Inspired Nursery Makeover

    A Vintage Inspired Nursery Makeover

    Baby girl’s nursery has changed, and had a few little improvements since I last posted about it. So, I thought it might be fun to share some new photos with you! I didn’t want a nursery for her that would be full of brightly color characters. I wanted something more authentic, I guess you could say. So, I created a vintage nursery for her.
    A Vintage Nursery {rainonatinroof.com} #vintage #nursery

    A Vintage Nursery

    Vintage Inspired Nursery Makeover
    Vintage Inspired Nursery Makeover

    The dresser was a $75 Craigslist find. I sanded and painted it Salmon Pink by Behr. The mirror was another Craigslist find, $30, that was previously gold.

    Vintage Inspired Nursery Makeover

    I picked up a couple of vintage nursery rhyme books at an antique store and framed my favorites in simple white frames from Michael’s.  Read more about those here.
    I wanted the wall color to be something she could grow with. I took a paint swatch of some gray paint I loved to Home Depot and had them custom color match it with Behr paint.

    Vintage Inspired Nursery Makeover
    The coat rack is really just a piece of old barn wood from the family farm with a piece of molding on top and hardware from Lowe’s.
    Vintage Inspired Nursery Makeover
    I found the hamper at the Salvation Army for a whopping $2. It did not look anywhere near this cute when I got a hold of it. It had been painted yellow, which was peeling, and had this  horrendous floral pattern underneath that. I sanded it and sprayed it blue. The top wouldn’t take paint well, so I used fabric to cover it. Grunt Labor was way “wowed” by this. He thought it was the cutest thing ever. Score.
    Vintage Inspired Nursery Makeover

    I picked up an old chandelier at Habitat for Humanity ReStore and spray painted it the same color as the hamper and coat rack.

    Vintage Inspired Nursery Makeover
    The chair was another Craigslist find. I made something close to a slipcover for it (there’s a reason there is no close-up photo of the chair). I called about having a professional make one, but that was going to be in the ballpark of $300. Um, no, I will not pay $300 for a slipcover for a chair I paid $25 for and will probably get rid of in a few years….So, it got a makeshift slipcover and so far, so good.
    Vintage Inspired Nursery Makeover

    The bedding was purchased from Etsy. As soon as I saw it, I knew it was what I wanted for the room.

    Vintage Inspired Nursery Makeover
    I made the tissue paper pom-poms that hang in the corner. The artwork above the bookshelf was actually from the end of my crib when I was a bambino. The bookshelf used to sit in my grandparent’s den. I remember my crayons being stored in a cigar box on the bottom shelf for me to easily access them. Landry’s cigar box is already there, just waiting on crayons. She would totally eat them now. Go ahead and judge the cigar box crayon storage. I don’t really care what you think about it. Its not like there are cigars in the box. Wait – I better go check…..
    Vintage Inspired Nursery Makeover
    The Bambi wall art was in Grunt Labor’s nursery when he was little. I was over the moon when my mama-in-law broke out those bad boys!
    What do you think? The perfect amount of vintage nursery without it looking old?

    Need more nursery ideas? Here are nine ones that won’t break the bank!

    You know you don’t wanna miss any of this crazy.

    Sign up to get my posts delivered to your inbox here. 

    Stalk Me Here:

    Pinterest / Facebook / Twitter / Instagram

  • Simple Screened-In Porch Makeover

    Simple Screened-In Porch Makeover

    I have teamed up with three other bloggers to bring you the Summer Spruce-Up Series. The series is all about sprucing-up our outdoor areas to get them ready for summer! What all of that means is that I had to get off my butt and get to work. Enter my screened-in porch makeover.

    Screened In Porch Makeover

    My screened-in porch had been so neglected until I was forced to tackle it (a good and needed forced, thanks gals). When we moved in two years ago, the last thing on our minds was the back porch. We were too busy with a kitchen, bathroom, and basically an overhaul of our entire house. I didn’t take a photo of the inside of the porch, but this was the outside, so you can get a pretty good idea of what it was like.

    Screened In Porch Makeover

    Rough, to say the least.

    We finally got around to working on it about six months after we moved in.

    But, then I got pregnant.

    And lazy.

    And tired.

    So, for the last year and a half, our screened-in porch has set like this. Partially finished.

    Screened In Porch Makeover
    Screened In Porch Makeover

    Grunt Labor had fixed the screening and added lattice to keep the dogs from getting in. We had also partially painted the woodwork, but that was it.

    And now, within the last three weeks, it has finally gotten its long overdue makeover.

    Screened In Porch Makeover

    With the exception of the chaise lounge and rocking chair, we already had the patio furniture.  I picked up the lounge at an antique store for $100. All of the furniture got a fresh coat of gloss black spray paint, which it was in desperate need of.

    Screened In Porch Makeover
    I am loving my outdoor chalkboard. We just bought a piece of pre-cut 4×8 plywood, slapped some chalkboard paint on it and nailed it up. The silver pail holds chalk.
    Screened In Porch Makeover
    We also purchased cushions from Home Depot for all the furniture.
    Screened In Porch Makeover
    I found that sweet little rocking chair at an antique store for $20. It was originally white and sporting some horrid circa 1991 floral fabric. I ditched that for some simple outdoor fabric that would match the new cushions.
    Screened In Porch Makeover
    Needless to say, that chaise lounge is this girl’s new favorite spot. Don’t sit in my chaise when I am present. It. Is. Mine.
    Screened In Porch Makeover
    I painted the floor the same color as the floor on the front porch. I finally got around to painting the rest of the trim / woodwork as well.
    Screened In Porch Makeover
    I love how all of the little decorative touches turned out. I really just threw some stuff together I had around the house. I made a monogrammed tray for us and put it in the middle of the table to hold napkins, condiments, and such. I pulled the lantern from the guest bedroom, since it will soon undergo a makeover.
    Screened In Porch Makeover
    I had these mason jars in the cabinet, with the hanging wire already attached. Luckily, the hooks were already in the ceiling as well, otherwise these boys may not have made it out. Right now, they have pebbles in them. And someday when I remember, I will pick up some candles for them.
    Screened In Porch Makeover
    We have had the chandelier for a few years now. I found it as-is at a yard sale for $3. Yes, I’ll take it.
    Screened In Porch Makeover
    We switched out the previous light fixture which was rusted and haunted-house-scary-looking for this one. I found it at Lowe’s on clearance for $25. Yes, I will take that as well.
    Screened In Porch Makeover
    Another favorite part of the porch for me is this clock. It is an old one with an electrical cord to make it run. I picked it up at an antique store for $15 a few years back. It still works, but there isn’t an electrical outlet on the porch. I wrapped the cord around the back, set the clock to 5:00, hung it up and then got myself a beer. 🙂
    Screened In Porch Makeover
    The tray was another yard sale find for $3. I gave it a coat of spray paint. Obviously, not a good one, considering there are bubbles on the side, but, hey, its outside, who cares? I pulled the metal pitchers from my open shelving, which recently got a makeover.
    Screened In Porch Makeover
    The screened-in porch is my new favorite place. It’s always 5:00 there, it’s a great outdoor dinner space, an awesome place to relax, keeps the kid contained, and did I mention it’s always 5:00 there?

    More outdoor projects you just might want to see:

    How to Stain Wood Outdoors the Easy Way (Lattice Makeover in an hour) – super easy with a big impact!

    Staining Pressure Treated Wood – No Waiting Required – for realz, no waiting!

    Mailbox Makeover in less than an  hour – another easy, but big impact project!

    Wanna snoop around my house more? Head here. 
     You know you don’t wanna miss any of this crazy.

    Sign up to get my posts delivered to your inbox here. 

    Stalk Me Here:

    Pinterest / Facebook / Twitter / Instagram

  • Master Bedroom Makeover (Neutral, Yet Beautiful)

    Master Bedroom Makeover (Neutral, Yet Beautiful)

    This was the room that got put off for a very long time. When we purchased the foreclosure, the last thing on our minds was the bedroom. I am thrilled to announce that our Master Bedroom Makeover is finally complete. Master Bedroom Makeover {rainonatinroof.com} #masterbedroom #makeover

    This post contains affiliate links for your shopping convenience. Click here to read my full disclosure policy.

    Master Bedroom Makeover

    It is finally done. We’ve been in this house almost two years, and the master was always put off on the makeover list. I am so happy to have it done and I’m pretty sure Grunt Labor might be more excited than I am because he doesn’t have to listen to me whine about not finding the right curtains or pillows, or frames. Poor guy. Here is the master bedroom makeover reveal:

    Summer 2013 Showcase of Homes {rainonatinroof.com} #hometour

    Summer 2013 Showcase of Homes {rainonatinroof.com} #hometour Summer 2013 Showcase of Homes {rainonatinroof.com} #hometour

    Here is a before:
    Master Bedroom Before
    I cringe.
    I actually kept a lot of elements from the before, I just re-arranged some things and made them over. The wall color also stayed the same. I’m still not 100% happy with the wall color, but I did not want to paint this room.
    Here’s what I did:
    Reading Nook
    Summer 2013 Showcase of Homes {rainonatinroof.com} #hometour
    I took a little corner of the room and turned it into a reading nook. Grunt Labor found that chair at Costco and the table was a Craiglist find that I made over with DIY chalk paint.
    DIY Corbel Shelving
    DIY Corbel Shelving
    I added a DIY Corbel Shelf above the reading nook. This shelf was super simple to make. Read more about it here.
    Bedding 
    Summer 2013 Showcase of Homes {rainonatinroof.com} #hometour
    Summer 2013 Showcase of Homes {rainonatinroof.com} #hometour
    The bedding got a serious makeover. We kept our headboard – love it way too much to part ways. We chose a simple white comforter from Dillard’s and bought some frugal accent pillows.
    Frugal DIY Wall Art
    Summer 2013 Showcase of Homes {rainonatinroof.com} #hometour
    I created some frugal DIY wall art with images and backgrounds I bought from Etsy. I made it all using Picmonkey. Did you notice the frames in the reveal photo? I found those at Target for $5 each!!! They were white, but I sprayed them gold! Read about the art here.
    Rub ‘N Buff Hardware Makeover
    Summer 2013 Showcase of Homes {rainonatinroof.com} #hometour

    I used the amazing Rub ‘n Buff to transform the hardware on our dresser and chest of drawers. Read how easy it was here.

    Overall, I’m very pleased with the makeover! Grunt Labor was very hesitant about the gold in the curtains and me spray painting the wall frames gold. But after it was all done, he said: “I’m not a gold guy, but I really like it in here.” SCORE.
    Master Bedroom Makeover {rainonatinroof.com} #masterbedroom #makeover
    What do you guys think? Successful master bedroom makeover?
    Update: The master bedroom has underwent another mini-makeover! See it here! 
    Need more real-life bedroom ideas – be sure to see this post with great out-of-the-box bedroom ideas that are totally doable!
    Want to snoop in my house more? Right this way, please…

    You know you don’t wanna miss any of this crazy.

    Sign up to get my posts delivered to your inbox here. 

    Stalk Me Here:

    Pinterest / Facebook / Twitter / Instagram

  • Kitchen Reveal – The Kitchen Renovation is complete!

    Kitchen Reveal – The Kitchen Renovation is complete!

    Don’t miss more posts like this! Sign up to get my posts delivered to your inbox here. 

    It is finally done. We have conquered the kitchen renovation. I’m thrilled to show you our kitchen reveal.
    This post contains affiliate links for your shopping convenience. Click here to read my full disclosure policy.
    Rustic Kitchen | White Kitchen | Kitchen Remodel | Kitchen Ideas | DIY Kitchen Ideas | Painted Kitchen Cabinets | DIY Kitchen Island
    **Update: There have been a couple questions about my faucet. It is Pegasus Lyndhurst Series by Glacier Bay. We’ve had it from the beginning of our re-model and love it! No problems with it at all!
    **Update: You can see more (and better) photos of the kitchen and improvements here! Thanks for stopping by!

    Kitchen Reveal

    The kitchen is finally finished! I posted a month or so back about the new countertops. Well, this is the big kitchen reveal. It’s. all. finished. Backsplash, countertops, cabinets, island, everything!
    Kitchen Reveal
    This is what it looked like when we first purchased the house back in June.
    Kitchen Before
    Kitchen Before
    On the opposite wall across from the window, there was a wall, which had to go.
    Kitchen Remodel
    And we knocked another wall down as well.
    Kitchen Remodel
    Luckily, what I did like about the kitchen were the cabinets. I love having the smaller ones on top of the larger ones on the wall. Gives the space lots of character. So, all they needed were some paint and new hardware, which saved us a TON of money!! I used Rust-Oleum‘s Cabinet Transformation kit to paint the cabinets. No priming or sanding required!
    We also saved money by going to Ikea for our cabinet hardware. It was about 40 – 50% cheaper there than at other places. We repositioned the refrigerator to the opposite wall, as well, ending up with this. You can see how we covered the old hardware holes on the cabinets here.
    Kitchen Remodel
    Kitchen Remodel
    After taking out one wall and moving the refrigerator, we had an exposed open cabinet. I called a cabinet maker and he made me two new doors and a drawer that match my others exactly for only $125! I honestly thought it would be much more than that! We also removed the wall cabinets on one side to make way for some open shelving. And I spray painted the counter tops black to keep me satisfied while waiting for new counter tops. Yes, spray painted.  And then my husband built me a beautiful kitchen island made out of old barn wood and porch posts and in December we got new counter tops!
    Kitchen Makeover - DIY Island
    Kitchen Reveal - Countertops
    We chose Silestone in Bianco River because it has a marble-y look. I really wanted marble, but knew that it didn’t hold up too well in kitchens without some routine sealing that I knew I wouldn’t do like I should. For Christmas, we got a Lowe’s gift card, which meant…..back splash!!!! We chose white subway tile. I. LOVE. SUBWAY. TILE. This is what our kitchen looks like now.
    Kitchen Reveal
    Kitchen Reveal
    Kitchen Reveal
    That’s our big kitchen reveal! What do ya think?
    Need more kitchen ideas? I’ve got you covered…

    You know you don’t wanna miss any of this crazy.

    Sign up to get my posts delivered to your inbox here. 

    Stalk Me Here:

    Pinterest / Facebook / Twitter / Instagram

  • Bathroom Renovation on a Budget

    Bathroom Renovation on a Budget

    When we moved into the foreclosure, we knew a bathroom remodel was in order for the hall bath. Of course, we didn’t have much money, so it all had to be done on a budget.
    I’m happy to say we were successful with our bathroom renovation on a budget.

    Bathroom Renovation on a Budget

    DIY Bathroom Renovation {rainonatinroof.com} #bathroom #renovation #makeover #diy

    As most of you know, my husband and I moved into a new home (a cash guzzling lovely foreclosure) this past June. Everything in the house needed some serious upgrades. It was stuck in 1970. However, everything, pretty much anyway, was in working order, including my bathroom. So, the bathroom sat untouched for a bit while dust progress was being created elsewhere.

    Here are a few rough pictures of where we started with the bathroom…

    DIY Bathroom Makeover on a Budget

    Bathroom Makeover
    Renovating a Bathroom on a Budget
    You saw right, that was a bowl in the sink. There were plumbing issues in the kitchen. Definitely an experience.
    There wasn’t much money left after taking out a wall in the kitchen for a professional to do the bathroom reno. So, we pulled a DIY bathroom renovation. As you can tell, the bathroom was plain, very plain. I did really like the solid cast iron tub though. It would be nice if it were free standing, but it worked and is in great condition, so I couldn’t let myself rip it out.
    About a month into the renovation, I got to start on my very own, husband-doesn’t-set-foot-in-it bathroom. As you will see, the result of the bathroom consists of my tastes, there isn’t a speck of him there. The vanity and mirror were ripped out and then the tile was hammered out. There was about 2 lovely, dusty inches of concrete underneath that tile. Joy.
    DIY Bathroom Renovation on a Budget
    Renovating a Bathroom on a Budget
    The hubby did an amazing job on the tile. Of course, I was instrumental in handing him the pieces and supervising. Marble is such a classic stone, I had to have it for my bathroom. Since it is a smaller bathroom, the cost wasn’t outrageous. Yay!
    The tile that surrounded my bathtub was horrendous. Like I say…..I’ll paint anything.
    How to Paint a Tile Shower
    I painted my bathroom tile. I used Rust-Oleum‘s tub and tile paint.
    Painting a Tiled Shower
    Renovating a Bathroom on a Budget
    After, the first coat, there were still some beige specks coming through, so after another coat and incredibly toxic fumes, the result was….
    Painting over Tile in a Shower
    Yay!!! White tile! It’s not my pick, which would have been subway, but its white like subway tile! I’ll take it!
    The vanity in my bathroom is my most favorite thing in there….I think, it was a mere $125.
    Budget Bathroom Makeover
    Bathroom Renovation on a Budget
    Bathroom Renovation on a Budget
    Bathroom Renovation on a Budget
    The open storage was supposed to be drawers, but those were missing, so towel storage, it is!
    Bathroom Renovation on a Budget
    I used the same Behr custom color match in my bathroom that I used in the nursery.
    Budget Bathroom Makeover
    Grunt Labor built some shelving above the toilet for extra storage.
    DIY Bathroom Shelving - Budget Bathroom Makeover
    Budget Bathroom Makeover
    I’m still dreaming of a floating soaking tub……but I’ll keep dreaming.
    What do you think of the bathroom renovation?
    Wanna snoop around my house more? Right this way, please….

    You know you don’t wanna miss any of this crazy.

    Sign up to get my posts delivered to your inbox here. 

    Stalk Me Here:

    Pinterest / Facebook / Twitter / Instagram