Category: DIY Projects

Budget DIY projects to give your home a high-end custom look, but on a budget.

  • Power Tools 101: How to Use a Miter Saw

    Power Tools 101: How to Use a Miter Saw

    Hands down, my absolute favorite tool is my miter saw. Power miter saws can do so many things – and do it pretty easily as well. This guide will show you the basics of how to use a miter saw and what all a miter saw can be used for.

    Its time for another empowering round of Power Tools 101.

    In this round, I’m going to go over the basics of a miter saw, my favorite kind of saw, and Gina from The Shabby Creek Cottage is going to teach you how to use a table saw, which happens to be my least favorite saw.

    Didn’t that work out nicely?

    How to Use a Miter Saw for Beginners - Rain on a Tin Roof

    Please use all appropriate and proper safety precautions when using tools and attempting projects. All projects and tool usage are attempted at the reader’s own risk.

    This post contains affiliate links for your shopping convenience. Click here to read my full disclosure policy.

    Using a Miter Saw

    First off…

    What is a miter saw? 

    Why, I am just so darn glad you asked. In short, a miter saw is a saw that allows you to cut at a variety of angles. Its base sits on top of a miter saw stand, table or workbench, unlike the circular saw that you move yourself. Most of the time, miter saws are used for cutting things like baseboards, window trim, and crown molding. However, I like to use it whenever I can to just get a straight cut, because I suck at that sometimes with a circular saw.

    This is our miter saw:

    What Is a Miter Saw Used For - Power Miter Saw - Rain on a Tin Roof

    It is a DeWalt Double Bevel Sliding Compound Miter Saw. Our miter saw is a much larger miter saw than many people would require. We have a large one because a) it was on sale for a great price and b) we needed a heavy duty one when we started all the work on the beloved foreclosure. Right now, this one sells for about $600, but there are just as effective, smaller ones that start around $120, like this Ryobi one. I will say that I do love having a sliding miter saw because it can cut larger width pieces of wood.

    Here’s how it looks when the blade is up:

    Blade Up on Miter Saw - Rain on a Tin Roof

    How a Miter Saw Works

    To release the blade, you push down on the handle with one hand, and press in on the “button” on the back left hand side, with the other hand:

    How a Miter Saw Works - Rain on a Tin Roof

    The saw will operate by squeezing the trigger in the handle:

    Trigger on a Miter Saw - Rain on a Tin Roof

    This saw is also capable of sliding back and forth by loosening the dial on the back of saw:

    Using the sliding feature on a miter saw. Rain on a Tin Roof

    Why would you need to slide the saw? Well, if you have a larger piece of wood that the blade wouldn’t normally cut all the way the width of, you can start cutting on the front of the wood and then slide the blade back while cutting. In the photo below, you can see how the blade slides. The top photo shows the blade in the front and the bottom one shows the blade slid back:

    Miter Saw Blade Down - Rain on a Tin Roof

    Like I said in the beginning, one of the biggest reasons people use miter saws are to easily make angled cuts. You make angled cuts by moving the arm on the base of the saw:

    Using a Miter Saw - Adjusting the Angle - Rain on a Tin Roof

     You push down on the button while moving the arm. The saw will lock into place at set angles. Angles are marked along the bottom:

    Choosing with angle to cut on a miter saw - Rain on a Tin Roof

    Anytime you cut a piece of wood on a miter saw, you need to make sure the wood is flush with the back:

    Cutting wood with a power miter saw - Rain on a Tin Roof

    This gives you a nice, clean, straight cut. After marking where your cut should be and making sure your wood is flush, you will put one hand onto the handle and push the trigger (as shown in the photo above) and use your other hand to hold the wood still – make sure your hand is far away from the blade:

    Making a cut with a miter saw - Rain on a Tin Roof

    As you pull down on the blade, you will see that the safety blade guard will automatically move backwards. You cut angled cuts the same way as straight cuts, you just move the handle on the bottom to the desired angle like I showed you above.

    After cutting through wood, release the trigger so that the blade stops spinning. As you raise the blade up, the blade guard will go back around the blade.

    What is a Miter Saw Used For?

    As you can see above from how a miter saw works, it can create many different types of cuts. But how do those cuts factor into real life projects. These are a few different projects where having a miter saw on hand is very useful:

    • Trim Installation (baseboards, window casing, door casing, etc.) – a power miter saw can easily create those 45 degree angles to give you beautifully installed millwork.
    • Crown Moulding – crown moulding is a little more trickier than regular trim, having a miter saw to get the correct cuts (like a bevel cut) is a necessity.
    • Just about any building project – miter saws make quick work of just about any cut you need to make on lumber. As long as it will fit on the saw base and under the blade, you can probably cut it with a miter saw.

    Do you have any tips for working with a miter saw?

    More Power Tools 101 Posts You Might Find Helpful:

    How to use a Drill – a must have tool for any DIYer!

    How to use a Circular Saw – make cuts across large pieces of wood sheets such as plywood.

    How to use a Heat Gun and 15 things to do with it – you won’t believe what all this thing is capable of!

    How to Use a Sander – and what kind of sandpaper to use when.

    The Best Tools for DIYers at any level – my tried and true tools.

    Want to come back to this post later? Pin the image below!

    Beginner's Guide to Using a Power Miter Saw - Rain on a Tin Roof

    Stalk Me Here:

    Pinterest / Facebook / Twitter / Instagram

    SaveSave

    How to Use a Miter Saw Guide - Rain on a Tin Roof

  • DIY Marble Top Table for $30 or less

    This one will be as short and sweet as possible, friends. The flu has struck our house and its first victim is me.

    I love marble. Have I told you that before? I mean, I’m sure its apparent by looking at my bathroom.

    I also love little side tables that can be moved around as needed to hold drinks and what not.

    And I love a classic black – paired with gold.

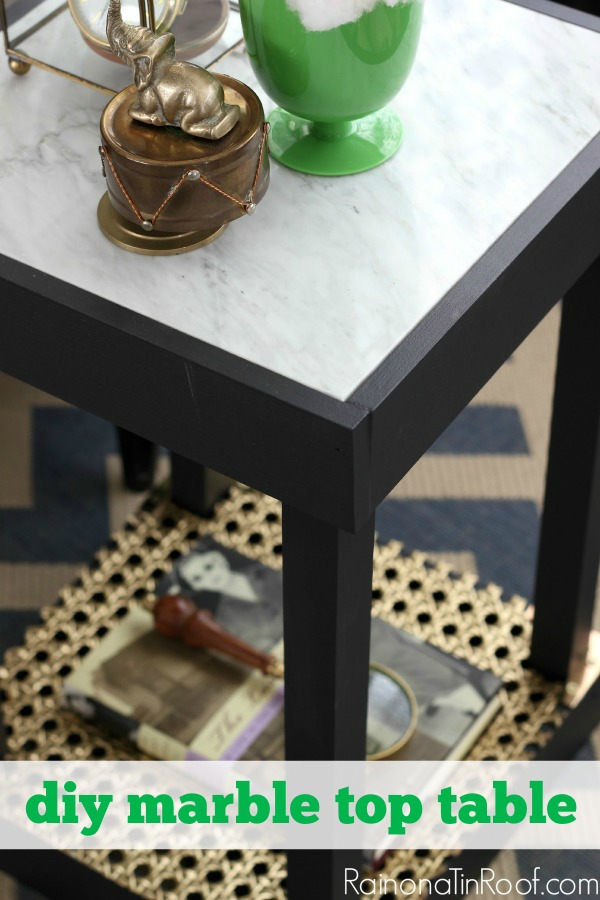
    The three loves combined in this DIY Marble Top Table.

    diy-marble-top-table-2

    Disclosure: This post was a collaboration with Velvet Finishes. All opinions and love of black, gold, and marble are 100% mine. This post contains affiliate links for your shopping convenience. Click here to read my full disclosure policy.

    I came up with this idea, but I have to give Grunt Labor credit for building it. Preschool is out until after the first of the year, so while I chased the kid, he worked on the table. Thanks, Grunt.

    How to Build a Marble Top Table

    Supplies & Tools Needed:

    • 1 marble tile (Mine was leftover from my bathroom reno, but they still have it at Home Depot)
    • 2 square balusters
    • 12 x 12 piece of MDF
    • 1 x 3 wood – 8 ft piece
    • Finish Nails
    • Nail Gun (that’s what we used, but you may be able to just use a hammer and nails)
    • Wood Glue
    • Circular Saw and/or Miter Saw
    • 4 – 2 1/2 inch L brackets
    • Caning or something else for the bottom
    • Velvet Finishes Luxurious Paint

    Steps

    Step 1:

    Trace out the tile on the MDF.

    Chic and small, but functional! DIY Marble Top Table via RainonaTinRoof.com

    Cut out the traced piece with a circular saw.

    Chic and small, but functional! DIY Marble Top Table via RainonaTinRoof.com

    Ignore that other square. We were going to use it for the bottom, but it didn’t work out.

    Step 2: 

    Cut the ends off the square balusters and then cut both in half – approximately 20 inches long and set aside.

    Chic and small, but functional! DIY Marble Top Table via RainonaTinRoof.com

    Step 3:

    Frame the tile with the 1 x 3s and cut as needed to fit the tile.

    Chic and small, but functional! DIY Marble Top Table via RainonaTinRoof.com

    Put wood glue on the ends, then use your nail gun to nail the frame together on the edges. Be sure not to nail where the tile is.

    Chic and small, but functional! DIY Marble Top Table via RainonaTinRoof.com

    Step 4:

    Place the cut MDF piece on top of the tile, but still within the frame you just nailed together. Take the balusters and place one in each corner. Nail them to the frame of 1 x 3s.

    Chic and small, but functional! DIY Marble Top Table via RainonaTinRoof.com

    Step 5: 

    At this point lift the spindles and frame (they should be nailed together) off the MDF and tile, and flip it over. Set the the MDF and tile aside.

    Cut 4 more pieces of 1 x 3 to create a square around the base of your table. Nail these pieces to the balusters at the bottom.

    Chic and small, but functional! DIY Marble Top Table via RainonaTinRoof.com

    Step 6: 

    Take your cut MDF square and place it in the top of the frame. Nail it down in the corners onto the spindles.

    Chic and small, but functional! DIY Marble Top Table via RainonaTinRoof.com

    Sit your marble inside the top frame. You can glue it down with something like Elmer’s Advanced, but I opted to just sit mine in there in case I ever want to change it out.

    Step 7: 

    Paint it, baby!

    So, I really really really wanted to paint this piece with Velvet Finishes Glamorous, but when I got it on the table, it just didn’t work with the marble.

    Instead, I opted to go with a classic never-fail black, Velvet Finishes Luxurious.

    Chic and small, but functional! DIY Marble Top Table via RainonaTinRoof.com

    I just slapped it on with a regular paintbrush and it only took two coats – even on the raw 1 x 3s. That kind of shocked me, because raw wood usually just soaks up paint and it takes coat after coat after coat if you don’t prime it. No priming here though and still only two coats. Holla.

    Step 8: 

    For the bottom, I cut some leftover caning to size, spray painted it gold, then secured it down with 4 L brackets.

    Chic and small, but functional! DIY Marble Top Table via RainonaTinRoof.com

    I love the classic combination of black and gold – it never fails me and it can work with just about any decor.

    Chic and small, but functional! DIY Marble Top Table via RainonaTinRoof.com

    Another thing I noticed with this paint is that even though I used a brush to put it on, there were no brush strokes.

    Chic and small, but functional! DIY Marble Top Table via RainonaTinRoof.com

    Cheers to the new year, friends – and black & gold marble tables!

    Looking for more easy DIY builds?

    DIY Modern Rustic Bookshelf – customize in any color you like!

    DIY Chippendale Desk – probably my most favorite build of all time, and an easy one too!

    DIY Clothes Rack – an easy build and perfect for extra clothes storage or selling clothes at yard sales!

    You know you don’t wanna miss any of this crazy.

    Sign up to get my posts delivered to your inbox here.

    Stalk Me Here:

    Pinterest / Facebook / Twitter / Instagram
    SaveSave

  • 6 Creative and Easy Ways to Document Memories

    6 Creative and Easy Ways to Document Memories

    When the kid started talking, she would answer “Sure” instead of “Yes.” Example:

    Kid (screaming): “Emonade, emonade, emonade!”

    Me (about to lose my sh*t): “Would you like some lemonade?!”

    Kid (very nonchalantly, as if she wasn’t just screaming for it: “Sure.”

    She now says “Yes” more than “Sure,” which I know is the way things are supposed to go, but it does make me just a little sad.

    My point is, I’m always terrified I will forget those little things.

    I’m also worried about forgetting Grunt Labor’s ways of saying I Love You, like “You’re the thin set to my tile.”

    (Where does he come up with this stuff?)

    And the time Will asked if this was Jesus music on the radio.

    AWESOME ways to remember stuff! And super easy and cheap! 6 Creative and Easy Ways to Document Memories via RainonaTinRoof.com

    I mean, it is Garth Brooks, he’s kind of like the Jesus of country music, people.

    And then there was the time Grandma told the kid (at the age of 1), “Its amazing how advanced you are. Its also unfortunate.”

    Truer words were never spoken.

    So, to keep up with all those sweet (and humorous) memories of our cra-cra lives, I’ve found a few ideas.

    Creative and Easy Ways to Document Memories

    This post contains affiliate links for your shopping convenience. Click here to read my full disclosure policy.

    1. Memory Rocks

    AWESOME ways to remember stuff! And super easy and cheap! 6 Creative and Easy Ways to Document Memories via RainonaTinRoof.com

    Memory Rocks are something Grunt Labor and I already do. We’ve actually been doing these since the first year we were together and I realized that our courtship wasn’t just some fling. Apparently, he knew that long before I did, but that’s a whole other story. Each rock is numbered and that number represents a moment in our lives that we don’t want to forget. More details on our memory rocks (including some of our best memories are here.)

    2. Family, Guest, and Friends Notebook

    AWESOME ways to remember stuff! And super easy and cheap! 6 Creative and Easy Ways to Document Memories via RainonaTinRoof.com

    I had this idea a few weeks ago and it is definitely something I plan on putting into action in the new year. Sometimes, our friends will bring up some of the funniest things we have done and I will have totally forgotten about it. Case in point, when we went on the RV trip to the middle of nowhere and David and Heather reminded me about the party at their house where I moved around the house all night engrossed with the Ghost Radar app on their iPad.

    I’m a sucker for anything ghostly.

    Since our friends tend to have better memories than we do sometimes, I thought it would be fun to put a pretty notebook on our entry table and let them write down a few things before they leave our house after a visit. Of course, a green Kate Spade notebook that says Penny for Your Thoughts is my pick.

    3. Yearly Calendar or Planner

    AWESOME ways to remember stuff! And super easy and cheap! 6 Creative and Easy Ways to Document Memories via RainonaTinRoof.com

    I’m stealing this idea from my father-in-law. When Grunt Labor was born, his dad had a calendar and would write down anything that Grunt did on that day. So when the kid was born and we were wondering when Grunt Labor started eating solid foods or pooping on a regular schedule (I’m kidding – he’ll kill me for writing that), all we had to do was phone Mom and Dad, and they whipped out the calendar and told us. Seriously, how hard would it be to just buy an extra calendar or planner and jot down those memories right as they happen? I would suggest a planner or calendar that has large spaces for writing, and of course it has to be pretty, like this one.

    4. Ticket Stub Holder

    AWESOME ways to remember stuff! And super easy and cheap! 6 Creative and Easy Ways to Document Memories via RainonaTinRoof.com

    As soon as I saw this ticket stub holder idea from Lauren at The Thinking Closet, I did it. I mean, really, its so stinkin’ cute and its a fun and pretty way to display all those ticket stubs! One of the boys actually asked for one of his own recently and he’s in the full blown teenager stage. If he thinks its cool, its most definitely cool.

    5. Memory Jar

    AWESOME ways to remember stuff! And super easy and cheap! 6 Creative and Easy Ways to Document Memories via RainonaTinRoof.com

    I love how pretty and easy to make this Etched Glass Memory Jar is. You don’t have to stash it away – keep it out to enjoy all the time!

    6. Memory Box (from a Recipe Box)

    AWESOME ways to remember stuff! And super easy and cheap! 6 Creative and Easy Ways to Document Memories via RainonaTinRoof.com

    This is also another super simple way to keep up with those special moments. Wit and Whistle uses a pretty recipe box to document her life.

    Do you have any creative and easy ways to document memories?

    You know you don’t wanna miss any of this crazy.

    Sign up to get my posts delivered to your inbox here.

    Stalk Me Here:

    Pinterest / Facebook / Twitter / Instagram

    pin-this-post

     AWESOME ways to remember stuff! And super easy and cheap! 6 Creative and Easy Ways to Document Memories via RainonaTinRoof.com

    SaveSave

  • How to Cover Old Hardware Holes

    How to Cover Old Hardware Holes

    Want to change the location of hardware in your cabinet doors or on another piece of furniture but don’t know what to do about those old holes? It’s actually an easy fix! Here’s how to fill holes in wood….

    Apparently, its hardware themed week here.

    On Monday, it was how to restore your hardware in five minutes and today its how to cover old hardware holes.

    I didn’t realize that when I was flying by the stick of my broom planned out my posts.

    After my kitchen was featured in Better Homes & Gardens, there were a few new people who came over and asked how I covered the old hardware holes that were in the center of my cabinets.

    I’ve filled holes in furniture so many times now, I often forget I should actually tell you how I do it. I actually figured out how to do this myself in my former life when I was working on the old farmhouse. It was totally by trial and error, y’all.

    You see, I used to think paint would just magically fill holes in trim.

    smacking myself in the face

    After I replaced and painted the trim, I realized, “Oh, that didn’t work.”

    So I found this stuff called wood putty. We’ve been good friends ever since.

    Anyone else find it pathetic that I’m referring to myself and wood putty as good friends?

    How to Cover Old Hardware Holes | How to Cover Holes in Wood | How to Fill Holes in Wood | How to Fill Holes in Cabinets

    If you have seen my kitchen renovation before, you know that we kept our original cabinets and just painted over them. They were in really great condition and I didn’t want to give my first born child as collateral for new cabinets.

    The cabinets use to have centered hardware.

    Banish that old centered hardware! So easy to do! How to Cover Old Hardware Holes via RainonaTinRoof.com

    Now, just so you don’t think I’m pulling a fast one on you, this is not one of the cabinets that is currently in our kitchen. It did used to be in the kitchen, but when we opted to put in open shelving we were left with a couple extra cabinets and so this one is used for storage in the garage. It never got painted, so it was the perfect candidate for this tutorial.

    How to Cover Old Hardware Holes

    This post contains affiliate links for your shopping convenience. Click here to read my full disclosure policy.

    Supplies / Materials Needed: 

    • Wood Putty / Filler (If painting over the wood filler / cabinets, the color of filler doesn’t matter. If you are staining over the filler / cabinets, get a stainable filler.)
    • Fine Grit Sandpaper (I usually use about a 220 grit.)

    Step 1: 

    Remove the old hardware. If your cabinets are older like mine were, there may be a grimy outline of the old hardware left behind. Just sand this lightly until its smooth with the cabinet door.

    Banish that old centered hardware! So easy to do! How to Cover Old Hardware Holes via RainonaTinRoof.com

    Step 2: 

    Grab your wood filler / putty.

    Banish that old centered hardware! So easy to do! How to Cover Old Hardware Holes via RainonaTinRoof.com

    I have used lots of different fillers over the years and this Elmer’s Wood Filler Max is by far my favorite. Its the easiest to work with and the easiest to sand, in my opinion.

    Squeeze a small amount of the filler onto your finger, then rub it right into the hole in a circular motion.

    Banish that old centered hardware! So easy to do! How to Cover Old Hardware Holes via RainonaTinRoof.com

    Some people prefer to do this with a spatula, but honestly, I’ve found that my finger is the best tool.

    After you have covered the hole, let it dry (doesn’t take long at all) and then sand it smooth. After you have sanded it, you may need another coat of the filler. If you do, just repeat as needed. Typically, I find that most holes need 1-2 coats of filler.

    Finally, paint or stain over the filler with paint or stain of your choice.

    Banish that old centered hardware! So easy to do! How to Cover Old Hardware Holes via RainonaTinRoof.com

    As I said in the beginning, if you are staining or want to stain the spot where you filled the hole, be sure to buy one of the wood fillers that is stainable. The stain won’t match up with the rest of the door as well as paint would, but it won’t be too noticeable at all.

    Have you covered up old hardware holes before? Any tips or tricks you can share with us? 

    Looking for more hardware or cabinet tricks? You'll like these then...

    Easy Ways to Update Furniture Hardware - instead of buying new, give these ideas a whirl!

    Best Paint for Painting Kitchen Cabinets - different types of paint you can use for painting cabinets and which does what best.

    Want to remember this wood filler tip for later? Just pin the image below!

    How to Cover Old Hardware Holes | How to Cover Holes in Wood | How to Fill Holes in Wood | How to Fill Holes in Cabinets

    You know you don't wanna miss any of this crazy.

    Stalk Me Here:

    Pinterest / Facebook / Twitter / Google+ / Instagram

    SaveSaveSaveSaveSaveSaveSaveSaveSaveSaveSaveSaveSaveSaveSaveSaveSaveSaveSaveSaveSaveSaveSaveSaveSaveSaveSaveSaveSaveSaveSaveSaveSaveSaveSaveSaveSaveSaveSaveSaveSaveSaveSaveSave

  • DIY Golden Snake Bowl

    DIY Golden Snake Bowl

    At my old house, killing snakes was at least a monthly occurrence.

    There was the one time my Dad showed up, walked up the porch steps, immediately started jumping around and yelling, “JENNA, SNAKE!”

    It was wrapped around a porch chair, hissing.

    I killed it with a hoe.

    And there was the one that liked to live inside my roof on the back of the house. Every once in a while, it would stick its head out and I could see it from the kitchen window – I could never catch him.

    And then once, as I was walking down the stairs, talking to my cousin on the phone, I was met by a snake in the middle of the living room floor. I hung up, killed the snake, then called her back two minutes later.

    She answered asking if I was ok. Of course, it was just a snake.

    It was a nearly 100 year old farm house with lots of holes – what did you expect?

    Luckily, we don’t really have any snakes to deal with around here.

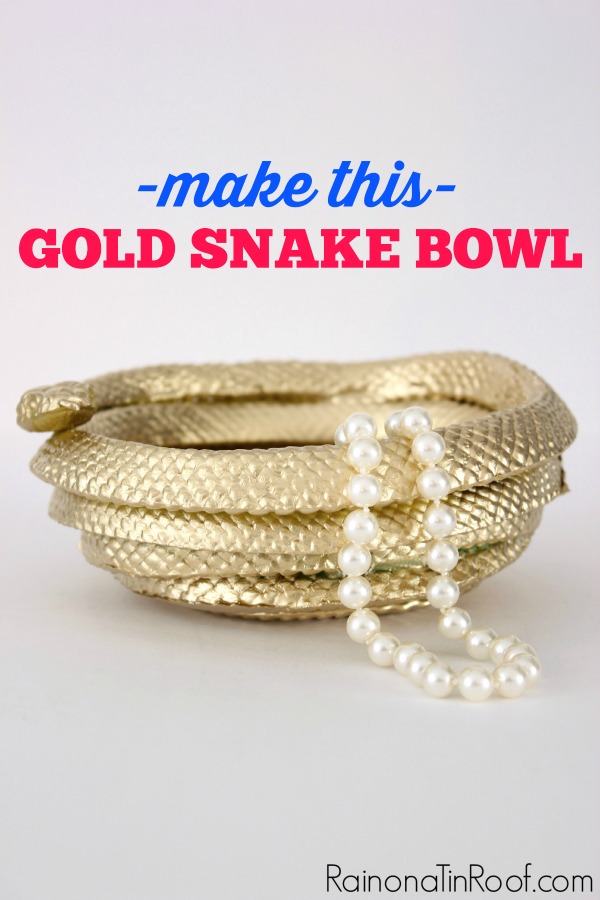
    Except pretty gold ones – made into a bowl.

    Had no clue you could do something like this with a heat gun! So many possibilities! DIY Gold Snake Bowl via RainonaTinRoof.com

    Disclosure: This post was sponsored by HomeRight. However, all opinions, snake killing stories, and love of golden snakes are 100% mine. This post contains affiliate links for your shopping convenience. Click here to read my full disclosure policy.

    Let me say that I do realize this will not be to everyone’s liking. I love it, so that’s all that matters. If you don’t like it, just use it as inspiration for something else you could make into a bowl.

    And also, before anyone starts to call me a devil worshipper because I made snake bowl – I’m not.

    I live in the south, I know someone is bound to think it.

    DIY Gold Snake Bowl

    Tools & Supplies Needed:

    Had no clue you could do something like this with a heat gun! So many possibilities! DIY Gold Snake Bowl via RainonaTinRoof.com

    • 2 Plastic Toy Snakes – I found that the best ones were the most flexible ones, which I found at The Dollar Tree.
    • Heat Gun – I used one of my new favorite tools, the HomeRight Heat Pro.
    • Heat Safe Gloves
    • Gold Spray Paint
    • Bowl that is approximately the size you want your bowl to be – make sure it will stand up to heat – mine was stainless steel.
    • Respirator Mask – just because you never know what kind of fumes the melting of the snakes will let off.

    Steps

    Step 1: 

    Put on the respirator. Turn your heat gun on – around medium high. Begin wrapping the snake into a circle, while focusing the heat between the rolls of the snake. Make sense?

    Had no clue you could do something like this with a heat gun! So many possibilities! DIY Gold Snake Bowl via RainonaTinRoof.com

    You don’t want to completely melt the snake, just weld it together.

    Step 2:

    Once you’ve got a small circle of him welded together, place it in the bowl and begin wrapping the snake around the bowl, while still focusing the heat gun in between his rolls.

    Had no clue you could do something like this with a heat gun! So many possibilities! DIY Gold Snake Bowl via RainonaTinRoof.com

    Every once in a while, stop and use your gloves to press down on the snake to weld him together well.

    Step 3: 

    Place your second snake in the bowl. Do this by taking the smallest end of the snake and placing it between the top rolls of the bottom snake as shown below.

    Had no clue you could do something like this with a heat gun! So many possibilities! DIY Gold Snake Bowl via RainonaTinRoof.com

    Heat it up and continue pushing it together with your gloves until its all welded together. Let the snake cool in the bowl for a couple of hours.

    Step 4:

    Once the snake is out of the bowl and fully cooled off, give it a coat of gold spray paint.

    Had no clue you could do something like this with a heat gun! So many possibilities! DIY Gold Snake Bowl via RainonaTinRoof.com

    Aren’t snakes much prettier gold?

    Had no clue you could do something like this with a heat gun! So many possibilities! DIY Gold Snake Bowl via RainonaTinRoof.com

    Especially when it only cost me a whopping $2, since I already had everything else on hand.

    I am in love with my heat gun – its one of my new favorite toys and so easy to use.

    Want to know what else a heat gun can do? 

    DIY Snake Bud Vase– made with a rubber snake too!

    How to Use a Heat Gun and 15 Things to do With It – you won’t believe all the things it’s capable of!

    How to Strip and Restain Furniture – so much less mess!

    You know you don’t wanna miss any of this crazy.

    Sign up to get my posts delivered to your inbox here.

    Stalk Me Here:

    Pinterest / Facebook / Twitter / Instagram

    pin-this-postHad no clue you could do something like this with a heat gun! So many possibilities! DIY Gold Snake Bowl via RainonaTinRoof.com

    SaveSave

  • DIY Faux Malachite Tray (For Less than $10)

    DIY Faux Malachite Tray (For Less than $10)

    Lately, I’ve been lusting.

    Lusting after this malachite fabric.

    I’ve kind of been dreaming and scheming to make that fabric into curtains for the living room.

    But I just can’t bite the bullet yet.

    But I do love malachite. 

    And as I was walking through the craft store the other day, plotting to make a pink and white marbled tray, I changed my mind.

    Which happens often. 

    I would make a faux malachite tray. 

    And I did.

    ANYONE can do this - its hard to mess up! And its cheap! DIY Faux Malachite Tray (For Less than $10) via RainonaTinRoof.com

    This post contains affiliate links for your shopping convenience. Click here to read my full disclosure policy.

    The best part?

    It will cost you $10 or less.

    If you are like me and tend to have some gold spray paint lying around, its only going to set you back about $6.

    Boom.

    How to Make a Faux Malachite Tray

    Materials & Supplies Needed:

    ANYONE can do this - its hard to mess up! And its cheap! DIY Faux Malachite Tray (For Less than $10) via RainonaTinRoof.com

    Steps

    Step 1: 

    Spray paint your picture frame gold.

    Step 2:

    Starting with the darkest color of green, squeeze out a line into the bottom of the tray. On both sides of the darkest green, squeeze out lines of the next darkest, and finally on both sides of those lines, squeeze out lines of the lightest green. It will eventually look like this:

    ANYONE can do this - its hard to mess up! And its cheap! DIY Faux Malachite Tray (For Less than $10) via RainonaTinRoof.com

    You will see that you kind of start to curve your lines as you work your way out. Don’t worry about that.

    Stop every once in a while and tap your tray against a level solid surface to kind of spread the paint out, but still maintain the pattern. Once you’ve got most of the tray covered with paint, you can move the tray around to get in any corners.

    Step 3:

    Run a toothpick back and forth and all around throughout the paint while it is still wet.

    ANYONE can do this - its hard to mess up! And its cheap! DIY Faux Malachite Tray (For Less than $10) via RainonaTinRoof.com

    Just go crazy with it until you have a pattern you like. You really can’t mess this up.

    Step 4: 

    Let the paint fully cure. This is a lot of paint, so its going to take a while. I let mine sit untouched for three days to let it fully dry.

    After its dry, you may have some green paint where you don’t want it on your gold, or maybe I’m the only hot mess crafter around. To cover those spots, I laid a few sheets of plain white printer paper in the tray and pressed it down with my hand while spray painting over the spots.

    ANYONE can do this - its hard to mess up! And its cheap! DIY Faux Malachite Tray (For Less than $10) via RainonaTinRoof.com

    Yes, your hands will get spray paint on them. Wear gloves if you aren’t down with that.

    Step 5: 

    After the spray paint dries, give your faux malachite a coat of satin Mod Podge and allow it to dry.

    ANYONE can do this - its hard to mess up! And its cheap! DIY Faux Malachite Tray (For Less than $10) via RainonaTinRoof.com

    This is totally one of my new favorite trays. I know – I’m kind of a tray whore.

    I love the way the gold snake bowl looks against the faux malachite.

    Are you a tray whore too? 

    Here are more tray makeovers you might like then…

    DIY Bathtub Tray – a simple build and functional!

    DIY Monogrammed Tray – makes a great gift!

     DIY Lucite Trays for less than $5 – so easy to make.

    You know you don’t wanna miss any of this crazy.

    Sign up to get my posts delivered to your inbox here.

    Stalk Me Here:

    Pinterest / Facebook / Twitter /Instagram

    pin-this-post

    ANYONE can do this - its hard to mess up! And its cheap! DIY Faux Malachite Tray (For Less than $10) via RainonaTinRoof.com

    SaveSaveSaveSaveSaveSave

  • 7 Unique Kitchen Island Ideas on a Budget

    7 Unique Kitchen Island Ideas on a Budget

    Increase the counter space and storage space in your kitchen with a new kitchen island – DIY style! Here are seven different kitchen island ideas on a budget that are functional and creative! 

    On the last three “house hunts” for a new home, a kitchen island was always at the top of the list in the kitchen space. The kitchen didn’t have to have an island right then, but there had to be a space where we could DIY one – and we’re pretty creative about fitting things like that in spaces. 🙂

    Kitchen islands can have a serious impact on your kitchen’s functionality – they can offer much needed food preparation space and also extra storage space. Who couldn’t use more of that in their kitchen?!

    These kitchen island designs are not only unique and creative, but they can easily be tweaked to work in any kitchen – big or small!

    Kitchen Island Ideas DIY

    DIY Reclaimed Materials Kitchen Island

    As you know, I am very partial to my kitchen island. I love it. Like love it so much, I threaten to be laid out on it when I die.

    kitchen island ideas on a budget - island made from reclaimed wood

    Grunt Labor & I built our kitchen island from barn wood out of my great grandfather’s barn and old porch posts.

    Turn a Sofa Table into a Kitchen Island

    kitchen island ideas diy - kitchen island made from a sofa table

    I had never thought of this before – find a sofa table you like and turn it into a kitchen island! That’s just what Designing Domesticity did! The open shelves below are perfect for larger kitchen items.

    Turn a Dresser into a Kitchen Island

    diy kitchen island ideas - island made from a dresser

    How about just taking an old dresser, painting it a bright color and turning it into an island? I love this one from You’re So Martha.

    diy kitchen islands on a budget - islands made from dressers with area for barstools.

    Here’s another dresser turned island, but this one from traerloves has an added overhang where you could push bar stools under. This would make the perfect spot for breakfast! Love how they added that overhang – such a unique diy.

    No room for a floating island? What about a kitchen peninsula?

    Turn a Dresser into a Kitchen Peninsula

    DIY Kitchen Peninsula made from a Dresser

    If you can’t get your hands on an old dresser, you could always pick up an IKEA dresser on the cheap and make it into an island. Ruffles and Such made her IKEA dresser into a peninsula and a breakfast bar.

    Small Kitchen Island Ideas

    Small diy kitchen island build

    This kitchen island looks pretty easy to make and very budget friendly from Kruse’s Workshop. It’s also narrow, so it would be perfect for a smaller rustic farmhouse kitchen.

    diy budget kitchen islands - rustic farmhouse kitchen island

    This kitchen island from Shanty 2 Chic is a bit more complicated to build, but only costs $85! It’s another one that is smaller scale so great for a small kitchen. It also has great shelves for storage and that butcher block countertop is gorgeous!

    Any DIY kitchen island ideas you’re brewing up?

    Need more DIY projects for the kitchen?

    See how I made laminate counters look like stone.

    And here are nine more DIY countertop makeover ideas.

    10+ Kitchen Ideas for Decorating, Organizing, and Storage – super good ones too.

    Want to come back to these kitchen island ideas later? Pin the image below!

    unique kitchen island ideas on a budget

    You know you don’t wanna miss any of this crazy.

    Stalk Me Here:

    Pinterest / Facebook / Twitter / Instagram

  • DIY Lucite Frame + Gone With the Wind Printable

    DIY Lucite Frame + Gone With the Wind Printable

    I am a sucker for many things.

    Laffy Taffy.

    Kelly Green.

    Oh, and Navy Blue or Cobalt Blue – its pretty good too.

    Sausage & Biscuits.

    Grunt Labor.

    Cherry Coke.

    Cheap Beer.

    Lucite.

    Good Southern Movies.

    The last two are the focus of this project.

    Because really who doesn’t love a little faux lucite and a good Gone With the Wind quote?

    Now, let’s pair those together in this DIY Lucite Frame.

    AWESOME idea to really showcase the art - super affordable too! DIY Lucite Frame + Gone With the Wind Printable via RainonaTinRoof.com

    This post contains affiliate links for your shopping convenience. Click here to read my full disclosure policy.

    Start to finish, this is going to take you all of 10 minutes. If that.

    Boom.

    How to Make a Lucite Wall Frame

    Tools & Supplies Needed:

    AWESOME idea to really showcase the art - super affordable too! DIY Lucite Frame + Gone With the Wind Printable via RainonaTinRoof.com

    • Printable (link at end of post) or other art of your choice.
    • 2 pieces of Acrylic or Styrene Sheets in whatever size of your choice. Mine are 18″ x 24″, but you can do whatever size you want. I got mine at Home Depot. They are also on Amazon and I’m sure at other home improvement stores.
    • 4 – #8 Machine Screws 3/4″ length (the length can be smaller if you aren’t using as thick of acrylic as I was.)
    • 4 – #8 Screw Nuts
    • Drill and Drill Bit the size of your screw ends
    • 4 Small Clamps
    • Pen or Pencil

    Steps

    Step 1: 

    Take the plastic off the acrylic.

    AWESOME idea to really showcase the art - super affordable too! DIY Lucite Frame + Gone With the Wind Printable via RainonaTinRoof.com

    Step 2: 

    Place your art on one of the pieces of acrylic. You may want to put a couple pieces of tape on the back of the art to keep it in place while you make the frame. Next, place the other piece of acrylic directly on top of that.

    AWESOME idea to really showcase the art - super affordable too! DIY Lucite Frame + Gone With the Wind Printable via RainonaTinRoof.com

    Clamp it all together.

    Step 3: 

    Mark where you want your screws to go.

    AWESOME idea to really showcase the art - super affordable too! DIY Lucite Frame + Gone With the Wind Printable via RainonaTinRoof.com

    I came in about 1 1/4″ on both sides.

    Step 4: 

    Going slowly and not putting too much pressure on the drill, drill through your marks until you make it through both pieces of acrylic.

    AWESOME idea to really showcase the art - super affordable too! DIY Lucite Frame + Gone With the Wind Printable via RainonaTinRoof.com

    Step 5:

    Place a screw through each of the holes and screw a nut onto the back.

    AWESOME idea to really showcase the art - super affordable too! DIY Lucite Frame + Gone With the Wind Printable via RainonaTinRoof.com

    AWESOME idea to really showcase the art - super affordable too! DIY Lucite Frame + Gone With the Wind Printable via RainonaTinRoof.com

    Heck of a lot cheaper than having someone else frame art for you.

    AWESOME idea to really showcase the art - super affordable too! DIY Lucite Frame + Gone With the Wind Printable via RainonaTinRoof.com

    Don’t you just love that quote from Rhett?

    It will never get old.

    Free Gone with the Wind Printable

    I hope you have a damn good day.

    Looking for more great projects to add to your list?

    How to Make a Huge Wall Frame for Cheap – and I mean huge. And cheap.

    DIY Lucite Handrail – the sexiest handrail you ever did see.

    DIY Lucite Trays – another lucite hack and it costs less than $5 to make.

    Free Printable Horse Art – gorgeous artwork that’s free!

    You know you don’t wanna miss any of this crazy.

    Sign up to get my posts delivered to your inbox here.

    Stalk Me Here:

    Pinterest / Facebook / Twitter / Instagram

    pin-this-post

    AWESOME idea to really showcase the art - super affordable too! DIY Lucite Frame + Gone With the Wind Printable via RainonaTinRoof.com

    SaveSave

  • Duck Tape Fringe Pillow: Dress Up Boring Pillows on the Cheap

    Duck Tape Fringe Pillow: Dress Up Boring Pillows on the Cheap

    I found a new obsession.

    I know. I find a new obsession at least once a week, but I’m ADD – work with me here.

    This week’s new obsession?

    Duck Tape Fringe.

    Especially this pillow that is adorned with golden fringe – made with, yes, Duck Tape.

    Seriously?! DUCK TAPE FRINGE! And its easy to make! Duck Tape Fringe Pillow: Dress Up Boring Pillows on the Cheap via RainonaTinRoof.com

    Disclosure: This post was a collaboration with Fiskars Scissors. However, all opinions and newfound love of Duck Tape fringe is 100% mine. This post contains affiliate links for your shopping convenience. Click here to read my full disclosure policy.

    I know, right?

    That gold paired with the hot pink = AMAZINGNESS.

    And its Duck Tape.

    Duck Tape. 

    Best part? SUPER EASY TO MAKE.

    How to Make Fringe from Duck Tape

    Materials & Supplies Needed:

    Seriously?! DUCK TAPE FRINGE! And its easy to make! Duck Tape Fringe Pillow: Dress Up Boring Pillows on the Cheap via RainonaTinRoof.com

    Steps

    Step 1:

    Choose which side of your pillow you want to start with. It doesn’t matter which side you choose. I opted to go with one of the short sides first.

    Cut a piece of duck tape that is as long as (or if you are paranoid like me, a little longer) than that side with the bigger 8″ duck edition scissors.

    Seriously?! DUCK TAPE FRINGE! And its easy to make! Duck Tape Fringe Pillow: Dress Up Boring Pillows on the Cheap via RainonaTinRoof.com

    These scissors are new from Fiskars and are specifically made to use with Duck Tape. Ya know how your regular scissors get all gunky and gum up when you cut lots of duck tape?

    These don’t.

    And they are sharp.

    Score.

    Step 2: 

    Cut another piece of duck tape the same size as the strip you just cut. Place the two strips on top of each other – sticky side together. The photo below is where I made two strips at one time. You get the idea though.

    Seriously?! DUCK TAPE FRINGE! And its easy to make! Duck Tape Fringe Pillow: Dress Up Boring Pillows on the Cheap via RainonaTinRoof.com

    You should now have one strip of duck tape that has gold (or your color of choice) on both sides – no sticky anywhere.

    If it works better for you, instead of cutting out two separate strips, you can pull off a length of tape that is double the size of one of your pillow sides and then fold it back down onto the tape strip and cut it. See photo below.

    double-strip

    Step 3: 

    Trim up any places where your tape didn’t meet up exactly.

    Seriously?! DUCK TAPE FRINGE! And its easy to make! Duck Tape Fringe Pillow: Dress Up Boring Pillows on the Cheap via RainonaTinRoof.com

    Don’t worry about the tape being a perfect rectangle – it isn’t going to happen and it doesn’t matter. You’ll never be able to tell with all the fringe.

    Step 4:

    Pull out your small 5″ detail scissors.

    Seriously?! DUCK TAPE FRINGE! And its easy to make! Duck Tape Fringe Pillow: Dress Up Boring Pillows on the Cheap via RainonaTinRoof.com

    These are specially made for making smaller, detail cuts.

    Starting at one edge of your tape strips, cut smaller strips into the tape, but don’t go all the way through it.

    Seriously?! DUCK TAPE FRINGE! And its easy to make! Duck Tape Fringe Pillow: Dress Up Boring Pillows on the Cheap via RainonaTinRoof.com

    Do this until you have made lots of little strips over the whole larger strip.

    Step 5: 

    Cut off a piece of duck tape that is the length of the large strip you have that you just fringed up. Place the fringed strip on the edge of the strip you just cut.

    Seriously?! DUCK TAPE FRINGE! And its easy to make! Duck Tape Fringe Pillow: Dress Up Boring Pillows on the Cheap via RainonaTinRoof.com

    Step 6:

    Place the sticky side of the piece you now have around your pillow edge. Press it firmly into the pillow.

    Seriously?! DUCK TAPE FRINGE! And its easy to make! Duck Tape Fringe Pillow: Dress Up Boring Pillows on the Cheap via RainonaTinRoof.com

    You can loosen the fringe up a bit by ruffling your fingers through it as shown above.

    Step back and be amazed by your awesomeness. 

    Seriously?! DUCK TAPE FRINGE! And its easy to make! Duck Tape Fringe Pillow: Dress Up Boring Pillows on the Cheap via RainonaTinRoof.com

    YOU GUYS.

    I have so many more ideas for this duck tape fringe since it was ridiculously easy to make!

    Those Fiskars Duck Edition Scissors knocked this project out in record time – love ’em!

    Need more Duck Tape Project Ideas? I got yo’ back:

    20+ Duck Tape Crafts, Projects & Ideas – behold the awesomeness of the duck tape.

    Duck Tape Trimmed Curtains – take basic, blah curtains and turn them into anything but boring.

    Duck Tape Shower Cornice – easy project, big impact.

    And don’t miss these amazing home projects made using electrical tape!

    You know you don’t wanna miss any of this crazy.

    Sign up to get my posts delivered to your inbox here.

    Stalk Me Here:

    Pinterest / Facebook / Twitter / Instagram

    pin-this-post

    Seriously?! DUCK TAPE FRINGE! And its easy to make! Duck Tape Fringe Pillow: Dress Up Boring Pillows on the Cheap via RainonaTinRoof.com

    SaveSave

  • Power Tools 101: How to Use a Drill

    Power Tools 101: How to Use a Drill

    A drill is one of the most versatile power tools a person can own. The best thing about it? Learning how to use a drill isn’t hard at all. Besides it being versatile, using a drill is pretty easy. 

    About a month and a half back, I was chatting with Gina from The Shabby Creek Cottage and attempting to bribe my child to be quiet with a popsicle so I could actually hear what Gina was telling me. I finally figured out we were troubleshooting what she should hang on a blank wall in her living room.

    One thing led to another and before we knew it, we were planning a Power Tools 101 series.

    Why?

    Because we’re bad asses like that.

    And we are ADHD.

    Ok, that’s not really the reason.

    The real reason is because we think that every woman (and all 3 men who read my blog, but don’t need this post – Hi Dad, Dad, and Grunt Labor) should know the basics of power tools.

    Why should you know the basics?

    Because you are a bad ass.

    And every bad ass knows their way around power tools.

    How to Use a Drill - Parts of a Drill and Instructions for Using One - Rain on a Tin Roof

    Once a month, Gina and I are each going to cover a different power tool. We are going to show you the basics of how the tool works and what it can do.

    This month, I am giving you the basics on cordless drills and Gina is sharing the how-to for a jigsaw.

    Using a Drill - In-Depth article on power drills - Rain on a Tin Roof

    This post contains affiliate links for your shopping convenience. Click here to read my full disclosure policy. 

    Please use all appropriate and proper safety precautions when using tools and attempting projects. All projects and tool usage are attempted at the reader’s own risk.

    First off, the photo above is of the actual drill that we have – a Ryobi One Plus 18V. So far, it has worked really well for us.

    Using a Drill

    Parts of a Drill

    I’m sure I don’t have to tell you where the trigger is or that it makes the drill “go,” but just in case, here ya go…

    How to Use a Power Drill - Trigger and Controlling Direction of Drill - Rain on a Tin Roof

    There is a button on each side with an arrow. You push it back and forth and it controls which direction the drill drives – reverse (counter clockwise) or forward (clockwise). You can also think of it as going inward (clockwise) when drilling into wood or attaching screws or outward (counter clockwise) when pulling a drill bit back out of wood or removing a screw.

    Using Power Drills - Controlling the Torque - Rain on a Tin Roof

    Our drill has a dial on top that controls the torque (power / force) that the drill drives with. The lower the number, the less torque and vice versa. Typically, I keep the drill on the lowest number, unless I am drilling into something pretty hard that I need more power with.

    What a Drill Can Do

    Driving Screws with a Drill

    When you are driving a screw, you will want to use a screwdriver bit in the end of your drill that matches the type of screw you are driving. Most likely, you will need to use a straight or a phillips head drill bit.

    How to Attach Screws with a Drill - Types of Screws - Rain on a Tin Roof

    And here are what some screwdriver bits look like:

    How to Use Screwdriver Bits in a Drill - Rain on a Tin Roof

    This is one set of screwdriver bits we have – a 45 piece set from DeWalt – it has just about any shape or size you could need.

    To insert a bit into your drill. Hold your hand firmly around the front part of your drill keeping it still while running the drill in reverse (#1 below). The opening will get larger as you continue to go in reverse (#2) and smaller as you go forward (#3).

    How to Change Bits in a Power Drill - Rain on a Tin Roof

    When the opening is big enough for your bit to fit in, but small enough for it not to fall too far in the hole, place your bit in the opening, hold your drill firmly as you did before and run the drill in the forward (inward) motion until the bit is securely in the drill (#4).

    You can also twist the front part of your drill to release and tighten bits into the drill.

    As a side note, Grunt Labor and I have a screw guide that we keep on our drill just about all the time. You put it in and remove it the same way you do a regular drill bit.

    Using a Sleeve Cover in a Power Drill - Rain on a Tin Roof

    Once you place a screw on the bit, you pull the sleeve over the screw and it helps to keep it stable while you are drilling the screw. The cover moves itself back as the screw goes into your surface.  A screw guide isn’t necessary, but is super helpful with getting your screws in straight and not having the screw fall off the bit a million times – especially with long screws.

    Ok, now that we have a screwdriver bit in the drill, let’s put the screw into the wood. Hold the drill straight (the picture below is not a good example of this because I was taking photos with one hand and using the drill with the other), firmly push down on the drill and pull the trigger at a slow and steady pace.

    How to Screw Into Wood with a Power Drill - Rain on a Tin Roof

    To remove screws, simply place the screwdriver bit into the screw you are removing, push the button on the side of the drill to make the drill go in the counterclockwise direction and pull the trigger.

    How to Use a Drill Bit

    Drilling Pilot Holes

    Sometimes, you may want to drill a pilot hole before placing your screw directly into the wood. Pilot holes keep your wood from splitting. You will do this with regular drill bits that make holes.

    Drill Bits for Drills - Rain on a Tin Roof

    The above set is one that belonged to Grunt Labor’s grandpa and it is great. This set would also be a good option that has just about any size you would ever need.

    To drill a pilot hole, select a drill bit that is a little smaller than the tip of your screw. Place the bit in your drill using the same method you used for putting the screwdriver drill bit in place. One more, firmly press down straight onto your drill, while pulling the trigger with a firm and steady motion to start drilling and create your pilot hole (#1 below).

    How to Use a Drill Bit with Power Drills - Step by Step - Rain on a Tin Roof

    After your pilot hole is drilled, reattach your screwdriver bit and drill the screw in. If you want to really look like a pro, before putting the screw back in, you can take a larger drill bit, the size of the screw’s head (#2 above) and drill out just a tad bit more where your pilot hole is (#3 above). You just want to drill out enough to where the screw’s head will sink into the wood (called counter-sinking). Once you have done this, drill your screw in and place wood putty on top of the screw – you won’t even be able to tell the screw is there (#4 above).

    More Useful Drill Bits

    There are other fun and useful bits you can use with a drill, like a spade drill bit.

    How to Use a Spade Drill Bit with a Power Drill - Rain on a Tin Roof

    Drilling a hole with a spade drill bit cuts out circles in wood.  You can also get hole saw bits which cut out much larger circles – you can use them for things like cutting out drink holders in a swing.

    And if you need to mix up something large, you can use a mixing bit.

    Using a Mixing Bit with a Cordless Drill - Rain on a Tin Roof

    Mixing drill bits are super handy for mixing grout, paint, and huge batches of cookies.

    Well, I haven’t tried the cookie thing, but I’m pretty sure it would work.

    Not too hard, huh?

    Seriously, anyone can use a drill. Anyone.

    Just don’t let your two year old play with it…. you may end up with a few holes in the wall….not like that’s ever happened to me or anything…

    Head over to The Shabby Creek Cottage for a crash course in using a jigsaw – now you get to cut stuff!

    Got any tips on how to use a power drill?

    Share them in the comments!

    Looking for more power tool 101 how-to’s? 

    How to Use a Circular Saw – a must have tool for any DIYer.

    How to Use a Miter Saw – probably my favorite power tool.

    How to Use a Heat Gun and 15 Things to Do With It – you won’t believe just what all a heat gun can really do!

    How to Use a Sander – a must for furniture makeovers!

    Need tool suggestions? Here are the best tools for DIYers at any level.

    Want to come back here later? Just pin the image below.

    Beginner's Guide on How to Use a Drill and What All It Can Do - Rain on a Tin Roof

    You know you don’t wanna miss any of this crazy.

    Sign up to get my posts delivered to your inbox here.

    Stalk Me Here:

    Pinterest / Facebook / Twitter / Instagram

    Power Drills and How to Use Them - Rain on a Tin Roof

    SaveSave

  • How to Make a Lampshade & Finial (Giddy up, Cowgirl)

    How to Make a Lampshade & Finial (Giddy up, Cowgirl)

    I’m usually really good at saying no to impulse buys.

    Well, except for when something is on clearance. If its on clearance and I love it, but have absolutely no need for it, its definitely coming home with me.

    I have a fabric hoarding problem as well.

    Its all just so pretty and colorful and pattern-ful. (That’s totally a word.)

    And so when I saw this cowgirl fabric this past spring, I had to have it.

    I also had no use for it whatsoever.

    Until I found this gold lamp on clearance at Target.

    And I didn’t have a use for it either.

    But I bought it anyway.

    And then I needed a shade.

    And then Kiri from i like that lamp sent me a lampshade kit.

    And then I thought of the cowgirl fabric.

    And then a cowgirl lampshade was born.

    And then all was right in the world.

    How to Make a Lampshade | DIY Lampshade | DIY Lampshade Ideas | DIY Lampshade from Scratch | How to Make a Lamp Finial | Lampshade Ideas

    Disclosure: i like that lamp provided me with supplies for this project. However, all opinions and cowgirl fun is 100% mine. This post contains affiliate links for your shopping convenience. Click here to read my full disclosure policy.

    How to Make a Lampshade

    With this kit, its really easy to turn any fabric into a lampshade! Here’s what you’ll need:

    • DIY Lampshade Kit (Mine was the 12 x12 one, there are other sizes available as well)
    • Fabric of your choice (I think I used about 1/2 a yard or so. This is a similar fabric to the one I used. It doesn’t look like they are selling mine anymore.)
    • Scissors
    • An old paintbrush

    Steps

    Step 1: 

    Open up your kit and remove the styrene sheet.

    You can literally turn ANY fabric into a lampshade! Think of all the possibilities! How to Make a Lampshade & Finial via RainonaTinRoof.com

    It’s wrapped in the tissue paper. 🙂

    Lay your fabric facedown on a flat surface. Make sure its free from wrinkles. Remove six inches or so of the backing from the styrene and place the styrene on the fabric (its sticky). Slowly remove the rest of the backing while you are sticking the styrene to the fabric.

    You can literally turn ANY fabric into a lampshade! Think of all the possibilities! How to Make a Lampshade & Finial via RainonaTinRoof.com

    Cut out the fabric, leaving an inch or so around all edges except for one short edge.

    Step 2:

    On the short end where you did leave some fabric overhang, go ahead and glue (the glue is included in the kit) that fabric edge down and over the styrene.

    You can literally turn ANY fabric into a lampshade! Think of all the possibilities! How to Make a Lampshade & Finial via RainonaTinRoof.com

    Step 3: 

    Stand the styrene up and shape it into a lampshade. Use the included clips to hold it in place. Attach more of the clips along the top edges of the lampshade and place one of the rings on top of the clips. If your fabric has a pattern that has a definite “right side up” motif, make sure you place the ring with the finial attachment (center ring in middle) on top. See photo #1 below. Make sense?

    You can literally turn ANY fabric into a lampshade! Think of all the possibilities! How to Make a Lampshade & Finial via RainonaTinRoof.com

    Run glue around the edges of your fabric and spread it around good with the paintbrush (#2). Pull the fabric over and under the ring and push it in tight with the wooden stick included in the kit (#3).

    When you have one end done, flip the shade over and do the same thing on the other end.

    Finally, run glue between the two end edges on the side of the lampshade and push firmly together.

    Let it dry well before placing it on the lampshade.

    And as if it could get any better than a cowgirl lampshade, how about a horse finial to top it off?

    Honestly, I think I may have been more excited about the finial kit than the lampshade because I love finials, but they are so overpriced. The finial kit is only $5. Yep, $5.

    You can literally turn ANY fabric into a lampshade! Think of all the possibilities! How to Make a Lampshade & Finial via RainonaTinRoof.com

    All you do is choose a small object to put on the finial, put a bit of super glue (included in the kit) on the gold hardware piece in the kit and stick your object on there. I just spray painted a plastic horse red.

    You can literally turn ANY fabric into a lampshade! Think of all the possibilities! How to Make a Lampshade & Finial via RainonaTinRoof.com

    There are many more finials in my future.

    Big fan of lamps? Me too. See these then…

    How to Make Lamp Tassels in Five Minutes– gorgeous, simple to make tassels to easily dress up those lamps!

    DIY Agate Slice Lamp Finial – easy to make agate finials that are loads cheaper than what you’d find in a store!

    16+ Lamp Ideas and Makeovers  – the ultimate list in lamp makeovers and genius lamp ideas!

    pin-this-post

    How to Make a Lampshade | DIY Lampshade | DIY Lampshade Ideas | DIY Lampshade from Scratch | How to Make a Lamp Finial | Lampshade Ideas

    Giddy up! 

    You know you don’t wanna miss any of this crazy.

    Sign up to get my posts delivered to your inbox here.

    Stalk Me Here:

    Pinterest / Facebook / Twitter / Instagram

    SaveSave

  • DIY Quote Art {Free Sex and the City & Dirty Dancing Printables}

    DIY Quote Art {Free Sex and the City & Dirty Dancing Printables}

    If you know anything about me, its probably two things:

    1. I like cheap beer.

    2. I quote Sex and the City waaaay too much.

    Seriously guys, its impossible for me to count how many times I have quoted Carrie Bradshaw or any character from Sex and the City on this blog. And then there’s all the times I’ve quoted it in real life – besides to my friends that live in the computer as Grunt Labor says.

     In the ongoing group text message between myself, Grunt Labor, Nicky, and the Man of Questionable Honor, I know there were two days in a row where Sex and the City quotes were flying everywhere.

    You see, The Man of Questionable Honor has not only moved to New York City (the Sex and the City mecca), but he has fallen in love.

    And as Carrie Bradshaw said,

    “Year after year, twenty-something women come to New York City in search of the two L’s: labels and love.”

    Ok, so Brandon is a guy and he’s not in his 20’s, but ya know, same thing. He’s got both L’s now.

    Anyone who knows me would also say I am incredibly random.

    The previous paragraphs prove this.

    Let’s chat about this DIY Quote Art today, shall we?

    I also have some snazzy printables for ya!

    DIY Quote Art {Free Sex and the City & Dirty Dancing Printables} via RainonaTinRoof.com

    This post contains affiliate links for your shopping convenience. Click here to read my full disclosure policy.

    When I realized the bathroom was getting a makeover, even though I hadn’t intended for it to, I knew I wanted to change up the decor on the built-in bathroom shelving.

    I needed new art.

    And I love quotes.

    Quote art was obviously the way to go.

    DIY Quote Art {Free Sex and the City & Dirty Dancing Printables} via RainonaTinRoof.com

    The More Issues Than Vogue is a Sex and the City quote.

    I made it by wrapping some of the black and white fabric leftover from the DIY shower curtain and cornice around a canvas and stapling it.

    DIY Quote Art {Free Sex and the City & Dirty Dancing Printables} via RainonaTinRoof.com

    I placed the printable on top, pushed furniture tacks through the corners, then put a bit of hot glue around the backs of the tacks to secure them.

    how-to-bathroom-wall-art

    The other quote, I carried a watermelon, is from…

    Come on, you should know this!

    DIY Quote Art {Free Sex and the City & Dirty Dancing Printables} via RainonaTinRoof.com

    Dirty Dancing. 

    Its one of my favorite movies. Ever.

    These printables were easy to whip up. I made them with PicMonkey and had them both finished in under 10 minutes.

    But…if you want, I’ll share them with you – for free.

    ‘Cause I’m cool like that.

    Free Sex and the City and Dirty Dancing Quote Art

    DIY Quote Art {Free Sex and the City & Dirty Dancing Printables} via RainonaTinRoof.com

    Looking for more free printable art? 

    Here’s Your One Chance Fancy Printable Art – Yep, just like the Reba song.

    This Kitchen is for Dancing Printable – because, what else would it be for?

    Frankly My Dear, I Don’t Give a Damn Printable – just like Rhett told Scarlett.

    Find Her Jesus, Keep Her Well Printable – for all the girls in your life. 🙂

    You know you don’t wanna miss any of this crazy.

    Sign up to get my posts delivered to your inbox here.

    Stalk Me Here:

    Pinterest / Facebook / Twitter / Instagram

    SaveSave

  • 10+ Gorgeous DIY Accent Wall Ideas for Just $30 or Less

    10+ Gorgeous DIY Accent Wall Ideas for Just $30 or Less

    Want to create a gorgeous focal point in your home? Have you thought about an accent wall? These DIY accent wall ideas bring the beauty but don’t require a lot of cash!

    Feature walls can be a total game changer for a room. Not only do they add character and beauty, but they can define a space and bring it to a whole other level – not that this happened in my dining room or anything lately. 😉

    Below you’ll find a few of my favorite easy and cheap accent wall ideas for multiple different areas in your home! The best part? Each one costs just $30 or less to complete!

    Easy Accent Wall Ideas

    Washed Out Stripes Wall

    DIY accent wall ideas- washed out blue stripes in a bathroom

    Bathroom Accent Wall

    A sample pot of paint. Yep. Just that, a ruler and some tape and you can create this washed out stripe look in your home!

    Object and Text Wall

    cheap accent wall ideas - combining objects and vinyl text on a wall

    Kids Room Wall

    This is one of the sweetest walls I’ve ever done. I mixed in objects and vinyl text lettering to create a feature wall especially for my daughter.

    Carpeted Wall

    easy accent wall - putting green astroturf carpet on a wall with pink accents.

    Putting Carpet on Walls

    Yes m’am, I did! Carpeted feature walls got a bad vibe back in the day, but I’m on a mission to change that! I put a $30 astroturf rug on a wall in my bedroom and it added the perfect amount of color and texture to the space.e

    Cane Inspired Feature Wall

    accent wall ideas -  green and white lattice bathroom wall

    Cane Inspired Accent Wall for $25 or Less

    This one might look a little complicated, but it’s actually quite easy! All you need is a little painter’s tape and paint, of course! This bathroom accent wall could be recreated in any space in your home.

    Painting One Wall

    create an accent wall by painting one wall only - blue feature wall against gray walls

    Blue Accent Wall

    You don’t always have to paint every wall or create a pattern on the walls – sometimes just painting one will do the trick!

    Gallery Wall that Hides the TV

    Accent Wall Ideas for Living Room - black and white gallery wall that hides the tv

    Black & White Gallery Wall

    This is still one of my favorite walls to date! I love this black and white gallery wall for two reasons. 1. It takes your wall art to a whole other level. 2. The television practically disappears into the wall.

    Wood Accent Wall

    Wood accent wall in a masculine bathroom

    DIY Wood Wainscoting Panels

    This is a cheap way to bring gorgeous stained wood walls into a room!

    Fun and Carefree Wall

    diy accent wall ideas - white wall with gold confetti on the wall.

    Confetti Accent Wall

    This easy confetti accent wall isn’t only easy and cheap to make, but its also fun. It adds a touch of whimsy to any space and is ridiculously easy to complete! This one is super budget friendly too – you can just use a bottle of craft paint for it!

    Classic Style Accent Wall

    cheap accent wall ideas - traditional black and white criss cross wall.

    Criss-Cross Accent Wall

    This criss-cross wall was a huge game-changer for my dining room! It helps to anchor the dining room with it’s traditional feel and pattern, but can easily work with color and modern decor as well.

    An Accent Ceiling

    accent wall on the ceiling - pink and white ceiling

    Pink Ceiling

    How about an accent ceiling? I painted my bathroom ceiling pink with faux white moldings. It adds a lot of interest to an otherwise all white bathroom. You can always opt for a different paint color to not make it seem as girly.

    Accent Squares

    easy accent wall - gray squares on a white wall

    Painted Wall Treatment on a Budget from Thistlewood Farms

    I love this simple graphic wall treatment from Karianne. And guess what? She did it with just a sample pot of paint!

    No Paint Accent Wall

    black and white accent wall using tape

    Striped Accent Wall without Paint from Homey Oh My

    This accent wall doesn’t even require paint! And isn’t that black and white classic?

    Stencil Wall

    white circles stenciled on a beige wall

    Circle Patterned Wall from Lilikoi Joy

    I love the circles on this one – adds a good dose of fun! You just switch it up with any kind of colors you prefer!

    Square on Squares Accent Wall

    squares on squares accent wall

    Graphic Statement Wall from AKA Design

    Squares are always a favorite of mine – and these make a bold statement, but are a simple pattern. This would be great in a modern home.

    Triangle Wall

    peel and stick triangles no paint accent wall

    Triangle Accent Wall from Upcycled Treasures

    Another one that doesn’t require paint! If modern is your style, this one might be perfect for your home too. Simply use peel and stick triangles to achieve the look!

    + Accent Wall

    Modern Accent Wall Idea

    Plus Signs Accent Wall from Knack Studios

    These plus signs or crosses are a fun and unexpected twist for another modern statement wall! You could easily create them with paint pens or electrical tape!

    Now go create an accent wall and come back and tell us all about it!

    Want more great ideas for your walls?

    Wall Paint Design Ideas with Tape – if you can tape it off, you can make it happen! You won’t believe some of these walls!

    DIY Indoor Lattice Wall – yes, lattice inside makes for a gorgeous wall treatment!

    Want to come back to these wall ideas later? Just pin the image below!

    Looking for BIG bang for your buck? Here are 9 Accent Walls for $30 or Less - includes lots of wall painting ideas, techniques and designs - and they are all DIY projects! Great painting ideas!

  • Criss-Cross Accent Wall for $30 or Less

    Criss-Cross Accent Wall for $30 or Less

     First off, the title of this post totally has me singing the Kriss Kross Jump song – you’ll think me later for sharing that link.

    Other than Criss-Cross, I couldn’t think of a better description for this wall though – besides of course amazingly-awesome-and-total-game-changer-for-my-dining-room.

    But that would have been a really long title.

    Now, in true “Jenna” fashion, I discovered how and how not to do this type of accent wall.

    I started out doing it one way and then ended up doing it another way.

    Either way, this criss-cross accent wall was truly a huge game changer for my dining room and does make me wanna jump-jump.

    Criss-Cross Accent Wall for $30 or Less via RainonaTinRoof.com #diy

    Disclosure: This post is sponsored by FrogTape. However, all opinions, game-changing black and white accent walls, and references to Kriss Kross are 100% mine.  This post contains affiliate links for your shopping convenience. Click here to read my full disclosure policy.

    Depending on what colors you want to use and how big your wall is, you can totally get by with $30 for creating this wall.

    Yes, $30 for one huge impact.

    Jump jump!

    Ok, I’ll quit referencing Kriss Kross songs now. Maybe.

    Materials & Supplies Needed:

    Steps

    Step 1

    If you are cool with the current paint color on your wall and just want to add in the criss-cross, leave your wall color as is and just choose a color for the criss-cross. If not, go ahead and paint your wall. I wanted the crisp black and white combo, so I painted the wall first with my paintstick and Snowfall by Behr.

    Step 2

    To make the criss-cross pattern, you are essentially creating squares that you will paint around. To start it off, take a piece of 12 x 12 cardboard or 12 x 12 scrapbook paper and place it in the top center of your wall turned sideways. Trace around the cardboard / paper.

    Criss-Cross Accent Wall for $30 or Less via RainonaTinRoof.com #diy

    After you have traced it, place your FrogTape along your lines. You want the outside edge of your FrogTape to go right along the traced lines, therefore keeping your overall square 12 x 12, but making the white space within the tape smaller than that. Make sense?

    Step 3

    From here, you can go about making the rest of the pattern two ways. The first way is to place two pieces of tape along the edges of your square you just made and then trace another square, and repeat steps two and three until your wall is covered. Like this:

    Criss-Cross Accent Wall for $30 or Less via RainonaTinRoof.com #diy

    I did this method for a little while and then saw that my pattern was becoming quite uneven. I removed some of my uneven spots and started using a good old ruler and pencil to measure out the rest of my pattern. Either way you do it, I suggest using the 12 x 12 piece of cardboard or scrapbook paper to make your first square. The measurements below are what you should be using to get your squares right:

    Criss-Cross Accent Wall for $30 or Less via RainonaTinRoof.com #diy

    Just take your ruler and make tick marks, then put your tape along those marks and repeat.

    Criss-Cross Accent Wall for $30 or Less via RainonaTinRoof.com #diy

    Step 4

    Once you have all your pattern taped out, you need to go back and even up your tape edges, so that you have perfect squares and can paint around them. I did this with an X-Acto knife and ruler.

    Criss-Cross Accent Wall for $30 or Less via RainonaTinRoof.com #diy

    Step 7

    After your tape is squared up, take a credit card and use it to press firmly along the edges to seal the tape.

    Criss-Cross Accent Wall for $30 or Less via RainonaTinRoof.com #diy

    Step 6

    Paint around your squares.

    Criss-Cross Accent Wall for $30 or Less via RainonaTinRoof.com #diy

    Step 7

    After your final coat of paint, remove the tape.

    And just so we remember how this space started, here’s the before:

    Criss-Cross Accent Wall for $30 or Less via RainonaTinRoof.com #diy

    And now:

    Criss-Cross Accent Wall for $30 or Less via RainonaTinRoof.com #diy

    Criss-Cross Accent Wall for $30 or Less via RainonaTinRoof.com #diy

    Criss-Cross Accent Wall for $30 or Less via RainonaTinRoof.com #diy

    Ya know it makes ya wanna jump jump!

    Yea, I lied about the whole “I’ll stop referencing Kriss-Kross” thing.

    I’m sure it seems like this took forever to do. It actually really didn’t. Once you get in the hang of marking your measurements, it goes really fast.

    If you want to see the whole new dining room, you can tour it here.

    Need more accent wall ideas? I’m your girl!

    Cane Inspired Accent Wall for $25 or Less – a gorgeous wall that packs a big punch for not a lot of money!

    Black & White Gallery Wall – one of my favorite accent walls of all time, and an easy one to do!

    Easy Confetti Accent Wall – super easy and super fun accent wall!

    9 Accent Walls for $30 or Less – on a tight budget? Check these out!

    You know you don’t wanna miss any of this crazy.

    Sign up to get my posts delivered to your inbox here.

    Stalk Me Here:

    Pinterest / Facebook / Twitter / Instagram

    SaveSave

  • DIY Shower Cornice with Black & White Shower Curtains A.K.A. That Time I thought I Could Carve Something

    DIY Shower Cornice with Black & White Shower Curtains A.K.A. That Time I thought I Could Carve Something

    As the Preppy meets Hollywood Regency Bathroom Makeover (that wasn’t supposed to happen) progressed, I had a brilliant idea.

    I would make a shower cornice. I had always wanted one, so now was the perfect time.

    This would not be just any cornice though.

    No, no, no.

    It would be a Greek Key Carved Shower Cornice.

    I spent hours actually using a ruler and level (instead of eyeballing it) drawing the perfect greek key pattern on my new cornice.

    And then I went to carve it out.

    Who the hell was I kidding?

    After about 15 minutes of trying to follow those lines, I realized it was going to look already looked like sh*t.

    Instead of tossing it into the trash though, I flipped the board over and whipped up a little Trash to Treasure Shower Cornice.

    DIY Shower Cornice with Black & White Shower Curtains via RainonaTinRoof.com #diy

    The great thing about this project is that you don’t have to screw up and waste countless hours like I did.

    Or maybe you are a master carver and could totally carve a greek key into a piece of wood like nobody’s business. If so, please help a sister out.

    DIY Shower Cornice & Curtains

    This post contains affiliate links for your shopping convenience. Click here to read my full disclosure policy.

    Materials and Tools Needed for Cornice:

    • 1″ x 10″ x 6′ Pine Board
    • Saw (or have the folks at the hardware store cut your board for you)
    • Paint color of your choice, preferably a Semi-Gloss or Gloss
    • Paint Brush / Roller
    • Gold Duck Tape
    • 4  Corner Braces & Screws
    • Ruler
    • Pencil
    • Scissors
    • Drill
    • X-Acto Knife

    Steps

    Step 1

    Cut the board down to the width of your shower. Mine was about 59″. Test it out to make sure it fits above your shower. Cut more as needed. I cut it with our miter saw, but a circular saw will do fine. You can even have the fellas at the hardware store cut it for you! Paint both sides of the board a color of your choice. I suggest a semi-gloss or gloss. It holds up better in a bathroom and will help to keep moisture out of the board better.

    Step 2

    After the paint is dry, take your ruler and make small tick marks 1/2″ all around the board.

    DIY Shower Cornice with Black & White Shower Curtains via RainonaTinRoof.com #diy

    Step 3

    Run the outside edge of your duck tape horizontally and then vertically along your tick marks.

    DIY Shower Cornice with Black & White Shower Curtains via RainonaTinRoof.com #diy

    Step 4

    Take an X-Acto knife and ruler and trim up where the edges of the duck tape meet.

    DIY Shower Cornice with Black & White Shower Curtains via RainonaTinRoof.com #diy

    Step 5

    How freakin’ easy was that? Your cornice is done and now you just need to hang it. You guys know I’m the queen of easy projects, thus once more, why the heck did I think I could carve a cornice? Seriously?

    Ok, sorry for digressing….take your four corner braces and attach one in each corner of your board. After attaching them to your board, recruit help.

    No seriously, I mean it. This part is much easier with someone holding the board and someone else drilling.

    Place your cornice where you want it to be above your shower and screw it into the wall through the other side of the brackets.

    DIY Shower Cornice with Black & White Shower Curtains via RainonaTinRoof.com #diy

    Most likely, you are going to have a stud in the area where you attach the braces to the wall. However, if you don’t, I would recommend using an anchor when screwing them to the wall. The photo above also shows how I hid the shower curtain rods behind the cornice. I used a cheap tension rod and curtain rod rings to hang the black and white shower curtains. I kept my old shower curtain rod and shower curtain and just slid it to one side of the shower and hid it behind the black and white curtains.

    If you want to make the shower curtains as well, they are super easy. You just need four yards of fabric (or more if you want to make them longer). I used this fabric. And a side note on the fabric: You may want to go with an outdoor fabric for this. It will hold up better in a bathroom. However, I went with a regular upholstery fabric and then waterproofed it and stain repelled it myself. You can totally do that too and find out how to here.

    Lay out your fabric, cut it to the length you want it. I made mine 78″ long.

    DIY Shower Cornice with Black & White Shower Curtains via RainonaTinRoof.com #diy

    Fold your fabric in half and cut it down the middle.

    DIY Shower Cornice with Black & White Shower Curtains via RainonaTinRoof.com #diy

    When my curtains are closed, there is about an inch on each side where you can still see through to the shower. That doesn’t bother me, because they aren’t meant to be closed. My old shower curtain still functions as the actual shower curtain we use when showering. If you do want to close these, you will need to buy more fabric.

    After cutting your panels out, pin all your edges down and then sew.

    That’s my easy, breezy, (and ok, a little lazy) curtain hack. I’ve done it for every single curtain I’ve ever sewed. I just hang them with clip-on curtain rings.

    DIY Shower Cornice with Black & White Shower Curtains via RainonaTinRoof.com #diy

    Nothing more classic that a good black and white stripe.

    And a salvaged DIY distaster.

    DIY Shower Cornice with Black & White Shower Curtains via RainonaTinRoof.com #diy

    Have you made your own cornice before?

    I’m sure you did and I’m sure yours was amazing from the beginning….unlike mine.

    See more of the Preppy meets Hollywood Regency Bathroom Makeover here!

    Want another great duck tape window treatment hack? Then see these duck tape trimmed curtains and don’t miss this post with 20+ Duck Tape Crafts and Projects!

    There’s more Trash to Treasure goodness to see!

    aka design trash to treasure sept 2014

    AKA Design: Grapevine & Berry Wreath

    Update Old Artwork

    So Much Better With Age: Update Old Artwork

    Make a Pillow from a Reusable Shopping Bag

    Thistlewood Farms: Make a Pillow from a Reusable Shopping Bag

    You know you don’t wanna miss any of this crazy.

    Sign up to get my posts delivered to your inbox here. 

    Stalk Me Here:

    Pinterest / Facebook / Twitter / Instagram

    SaveSave

  • A Pink Ceiling with Faux Moldings

    A Pink Ceiling with Faux Moldings

    Every time I visit the paint counter, the paint guy rolls his eyes at me.

    He is shocked not when I hand him a mint green or bright pink paint swatch, but a white, black or cream colored swatch.

    He has grown accustomed to me selecting not-so-average paint colors.

    A couple months ago when I walked in with my Glidden Watermelon Smoothie paint card and handed it to him, he just shook his head.

    When I told him it was going on the ceiling, I think he almost laughed.

    Heck, I laughed.

    This is one of my craziest ideas to date and I wasn’t 100% sure it was going to work out.

    It ended up being the spark of the entire Preppy meets Hollywood Regency Bathroom Makeover.

    Oh, the power of a pink ceiling.

    With pretty white faux molding.

    A Pink Ceiling with Faux Moldings via RainonaTinRoof.com #diy #ad

    Disclosure: This post is sponsored by HomeRight. However, all opinions and bright pink ceilings are 100% mine. This post contains affiliate links for your shopping convenience. Click here to read my full disclosure policy.

    How to Paint a Pink Ceiling with Faux Moldings

    Tools & Materials Needed:

    • Flat Finish Pink Paint (Ok, another color of your choice if you insist. I used Glidden Watermelon Smoothie.)
    • Flat Finish White Paint or your standard White Ceiling Paint, which is what I used
    • HomeRight Paint Stick
    • HomeRight Quick Painter Edge Painter
    • 1.41 in width FrogTape
    • X-Acto Knife
    • Ruler
    • Pencil

    First of all, I removed the popcorn from my ceiling. I showed you how to do that yesterday in this post. If you don’t have popcorn ceilings – lucky you! If you do have popcorn ceilings, you can still paint it, but obviously it won’t be smooth and you probably won’t be able to do the faux moldings.

    Steps

    Step 1

    Roll on and edge in your flat finish white paint or standard white ceiling paint around the first 6-7 inches of the ceiling.

    A Pink Ceiling with Faux Moldings via RainonaTinRoof.com #diy #ad

    Do two coats of this paint to make sure you have a solid white color there. I like to use my HomeRight Edge Painter to easily paint around the edges. By the way, when I was painting, I wasn’t worried about getting it on the wall – I already knew I was going to be touching up the wall paint and most likely changing it out. Thus, why the photo above looks rough.

    Step 2

    After the white paint has fully cured (I like to give it at least three days), you need to mark where you want your faux moldings to start. I chose to come out 2 3/4 inches from the edge of the ceiling. Go around the entire ceiling making tick marks wherever you want your measurement to be.

    A Pink Ceiling with Faux Moldings via RainonaTinRoof.com #diy #ad

    Step 3

    Run tape all along the tick marks.

    A Pink Ceiling with Faux Moldings via RainonaTinRoof.com #diy #ad

    I went with the 1.41 inch FrogTape because I didn’t want too wide of a “molding.”

    After you run your tape along the tick marks, go back and press the tape and the edges down firmly with a credit card.

    Step 4

    To have clean straight corners, you need to straighten up your tape in the corners. Do this by taking an X-Acto knife and running it along the edges of the tape.

    A Pink Ceiling with Faux Moldings via RainonaTinRoof.com #diy #ad

    And in that photo above, my knife should totally be on the other side of that tape strip. Whoops. Y’all get the idea though. A lot of times, I use a ruler to guide my knife. This time, I just eyeballed it. (I was lazy and didn’t want to go downstairs to get the ruler.) I recommend the ruler method though, y’all.

    After you trim up your corners, make sure that tape is securely down by running a credit card over those edges in the corners again.

    Step 5

    Paint the pink on the entire ceiling.

    A Pink Ceiling with Faux Moldings via RainonaTinRoof.com #diy #ad

    I used my PaintStick Mini to do this which made the job go so much faster. You just suck that paint up in the stick and roll it on pushing the end of the stick as you need more paint. The PaintStick Mini is now sold as an attachment to the regular PaintStick. The mini is just a smaller handle which is great for tight spaces.

    I did two coats of pink. You may need more or less depending on your paint and its color.

    Step 6

    Remove the tape to reveal your faux moldings.

    A Pink Ceiling with Faux Moldings via RainonaTinRoof.com #diy #ad

    When I did this, I was worried about the pink casting a pink shadow over the entire bathroom. Well, it did…at first. The gray paint I had on the walls just was not meshing well with that pink. The pink shadow was everywhere. Before all my hard work was lost by painting the ceiling just plain ol’ white, I decided to paint all the walls a bright, crisp white in hopes of combating the pink shadow.

    And it worked!

    There is a slight pink haze / shadow around the top first 5 or 6 inches of wall, but that’s it. I can’t see it when I’m getting ready at all. The only time I do see it is when I look up at that little space around the top of the wall and its hard to spot it then!

    Pink Painted Ceiling with DIY Faux Moldings | Painted Ceiling Ideas | How to Paint a Ceiling | Tips for Painting a Ceiling | Painting a Ceiling a Color

    Want more painted ceiling ideas? Don’t miss these gorgeous painted ceiling designs then!

    Want more ideas for painting patterns on your walls, ceiling and furniture? Then see these Wall Painting Ideas and Painting Designs!

    You know you don’t wanna miss any of this crazy.

    Sign up to get my posts delivered to your inbox here. 

    Stalk Me Here:

    Pinterest / Facebook / Twitter / Instagram

    SaveSave

  • How (And How Not To) Remove Popcorn Ceilings

    How (And How Not To) Remove Popcorn Ceilings

    Is your ceiling sporting that (not-so) glorious popcorn texture that was once so popular? Mine was too until I decided to pull a little DIY popcorn ceiling removal. Read on to learn how to remove popcorn ceiling the right way – and what not to do. Learn from my mistakes, friends.

    Friends, this is one of those projects that is not for everyone.

    Removing a popcorn ceiling is not necessarily hard, but its messy.

    And frustrating.

    And did I say it was messy?

    Oh and this single project is what sparked the entire makeover of the bathroom.

    However, in the end, for me, it was worth it.

    Lucky for you, I screwed up multiple times during this process and can tell you exactly what not to do.

    How to Remove Popcorn Ceilings and what not to do - Rain on a Tin Roof

    Disclosure: This post is sponsored by HomeRight, however all opinions and popcorn ceiling messes are 100% mine. This post contains affiliate links for your shopping convenience. Click here to read my full disclosure policy.

    How to Get Rid of Popcorn Ceilings

    *Before you start anything you need to determine whether or not your ceiling contains asbestos. If your house was built prior or around 1978, your ceiling could contain asbestos. You can do testing for asbestos by using this kit.

    Tools & Materials Needed:

    • Tank Garden Sprayer – I used this one.
    • Wide Putty Knife
    • Plastic Sheeting or Drop Cloths (If you want to keep a mushy mess from getting on your floor and ceilings)
    • FrogTape or Painter’s Tape (needed if you use the plastic sheeting)
    • Ladder
    • Breathing Mask
    • Water
    • Safety Glasses / Goggles

    What You May Need if You Screw Up Like I Did: 

    But you are going to pay close attention to the what not to do’s and not need those last two items above, mmkay?

    Learn from my mistakes, y’all.

    Steps

    Step 1

    Remove any light fixtures and cover up the wiring so that it isn’t exposed to water. Also be warned that when water hits a hot light bulb, the bulb will bust. Yes, this may have happened to me.

    If you want to avoid a big mess, at this point you need to run the plastic sheeting all along your walls and floors securing it with tape along the edges. If you like big messes or you really don’t care to clean it up, you can skip this part.

    Guess who skipped this part because she may have been a bit too impatient?

    Yep. I’m still cleaning popcorn ceiling remnants out of my grout.

    And yes, I realize that was more like three different steps, but its all just prep work.

    Step 2

    Fill up your garden sprayer with water. Nothing else, just plain water. Do not fill it so full that it is too heavy to carry across your shoulder while you are on the ladder. Yes, I nearly toppled myself over because of that.

    Step 3

    Pump up the pressure on your tank sprayer and aim your nozzle toward the ceiling. Begin spraying the water directly onto your popcorn ceiling. Wear safety glasses  / goggles to keep the water from dripping onto your eyes and eventually the popcorn. Do not try to be a rebel and not wear them. Take it from me.

    How to Get Rid of Popcorn Ceilings - using a garden sprayer - Rain on a Tin Roof

    If you are working in a small space, as my bathroom was, then spray the entire ceiling down at once. If it is a large space, work in sections.

    After you spray the entire ceiling down once, go back to where you began and spray it down again.

    How to Scrape Popcorn Ceilings

    Step 4

    Put on your breathing mask. Seriously, put it on. I mean it. 

    After the water has had about 15 minutes to soak in, go back to where you began spraying, take your putty knife and scrape the ceiling texture right off the ceiling.

    If it doesn’t come down easily with one scrape, stop and let the water soak in more or spray more water on the ceiling. Do not think that constantly scraping it will make it come down. Wait until it is soaked through and it will come down super easily – like mush. Literally.

    Keep the putty knife flush against the ceiling and don’t angle it on the ends one way or the other.

    How to Scrape Popcorn Ceilings - use a wide putty knife - Rain on a Tin Roof

    Ok, so see that small putty knife I was using? This works so much better and goes faster with a wider, larger putty knife. The small one is good for going back and getting small pieces of popcorn you missed, but a larger one is better overall.

    Where was my large putty knife you ask?

    Buried in a box of sandpaper that I found after I had scraped the ceilings. Story of my life.

    Do not think that you can leave small pieces of popcorn behind.

    DIY Popcorn Ceiling Removal - what I learned - Rain on a Tin Roof

     All those small pieces gotta go too. If they dry before you get to them, wet them back down and then scrape.

    When scraping the popcorn off, try to keep the putty knife as level as possible against the ceiling. Do not put too much pressure on the edges or you will gouge the ceiling:

    Repairing the ceiling after popcorn removal - Rain on a Tin Roof

    Where you see the brown is where I put too much pressure on one side of the knife and took off some of the drywall paper. Not good, but fixable.

    In the end, you will be left with this:

    Removing Popcorn Ceilings - What and What Not to Do - Rain on a Tin Roof

    The above picture is why you tape plastic sheeting up. I think the picture proves the value of this.

    Step 5

    After you have scraped all the popcorn off, allow the ceiling to fully dry. If you scored an A+ in following my what not to do’s, then you may not need to do this step.

    If you do have some spots, like I did, where the paper on the drywall tore or you gouged the ceiling, you’ll need to fix them now.

    Spackle and sand ceiling gouges from popcorn ceiling removal. Rain on a Tin Roof

    Lightly sand them to make them as even as possible, then spackle as needed. Allow the spackle to dry and then sand them smooth.

    Skim coat gouges in ceiling after popcorn ceiling removal. Rain on a Tin Roof

    If the ceiling is really bad, you might need to skim coat the whole ceiling with drywall mud, let dry, then sand.

    Step 6

    Prime and paint the ceiling. I used Kilz 2 Primer and my Paintstick.

    Prime and paint ceiling after ceiling texture is removed. Rain on a Tin Roof

    You should only need one coat of primer. This just helps to seal the drywall and keep your ceiling paint from soaking in too much and requiring multiple coats.

    At this point, you can paint your ceiling white or whatever color you want to paint it.

    Oh, you are wondering if I was just lazy and left my ceiling primed? Nope…..I painted it PINK and added some faux white moldings to it. See that tutorial here!

    Have you done a DIY popcorn ceiling removal before?

    Share your experience in the comments!

    More helpful ceiling posts: 

    Not ready to take the plunge into removing your popcorn ceiling? I totally get it – see these ideas instead for distracting from your popcorn ceilings!

    Painted Ceiling Designs – you’ve banished the popcorn, now make that ceiling shine!

    Want to keep this post for later? Pin the image below!

    Popcorn Ceiling Removal - What to Do and What Not to Do - Rain on a Tin Roof

    You know you don’t wanna miss any of this crazy.

    Stalk Me Here:

    Pinterest / Facebook / Twitter / Instagram

    SaveSaveSaveSaveSaveSaveSaveSaveSaveSaveSaveSaveSaveSaveSaveSaveSaveSaveSaveSaveSaveSaveSaveSaveSaveSaveSaveSaveSaveSaveSaveSaveSaveSaveSaveSaveSaveSaveSaveSaveSaveSaveSaveSave

  • DIY Succulent Book Planter

    DIY Succulent Book Planter

    I may be giving myself too much credit.

    My head may be getting a bit too big.

    But….

    I’m giving succulents a try again.

    With the success (meaning I’ve had it for more than a month and haven’t killed it yet) of the fiddle leaf fig and the banana tree, I’m thinking, hoping, praying that I can keep these succulents alive.

    In the past year, I’ve successfully killed two succulents.

    Yes, I’m well aware I’m the only person on the planet who can’t keep them alive.

    I decided that maybe if I gave this new succulent a cozy, happy, pretty home it would want to live longer, so I made it a succulent book planter.

    What better place for a succulent to live than in between the pages of a book?

    Heck, what better place for anyone to live than in between the pages of a book?

    DIY Succulent Book Planter via RainonaTinRoof.com #succulent #ad

    I was selected for this opportunity as a member of Clever Girls Collective and the content and opinions expressed here are all my own.

    DIY Succulent Book Planter

    Before I tell you how to make this little project, let me answer your question that I know you are asking, “Aren’t the pages going to get moldy and mildewy from the plant’s moisture?”

    Why no, they are not. We are going to seal the pages.

    Materials Needed:

    DIY Succulent Book Planter via RainonaTinRoof.com #succulent #ad

    • Small Potted Succulent
    • Plastic tray to go around base of the succulent pot
    • Books that you don’t care to cut
    • Dremel Micro 8050
    • Pencil
    • Mod Podge
    • Paint Brush

    Steps

    Step 1

    Determine the order you want to stack your books in. Take the book that will be on top and lay the plastic tray in the center of it and trace around it.

    Step 2

    Put the cutting disc on the Dremel Micro 8050, and begin cutting through the cover of the book. I put the Dremel on the highest speed to do all my cutting. The Micro 8050 is pretty cool because it can cut, carve, engrave, sand, grind, sharpen, clean and polish—helping you bring just about any brilliant project to life. It’s also cordless – which means no worrying about accidentally cutting through cords – not that I’ve ever done that before or anything…

    DIY Succulent Book Planter via RainonaTinRoof.com #succulent #ad

    Step 3

    Once you get through the front cover of the book, open it up and continue cutting through the pages.

    Step 4

    Once you get all the way through your book, your circle may be a bit smaller on the back than the front. Flip the book over to the back and cut the circle as needed. You can go up and down with the Dremel to get a good even cut. It is very light and easy to handle in tight spaces, the Dremel® Micro™8050 is packed with features that have crafters, hobbyists and DIYers in mind: soft grip, LED front-end lighting to illuminate projects, a docking station that continually charges, and an 8V Max Lithium-ion battery.

    Step 5

    After your top book has its circle cut out, place your succulent pot in the book to make sure it will fit properly. If it doesn’t cut more as needed. If its good to go, move on to cutting the second book. Do this by placing the book you have already cut on top of the book you are about to cut. Use a pencil and trace inside the circle onto the book to be cut.

    Step 6 

    Remove the top book and place the plastic tray around the traced circle. Trace around the plastic tray – it may be slightly bigger and you want that measurement, not the smaller one.

    DIY Succulent Book Planter via RainonaTinRoof.com #succulent #ad

    Step 7

    Begin cutting out the hole in the second book as you did with the first book.

    Step 8

    If your pot was the same size as mine, you may not need to go all the way through the back cover on the second book, test the pot in the book as you go to determine how much more you need to cut. If your pot is narrower at the base, as most are, it will be ok if the hole in the second book is a bit angled as you see above. Just test the pot to see if it fits.

    Step 9

    After all the cutting is done, clean off the books and shake out any pieces of cut paper. To seal the books and keep mildew and mold from forming, you need to apply Mod Podge to the cut edges of the books. I started at the back cover and worked my way through the book. You don’t have to go through every single page, do small sections of pages at a time and you can put it on heavy.

    Step 10

    On the inside covers of the books, apply Mod Podge all over the cover and pages to keep the book shut.

    DIY Succulent Book Planter via RainonaTinRoof.com #succulent #ad

    Step 11

    If you want to, you can seal the outer edges of the book with Mod Podge as well.

    Step 12

    To hold the books together, apply Mod Podge to the covers of the books and place them in the order you want them stacked. Also, be sure to give the top book cover a really good coat of Mod Podge.

    Step 13

    After the Mod Podge has dried, place your plastic tray in the books and then your potted succulent plant.

    DIY Succulent Book Planter via RainonaTinRoof.com #succulent #ad

    Isn’t this a fun twist on a planter?

    The Dremel made the process of cutting out the pages go so fast and even I was able to cut out a decent circle.

    DIY Succulent Book Planter via RainonaTinRoof.com #succulent #ad

    I’m even liking it more than I expected.

    You can purchase the Dremel Micro 8050 online at Amazon.com and HomeDepot.com.

    Want more great planter ideas? 

    DIY Cedar Planter Box – a great DIY project that will add some curb appeal to your home!

    Modern Painted Planter Pots – take basic planters and snaz them up with spray paint!

    10+ Creative Flower Pot Ideas – full of so many out-of-the-box ideas!

    You know you don’t wanna miss any of this crazy.

    Sign up to get my posts delivered to your inbox here. 

    Stalk Me Here:

    Pinterest / Facebook / Twitter /Instagram

  • 17 Easy Crafts and DIY Projects for under $10

    17 Easy Crafts and DIY Projects for under $10

    What makes DIY projects and crafts even better?

    When they are EASY DIY Projects and EASY crafts and……..when they cost LESS THAN $10!

    Can I get an amen?!

    Easy Crafts and DIY Projects for the Home

    DIY Agate Slice Lamp Finials

    Your lamps will love you for these! So pretty and crazy easy to make! Tutorial for these beauties here!

    Step Stool Makeover

    Jazz up those blah and basic step stools with a little scrapbook paper and tassel love – super easy to do! Step stool makeover here!

    Golden Snake Bud Vase

    Would you believe that this snake was once just a rubber snake you bought at the Dollar Store? Yep! Now, it’s a golden beauty though! Here’s how I made it!

    Lamp Tassels

    I love a great tassel and I love them even more when they dress up lamps! I made these lamp tassels in under 5 minutes!

    Mohawk Lollipop Holder

    This one definitely isn’t everyone’s cup of tea, but it definitely starts a lot of conversations at my house! Find this project here.

    DIY Crystal Knobs

    I love making unique hardware for my furniture – these DIY crystal knobs are some of my favorites!

    Glittered Mason Jars

    The great thing about these glittered mason jars is that they are so versatile – they make great vases, lanterns and more!

    Faux Malachite Tray

    I love malachite, but not the heavy price tag attached to it. This malachite tray though comes at a cheap price!

    DIY Crystal Magnets

    These crystal magnets would make a great little gift for your girlfriends!

    Golden Snake Bowl

    Another snake home accessory that used to be residing in the Dollar Store aisle – here’s how I made this beauty!

    Crystal Lamp Finials

    Is it obvious that I can’t get enough crystals? Here’s how I made these crystal lamp finials!

    Duck Tape Fringe

    A little fringe always makes things better, right?! Make your own fringe on a budget using Duck Tape!

    DIY Sunglasses Holder

    We made this cute little sunglasses holder to display and hold all the Circus’ adorable shades.

    DIY Selenite Knobs

    Another great DIY knob! Selenite is one of my favorite stones and it was so easy to make these selenite knobs!

    DIY Headband Holder

    Would you believe that part of this headband holder is made with a paper towel roll?!

    DIY Stone Embellished Napkin Rings

    These napkin rings went from “ok” to little gems with this easy stone napkin ring tutorial!

    Crystal Embellished Vase

    Easily embellish any vase with pretty crystals using this tutorial.

    DIY Faux Jadeite

    faux-jadeite-sidebar

    DIY Faux Jadeite  – you WILL NOT believe how easy this one is!

    Knock-Off Kate Spade Photo Frame

    Kate Spade Knock-Off Photo Frame via RainonaTInRoof.com #katespade #knockoff #photo #diy #craft

    Kate Spade Knock-Off Photo Frame – create this Kate Spade Knock-Off for $5!

    DIY Lucite Trays

    DIY Lucite Trays {Under $5 in 15 minutes} via RainonaTinRoof.com

    DIY Lucite Trays – you will never believe what these trays are actually made from!

    Electrical Tape Embellished Lampshade

    Small Changes with Big Impact via RainonaTinRoof.com #homedecor

    Electrical Tape Lampshade – give a little black and white love to a lampshade!

    Duck Tape Trimmed Curtains

    Duck Tape Trim Curtains via RainonaTinRoof.com #ducktape #ikeacurtain #hack

    Duck Tape Trimmed Curtains – easily add bling to your curtains!

    DIY Animal Candleholders

    DIY Animal Candleholders via RainonaTinRoof.com

    DIY Animal Candleholders – make candle holders from toys!

    Sequined Coat Hangers

    Sequined Coat Hangers via RainonaTinRoof.com #lifequotes #sequins #coathanger

    Sequined Coathangers – hang your clothes in style!

    Faux Brass Furniture Feet

    Faux Brass Capped Feet via RainonaTinRoof.com

    Faux Brass Capped Feet – give the Midas touch to all your furniture feet!

    DIY Decorative Horse Accessories

    40+ Gold Projects {rainonatinroof.com} #gold #DIY #craft

    Decorative Horse Accessories – another home accessory you can make out of toys!

    Chic and Sassy Message Board

    Four Easy DIY Gift Ideas via RainonaTinRoof.com #diy #giftideas

    Sassy Fabric Covered Message Board – create a chic message board and get your sassy on with fun quotes!

    Easy Home Decor Crafts | Easy Home Decor DIY Projects | Easy DIY Home Decor | Easy Crafts to Make and Sell | Easy Crafts to Sell

    Still need more great craft and DIY ideas? 

    14 Painted Rug Hacks – who knew a rug could get so fancied up with paint?

    14 Classic Black and White DIY Projects – you can never go wrong with black and white!

    You know you don’t wanna miss any of this crazy.

    Sign up to get my posts delivered to your inbox here. 

    Stalk Me Here:

    Pinterest / Facebook / Twitter / Instagram

  • 14 Painted Rug Hacks

    14 Painted Rug Hacks

    I love a good hack, especially a good hack that is so much cheaper than the real thing. Painting a basic rug is an affordable way to get exactly the look you want without paying a fortune on a rug that may get grape Kool-Aid spilled on it only minutes after you put it down. Yea, you know what I’m talking about.

    14 Painted Rug Hacks

    DIY Painted AstroTurf Rug Tutorial via RainonaTinRoof.com #diy #rug #homedecor #outdoordecor

    Painted Astroturf Rug from Rain on a Tin Roof

    14 Painted Rug Hacks that you CANNOT miss! Paint rugs to get a prettier higher end look without spending a fortune!

    Fruit Welcome Mat from The House that Lars Built

    14 Painted Rug Hacks that you CANNOT miss! Paint rugs to get a prettier higher end look without spending a fortune!

    Pink and White Patterned Painted Rug from Rappsody in Rooms

    14 Painted Rug Hacks that you CANNOT miss! Paint rugs to get a prettier higher end look without spending a fortune!

    Cabana and Nautical Rug from Made in a Day

    14 Painted Rug Hacks that you CANNOT miss! Paint rugs to get a prettier higher end look without spending a fortune!

    Monogram Welcome Mat from Thistlewood Farms

    14 Painted Rug Hacks that you CANNOT miss! Paint rugs to get a prettier higher end look without spending a fortune!

    Chevron Painted Rug from Cape Twenty Seven

    14 Painted Rug Hacks that you CANNOT miss! Paint rugs to get a prettier higher end look without spending a fortune!

    Stenciled Circle Rug from Tatertots & Jello

    14 Painted Rug Hacks that you CANNOT miss! Paint rugs to get a prettier higher end look without spending a fortune!

    Navy Painted Rug from  Little Black Door

    14 Painted Rug Hacks that you CANNOT miss! Paint rugs to get a prettier higher end look without spending a fortune!

    Black and White Stripes Painted Rug from  Adventures of an Almost 40 year old Intern

    14 Painted Rug Hacks that you CANNOT miss! Paint rugs to get a prettier higher end look without spending a fortune!

    Polka Dot Rug from  A Beautiful Mess

    14 Painted Rug Hacks that you CANNOT miss! Paint rugs to get a prettier higher end look without spending a fortune!

    Spray Painted Herringbone Rug from  Park House Love

    14 Painted Rug Hacks that you CANNOT miss! Paint rugs to get a prettier higher end look without spending a fortune!

    Trellis Painted Rug from Pudel-Design

    14 Painted Rug Hacks that you CANNOT miss! Paint rugs to get a prettier higher end look without spending a fortune!

    Yellow Starburst Painted Rug from  Adventures of an Almost 40 year old Intern

    Want another great rug hack? Don’t miss this DIY Cowhide rug – no painting required on it!

    Do you have any ideas for painted rugs?

    DIY Painted Rug Ideas | DIY Painted Rug Tutorials | Painted Rug DIY | DIY Painted Rug | DIY Painted Rug Outdoor

    Happy hacking!

    You know you don’t wanna miss any of this crazy.

    Sign up to get my posts delivered to your inbox here. 

    Stalk Me Here:

    Pinterest / Facebook / Twitter / Instagram

  • DIY Faux Jadeite from thrift store finds

    DIY Faux Jadeite from thrift store finds

    Don’t want to commit to the real stuff? I totally get it! Real jadeite is gorgeous, but also expensive. No problem! Make your own “jadeite” using the simple tutorial below!

    You guys.

    I just got back from an amazingly fun wedding weekend.

    In Fort Wayne, Indiana.

    Totally in the middle of nowhere – or so it seemed, but our group rocked that town like none other. You can see some of the debauchery that took place on my Instagram account.

    There are so many stories from this weekend that will be making their way onto the blog.

    Prepare yourself.

    However, I am still trying to unpack and regain some sleep from the lack thereof this weekend.

    Oh, and Better Homes & Gardens is coming to photograph my kitchen on Wednesday.

    Wha What?

    Yep. I found out about a week and a half ago and went into crazy mode immediately.

    Needless to say, I am running around patching nail holes, touching up paint, and deep cleaning like nobody’s business.

    Therefore, I have for you a very quick, very simple, very cheap DIY project:

    Faux Jadeite

    DIY Faux Jadeite from thrift store finds | Jadeite Dishes | DIY Jadeite | Thrift Store Crafts | Easy Crafts to Make and Sell | Glass Crafts


    I love the look of jadeite, however I don’t have a whole lot of places where I can work it into my home without the kid having it obliterated in less than five minutes.

    Word.

    This faux jadeite is perfect because its easy to make and if a piece gets broken – it won’t be the end of your world. You’ll just need another trip to the thrift store – and ain’t nobody gonna complain about extra trips to the thrift store.

    Except maybe your significant other.

    But really, what do they know about good thrifting?

    How to Make Your Own Jadeite

    This post contains affiliate links for your shopping convenience. Click here to read my full disclosure policy.

    Materials Needed: 

    DIY Faux Jadeite from thrift store finds | Jadeite Dishes | DIY Jadeite | Thrift Store Crafts | Easy Crafts to Make and Sell | Glass Crafts

    Steps

    Step 1

    Clean your glass pieces very well. Make sure they are free of all sticker residue, grease, and grime. Let them dry fully before proceeding.

    Step 2

    Give each piece 2-3 light coats of Krylon Pistachio spray paint. There is probably a better acrylic paint that would match Jadeite better out there, however, I did not want to spend hours painting multiple coats of acrylic paint on glass pieces that I paid $5 for, nor did I want to have to deal with brush strokes. That’s your call though – I will support your decision either way. I will just always choose to take the faster solution.

    Just sayin’.

    Step 3

    After the pistachio spray paint has dried, give each piece two light coats of the gloss topcoat. This helps to protect the paint from easily scratching off. Let dry for a full day before using.

    DIY Faux Jadeite from thrift store finds | Jadeite Dishes | DIY Jadeite | Thrift Store Crafts | Easy Crafts to Make and Sell | Glass Crafts

    These are a fun little way of displaying trinkets or holding jewelry.

    I do not recommend serving food on these pieces, as they are covered with spray paint.

    Are you a jadeite fan?

    I still love the real thing, but this faux jadeite is a great frugal alternative.

    I love ya’ll, but I gotta go scrub some floors.

    Want more great home decor hacks?

    Don’t miss this tutorial for how to make your own faux crystals and then turn them into finials, knobs, magnets and more!

    Glitter up mason jars like this to turn them into pretty lanterns.

    And here are 17+ Easy Crafts and DIY projects you’ll want to see too!

    Want to come back here later? Just pin the image below!

    DIY Faux Jadeite from thrift store finds | Jadeite Dishes | DIY Jadeite | Thrift Store Crafts | Easy Crafts to Make and Sell | Glass Crafts

    You know you don’t wanna miss any of this crazy.

    Sign up to get my posts delivered to your inbox here. 

    Stalk Me Here:

     Pinterest / Facebook / Twitter / Instagram

    SaveSave

  • How to Glitter Mason Jars

    How to Glitter Mason Jars

    These glitter mason jars are easy to make and add a fun touch to your home’s decor or a party. They also make a great gift idea! Find out how to make glitter mason jars yourself below!

    Is there anyone else out there that just feels the need to add a little bling everywhere?

    A little gold here, a little glitter there?

    It just makes everything a little more fun and pretty.

    When I made over the porch recently, I realized that these mason jars didn’t quite fit with the fun, colorful vibe going on out there. I wanted to keep them though to use as lanterns for extra lighting at night.

    My solution: Bling ‘Em Out.

    Now, I have sparkly glitter mason jars.

    DIY Glitter Mason Jars - easy mason jar crafts - Rain on a Tin Roof

    This post contains affiliate links for your shopping convenience. Click here to read my full disclosure policy.

    If you’re a fan of mason jar crafts, this one’s for you!

    DIY Glitter Mason Jars

    This is a really simple and relatively fast craft project – you guys know I love the fast projects with instant gratification.

    Materials Needed: 

    How to Make Glitter Mason Jars using Mod Podge - Rain on a Tin Roof

    • Mason Jars or Glass Jars (Mine came from Kirkland’s about three years ago, but they still have them for a whopping $3 a pop!!! They are here.)
    • Glitter in Colors of Your Choice
    • Mod Podge
    • Foam Brush or Paint Brush
    • FrogTape

    Steps

    Step 1

    Before starting the glittering process, I spray painted the handles of my jars gold. The gold just worked better with the porch. Painting the handles is completely optional.

    Grab your FrogTape and wrap a strip of it across the jar diagonally.

    Glitter Dipped Mason Jars - tape across jars - Rain on a Tin Roof

    I didn’t really do any sort of measurements with the tape. I just wrapped it around the jar as you can see in the photos above. I did keep a straight edge on the side of the jar – that’s why the straight vertical piece of tape is there. You don’t have to do this. You can just keep wrapping the tape if you want to.

    Step 2

    Starting at the bottom of the jar where the glass is still visible, use your foam brush or paint brush and apply Mod Podge where you want the glitter.

    Mod Podge Mason Jars to Add Glitter - Rain on a Tin Roof

    You don’t need a really thick coat, just an even coverage over the glass. Don’t let the Mod Podge sit too long – this stuff can dry fast on glass. As soon as you have put your Mod Podge on the glass, sprinkle your glitter on the jar, gently tap the excess glitter off and let it sit for five minutes or so.

    Step 3

    Remove your tape carefully. If you just want one swirl of glitter – you are done! If you want two swirls (like I did), then you can repeat the first two steps and add another color of glitter.

    How to Glitter Mason Jars - apply glitter to jars - Rain on a Tin Roof

    You can also skip the tape on this one and run your Mod Podge just along the edge of your first glitter color and apply your other glitter there.

    Putting Glitter on Mason Jars - Rain on a Tin Roof

    I have these hanging on large cup hooks in the screened-in porch.

    Mason Jar Crafts - Glittered Mason Jars - Rain on a Tin Roof

    Gold glitter just gets me every time and the pink works perfectly on the porch. Who knew putting glitter on mason jars could be so fun?

    Any glitter dipped mason jars in your future?

    Looking for more great craft and DIY projects for the home?

    17+ Easy Crafts and DIY Projects Under $10 – you won’t believe what all is here!

    Looking to make a little money on your projects? Take a look at these 10 Easy Crafts to Make and Sell.

    Want to remember this project? Just pin the image below! 

    Glittering Mason Jars with Mod Podge - Rain on a Tin Roof

    You know you don’t wanna miss any of this crazy.

    Sign up to get my posts delivered to your inbox here. 

    Stalk Me Here:

    Pinterest / Facebook / Twitter / Instagram

    Easy Crafts - DIY Glittered Mason Jars - Rain on a Tin Roof

    SaveSave

  • DIY Floating Curtain Panels

    DIY Floating Curtain Panels

    As you guys well know, I will stretch a dollar as far as I possibly can.

    And then some.

    The same is true with fabric.

    When I started the colorful porch makeover, Grunt Labor had one request:

    Curtains.

    Well he had other requests too, like a fireplace and a television, but at the current moment, those aren’t attainable.

    He was adamant on the curtains though. He thought it would make the space feel more homey.

    Yes, that coming from a male who even refers to himself as Grunt Labor is a little odd, but he was right. And really, the man rarely asks for anything around here – there was no way I could say no.

    My problem was that I only had three yards of fabric for the curtains. Typically, I would be lucky to get two curtain panels out of three yards – and they would be skinnier panels at that.

    My other problem here was that even though the porch is screened-in, the curtains were still going to get dirty at the bottom pretty quickly.

    Luckily at Home Depot one day, the lightbulb went off.

    Does anyone else have moments of genius at Home Depot? I swear sometimes that’s the only place I get them. I will have ran in for one can of spray paint and by the time I get to the checkout line, I’m struggling to hold onto everything that I’ve picked up and apologizing for knocking over a display with the 10 foot piece of pipe I’m barely holding under my arm.

    Yep, I’m that girl.

    But it was that stroke of genius that solved both problems – I would make Floating Curtain Panels.

    DIY Floating Curtain Panels | DIY Outdoor Curtains | How to Make Outdoor Curtains | Outdoor Curtains for Porch or Patio | DIY Outdoor DecorThis post contains affiliate links for your shopping convenience. Click here to read my full disclosure policy.

    DIY Floating Curtain Panels

    If you can sew a straight semi-straight line (my lines are never totally straight) and make a couple of simple cuts with a hand saw or electrical saw, you can totally do these. Seriously, they aren’t hard at all.

    Materials Needed:

    -3 yards of fabric of your choice (I used this outdoor fabric and it made three panels for me that were 19 in wide x 89 in long before being hemmed. I did have a little leftover. If these are going outdoors and you don’t find an outdoor fabric you like, you can always waterproof, color protect, and stain repel the fabric yourself by using this tutorial.

    -10′ piece of 1/2″ PVC pipe

    –Gold Spray Paint

    -Regular Hand Saw or Circular Saw or Miter Saw (I used our Miter Saw)

    -12 Screw Eyes 

    –Neon Pink Cord (or other color of your choice – you guys know I love my bright flashy colors)

    -Scissors

    -Sewing Machine & Thread or Stitch Witchery

    -Straight pins

    -Measuring Tape

    Steps

    Step 1

    Cut your pipe down to whatever your desired length is. I was fitting my pipe between the 2×4 supports on my porch. Of course, no measurement between the 2x4s were the same. That’s just what you get with older houses and foreclosures, people. I thought it would look funny to have different size panels, so I opted to make all my pipes the same size, which was 19 inches. I marked my pipe and cut it with a miter saw.

    DIY Floating Curtain Panels via RainonaTinRoof.com #curtains #drapery #diy #fabric #ad #onlinefabricstore #porchMost of the pipe will be covered by the panels, however, the ends do still show. I didn’t want them to be white, so I spray painted the ends gold.

    Step 2

    Lay out your fabric and cut it into panels. Each of my panels were 19 inches wide x 89 inches long.

    DIY Floating Curtain Panels via RainonaTinRoof.com #curtains #drapery #diy #fabric #ad #onlinefabricstore #porch

    After you have cut your panels, pin down the long side edges only (not the top or bottom edges) and hem them. If you want to go the no-sew route, use the stitch witchery here.

    And by the way, if I can sew a decently straight line on this….

    DIY Floating Curtain Panels via RainonaTinRoof.com #curtains #drapery #diy #fabric #ad #onlinefabricstore #porch

    Anyone can sew a decently straight line. That sewing machine was my great grandmother’s, my grandmother’s, and now mine. I’ve cursed it, hit it (that hurt), ran my finger through it on more than one occasion (that hurt more), but I wouldn’t think of sewing with anything else.

    We have a history.

    Step 3

    Now you need to hem your top edges, but leave an opening for the pipe to fit through.

    DIY Floating Curtain Panels via RainonaTinRoof.com #curtains #drapery #diy #fabric #ad #onlinefabricstore #porch

    Do this by placing the pipe long the top edge, then pulling the fabric over the pipe and pinning the edges in place (#1 in the photo above). Remove the pipe and pin down the rest of the edge (#2 above). Finally, sew the edge down (#3). Repeat this with the top and bottom edges for all the panels.

    Step 4

    Take your screw eyes and screw one into each corner where your panels will hang from (top and bottom). Since my pipes were 19 inches long, I put my screw eyes about 19 inches apart.

    DIY Floating Curtain Panels via RainonaTinRoof.com #curtains #drapery #diy #fabric #ad #onlinefabricstore #porch

    Next, thread the nylon cord through your pipe and tie each end onto the screw eyes.

    Stand back and observe your amazingness.

    DIY Floating Curtain Panels via RainonaTinRoof.com #curtains #drapery #diy #fabric #ad #onlinefabricstore #porch

    Go grab a cheap beer or a cocktail.

    DIY Floating Curtain Panels via RainonaTinRoof.com #curtains #drapery #diy #fabric #ad #onlinefabricstore #porch

    And relax in the shade of your new floating curtain panels that you made all by yourself.

    Because you are a superstar.

    DIY Floating Curtain Panels | DIY Outdoor Curtains | How to Make Outdoor Curtains | Outdoor Curtains for Porch or Patio | DIY Outdoor Decor

    Do you have any DIY curtain hacks?

    See the full porch makeover here and this little DIY flamingo wreath that embellishes these curtain panels now!

    Love a good curtain hack? Be sure to see these duck tape trimmed curtains too!

    You know you don’t wanna miss any of this crazy.

    Sign up to get my posts delivered to your inbox here. 

    Stalk Me Here:

    Pinterest / Facebook / Twitter / Instagram

    SaveSave

  • 10 of My Favorite Weapons of Choice for DIY Projects

    10 of My Favorite Weapons of Choice for DIY Projects

    By now, many of you could easily tell a perfect stranger what my favorite colors are, my favorite beverage of choice, and that I call my husband Grunt Labor.

    And we’ve only met through the internet.

    Most of you could probably whip up a list in under a minute of my favorite weapons – products and tools for DIY projects.

    But, just in case you can’t and if you were wondering here is my complete list (at the moment) of my favorite weapons of choice.

    Commentaries included.

    This post contains affiliate links for your shopping convenience. Click here to read my full disclosure policy.

    Tools for DIY Projects | Best Tools for DIY | Tools for Woodworking | Tools for Furniture Painting | Tools for Painting

     #1 – Spray Paint

    Spray paint is most definitely my favorite weapon of choice.  In my opinion, there is nothing that spray paint can’t fix. The average can of spray paint will cost anywhere from $3 – $10 and gives a great bang for your buck. Use it to update lamps in no time, bring a roadside rescue metal cabinet back to life, and update home décor stuck in the 80’s.

    My 10 Favorite Products & Tools for DIY Projects via RainonaTinRoof.com #diy

    Favorite Spray Paint Brand: Rust-Oleum

    Hands down, Rust-Oleum has the best coverage when it comes to spray paint and at around $4 a can, its the best bang for your buck. The only thing I have against Rust-Oleum spray paint is that they need more colors. They need a good coral color and a red color that isn’t too apple-y or dark. If someone there could get that ball rolling, I’d greatly appreciate it. Mkay? Thanks.  My favorite Rust-Oleum color is a toss-up between Forest Green (on my barstools) and Metallic Gold (on just about anything that is gold in my house).

    #2 – Rust-Oleum Comfort Grip

    My 10 Favorite Products & Tools for DIY Projects via RainonaTinRoof.com #diy

    Speaking of spray-painting, this little gem will make spray painting a cakewalk. The comfort grip fits over the spray nozzle and has a nice little hand grip that you pull to spray paint. No more sore, red pointy fingers, y’all.

     #3 – Duck Tape

    My 10 Favorite Products & Tools for DIY Projects via RainonaTinRoof.com #diy

    You knew it was coming. I’m from the south, and around here duck tape is a staple. It fixes anything. These days, its also making everything a whole lot prettier just like these duck tape curtains and these 20+ duck tape crafts and ideas. My favorite kind of duck tape is…..duh, metallic gold. There are lots of more patterns and colors though.

    #4 – HomeRight Finish Max Paint Sprayers

    My 10 Favorite Products & Tools for DIY Projects via RainonaTinRoof.com #diy

    Many of you know of my love for my HomeRight Finish Max paint sprayer. If you would have asked me to paint something with an electric paint sprayer a year ago, I would have adamantly said no.  Things have changed since then. Last fall, I tried out a HomeRight FinishMax Paint Sprayer and fell in love. I thought it would be just like the other sprayers I had tried before – uneven spraying, hard to clean, and gets more paint on the floor than on the furniture. I was wrong about this one. It has totally transformed the way I paint furniture. It gives fine even coats and is simple to clean. I have used it on these navy and gold chests, this French desk makeover, and much more in my furniture makeover gallery. HomeRight has even came out with a new paint sprayer, the Finish Max Pro, and shockingly, it gives an even finer finish than the Finish Max. Either of them are great sprayers. As a bonus, when you own a Finish Max, you also get to take really goofy photos with it, such as the one pictured above.

    #5 – Rub ‘N Buff

    My 10 Favorite Products & Tools for DIY Projects via RainonaTinRoof.com #diy

    If I ever meet the person who created Rub ‘N Buff, I will probably be arrested for harassment. I just want to hug them and tell them how much time and money they have saved me and how much fabulous-ness they have brought into my home. Rub ‘N Buff is a type of wax-y finish that comes in 10+ colors ranging from metallic to whites to blacks. It comes in an itty bitty tube and costs around $5 – $10. However, that itty-bitty tube will last for-ev-er (imagine me saying that like the kid in The Sandlot says it). It is great for updating furniture pulls, reviving brass feet, and so much more. You can put it on metal, wood, just about anything. I’ve used it to update my bedroom furniture hardware, on a bar cart, my barstools, on a photo frame, and along the edge of my entry table that you can see here.  Seriously y’all, that one little tube goes a long way. One tube I bought last January has been used on at least five projects and I still have a good bit left. You can find Rub ‘N Buff at Michael’s, Hobby Lobby (use one of their coupons for more money off) and on Amazon.

    #6 – Gorilla Glue Epoxy

    My 10 Favorite Products & Tools for DIY Projects via RainonaTinRoof.com #diy

    When I was a teenager, my father sang the praises of Gorilla Glue. At that time, I didn’t care what Gorilla Glue was or what it could do. Instead, I was trying to figure out how I could get money for the weekend out of my tightwad father. Things change though, and I too am now a faithful follower of Gorilla Glue and being a tightwad as well. However, my Gorilla Glue preference is their Epoxy. It can adhere anything to anything – seriously. I used it to make this bamboo mirror.

    #7 – FrogTape Painter’s Tape and Shape Tape

    My 10 Favorite Products & Tools for DIY Projects via RainonaTinRoof.com #diy

    Thanks to FrogTape, creating chevron, wave, and scalloped patterns with paint is now a very easy thing to do. You can create a stylish chevron pattern in record time with Shape Tape and spray paint. I also used a combination of standard FrogTape and scalloped shape tape to create faux wall moldings. They were more affordable than real wall moldings, easy to do, and just as chic.

    #8 – HomeRight EZTwist PaintStick

    My 10 Favorite Products & Tools for DIY Projects via RainonaTinRoof.com #diy

    When Grunt Labor and I moved into the foreclosure, we were in a mad dash to finish most of the renovations within a two-month timeframe. I scrambled to pick paint colors and ended up not being happy with well, any of them. I put off re-painting for two years because I dreaded the thought of painting walls again. In November, I finally bit the bullet and repainted our entire main living area. Luckily, I had the HomeRight EZTwist PaintStick, which cut the painting time in half. Not only have I repainted the main living area with it, but since January I’ve also painted the guest bedroom, an accent wall, and the master bedroom with this little gem.

    #9 – Mod Podge

    My 10 Favorite Products & Tools for DIY Projects via RainonaTinRoof.com #diy

    Mod Podge is a powerful weapon. Its like a glue adhesive that leaves projects with a protective topcoat. I had a side table with a rough top that I just could not sand smooth. My solution was to put pretty wrapping paper over the top of it using Mod Podge. It worked like a charm and turned out cuter than I could have imagined. I’ve also used Mod Podge to create wall art using remnants of an old calendar and its what I used to adhere decorative numbers to dresser drawers. I made an adorable vintage nursery rhyme tissue box cover with it for my daughter’s nursery and used it to make a mongrammed serving tray that was a wedding gift. My favorite Mod Podge is the satin finish.

    #10 – Elmer’s ProBond Advanced Glue

    My 10 Favorite Products & Tools for DIY Projects via RainonaTinRoof.com #diy

    This is a new type of glue that just came out. It bonds porous materials to non-porous materials such as wood to metal or ceramic to drywall or glass to wood. And it works. It works amazingly well, y’all. I just used it on an awesome project that I’ll be showing you in a couple of weeks.

    That’s all I’ve got, folks. What are your favorite weapons of choice for DIY projects and crafts?

    Need more painting tips and advice? These should help you out then:

    The Ultimate Guide to Painting Anything – everything about painting furniture, walls and trim in one place.

    What Kind of Paint Do I Use on That? – Not sure what kind of paint to use? Read this article then – it walks you through all the types and paint and what to use each for!

    Topcoats 101 – when you should use a topcoat on furniture makeovers and when you don’t have to worry about it!

    You know you don't wanna miss any of this crazy.

    Sign up to get my posts delivered to your inbox here. 

    Stalk Me Here:

    Pinterest / Facebook / Twitter / Instagram

    SaveSave