Category: Parties

  • Easy Red Carpet Party Backdrop

    Easy Red Carpet Party Backdrop

    Throwing a VIP themed party? Here’s an inexpensive and simple to make red carpet party backdrop. Your guests will have a ball posing in front of this!

    Now that the Circus’ bathroom is finished and I’m finally able to come back up for air, I’m working to get caught back up on posting and finishing projects I’ve had on my list for a while now.

    This fun little vinyl record backdrop was part of the Circus’ VIP/Music Awards themed birthday party.

    Red Carpet Party Backdrop

    The backdrop was really simple to make and it was a super fun photo op to have for all the kids.

    This post contains affiliate links for your shopping convenience. Click here to read my full disclosure policy.

    DIY VIP Party Backdrop

    Supplies Needed

    Steps

    Step 1

    Prep the records.

    I opted to do a mix of black and gold records. If you want to do the same, spray paint some of the albums gold and let dry before preceding.

    Step 2

    String the records together.

    Lay 4-5 records on the floor with the side that you want to be seen facing down. Space the albums out evenly, then string fishing line from each album to the next, along the centers of the albums and securing with hot glue. Leave plenty of string above the top of the first album for hanging.

    Note: I used four albums per vertical row. If you have taller ceilings, you may want to use more. I also alternated between gold and black albums. I did four vertical rows total of albums along about an 8 foot span of wall.

    Set the strung albums aside after gluing.

    Step 3

    Hang the tablecloths.

    Using push pins, hang the white tablecloths at the top of your walls. Secure down along the sides with tape as needed.

    Note: I doubled up on tablecloths because I was covering a darker wall and didn’t want it to show through.

    Step 4

    Attach the command hooks.

    Determine where you will hang your vertical album rows. Make a mark at the top of the tablecloths in each location, then cut a small slit in the tablecloths at this spot.

    Attach the command hook to the wall underneath the tablecloths by putting the command hook through the slit.

    Step 5

    Hang the records.

    Hang each row of records from the command hooks. Use tape if needed to keep the records from moving. I found that mine were heavy enough to stay in place without tape.

    VIP Party Backdrop

    Top it all off with a red carpet and stanchions.

    The kiddos had a ball posing in front of this backdrop!

    This would be a super fun background for a music awards viewing party too! What do you think?

    Looking for more VIP party ideas?

    Here’s our full red carpet party complete with loads of party ideas!

    Make these DIY microphones for fun party props!

    And these free printable VIP passes add a special touch!

    Want to come back to these instructions later? Just pin the image below!

    VIP Red Carpet Party Background

    Hang out with us on social media!

    Facebook | Instagram | Pinterest | Twitter

  • Free Printable VIP Pass

    Free Printable VIP Pass

    Use this free printable VIP pass for your next special event, party or just for your kiddos to have fun with! Simply print, cut out and place in a lanyard!

    Another fun little thing I did for the Circus’ Red Carpet Birthday Party were these VIP Passes. These were for kids only, so it was an extra little touch that hopefully made them feel special and of course, like a VIP – which of course, they are!

    Free Printable VIP Pass

    Creative Commons red carpet image used for this printable found here. I replaced the stars with more red carpet.

    Aren’t they fun? As soon as each kiddo walked through the door, they got one of these.

    If you’ve got your own event coming up where these would be handy or want a fun little treat for partygoers, then you can easily whip out your own VIP Badges by downloading the free printable file I made for these.

    This post contains affiliate links for your shopping convenience. Click here to read my full disclosure policy.

    VIP Badge Free Printable

    Please note, these are for personal use only. Print as many passes as you wish, but you may not print and resell or sell the printable file.

    To get the printable VIP pass file, you’ll need to be a Rain on a Tin Roof email subscriber. It’s free and I don’t usually send out anymore than 2-3 emails a week – just when I publish new posts.

    Sign up below to get on the email list and to also gain access to the printable VIP badge file.

    Once you’ve subscribed and confirmed your subscription, you’ll be sent to a page where you can download the file. As a Rain on a Tin Roof Roof subscriber, you’ll also be able to snag all the other free printables in my printable library.

    Already a Rain on a Tin Roof email subscriber? You can put your email address in the form above and it should immediately take you to the download page for the VIP pass. You won’t be signed up twice for my emails though. You can also find a link to the file in my Printable Library if you’d rather go that route. Look at the bottom of the last email you got from me for the password.

    VIP Pass Printing Info and Tips

    • There are eight VIP passes per sheet of 8.5″ x 11″ paper.
    • The passes are on a black background that covers the entire sheet of paper. This will obviously take some ink. I highly suggest taking this to a printing center like Staples so you don’t use all your ink. Personally, I always take my stuff like this to Staples because I don’t even own a color printer. haha!
    • Printing on card stock or photo paper will be best. Photo paper will give you a more glossy sheen if you go that route. I had mine printed on card stock.

    Making the VIP Passes Look Legit

    Like how I worded that? haha.

    To give the passes a “real deal” look, after cutting each one out, I placed it in a lanyard.

    Printable VIP Badge

    I bought this pack of lanyards for our passes. Of course, you can go with whatever your little heart desires.

    Have fun with these – they could even just be a fun little addition to your kiddo’s dress up ensembles!

    Want more ideas for a great party?

    Get all the full Red Carpet party details right here.

    Check out these fun play microphones I made for the party here.

    And there are boo-koos of all sorts of great party ideas here!

    Want to remember this one? Just pin the image below!

    VIP Pass Printable

    Keep up on social media:

    Facebook | Instagram | Pinterest | Twitter

  • Red Carpet Theme Party

    Red Carpet Theme Party

    Roll out the red carpet and create your own Hollywood using these red carpet theme party ideas! You’ll throw a VIP party that no one will ever forget!

    While the Circus’ birthday is in May, she started talking party themes in January.

    And promptly after her birthday party this year, she started talking themes for next year’s party.

    I told her she had to nail down a theme no later than one month before her party. She was all over the place with themes, y’all – Power Rangers, dolphins, cats, dance party, dadadadadada.

    A few days before the deadline, she said she wanted a “country music awards party.” Yes, you know my heart swelled in that moment, folks.

    The more we talked, the more it became obvious that she wanted lots of different types of music played at her party though – not just country and she also wanted people to dress up if they wished. So, we morphed her birthday party into a red carpet party that encompassed her country music awards party and a little touch of Hollywood…

    Red Carpet Party Ideas

    This post contains affiliate links for your shopping convenience. Click here to read my full disclosure policy.

    VIP Party Invitations

    For her invitations, I wanted to combine the music and red carpet themes together.

    Red Carpet Theme Party

    I made her invitations myself using Picmonkey. On the back, we taped on another piece of paper that had a URL for people to go to to RSVP and add some songs to the party playlist. I know – we’re super extra. And unapologetically so.

    VIP Passes

    VIP Party

    Upon entering the party, every kiddo got their very own All Access VIP pass. The kids loved them and thought they were so cool. Again, I made these myself using Picmonkey. I bought this pack of lanyards to put each pass in. Get the VIP pass printable file here! These also made a great party favor for the kids.

    Hollywood Party Swag Station

    Red Carpet Party Ideas

    Black Tablecloths / Gold Fringe Backdrop / 7 Balloon / Red Carpet Runner

    After receiving their VIP pass, the kids went downstairs to the VIP lounge (a.k.a. the cleaned out den). On the way in, they could stop by the swag station and adorn themselves with gear if they so wished.

    To create the backdrop for the swag station, I hung up a couple of black plastic tablecloths from the ceiling and then layered on a gold fringe backdrop. On top of that, a simple “7” balloon.

    Red Carpet Party

    I put a table in front of the tablecloths, then covered that with another black tablecloth and pulled some of the gold fringe over the table. I used shiny things from around the house to hold all the swag.

    Red Carpet Birthday Party

    My ice bucket collection came in pretty handy – two of those held the play microphones I made for the kids. Tutorial for the DIY kids microphone is here! I used a small acrylic vase to hold play pearl necklaces.

    Red Carpet Theme Party Ideas

    Top Hats / Bow Ties

    Even the marble cheese board got in on the action! It held top hats and bow ties. All the swag doubled as party favors for the kids as well.

    Red Carpet Party Decoration Ideas

    The red carpet runner in front of the swag table led on into the VIP lounge….

    Red Carpet Party Backdrop

    Red Carpet Party Backdrop

    I took one wall in the den and created a backdrop to pose against when walking the red carpet.

    DIY Red Carpet Backdrop

    Red Carpet

    Tutorial for making the backdrop is here! My bestie, Jason came through with all the albums. He already had some that were painted gold, so I didn’t have to paint any! Always have a friend who is extra like you, folks. They are often the only other one who gets you. 😉

    DIY Stanchions for Hollywood Party

    I just couldn’t bring myself to do a red carpet party without stanchions. These are really expensive to buy and I did find a place where I could rent them locally, but for less than the amount to rent them, I was able to make my own that we can keep for future parties or for the Circus to play with anytime. I’ll have the tutorial up for these soon!

    The Lounge Area

    Lounge Area for VIP Party

    The Circus wanted dancing at her party. In order to create a dance space, I moved a few things out of the den and rearranged the sofa to provide a big open space for dancing between the lounge area and the backdrop. I strategically placed the sofa in front of the fireplace so no drunk on Capri Sun kiddos would fall into it. 😉

    For decorating here, I hung plastic red tablecloths over the bookshelves, then hung more gold records on top of them and threw in some albums to add to the decor.

    Music Dance Party Decorations

    There were also trophies for the kids to take home as favors, since this was a red carpet music awards party. 😉

    And of course, cupcakes.

    Kids Red Carpet Birthday Party Cupcake Toppers

    The Circus requested cupcakes instead of a cake, so that was easy for me – Hello, Publix! I made simple cupcake stands by gluing old records to candlestick holders spray painted gold.

    Star Cupcake Toppers for Kids Birthday Party

    For toppers, I cut some stars out of gold card stock using my Silhouette and then hot glued two together per toothpick. Easy peasy.

    A good time was had by all.

    And don’t think for a second those stanchions and red carpet didn’t get toppled over and pulled up by the crazed dance party a time or two.

    That’s a wrap for our red carpet birthday party. We definitely do birthday parties big around here, I won’t deny that, but they’re only little once right? Before long, she’s just going to want me to drop her at the movies with her friends for her birthday. 😳

    Looking for more party ideas?

    DIY Party Background for $5 – use this video tutorial to make a super simple party background in whatever colors fit your party’s theme!

    Simple DIY Party Decorations on a Budget – lots of ideas for party decor that can be customizable to all sorts of different party themes.

    Picmonkey Invitation Tutorial – learn how to make your own party invitations using the online photo editor and creator, Picmonkey.

    Want to save these red carpet ideas for later? Just pin the image below!

    VIP Red Carpet Party Ideas

    Keep up with me on social media!

    Facebook | Instagram | Pinterest | Twitter

  • Simple DIY Party Decorations on a Budget

    Simple DIY Party Decorations on a Budget

    Throwing a birthday party, baby shower, graduation party or any other kind of event can get expensive quick! Your party decorations don’t have to be expensive though! Use these easy party decoration ideas to create beautiful DIY party decorations custom fit to your event!

    The Circus’ birthday is in May and the kid has been talking potential party themes since January. Nope, not kidding. I’m not surprised either though. She always gets into the party planning for her birthday and we do love to throw a good party around here. At the moment, she’s going between a dance party birthday and a dolphin birthday party. Yes, complete ends of the spectrum. She’s also considered, but upon further evaluation nixed a Power Ranger party and carnival themed party. Personally, I’m 100% on board for the dance party birthday. I’m seeing a red carpet flanked by “doormen”. You’ll of course have to be on the VIP list to get in. Inside, I’m seeing a dance floor complete with a disco ball. Upon further thought, maybe that should just be my birthday party. 😉

    The Circus’ birthdays have always been filled with lots of homemade party decorations that were cheap and easy to make. After six parties, I’ve come up with quite a few DIY party decorations that can work not only for birthday parties, but also for baby showers, graduation parties and more. Just take the general idea and modify it to fit your party’s theme or colors. 🙂

    This post contains affiliate links for your shopping convenience. Click here to read my full disclosure policy.

    Easy Party Decoration Ideas

    Custom DIY Party Invitations

    DIY Party Decorations

    Have’t made those party invitations yet? No worries! I’ve made all of the Circus’ party invitations using PicMonkey so that I can easily customize them to her and her party’s theme. Use this tutorial for a basic party invitation and this one for making the farm themed one you see above.

    DIY Party Backdrop

    Easy Party Decoration Ideas

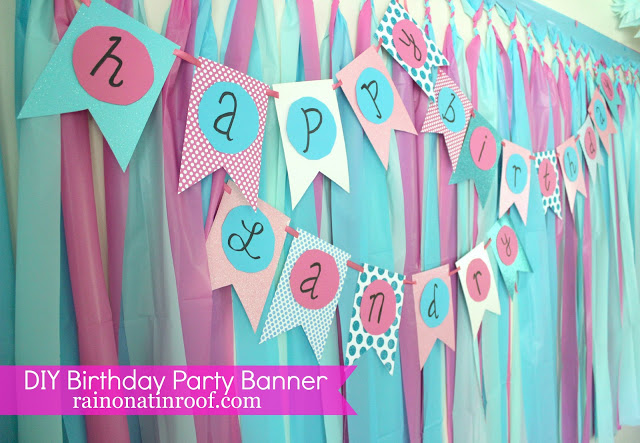
    My most tried and true party decoration – a party backdrop made from plastic tablecloths. We’ve had one of these for four out of six of the Circus’ birthday parties and I’ve also made a couple of these for baby showers as well. These are the perfect focal point for your party. Place it behind your cake table, present table, or just leave it on an open wall to work as a photo backdrop too. If you’re using a banner, it’s the perfect backdrop for your party banner too. This thing is so easy to make – all you’ll need are a few plastic tablecloths, scissors and table. Full tutorial for this one HERE!

    Easy Party Banner

    Homemade Party Decorations

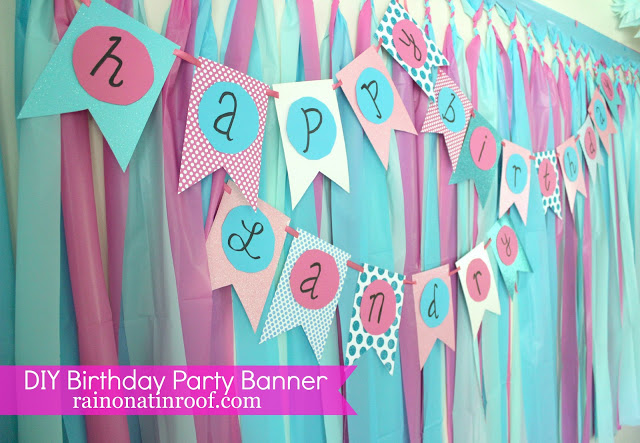
    Speaking of party banners, this one is easy peasy to make. No fancy Silhouette or Cricut required – just trace and cut. Find out how to make it here!

    If you want to be more elaborate with your party banner…

    DIY Party Decorations on a Budget

    I made this superhero style banner with Picmonkey. You can switch up the design to work with your party’s theme. See how to make your own HERE!

    Budget Flower Arrangements + Cheap Centerpieces

    Cheap and Easy Party Decoration Ideas

    For the Circus’ farm party, I wanted simple, but pretty flower arrangements on each table. Premade, ready to go arrangements aren’t cheap. To keep things wallet friendly, I bought three different bouquets of three different kinds of flowers, then mixed them all up in mason jars for the tables.

    If some kind of animal works with your party theme, raid your kid’s toys for little plastic animals, then adorn them with mini party hats. I borrowed farm animals from the Circus then topped each with mini party hats made from cupcake liners.

    DIY Cake Topper

    Budget Homemade Party Decorations

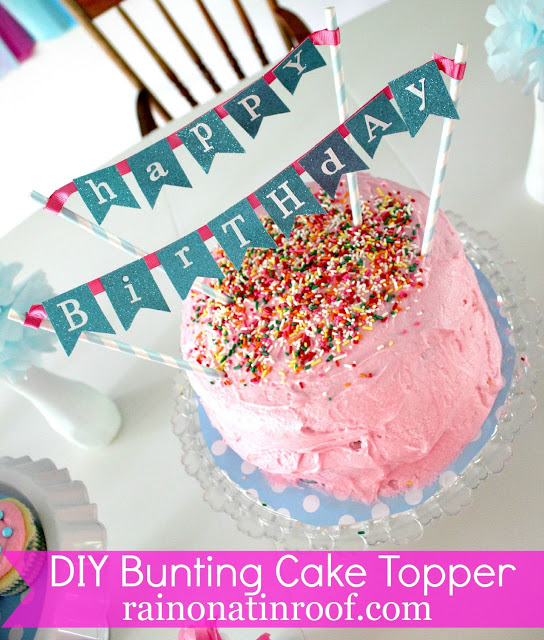
    Cake toppers can add so much to a cake and the party decorations and they can be super easy to make! I did the one above for the Circus’ first birthday using just scrapbook paper, stickers, ribbon and straws! You can easily customize it with colors, patterns and wordage for your party. I did a similar one before for a wedding shower and used the couples monogram on the topper. Find out how to make it HERE.

    DIY Cupcake Holders

    Simple DIY Party Decorations

    I made these cupcake holders using items from a thrift store and they added so much cuteness to the food table! I made mine white so that they can work with any party decor. The top has an inset that allows you to put a round piece of cardstock in, so that’s another place for you to add some color and decor! Find out how to make these cupcake pedestals HERE!

    Photos as Party Decorations

    Easy DIY Party Decorations on a Budget

    This is one of those party decorations that everyone will love to spend some time looking at – a picture collage. If you’re doing this for a birthday party, obviously doing it with the birthday number is a no-brainer. If you’re doing it for a wedding shower, use pictures of the couple both together and separate as they were growing up, then put the photos in the shape of what will be the initial of their last name. For graduation parties, select a picture or two from each year of the graduate’s school grades, then put them in the shape of their initial. More on how I did the one above is HERE!

    DIY Party Hat

    Simple Homemade Party Decorations

    This will always be my most favorite party hat. 🙂 I made this using good ole’ scrapbook paper and yarn pom poms. Super easy. Super adorable. See how to make your own party hat HERE!

    Semi-Homemade Party Decorations

    Easy and Affordable Party Decoration Ideas

    A great way to save time, but still have custom party decorations is to embellish store bought decorations. I like to call these semi-homemade party decorations. 😉 For the ones you see above, I bought plastic horses at the Dollar Tree then painted them in bright colors and glittered their manes. Then, I just glued them on the store bought party hats and wall decorations. See more about it HERE!

    DIY Party Decorations that will become keepsakes…

    Affordable Party Decoration Ideas

    To decorate some of the tables at the Circus’ farm party, I made some simple stencil art that was customized for her party theme. We hung onto these afterwards and now they are hanging in her bedroom! Obviously, farm animals and horseshoes aren’t going to work for every party. 🙂 For things like wedding showers, do art with the couples’ monogram, initials, future wedding date, etc. For baby showers, ask the parents-to-be how they are decorating the nursery and make the art match the nursery so they can use it in there afterwards!

    Personalized Table Decor

    DIY Party Decorations that are easy and cheap.

    Another great table decoration here – add height and personalization by making personalized cutouts relevant to your party theme. These were for the Circus’ birthday, so they have the birthday number on them and her initials. If you’re doing it for a wedding shower, make a bride and groom, rings or “I do!” cutouts. To make my cutouts, I bought a graphics file on Creative Market, then loaded them into my Silhouette to cut out.

    Any budget homemade party decorations you can add to this list?

    Pin This Post
    Simple DIY Party Decorations

    Join the Freak Show On:

    Facebook | Instagram | Pinterest | Twitter

  • Farm Birthday Party Ideas

    Farm Birthday Party Ideas

    Whoever said a farm birthday party couldn’t be stylish too? These farm themed birthday party ideas prove that a farm party can be both fun and filled with adorable and humorous party decorations.

    When the Circus decided she wanted a farm theme party for her 6th birthday this year, I was totally on board, but I didn’t want it to be your typical farm theme party with everything black and white to reflect milk cows and hay all about. I wanted it to be colorful too – like her! I’m happy to say we successfully pulled off one full of personality, colorful farm themed birthday party!

    This post contains affiliate links for your shopping convenience. Click here to read my full disclosure policy.

    Decoration Ideas for a Farm Party

    These ideas are great for any gathering that is held on a farm or farm related in some way!

    Set the mood.

    Farm Birthday Party

    Create an entrance to your party and set the mood with a “Welcome to the Farm!” sign. Use hay bales to hold it up if needed and embellish with balloons, bandannas and more!

    Keep the tables simple.

    Farm Birthday

    There aren’t a whole lot of frills on a farm. Keep the table decorating simple by using red and white checkered tablecloths – a pattern that’s often seen on farms. Find the tablecloths here. This will also make for easy cleanup – these are just plastic, so after the party, just toss the soiled tablecloths in the trash!

    Affordable and Simple Flower Arrangements

    Farm Birthday Party Ideas

    Mason jars are a staple around farms. Fill them with grocery store flower bouquets that you mix and match yourself. For these arrangements, I bought three different bouquets at the grocery store, then just mixed flowers from each bouquet into each mason jar.

    Barnyard Games

    Farm Party

    Have a few barnyard games around for folks to play. This bean bag toss is fun for both kids and adults. It’s simply made from one sheet of plywood and a little spray paint.

    Farm Party Ideas

    Another easy play activity to create for kids at farm themed parties are these “horses” made from square hay bales and stick horses. Just place the stick horse in the hay bale and let the kids ride!

    Other barnyard games could include horseshoes, and pin the tail on the donkey.

    Ideas for a Farm Birthday Party

    These ideas are specifically for farm theme birthday parties! Personalize the party with the birthday kiddo’s age, name, and more!

    Mini Party Hats for Animals

    Farm Theme Party

    You probably noticed these cute little fellers in one of the photos above. I borrowed some of my daughter’s plastic farm animals, then adorned each with a mini party hat made from a cupcake liner. See how to make the hats here! I scattered these all around the party on the eating tables, food tables, etc. If you don’t have any farm animals on hand, you could use these.

    Farm Birthday Party Banner

    Farm Theme Party Ideas

    Create a birthday banner that reflects your farm theme by simply attaching letters to pieces of burlap using clothespins. Add more color to the banner by tying strips of colorful, patterned fabric to the ends.

    Farm Birthday Art

    Farm Themed Birthday Party

    Another simple farm party decoration I made were these pieces of art which I scattered all around the party. To make the one above with the farm animals, I used this stencil and just painted it on a small canvas, then just added the party themed stickers after the paint was dry.

    Farm Birthday Party

    I made this horseshoe art decoration for the party using this stencil. I personalized it a little more by adding “six” using stickers to the bottom of the horseshoe.

    The great thing about these party decorations is that after the party we hung them up in the kiddo’s room – nice little mementos to have!

    Animal Cutouts

    Farm Birthday Party Ideas

    To add some decorative height as needed around the party, I made these animal cutouts. First, I bought these animal silhouettes, then loaded them into my Silhouette cutting machine and cut them out on colorful pieces of card stock. I glued them onto small wood dowels, then added touches of glitter here and there. Personalize these with your child’s age and initials. Stick them in bottles or vases as desired – we opted for old Coca Cola glass bottles. We also hung onto these as little decor pieces after the party.

    Custom T-Shirt for the Birthday Boy or Girl

    For the birthday party, the Circus wore a cute little shirt a friend of ours made that said “Farm Fresh.”

    Don’t forget the party favors!

    Farm Birthday Party Favors

    Don’t just give them any ol’ party favor – give them a farm birthday party favor that they’ll enjoy for longer than just one day! We gave each of our party guests a packet of seeds and a small planting pot.

    Do you have any other farm theme party ideas to share?

    Need more budget DIY party decoration ideas? You’re going to need to see these then…

    Simple DIY Party Decorations on a Budget

    How to Make Farm Birthday Party Invitations using PicMonkey

    Easy DIY Party Background for $5

    And the full list of all my party ideas, decorations and more can be found HERE!

    Follow along on social media for more ideas:

    Facebook | Instagram | Pinterest | Twitter

    Farm Birthday Party Ideas
  • Farm Birthday Invitations using Picmonkey

    Farm Birthday Invitations using Picmonkey

    Every year, I make a customized birthday party invitation for the Circus’ party. This year, it’s a farm themed birthday, so I made farm birthday invitations. It’s actually pretty easy to make your own invitations and on top of that, it’s much more affordable than buying customized ones via other sources. Use this guide to make your own farm invitations or as a guide to whip up your own different themed party invitations. 

    Another birthday in the books for the Circus! I can’t believe it, but she is already six!

    This year, she wanted a farm themed birthday party. As I always do, I made the invitations for her birthday myself using Picmonkey. It took me about an hour or a little less to put this one together and order the actual printed invitations. The best thing about making your own invitations though is that they can be 100% customized to fit the party and the birthday kiddo. Bonus – it’s much more affordable to make and print out your own invitations instead of going with another design and print service somewhere else online.

    Here’s the farm birthday party invitations we ended up with this year for the Circus’s celebration…
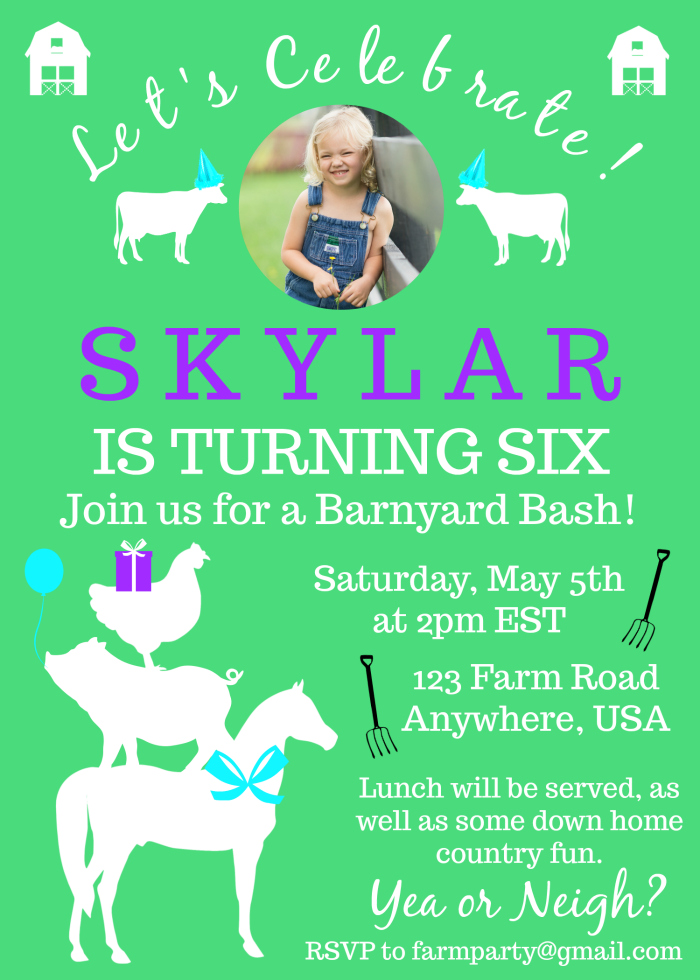
    Farm Birthday Invitations Tutorial - fully customizable - Rain on a Tin Roof

    Isn’t it adorable? Here’s how we did it…

    Farm Invitations Tutorial

    This post contains affiliate links for your shopping convenience. Click here to read my full disclosure policy.

    The video below will completely walk you through the steps of making your own birthday invitations using Picmonkey and even printing them out. Like I said, you will be able to completely customize this invitation to your own liking. You can change the fonts, colors, anything like that. In the video, I do show you exactly how I did mine, but you can change it up however you like.

    Before you start to create your own invitation, there are a couple of things you need:

    1. Farm Animal Images 

    To create farm animal birthday invitations, you have to have some cute farm animal graphics, of course! The one thing Picmonkey does not have are any farm animal images. They have just about every other kind of graphic you could need, but no farm animals. (Come on, Picmonkey – get on it!) So, you will need to have those on hand before you start. I purchased this pack of farm animal silhouettes from Creative Market to use. It was $5 for 42 farm related images and it was a steal. Not only did I use these for the invitations, but I also used them for decorations at the party as well.

    2. Photo of the Birthday Kid (Optional)

    I always like to put a photo of the Circus on her birthday invitations. I keep one every year and that way, you can always look back and see how much they changed from year to year. If you don’t want to include a photo on your invitation, then you can just replace the photo with another farm themed image or something else to your liking. I’ll show you how to crop the photo into a circle in the video.

    Ready to get started on your own farm party invitations? Watch the video below! I’m also including written directions as well below the video, but the video will give you the best visual. First, go to Picmonkey!

    [adthrive-in-post-video-player video-id=”isvGrWP0″ upload-date=”2018-05-22T13:12:10.000Z” name=”How to Make Farm Birthday Party Invitations using Picmonkey” description=”Make these farm birthday invitations for free using Picmonkey. You can make them completely customized to fit your birthday party’s details and even add a photo of the birthday kiddo! You can make your own invitations in under an hour with this tutorial – all you need to do is print them! “]

    Here’s what I did step-by-step. As you do this, be sure to leave plenty of blank space around the edges of your invitation. This will ensure that when you go to print the invitations that none of your text or images will get cut off.

    Barnyard Invitations: Step by Step

    Steps

    Step 1

    Create the circle image of the birthday guy or gal.

    Go to Picmonkey. Select Edit > Computer > Select the Photo of the birthday kid you want to use.

    Go to the square on the left that says Frames > Shape Cutouts > Circle.

    Size and move the circle until you have the photo cropped as you like it. Export the image and save it to your desktop.

    Step 2

    Go to the Picmonkey homepage. Select Design > Blank Canvas > Print Size, 5×7. Scroll toward the bottom and select the vertical blank one.

    Step 3

    Select Canvas Color on the left side. Choose the color you want your background to be. We used a green color, which was 4adc7c. You can simply type that into the letter box under Canvas Color if that’s the same one you wish to use.

    Step 4

    Click on the Butterfly icon on the left, which is the Overlays menu. Click Add Your Own. Find and choose the barn images or whatever other image you wish to use and put one in each of the upper corners of the invitation.

    Repeat this process and add in the animals on top of one another in the lower left hand corner as well.

    Use the Overlay box that pops up with each image to turn the images white or whatever other color you want to use.

    Step 5

    Click on the Tt on the left. Add in a text box using the font Black Jack. Type in “Let’s Celebrate!” Make it white or another color you want to use. Click on the Effects button on the text menu box that pops up and select curve. This will curve the text. Place this text box near the top of the invitation.

    Step 6

    Click on the Butterfly icon > Add Your Own. Select the photo you cropped into a circle. Size and place it just under “Let’s Celebrate!”

    Step 7

    Add in the rest of the text.

    Click on the Tt button again and add in the rest of the details for your party. Below is a detailed image noting each text font and colors.

    Sorry about the typos in the invitation near the bottom – you get the idea though! 

    Farm Invitations - Fonts and colors - Rain on a Tin Roof

    Step 8

    Add in the rest of your images.

    Go back to the Butterfly icon > Add Your Own. Add in the cows on either side of the photo. Add the pitchforks beside the date and address.

    Go to the Apple icon on the left. Select Celebrate. This is where you can add the balloon and party hats. To add the gift and bow, select Santaland from the Apple icon. You’ll find those under that theme. Below is another image with all the details on the images I used.

    Barnyard Invitations - graphics and overlays to use - Rain on a Tin Roof

    Step 9

    After you’ve got your invitations exactly how you like them, click Export along the top and save it to your computer. You can also click the Save icon along the top and that will save it to your Picmonkey hub, which will allow you to come back in and edit the invitation if needed. I generally like to do both of those options in case I do need to come back in and edit the invitation for some reason.

    Step 10

    Print your invitations!

    You can also print your invitations right from Picmonkey. Once you’ve exported and saved your party invitation to your desktop, go to the Picmonkey homepage. Scroll down to the bottom and click on Picmonkey Print under Apps + Tools.

    Select Flat Cards > Get Started > 5×7 > Single Sided > Whichever paper type you prefer > How Many Invitations You Need > Upload Your Invitation. Make sure everything looks good and that nothing is cut off on the edges, then finish your order!

    Farm Party Invitations - how to make your own - Rain on a Tin Roof

    Isn’t she a cutie? Of course, I’m partial though. 😉

    Have you ever created your own invitations for parties? Tell us about them in the comments!

    Looking for more ideas for your birthday celebrations? 

    Get more ideas for farm birthday parties here!

    How to Make a Party Banner with Picmonkey – yep, I use Picmonkey to make party banners too!

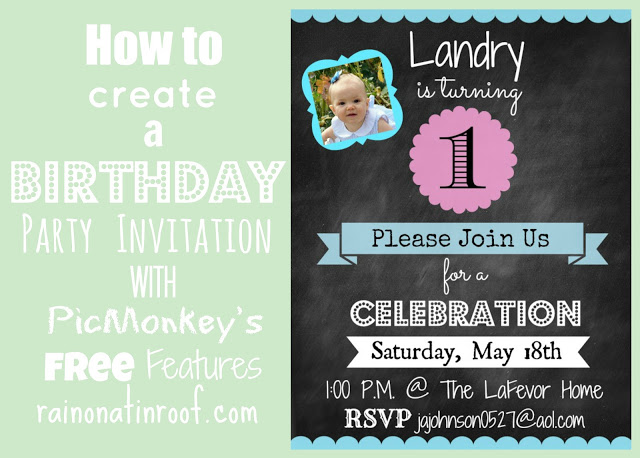
    Another Kind of DIY Party Invitation using PicMonkey – this one is a more basic invitation that could work for lots of different party themes.

    Want to know what else Picmonkey can do? Check out these 17+ Picmonkey Tutorials, Tips and Projects then.

    Want to refer back to this post later? Pin the image below!

    Farm Birthday Party Invitations Tutorial using Picmonkey - Rain on a Tin Roof

  • How to Make a Party Banner with PicMonkey

    How to Make a Party Banner with PicMonkey

    The Circus has turned five. 

    I’m not sure how we got here, or how we made it here all in one piece, but nevertheless, we did. #thankyajesus

    For her birthday party, she wanted a superhero theme – mostly Wonder Woman, but with a splash of Supergirl and Batgirl as well. #girlpower

    I was far too excited about this one. I love Wonder Woman. And really, all things girl power. 

    For the party, I made one of my super easy, super cheap party backdrops, then layered on a Wonder Woman / Superhero Style party banner I made using PicMonkey. 

    This tutorial will teach you how to make a party banner with PicMonkey. Customize the DIY party banner with your party theme - easy DIY Party Decor!

    The banner is really easy to make with PicMonkey. After you’ve created it, you just print it out, cut out the shapes, and string it together. 

    How to Make a Party Banner with PicMonkey

    Besides obviously needing a computer and the internet, you’ll also need a couple of other things after you print out the banner.

    Tools & Supplies

    Steps

    Step 1.

    Watch the video below to first make the banner using PicMonkey. Keep in mind you can customize the banner however you wish once you have the basic shape of the banner made – change up the colors, switch out the backgrounds, etc.

    Some of the fonts and features I used for the banner are part of PicMonkey’s Premium Features which aren’t available with the free version of PicMonkey. You can switch those out and use their free features or you can spring for the premium features, which are $3.99 – $7.99 per month. Personally, I couldn’t live without the premium features and the price is more than worth it to me. 
    [adthrive-in-post-video-player video-id=”MqDcJrnE” upload-date=”Tue Jun 06 2017 19:00:07 GMT+0000 (Coordinated Universal Time)” name=”How to Make a Custom Party Banner with PicMonkey” description=”Learn how to make a custom party banner using Picmonkey.”]

    Step 2. 

    Upload each of your banner files to a place where you can print them off. I used Staples for this and just uploaded all of my files into their copy and print services website, placed the order, then picked them up in-store. I printed mine out on a heavy 8.5 x 11 cardstock so that they would lay nice and flat against the backdrop. Also, be sure you print multiples of any letters you may need more than one of.

    Step 3.

    Once you get your banner sheets printed out, cut out around the shapes as I noted in the video. 

    Step 4. 

    To string the banner together, use the X-Acto knife and cut a small slit in each upper corner of each bunting. Weave your ribbon, string, or golden lasso 😉 through the buntings to connect them together. 

    This tutorial will teach you how to make a party banner with PicMonkey. Customize the DIY party banner with your party theme - easy DIY Party Decor!

    Hang the banner on the wall with thumbtacks or push pins. 

    This tutorial will teach you how to make a party banner with PicMonkey. Customize the DIY party banner with your party theme - easy DIY Party Decor!

    Our mini Wonder Woman thought the party decorations were pretty cool! 

    Do you have any favorite things to whip up with PicMonkey?

    You might also want to see…

    How to make a DIY birthday party backdrop for $3.

    DIY Birthday Party Backdrop

    Simple DIY Birthday Party Banner with Paper and Scissors

    DIY Birthday Banner with Paper, Scissors and a Marker

    17 PicMonkey Tutorials, Tips, and Projects

    PicMonkey Tutorials, Tips and Projects

    Pin This Post

    This tutorial will teach you how to make a party banner with PicMonkey. Customize the DIY party banner with your party theme - easy DIY Party Decor!

  • DIY Party Invitation using PicMonkey

    DIY Party Invitation using PicMonkey

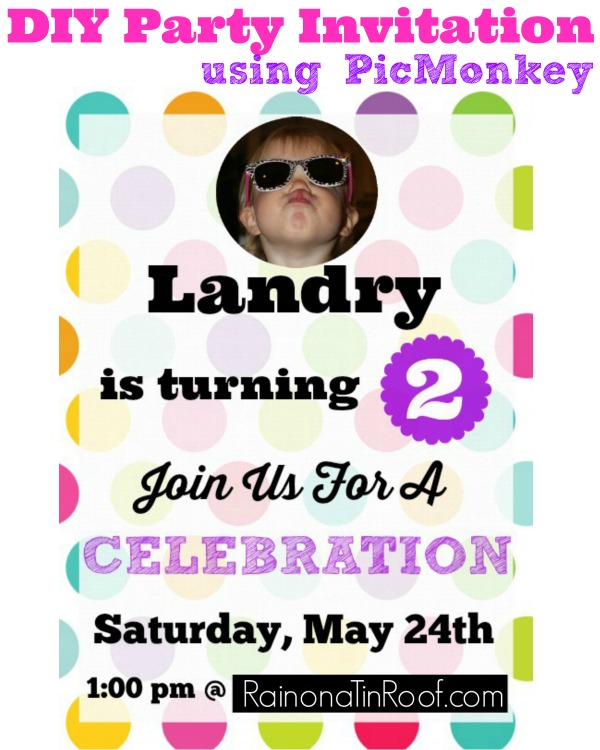
    Create your own customized party invitations for any event using this Picmonkey invitation tutorial! No more paying a boatload for custom party invites – now you can do it yourself on the cheap with Picmonkey invitations! 

    This post contains affiliate links. 

    Once more, its that time of the year.

    When Mama drinks a little more cheap beer than usual.

    When she may cry simply because the streamers aren’t twisting just right.

    When she is hovering on the edge of a nervous breakdown.

    That’s right, its birthday season around here.

    Why I put this much stress on myself for the kid’s party, I do not know. I mean, let’s be honest. The minute the kid dropped her first cuss word, that mother of the year award was out of my reach. As if a perfectly decorated birthday party would bring it back.

    One thing however, that is going right in the birthday planning are the party invitations I made using PicMonkey.

    Picmonkey Invitation Tutorial

    Bless you, PicMonkey.

    Bless you for helping me keep a little piece of what sanity I have left.

    Here’s how I made my Picmonkey invitations. You can customize them to your liking or party theme however you wish.

    DIY Picmonkey Invitations

    These were really easy to make. I think I had it all done in about an hour – more time to make those streamers just perfect.

    Steps

    Step 1

    If you don’t already have a Picmonkey account, you’ll need to sign up for one. You can get a free trial here or just go ahead and pay the $6 a month if you want – it’s completely worth it and honestly, it’s a steal for how much you save making stuff like this yourself.

    Step 2

    Select a background you want to use.

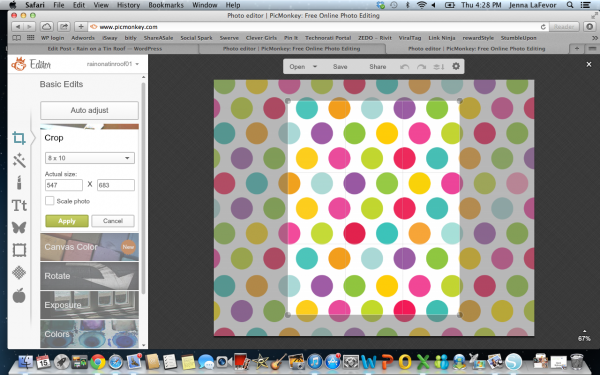
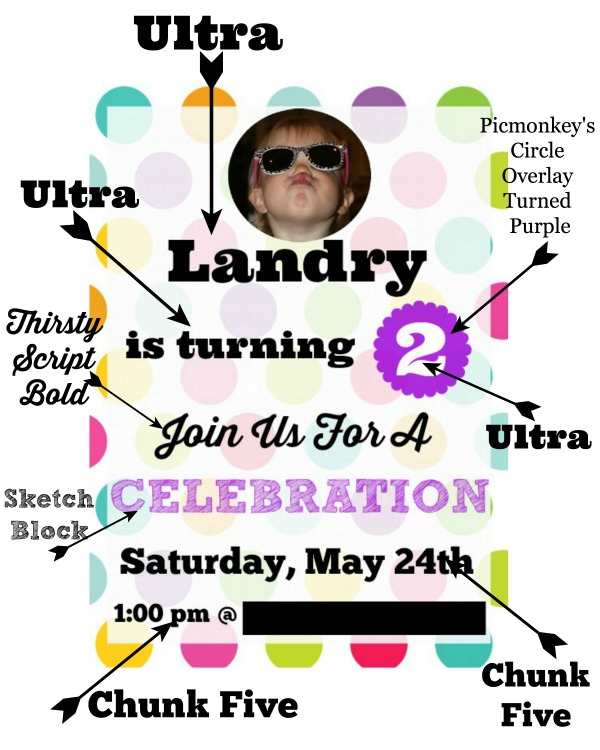
    I went with the different colored polka dots because the kid’s party is a Care Bear theme and ya know, there are lots of rainbows in Care-A-Lot and I didn’t want bears to be exploding from every surface. I just googled rainbow polka dots, or polka dots, or rainbow, until I found an image that I liked and was large enough to work for what I needed. And of course, that was free. When you have your image saved, open it up in PicMonkey, and crop it down to an 8×10 size or a rectangle size of your choice. I do 8×10 and then print in 5×7 sizes. Doing the larger size just gives a better resolution – or I think so anyway. Picmonkey InvitationsStep 3

    Put an overlay on top of the background. 

    Obviously, if you tried to put your text on top of all those different colors, it isn’t going to stand out very well. To help with this, put a white faded overlay on top of your background. Do this by selecting the butterfly icon, then the geometric tab, then the rectangle, size it as needed, change the color to white and fade it to 15%. Center it on the background.

    Picmonkey Invitation Tutorial

    Step 4

    Add your text and other images. 

    To make this easier on you and me, I have this handy little graphic that tells you exactly what fonts and images I used.

    You can send me a cheap beer to thank me for it.

    Picmonkey Invitations

    Last year’s birthday party invitations had quite a few different fonts going on. This year, I stuck with just a few different ones because there was so much going on with the background.

    Step 5

    Save and Print.

    Once you’ve got the invitations to your liking, save them on your desktop. After that, go to Picmonkey Print and print out the invitations or you can also print them elsewhere if you wish. I typically print out our invitations in a 5″ x 7″ size.

    Have you ever made party invitations using PicMonkey or something else?

    You may also want to see…

    This tutorial will teach you how to make a party banner with PicMonkey. Customize the DIY party banner with your party theme - easy DIY Party Decor!

    How to Make a Superhero Party Banner with Picmonkey

    Top 10 Posts of 2013 from RainonaTinRoof.com

    DIY Party Backdrop for $5

    Pin This Post

    Custom Picmonkey Invitation Tutorial

    You know you don’t wanna miss any of this crazy.

    Stalk Me Here:

    Pinterest / Facebook / Twitter / Instagram

    SaveSaveSaveSave

  • Sparkly Horses Birthday Party

    Sparkly Horses Birthday Party

    Every year around the end of April, I feel the need to start drinking a tad bit more.

    Because a birthday party is on the horizon.

    And that means lots of planning.

    And organizing.

    And making.

    All in a specific timeframe.

    And I’ve never been good at any of that stuff all together at once.

    Thus, why the sparkly horse birthday party was two months ago and you are just now hearing about it.

    I needed time to recuperate.

    Sparkly Horses Birthday Party

    This post contains affiliate links. 

    Sparkly Horse Birthday Party / DIY Party Decorations / DIY Party Hats and More

    While many stuffed animals come and go around here, the horses never leave. The circus has an unwavering love for horses.

    It was obvious horses would be her 3rd birthday party theme.

    I actually did less in terms of decorations this year than the past two birthdays, which was nice. Here are a few of my favorite things from the party though.

    Horse Birthday Party / DIY Horse Wreath / DIY Party Decor / Horse Birthday Party Wreath

    I made a horse wreath to put on the front door. I started scouring thrift stores and yard sales for bigger sized horses a few months before the party and found that one for $0.25. I thought I would have to paint it, but it actually worked perfectly with the purple, pink and blue colors I used. The “3” came from the Target dollar spot. I just put gold glitter on it. I made a paper straw garland to drape across the wreath.

    Horse Birthday Party / Photo Number Collage / DIY Party Decorations

    There was also the annual number photo collage. Two and three have not been nearly as easy to make as “1” was. I picked up some vintage horse show ribbons at the Country Living Fair and draped it around the neck of one of the kid’s play horses and popped it beside the collage.

    DIY Party Background / DIY Party Decor / Horse Birthday Party / DIY Party Backdrop

    Inside, we had our also annual DIY party background. It’s just too easy and cheap not to make. I did opt not to make our own banner this year though and instead bought this one from Target. It worked pretty well with the rest of the decor and saved me some time. The black and white fans with horses were semi-DIY party decorations.

    DIY Birthday Party Hats / DIY Party Decor / Horse Birthday Party

    My favorite party decorations, excuse me, party attire, were the colorful and sparkly party hats. Once more, Target had the hats and we just added the horses after painting and glittering them up.

    Horse Birthday Party / DIY Party Decor / DIY Party Hats

    I spread out most of the hats on the buffet and tossed the horns in the clam shell.

    Also, I was a total slacker this year and did not make the birthday cupcakes.

    And it felt so good.  

    Instead, we had a horse birthday cake made and it was the most adorable (and scrumptious) thing I’ve ever seen or eaten. Local Chattanooga people – it was from the Irresistible Sweet Shoppe.

    The absolute best thing about the party though was the petting zoo. We hired Bagby’s Critter Corral to come out for an hour during the party and it was just awesome. They brought ponies, goats, sheep, pigs, rabbits, an alpaca and all other kinds of creatures. All the kids (and lots of the parents) had a ball.

    And the birthday girl got to ride a pony, which totally made her day.

    Need more DIY Party Ideas?

    Then, you’ll probably want to see this…

    DIY Party Decor Ideas

    pin-this-post-2

    Sparkly Horse Birthday Party / DIY Party Decorations / DIY Party Hats and More

    You know you don’t wanna miss any of this crazy.

    Sign up to get my posts delivered to your inbox here.

    Stalk Me Here:

    Bloglovin / Pinterest / Facebook / Twitter / Google+ / Instagram

    blog-signature-summer-15

    SaveSave

  • Semi-DIY Party Decorations

    Semi-DIY Party Decorations

    Did you ever watch that television show, Semi-Homemade Cooking with Sandra Lee?

    I’m not even sure that its still on anymore, and I only watched it a few times but what I loved most about it was that she always made a great cocktail during the show, oh and that some of the actual food was already made.

    But mostly that she always had a cocktail.

    I worked on discovering my inner Sandra Lee with these semi-DIY party decorations for the circus’ upcoming third birthday party.

    The circus even helped me with them.

    Which explains why cocktails were needed when we were finished. 

    Such a great idea! Save yourself time by getting store bought party decorations, but then customizing them with items that fit your party theme! Birthday Party Decorations

    Disclosure: This post was a collaboration with Delta Faucet. However, all opinions and kids with duck faces are 100% mine.

    Black + White, Bright Colors, Gold + Glitter.

    I mean really, could it get any better?

    Semi-DIY Party Decorations

    To make some semi-DIY party decorations of your own, you’ll need:

      • Store bought party fans (those came from Target too)
      • Something that relates to the theme of your party. The kid is having a horse birthday party, so we bought the larger plastic horses from the Dollar Tree and the smaller ones from Amazon.
      • Acrylic paints in colors of your choice (all of our colors came from Target)
      • Paintbrushes
      • Glitter
    • Hot glue

    Make your own party decorations!

    • And a cute little circus (duck face optional)

    Steps

    Step 1:

    Paint the horses.

    Paint your horses bright colors!

    We stuck with pink, purple, and blue for our horse. Those are the kid’s favorite colors and just so happen to work perfectly together.

    I swear, her mama didn’t have a say in it at all. 

    Paint your horses fun colors!

    Most of our horses took a couple of coats of paint, so between coats, we may have had a little too much fun with the paint.

    Get messy! Delta Happimess

    It may or may not have ended up everywhere…

    But that was ok, it was a #HappiMess.

    And really if you aren’t making a mess, is it even worth doing? 

    Clean up with the Delta Trinsic Touch2O Faucet!

    Our shiny, new Delta Trinsic Touch2O Kitchen faucet cleaned up all paint splattered hands, and faces, easily.

    Clean up with the Delta Trinsic Touch2O Faucet!

    To turn it on, you touch it.

    Literally. You just touch it. 

    Needless to say, the kid thinks its the coolest thing ever.

    Step 2:

    After our painted horses were dry, I carefully painted Mod Podge on their tails and manes, then let the circus sprinkle glitter on them.

    Semi-Homemade DIY Birthday Party Decorations

    That’s her, OMG, she’s giving me glitter again! I can’t believe I get to have glitter again after what went down with glitter last time she handed it to me, face.

    We won’t talk about the last time she got glitter…

    Throw some glitter, make it rain!

    She did a really good job this time though. 🙂

    Step 3: 

    After the Mod-Podge had time to dry, I hot-glued the large horses onto the fans and the small ones onto the party hats.

    Semi-Homemade DIY Party Decorations

    She was pretty pumped about them.

    Birthday Decoration Ideas - Buy plain party decorations from a store, then customize them to fit your theme!

    Ok, even I’m pumped about how colorful and glittery they are. 

    So cute! Buy the birthday party hats at the store, but then customize it with your theme! DIY Birthday Party Decorations

    If these actually make it to her birthday party in a semi-decent state, it’ll be nothing short of a miracle.

    She can’t keep her hands off them.

    Get store bought party decoration items, then customize them to your theme! DIY Party Decorations

    Are you a semi-homemade party decorations kind of gal? 

    Need more easy party decoration ideas?

    Don’t miss these simple DIY party decorations on a budget and then be sure to see my full gallery of DIY party invitations, decorations and more.

    You know you don’t wanna miss any of this crazy.

    Sign up to get my posts delivered to your inbox here.

    Stalk Me Here:

    Pinterest / Facebook / Twitter / Instagram

    pin-this-post

    Oh. My. Goodness. Stop it! These horse birthday party decorations are just too much! Love this idea for "semi-homemade" DIY Party Decorations!

  • Easy Happy Birthday Sign

    Easy Happy Birthday Sign

    Hi Friends!

    I was secretly MIA last week on a beach vacation. It was great, but of course I’m playing catch-up. So today, I’m going to share the last of my DIY party decorations from the Care Bear & Rainbow Birthday party.

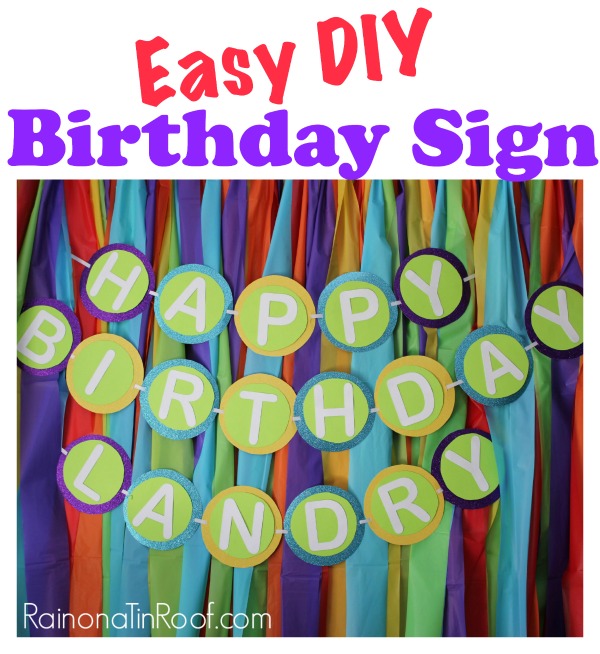
    This Happy Birthday sign was easy to make and got the job done.

    Easy Happy Birthday Sign via RainonaTinRoof.com #happybirthdaysign #birthday #crafts #diypartydecorationsThis post contains affiliate links for your shopping convenience. Click here to read my full disclosure policy.

    Instead of going with a bunting or flag shape like last year’s banner, I opted for simple circles this year.

    This was real technical, y’all, so pay very close attention.

    If you know anything about me, then you know that last sentence was a lie.

    Materials: 

    Cardstock in colors of your choice, 12 x 12 size  – This is for the background circles. I used 10 sheets total. If you are just doing “Happy Birthday,” you will only need 8 sheets. I used glitter card stock as the biggest background circle and regular card stock for the rest.

    Cardstock for the letters – 5-6 sheets

    Scissors

    Silhoutte (optional)

    2 Round Objects – 1 slightly smaller than the other

    Skinny Ribbon

    Pencil

    Steps

    Step 1

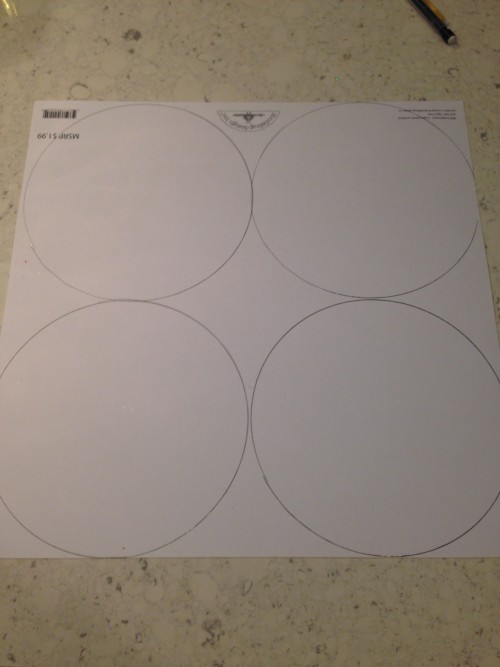
    Flip over the card stock you will use as your biggest background circle. This was the glitter card stock for me. Place the largest circle object over it and trace around it. I got four circles on one 12 x 12 sheet.

    Easy Happy Birthday Sign via RainonaTinRoof.com #happybirthdaysign #birthday #crafts #diypartydecorations

    Repeat this on all the card stock you will be using for your biggest circle. Cut them out

    Step 2

    Trace the smaller circle over the backside of the your other card stock, then cut them out.

    Step 3

    Glue the smaller circle onto the larger circle. I used hot glue for this.

    Step 4

    For the letters, I used my Silhouette. You can do that, or you can use large sticker letters or trace some and then cut them out like I did here.

    Step 5

    Adhere the letters to the top circle.

    Step 6

    Cut small slits on each side of the circles and weave ribbon in out and to connect them.

    Sorry for the lack of pictures to go along with the steps. I kind of, umm, waited till the last minute to get this done and had no time for photos. Its so simple though, you don’t even need them.

    Easy Happy Birthday Sign via RainonaTinRoof.com #happybirthdaysign #birthday #crafts #diypartydecorationsI used thumbtacks to put it on the wall and hid them behind the DIY party backdrop– easiest backdrop ever!

    Have you made a happy birthday sign before?

    You can find loads more DIY party decorations here.

    You know you don’t wanna miss any of this crazy.

    Sign up to get my posts delivered to your inbox here. 

    Stalk Me Here:

    Pinterest / Facebook / Twitter / Instagram

    SaveSave

  • DIY Birthday Hat…Another reason I’m not the kid’s favorite parent…

    DIY Birthday Hat…Another reason I’m not the kid’s favorite parent…

    There is no doubt in my mind that my kid loves her father much more than she loves me.

    That’s ok, and really its no surprise.

    With the exception of summer, she’s stuck with me for at least eight hours a day.

    Eight hours of random dance parties, eight hours of DIY projects, eight hours of hearing me scream at the dogs, eight hours of reruns of Sex and the City.

    Wait a minute, why doesn’t she love me the most? Obviously, I am the most awesome parent alive.

    Although, maybe not the most award winning one…

     Adding to her reasons of why I’m not her favorite would be this lovely birthday hat I made her.

    I find it adorable.

    She refused to wear it for more than 30 seconds.

    DIY Birthday Hat via RainonaTinRoof.com #birthday #partyhat #kids

    This post contains affiliate links for your shopping convenience. Click here to read my full disclosure policy.

    DIY Birthday Hat

    Isn’t it adorable?

    Sparkly, yet not too girly with the purple?

    I thought so too.

    I made this birthday hat with the same template I used for last year’s party hat. Get the details here.

    DIY Birthday Hat via RainonaTinRoof.com #birthday #partyhat #kids The purple glitter card stock was a great base, and I added a bit more pizzaz with the bright poms. I did use my Silhouette to cut out the “2,” however, you could easily follow this tutorial here on how to cut letters and numbers without a silhouette. I attached everything with hot glue.

    I did manage to sneak a photo right after I tricked her into wearing it for a brief shining moment.

    DIY Birthday Hat via RainonaTinRoof.com #birthday #partyhat #kids

    At least the birthday hat still looks good by itself.

    Have you made any party hats before?

    Were you that rockstar mom who actually got your kids to wear them?

    If so, please send me your tips.

    Now.

    Looking for more party decorating ideas?

    See how I made the Circus’ first birthday party hat here.

    Make the easiest ever party backdrop using this tutorial.

    And here’s a super easy DIY party banner here.

    You can see the entire Rainbow & Care Bear Party here.

    And all of my DIY party decorations are here.

    You know you don’t wanna miss any of this crazy.

    Sign up to get my posts delivered to your inbox here. 

    Stalk Me Here:

    Pinterest / Facebook / Twitter / Instagram

    SaveSave

  • Easy Party Backgrounds for $10 or less (Video)

    Easy Party Backgrounds for $10 or less (Video)

    Having a great photography backdrop for any event or party is always fun for guests. Make this colorful rainbow backdrop in under an hour for just about $10.

    As you may well know, kid’s birthday parties can get expensive really quick.

    And I’m not even talking about their gifts. I’m talking about feeding everyone, decorations, invitations, etc.

    I like to DIY as many party decorations as I possibly can to save money.

    I first showed you my easy party backgrounds last year when I did one for the kid’s 1st birthday party. This year, I added a bit more umph to it.

    Easy DIY Rainbow Backdrop

    This post contains affiliate links for your shopping convenience. Click here to read my full disclosure policy.

    Rainbow Photo Backdrop

    To make these, you only need plastic rectangle tablecloths. Last year, I only used two different colors for the backdrop. This year, I started out using just green, blue, and yellow. The result was a very lemon-limey, Sierra Mist, Sprite looking backdrop.

    Not exactly what we were going for.

    Since the kid’s party was a Care Bear and Rainbow theme, I didn’t want that.

    Rainbow Photo Backdrop using Plastic Tablecloths

    I ended up going back to the party store and buying the other three colors of the rainbow (red, orange, and purple) and making a second backdrop to layer on top the lemon-lime one.

    To add the extra colors, I just left the lemon-lime background up on the wall, then pinned up the new colors and made a separate backdrop with them. The tutorial for how to make the basic party backdrop is here. After I had finished the new rainbow color background, I just ran my fingers through both and blended them together. You can also find the tutorial for that simple birthday banner here.

    Rainbow Color Background Tutorial for parties.

    You can watch the video below to see how to make one of the backgrounds. To make one with more than three colors, just layer another three different colored backdrops on top of the first one.

    [adthrive-in-post-video-player video-id=”yhS6773x” upload-date=”Tue Aug 16 2016 14:38:10 GMT+0000 (Coordinated Universal Time)” name=”Rain on a Tin Roof – DIY Party Backdrop” description=”Make this less than $5 and very simple diy party backdrop to spruce up any party! All it takes is a little time and three plastic tablecloths.”]

    Of course, it doesn’t have to be a rainbow background; you could use any colors you wish. These make the perfect photography backdrop to document those fun memories made at the party!

    Rainbow is better than lemon-lime any day of the week, right?

    I got my tablecloths from Party City at $2 each, however you could easily use ones from the Dollar Tree and have $6 in this bad boy.

    Have you made a rainbow party backdrop before?

    Need more DIY party decorating ideas?

    DIY Birthday Party Hat – so easy to make and easily customizable for any party colors or theme!

    Easy DIY Cake Topper – you just need stickers and some scrapbook paper for this adorable cake topper!

    And don’t miss all these simple DIY Party Decorations on a budget!

    If you want to remember this rainbow backdrop for later, just pin the image below!

    Rainbow background on a wall made using plastic tablecloths.

    You know you don’t wanna miss any of this crazy.

    Stalk Me Here:

    Pinterest / Facebook / Twitter / InstagramSaveSave

  • Care Bear and Rainbow Party {I Survived….Barely}

    Care Bear and Rainbow Party {I Survived….Barely}

    Seriously y’all, I don’t think I’ve ever been so happy to have a birthday party over with.

    Not that it wasn’t a great little party and yes, I’m a little sad the kid is growing up so fast, but party planning and party decorating for kids birthdays are just. so. exhausting.

    Can I get an amen?

    This year we opted for a Care Bear and Rainbow Party for the kid’s birthday. When I started planning it, she was really into her stuffed bears, by the time the party rolled around she was really into her stuffed dogs. Can’t go anywhere without a stuffed dog these days.

    Kid changes her mind more than I do.

    Care Bear and Rainbow Party via RainonaTinRoof.com #rainbow #party #kids #carebears #diy #partydecorThis post contains affiliate links for your shopping convenience. Click here to read my full disclosure policy.

    This post is an overview of the entire party. I’ll be sharing the details on all the DIY party decorations I made over the next few weeks.

    Care Bear & Rainbow Party

    Guests were greeted by a photo collage in the shape of a 2 as they came in the door.

    Care Bear and Rainbow Party via RainonaTinRoof.com #rainbow #party #kids #carebears #diy #partydecor

    Its a little different than our “1” photo collage from last year, but still the same idea.

    A Care Bear sign with rainbow streamers was on the door…

    Care Bear and Rainbow Party via RainonaTinRoof.com #rainbow #party #kids #carebears #diy #partydecor

    And just in case you didn’t know, the reason for all the rainbows is because in Care-A-Lot, where all the Care Bears live, there are lots of rainbows coming out of clouds.

    You feel incredibly well-educated all of a sudden, don’t you?

    Its ok, you can admit it.

    Care Bear and Rainbow Party via RainonaTinRoof.com #rainbow #party #kids #carebears #diy #partydecor

    The dining room was the main attraction.

    Care Bear and Rainbow Party via RainonaTinRoof.com #rainbow #party #kids #carebears #diy #partydecor

    Complete with white cloud balloons and a rainbow made from streamers.

    I found that the best thing to attach the balloons and streamers to the ceiling was with masking tape. It held it all up – not one fell – and it didn’t take off too much of the ceiling. I have popcorn ceilings, but you can’t tell where the tape strips were. To make the tape part of the decorations, I used this bright yellow masking tape.

    Care Bear and Rainbow Party via RainonaTinRoof.com #rainbow #party #kids #carebears #diy #partydecor

    I made another easy party backdrop, but gave it a twist. The details on it are here.

    I also made the birthday sign, which is different from last years, but still easy.

    Each one of her Care Bears got their own party hat – you have no idea how difficult it can be to make such a tiny party hat.

    Care Bear and Rainbow Party via RainonaTinRoof.com #rainbow #party #kids #carebears #diy #partydecor

    The DIY cupcake pedestals made another appearance as well.

    Care Bear and Rainbow Party via RainonaTinRoof.com #rainbow #party #kids #carebears #diy #partydecorThe kid also got a new party hat, complete with bright poms. That party hat worked about as well as last year’s did.

    Care Bear and Rainbow Party via RainonaTinRoof.com #rainbow #party #kids #carebears #diy #partydecor

    Both chalkboards got a birthday treatment.

    Care Bear and Rainbow Party via RainonaTinRoof.com #rainbow #party #kids #carebears #diy #partydecor

    My chalkboard skills are definitely still lacking, but hey I gave it a whirl. I did discover that this colored chalk is my all-time favorite colored chalk. The colors were so vivid – especially helpful in distracting eyes away from my horrible chalk penmanship.

    And what was the kid’s favorite part of her birthday?

    The balloons. All she wanted to do after the party and for the following two days was to run around with 12 balloons in her hand.

    Those balloons took a freedom flight night before last.

    Mama had enough.

    Stick around for the details on all the party decor!

    You can see last year’s party and all the DIY party decorations that went along with it here.

    Have you thrown a Care Bear or Rainbow Party before?

    Did you also come out of it needing a drink in your hand for the next few days?

    Anyone? Anyone?

    Need more great DIY party decor ideas on a budget? You’ll want to see these then…

    Easy DIY Cake Topper – make an easy cake topper to complement your party theme using just scrapbook paper and stickers!

    DIY Birthday Party Hat – it will take you all of five minutes and it’s so stinking adorable!

    Make Your Own Custom Party Invitations – this is so easy and gives the party a great personal touch!

    You know you don’t wanna miss any of this crazy.

    Sign up to get my posts delivered to your inbox here. 

    Stalk Me Here:

    Pinterest / Facebook / Twitter / Instagram

    SaveSave

  • Easy DIY Cake Topper

    Easy DIY Cake Topper

    I love a good cake topper because it can completely take a cake to the next level. The most important part is how good the cake tastes, but we need a cute little cake banner topper too, right? This DIY cake topper can easily be made in under 30 minutes – and no fancy cutting machines required.

    The final post of the blue and pink birthday party crafts. I’m not even gonna lie, I am sick of all this party stuff. I was tired of it about 10 minutes after the party ended. And that was a month ago. But, this custom cake topper is adorable and simple to make, so I had to share. It’s perfect for the sweetest occasion. <– See what I did there. hehehehe.

    Pink and Blue Cake Banner Topper

    Please disregard the sloppiness of the icing on the cake there. That would be where part of the cake fell off (my fault) and where my wonderful mother-in-law did the best she could do to salvage my mistake. Bless her.

    This post contains affiliate links for your shopping convenience. Click here to read my full disclosure policy.

    DIY Cake Topper

    Materials Needed for This Sweet Bunting Banner: 
    – Cardstock in your choice of color (Mine came from Hobby Lobby)
    – Letter Stickers (These too came form Hobby Lobby)
    – Ribbon (I used this kind.)
    – Hot Glue
    – Straws or some other stick or tubular device-thing-a-ma-jig to attach the bunting to and stick in the cake

    Step 1

    You will need to sketch out a flag bunting shape to use as a template. I did this with a ruler. Once it is sketched out, cut out the template and trace as many letters as will be on your bunting on the back of the card stock (this keeps any lines from being seen on the front and if you have glitter card stock like I did, you can’t really draw on glitter.)

    DIY Cake Topper using bunting template

    Step 2

    Cut out all the little flags and attach your sticker letters on them.

    Cake topper banner using scrapbook paper and stickers.
     
    Of course, you can make the banner say anything you wish, not just “Happy Birthday.”
     
    Step 3
     
    Cut off 2 strips of ribbon. Make it longer than you think it should be to have plenty for error. Line up your flags on the ribbon. Place a small dot of hot glue on the back top of each flag and immediately stick it to the ribbon.
     
    Step 4
     
    Its time to attach the bunting to your straws or whatever you are sticking in the cake to hold the bunting up. All you do is take your ribbon and wrap it around the top of the straw securing it with hot glue.
     
     
    Cake Bunting Banner Topper in pinks and blues
     
    Now, go stick that birthday cake topper in your cake.
     
    DIY Cake Banner Topper made from scrapbook paper.
     
    What do you think of our cake topper banner? Have you done any creative cake banners or toppers before?
     
    Want another easy DIY project for your parties? See these posts then! You can easily switch up the colors on these to make them fit perfectly for your own party! 
     
    DIY Cupcake Pedestals – these literally take cupcakes to a whole other level!
     
    1st Birthday Photo Collage – a sentimental decoration that is perfect for all kinds of parties! 
     
    DIY Party Banner – again, this one is great for various kinds of parties!
     
    DIY Party Backdrop – easiest thing to make with the biggest impact!
     
    DIY Party Hat – if you’ve got five minutes to spare, you can do this! 

    SaveSaveSaveSave

  • 1st Birthday Photo Collage (A Personal DIY Party Decoration)

    1st Birthday Photo Collage (A Personal DIY Party Decoration)

    Today, I have another DIY party decoration from the blue and pink 1st birthday party to share with you! This one is a big more personal and everyone loved seeing it at the party.
    I created a birthday photo collage with photos of the kid from her first year.
    Birthday Photo Collage

    Birthday Number Photo Collage

    For baby girl’s 1st birthday, I wanted to have something special to welcome everyone to the celebration. This birthday collage was perfect propped on the front porch. Naturally, there were many oooohhhhsss and ahhhhhhhsssss. I mean, I did it, so, it was fabulous. Oh, and the kid is pretty cute too.
    I started out with lots of pictures, an old barn door from the family farm, and painter’s tape. Seriously high tech stuff, y’all.
    Making a Birthday Number Photo Collage
    Before I started taping photos to the door, I laid them out in a “1” first to make sure I had enough photos and to decide exact placement.
    How to Make a Birthday Number Photo Collage
    After I had it mapped out on the floor, I started from the bottom and worked my way up.
    DIY Birthday Number Photo Collage
    I used a couple pieces of painter’s tape on the back of each photo.
    When I was finished with the “1” I decided to add a little bunting with card stock at the top of the door for some pops of color, and to incorporate the blue & pink theme.
    1st Birthday Picture Collage
    Birthday Number Photo Collage
    The birthday collage really was a big hit and another simple DIY party decoration. Everyone loved seeing how Landry has changed in the past year. The neighbors loved the door as well. They really had no choice since it sat on our porch for days after the party while I was lazy still recovering from the celebration. Now, the neighbors really adore the barn door with just the cute bunting at the top. I finally took the pictures off, but, the door has not yet moved. They may call the neighborhood association on me soon. Can someone bail me out?

    Have you done a photo collage for special occasions?

    Need more great party decoration ideas? Here you go…

    DIY Birthday Party Hat – so cute and only takes about 5 minutes to make!
    DIY Bunting Cake Topper – you’ll just need scrapbook paper, stickers and scissors!
    DIY Cupcake Pedestals – made from thrift store finds and you can use them over and over again!
    DIY Tablecloth Party Backdrop – THE absolute easiest and cheapest party backdrop!
    And you can always find my entire gallery of DIY party ideas here.
     You know you don’t wanna miss any of this crazy.

    Sign up to get my posts delivered to your inbox here. 

    Stalk Me Here:

    Pinterest / Facebook / Twitter / Instagram

  • Make This Adorable DIY Cupcake Holder for $5 or Less

    Make This Adorable DIY Cupcake Holder for $5 or Less

    You won’t believe how easy it is to make this DIY cupcake holder! Not only are these cupcake holders adorable, but they are also super easy to make, can be easily customized to fit your party decor and you can make them with items you find at the thrift store! Here’s how to make a cupcake stand that will wow your party crowd…

    Yes, me again. Back with more DIY party decorations from the blue and pink birthday party extravaganza. This time, I’m super excited to share these DIY cupcake stands with you. I think they are just adorable and I made them using items I found at thrift stores!

    DIY cupcake holder from thrift store items

    This post contains affiliate links for your shopping convenience. Click here to read my full disclosure policy.

    DIY Cupcake Stand

    Materials and Supplies Needed:

    • Candlestick Holders – doesn’t have to be a certain size or color, although I wouldn’t go too terribly tall with them. Can be wood, metal or whatever else.
    • Old Baking Pans with Pretty Edges – old tart pans work great for this, or just about any round or square pan with fluted or pretty edges. I found mine at Goodwill.
    • Liquid Nails or E6000 Glue or ProBond Glue (A glue that will adhere metal to wood. I used Liquid Nails.)
    • Spray Paint Color of Your Choice – I opted for white so that I would have white cupcake stands that could work with lots of different party themes.
    • Scrapbook Paper that coordinates with your party’s theme or colors

    Steps

    Step 1

    Be sure that the candlesticks and baking pans are clean. Attach the old baking pans to the candlesticks using whichever glue you opted to go with. For me, my pans looked best flipped upside down on the candlestick with the fluted edges pointing down. It’s up to you, though!

    Let the glue fully cure overnight.

    Step 2

    Spray paint the cupcake stands with the color of spray paint you opted for. Let dry completely. You could also opt to spray paint the candlesticks and pans different colors before gluing if you wanted to go for a really colorful or contrasting look.

    how to make a cupcake stand - blue and white cupcake stand

    Step 3

    After the cupcake holders are completely dry, cut a circle or square out of your coordinating scrapbook paper that is roughly the size of the top of your cupcake stand tops.

    diy cupcake stand - blue and pink cupcakes on white cupcake stand

    Place the paper on the top of the stand to add a little more pizzaz to the stands. You don’t have to glue it on, it should just sit on top of the stands. Then, for your next party, you can switch up the paper to work for that party’s theme.

    easy blue and white diy cupcake holders

    Aren’t these just adorable little cupcake display ideas? And so easy and cheap to make!

    The cost of this project:
    • Baking Dishes: $1.50 each = $3 total
    • Candlestick Holders: Free (my aunt was going to throw them away. hello?! Give them to the hoarder, please!)
    • Spray paint and liquid nails were all on hand already!
    $3 TOTAL!

    Bam! That’s what I call a deal!

    Other great ideas you could do with these:

    • Use as a cake stand or cake plate for smaller cakes.

    • Make the stands using various sized baking pans and candleholders, then glue one on top of another to create a tiered cupcake stand or cupcake tower.

    Have you made your own cupcake stands before?

    Looking for more great DIY party decor ideas?

    DIY Party Decorations on a Budget – my best party decor that doesn’t break the bank, but still leaves guests oohing and ahhing.

    How to Make a Party Hat – completely (and easily!) customizable for any event!

    DIY Plastic Tablecloth Party Backdrop – don’t worry, you’re going to make those cheap tablecloths look so pretty!

    Want to remember these little cupcake stands for later? Just pin the image below!

    Get more creative ideas on social media!

    Facebook | Instagram | Pinterest | Twitter

  • Party Background Tutorial with tablecloths for $5 (Video)

    Party Background Tutorial with tablecloths for $5 (Video)

    Looking for an easy party backdrop for an upcoming event? This one is your answer! This party background is super easy to make and costs just around $5 in supplies!

    This is the easiest and cheapest party background. In the history of ever.

    Really, I promise.

    Would I lie to you?

    Why absolutely not!

    This is one of the many DIY party decorations I made for my daughter’s 1st birthday party and it was also probably the easiest, but yet the largest scale one!

    Go figure, right?!

    DIY Party Backdrop made with Plastic Tablecloths - pink and blue - Rain on a Tin Roof

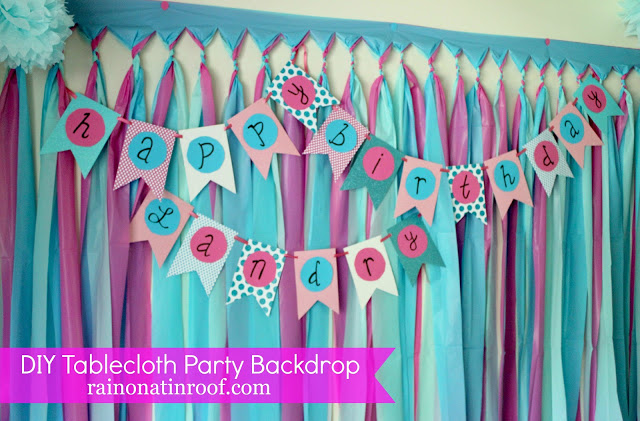
    This party backdrop costs about $3 – $6 to make depending on how much you spend on your plastic tablecloths. You can buy the $1 tablecloths for it at the Dollar Tree or you could splurge a little and buy ones that are about $2 or $3 at Party City. It’s totally your choice and it’s totally customizable – you can choose whatever colors you want to for it. Personally, I got my tablecloths from Party City because they have a huge variety of colors.

    To make this, you’ll need about an hour or so, but it’s an easy hour!

    Party Background

    This post contains affiliate links for your shopping convenience. Click here to read my full disclosure policy.

    Materials Needed:

    Steps

    The video below will show you exactly how to make the party backdrop step-by-step. I’ve also included written instructions below the video as well.

    [adthrive-in-post-video-player video-id=”yhS6773x” upload-date=”2016-08-16T14:38:10.000Z” name=”Rain on a Tin Roof – DIY Party Backdrop” description=”Make this less than $5 and very simple diy party backdrop to spruce up any party! All it takes is a little time and three plastic tablecloths.”]

    Step 1

    Determine if you want your background to hang horizontally or vertically. The one shown in this post you are reading now is hung horizontally because it worked better that way for the space I was hanging it on. I have made these and hung them vertically though as well. You can see a vertically hung party backdrop I did for the sparkly horses birthday party here.

    Step 2

    Once you decide which direction to hang it, open up one of your tablecloths and put it on the wall with thumbtacks. For mine hanging horizontally, it took 6 thumbtacks. Just start in one corner and tack it up as you go. Once you have the first tablecloth up, step back and decide if it needs to be leveled out in any places and adjust as needed. You can put the tablecloths in any order when it comes to color. In the end, all the colors basically mix together. If you’re really particular about one color showing more than the others, then put the one you want to show more as the last layer on top of the other tablecloths. There will be a little sliver of it that will show more at the very top.

    Step 3

    After the first tablecloth is up, open up another one and layer it on top of the first one. I did this by removing one tack at a time, and then putting it back through both tablecloths. Repeat with the third and final tablecloth.

    Step 4

    Next, take a pair of regular scissors and cut strips up to about 3-4 inches from the top of the tablecloths. You are going to cut all three tablecloths at once when you cut a strip. I didn’t even measure the width of my strips, I just eyeballed it. They were each probably around 3-4 inches wide.

    Step 5

    Once all your strips are cut, you are going to braid each set of strips together. Start on one side of the backdrop, take your first set of strips (one of each color that you cut at the same time), and braid them together from the top down. You only want to braid down far enough to hold the strips together. You don’t have to start with a certain color and end with another one. Just braid each set together – once more, all the colors will blend together in the end. Here is how mine looked when I braided it after I had cut all the strips.

    Party Backdrop

    Once you have braided all your strips, you’re done!

    Birthday Party Backdrop

    Told you it was super simple!

    The white thumbtacks were driving me crazy at the top, so I punched out balloon shapes from pink & blue card stock and put them over the tacks with square photo mounts.

    DIY Party Backdrop: Helpful Tips, Tricks, and Questions Answered

    Can I make this ahead of time and then take it to the party location and hang it up there? 

    Yes. What I would suggest doing is lay all the tablecloths on the ground, if you don’t want to put them on your wall. Put some heavy books or something similar along the top to keep them in place, then cut the strips and braid them as stated above. Once braided, you should just be able to pick it up and take it with you.

    Could I do this with more than three colors? 

    You bet! I did this same backdrop with six colors right here!

    Could I staple this together and then attach it to a wall with tape? The place the party is located at doesn’t allow thumbtacks in their walls.

    I definitely think you could staple it together along the top. As for the tape, I would recommend using a wide width FrogTape. It’s strong, but shouldn’t take the paint off the walls.

    Have you ever made a DIY party background before?

    See how I put a spin on this backdrop for the kid’s 2nd birthday by layering in more colors here!

    Looking for more easy DIY party decorations?

    Birthday Photo Collage – perfect for birthday parties, graduations, anniversaries and more!

    DIY Party Banner – no fancy cutting machines required! You’ll just need scrapbook paper and scissors!

    DIY Bunting Cake Topper – another one where you’ll just need some scrapbook paper!

    DIY Cupcake Pedestals – so cute, yet made from thrift store finds!

    DIY Party Hat – if you’ve got five minutes, you can make this adorable party hat!

    Want to come back to this birthday party backdrop idea later? Just pin the image below!

    DIY Party Backdrop with Plastic Tablecloths | DIY Party Background | DIY Party Decorations | DIY Party Decor | Party Backdrop DIY Ideas

    Hang out with us on social media!

    Facebook | Instagram | Pinterest | Twitter

    SaveSaveSaveSave

  • A Stylish Blue and Pink Birthday Party

    A Stylish Blue and Pink Birthday Party

    We made it through year one. No serious injuries, no serious sickness, only busted her lip a few times, fell off the couch and bed a couple times, multiple bruises, and I only let her eat a clump of dirt once. We. Survived. It. Hallelujah.

    To celebrate the big day, we threw a blue and pink birthday party. As much as I may or may not love the Care Bears and Strawberry Shortcake theme ideas, we went for a more stylish approach to the party: Blue & Pink.
    Pink and Blue Birthday Party
    With the exception of running out of gas for the grill and setting off the smoke alarm (luckily Grandma rigged it with a plastic bag), the party went great! But hey, at least we can tell her a funny story about her 1st birthday.
    This post contains affiliate links for your shopping convenience. Click here to read my full disclosure policy.
    Pink and Blue Birthday Party
    If you remember my birthday party inspiration board, you know I used a lot of ideas from Jamie at Better with Age and April at House by Hoff.
    Blue and Pink Birthday Party Ideas
    I loved Jamie’s cake for her little girl with all the sprinkles. I ended up not using the recipe she did, but still going for the sprinkle effect on top. I read that recipe and totally knew I was not a good enough baker to pull it off.  She also put really cute sprinkles around the bottom of her cake, but once more, I am not very good at icing (Thank God my amazing mother-in-law was here to salvage the cake), so I opted to not attempt the sprinkles around the bottom.
    To top the cake off, I made the happy birthday banner for it.
    Blue and Pink Birthday Party Ideas
    The kid got her very own cake served on a silver platter. Spoiled much? Grunt Labor iced it because at that point in the day, I was done icing cakes and cupcakes and in desperate need of alcohol. These birthday parties are BEASTS! My hat is off to all you folks with multiple kids!
    Blue and Pink Birthday Party Ideas
    Blue and Pink Birthday Party
    We also served cupcakes. I did use the same recipe Jamie did for her cupcakes, which can be found here.
    The white cupcake pedestals were thrifted finds I put together for less than $3 each. I’ll show you how to do those here.
    I completely stole the idea for the balloon cupcake toppers from April. She made flowers for her cupcake toppers and shows you how to make them here. I made the tissue paper flowers, similar to the ones April also made. They were very easy to make, a lot like my tissue paper pom-poms, just on a smaller scale.
    Blue and Pink Birthday Party
    We served pink lemonade and had some blue and pink striped straws for extra flair and decor.
    Blue and Pink Birthday Party
    The backdrop is made from tablecloths – super easy, I’ll show you how to make it here – and I made the banner out of scrapbook paper – I’ll show you how to do that here! I threw together some of the tissue paper pom-poms to hang from the ceiling.
    1st Birthday Chalkboard
    1st Birthday Chalkboard Wall
    I decorated both chalkboards with birthday themes and the best chalkboard writing skills I could muster.
    Blue and Pink Birthday Party
    While scouring through the attic a couple months back, I found this Happy Birthday musical thing-a-ma-bob that was my Dad’s. I thought it fit perfectly with the theme, so I set it out as a little vintage touch. Sorry, Dad, I’m sure the “vintage” description makes you feel old.
    1st Birthday Party Ideas
    I took an old barn door from my great grandfather’s farm and made a picture collage in the shape of a 1 to greet guests as they entered. See the full barn door tutorial here.
    Remember the super cute DIY party hat I made? That is how that turned out…
    See all my DIY party decorations and ideas here.
    You know you don’t wanna miss any of this crazy.

    Sign up to get my posts delivered to your inbox here. 

    Stalk Me Here:

    Pinterest / Facebook / Twitter / Instagram

  • DIY Birthday Banner: Simple and Affordable

    DIY Birthday Banner: Simple and Affordable

    Looking for a simple to make, yet adorable DIY birthday banner? Look no further! This DIY banner is easily made with a printable template, card stock, scissors and markers. You can fully customize it to match your party’s decor! 
    This DIY Birthday Banner is one of the many homemade DIY party decorations I made for my daughter’s 1st birthday party.
    DIY Birthday Banner - made with cardstock and markers -  Rain on a Tin Roof

     It was a blue and pink themed party with LOTS of DIY party decorations (did you really expect me to pay lots of $$ for it all considering how cheap I am?)!

    This DIY party banner hung on top of the DIY party backdrop. The banner was super simple to make and turned out really cute! Really, it can be a DIY banner for any kind of celebration – customize it to your own liking!

    This post contains affiliate links for your shopping convenience. Click here to read my full disclosure policy.

    Happy Birthday Banner DIY Project

    Materials Needed:

    • Scrapbook Paper or Cardstock (I got about two “flags” out of a 12×12 piece of scrapbook paper. I got all my paper at Hobby Lobby.)
    • DIY Birthday Banner Template (found here)
    • Adhesive Mounts of some sort (I used these)
    • X-Acto Knife or Hole Punch
    • Ribbon (I used this kind)
    • Sharpie
    • Scissors

    I know I took pictures of this process, but it appears, I have deleted those photos! I am so sorry, but I promise, this is so easy you really don’t need photos.

    Steps

    Step 1:

    Print out the banner template noted in the supply list from Miss Lovie Creations. She did a great job of making her DIY birthday banner and I did mine similar to hers.

    Happy Birthday Banner DIY - DIY Birthday Banner Template Printable -  Rain on a Tin Roof
    Source

    Step 2:

    Cut out the template. I used regular scissors for this.

    Step 3:
    Place the banner template over the back of your scrapbook paper or card stock and trace it with a pencil. Trace as many banners and circles as you will need. To spell out just “Happy Birthday,” you’ll need 13 banners.

    Step 4:

    Cut out the traced pieces. I used scissors for this as well, but you could use the X-Acto knife.

    Step 5:

    Place the circle template over scrapbook paper or card stock. Trace as many circles as letters you need. Again, you’ll need 13 to spell out “Happy Birthday.” I chose to use just blue and pink solid card stock for this so that my letters didn’t disappear on patterned paper.

    Step 6:

    Cut out circles.

    Step 7:

    Write your letters on the circles. I used a pencil to sketch the letters out and then just went over them with a sharpie.

    Step 8:

    Use the adhesive mounts or some other adhesive to attach the circles to the flags. Hot glue would probably work fine as well.

    Step 9:

    Use the X-Acto knife to cut small slits in each upper corner of the flags. If you don’t want to use the X-Acto knife for this, you could also use the hole punch.

    Step 10:

    Weave your ribbon in and out of the flags to string them together, then hang with thumbtacks.

    All done! Easy peasy!

    How to Make a Birthday Banner - Homemade birthday banner on party backdrop -  Rain on a Tin Roof

    I put my thumbtacks behind the backdrop to keep them hidden.
    DIY Banner - How to Make Homemade Banners using Cardstock -  Rain on a Tin Roof

    Now aren’t you glad you learned how to make a birthday banner?

    Told you it was super easy!
    Need more DIY party decoration ideas? I totally have you covered!
    DIY Birthday Party Hat – so cute and takes about 5 minutes to make with scrapbook paper!
    DIY Bunting Cake Topper – another easy scrapbook paper and sticker project!
    DIY Cupcake Pedestals – made with thrift store items and you can use them over and over again!
    DIY Tablecloth Party Backdrop – the easiest and cheapest party backdrop EVER! It’s made from plastic tablecloths!
    And you can always find all my DIY party decorations HERE!
    Want to come back here later? Just pin the image below!
    How to Make Homemade Banners for Parties -  Rain on a Tin Roof

    Sign up to get my posts delivered to your inbox here. 

    You know you don’t wanna miss any of this crazy.

    Stalk Me Here:

    Pinterest / Facebook / Twitter / Instagram

    How to Make a Happy Birthday Banner - customizable for any party -  Rain on a Tin Roof

  • DIY Birthday Hat for less than $5 in 15 minutes

    DIY Birthday Hat for less than $5 in 15 minutes

    Can’t find the perfect party hat for the big bash? Don’t fret! Make your own DIY birthday hat in no time using this tutorial for how to make a party hat out of paper! It’s super easy using the provided party hat template!

    As you all probably know by now, there is a big birthday party to be had. Baby girl is turning one. Of course, she must have a party hat. I would not settle for your typical birthday hat you can buy at a party store. Those are fine and dandy, but no, no, no. I wanted something that she would really hate me for later in life. That’s how I roll. So, along with all the other DIY party decorations, I made this birthday party hat for her.

    DIY Birthday Hat using Party Hat Template - Rain on a Tin Roof

    Yes, this should do. This birthday hat was surprisingly VERY simple to make. Here’s how to do it…

    How to Make a Birthday Hat

    This post contains affiliate links for your shopping convenience. Click here to read my full disclosure policy.

    Materials Needed:
    • Birthday Hat Template (can be found here)
    • Scissors
    • Cardstock Paper in Color / Patterns of Your Choice
    • X-Acto Knife
    • Hot Glue Gun
    • Items for decorating the hat (optional) – I used a pom pom maker to make pom poms for embellishing the hat.
    • Ribbon or Elastic String

    Steps

    Step 1

    Print the party hat template noted above, then cut out the template.

    Party Hat Template - Rain on a Tin Roof

    Step 2

    Place the template over the paper you are making your party hat out of.

    How to Make a Party Hat Out of Paper - Rain on a Tin Roof
    I found this super cute blue glitter dots scrapbook paper at Hobby Lobby.
    Trace around the template onto your party hat paper, then cut it out.
    DIY Party Hats using a Birthday Hat Template - Rain on a Tin Roof
    Use the X-Acto knife to make slits on the cardstock paper where the template notes.
    Step 3
    Wrap the scrapbook paper into a cone shaped hat and stick the tab in the slot. I did have to make my slot a bit longer than the template had. I also hot glued under the tab to secure it once it was in the slot.
    Step 4
    If you want to embellish your birthday hat further, then do so now.
    I used my Pom-Pom maker to make pom poms to add to the hat.
    How to Make a Birthday Hat - embellishing with pom poms - Rain on a Tin Roof
    Some people make these with forks, but I have always used my makers. I used the large green one for the pom-pom on top of the hat. I also made 6 small poms with the pink one to place around the bottom edges of the party hat. I just hot-glued those bad boys right on the hat.
    Step 5
    For our straps, I bought some pink ribbon and made a small slit on each side of the party hat. I tied a knot on the inside of the hat to secure the ribbon.
    How to Make a Paper Party Hat - Rain on a Tin Roof
    You could also hot glue the ribbon or elastic string to the inside bottom edge  to secure the hat onto the party guy or gal.
    Make a party hat using cardstock - Rain on a Tin Roof
    And of course, we had to give the first birthday hat a test run…
    Yep, you can already see the disbelief and resentment in her face. Score.

    Any DIY Party Hats in your future?

    See another version of this party hat here and loads more party ideas are here. Make sure you don’t miss this easiest ever and cheapest ever DIY party backdrop using plastic tablecloths either!
    Want to come back here later? Just pin the image below!
    Birthday Party Hat DIY - Rain on a Tin Roof
    You know you don’t wanna miss any of this crazy.

    Sign up to get my posts delivered to your inbox here. 

    Stalk Me Here:

    Pinterest / Facebook / Twitter / Instagram

    SaveSave

  • How to Create an Invitation in PicMonkey

    How to Create an Invitation in PicMonkey

    Learn how to make your own party invitations with this PicMonkey invitation tutorial! You can customize it with any colors or fonts of your choice.

    This post contains affiliate links for your shopping convenience. Click here to read my full disclosure policy.

    With the kid’s 1st birthday quickly approaching, I realized I had better get some invitations made for her birthday party.

    As many of you already know, I am a big PicMonkey fan. I love all the cool things it lets you do with photos. And for just $6 a month, it is well worth the money since you can save boatloads on creating your own invitations, holiday cards and more and not pay retail for them! If you don’t have a Picmonkey subscription yet, you can get a free trial by clicking here.

    I have used PicMonkey for my master bedroom wall art, my blog design, and to make my pictures “pin-worthy,” among other things. So, with the help of Picmonkey, I whipped up some pretty stellar invitations for the kiddo’s birthday.

    Picmonkey Invitation Tutorial

    How to Create an Invitation with Picmonkey

    Isn’t it adorable? The birthday party theme” is pink and blue, thus why those pops of color in the invitation.
    This invitation was pretty simple to make. Here’s how I created this Picmonkey invitation:
    Step 1
    The first thing you want to do is upload an image for your background. I used a chalkboard background I found for free here.
    Step 2
    Next, add any other overlays you want to use. I added the blue borders I found here. The banners and labels were all found on PicMonkey. I put where you can find them in the image below.
    DIY Picmonkey Invitation
    Step 3
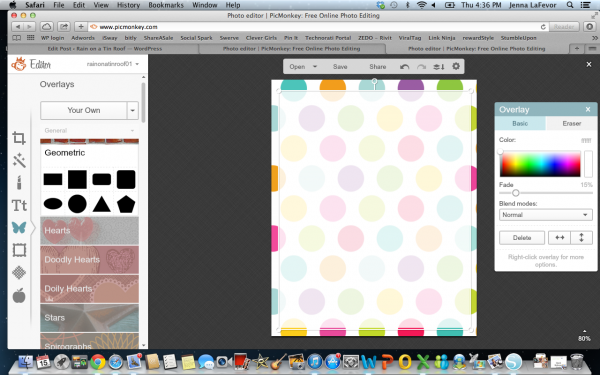
    Now, its time to add your text. All you do is add the text box and place it where you want it on the image. I put what fonts I used in the image below.
    DIY Party Invitation with Picmonkey
    Step 4
    Once you have your Picmonkey invitation how you want it, save it. At this point, you can opt to print it off locally or you can go to Picmonkey Print and print from there – one stop shop.

    What kind of Picmonkey invitations will you whip up?

    Want to see other party invitations I’ve made with Picmonkey…

    Colorful Polka Dots Invitation – a basic party invitation that’s great for any party!

    Farm Birthday Party Invitation – perfect for your next hoedown!

    Need more party ideas? Here you go:

    How to Make a Superhero Party Banner with Picmonkey – easy and you can switch it up to match your party’s decor!

    DIY $5 Party Backdrop – so stinkin’ easy, cheap and an awesome party decoration!