If you’re looking for a festive touch to your holiday party this year, make these Christmas ornament drink stirrers. It’s a simple DIY that will take about 10 minutes and costs around $10-$15.
You might remember these fun little drink stirrers from last year’s Christmas home tour when they made their debut appearance. I love them just as much this year as I did last and maybe even more!
These will add a fun touch to any holiday party you might be hosting or just for casual drinks with friends one evening. Either way, everyone will think you’re the hostess with the mostess. 😉
You can customize these with colors and patterns that reflect your holiday decor too!
This post contains affiliate links for your shopping convenience. Click here to read my full disclosure policy.
DIY Christmas Drink Stirrers
Supplies Needed:
Festive Paper Straws – I opted for gold ones, but you could go with any color that fits with your holiday decorations.
Mini Ornaments – Mine came from Target. I believe you can find them at Michael’s and Hobby Lobby as well. Again, go with whichever colors/patterns you prefer.
Using the X-Acto knife, cut a small hole in the bottom of each mini-ornament. You want the hole to be a little smaller than the end of the straw so that the ornament will fit snugly on the top of the straw.
Step 2
Place an ornament on one end of each straw. If you made your holes the right size, then you shouldn’t need anything else to hold the ornament onto the straw. If the ornaments are loose on the top of the straw, put a drop of hot glue either inside the ornament or just around the base of the ornament where it meets the straw to keep it in place.
That’s it! Easy peasy, super simple.
Have a designated spot for guests to drop their stirrers when they are finished with them. After the party, pull the ornament off the top of the straw and throw the straw away. This way, to create more stirrers, all you’ll have to do is just pop the ornaments on new straws!
I love that these also double as decor leading up the holidays.
Cheers (complete with festive drink stirrers), friends!
Want more great Christmas decorations that are easy to make?
Today, I have another DIY party decoration from the blue and pink 1st birthday party to share with you! This one is a big more personal and everyone loved seeing it at the party.
I created a birthday photo collage with photos of the kid from her first year.
Birthday Number Photo Collage
For baby girl’s 1st birthday, I wanted to have something special to welcome everyone to the celebration. This birthday collage was perfect propped on the front porch. Naturally, there were many oooohhhhsss and ahhhhhhhsssss. I mean, I did it, so, it was fabulous. Oh, and the kid is pretty cute too.
I started out with lots of pictures, an old barn door from the family farm, and painter’s tape. Seriously high tech stuff, y’all.
Before I started taping photos to the door, I laid them out in a “1” first to make sure I had enough photos and to decide exact placement.
After I had it mapped out on the floor, I started from the bottom and worked my way up.
I used a couple pieces of painter’s tape on the back of each photo.
When I was finished with the “1” I decided to add a little bunting with card stock at the top of the door for some pops of color, and to incorporate the blue & pink theme.
The birthday collage really was a big hit and another simple DIY party decoration. Everyone loved seeing how Landry has changed in the past year. The neighbors loved the door as well. They really had no choice since it sat on our porch for days after the party while I was lazy still recovering from the celebration. Now, the neighbors really adore the barn door with just the cute bunting at the top. I finally took the pictures off, but, the door has not yet moved. They may call the neighborhood association on me soon. Can someone bail me out?
Have you done a photo collage for special occasions?
Need more great party decoration ideas? Here you go…
You won’t believe how easy it is to make this DIY cupcake holder! Not only are these cupcake holders adorable, but they are also super easy to make, can be easily customized to fit your party decor and you can make them with items you find at the thrift store! Here’s how to make a cupcake stand that will wow your party crowd…
Yes, me again. Back with more DIY party decorations from the blue and pink birthday party extravaganza. This time, I’m super excited to share these DIY cupcake stands with you. I think they are just adorable and I made them using items I found at thrift stores!
This post contains affiliate links for your shopping convenience. Click here to read my full disclosure policy.
DIY Cupcake Stand
Materials and Supplies Needed:
Candlestick Holders – doesn’t have to be a certain size or color, although I wouldn’t go too terribly tall with them. Can be wood, metal or whatever else.
Old Baking Pans with Pretty Edges – old tart pans work great for this, or just about any round or square pan with fluted or pretty edges. I found mine at Goodwill.
Spray Paint Color of Your Choice – I opted for white so that I would have white cupcake stands that could work with lots of different party themes.
Scrapbook Paper that coordinates with your party’s theme or colors
Steps
Step 1
Be sure that the candlesticks and baking pans are clean. Attach the old baking pans to the candlesticks using whichever glue you opted to go with. For me, my pans looked best flipped upside down on the candlestick with the fluted edges pointing down. It’s up to you, though!
Let the glue fully cure overnight.
Step 2
Spray paint the cupcake stands with the color of spray paint you opted for. Let dry completely. You could also opt to spray paint the candlesticks and pans different colors before gluing if you wanted to go for a really colorful or contrasting look.
Step 3
After the cupcake holders are completely dry, cut a circle or square out of your coordinating scrapbook paper that is roughly the size of the top of your cupcake stand tops.
Place the paper on the top of the stand to add a little more pizzaz to the stands. You don’t have to glue it on, it should just sit on top of the stands. Then, for your next party, you can switch up the paper to work for that party’s theme.
Aren’t these just adorable little cupcake display ideas? And so easy and cheap to make!
The cost of this project: • Baking Dishes: $1.50 each = $3 total • Candlestick Holders: Free (my aunt was going to throw them away. hello?! Give them to the hoarder, please!) • Spray paint and liquid nails were all on hand already! $3 TOTAL!
Bam! That’s what I call a deal!
Other great ideas you could do with these:
• Use as a cake stand or cake plate for smaller cakes.
• Make the stands using various sized baking pans and candleholders, then glue one on top of another to create a tiered cupcake stand or cupcake tower.
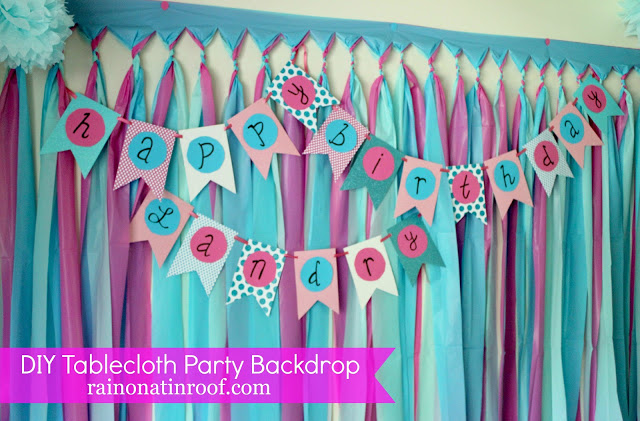
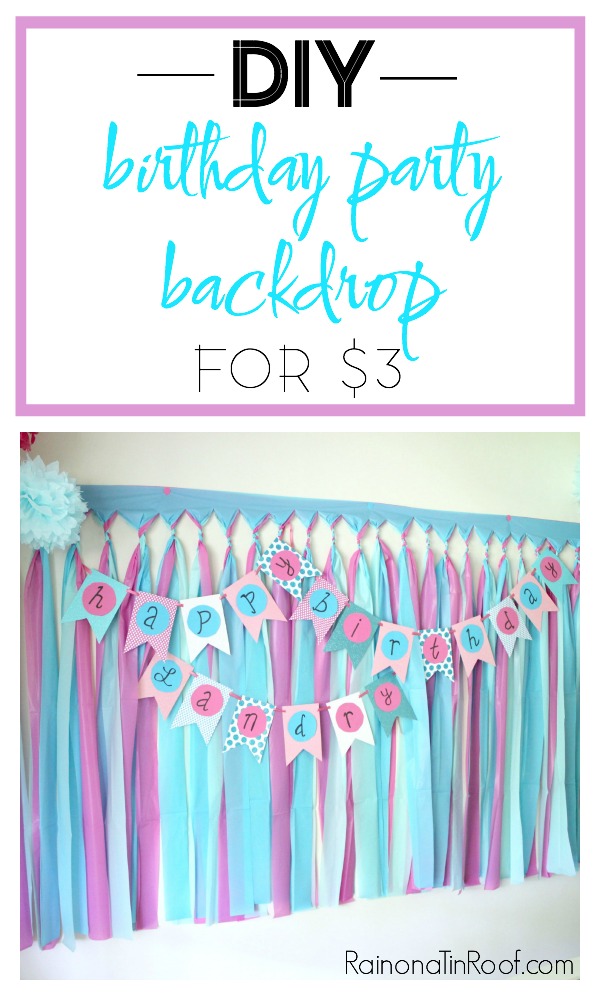
Looking for an easy party backdrop for an upcoming event? This one is your answer! This party background is super easy to make and costs just around $5 in supplies!
This is the easiest and cheapest party background. In the history of ever.
Really, I promise.
Would I lie to you?
Why absolutely not!
This is one of the many DIY party decorations I made for my daughter’s 1st birthday party and it was also probably the easiest, but yet the largest scale one!
Go figure, right?!
This party backdrop costs about $3 – $6 to make depending on how much you spend on your plastic tablecloths. You can buy the $1 tablecloths for it at the Dollar Tree or you could splurge a little and buy ones that are about $2 or $3 at Party City. It’s totally your choice and it’s totally customizable – you can choose whatever colors you want to for it. Personally, I got my tablecloths from Party City because they have a huge variety of colors.
To make this, you’ll need about an hour or so, but it’s an easy hour!
Party Background
This post contains affiliate links for your shopping convenience. Click here to read my full disclosure policy.
The video below will show you exactly how to make the party backdrop step-by-step. I’ve also included written instructions below the video as well.
[adthrive-in-post-video-player video-id=”yhS6773x” upload-date=”2016-08-16T14:38:10.000Z” name=”Rain on a Tin Roof – DIY Party Backdrop” description=”Make this less than $5 and very simple diy party backdrop to spruce up any party! All it takes is a little time and three plastic tablecloths.”]
Step 1
Determine if you want your background to hang horizontally or vertically. The one shown in this post you are reading now is hung horizontally because it worked better that way for the space I was hanging it on. I have made these and hung them vertically though as well. You can see a vertically hung party backdrop I did for the sparkly horses birthday party here.
Step 2
Once you decide which direction to hang it, open up one of your tablecloths and put it on the wall with thumbtacks. For mine hanging horizontally, it took 6 thumbtacks. Just start in one corner and tack it up as you go. Once you have the first tablecloth up, step back and decide if it needs to be leveled out in any places and adjust as needed. You can put the tablecloths in any order when it comes to color. In the end, all the colors basically mix together. If you’re really particular about one color showing more than the others, then put the one you want to show more as the last layer on top of the other tablecloths. There will be a little sliver of it that will show more at the very top.
Step 3
After the first tablecloth is up, open up another one and layer it on top of the first one. I did this by removing one tack at a time, and then putting it back through both tablecloths. Repeat with the third and final tablecloth.
Step 4
Next, take a pair of regular scissors and cut strips up to about 3-4 inches from the top of the tablecloths. You are going to cut all three tablecloths at once when you cut a strip. I didn’t even measure the width of my strips, I just eyeballed it. They were each probably around 3-4 inches wide.
Step 5
Once all your strips are cut, you are going to braid each set of strips together. Start on one side of the backdrop, take your first set of strips (one of each color that you cut at the same time), and braid them together from the top down. You only want to braid down far enough to hold the strips together. You don’t have to start with a certain color and end with another one. Just braid each set together – once more, all the colors will blend together in the end. Here is how mine looked when I braided it after I had cut all the strips.
Once you have braided all your strips, you’re done!
DIY Party Backdrop: Helpful Tips, Tricks, and Questions Answered
Can I make this ahead of time and then take it to the party location and hang it up there?
Yes. What I would suggest doing is lay all the tablecloths on the ground, if you don’t want to put them on your wall. Put some heavy books or something similar along the top to keep them in place, then cut the strips and braid them as stated above. Once braided, you should just be able to pick it up and take it with you.
Could I staple this together and then attach it to a wall with tape? The place the party is located at doesn’t allow thumbtacks in their walls.
I definitely think you could staple it together along the top. As for the tape, I would recommend using a wide width FrogTape. It’s strong, but shouldn’t take the paint off the walls.
Have you ever made a DIY party background before?
See how I put a spin on this backdrop for the kid’s 2nd birthday by layering in more colors here!
Looking for more easy DIY party decorations?
Birthday Photo Collage – perfect for birthday parties, graduations, anniversaries and more!
DIY Party Banner – no fancy cutting machines required! You’ll just need scrapbook paper and scissors!
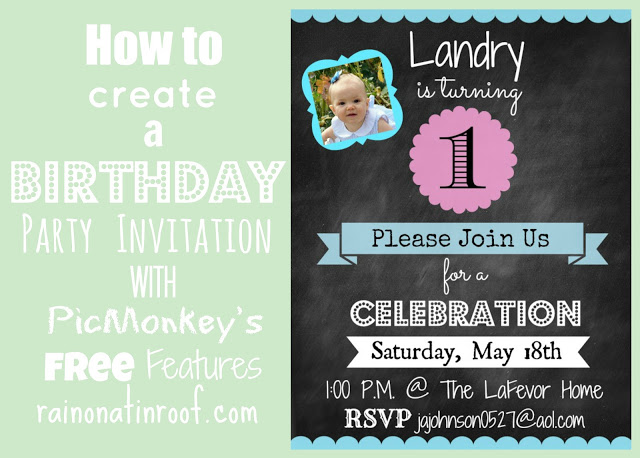
Learn how to make your own party invitations with this PicMonkey invitation tutorial! You can customize it with any colors or fonts of your choice.
This post contains affiliate links for your shopping convenience. Click here to read my full disclosure policy.
With the kid’s 1st birthday quickly approaching, I realized I had better get some invitations made for her birthday party.
As many of you already know, I am a big PicMonkey fan. I love all the cool things it lets you do with photos. And for just $6 a month, it is well worth the money since you can save boatloads on creating your own invitations, holiday cards and more and not pay retail for them! If you don’t have a Picmonkey subscription yet, you can get a free trial by clicking here.
Isn’t it adorable? The birthday party theme” is pink and blue, thus why those pops of color in the invitation.
This invitation was pretty simple to make. Here’s how I created this Picmonkey invitation:
Step 1
The first thing you want to do is upload an image for your background. I used a chalkboard background I found for free here.
Step 2
Next, add any other overlays you want to use. I added the blue borders I found here. The banners and labels were all found on PicMonkey. I put where you can find them in the image below.
Step 3
Now, its time to add your text. All you do is add the text box and place it where you want it on the image. I put what fonts I used in the image below.
Step 4
Once you have your Picmonkey invitation how you want it, save it. At this point, you can opt to print it off locally or you can go to Picmonkey Print and print from there – one stop shop.
What kind of Picmonkey invitations will you whip up?
Want to see other party invitations I’ve made with Picmonkey…