Tag: office

  • DIY Countertops: Upholstered Countertop for Built In Cabinets and Other Ideas

    DIY Countertops: Upholstered Countertop for Built In Cabinets and Other Ideas

    Countertops are one of those things that can creep up on ya and take a big bite out of your project budget fast. These DIY countertop ideas for built in cabinets are creative and easy on your wallet. 

    When I installed the built in cabinetry in my recent office makeover, the one thing I didn’t worry too much about was what I would do for a countertop. I just assumed I’d be able to pop a 1″ x 12″ across the top of the cabinet run, paint it and call it a day.

    Wrong.

    Never ever ever expect anything to go smoothly when it comes to home projects.

    DIY Countertop Ideas - Upholstered Countertop

    As it turned out, the wall I was installing my built-ins on had a huge hump in it that I had to work around. This caused a major hiccup in the countertop department.

    Here’s the thing though.

    Not everyone is going to have a huge hump that some drywall guy thought looked decent enough forty years ago. So if you are planning to install built in cabinets somewhere in your home, first, I’m going to give you some ideas for the countertops that will work if you don’t have a huge hump in your wall, which you most likely won’t. 🙂 And then, I’m going to show you how I worked around my little problem and made an upholstered countertop for my built-ins, in case you have that problem too. And even if you don’t have a big hump in your wall (lucky you!), you can still do the upholstered countertop if you like it!

    First off, if you have no clue as to what I’m talking about when referring to my office built-ins, then read this post first.

    Affiliate links included in this post.

    Countertop Ideas for Built In Cabinets

    Idea #1: Use two 1″ x 8″s or a combination of other 1″ boards.

    If the cabinets you purchased for your built-ins are like mine, stock wall cabinets, then the tops of them are right around 12″ deep. While one would think, you could just go buy a 1″ x 12″ at your local hardware store, cut down the length to fit and nail it in place, you would be wrong, because a 1″ x 12″ is actually not 12″ wide, but only 11 1/4″ wide, therefore, you would have a gap left to fill on top of your cabinets.

    The solution to this would be to purchase two 1″ x 8″s, cut them down to the length of your cabinet span, place them side by side on top of your cabinets, secure them in place, then fill holes and gaps and paint. 1″ x 8″s are actually 7 1/4″ inches wide, so you would have a total 14 1/2″ to cover those cabinets, leaving you with a nice overhang.

    You could also use a combination of other 1″ boards like 1″ x 3″, 1″ x 4″, 1″ x 6″ – just depends on what you want the countertop to look like and how many boards you want to cut.

    If you have access to a local lumber mill that mills their own lumber, then you may be able to contact them and have them custom cut a piece, such as a 1″ x 14″ just for you.

    Idea #2: Custom Laminate or Stone Countertop

    You could go to your local home improvement store or stone store and have them come out, measure and cut a custom size countertop for your built-ins. They would be able to give you a single slab of countertop in the exact measurements you would need. This is going to be a pricier option though.

    Idea #3: DIY-ish Laminate Countertop

    You can purchase in-stock laminate countertops at your local home improvement store, then cut them down to the size you need for your built-ins. If you went with true base cabinets, this would just be a matter of cutting down the length of the countertop. If you went with wall cabinets like I did for your built-ins though, you would need to cut down the width and length of the countertop, which can be a little more tedious. This option isn’t as pricey as custom laminate or stone counters, but would probably run you around $75 – $100 depending on what size you needed. We installed some built-in cabinetry using base cabinets in the sitting area of our bedroom and this is what we opted to do there. You can see how it turned out here.

    Idea #4: Faux Stone Countertop using an Old Laminate Countertop

    If you’ve got a local Habitat for Humanity or another store that sells building and housing materials that have been removed from homes, then you could go there and find a piece of laminate countertop that would fit your built-in, then turn them into “soapstone” counters using this DIY method that I did in one of our previous homes.

    Idea #5: Plywood Countertop

    If your cabinet run isn’t longer than a piece of plywood (8 ft.), you could take your measurements to your local Home Depot or Lowe’s, get a piece of their high quality sanded 3/4″ plywood and have them cut it down to the size of your built-ins – remember to leave a little for overhang. Go home, install it on the cabinets using a finish nailer, fill holes, caulk and then paint or stain it. If you buy the good quality sanded plywood, this should give you a pretty good looking, smooth countertop for your built-ins.

    Idea #6: Perpendicular 1″ x 3″s or Beadboard

    This idea is courtesy of the one and only Wayne. Wayne is Nicky’s dad and he is my go-to guy for when I run into any snags when it comes to any home project. The man knows everything. I called Wayne over to come and help me troubleshoot the cabinets and counter of my built-ins when I realized that I had the huge hump in my wall. He had the idea to take multiple beadboard panels (the small ones that fit together tongue and groove style) or 1″ x 3″ pieces, cut them down to where there was a 1 1/4″ overhang and then put them perpendicular on the top of the cabinets. So instead of having just a couple of long pieces of boards as the counter, you would have lots of pieces going along the cabinet top that almost created a shiplap type look. You could paint or stain the pieces after you installed them all.

    This idea would also work if you have a hump in the wall because you would be custom fitting each individual piece of wood. The only reason I opted to not go with this solution was because I thought it might give the built-ins more of a farmhouse look and my office definitely is not farmhouse. We all know how I feel about shiplap.

    Alas, those ideas either wouldn’t work for my built-ins due to the large hump in the wall or they just weren’t my style. So, I created an upholstered countertop for my built-ins. If you’re interested in that option, here’s how I did mine.

    How to Make an Upholstered Countertop for Built In Cabinets

    Materials & Tools Needed

    Please note, If you don’t have a big hump in the wall like I did, then you can skip some of these steps. 🙂 You could just cut a piece of plywood to size, attach it to your cabinet tops and skip to step #3.

    Steps

    Step 1: Install the 1″ x 6″ or 1″ x 8″

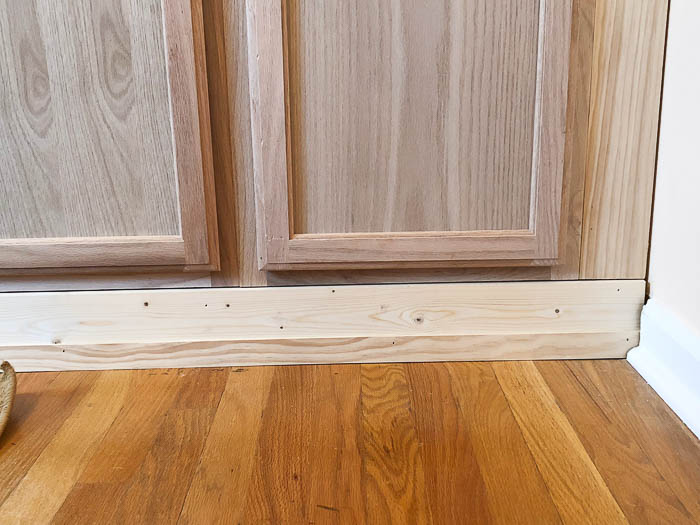
    First, cut a 1″ x 6″ or 1″ x 8″ down to the length of your built-ins (wall to wall or however long your complete built-in is, filler pieces included.) Place that piece on the front edge of your cabinet tops, slightly overhanging it over the cabinet edges by 1 1/4″ or so. Make sure your overhang measurement is the same over the whole span of your built-in, then nail the 1″ x 6″ into place.

    Countertop Ideas

    This is going to allow you to have a smooth countertop front that will have an even overhang all the way across.

    Step 2: Install the Plywood Pieces Against the Wall

    Next, take 3/4″ plywood and cut it into pieces that are the length, plus a little (measure to about the middle of the gap between the cabinets that are side by side), of each individual cabinet. For the width, cut the plywood at the biggest measurement between your wall and the 1″ x 6″.

    Countertop for Built In Cabinets

    Place the plywood piece along the back of the cabinet tops, then using a carpenter’s pencil, run it along the wall on the back of the plywood piece.

    Cheap Countertop Ideas

    This is called scribing. It’s going to give you the shape of your wall so you can custom fit that piece of plywood to it. Once you’ve scribed, use a jigsaw or circular saw to cut along the line you drew. Repeat until the piece fits and attach it to the cabinet tops using a brad nailer or a hammer and finish nails.

    DIY Countertops

    Repeat this whole process with the plywood pieces until you’ve covered the entire span of your built-ins.

    Step 3: Upholster the Countertop

    Lay your upholstery material out along your countertop – this is the material I used. Pull a little bit of excess up around the back and the edges.

    Countertops Ideas - Upholstering a Countertop

    Cut a piece of lattice trim to the length of your countertop span. Place the trim along the back of the countertop, on top of the upholstery material.

    DIY Upholstered Countertop

    Attach the lattice trim to the wall where studs are using a finish nailer or finish nails. As you attach the trim, push it down firmly both onto the upholstery material and against the wall.

    Trim off the excess material along the front edge of the countertop, leaving enough overhang to staple under the countertop.

    Upholstered Countertop for Built In Cabinets

    Pull tightly on the front of the upholstery and staple it under the overhang of the countertop. Trim any excess material as needed.

    Cut two lattice strips to the length coming out from the end corners of each wall to the edge of the countertop. With these, repeat the same process you did with the lattice piece on the back.

    Step 4: Install Quarter Round Trim (Optional)

    If you still have any gaps around where the lattice trim and the upholstered countertop meet, you can cut quarter round trim and install it along those areas. I did have to do this because I still had some gaps to contend with. Quarter round is very flexible though, so it easily curved into all those gaps and closed them.

    Step 5: Paint the Trim

    Fill any holes in the lattice trim and quarter round with spackling or wood filler. If you have any gaps along the wall, caulk those. Paint the trim whatever color you wish. I opted to go with the color of my built-in cabinets.

    Cheap Countertop Ideas - DIY Upholstered Countertop

    The upholstery I used for my countertop is a faux leather crocodile pearl, so it wipes easily, but also has a little shine to it.

    DIY Countertops - How to Upholster a Countertop

    And so the saga of the built-ins ends.

    Thank ya, Jesus.

    Can you add any DIY countertop ideas to this list?

    If you haven’t seen how I installed the built-in cabinetry, you can read how to do that right here.

    You might also want to see…

    Home Office Makeover with Budget-Friendly DIY Projects: An Office Makeover on a Budget with lots of Office DIY Decor

    Complete Home Office Makeover

    Yes, please! Great DIY countertop makeovers that are doable and affordable!

    More DIY Countertop Makeovers

    Pin This Post

    Countertop Ideas - Upholstering a Countertop on Built In Cabinets

  • DIY Built-In Cabinets using Stock Wall Cabinets

    DIY Built-In Cabinets using Stock Wall Cabinets

    By far, one of the best things I did when I completed my office makeover was installing built in cabinets. They gave me loads more of hidden storage. I can just close the cabinet doors on all that clutter! These DIY built in cabinets were made using unfinished wall cabinets as base cabinets.

    When I first showed you my office makeover back in March, I said that I was so mad at myself for not doing it sooner because I felt like having an office that was organized and beautiful made me much more productive. The more I thought about it though, the more I am kind of glad I waited a while to whip this space into shape. Granted, I shouldn’t have waited two years, but waiting did help me to pinpoint a few things that I knew I needed to add or change in my office to make it more functional – these built-in wall cabinets being one of those things.

    Built In Cabinets using Stock Cabinets - Blue cabinets against wall - Rain on a Tin Roof

    I have a pretty good size closet in here, but it holds all my craft supplies. I desperately needed something that would both store and hide away all the paperwork, files, etc. that go along with running your business from your house. The solution to that were these DIY built-in cabinets using stock cabinets. Since I was short on floor space in this room, I ended up buying stock wall cabinets and used them as base cabinets for these built-ins. With a little bit of work, these stock cabinets look custom built for this space. 

    Using Prefab Cabinets for Built-Ins

    This post contains affiliate links for your shopping convenience. Click here to read my full disclosure policy.

    Obviously, since these built in wall cabinets were made for a certain space in my house, my measurements won’t match up exactly to yours. I’m going to list out everything I used and how I installed the cabinets and trimmed them out, but keep in mind, this is a project that will vary by size depending on where you are actually installing your built-in cabinets.

    Supplies & Tools Needed for the Built-In Cabinets

    Steps

    Step 1: Remove Existing Baseboard

    Before building or installing anything, you’ll want to remove the existing baseboard that is in the space where you’ll cabinets will go.

    DIY Built In Cabinets - preparing the space - Rain on a Tin Roof

    To do this, you should be able to use a small pry bar and hammer along the back wall the cabinets will sit against. For the sides, come out about 12″ from the corner of the wall, mark it and then use an oscillating saw going in at that mark to cut out that portion of the baseboard instead of having to remove the whole thing. Be sure to check the depth of your stock cabinets first though – they might be different than mine!

    Using Prefab Cabinets for Built Ins - Removing the baseboard - Rain on a Tin Roof

    The photo above was taken after the cabinets were installed, but I wanted you to have an idea of what I was talking about with the oscillating saw. They are really a great little tool to have.

    Step 2: Build a Frame for the Cabinets to Sit On

    Since these are wall cabinets, they are shorter than typical base cabinets. If you just install them without putting them on a base, they are going to feel really small in a room and you’re going to be bending over more than you should. To bring the height of the cabinets up, build a base for them consisting of 2″ x 4″s and plywood.

    You will want your frame to be as long as the space you are installing your cabinets in and as deep as your cabinet bottoms, about 12″. Again though, be sure to double check the depth of your cabinets.

    Built In Wall Cabinets - making a base - Rain on a Tin Roof

    I found it easiest to first assemble a basic 2″ x 4″ rectangle frame, put it in the space, then add in more 2″ x 4″ supports.

    Add 2″ x 4″ supports every 16″ inches. You’ll want to drill a pilot hole first, then attach the pieces with your screws to keep from splitting the wood.

    DIY Built In Office Cabinets - building a base and supports for the cabinets - Rain on a Tin Roof

    I screwed the supports along one side of the frame first, flipped it, then put the screws in on the other side. Being able to push the frame against the wall while attaching the screws made it easier to get the screws in.

    DIY Built Ins with Stock Cabinets - attaching the cabinet base to the wall - Rain on a Tin Roof

    To finish off the base for the cabinets, you’ll want to cut out either one full piece of 3/4″ plywood or multiple pieces to fit and cover the top of the 2″ x 4″ base. Attach the plywood with screws to the 2″ x 4″ base.

    Installing DIY Office Wall Cabinets - Rain on a Tin Roof

    It’s perfectly fine to piece together scraps of plywood you have on hand here, as long as they are all 3/4″. You won’t be able to see this part once the cabinets are installed.

    Step 3: Set the Cabinets in Place

    Bring your cabinets in and set them up however you wish on the base. Most likely, you’ll want to space them out so that you have a relatively even amount of empty space at each end of the cabinets.

    Built In Office Cabinets using Unfinished Wall Cabinets - putting on the base - Rain on a Tin Roof

    Once you have everything how you want it, remove the end cabinets. You’ll need to add small wood blocks along the front side edge of each end cabinet that is closest to the wall.

    Home Office Cabinets - filling the end gaps - Rain on a Tin Roof

    The blocks don’t have to be a certain size. I just pulled out a piece of scrap wood I had. Attach it just behind that edge lip. Put a little glue on it and then nail it to the side of the cabinet. You’ll attach your filler pieces of wood to these little wood pieces once your cabinets are installed.

    Step 4: Install the Cabinets

    Put your end cabinets back in place. Check to make sure the cabinets are where you want them. Use a stud finder and mark where the studs are on the wall just above the tops of your cabinets.

    I had a spot/hump on my wall that stuck out more than the rest of the wall. Knowing that I couldn’t push the cabinet back any farther into that area, but that I would be able to use wood shims to pull the other cabinets out more if needed, I started by installing the cabinet that butted up to that hump in the wall.

    You can see in the photo below what I’m talking about.

    Built In Cabinets - installing on the wall and shimming - Rain on a Tin Roof

    Attach the cabinets to the wall with screws. The key to installing the cabinets is to make sure that each cabinet bottom is even with the cabinet base you built and that each individual cabinet meets up nicely to the cabinets beside it. This may mean that some cabinets aren’t flush with the wall. Use wood shims as shown above to make the cabinets meet the wall and allow a screw to hold it all together.

    Step 5: Install the Filler Pieces

    If you had gaps on the ends of the cabinets, now is the time to cut those filler pieces to the length of the cabinets and nail them to the small wood blocks you attached to the cabinet ends.

    DIY Built in Wall Cabinets using Unfinished Stock Cabinets - Rain on a Tin Roof

    I used a finishing nail gun, but you could also use a hammer and finish nails. I was able to use a 1″ x 4″ on each end of my cabinets as filler pieces. Of course, yours may be different depending on how much empty space you had at the end.

    Step 6: Trim Out the Base

    You don’t want the exposed 2″ x 4″ frame to be what you see at the bottom of the cabinets. You want that to look more built-in and finished.

    Cut your piece of 1″ x 4″ to the length of your cabinet run and attach it to the base just where the cabinet bottom ends and the plywood base begins. You can use a finish nailer or a hammer and finish nails for this.

    DIY Built In Cabinet Plans using Prefab Cabinets - Rain on a Tin Roof

    You’ll still have a small gap at the bottom. To cover this, cut a piece of lattice strip wood to the length of your cabinet run and nail it on top of the 1″ x 4″ near the bottom to where it meets the floor.

    Step 7: Painting the Built-Ins

    Fill all your nails holes with spackling or wood filler. Caulk any gaps along the edges, between cabinets and the trim, then prime and paint.

    Because these were unfinished oak cabinets and I wanted the grain of the wood to show as little as possible, I did two coats of primer and three coats of paint.

    DIY Built In Office Cabinets - Blue Cabinets against Peach Wall - Rain on a Tin Roof

    If you don’t care too much about the grain showing, you can easily get by with one coat of primer and two coats of paint.

    For the paint, I do suggest opting for a semi-gloss or gloss finish, so that you can easily wipe it clean as needed.

    DIY Built Ins Using Stock Cabinets - Blue cabinets with upholstered countertop - Rain on a Tin Roof

    I found these cute marble like knobs to top off my built-in office cabinets with – they were a steal!

    And then there’s the countertop. Because this is already such a long post, I put the how-to for the countertop into another post. You can read about countertop ideas for the built-ins here and how I upholstered my countertop as well.

    Do you have any plans for adding built in office cabinets to your home? 

    Need more home office inspiration?

    The Full Office Makeover– see the full before and after of my office space including all the budget DIY projects that went into it. 

    DIY Chippendale Desk– can you believe I actually built my desk? It’s a really simple build and won’t cost more than around $100. 

    DIY Wall Mounted Drop Down Desk with Storage– short on space? This wall mounted desk is a great solution!

    12 Stylish and Comfortable Office Chairs – it’s hard to find a chair that fits both criteria, right? Well, I’ve found 12 that do!

    Want to save this project for later? Pin the image below!

    DIY Built In Office Cabinets using Unfinished Stock Wall Cabinets - Rain on a Tin Roof
  • DIY Chippendale Desk

    DIY Chippendale Desk

    I almost gave up on this idea no less than 10 times.

    I mulled over tons of different options and ideas for how to build this chippendale desk for weeks.

    Nearly every idea I came up with seemed to eventually hold up a bright red STOP sign.

    I would go back to the drawing board. Sometimes, I would even go straight to my computer and start searching for a desk I could buy because I just didn’t think this idea was going to work out.

    But I kept coming back to it. I just couldn’t leave the vision I had in my head of this chippendale beauty behind.

    And then magically, it was like it all came together. It was more than a light-bulb moment.

    Actually, it was just a hell of a lot of back and forth in my head, troubleshooting, mulling over all the different ways it could possibly be done and then making Grunt be my sounding board for all the above.

    But I did it.

    Yes, I.

    I built this little baby all by myself.

    DIY Chippendale Desk - an easy diy desk plan that has a high end look but costs less than $100 to make.

    At first glance, that might seem like a big deal, but I assure you if I can do this, anyone can.

    And don’t fret – you don’t have to make those chippendale panels yourself…

    DIY Chippendale Desk

    This post contains affiliate links for your shopping convenience. Click here to read my full disclosure policy.

    Supplies & Tools Needed

    Cut List

    • Using your circular saw, cut the sheet of plywood into two pieces:

    • 1 piece should be 29″ x 48″ – this is going to be the front panel of your desk.
    • 1 piece should be 29 7/8″ x 48″ – this is going to be the top of your desk.

    • Using either your circular saw or a miter saw, cut the 1″ x 4″ x 6′ into two pieces that each measure 28 3/4″ long.

    • Using either your circular saw or a miter saw, cut the 1″ x 2″ x 6′ down to 46 5/8″ long.

    If you don’t want to do the cutting yourself, then usually your local hardware store will cut them for you.

    Steps

    Step 1

    First, you’re going to need to reinforce your chippendale panels. When I first pulled my panels out of the wrapping, I quickly noticed that some of the fretwork wasn’t super secure. To keep all the fretwork in place, you want to put wood glue between all the joints.

    How to Make a Chippendale Desk from readymade chippendale panels - an easy desk plan idea.

    Just squeeze a little bit of glue where every joint is, as noted above, then rub your finger over the joint to push the glue into the joint. Once that side of the chippendale panel is dry, flip it over and do the same thing to the other side. It might not seem like this is going to make a huge difference, but it really does. Wood glue is serious stuff.

    Do this with both chippendale panels, front and back. Let the glue fully dry before proceeding to the next step.

    Step 2

    Now, you’re going to be attaching feet to the chippendale panels.

    Lay both chippendale pieces down with the inside facing up. You’ll also need both of your cut 1″ x 4″ pieces (the 28 3/4″ long pieces) now too.

    DIY Chippendale Desk - easy DIY desk build.

    Run wood glue along the inside edge of the chippendale panel that is 28 3/4″ long. Be sure you are gluing on the right edge – the chippendale panels are not perfect squares!.

    DIY Chippendale Desk - easy DIY desk build.

    Place your cut 1″ x 4″ pieces along where you just ran your glue and secure it with a finish nailer or with finish nails using a hammer.

    DIY Chippendale Desk - easy DIY desk build.

    Stand your panels up.

    Easy Desk Idea - build a chippendale desk from readymade chippendale panels.

    Let this dry completely before moving on to the next step.

    Step 3

    Now, you’re going to attach the front solid panel of the desk.

    Stand both chippendale panels up on their feet. Attach corner braces along the sides and foot of each panel as shown below.

    How to Make a Chippendale Desk from readymade chippendale panels - an easy desk plan idea.

    You’ll use single hole corner braces, the 3/4″ inch ones along the chippendale panel and one double hole corner brace, the 1 1/2″ ones, where the foot is.

    Place the 29″ x 48″ piece of 3/4″ plywood in front of the brackets, then attach the brackets to the plywood panel.

    An important thing to note – before attaching the brackets to the plywood panel, make sure the screws aren’t too long and won’t go through the front of the plywood. Some brackets come with longer or shorter screws than others. If your screws are going to be too long for the plywood panel, then just go to the hardware store and buy shorter screws that have about the same size screw head as the ones that came with your brackets.

    How to build a chippendale desk for less than $100.

    Step 4

    Now, you’re going to put on the desk top.

    Start by attaching four single hole braces (3/4″ braces) along the top edge (shown below) of the front panel of plywood you just attached.

    DIY Chippendale Desk

    Attach two more single hole braces (3/4″ braces) to each chippendale side panel along the top, as shown below.

    DIY Chippendale Desk

    Lay your 29 7/8″ x 48″ piece of plywood on top of the front panel of plywood and the side chippendale panels making sure everything is even and squared up how you want it, then just like you did with the front plywood panel, attach the top plywood panel to the corner braces you just installed.

    Easy Desk Ideas: How to build a chippendale desk from readymade chippendale panels.

    Step 5

    Now, for a little added support in the back of the desk, you are going to attach your cut 1″ x 2″ wood piece that you cut down to 46 5/8″ long just along the inside top at the back of your desk.

    DIY Desk Idea - Make a chippendale style desk easily.

    Place it so that it meets up with that inside frame of the chippendale panel.

    Easy DIY Chippendale Desk

    Attach the 1″ x 2″ to the desk using the 1 1/2″ double hole corner braces on each side as shown in the image above.

    Step 6

    Caulk any gaps in the desk to give it a nice clean finished look. I caulked all along the places where the plywood met the chippendale panels.

    Step 7

    Prime and paint the desk.

    I opted to prime my desk before painting it so the raw wood wouldn’t soak up too much of the paint. I was very glad I did because it allowed me to only need one coat of the oil-based paint, which we all know isn’t great fun to work with.

    DIY Chippendale desk - priming.

    That was after the primer coat.

    And the finished DIY Chippendale Desk….

    How to Build a Desk: Easy DIY Chippendale Desk Plan

    Desk Chair / Leopard Print Rug (similar) 

    Isn’t she a beaut? It is the perfect size for my smaller office with the perfect touch of interest.

    Easy DIY Desk Plan - How to Build a Chippendale Desk

    So – do you think you’ll give this easy desk plan a whirl?

    You might also want to see…

    How I DIYed those Built In Cabinets:

    DIY Built In Office Cabinets

    The Full Office Makeover:

    Home Office Makeover with Budget-Friendly DIY Projects: An Office Makeover on a Budget with lots of Office DIY Decor

    Budget-Friendly DIY Office Makeover

    Really great list of 12 Stylish and Comfortable Office Chairs - most are very affordable as well! Great desk chairs!

    12 Stylish and Comfortable Office Chairs

    If you want to come back to this project later, just pin the image below!

    DIY Chippendale Desk - an easy diy desk idea that looks high-end but is less than $100.

  • A Home Office Makeover Full of Budget-Friendly DIY Projects that Look High End

    A Home Office Makeover Full of Budget-Friendly DIY Projects that Look High End

    If you work from home, then take my advice.

    Get your home office in tip-top shape.

    Paint it. Decorate it. Organize it. Make it you.

    I’m not sure quite how, but somehow, magically, once you do that, you become so much more productive. So much more saner.

    So much more feeling like maybe you can just make it through this day.

    Hand to God, ever since I have gotten this office done, I feel like I have been so much more less stressed than before.

    Why in the hell did I wait nearly two years after moving into the 70’s Landing Pad to make my office me?

    Screw making the kitchens, bathrooms and living rooms beautiful, I’m starting to become a cheerleader for making your workspace beautiful and functional before the rest of all that.

    And you know what the best thing about this office makeover is?

    It was all done on a budget. I DIY’ed a lot of things in this space and did a lot of reusing what I already had as well.

    Ok, here is what the office looked like when we first bought the house:

    The Office Before

    The previous tenants had left behind the desk as well as the hardwood floors that were loosing their finish.

    When we moved in, I put my old desk in here, hung some curtains, threw in some other things and called it a day. You can see photos of that here. There was too much going on though. Too much stuff in the room, too much stark white wall, too much brightly colored patterns against stark white walls. It just didn’t work.

    Now though, it works…

    Home Office Makeover Full of Budget-Friendly DIY Projects

    This post contains affiliate links for your shopping convenience. Click here to read my full disclosure policy.

    Home Office Makeover with Budget-Friendly DIY Projects: DIY Chippendale Desk, peach walls, blue cabinets, leopard prints

    Wall Color / Light Fixture / Cabinetry / Desk Chair / Leopard Print Rug (similar) / DIY Chippendale Desk

    It feels more open. There are fewer things, but more storage. It’s light and airy, without being stark. It’s…exactly what I needed to stay sane.

    Ok, and wanted too. And honestly, it turned out better than I ever imagined it would!

    Let’s talk details.

    First, the walls got a fresh coat of paint.

    Home Office Makeover with Budget-Friendly DIY Projects - Peach walls, leopard prints, DIY Chippendale desk and more!

    This room is small, so I didn’t want anything too dark, but didn’t want white walls. I went with Citrus Delight by Behr. It’s a peach color, which actually looks even lighter in this space than what the sample card showed because that window faces the sun nearly all day.

    The leopard print rug has been in my office since we moved in. I’ve had it for a few years now and it has to be one of the best yard sale purchases I’ve ever made – it was only $2. The rug is also covering up where the finish was wearing off the hardwoods – no money in the budget to fix all that yet.

    I had also switched the ceiling fan out for that light fixture a few years back and it stayed.

    I added built-ins along the back wall.

    Home Office Makeover with Budget-Friendly DIY Projects - built-ins made from stock cabinetry.

    Cabinetry / Cabinetry Knobs

    I needed some serious storage in here. I have a closet, but it holds all my my craft supplies and extra home decor accessories. I needed something for paperwork and office supplies and all that ho-hum stuff. I bought unfinished wall cabinets, built a base for them and then attached them to the wall. Once I got in the middle of the project, I discovered I had a very bowed wall of drywall and that made the install much tougher, but still worth it. Read the tutorial here on how I added the built-ins.

    Home Office Makeover with Budget-Friendly DIY Projects - built-ins made from stock cabinetry.

    Dolly Print / Leopard Print / Burt Print

    The countertop of the built-ins is actually upholstered in a durable faux leather pearl vinyl. I had to get creative there because of the bowed drywall. The tutorial for upholstering a countertop is here.

    Home Office Makeover Ideas - framed picture of Dolly Parton

    Dolly Print / Leopard Print / Burt Print

    Dolly is front and center in the office. Grunt says it’s funny to walk in and see me working with Dolly watching over me. I’m hoping she’ll shower some of her greatness on me. I found the Dolly print here and used this gold frame from Target to showcase her.

    Home Office Makeover Ideas - affordable art.

    Leopard Print / Burt Print / Upholstery on Counter / Cabinetry Knobs

    And you can’t have Dolly without Bert. 😉 I actually decided several months back that Bert was going in my office. That’s the picture from his 1972 Cosmo spread. I found it here. The seller offered it in an 8×10 size, but I wanted one bigger, so I messaged them and they were able to set me up with a 12 x 18 size. Because of the size of the actual photo, there is a good bit of white space around it when you get it in any size. Because of that, I decided to get it semi-custom framed. Since it’s such an odd size, I had a custom mat cut for it, but then just bought a frame that was already premade. I used Michael’s for framing it and they did a wonderful job. In fact, I think the framing girl was just as excited about framing Burt as I was! I got the leopard from Society6 a few months ago. I didn’t know the full plan for the office yet, but I knew he would be great alongside Bert – and I was right.

    Home Office Makeover with lots of DIY project ideas that are affordable - printable Fancy artwork.

    Over on the other side of the cabinetry is a bust I’ve had for years and finally found the perfect place for. I asked on my Instagram stories what I should paint him and Optometrist Jackie suggested a marbled finish. I gave it a whirl and I think it turned out pretty well.

    Home Office Makeover with lots of DIY project ideas that are affordable - free printable Here's Your One Chance Fancy artwork.

    I also whipped up a little custom art as well. Me and Reba were tight when I was a kid. And Fancy, well it was most definitely my favorite song, even in elementary school. I figured this line would serve as some good motivation.

    And did you notice my new desk?

    Home Office Makeover full of Budget-Friendly DIY Decor Projects like this DIY Chippendale desk!

    Desk Chair / Leopard Print Rug (similar) 

    I built it, ya’ll! Me! All by myself! It might look complicated, but I assure you, it was a pretty simple build. The how-to for the desk build is right here. That’s my same office chair I’ve had for a few years, it still worked perfectly in the space and is comfortable as well.

    I did have a bit of a hard time parting with my old desk, which was actually my Pap and Grannie’s kitchen table at one time. However, it just wasn’t as functional as I really needed my desk to be. I have plans for it at the farmhouse and I know Pap would have been proud that I built the new desk myself.

    Home Office Makeover Ideas that are low-budget - uses vases and vintage glassware to wrangle desk items.

    DIY Faux Crystal Vase

    That’s the DIY faux crystal vase I made last year that I’m using as a pen/pencil holder. The little glass dish tray was my great-grandmother’s. She used it to feed her chickens with. Not kidding! One of my great aunts started cleaning out family stuff years ago and brought me a few different things – this being one of them. She said she always remembered her feeding the chickens out of that dish and when she died, she just had to get it for the memories.

    On the other side of the desk, I created an inspiration board of sorts.

    Home Office Makeover Idea: DIY Fabric Covered Bulletin Board

    That just means I wrapped pretty fabric around a bulletin board and added nailhead trim. I love how that green fabric works with the peach walls and blue cabinetry though – the perfect pop of color.

    Easy Home Office Makeover Idea: DIY Fabric Covered Bulletin Board

    Green Upholstery Fabric / Nailhead Trim

    Instead of individual nailheads, I used the rolled nailhead trim which helped me keep straight lines. It was a huge timesaver as well.

    Home Office Makeover Idea: DIY Fabric Covered Bulletin Board

    One of the biggest, yet easiest and super cheap things I suggest anyone do in their home office is to hang a pretty towel hook.

    Home Office Decor and Organization Idea - use a fancy towel hook to hold your computer bag.

    Not for towels of course, but for your computer bag or camera bag or whatever kind of bag you need to hang on it. It’s so much better than throwing it on the floor and tripping over it. Not that that’s happened to me or anything.

    Home Office Decor Ideas - Easy Upholstered Window Cornice with Tassels

    I also brought more of that glorious green upholstery fabric onto the other side of the room on a window cornice. Such a simple and cheap DIY project with so much bang for your buck. A yard and a half of this fabric (only $15 a yard!) gave me more than enough for the cornice and the bulletin board.

    Home Office Decor Ideas - Easy Upholstered Window Cornice with Tassels

    Green Upholstery Material / Tassel Trim

    I found the tassel trim at Hobby Lobby and it added some more color and fun to the space.

    Home Office Makeover with Budget-Friendly DIY Projects - painted and patterned closet doors.

    DIY Painted and Patterned Closet Doors

    I had actually painted these closet doors (full tutorial here) before we moved into the house and I still love them. They worked great with the space and the peach paint color, so I happily kept them as they were.

    Home Office Decor Ideas: Blow up loved one's handwriting from cards to use as art.

    My little $5 elephant stool finally found a home!

    Home Office Decor Ideas - stack colorful books together.

    Elephant Stool (similar)

    He’s another one of my best yard sale purchases ever! I loaded him up with a few of my favorite colorful coffee table books. There is a similar elephant stools I found here.

    And finally, one of my favorite touches in the room…

    Home Office Decor Ideas: Blow up loved one's handwriting from cards to use as art.

    I scanned a couple of old cards and envelopes where my Pap had written my name and signed his and turned them into wall art. They are right across from my desk, so all I have to do is look up and it makes me smile.

    So all in all, I have roughly right around $600 in the office makeover. The biggest chunk of that is the built-in cabinetry, which was around $300, but so worth it. The desk was less than $100 to make and then there’s around another $200 in paint, fabric, art, frames and various other supplies.

    I for one though think that for just having spent $600, the whole space looks more like a million bucks. 😉

    What do you think about the office makeover?

    You might also want to see…

    DIY Built-In Office Cabinets from Stock Cabinets

    DIY Chippendale Desk - an easy diy desk idea that looks high-end but is less than $100.

    DIY Chippendale Desk

    Really great list of 12 Stylish and Comfortable Office Chairs - most are very affordable as well! Great desk chairs!

    12 Stylish and Comfortable Office Chairs

    Pin This Post

    Home Office Makeover with Budget-Friendly DIY Projects: An Office Makeover on a Budget with lots of Office DIY Decor

    SaveSave

  • Eclectic Home Tours: The 70’s Landing Pad Home Tour, Part 1

    Eclectic Home Tours: The 70’s Landing Pad Home Tour, Part 1

    I cannot believe I actually just typed that title, y’all.

    We just moved into the 70’s Landing Pad about three weeks ago. By no stretch is the house completed, but the fact that I can actually share a home tour with y’all that doesn’t include a three inch thick layer of dust on the floors is a huge accomplishment for me. There still aren’t curtains in the living room and dining room and things aren’t exactly the way I want them just yet, but that takes time and it is what it is. #reallife #itaintalwayspretty

    Today, I’ll share the living room, dining room, hall bathroom and my office as part of the Eclectic Home Tours. Next week, I’ll have the Circus’ bedroom, the master bath and the den for you, so stay tuned. I’ve already revealed the Well Traveled Master Bedroom and if you haven’t seen it yet, it’s here.  Don’t miss the rest of the tours in the Eclectic Home Tours either – links are at the end of this post – I promise you won’t be disappointed.

    I’m not going to do much talking in this one. Instead, I’ll come back over the next few weeks and share all the details of each space separately and what all we did to each room along with before shots of the rooms when we bought the house. Also there’s the fact that this post is supposed to be published along with everyone else’s on the tour today at 8am EST and I’m just now writing the post at 7:48 AM EST. #storyofmylife

    Without further ado, I present to you the semi-finished 70’s Landing Pad.

    Affiliate links may be contained in this post.

    Living Room

    JAW DROPPING! The 70's Landing Pad Living Room Tour: Full of vintage finds paired with modern pieces and pops of color. Living Room Design | Black and White Interior Decorating | Vintage Decor | Retro Decor

    Snakeskin Print Rug / Ghost Chairs / Lion Print / Brass Floor Lamp

    *Ignore the hideous chandelier behind the couch – that will be replaced soon!

    JAW DROPPING! The 70's Landing Pad Living Room Tour: Full of vintage finds paired with modern pieces and pops of color. Living Room Design | Black and White Interior Decorating | Vintage Decor | Retro Decor

    Leopard Print Pillow / Palm Print Pillow

    JAW DROPPING! The 70's Landing Pad Living Room Tour: Full of vintage finds paired with modern pieces and pops of color. Living Room Design | Black and White Interior Decorating | Vintage Decor | Retro Decor | Snakeskin Print Rug

    Gold Sphere / Snakeskin Rug / Acrylic Napkin Holder Coasters

    P.S. Notice the leg of my tripod in the photo above. #mybad

    JAW DROPPING! The 70's Landing Pad Living Room Tour: Full of vintage finds paired with modern pieces and pops of color. Living Room Design | Black and White Interior Decorating | Vintage Decor | Retro Decor | Ghost Chairs

    Lion Print / Ghost Chairs

    JAW DROPPING! The 70's Landing Pad Living Room Tour: Full of vintage finds paired with modern pieces and pops of color. Living Room Design | Black and White Interior Decorating | Vintage Decor | Retro Decor

    Brass Unicorn (similar ones)

    JAW DROPPING! The 70's Landing Pad Living Room Tour: Full of vintage finds paired with modern pieces and pops of color. Living Room Design | Black and White Interior Decorating | Vintage Decor | Retro Decor | Ghost Chairs

    Green Velvet Pillow / Ghost Chair / Acrylic Napkin Coasters

    JAW DROPPING! The 70's Landing Pad Living Room Tour: Full of vintage finds paired with modern pieces and pops of color. Living Room Design | Black and White Interior Decorating | Vintage Decor | Retro Decor

    JAW DROPPING! The 70's Landing Pad Living Room Tour: Full of vintage finds paired with modern pieces and pops of color. Living Room Design | Black and White Interior Decorating | Vintage Decor | Retro Decor

    To The Night Art Print

    JAW DROPPING! The 70's Landing Pad Living Room Tour: Full of vintage finds paired with modern pieces and pops of color. Living Room Design | Black and White Interior Decorating | Vintage Decor | Retro Decor

    Rolling Stone 70’s Book / Elvis Book

    JAW DROPPING! The 70's Landing Pad Living Room Tour: Full of vintage finds paired with modern pieces and pops of color. Living Room Design | Black and White Interior Decorating | Vintage Decor | Retro Decor

    Elvis Bust (similar ones)

    JAW DROPPING! The 70's Landing Pad Living Room Tour: Full of vintage finds paired with modern pieces and pops of color. Living Room Design | Black and White Interior Decorating | Vintage Decor | Retro Decor | WTF Pillow

    I know – isn’t that pillow epic?

    Dining Room

    A STUNNING HOME! The 70's Landing Pad Home Tour: The Dining Room | Black and White Decor / Moody Interior Design / Vintage Interior Design / Glass Dining Table / Vintage Brass Chandelier / Vintage Round Cantilever Chairs

    Rug / Glass Dining Table (similar) / Cantilever Chairs (similar) 

    A STUNNING HOME! The 70's Landing Pad Home Tour: The Dining Room | Black and White Decor / Moody Interior Design / Vintage Interior Design / Glass Dining Table / Vintage Brass Chandelier / Vintage Round Cantilever Chairs

    A STUNNING HOME! The 70's Landing Pad Home Tour: The Dining Room | Black and White Decor / Moody Interior Design / Vintage Interior Design / Minted Art Print, Ivy / Glass Dining Table

    Ivy Art Print

    Hall Bathroom

    Such an adorable bathroom for a kid, but also stylish for adults! The 70's Landing Pad Hall Bathroom | Gray Walls / Black and White Decor / Kid's Bathroom / Purple Bathroom Vanity / Gray Rectangle Floor Tiles

    Shower Curtain / Yellow Hand Towel

    Such an adorable bathroom for a kid, but also stylish for adults! The 70's Landing Pad Hall Bathroom | Gray Walls / Black and White Decor / Kid's Bathroom

    Bonkers Art

    Such an adorable bathroom for a kid, but also stylish for adults! The 70's Landing Pad Hall Bathroom | Gray Walls / Black and White Decor / Kid's Bathroom / Purple Bathroom Vanity / Gray Rectangle Floor Tiles

    Faucet / Cabinet Pulls / Cabinet Knobs

    Such an adorable bathroom for a kid, but also stylish for adults! The 70's Landing Pad Hall Bathroom | Gray Walls / Black and White Decor / Kid's Bathroom / Round Black Mirror / Vintage Style Globe Pendant Lights

    My Office

    Great ideas for incorporating family trinkets and treasures into your decor! The 70's Landing Pad Office Tour: Full of family treasures and trinkets, but decorated tastefully and with a touch of flair.

    Curtains

    Great ideas for incorporating family trinkets and treasures into your decor! The 70's Landing Pad Office Tour: Full of family treasures and trinkets, but decorated tastefully and with a touch of flair.

    Great ideas for incorporating family trinkets and treasures into your decor! The 70's Landing Pad Office Tour: Full of family treasures and trinkets, but decorated tastefully and with a touch of flair.

    Gemstones Print / Dream Big Hustle Hard Print

    Great ideas for incorporating family trinkets and treasures into your decor! The 70's Landing Pad Office Tour: Full of family treasures and trinkets, but decorated tastefully and with a touch of flair.

    Great ideas for incorporating family trinkets and treasures into your decor! The 70's Landing Pad Office Tour: Full of family treasures and trinkets, but decorated tastefully and with a touch of flair. | Black and White Painted Closet Doors

    DIY Painted Pattern Closet Doors

    Great ideas for incorporating family trinkets and treasures into your decor! The 70's Landing Pad Office Tour: Full of family treasures and trinkets, but decorated tastefully and with a touch of flair.

    Curtains

    Great ideas for incorporating family trinkets and treasures into your decor! The 70's Landing Pad Office Tour: Full of family treasures and trinkets, but decorated tastefully and with a touch of flair. | Malachite Credenza

    Malachite Credenza / Design Sponge Book / Sarah Richardson Style Book / Modern Mix Book 

    What do you think? How’s the 70’s Landing Pad coming along so far?

    Shop the Home Tour…

    [show_shopthepost_widget id=”1867007″]

    Don’t miss these other stops in the Eclectic Home Tours today…

    SaveSave

  • Masculine Bedroom + Office Makeover Full Source List

    Masculine Bedroom + Office Makeover Full Source List

    Affiliate links may be contained in this post.

    I realize it’s been well over a month since I first showed you the masculine guest bedroom and office makeover – A.K.A. Bill’s room.

    Essentially, Christmas threw up everywhere and this post kept getting pushed to the back burner.

    This room is by far one of my favorites and really, I just pulled it together, Bill came up with the plan and he knocked it outta the park. We used a mix of new items with ones we already had, we DIYed a thing or two and of course, we mixed in a few yard sale and thrift store finds. Here’s the full source list for everything in the space – if something is no longer being made, I tried to find a similar version for ya.

    Masculine Bedroom + Office Makeover Full Source List / Black and White Bedroom / Black and White Interior Design / Vintage Inspired Interior Design

    Faux Sheepskin Area Rug (Chocolate Color, We went with an 8′ x 11′)

    We also removed the footboard and added feet to the box spring to eliminate the need for bed rails.

    Masculine Bedroom + Office Makeover Full Source List / Black and White Bedroom / Black and White Interior Design / Vintage Inspired Interior Design / Fur Blanket / Black Wall

    Faux Fur Blanket / White Quilt  / Green & White Pillow (similar one, mine originally came from Target about a year ago.)

    Paint Colors: Limousine Leather & Bit of Sugar

    I’ll be honest – I didn’t think that white quilt would work at all. Bill was very specific about not getting a comforter because it made him too hot, but he didn’t want something too thin either. He found the white quilt and when we got it home, I was so surprised at how well it worked in the space. I do think though that without the fur throw it would have been too stark.

    Masculine Bedroom + Office Makeover Full Source List / Black and White Bedroom / Black and White Interior Design / Vintage Inspired Interior Design

     White Side Table  / White and Black Faux Fur Pillow (Similar) / Jack Accent  / White Deer Head (similar and similar)

    The black and chrome chair is vintage and was a yard sale find that was once covered in rust. This chair is actually the exact same one – minus the rust mine had. Wassily chairs are also very similar and honestly, prettier, but more expensive. The drapes are just your basic white ones from IKEA.

    Masculine Bedroom + Office Makeover Full Source List / Black and White Bedroom / Black and White Interior Design / Vintage Inspired Interior Design / Green Glass Lamp

    Green Glass Lamp

    Masculine Bedroom + Office Makeover Full Source List / Black and White Bedroom / Black and White Interior Design / Vintage Inspired Interior Design / Vintage Dresser / Dog Statue

    Framed Art

    The dresser is vintage. For local Chattanooga folks, it came from the Insyde Outsyde Shop. I wasn’t using the mirror that goes with our master bedroom furniture, so I propped it on top of Bill’s dresser.

    Masculine Bedroom + Office Makeover Full Source List / Black and White Bedroom / Black and White Interior Design / Vintage Inspired Interior Design / DIY Bookshelf

    DIY Bookshelf / Vintage Record Holder (Similar) 

    We made the bookshelf ourselves after we saw a similar one for $1000 that I just couldn’t bring myself to spend that much money on. I found the record holder at a yard sale. Urban Outfitters has a similar new option and Etsy is full of vintage ones.

    The horse print was a yard sale find and unfortunately, I can’t find any similar ones online. The vintage pennant was a gift from a friend, but you can find lots of those on Etsy.

    And finally, my office portion of the room…
    Masculine Bedroom + Office Makeover Full Source List / Black and White Bedroom / Black and White Interior Design / Vintage Inspired Interior Design / Office Space / Comfortable but Stylish Office Chair

    Desk Chair / DIY Desk

    I’ve also got a post about stylish and comfortable desk chairs here if ya need that.

    If I left anything out, let me know y’all!

    And can I just say  – I’m really glad the Christmas decorating hoopla is winding down… #thisgirlneedsatimeout

    And if you didn’t see the full before and after of Bill’s room, you probably should. He kinda killed it.

    Masculine Bedroom Makeover - This room functions as a Guest Room, Teenage Boy's Room, and an Office. Lots of great ideas for making a room function for multiple uses.

    Masculine Bedroom Makeover

    blog-signature-summer-15

    You know you don’t wanna miss any of this crazy.

    Sign up to get my posts delivered to your inbox here.

    Stalk Me Here:

    Pinterest / Facebook / Twitter / Instagram

    SaveSave

  • Masculine Bedroom and Office Makeover

    Masculine Bedroom and Office Makeover

    How many uses can you find for one average sized bedroom?

    Well around here, we can find three.

    Apparently, we like a challenge.

    I thought that as kids got older, they liked to spend more time with their friends – away from the adults in their lives.

    Apparently, I was wrong.

    Or either Bill is the exception.

    It seems the older he gets, the more he’s here.

    I’m not complaining – I’ll take all the quality time I can get; he’s off to college next year.

    In the meantime though, the room he was inhabiting was not very “Bill.”

    The Room Before

    While Elvis loved his jungle room, apparently Bill was not fond of a similar theme with the leopard print wall in his room.

    The Room Before

    I was also invading part of his space with my office area.

    So I told him he could decide what he wanted to do with the room.

    I know – I couldn’t believe I uttered those words myself.

    The only conditions were that it did still have to have the bed, as the room is also our only guest room, and my desk had to stay in the space. Anything else was up to him.

    I set him up on Pinterest one night – and held my breath.

    I prayed he wouldn’t pin some hideous basketball/baseball/football/soccer ball border circa 1992. I cringed as he looked at bright orange Tennessee Vols decor. I finally had to leave the room.

    About 30 minutes into his browsing, he called me back in and presented me with his pick – a masculine black and white room with fur accents and wood tones.

    I don’t know if I was ever more proud of him.

    I asked him if he was sure he liked that. He did. He was actually excited about it. And then he said the words I would have never dreamed he would say – “I think we should add in some pops of green too. That would keep it in line with the rest of the house.“

    Oh. My. Stars.

    This is what we ended up with…

    Masculine Bedroom Makeover - This room functions as a Guest Room, Teenage Boy's Room, and an Office. Lots of great ideas for making a room function for multiple uses. Black Walls (Behr's Limousine Leather), Black and White with green and wood toned accents. Brown Faux Fur Rug

    I really don’t know who was more excited about how well it turned out – me or him. It is perfect for him, it works just fine for guests and my office space is still in the room – just out of the way.

    *A big thanks to Home Decorators Collection for helping with this project so Bill can have a bedroom that doesn’t resemble the jungle room.

    Here’s the breakdown…

    Masculine Bedroom Makeover

    We definitely wanted black in the room, but didn’t want the entire room to be black. We opted to paint one wall completely black and then paint black halfway up on two of the walls.

    Masculine Bedroom Makeover - This room functions as a Guest Room, Teenage Boy's Room, and an Office. Lots of great ideas for making a room function for multiple uses. Black Walls (Behr's Limousine Leather), Faux Fur Throw / Green Accents

    The bed stayed, however I removed the rails and added feet to the box spring – it was ridiculously easy. It really helped to open up the room. I also think it makes the headboard really stand out against the black walls – I love that wood grain against the black wall. We opted for a white quilt on the bed, accented with a super soft and cozy faux fur throw and a green accent pillow.

    Masculine Bedroom Makeover - This room functions as a Guest Room, Teenage Boy's Room, and an Office. Lots of great ideas for making a room function for multiple uses. Faux Fur Throw on White Quilt.

    Most of the time, he totally ditches the quilt and sleeps with the fur throw. He. Loves. it.

    My desk used to be on the wall coming right into the room – it was way too overwhelming there though. We moved it to another wall and found a vintage mid-century modern dresser to place along the wall for some much needed storage.

    Masculine Bedroom Makeover - This room functions as a Guest Room, Teenage Boy's Room, and an Office. Lots of great ideas for making a room function for multiple uses. Vintage Mid-Century Modern Dresser / Faux Brown Fur Rug / Black and Leather Chrome Chair / Fur Accents / White Geometric Table / Oversized Jack Decor

    A chocolate faux fur rug from Home Decorators Collection covers most of the carpet in the room. The rug was a steal of a deal. I got an 8 x 11 for under $300. When Bill came home and saw it for the first time, he immediately laid down on it and hardly moved for the rest of the night. We did keep the chrome and black chair in there, but got smaller side tables for each side of the bed.

    Masculine Bedroom Makeover - This room functions as a Guest Room, Teenage Boy's Room, and an Office. Lots of great ideas for making a room function for multiple uses. White Geometric Side Table with Brass Horse Tray

    The tables have open geometric shapes on the sides, so they are very airy feeling, which is great for small spaces. There is still plenty of room though to hold knick-knacks on the top.

    He picked out the dresser himself (we found it at a local vintage shop). I pulled the mirror that actually goes with mine and Grunt Labor’s bedroom set out of storage to prop on his dresser.

    Masculine Bedroom Makeover - This room functions as a Guest Room, Teenage Boy's Room, and an Office. Lots of great ideas for making a room function for multiple uses. Vintage Mid-Century Modern Dresser / Dog Statue

    He fell in love with Finneman the dog as soon as he saw him.

    Masculine Bedroom Makeover - This room functions as a Guest Room, Teenage Boy's Room, and an Office. Lots of great ideas for making a room function for multiple uses. Dog Statue - love how its used as decor in a bedroom rather than in an entry.

    He didn’t really have to convince me – I thought putting the dog in a bedroom rather than as the typical entry decor was a genius idea. However, if you follow me on Instagram, you may have seen that the Circus has tried to make the dog her own. She’s drug him all around the house and adorned him in hair of tinsel, a ballerina costume and most recently a combination of items that make him look like he’s a cross between an Egyptian pharaoh and a Disney princess.

    The art and deer head on the dresser was in the room before, it still worked pretty well with the space, however we did add in a green glass lamp that I wouldn’t mind stealing for my own room.

    Masculine Bedroom Makeover - This room functions as a Guest Room, Teenage Boy's Room, and an Office. Lots of great ideas for making a room function for multiple uses. Green Glass Lamp with Faux Wood Shade / Black Walls (Behr's Limousine Leather) / Chrome and Leather Chair

    When he said we needed green accents, there was no way I wasn’t going along with that one. 😉

    Masculine Bedroom Makeover - This room functions as a Guest Room, Teenage Boy's Room, and an Office. Lots of great ideas for making a room function for multiple uses. Green Glass Lamp with Faux Woodgrain Shade / Black Walls (Behr's Limousine Leather)

    I also love the shade on this lamp – it’s a woodgrain look that goes great against the black and white wall.

    The other side of the bed may be my favorite part of the room though.

    Masculine Bedroom Makeover - This room functions as a Guest Room, Teenage Boy's Room, and an Office. Lots of great ideas for making a room function for multiple uses. DIY Bookshelf / Guitar as decor / White Geometric Side Table / Black Walls (Behr's Limousine Leather)

    Bill and I made, (yes we made!) a bookshelf for this wall.

    Masculine Bedroom Makeover - This room functions as a Guest Room, Teenage Boy's Room, and an Office. Lots of great ideas for making a room function for multiple uses. DIY Bookshelf / Guitar as decor

    The full tutorial for the bookshelf is here. We decorated with some vintage items around it – including my grandmother’s guitar which he thought was a pretty cool touch.

    Masculine Bedroom Makeover - This room functions as a Guest Room, Teenage Boy's Room, and an Office. Lots of great ideas for making a room function for multiple uses. DIY Bookshelf / Guitar as Decor / Vintage Records / Fur Rug

    The other occasional table is on this side as well.

    Masculine Bedroom Makeover - This room functions as a Guest Room, Teenage Boy's Room, and an Office. Lots of great ideas for making a room function for multiple uses. Old guitar as decor / White Geometric Side Table / Black Walls (BEHR's Limousine Leather) / Brown Fur Rug

    And finally, on the wall opposite from everything else is my workspace.

    Masculine Bedroom Makeover - This room functions as a Guest Room, Teenage Boy's Room, and an Office. Lots of great ideas for making a room function for multiple uses. Functional office space in a guest bedroom.

    It’s tucked away from everything else and I also kept this wall entirely white to visually separate the two spaces. I’m one smart cookie, right?

    No, I’m not at all. It was just a random idea that happened to work. 🙂

    So what do you think of the masculine bedroom makeover? Bill did a pretty good job, didn’t he? He only had a smidgen of help…

    pin-this-post-2

    Masculine Bedroom Makeover - This room functions as a Guest Room, Teenage Boy's Room, and an Office. Lots of great ideas for making a room function for multiple uses.

    You might wanna see this too…

    DIY Modern Rustic Bookshelf - simple build and costs about $40 in materials. Could do any color you wanted to!

    DIY Modern Rustic Bookshelf

    How to Add Feet to a Box Spring and Get Rid of the Footboard - great and easy idea for small bedrooms. You could also remove the headboard with this idea if you wanted to. / Bedroom Ideas / DIY Bed Ideas / DIY Bed Frame

    How to Add Feet to a Box Spring

    ***Giveaway Now Closed.***

    And…Home Decorators Collection is giving away a $50 gift card to one lucky guy or gal!

    Home Decorators Collection Gift Card Giveaway

    Use the Rafflecopter below to enter!

    a Rafflecopter giveaway

    Disclosure: This post was a collaboration with Home Decorators Collection. However, all opinions and pride in the teenager’s design skills are 100% mine.

  • Chic Guest Bedroom and Office Reveal

    Chic Guest Bedroom and Office Reveal

    Sometimes, I must think I’m Wonder Woman.

    At the beginning of every week, I create a list of what I need / want to get accomplished.

    The list is usually one full page of my large planner long and somehow I think I will be able to do all this stuff within the week.

    The only time I get to work on my projects and the blog is a few hours each day before the kid wakes up and after she goes to sleep, and for 4 1/2 hours two days a week while she is at preschool.

    I must be crazy.

    Not every item on that list ever gets checked off.

    Needless to say, I had planned on showing this completed guest bedroom and office space to you months ago.

    Yea, right.

    Whatever voice in my head telling me that was insane.

    You have seen some projects from it already, but you haven’t seen the whole enchilada.

    Guest Bedroom + Office Reveal {Guest Bedroom Ideas} via RainonaTinRoof.com #guestbedroom #bedroom #office #homeoffice (more…)

  • How to Build a Desk (Using Furniture You Already Have)

    How to Build a Desk (Using Furniture You Already Have)

    When I walked through the back door, I knew he would either be in his recliner or at the kitchen table.

    If he was in his recliner, there was a 50 / 50 chance he had fallen asleep with a cigarette in hand and either Bonanza or In the Heat of the Night blaring from the television.

    If he was expecting me and it was morning, he would most likely be at the kitchen table, facing me when I walked through the door, flipping through a magazine he had pulled from the stack that was a foot tall and rising.

    This kitchen table was more than a table to me.

    I sat on this table and ate my first birthday cake and drank milk from a mustard bottle.

    I sat at this table and watched my grannie make me milkshakes.

    I sat at this table and watched my pap try to make those same milkshakes after Grannie died.

    I sat at this table and said my first curse word as I stuck a fork into a potato.

    I sat at this table as he told me he would work on the tractor and I would mow the grass. I may hurt myself on the tractor.

    I sat at this table with every cookbook of my grannie’s open, looking for that one chicken spaghetti recipe that my pap wanted so much to make.

    I sit at this table now and write this post.

    This table has been around as long as I can remember. Its solid, its sturdy, and if there is one piece of furniture that I want to work at every day, its this one. Its got a good history.

    And we all know a piece of furniture with a good history is the best.

    How to Build a Desk (Using Furniture You Already Have) via RainonaTinRoof.com #desk #diy #furnituremakeover

    How to Build a Desk Using a Kitchen Table

    This post contains affiliate links for your shopping convenience. Click here to read my full disclosure policy.

    This table actually has two leaves that go with it. They fold down, but when they are folded down, they block your knees and its uncomfortable. Because of this, I just unscrewed them from the table.

    How to Build a Desk (Using Furniture You Already Have) via RainonaTinRoof.com #desk #diy #furnituremakeoverThe top part, the hutch, actually came with that dresser I paid $10 for at a yard sale and turned into my buffet. I didn’t really need the hutch on the buffet, so I just took it off, but knew I would end up having the perfect project for it one day.

    How to Build a Desk (Using Furniture You Already Have) via RainonaTinRoof.com #desk #diy #furnituremakeoverOnce the table was in place, we set the hutch on top of it, then Grunt Labor found a stud and secured the hutch to the wall with a screw.

    How to Build a Desk (Using Furniture You Already Have) via RainonaTinRoof.com #desk #diy #furnituremakeoverI painted it all glossy black to match the moldings and other black accents in the guest bedroom. Then, I “dipped” the feet with gold spray paint.

    How to Build a Desk (Using Furniture You Already Have) via RainonaTinRoof.com #desk #diy #furnituremakeover

    I kept my Jonathan Adler inspired chair in the room as my office chair.

    How to Build a Desk (Using Furniture You Already Have) via RainonaTinRoof.com #desk #diy #furnituremakeoverAnd added a fun pillow to keep me workin’ hard.

    How to Build a Desk (Using Furniture You Already Have) via RainonaTinRoof.com #desk #diy #furnituremakeoverAnd I love it. I seriously love working in this space every single day. I smile every time I look at my new office space.

    Its functional, its stylish, it was affordable, and most importantly, it has a history.

    My history.

    Loved this one? Be sure to see these projects too then…

    DIY Chippendale Desk – a gorgeous, easy to build desk with beautiful chippendale panels on the ends.

    DIY Kitchen Island – made using old porch posts and barn wood!

    DIY Ottoman Coffee Table – turn a coffee table into an ottoman or bench!

    A Dress-Up Station Made from a Bookshelf – perfect for kiddos and an easy project!

    How to Build a Desk (Using Furniture You Already Have) via RainonaTinRoof.com #desk #diy #furnituremakeover

    You know you don’t wanna miss any of this crazy.

    Sign up to get my posts delivered to your inbox here. 

    Stalk Me Here:

    Pinterest / Facebook / Twitter / Instagram

  • Sequined Coat Hangers

    Sequined Coat Hangers

    Last week when I showed you the faux wall moldings, many of you mentioned the sequined coat hangers.

    Who knew a coat hanger could be so fabulous?

    When I was trying to figure out how I could make frugal wall decor for the guest bedroom, I knew I wanted to have lots of inspiring and fun life quotes. I also wanted them to be fabulously displayed. And what better to display them with than sequined coat hangers.

    Sequined Coat Hangers via RainonaTinRoof.com #lifequotes #sequins #coathanger
    Sequined Coat Hangers

    This post contains affiliate links. 

    I bought an 8 pack of the Bumerang Curved Coat Hangers from IKEA for $5.

    Sequined Coat Hangers + Free Printable Life Quotes via RainonaTinRoof.com #lifequotes #sequins #coathangerI bought four small rolls of stretch sequin ribbon in gold from Michael’s. It took two rolls per coat hanger. I think each roll was about $4 regular. Use your coupons or wait till its on sale to get it cheaper! That’s what I did!

    Sequined Coat Hangers + Free Printable Life Quotes via RainonaTinRoof.com #lifequotes #sequins #coathangerAfter the sequin ribbon fabulous-ness was attained, I just wrapped it around the coat hanger, putting a dot of hot glue on the coat hanger every now and then to keep the ribbon in place.

    Sequined Coat Hangers + Free Printable Life Quotes via RainonaTinRoof.com #lifequotes #sequins #coathangerI used Rub ‘N Buff to make the bottom bar gold.

    I taped gold and white twine to the back from the Target Dollar Spot, then tied them on the coat hangers.

    Sequined Coat Hangers via RainonaTinRoof.com #lifequotes #sequins #coathanger

    And aren’t those prints so fun?

    Sequined Coat Hangers via RainonaTinRoof.com #lifequotes #sequins #coathanger

    I like to think of them as life quotes. Words to live by.

    Words to live by in my crazy life anyway.

    Get those life quotes as well as some other ones for free here! 

    Read about the faux wall moldings shown in this post here.

    If you liked this easy little craft, you’ll want to see these too…

    Learn how to make faux crystals and then turn them into gorgeous knobs HERE!

    Find out how to make a huge wall frame for super cheap HERE!

    You know you don’t wanna miss any of this crazy.

    Sign up to get my posts delivered to your inbox here. 

    Stalk Me Here:

    Pinterest / Facebook / Twitter / Instagram

    SaveSave

  • Faux Wall Moldings

    Faux Wall Moldings

    Today, you get to see another little piece of the guest bedroom and office.

    I’m still not quite done with the rest of the room as I told you on Tuesday, but I’m hoping I get to show you a full reveal next week.

    When I began plotting out this room makeover, I found some great inspiration photos on Pinterest. If you follow me there, you may have noticed I pinned a lot of black and white rooms that had some great black wall moldings.

    Disclosure: This post is sponsored by FrogTape, but you know how I roll, all opinions are 100% mine. This post contains affiliate links for your shopping convenience. Click here to read my full disclosure policy.

    Here’s the problem with wall moldings -they can be expensive.

    My solution?

    Faux wall moldings made with FrogTape and glossy black paint.

    Faux Wall Moldings via RainonaTinRoof.com #frogtape #faux #wallmoldings

    Faux Wall Moldings

    After I nailed down my measurements, these were pretty easy to do. From outside edge to outside edge, my moldings are 24 1/2 inches wide x 74 inches long. The bottom edge comes up 11 1/2 inches from the floor and the top edge comes down 10 inches from the ceiling. There is more room between the ceiling and top edge than the baseboard and the bottom edge. I did that on purpose – I may want to add faux crown molding one day!

    I determined the size by sketching lines on my wall to get an idea of how large I wanted the moldings. Be sure to write down your measurements before completing the next step.

    When I had the lines where I wanted them, I painted a rough rectangle right over the lines.

    Faux Wall Moldings via RainonaTinRoof.com #frogtape #faux #wallmoldingsNow, you need to put FrogTape over the black where your rectangle will go.

    To do this, you first need to measure back out your dimensions. You don’t have to draw the entire line again, just measure to where you want your tape edge to start and put a mark.

    After you have your marks, enlist help.

    Seriously, this step is done much easier with another person.

    I enlisted Bill, whose name isn’t really Bill, but he said he liked the name Bill. He told me he wanted to be on the blog. I said I needed help on a project that was going on the blog. He’s on the blog, I get help. Its a win-win for myself and for Bill.

    Now, have your helper, in my case, Bill, hold a level on the mark and make sure its level.

    Faux Wall Moldings via RainonaTinRoof.com #frogtape #faux #wallmoldingsOnce its level, run your FrogTape along the edge. Because I had just painted the black the day before, I used the FrogTape Delicate Surface for newly painted surfaces.

    Faux Wall Moldings via RainonaTinRoof.com #frogtape #faux #wallmoldingsDo your vertical and horizontal edges the same way. You’ll end up with this:

    Faux Wall Moldings via RainonaTinRoof.com #frogtape #faux #wallmoldingsNow, I didn’t just want a plain jane rectangle. We all know I’m not a plain jane kinda gal. So, I took some FrogTape Scalloped Shape Tape and put it in the corners.

    Faux Wall Moldings via RainonaTinRoof.com #frogtape #faux #wallmoldingsBe sure to trim up your corners evenly as well.

    After all your tape is up, paint over it with your existing wall color. In my case, white.

    Which took about five coats to cover the black.

    But, the end result was worth the five coats.

    Faux Wall Moldings via RainonaTinRoof.com #frogtape #faux #wallmoldings

    Faux Wall Moldings via RainonaTinRoof.com #frogtape #faux #wallmoldings

    Faux Wall Moldings via RainonaTinRoof.com #frogtape #faux #wallmoldings

    More projects in this post that may have caught your eye: 

    DIY Sequined Coat Hangers– so fun to use for display!

    How to Build a Desk Using Furniture You Already Have– I made this desk using an old kitchen table and a discarded hutch top!

    Free Sassy Printables – everyone needs a little sass in their lives, right?

    Where would you like to add faux molding?

    Sign up to get my posts delivered to your inbox here. 

    You know you don’t wanna miss any of this crazy.

    Stalk Me Here:

    Pinterest / Facebook / Twitter / Instagram

    SaveSave

  • DIY Acrylic / Lucite Trays for $5 or less in 5 minutes!

    DIY Acrylic / Lucite Trays for $5 or less in 5 minutes!

    I absolutely love having lots of pretty trays around my home. Lucite or acrylic trays (whichever you want to call them!) are perfect for corralling items in a stylish way. They can easily make your home look chic and organized at the same time. But, those clear acrylic trays can also be really expensive! Keep reading though to see how I created my own lucite trays for less than $5 and in five minutes! 

    I was ecstatic with all your comments last Friday when I introduced this new series, 15 on Friday! Thanks so much, y’all!

    This week’s 15 on Friday, I think, is FAB.

    This post contains affiliate links for your shopping convenience. Click here to read my full disclosure policy.

    See, I have this thing for lucite / acrylic. When Grunt Labor asked me what lucite was, my response was, “It’s the stuff dreams are made of.”

    Obsessed much? Probably too much.

    For Christmas, I asked for a plethora of lucite items from Anthropologie. One being this tape dispenser (that I got!) and another one, this lucite tray. Friends, that tray is $44. You can get this one cheaper – its $25.

    Or, you could make your own DIY lucite tray for $5 and in less than 5 minutes.

    And you can make the bottom prettier than those other ones.

    We have a winner! {Insert Price is Right theme song here}
    DIY Acrylic Tray

    DIY Lucite Tray

    Here’s what ya do.

    Step 1

    Go to Michael’s (mine came from Michael’s) or another craft store or maybe even Target and buy an acrylic frame and pretty paper (12 x 12).

    DIY Lucite Tray

    I got two frames – a larger one and smaller one – and by using a 40% coupon at Michael’s each was under $5. I think the paper was like $0.50 a sheet on sale.

    Step 2

    Now, unwrap the frames and flip them over.

    How to Make a Clear Acrylic Tray

    Step 3

    Pull out the cardboard backing.

    DIY Lucite Trays {Under $5 in 15 minutes} via RainonaTinRoof.com

    Instant clear acrylic tray.

    Now, this next step isn’t necessary, but if you want to add a bit more to your tray, you can easily add a little bling.

    Trace the tray’s shape on the back of the paper and cut it out. Pop it in the tray.

    Acrylic Tray

    Bling added.

    Were you expecting it to be more complicated? You should know by now that I love quick and easy projects with some bling.

    DIY Lucite Trays {Under $5 in 15 minutes} via RainonaTinRoof.com

    I sent my paper to work with Grunt Labor one day and had him laminate it. You don’t have to do this, but it just adds a little extra protection. You can also get that done pretty cheap at just about any office supply store. Or, you could even Mod-Podge it in there.

    DIY Lucite Trays {Under $5 in 15 minutes} via RainonaTinRoof.com

    Both trays are on my new office desk / hutch.

    The small one is holding my business cards (that need an update), extra gold animal push-pins, and my grandmother’s retro glasses that she wore while driving her beloved Cadillac.

    DIY Lucite Trays {Under $5 in 15 minutes} via RainonaTinRoof.com

    The larger one holds….

    DIY Lucite Trays {Under $5 in 15 minutes} via RainonaTinRoof.com

    An old Avon perfume bottle that is a cross between a giraffe and the Eiffel Tower?? Strange, but pretty when spray painted gold….

    Lucite Tray

    A fun (and inappropriate) coaster my friend Lindsay got me from Z-Gallerie.

    DIY Lucite Trays {Under $5 in 15 minutes} via RainonaTinRoof.com

    And the beloved lucite tape dispenser….

    DIY Lucite Trays {Under $5 in 15 minutes} via RainonaTinRoof.com

    What do you think of these DIY lucite trays? Better than a $40 one?

    Love a good tray hack or knock-off DIY? Then you’ll want to see these…

    This Faux Malachite Tray costs less than $10 to make.

    This DIY Monogrammed Tray makes a perfect gift.

    Learn how to make your own lucite frame – and get a free Gone with the Wind printable.

    You know you don’t wanna miss any of this crazy.

    Stalk Me Here:

    Pinterest / Facebook / Twitter / Instagram

    SaveSave

    SaveSave