Category: Crafts

Home decor and seasonal crafts that are high-end, but budget friendly and easy to do.

  • 27 Projects You Can Do When You’re Stuck at Home

    27 Projects You Can Do When You’re Stuck at Home

    Now is a great time to be super productive at home, right? You’ve got unexpected time there and rather than worry constantly or veg out on Netflix all day, why not use that time wisely and even try to have fun with it?

    No doubt, everyone’s biggest concern right now should be their own health and the health of others. As I said in my post on Tuesday, we can combat that most effectively and do the most good right now when we stay at home.

    Keeping all that in mind, I’ve created a list of crafts, DIY projects, decorating ideas, curb appeal projects and even a couple cleaning tips to fill your time at home right now.

    The materials needed for these projects can all be ordered online and delivered straight to your door! However, I’m willing to bet many of you already have lots of these project supplies on hand already. Like electrical tape, construction paper, scrap fabric and other similar items. I’m right, aren’t I? I knew y’all were craft supply hoarders like me. 😉

    Crafts and Home Projects to Beat the Boredom

    This post contains affiliate links for your shopping convenience. Click here to read my full disclosure policy.

    Get Crafty

    Crafts projects for when you're stuck at home - Easter bunny vases.

    Some of these are perfect for kids!!

    Have the kids help with these Easter Bunny Vases. Guess what? Easter isn’t canceled! Everything to make these cute little simple bunny vases can be ordered online – I’m willing to bet you also have most of the supplies on hand though! Follow that link above for the supply list and tutorial.

    Use electrical tape for nothing it was ever intended for. I’m willing to bet you’ve already got a roll of electrical tape lurking around in your garage, toolbox or maybe a junk drawer. Am I wrong? Here are seven simple, cute crafts that use electrical tape. The kids will have fun with some of these too!

    Duck Tape Crafts. Speaking of tape, every American should have a roll or two of duck tape stashed away, right? Here are 20+ duck tape crafts for adults and kids to do.

    Hide wall sconce cords in style. If you’ve got even just a piece of pretty scrapbook paper, wrapping paper or wall paper hanging around and a touch of Mod Podge, the only thing you’ll have to order to disguise cords in style is this basic cord cover which is the base for this project. Here’s the tutorial for how to hide cords in style.

    Make beautiful silhouettes of your family. What better time than now to make silhouette portraits of your kiddos? If you’ve got black construction paper on hand, you’re ready to go! If you don’t, order some here, then use this tutorial for DIY silhouettes. This one would be fun for the kids too – let them make your silhouettes!

    Recover a lamp shade. Update a boring old lampshade with a fun print or pattern. If you don’t already have fabric on hand, you can order it online from Fabric.com or Online Fabric Store, then use this tutorial for recovering a lamp shade.

    Make faux crystals. And then turn them into magnets, lamp finials and more! The faux crystal tutorial is here and links to everything you need!

    Make mason jar lanterns. Another fun one for the kids to get in on here. I made glitter mason jar lanterns, but you could also use craft paint for yours! And they don’t have to be lanterns, they can be vases, pencil holders or fill them with citronella in the summer for bug repellant!

    Make pretty finials for your lamps. These agate slice lamp finials are incredibly easy to make and in my opinion are the icing on the lamp.

    DIY Home Projects You Can Tackle Now

    DIY projects you can do when you're stuck at home - green painted chair with black and white upholstery.

    Make a cowhide rug. A faux one that is! Just order this faux cowhide or another one of your choice and follow my faux cowhide rug tutorial!

    Make a bottle lamp. If you have a cool old bottle lying around (or say you polish off a bottle of Jack during this time 😉), you can easily turn it into a lamp with a bottle lamp kit you can order online. Follow this tutorial for how to make a lamp out of a bottle to put it all together.

    Makeover a piece of furniture. Have the paint shipped straight to you! My favorite furniture paint, Velvet Finishes will ship their paint and other furniture painting supplies straight to you. Velvet Finishes is also a small business so you’re helping to support them during this tough time. If you’re a newbie to the world of painting furniture, I’ve got lots of tips, tricks and info for ya on my Painting 101 page. If you’re an old pro at painting furniture, maybe one of my previous furniture makeovers here might inspire your next project!

    Paint an accent wall. For this accent wall, all you need is a sample pot of paint. Did you know that you can order sample pots online, but I’m willing to bet lots of you will already have a sample pot or two just hanging around.

    Paint your cabinets or a bathroom vanity. Again, you can have paint delivered straight to your door from Home Depot, Velvet Finishes and other online retailers. Here’s a guide to the best paint for cabinets and here’s a post about when I painted my kitchen cabinets to create a navy and white kitchen.

    Switch out your handrail. Ditch the dated handrail for a glam and modern lucite handrail. You can order everything you need, rail included, and have it delivered straight to you. Bonus – the acrylic rod for the handrail comes from a small business!

    Give your countertops a makeover. Order a can of chalkboard paint and you’re halfway to creating faux stone countertops.

    Refresh and Update Home Decor

    Home decorating projects you can do while you're stuck at home. Blue painted bedroom with black velvet headboard and orange bedding.

    Refresh Your Bedding. Did you catch my recent bedroom refresh? The pink walls are gone, replaced by blue and the bedding is begging for spring weather to arrive!

    Update and/or Add in Color with Runners. Bring a little more interest and pattern to your flooring by throwing down one of these cheap runner rugs. All are less than $30.

    Switch out your pillows. Freshen up your throw pillows with one of these affordable pillow covers. Available in all sorts of colors, patterns and prints. P.S. That list links to lots of pillow covers on Etsy which equates to supporting more small businesses!

    Working from home? Treat yourself to a new comfortable, but still stylish desk chair. You won’t believe how good a desk chair can look.

    Order fabric samples to inspire your next project. Now’s the perfect time to plot out a new room makeover. You can order fabric samples from Fabric.com or Online Fabric Store . Here’s a list of some of my favorite cheap fabrics by the yard.

    Make a design plan. Once you’ve got those fabrics chosen, here’s how to make a moodboard to plot out your entire design.

    Have fun accessorizing. Not with your daily outfit, but with your home decor! Trade out accessories in rooms, pull out treasures you’ve had stashed away. Mix it up and have fun! Here are my tips for accessorizing a space without over accessorizing.

    Work on Your Home’s Curb Appeal

    Outdoor projects you can do while you're at home - cut flower garden.

    Install or replace old dated shutters on your home. Simply measure and order online. These are the ones we put on our house a couple years back. Here’s a guide for how to hang shutters on brick.

    Make a flower garden. You can order seeds from Burpee and use my cut flower garden guide for beginners to get you going.

    Refresh your outdoor furniture. Most outdoor furniture can easily be painted with a few cans of spray paint. Home Depot has their entire line of spray paint available for purchase online. And here are 12 ideas to redo lawn furniture!

    Clean all Those Things You’ve Been Putting Off

    Cleaning projects for when you're stuck at home - restoring copper.

    Polish it up. Copper, Brass and Rusted Chrome are no match for Bar Keepers Friend. Here’s how to use it to clean your copper, clean tarnished cabinet hardware and remove rust from chrome.

    Preserve your upholstery. Grab a can of Thompson’s WaterSeal FabricSeal and go to town (well, actually just your living room or dining room) on your upholstery. Here’s how I use it to protect and waterproof upholstery fabric.

    Read a Good Book

    Don’t forget the power of a great book. As corny as it may sound, you can escape to a different world! Here’s a collection of my favorite books!

    What projects are you tackling at home right now?

    Want to remember this list for later? Pin the image below!

    Home projects to do while you're stuck at home.

    Follow on social media for more:

    Facebook | Instagram | Pinterest | Twitter

  • DIY Kids Microphones – Great party favors!

    DIY Kids Microphones – Great party favors!

    This easy-to-make kids microphone will make any little guy or gal feel like the star of their own show! These are perfect for everyday play, but also make great party favors as well! Best of all – this toy microphone is simple and affordable to make.

    Since summer has ended and both of my crew members are back at work and school, I’m finally getting around to sharing how I made everything come together for the Circus’ VIP Red Carpet Birthday Party.

    One of my favorite projects from the party were these kids microphones.

    kids microphone tutorial

    The little partygoers had a ball singing with them at the party and they doubled as party favors they could take home as well! Bonus – these toy microphones are super easy to make!

    Play Microphone Tutorial

    This post contains affiliate links for your shopping convenience. Click here to read my full disclosure policy.

    Materials Needed

    toy microphone supplies

    Steps

    Step 1

    Spray paint all the PVC pipe black.

    play microphone tutorial

    I found it easiest to attach screws to a scrap piece of wood and stand the pipe on them to spray paint.

    Step 2

    While the spray paint is drying, glitter the eggs.

    how to make a kids play microphone

    To do this, place a toothpick in the narrow end of each egg. Apply Mod Podge, then immediately cover the egg with glitter.

    To dry the eggs, I placed each toothpick through a cardboard box to keep them elevated.

    Step 3

    After the pipes are dry, put a good bit of hot glue or another adhesive along one end of the pipe as shown below.

    diy kids toy microphone

    Put some adhesive a little bit inside the pipe as well.

    Place an egg, narrow end down, into each microphone pushing firmly.

    Let the glue dry.

    Step 4

    microphone party favors

    Once the glue has had enough time to dry, give each microphone a couple of coats of clear gloss top coat spray paint. This will help to seal all the glitter to the egg and keep it from falling off so much.

    Let dry and then rock out!

    We placed the microphones on our VIP table for the kids to grab as soon as they made their entrance into the party lounge.

    DIY Play Microphones

    Ice buckets were perfect for corralling them all!

    Need more great party ideas?

    Looking for more Red Carpet party ideas? See our entire VIP Red Carpet Party here!

    Make these VIP Passes for your next event with this free printable!

    Need an easy party backdrop? This DIY Party Background is easy to make and only costs around $5!

    Want to DIY as many party decorations as you can! That’s my jam too! Don’t miss these simple DIY party decorations on a budget!

    Want to come back to these instructions later? Just pin the image below!

    DIY Toy Microphones

    Are you following along on social media?

    Facebook | Instagram | Pinterest | Twitter

  • Make This Simple Valentines Wreath DIY in Under 30 Minutes

    Make This Simple Valentines Wreath DIY in Under 30 Minutes

    Looking for a simple valentine door wreath to make? This valentines wreath DIY will take you only 30 minutes to less to make – and it’s beautiful!

    I never knew Grunt Labor’s grandfather, but after the many stories I’ve heard about him, I feel that we would have gotten along quite fabulously.

    Although, he would have never used the term fabulously. 

    Among other things, we both liked to hang onto things. Some might call it hoarding. I, and maybe Grandpa, though would perhaps call it collecting. You never know when you might need something for a rainy day.

    Also before I came along, a dumpster was rented and Mama and one of Grunt’s uncles, Vic, cleared out one of the rooms in the house from the “junk” Grandpa had accrued.

    Apparently, Grandpa was sitting in his chair in the den while all this was going on talking about all the great stuff they were throwing away.

    If I had been there, I’m sure I would have agreed with him.

    And then probably sneaked out around to the back of the dumpster and climbed in to rescue some of the treasures.

    So, this past fall when it was time to clean out Grunt’s grandparents’ entire house, there was another dumpster rented.

    This time I was there though, so as you can imagine not quite everything handed to me to go to the dumpster actually made it to the dumpster. 😉

    One of those things being a handful of little Valentine cards Grandpa had received in the 1930s.

    I just wouldn’t have been able to live with myself had I tossed them into that dumpster. You’d be the same way, right?

    And so, I brought them home and last week, the Circus and I made this simple little diy valentine wreath using a couple of the valentines.

    Simple Valentines Wreath DIY with flowers and vintage valentines.

    This wreath took all of about 10 minutes – not including paint drying time of the ring, but that is totally optional.

    Don’t have your own vintage valentines to use? No problem! I’ve got you covered with a link below where you can print off vintage valentines to use!

    This post contains affiliate links for your shopping convenience. Click here to read my full disclosure policy.

    How to Make a Valentine Wreath

    Tools and Supplies Needed:

    Supplies for making a valentine door wreath.

    Steps

    Step 1

    I opted to spray paint my metal hoop gold. This is totally optional, but if you’re doing this, do it first.

    Note: You could also tweak this wreath and use a heart wreath form to give it more Valentine zing!

    Step 2

    Disassemble the bouquet. Start wrapping the greenery and florals on the ring.

    How to make a valentine wreath using faux flowers.

    If you go with the kind of bouquet or a similar one like we got, then the flowers already have wire in them, so they just wrap right around that ring, no extra wire needed.

    diy valentine wreath using a wire hoop

    They stay where you put them, but then you can also move them around the ring if needed as well. So much nicer than having to mess with that bare wire and poking yourself.

    Valentine Day Wreaths using a wire hoop and faux flowers.

    Leave some space between the flowers for where you think you want your valentines to go. Put as many or as few flowers on your ring. We covered about 1/4 of the ring or so.

    Using vintage valentines and faux flowers to make a front door valentine wreath.

    Step 3

    Now you can attach your vintage valentines. Now, being as how the valentines I was using were special to us, I didn’t want to permanently put them on this wreath or damage them by putting hot glue directly on them and then onto the wreath. So, I opted to use mini-clothespins to attach my valentines.

    Vintage Valentines you can print.

    I just stuck a clothespin on the valentine, then hot-glued the clothespin onto the metal ring or flower stem wherever I wanted it to go. Of course, if you aren’t attached to your valentines, you can just hot glue them right onto the wreath.

    Valentines wreath with printable vintage valentines.

    You can add in as many or as few valentines as you like. We opted for two of our favorites – a boy and girl and angled them to where they were kind of looking at one another.

    Step 4

    Take some of the skinny ribbons and wrap them around the metal ring and between the flowers and valentines, filling in as much or as little as you like. If you want to add a little more somethin-somethin to the wreath, then you could also embellish with a pom pom or two.

    Step 5

    Hang it up! We just used a wide peach colored ribbon to do this. You can drape the wreath over your front door and secure it on the other side or simply hang it from a nail or command hook on the wall somewhere.

    Vintage Valentine Decorations - a valentine wreath.

    I do love how the clothespins makes the valentines pop out from the flowers a little more than they might otherwise do.

    valentine day wreath ideas with ribbon, flowers and valentine cards.

    I just adore the sweetness of vintage valentine decorations, don’t you? They truly don’t make ’em like that anymore.

    easy valentines wreath diy with a simple look.

    Here’s to one handful of “junk” that didn’t get away, Grandpa!. 😉

    What kind of valentine day wreaths have you made before?

    Looking for more valentine decorating ideas?

    Here’s some fun valentine decor and cards the Circus and I made one year.

    And here are some great valentine ideas from a few blogging friends:

    Valentine Heart Printables (printed on clear address labels) via So Much Better with Age

    Valentine’s Day Dining Room via House by Hoff

    Love Print via Two Twenty One

    Adorable o”fish”ally Free Valentine Printables via The Happy Housie

    Want to come back to this valentine wreath tutorial later? Just pin the image below!

    how to make a valentine wreath with a vintage feel

    Follow on social media for more simple holiday crafts!

    Facebook | Instagram | Pinterest | Twitter

    Easy valentine wreath craft with flowers, valentines and ribbon.

    SaveSaveSaveSave

  • How to Make Crystal Magnets

    How to Make Crystal Magnets

    Hopefully you’re not too sick of these crystal projects yet. I have just this one and one more up my sleeve to share with you soon!

    This is another easy, ten minutes or less total craft for using the faux crystals.

    Learn how to make crystal magnets with this tutorial for DIY crystals! These dress up a refrigerator and would make a great housewarming gift as well!

    Crystal Magnets!

    Refrigerators deserve to have a little bit of bling in their lives too, right? That grocery shopping list won’t look quite so daunting when it’s in place on the fridge with one of these babies!

    How to Make Crystal Magnets

    Affiliate links included in this post. 

    Tools & Supplies

    Learn how to make crystal magnets with this tutorial for DIY crystals! These dress up a refrigerator and would make a great housewarming gift as well!

    Steps

    Step 1

    Make your faux crystals first. Let them dry overnight before applying them to the magnets.

    Step 2

    Apply E6000 glue to the side of the magnet that will go against the crystal.

    Learn how to make crystal magnets with this tutorial for DIY crystals! These dress up a refrigerator and would make a great housewarming gift as well!

    Place the crystal firmly on top of the glue and set aside to let it dry.

    The next day you can put your magnets into action.

    Learn how to make crystal magnets with this tutorial for DIY crystals! These dress up a refrigerator and would make a great housewarming gift as well!

    I really love how much they pop against our black refrigerator.

    Learn how to make crystal magnets with this tutorial for DIY crystals! These dress up a refrigerator and would make a great housewarming gift as well!

    I think these would be a great little housewarming present for someone as well. You could also use them in an office too!

    You might also want to see…

    Crystal Finials | DIY Crystal Lamp Finial | How to Make Lamp Finials | How to Make Crystals | DIY Faux Crystals | DIY Lamp Finial

    How to Make a Crystal Lamp Finial

    DIY Faux Crystal Vase | DIY Vase Ideas | DIY Vase Decor | Vase Decorating Ideas | Faux Crystal DIY | DIY Faux Crystals | How to Make Crystals

    DIY Crystal Vase

    How to Make Faux Crystal Knobs | Furniture Hardware DIY | Furniture Hardware Ideas | How to Make Crystal Geodes | How to Make Knobs

    DIY Crystal Knobs

    Learn how to make crystal magnets with this tutorial for DIY crystals! These dress up a refrigerator and would make a great housewarming gift as well!

    SaveSave

  • 17+ PicMonkey Tutorials, Tips, and Projects

    17+ PicMonkey Tutorials, Tips, and Projects

    Picmonkey is an online resource for editing photos, creating collages and graphics, making your own watermark, invitations and much more! Not only will you learn Picmonkey photo editing with these Picmonkey tutorials, but you’ll also learn how to make so much more with it!

    This post contains affiliate links. 

    If you have been around here for long enough, you may have heard me chat about Picmonkey – the way I edit pictures online. But the question is, what all can it really do? The short answer: everything. The long answer: collages, recipe cards, labels, tags, and so much more….

    How to Use PicMonkey

    First things first, right? Head to PicMonkey. If you don’t already have an account, go ahead and create one. PicMonkey used to be free, but with upgrades you can buy. Now, it does cost $5.99 a month to use the service. In my opinion, it’s completely worth it. If you’re not sure though about going ahead and signing up for a paid account, I totally get it. You can do a free trial by clicking here.

    Now, onto actually using PicMonkey. Here are some basic PicMonkey tutorials.

    The Beginner’s Guide

    Picmonkey Tutorial for Beginners

    If you haven’t done much with PicMonkey before, then you should probably start with this beginner’s guide.

    PicMonkey Photo Editing Tutorials

    Editing Baby Pictures with PicMonkey

    Picmonkey Photo Editing - Babies

    This Picmonkey tutorial from We Lived Happily Ever After is a great guide for editing not only baby photos but other photos as well. Seriously, look at that photo! Gorgeous! This gal knows her PicMonkey!

    30 Second Edits on PicMonkey

    Editing Photos with PicMonkey

    Ummm, seriously, do you see the difference in those two photos? Yes, people. PicMonkey can do that with its photo edits. Creative Cain Cabin will show you how to make these 30 second edits. 

    Create Collages with PicMonkey

    How to Use PicMonkey

    Sweet C Designs has the deets on making collages with Picmonkey.

    PicMonkey Tutorials for Making Your Own Cards, Invitations, Party Decor and More

    Birthday Party Invitation using PicMonkey

    Picmonkey Tutorial for Party Invitations

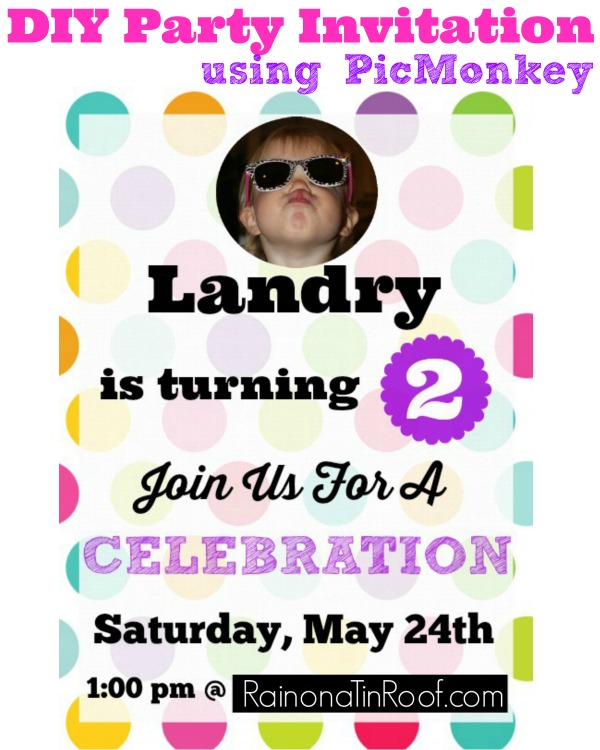
    For the kid’s second birthday, I made this fun party invitation on PicMonkey.

    Farm Party Invitation Using PicMonkey

    Picmonkey tutorial for birthday invitations

    We had a farm themed party for another one of the Circus’ birthdays and I made this farm themed birthday invitation for it.

    Superhero Party Banner using PicMonkey

    Picmonkey tutorial for party decor

    When the Circus had a superhero party, I made this customizable superhero banner for the party.

    Chalkboard Birthday Party Invitation 

    Picmonkey tutorials for making party invitations

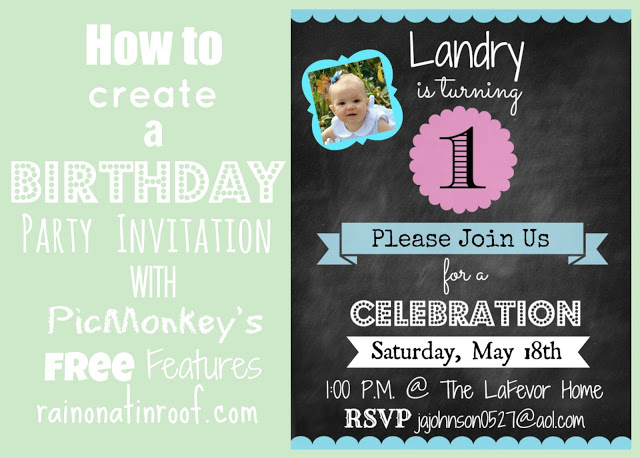
    Last year, for the kid’s blue and pink 1st birthday party, I created her invitations in Picmonkey.

    Christmas Cards using PicMonkey

    Picmonkey tutorial for Christmas cards

    Christmas cards can be so expensive. Why not use Picmonkey to make your own and save a lot of dough?

    PicMonkey Tutorials for Creating Your Own Art, Graphics, and More

    Make your Own Wall Art

    How to Use PicMonkey to Make Your own Art

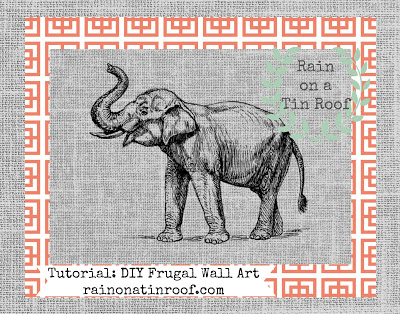
    When I was working on my master bedroom makeover last year, I needed new wall art, but didn’t want to spend a lot of money. I ended up making my own DIY Wall Art.

    Create Labels with PicMonkey

    How to use picmonkey to make labels

    Blissful Roots will show you how to make your own labels in Picmonkey.

    Make Recipe Cards

    Picmonkey tutorial for a recipe card

    Anyone else have a hot mess of a recipe box? Please don’t say its just me! Find out how to make a recipe card here and tame that hot mess!

    Make Printable Holiday and Gift Labels

    How to use picmonkey to make gift labels

    Don’t buy labels or gift tags again! Make your own with this tutorial from The Importance of Being Reese.

    Create Chalkboard Art and Printables

    How to use picmonkey to make chalkboard art

    Here’s another great tutorial for creating chalkboard art from House of Hawthornes.

    Picmonkey Tutorials for Bloggers

    Making Photos Pin-Worthy

    How to use Picmonkey for Bloggers

    Making your photos pin-worthy is super important for bloggers. These are my tips I use when editing photos with PicMonkey.

    Favorite Things Graphics

    Picmonkey Tutorial for creating graphics

    Honey We’re Home has a great tutorial for creating favorite things graphics.

    How to Make Watermarks with PicMonkey

    Picmonkey tutorial for creating watermarks

    I love this tutorial on creating a custom and transparent watermark.

    Are you ready to dive in and learn how to use Picmonkey so that you can follow some of these PicMonkey tutorials?

    pin-this-post

    Picmonkey Tutorials for Editing Photos, Invitations, Art and More

    You know you don’t wanna miss any of this crazy.

    Stalk Me Here:

    Pinterest / Facebook / Twitter / Instagram


    SaveSave

  • How to Make a Crystal Lamp Finial

    How to Make a Crystal Lamp Finial

    This crystal project might just be my favorite project to come out of the faux crystal tutorial I shared a couple of weeks ago.

    A crystal lamp finial.

    Learn how to make lamp finials with this tutorial for how to make a crystal lamp finial. It also shows you how to make your own faux crystals.

    You guys know that I’m a big details person and one of my favorite places to add those little wonderful pops of detail is with lamp finials.

    It’s just damn glorious.

    And no, I’m not being too dramatic. 

    Here’s how to make these little beauties…

    How to Make a Crystal Lamp Finial

    Affiliate links included in this post. 

    Tools & Supplies

    Learn how to make lamp finials with this tutorial for how to make a crystal lamp finial. It also shows you how to make your own faux crystals.

    Steps

    Step 1

    After you’ve made your crystals, let them fully dry overnight before making the finials.

    When the crystals are ready, apply a dollop of E6000 glue to the finial base, then carefully push the crystal onto the glue.

    Learn how to make lamp finials with this tutorial for how to make a crystal lamp finial. It also shows you how to make your own faux crystals.

    Step 2

    Leave the finial upright and let it fully dry overnight. You can nestle the finial in a small bowl of uncooked rice to stabilize it and keep it from falling over while it’s drying.

    The next day you can screw it onto your lamp top.

    Learn how to make lamp finials with this tutorial for how to make a crystal lamp finial. It also shows you how to make your own faux crystals.

    I’m completely smitten.

    You could also use these crystals to just embellish plain lamp bases or lampshades if your lamp doesn’t allow you to use a finial. Just use the glue to attach them to the lamps or shades as you wish!

    You might also want to see…

    How to Make Faux Crystal Knobs | Furniture Hardware DIY | Furniture Hardware Ideas | How to Make Crystal Geodes | How to Make Knobs

    DIY Faux Crystal Knobs

    DIY Agate Slice Lamp Finials: GORGEOUS - and simple to make! / DIY Projects / Crafts / Home Decor Projects

    How to Make Agate Slice Lamp Finials

    Learn how to make lamp finials with this tutorial for how to make a crystal lamp finial. It also shows you how to make your own faux crystals.

    *Affiliate links may be contained in this post. That just means that if you click on one of those links and buy something, I may receive a small commission, but you won’t pay a dime more.

    SaveSaveSaveSaveSaveSave

  • DIY Faux Crystal Vase

    DIY Faux Crystal Vase

    I’ve got another quick little 10 minute faux crystal project for you today! I really love these little things – they are so pretty and simple to make!

    This time around, I used one of the faux crystals to embellish a simple vase. You may already have one of these vases lying around!

    Embellish plain vases with these faux crystals! Use this tutorial for a DIY Faux Crystal Vase to make your own in 10 minutes or less!

    Doesn’t the crystal just add a simple touch of glam to the vase?

    DIY Faux Crystal Vase

    Affiliate links included in this post. 

    Tools & Supplies

    Embellish plain vases with these faux crystals! Use this tutorial for a DIY Faux Crystal Vase to make your own in 10 minutes or less!

    StepsStep 1

    After you’ve made your faux crystal(s), let them fully dry overnight before applying them to your vase. Choose a side on your vase to put the crystal on and make sure it is clean. If you wipe it off, be sure to let it dry before applying the crystal.

    Step 2

    Apply E6000 glue to the backside of the crystal and firmly push it into place on the vase.

    Embellish plain vases with these faux crystals! Use this tutorial for a DIY Faux Crystal Vase to make your own in 10 minutes or less!

    Keep the vase on it’s side and allow the glue to dry overnight.

    Embellish plain vases with these faux crystals! Use this tutorial for a DIY Faux Crystal Vase to make your own in 10 minutes or less!

    Fill with your favorite flowers!

    Embellish plain vases with these faux crystals! Use this tutorial for a DIY Faux Crystal Vase to make your own in 10 minutes or less!

    I really love the simple, but chic look these faux crystals add to the vase – and it’s such an easy project! If you have a taller vase, you could line multiple crystals up vertically as well.

    What favorite flowers would you use to fill these DIY Faux Crystal Vases?

    You might also want to see…

    How to Make Faux Crystal Knobs | Furniture Hardware DIY | Furniture Hardware Ideas | How to Make Crystal Geodes | How to Make Knobs

    How to Make Faux Crystal Knobs

    Crystal Finials | DIY Crystal Lamp Finial | How to Make Lamp Finials | How to Make Crystals | DIY Faux Crystals | DIY Lamp Finial

    How to Make a Crystal Lamp Finial

    How to Make Crystal Magnets | DIY Crystal Magnets | DIY Crystal Crafts | Easy Crafts | How to Make Crystals DIY | Crystal Magnets

    How to Make Crystal Magnets

    It's so easy to DIY your own and much cheaper than buying one already made! DIY Lucite Handrail | Acrylic Handrail | Lucite Home Decor | Stairwell

    DIY Lucite Handrail

    Embellish plain vases with these faux crystals! Use this tutorial for a DIY Faux Crystal Vase to make your own in 10 minutes or less!

    *Affiliate links may be contained in this post. That just means that if you click on one of those links and buy something, I may receive a small commission, but you won’t pay a dime more. 

    SaveSave

  • DIY Faux Crystal Knobs

    DIY Faux Crystal Knobs

    I am a details person. I love little knick-knacks and those small things that make a statement. As a prime example, I have way too many brass lions because I just can’t stand to leave one behind at thrift stores. I think all those little details really help to set a space apart and even give a nod to your personality in a room.

    These DIY faux crystal knobs are one of those small details that give a big impact.

    I made these using the tutorial for the DIY faux crystals I wrote about earlier in the week.

    Give your furniture doors and drawers a touch of affordable glam with these easy to make DIY faux crystal knobs! It will take less than 10 minutes!

    How to Make Faux Crystal Knobs

    This post contains affiliate links for your shopping convenience. Click here to read my full disclosure policy.

    Tools & Supplies

    Give your furniture doors and drawers a touch of affordable glam with these easy to make DIY faux crystal knobs! It will take less than 10 minutes!

    Steps

    Step 1

    After you’ve made your faux crystals, be sure to let them fully dry overnight before making your knobs.

    To make the knobs, all you need to do is apply E6000 glue to the flat knob base, then firmly push the crystal onto the base.

    Give your furniture doors and drawers a touch of affordable glam with these easy to make DIY faux crystal knobs! It will take less than 10 minutes!

    Leave the knobs upright and let them dry overnight. If you’re worried about your knobs knocking over, then nestle them into a bowl of rice. I did this when I made selenite knobs and it worked like a charm.

    The next day you can attach the crystal knobs to your furniture!

    Give your furniture doors and drawers a touch of affordable glam with these easy to make DIY faux crystal knobs! It will take less than 10 minutes!

    That’s all you have to do to make these beauties! Almost too good to be true, right?

    You get bonus points if you attach them to a really colorful piece of furniture that just makes those crystals sing. 😉

    Stay tuned because there are more DIY faux crystal projects coming your way!

    You might also want to see..

    DIY Selenite Knobs - These are GORGEOUS! Plus, they cost LESS than $1 per knob to make! / DIY Hardware / Gem Knobs / Gem Hardware / Stone Knobs / Stone Hardware

    How to Make Selenite Knobs

    DIY Faux Crystal Vase | DIY Vase Ideas | DIY Vase Decor | Vase Decorating Ideas | Faux Crystal DIY | DIY Faux Crystals | How to Make Crystals

    DIY Faux Crystal Vase

    Crystal Finials | DIY Crystal Lamp Finial | How to Make Lamp Finials | How to Make Crystals | DIY Faux Crystals | DIY Lamp Finial

    How to Make a Crystal Lamp Finial

    Give your furniture doors and drawers a touch of affordable glam with these easy to make DIY faux crystal knobs! It will take less than 10 minutes!

  • How To Make Faux Crystals

    How To Make Faux Crystals

    This has been one of those projects I’ve had in the back of my mind for a year.

    A freakin’ year. 

    That’s how long I’ve had the idea and supplies.

    And I did try it a year ago, but it didn’t work out the first time around, so I put it to the side. Finally, two weeks ago, I decided to try it a different way and what do you know – it worked like a charm.

    While I am for the most part, anti-trends, these pretty crystals and geodes that are all around is one trend I do love.  

    However, that shit is expensive.

    I was at T.J. Maxx yesterday and one single crystal-type bookend cost $25. And that was at T.J.Maxx. And just for one bookend, not two. While $50 for a set of bookends isn’t like highway robbery or anything, I’m used to finding that kind of stuff for $5 – $10 a set at yard sales and thrift shops.

    Well with this DIY faux crystal tutorial, you could make your own bookends for way less than $50. You can also use these to adorn many other things, which I will also be showing you tutorials for in the coming weeks. If you love the crystal look, but not the crystal price tag, then today, I am your girl.

    Love the crystals and geodes you're seeing in home decor, but not the price? Find out how to make faux crystals and five things to do with them here!

    DIY Faux Crystals

    This post contains affiliate links for your shopping convenience. Click here to read my full disclosure policy.

    Tools and Supplies Needed

    Steps

    This is a simple DIY project, but I thought it would be better explained in a video, rather than pictures. The video below shows you how to make the faux crystals step-by-step and I’m also including written instructions below the video, however there aren’t any photos to go with it.

    [adthrive-in-post-video-player video-id=”6KCwDZIN” upload-date=”Tue Feb 28 2017 11:00:00 GMT+0000 (Coordinated Universal Time)” name=”DIY Faux Crystals” description=”How to make faux crystals for home decor projects.”]

    Step 1

    If your stones aren’t already painted gold, you will first want to paint them using a gold spray paint such as this one. Give them 2-3 coats and let them fully dry overnight before proceeding.

    Step 2

    Place a good bit of sea salt in a paper plate. Select a stone that has at least one semi-flat side. The side can be sloping, but you don’t want it to have lots of ridges and crannies. Apply E6000 glue to that side and spread it out with a small paintbrush. Press the stone glue side down into the sea salt.

    Step 3

    Apply a dollop of E6000 glue on top of the sea salt you just put on the stone. Once more, press the stone glue side down into the sea salt.

    Step 4

    Use your fingers to push any sea salt that is sliding onto the sides of the rock onto the top of the rock. You will also want to come back and do this a few times while the glue is drying as this glue is slippery. Let the stones dry overnight.

    Step 5

    After the stones have dried, give them three coats of a clear gloss topcoat spray paint. This will provide another bonding agent for the salts and also shine everything up.

    Love the crystals and geodes you're seeing in home decor, but not the price? Find out how to make faux crystals and five things to do with them here!

    You can make these as large or small as you wish, depending on the size of rock you use.

    Love the crystals and geodes you're seeing in home decor, but not the price? Find out how to make faux crystals and five things to do with them here!
    Love the crystals and geodes you're seeing in home decor, but not the price? Find out how to make faux crystals and five things to do with them here!

    White Bust (similar) / Glass Display Case (similar ones) / Brass Key (similar ones)

    You can display them simply in a glass display case or you can create other home decor items out of them as well – see the links below!

    Love the crystals and geodes you're seeing in home decor, but not the price? Find out how to make faux crystals and five things to do with them here!

    Here’s some things you can make with the crystals:

    How to Make Faux Crystal Knobs – gorgeous for embellishing side tables and such.

    DIY Faux Crystal Vase – easily kick a boring vase up a notch!

    How to Make a Crystal Lamp Finial – a great way to add a little glam to a lamp.

    How to Make Crystal Magnets – who knew magnets could be so chic?

    Other projects you might like to see:

    DIY Agate Slice Finials – high-end lamp finials on a beer budget.

    DIY Selenite Knobs – another great knob idea for furniture!

    Want to remember this post for later? Be sure to pin the image below!

    Love the crystals and geodes you're seeing in home decor, but not the price? Find out how to make faux crystals and five things to do with them here!
  • How to Make Lamp Tassels in Five Minutes. BOOM.

    How to Make Lamp Tassels in Five Minutes. BOOM.

    BOOM.

    That is literally what I said after I made one of these lamp tassels and attached it to a sconce in my living room.

    It was so easy – it should have been a sin.

    Not to mention, it’s pretty sexy too, so that should have made it even more of a sin.

    #hubbahubba

    Also, I am aware that I just referred to a lamp tassel as sexy. I fully realize I’m not right, y’all.

    How to Make Lamp Tassels in Five Minutes

    Affiliate links may be contained in this post.

    Tools & Supplies

    These are GORGEOUS! And I had no clue they were SO simple to make! How to Make Lamp Tassels in Five Minutes | Easy Crafts | Easy Home Decor Projects | DIY Home Accessories | DIY Tassels

    • Two Keychains – preferably one that is a large tassel like the black one pictured above (it came from Michael’s) and one that is something else like the jaguar one pictured above (it came from Loft Outlet). Here are some other ones I found online which could also work…

    Keychains for Lamp Tassels

    Unicorn / Fleur de Lis / Eiffel Tower / Peacock / Elephant / Leopard / Wine Glass / Lips

    Steps

    Step 1

    Remove the keychain ring from the large tassel keychain. Connect the large tassel keychain and other large keychain together as shown below.

    These are GORGEOUS! And I had no clue they were SO simple to make! How to Make Lamp Tassels in Five Minutes | Easy Crafts | Easy Home Decor Projects | DIY Home Accessories | DIY Tassels

    Step 2

    Add 1-3 of the chain jump rings and one lobster clasp to two of the smaller tassels as shown below.

    These are GORGEOUS! And I had no clue they were SO simple to make! How to Make Lamp Tassels in Five Minutes | Easy Crafts | Easy Home Decor Projects | DIY Home Accessories | DIY Tassels

    Step 3

    Attach the smaller tassels to the other two keychains you’ve already put together.

    These are GORGEOUS! And I had no clue they were SO simple to make! How to Make Lamp Tassels in Five Minutes | Easy Crafts | Easy Home Decor Projects | DIY Home Accessories | DIY Tassels

    Step 4

    Attach a chain jump ring and lobster clasp to the large tassel and attach it to the rest of the tassel behind the other items as shown below.

    These are GORGEOUS! And I had no clue they were SO simple to make! How to Make Lamp Tassels in Five Minutes | Easy Crafts | Easy Home Decor Projects | DIY Home Accessories | DIY Tassels

    Step 5

    Attach the finished lamp tassel to a lamp by first attaching 1-2 jump rings to the switch on the lamp and then attaching the lobster clasp at the top of the tassel to the jump rings.

    These are GORGEOUS! And I had no clue they were SO simple to make! How to Make Lamp Tassels in Five Minutes | Easy Crafts | Easy Home Decor Projects | DIY Home Accessories | DIY Tassels

    Once you get it on your lamp, you might want to adjust how high/low some of the tassels hang. Just add on or take away jump rings as needed. I ended up removing the actual keyring from the jaguar as well once I had it on my lamp.

    These are GORGEOUS! And I had no clue they were SO simple to make! How to Make Lamp Tassels in Five Minutes | Easy Crafts | Easy Home Decor Projects | DIY Home Accessories | DIY Tassels

    Isn’t he sexy?

    These are GORGEOUS! And I had no clue they were SO simple to make! How to Make Lamp Tassels in Five Minutes | Easy Crafts | Easy Home Decor Projects | DIY Home Accessories | DIY Tassels

    Of course, gnomes are always suggested to add a little sexy flair – ha!

    Any lamp tassels in your future?

    You are probably going to want to see this too...

    DIY Agate Slice Lamp Finials: GORGEOUS - and simple to make! / DIY Projects / Crafts / Home Decor Projects
    DIY Agate Slice Lamp Finial

    You can literally turn ANY fabric into a lampshade! Think of all the possibilities! How to Make a Lampshade & Finial via RainonaTinRoof.com

    How to Make Your Own Lampshade and Finial

    pin-this-post-2

    How to Make Lamp Tassels | Easy DIY Tassels for Lamps and Furniture | Easy Craft Ideas | How to Make Tassels | Easy Tassels for Purses

    SaveSave

  • Semi-Winning The Tablescape Game: DIY Stone Embellished Napkin Rings

    Semi-Winning The Tablescape Game: DIY Stone Embellished Napkin Rings

    This post is sponsored by Birch Lane, however all opinions are 100% mine. Affiliate links may be contained in this post.

    I am not a tablescape person.

    To be blunt, I suck at them.

    It’s just too much thinking – there are too many things that have to be on a set table for me to also figure out what to use as a centerpiece, place cards, etc.

    Now, doing one of those things solo without having to think of all the other jazz – I’m good.

    Like last year – I had really cute, or really cute in my opinion anyway, also cheap, little painted pumpkins that doubled as place card holders.

    And this year, I’m rocking one single element of the tablescape – the napkin and napkin ring.

    Now, just let me say this is not too frou-frou. I’m not a frou-frou person and frou-frou just stresses me out. So if you were expecting a perfectly color coordinated full place setting to go along with that napkin and ring, I’m not your girl.

    However, if you want pretty stone embellished napkin rings (done in under 10 minutes), then I’m totally your girl. 😉

    Beautiful, easy and done in less than 10 minutes! You could use any kind of stone! DIY Stone Embellished Napkin Rings

    Also, coincidentally, I managed to color coordinate these napkin rings and napkins in Grunt Labor’s fraternity colors – purple and green. He was very proud.

    I didn’t tell him it was 100% unplanned.

    Materials:

    Beautiful, easy and done in less than 10 minutes! You could use any kind of stone! DIY Stone Embellished Napkin Rings

      • Various Colored Stones (use any color and sizes you would like, although you don’t want them to get too big.)
      • Pretty Napkin Rings (Mine came from Birch Lane)

    Step 1: 

    If your stones are a bit dirty (mine were), rinse them off well and let them dry. After they are dry, give each stone you intend to use three light coats of the clear gloss spray paint. This is going to make them more shiny and polished, rather than looking like you just pulled them outta the dirt. Let the stones fully dry.

    Step 2: 

    Tear off a piece of painter’s tape that could wrap around the napkin ring several times and set aside. Place a small amount of E6000 Glue on the flattest side of each stone, then place the stone on top of the napkin ring. While holding the stone in place on the ring, wrap the painter’s tape around the top of the stone and around the ring to keep it in place while the rings dry.

    Beautiful, easy and done in less than 10 minutes! You could use any kind of stone! DIY Stone Embellished Napkin Rings

    Place the rings in a box with paper towels smushed between them to keep them upright or in a bowl of rice or beans. Don’t worry – the rings don’t fall over when they are on a napkin – I just needed something to keep the rings from falling down against each other while drying. Let them dry for a full 24 hours before using them.

    Beautiful, easy and done in less than 10 minutes! You could use any kind of stone! DIY Stone Embellished Napkin Rings

    In an unexpected twist, I opted for plum colored napkins to go with the napkin rings. I have to say – I’m really digging my signature green with the plum…

    Maybe those fraternity colors aren’t too bad…

    What do you think of the combo?


    Beautiful, easy and done in less than 10 minutes! You could use any kind of stone! DIY Stone Embellished Napkin Rings

    Since this is only one little part of the table, there are more bloggers lined up to show you the rest!

    Elements of Thanksgiving Blog Hop

    Monday

    Everyday Enchanting | Maison de Pax | The Wood Grain Cottage

    Tuesday

    Rain on a Tin Roof | Making Home Base | Life on Virginia Street | Migonis Home

    Wednesday

    The Blissful Bee | House by Hoff | The Happy Housie | Just a Girl and her Blog

    blog-signature-summer-15

    Disclosure: This post was a collaboration with Birch Lane. However, all opinions and admittance of not being able to pull off a complete tablescape is 100% mine.

    SaveSaveSaveSaveSaveSaveSaveSaveSaveSave

  • DIY Headband Holder for $5

    DIY Headband Holder for $5

    Swimming in a sea of headbands for your little girl and not sure how to store and organize them? Then, learn how to make a headband holder below! This DIY headband holder is a perfect (and easy!) solution for headband storage.

    Remember our Aunt Rochelle?

    The aunt that you wanted for yourself?

    The one who sends the circus ensembles complete with matching shirts, pants, dresses, cardigans and even sunglasses.

    Well, that amazing Aunt Rochelle, she also sends hair accessories to match every single outfit she’s ever bought for the circus – mostly of the headband variety.

    She’s pretty much any little fashionista’s dream. 

    She is 100% the reason why the kid wins best dressed at preschool every year.

    Well, there really isn’t an award for that, but if there was, she’d have it in the bag. 

    While the circus will wear, and love, every shirt, shorts, dress, sunglasses and everything else Aunt Rochelle sends, she isn’t always a fan of the headbands.

    So I had a brilliant idea when I made her dress-up station.

    I would also make a headband holder so the circus would easily spot her headbands and in theory, want to wear them.

    DIY Headband Holder

    Headband Holder - easy diy project - Rain on a Tin Roof

    This post contains affiliate links for your shopping convenience. Click here to read my full disclosure policy.

    By the time I got to this addition of the dress-up station, funds were low, so I was scrounging around for cheap materials for this. I managed to make it for about $5 total – and you’re never going to believe what I used for the actual headband holder part…

    Materials Needed: 

    DIY Headband Holder - Supplies - Rain on a Tin Roof

    *Ignore the Mod Podge in the image – I ended up not needing it. 

    • Paper Towel Roll, preferably about 1/2 – 3/4 used. (yep, not kidding.)
    • Wood Base / Plaque (mine came from Michael’s – don’t forget to use a coupon!)
    • 5/8″ dowel – cut down to about 8 inches or so. You can easily make it shorter or taller if you wish, just cut the dowel accordingly.
    • Wood Glue
    • Drill and Drill Bits
    • Gold Spray Paint or another color of your choice
    • Fabric – about a 24″ inch square or so. You’ve probably got scrap laying around you can use.
    • Hot Glue Gun
    • X-Acto Knife
    • Scissors

    Step 1:

    Mark the center of your wooden plaque. Attach a drill bit that is the same size as the wooden dowel and drill a hole through the wooden plaque where you marked the center.

    How to Make a Headband Holder - drill hole in wood plaque - Rain on a Tin Roof

    Step 2: 

    After you have cut your dowel down to your desired size, place a little wood glue around the bottom of the dowel and insert it into the hole that you just made.

    Headband organizer - put wooden dowel in wood plaque - Rain on a Tin Roof

    Wipe away any excess glue from around the edges and let it dry for about 30 minutes.

     Step 3: 

    While the glue is drying, cut a hole in the center of the paper towel roll using the X-Acto Knife. You want to go through one side of all the paper towels and the cardboard roll in the middle, but not all the way through the roll.

    Headband Storage - put hole in center of paper towel roll - Rain on a Tin Roof

    I found it easiest to punch a hole through the roll with the knife first and then kind of carve out the circle.

    Step 4: 

    Spray paint the wooden base and dowel.

    Step 5: 

    While the base and dowel are drying, wrap your fabric around the paper towel roll. Start by hot gluing an edge onto the paper towels where you made the hole and then wrapping around the other edge. Put a small line of hot glue along the edge that will be seen and fold it over so you have a clean edge, then hot glue that onto the paper towel roll just covering your first edge.

    headband storage organizer - cover with fabric - Rain on a Tin Roof

    Use scissors to cut a small hole in the fabric where the hole in your paper towel roll is. For the ends of the fabric, put a little hot glue inside the paper towel roll edges, then just shove the material into the edges.

    Step 6: 

    After the base and dowel is dry, slide the covered paper towel roll onto the dowel.

    Headband Storage Ideas - paper towel roll covered in fabric - Rain on a Tin Roof

    And now you have an adorable way to store and organize all those headbands!

    And ya know what, even though the kid now has this adorable little headband organizer, she still doesn’t wear all her cute headbands.

    Nope.

    She wants me to wear them instead. 

    Most days, you can find me sporting a huge pink bow on my head.

    Update: Just in case you were wondering, it’s now been nearly four years since we made this headband holder and we’re still using it! Paper towel rolls are pretty sturdy when they need to be!

    Will you be making a headband organizer?

    Looking for more great accessory storage ideas for your kiddos?

    This DIY sunglasses holder is a fun way to display all the kid’s shades.

    They will adore having their own dress-up closet! Psst….it’s easy to make too!

    And be sure to see these six pretend play stations for kids – they’ll even learn while they’re playing at the stations!

    Want to come back to this headband holder later? Just pin the image below!

    Headband Organizer DIY - hair accessories storage for little girls - Rain on a Tin Roof

    And Stalk Me Here…

    Pinterest / Facebook / Twitter / Instagram

    blog-signature-summer-15
    headband organizer diy - headband storage for little girls - Rain on a Tin Roof

    SaveSave

  • DIY Flamingo Wreath in under an hour

    DIY Flamingo Wreath in under an hour

    Want to dress up your front door for summer? What better way than with a DIY flamingo wreath! The best part? It’ll take just an hour to make!

    It’s the official symbol of summer.

    I don’t care if you think its tacky or not.

    The official symbol of summer: The Pink Flamingo

    All hail the pink flamingo. 

    I can’t get enough of this pink feathered friend of mine, therefore I am proclaiming it to be the official symbol of summer.

    I fully realize I may be the only one involved in this proclamation.

    That’s ok.

    I’ll own it. 

    It started with the DIY Flamingo Sprinkler.

    My fun friend has recently shown up once more.

    In the colorful screened-in porch.

    On a wreath.

    How to Make a Flamingo Wreath with a Plastic Flamingo

    This fun and colorful wreath fits in perfectly with the rest of the porch.

    It will also lend a fun touch to a summer party – it practically insists you have a drink complete with a mini-umbrella.

    Or at least that’s what it told me. 

    How to Make a Flamingo Wreath

    This post contains affiliate links for your shopping convenience. Click here to read my full disclosure policy.

    Here’s what you need to make your own pink flamingo wreath: 

    • Wreath Form (I used a 14 inch straw wreath)
    • Astroturf (You can go to your local home improvement store and buy the minimum that you can off the roll for about $5 or so and that should be plenty. I used scraps leftover from a project.)
    • Pink Flamingo
    • Drink Umbrellas – check your local Dollar Store or Dollar Tree for these during summer!
    • Hot Glue Gun
    • Scissors

    Step 1: 

    Cut the astroturf into long strips about three inches wide and three feet long. Wrap the strips around the wreath form securing with a dollop of hot glue between the astroturf and wreath as you wrap it. Continue until the wreath is covered with astroturf.

    Step 2: 

    Poke the mini drink umbrellas into the bottom of the wreath and a little up the sides.

    Step 3: 

    Hot glue the pink flamingo to the wreath. I did this by putting a good sized glob (love my terminology?) on the back of the neck and rear end of the flamingo, then immediately pressing and holding the flamingo onto the wreath. So far, its held up perfectly fine.

    Step 4: 
    Use another strip of astroturf to hang the wreath from or a ribbon.

    DIY Flamingo Wreath with Drink Umbrellas and a Plastic Flamingo

    Isn’t she just so fun? 

    Summer Wreath with a Pink Flamingo

    Are you in a summer lovin’ kind of mood yet?

    Want to come back to this flamingo wreath tutorial later? Then, just pin the image below!

    Flamingo Wreath for Summer

    Want more colorful summer project ideas?

    Creating a Cut Flower Garden for Beginners – ready to have fresh flowers every single day! It’s not as hard as you may think!

    12 Outdoor Furniture Makeovers – ideas to refresh your outdoor furniture rather than tossing it!

    DIY Outdoor Daybed – spend lazy summer afternoon right here!

    10+ Creative Flower Pot Ideas – things you never knew could be a flower pot!

    And get more inspiration for all your outdoor spaces HERE!

    Hang out with me on social media!

    Facebook | Instagram | Pinterest | Twitter

    DIY Flamingo Wreath for Summer with Drink Umbrellas

    SaveSave

  • Mohawk Lollipop Holder: A Jonathan Adler Knock-Off

    This project will fall into the category with the snake bowl and the snake vase for many of you.

    That’s the category classified as:

    Things Jenna Loves & Most People Hate

    That’s perfectly fine.

    Me, my snake bowl, snake vase, and the newest addition to the category, the mohawk lollipop holder will be perfectly happy together.

    The Jonathan Adler version will cost you $98. This version will cost you $10. Mohawk Lollipop Holder - A Jonathan Adler Knock-Off

    This post contains affiliate links for your shopping convenience. Click here to read my full disclosure policy.

    That’s right. A punk rocker lollipop holder.

    How much more fun could it get?

    I was perusing Jonathan Adler’s newest items a while back, plotting out which items I would buy when I hit the lottery (all of them) and I happened upon this little jewel.

    Jonathan Adler Mohawk Lollipop Holder

    The Jonathan Adler Mohawk Lollipop Holder

    This is actually one of his more affordable items – its $98.

    However, I couldn’t bring myself to shell out $98 for a lollipop holder.

    So I made my own.

    For $10.

    DIY Jonathan Adler Inspired Mohawk Lollipop Holder

    Materials & Tools Needed:

    DIY Mohawk Lollipop Holder - A Jonathan Adler Knock-Off

    • Styrofoam Head (Mine came from Hobby Lobby. Use a 40% off coupon to get it for $5.)
    • Round Styrofoam Disc (Mine came from Hobby Lobby. It was $2.)
    • Metal Studs (Mine came from Michael’s. They were $3)
    • Pencil
    • X-Acto Knife
    • Hot Glue Gun
    • Toothpicks

    Steps

    Step 1. 

    Place the styrofoam head on top of the styrofoam disc and do an outline around the top of the head with your pencil. See #1 in the photo below. This will be your mohawk. After you have made your outline, cut out the mohawk slowly with an X-Acto knife.

    DIY Mohawk Lollipop Holder - A Jonathan Adler Knock-Off

    Step 2:

    Place about five toothpicks in the center top of the head, spread out a little shorter than the mohawk.  See #2 in the photo above.

    Step 3: 

    Push the mohawk down on top of the toothpicks. Push it slowly, so that it doesn’t break.

    Step 4: 

    Run a line of hot glue quickly along each side of the mohawk, then push the mohawk down and firmly into place with your hand. Hold it down until the glue is dry. See #4 in the photo above.

    Step 5:

    Hot glue the studs around the base of the head.

    Step 6: 

    Push your lollipops into the mohawk.

    I realize mine does not look as good as his, but for $10, I’ll take it.

    Wouldn’t this be so fun and quirky to have out at a party?

    Is there a mohawk lollipop holder in your future?

    I think there should be, but I won’t judge you if there isn’t. 🙂

    Want more Jonathan Adler inspiration?

    Don’t miss these 8 Jonathan Adler Inspired Projects!

    You know you don’t wanna miss any of this crazy.

    Sign up to get my posts delivered to your inbox here.

    Stalk Me Here:

    Pinterest / Facebook / Twitter / Instagram

    pin-this-post

    The Jonathan Adler version will cost you $98. This version will cost you $10. Mohawk Lollipop Holder - A Jonathan Adler Knock-Off

    SaveSave

  • DIY Snake Bud Vase (Snake Haters, Avert Your Eyes)

    DIY Snake Bud Vase (Snake Haters, Avert Your Eyes)

    I knew there would be many of you that would hate it.

    Jenna's Favorite Things (Home and DIY Edition) and 11 HUGE GIVEAWAYS! via RainonaTinRoof.com

    The Golden Snake Bowl.

    That was fine with me.

    Because I love it. 

    And even if you did hate it, you totally have to give me an A+ for creativity.

    I mean, I took a rubber snake and made it into a bowl. 

    That has to count for something.

    While I was melting snakes into bowls, I also melted one into a bud vase.

    You read right – a Snake Bud Vase.

    Made from a $1 rubber snake! DIY Snake Bud Vase

    This post contains affiliate links for your shopping convenience. Click here to read my full disclosure policy.

    It’s totally fine – I get it if you don’t like this one either, but I still get an A+ for creativity.

    Possibly an A+ for playing with toy snakes as much as I do as well. 

    I made this beauty out of a $1 rubber snake. It was even easier to make than the snake bowl.

    How to Make a Snake Bud Vase

    Supplies and Tools Needed: 

    Made from a $1 rubber snake! DIY Snake Bud Vase

      • 1 Rubber Snake (I found that the best ones to use are the long and really bendy, bouncy ones from the Dollar Tree.)
      • Heat Safe Gloves
      • Empty metal can (I raided my cabinet and found a can of chicken gravy that was a year past its expiration date. SCORE.)
      • Toy Doctor’s Kit from the Dollar Store (this will make total sense in a little while, and no not because you will hurt yourself while making this stellar bud vase)

    Steps

    Step 1: 

    Make sure your metal can is clean (we don’t want a snake vase that smells like bad chicken gravy) and then coil the snake into the can.

    Made from a $1 rubber snake! DIY Snake Bud Vase

    I found the easiest way to do this was by holding the can between my feet and using both hands to tightly coil the snake in the can. Otherwise, the snake kept knocking the can over.

    Side note: I also did this right on my front porch for all the neighborhood to see. If they weren’t questioning my sanity before, they sure as hell are now.

    Step 2: 

    Turn on your heat gun (I turned mine up to high) and point the nozzle right down into the center of the can and also the center of the coiled snake.

    Made from a $1 rubber snake! DIY Snake Bud Vase

    Stop every once in a while and look in the can to see if he is good and melted together.

    Step 3:

    When the snake is melted together, let him cool for a few minutes, then pop him out of the can and give the sides of the snake a quick blast of the heat gun.

    Made from a $1 rubber snake! DIY Snake Bud Vase

    Keep the heat gun on high and focus the heat in between the layers of the snake. You just want to melt these pieces together – not turn it into liquid – so don’t leave it there too long.

    Step 4: 

    After the snake is fully cool, spray paint it gold or another color of your choice.

    Step 5: 

    Obviously, you can’t just plop a flower in this vase without something to hold water so the flower will live. Since this is a small vase, I had to get creative with this. I went to the Dollar Store (not the Dollar Tree where you got the snake, but the Dollar Store) and found this toy doctor’s kit:

    Made from a $1 rubber snake! DIY Snake Bud Vase

    I took the syringe apart and put a dab of monkey glue on the end of it where there was a small hole.

    Made from a $1 rubber snake! DIY Snake Bud VaseAfter it dried, I popped it into the bud vase with a little water and put my rose in it.

    Why yes, I do know that I’m a genius. Thank you. 

    Made from a $1 rubber snake! DIY Snake Bud Vase

     You can see just the edge of the syringe in the photo above.

    Looking for more great home decor projects? 

    If you’re a gold fan, don’t miss these 40+ gold home decor projects.

    And you won’t believe some of these 15+ Easy Crafts and DIY Projects!

    You know you don’t wanna miss any of this crazy.

    Sign up to get my posts delivered to your inbox here.

    Stalk Me Here:

    Pinterest / Facebook / Twitter / Instagram

    pin-this-post

    Made from a $1 rubber snake! DIY Snake Bud Vase

    SaveSave

  • 6 Creative and Easy Ways to Document Memories

    6 Creative and Easy Ways to Document Memories

    When the kid started talking, she would answer “Sure” instead of “Yes.” Example:

    Kid (screaming): “Emonade, emonade, emonade!”

    Me (about to lose my sh*t): “Would you like some lemonade?!”

    Kid (very nonchalantly, as if she wasn’t just screaming for it: “Sure.”

    She now says “Yes” more than “Sure,” which I know is the way things are supposed to go, but it does make me just a little sad.

    My point is, I’m always terrified I will forget those little things.

    I’m also worried about forgetting Grunt Labor’s ways of saying I Love You, like “You’re the thin set to my tile.”

    (Where does he come up with this stuff?)

    And the time Will asked if this was Jesus music on the radio.

    AWESOME ways to remember stuff! And super easy and cheap! 6 Creative and Easy Ways to Document Memories via RainonaTinRoof.com

    I mean, it is Garth Brooks, he’s kind of like the Jesus of country music, people.

    And then there was the time Grandma told the kid (at the age of 1), “Its amazing how advanced you are. Its also unfortunate.”

    Truer words were never spoken.

    So, to keep up with all those sweet (and humorous) memories of our cra-cra lives, I’ve found a few ideas.

    Creative and Easy Ways to Document Memories

    This post contains affiliate links for your shopping convenience. Click here to read my full disclosure policy.

    1. Memory Rocks

    AWESOME ways to remember stuff! And super easy and cheap! 6 Creative and Easy Ways to Document Memories via RainonaTinRoof.com

    Memory Rocks are something Grunt Labor and I already do. We’ve actually been doing these since the first year we were together and I realized that our courtship wasn’t just some fling. Apparently, he knew that long before I did, but that’s a whole other story. Each rock is numbered and that number represents a moment in our lives that we don’t want to forget. More details on our memory rocks (including some of our best memories are here.)

    2. Family, Guest, and Friends Notebook

    AWESOME ways to remember stuff! And super easy and cheap! 6 Creative and Easy Ways to Document Memories via RainonaTinRoof.com

    I had this idea a few weeks ago and it is definitely something I plan on putting into action in the new year. Sometimes, our friends will bring up some of the funniest things we have done and I will have totally forgotten about it. Case in point, when we went on the RV trip to the middle of nowhere and David and Heather reminded me about the party at their house where I moved around the house all night engrossed with the Ghost Radar app on their iPad.

    I’m a sucker for anything ghostly.

    Since our friends tend to have better memories than we do sometimes, I thought it would be fun to put a pretty notebook on our entry table and let them write down a few things before they leave our house after a visit. Of course, a green Kate Spade notebook that says Penny for Your Thoughts is my pick.

    3. Yearly Calendar or Planner

    AWESOME ways to remember stuff! And super easy and cheap! 6 Creative and Easy Ways to Document Memories via RainonaTinRoof.com

    I’m stealing this idea from my father-in-law. When Grunt Labor was born, his dad had a calendar and would write down anything that Grunt did on that day. So when the kid was born and we were wondering when Grunt Labor started eating solid foods or pooping on a regular schedule (I’m kidding – he’ll kill me for writing that), all we had to do was phone Mom and Dad, and they whipped out the calendar and told us. Seriously, how hard would it be to just buy an extra calendar or planner and jot down those memories right as they happen? I would suggest a planner or calendar that has large spaces for writing, and of course it has to be pretty, like this one.

    4. Ticket Stub Holder

    AWESOME ways to remember stuff! And super easy and cheap! 6 Creative and Easy Ways to Document Memories via RainonaTinRoof.com

    As soon as I saw this ticket stub holder idea from Lauren at The Thinking Closet, I did it. I mean, really, its so stinkin’ cute and its a fun and pretty way to display all those ticket stubs! One of the boys actually asked for one of his own recently and he’s in the full blown teenager stage. If he thinks its cool, its most definitely cool.

    5. Memory Jar

    AWESOME ways to remember stuff! And super easy and cheap! 6 Creative and Easy Ways to Document Memories via RainonaTinRoof.com

    I love how pretty and easy to make this Etched Glass Memory Jar is. You don’t have to stash it away – keep it out to enjoy all the time!

    6. Memory Box (from a Recipe Box)

    AWESOME ways to remember stuff! And super easy and cheap! 6 Creative and Easy Ways to Document Memories via RainonaTinRoof.com

    This is also another super simple way to keep up with those special moments. Wit and Whistle uses a pretty recipe box to document her life.

    Do you have any creative and easy ways to document memories?

    You know you don’t wanna miss any of this crazy.

    Sign up to get my posts delivered to your inbox here.

    Stalk Me Here:

    Pinterest / Facebook / Twitter / Instagram

    pin-this-post

     AWESOME ways to remember stuff! And super easy and cheap! 6 Creative and Easy Ways to Document Memories via RainonaTinRoof.com

    SaveSave

  • DIY Golden Snake Bowl

    DIY Golden Snake Bowl

    At my old house, killing snakes was at least a monthly occurrence.

    There was the one time my Dad showed up, walked up the porch steps, immediately started jumping around and yelling, “JENNA, SNAKE!”

    It was wrapped around a porch chair, hissing.

    I killed it with a hoe.

    And there was the one that liked to live inside my roof on the back of the house. Every once in a while, it would stick its head out and I could see it from the kitchen window – I could never catch him.

    And then once, as I was walking down the stairs, talking to my cousin on the phone, I was met by a snake in the middle of the living room floor. I hung up, killed the snake, then called her back two minutes later.

    She answered asking if I was ok. Of course, it was just a snake.

    It was a nearly 100 year old farm house with lots of holes – what did you expect?

    Luckily, we don’t really have any snakes to deal with around here.

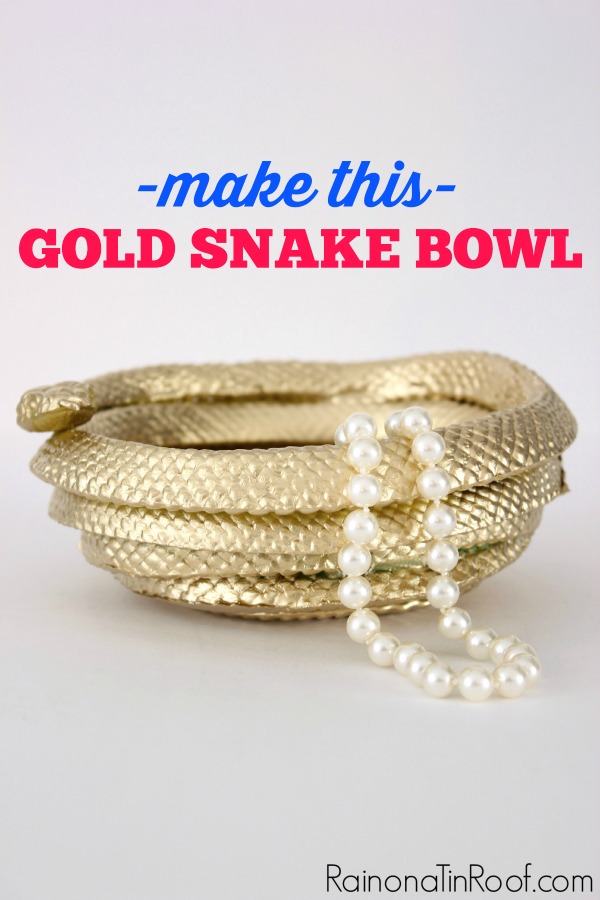
    Except pretty gold ones – made into a bowl.

    Had no clue you could do something like this with a heat gun! So many possibilities! DIY Gold Snake Bowl via RainonaTinRoof.com

    Disclosure: This post was sponsored by HomeRight. However, all opinions, snake killing stories, and love of golden snakes are 100% mine. This post contains affiliate links for your shopping convenience. Click here to read my full disclosure policy.

    Let me say that I do realize this will not be to everyone’s liking. I love it, so that’s all that matters. If you don’t like it, just use it as inspiration for something else you could make into a bowl.

    And also, before anyone starts to call me a devil worshipper because I made snake bowl – I’m not.

    I live in the south, I know someone is bound to think it.

    DIY Gold Snake Bowl

    Tools & Supplies Needed:

    Had no clue you could do something like this with a heat gun! So many possibilities! DIY Gold Snake Bowl via RainonaTinRoof.com

    • 2 Plastic Toy Snakes – I found that the best ones were the most flexible ones, which I found at The Dollar Tree.
    • Heat Gun – I used one of my new favorite tools, the HomeRight Heat Pro.
    • Heat Safe Gloves
    • Gold Spray Paint
    • Bowl that is approximately the size you want your bowl to be – make sure it will stand up to heat – mine was stainless steel.
    • Respirator Mask – just because you never know what kind of fumes the melting of the snakes will let off.

    Steps

    Step 1: 

    Put on the respirator. Turn your heat gun on – around medium high. Begin wrapping the snake into a circle, while focusing the heat between the rolls of the snake. Make sense?

    Had no clue you could do something like this with a heat gun! So many possibilities! DIY Gold Snake Bowl via RainonaTinRoof.com

    You don’t want to completely melt the snake, just weld it together.

    Step 2:

    Once you’ve got a small circle of him welded together, place it in the bowl and begin wrapping the snake around the bowl, while still focusing the heat gun in between his rolls.

    Had no clue you could do something like this with a heat gun! So many possibilities! DIY Gold Snake Bowl via RainonaTinRoof.com

    Every once in a while, stop and use your gloves to press down on the snake to weld him together well.

    Step 3: 

    Place your second snake in the bowl. Do this by taking the smallest end of the snake and placing it between the top rolls of the bottom snake as shown below.

    Had no clue you could do something like this with a heat gun! So many possibilities! DIY Gold Snake Bowl via RainonaTinRoof.com

    Heat it up and continue pushing it together with your gloves until its all welded together. Let the snake cool in the bowl for a couple of hours.

    Step 4:

    Once the snake is out of the bowl and fully cooled off, give it a coat of gold spray paint.

    Had no clue you could do something like this with a heat gun! So many possibilities! DIY Gold Snake Bowl via RainonaTinRoof.com

    Aren’t snakes much prettier gold?

    Had no clue you could do something like this with a heat gun! So many possibilities! DIY Gold Snake Bowl via RainonaTinRoof.com

    Especially when it only cost me a whopping $2, since I already had everything else on hand.

    I am in love with my heat gun – its one of my new favorite toys and so easy to use.

    Want to know what else a heat gun can do? 

    DIY Snake Bud Vase– made with a rubber snake too!

    How to Use a Heat Gun and 15 Things to do With It – you won’t believe all the things it’s capable of!

    How to Strip and Restain Furniture – so much less mess!

    You know you don’t wanna miss any of this crazy.

    Sign up to get my posts delivered to your inbox here.

    Stalk Me Here:

    Pinterest / Facebook / Twitter / Instagram

    pin-this-postHad no clue you could do something like this with a heat gun! So many possibilities! DIY Gold Snake Bowl via RainonaTinRoof.com

    SaveSave

  • DIY Faux Malachite Tray (For Less than $10)

    DIY Faux Malachite Tray (For Less than $10)

    Lately, I’ve been lusting.

    Lusting after this malachite fabric.

    I’ve kind of been dreaming and scheming to make that fabric into curtains for the living room.

    But I just can’t bite the bullet yet.

    But I do love malachite. 

    And as I was walking through the craft store the other day, plotting to make a pink and white marbled tray, I changed my mind.

    Which happens often. 

    I would make a faux malachite tray. 

    And I did.

    ANYONE can do this - its hard to mess up! And its cheap! DIY Faux Malachite Tray (For Less than $10) via RainonaTinRoof.com

    This post contains affiliate links for your shopping convenience. Click here to read my full disclosure policy.

    The best part?

    It will cost you $10 or less.

    If you are like me and tend to have some gold spray paint lying around, its only going to set you back about $6.

    Boom.

    How to Make a Faux Malachite Tray

    Materials & Supplies Needed:

    ANYONE can do this - its hard to mess up! And its cheap! DIY Faux Malachite Tray (For Less than $10) via RainonaTinRoof.com

    Steps

    Step 1: 

    Spray paint your picture frame gold.

    Step 2:

    Starting with the darkest color of green, squeeze out a line into the bottom of the tray. On both sides of the darkest green, squeeze out lines of the next darkest, and finally on both sides of those lines, squeeze out lines of the lightest green. It will eventually look like this:

    ANYONE can do this - its hard to mess up! And its cheap! DIY Faux Malachite Tray (For Less than $10) via RainonaTinRoof.com

    You will see that you kind of start to curve your lines as you work your way out. Don’t worry about that.

    Stop every once in a while and tap your tray against a level solid surface to kind of spread the paint out, but still maintain the pattern. Once you’ve got most of the tray covered with paint, you can move the tray around to get in any corners.

    Step 3:

    Run a toothpick back and forth and all around throughout the paint while it is still wet.

    ANYONE can do this - its hard to mess up! And its cheap! DIY Faux Malachite Tray (For Less than $10) via RainonaTinRoof.com

    Just go crazy with it until you have a pattern you like. You really can’t mess this up.

    Step 4: 

    Let the paint fully cure. This is a lot of paint, so its going to take a while. I let mine sit untouched for three days to let it fully dry.

    After its dry, you may have some green paint where you don’t want it on your gold, or maybe I’m the only hot mess crafter around. To cover those spots, I laid a few sheets of plain white printer paper in the tray and pressed it down with my hand while spray painting over the spots.

    ANYONE can do this - its hard to mess up! And its cheap! DIY Faux Malachite Tray (For Less than $10) via RainonaTinRoof.com

    Yes, your hands will get spray paint on them. Wear gloves if you aren’t down with that.

    Step 5: 

    After the spray paint dries, give your faux malachite a coat of satin Mod Podge and allow it to dry.

    ANYONE can do this - its hard to mess up! And its cheap! DIY Faux Malachite Tray (For Less than $10) via RainonaTinRoof.com

    This is totally one of my new favorite trays. I know – I’m kind of a tray whore.

    I love the way the gold snake bowl looks against the faux malachite.

    Are you a tray whore too? 

    Here are more tray makeovers you might like then…

    DIY Bathtub Tray – a simple build and functional!

    DIY Monogrammed Tray – makes a great gift!

     DIY Lucite Trays for less than $5 – so easy to make.

    You know you don’t wanna miss any of this crazy.

    Sign up to get my posts delivered to your inbox here.

    Stalk Me Here:

    Pinterest / Facebook / Twitter /Instagram

    pin-this-post

    ANYONE can do this - its hard to mess up! And its cheap! DIY Faux Malachite Tray (For Less than $10) via RainonaTinRoof.com

    SaveSaveSaveSaveSaveSave

  • 7 Super Simple, Super Cute Electrical Tape Crafts

    7 Super Simple, Super Cute Electrical Tape Crafts

    Apparently, this week is a tape themed week. That’s cool – tape is cheap. And cheap crafts are the best crafts. So bouncing off of the Duck Tape Fringed pillow, here are seven super simple, super cute, (and super cheap!) electrical tape crafts!

    Electrical Tape Crafts

    Electrical Tape Lampshade

    Electrical Tape Crafts: Electrical Tape Embellished Lampshade

    I felt like this lampshade was lacking a little, so I upped it’s fun faction with a quick application of electrical tape! Find out how I made this electrical tape lampshade here.

    Kate Spade Knockoff Photo FrameKate Spade Knock-Off Photo Frame - an easy electrical tape craft!

    This photo frame retails for about $30. That isn’t a bad price, but you can make your own for about $3 or $4 and yep, you can do it with electrical tape. Grab the tutorial for this Kate Spade Knockoff frame here!

    Electrical Tape Wrapped Candles

    Electrical Tape Crafts: Electrical Tape Wrapped Candles

    Aren’t these Electrical Tape Wrapped Candles from Southern State of Mind just so clever?!

    Electrical Tape Photo Mat

    Electrical Tape Crafts: Electrical Tape Embellished Frame

    Customize your frame mats with electrical tape from 6th Street Design School.

    Electrical Tape Wall Frame

    Electrical Tape Crafts: Electrical Tape Frame

    Instead of buying a wall frame, make your own custom one with electrical tape like these Electrical Tape Frames from Stars for Streetlights.

    Electrical Tape Washer and Dryer

    Electrical Tape Crafts: Electrical Tape Decorated Washer and Dryer

    Now this Electrical Tape Striped and Dotted Washer and Dryer from A Beautiful Mess is so cool! Would make doing laundry a lot more fun, right?

    Electrical Tape Storage Box

    Electrical Tape Crafts: Electrical Tape Storage Box

    Give your storage boxes a chic upgrade with this Black & White Electrical Tape Storage Box tutorial from Decoist.

    Want more tape crafting inspiration?

    Here are 20+ Duck Tape Crafts and Projects  – oh, the power of duck tape.

    Don’t miss these 17 Easy Crafts and DIY projects either – you’ll be amazed at how easy, yet how pretty they are!

    You know you don’t wanna miss any of this crazy.

    Sign up to get my posts delivered to your inbox here.

    Stalk Me Here:

    Pinterest / Facebook / Twitter / Instagram

    pin-this-post

    AMAZING IDEAS! And electrical tape is SO cheap! SCORE! 7 Super Simple, Super Cute Electrical Tape Crafts via RainonaTinRoof.com

    SaveSaveSaveSave

  • Duck Tape Fringe Pillow: Dress Up Boring Pillows on the Cheap

    Duck Tape Fringe Pillow: Dress Up Boring Pillows on the Cheap

    I found a new obsession.

    I know. I find a new obsession at least once a week, but I’m ADD – work with me here.

    This week’s new obsession?

    Duck Tape Fringe.

    Especially this pillow that is adorned with golden fringe – made with, yes, Duck Tape.

    Seriously?! DUCK TAPE FRINGE! And its easy to make! Duck Tape Fringe Pillow: Dress Up Boring Pillows on the Cheap via RainonaTinRoof.com

    Disclosure: This post was a collaboration with Fiskars Scissors. However, all opinions and newfound love of Duck Tape fringe is 100% mine. This post contains affiliate links for your shopping convenience. Click here to read my full disclosure policy.

    I know, right?

    That gold paired with the hot pink = AMAZINGNESS.

    And its Duck Tape.

    Duck Tape. 

    Best part? SUPER EASY TO MAKE.

    How to Make Fringe from Duck Tape

    Materials & Supplies Needed:

    Seriously?! DUCK TAPE FRINGE! And its easy to make! Duck Tape Fringe Pillow: Dress Up Boring Pillows on the Cheap via RainonaTinRoof.com

    Steps

    Step 1:

    Choose which side of your pillow you want to start with. It doesn’t matter which side you choose. I opted to go with one of the short sides first.

    Cut a piece of duck tape that is as long as (or if you are paranoid like me, a little longer) than that side with the bigger 8″ duck edition scissors.

    Seriously?! DUCK TAPE FRINGE! And its easy to make! Duck Tape Fringe Pillow: Dress Up Boring Pillows on the Cheap via RainonaTinRoof.com

    These scissors are new from Fiskars and are specifically made to use with Duck Tape. Ya know how your regular scissors get all gunky and gum up when you cut lots of duck tape?

    These don’t.

    And they are sharp.

    Score.

    Step 2: 

    Cut another piece of duck tape the same size as the strip you just cut. Place the two strips on top of each other – sticky side together. The photo below is where I made two strips at one time. You get the idea though.

    Seriously?! DUCK TAPE FRINGE! And its easy to make! Duck Tape Fringe Pillow: Dress Up Boring Pillows on the Cheap via RainonaTinRoof.com

    You should now have one strip of duck tape that has gold (or your color of choice) on both sides – no sticky anywhere.

    If it works better for you, instead of cutting out two separate strips, you can pull off a length of tape that is double the size of one of your pillow sides and then fold it back down onto the tape strip and cut it. See photo below.

    double-strip

    Step 3: 

    Trim up any places where your tape didn’t meet up exactly.

    Seriously?! DUCK TAPE FRINGE! And its easy to make! Duck Tape Fringe Pillow: Dress Up Boring Pillows on the Cheap via RainonaTinRoof.com

    Don’t worry about the tape being a perfect rectangle – it isn’t going to happen and it doesn’t matter. You’ll never be able to tell with all the fringe.

    Step 4:

    Pull out your small 5″ detail scissors.

    Seriously?! DUCK TAPE FRINGE! And its easy to make! Duck Tape Fringe Pillow: Dress Up Boring Pillows on the Cheap via RainonaTinRoof.com

    These are specially made for making smaller, detail cuts.

    Starting at one edge of your tape strips, cut smaller strips into the tape, but don’t go all the way through it.

    Seriously?! DUCK TAPE FRINGE! And its easy to make! Duck Tape Fringe Pillow: Dress Up Boring Pillows on the Cheap via RainonaTinRoof.com

    Do this until you have made lots of little strips over the whole larger strip.

    Step 5: 

    Cut off a piece of duck tape that is the length of the large strip you have that you just fringed up. Place the fringed strip on the edge of the strip you just cut.

    Seriously?! DUCK TAPE FRINGE! And its easy to make! Duck Tape Fringe Pillow: Dress Up Boring Pillows on the Cheap via RainonaTinRoof.com

    Step 6:

    Place the sticky side of the piece you now have around your pillow edge. Press it firmly into the pillow.

    Seriously?! DUCK TAPE FRINGE! And its easy to make! Duck Tape Fringe Pillow: Dress Up Boring Pillows on the Cheap via RainonaTinRoof.com

    You can loosen the fringe up a bit by ruffling your fingers through it as shown above.

    Step back and be amazed by your awesomeness. 

    Seriously?! DUCK TAPE FRINGE! And its easy to make! Duck Tape Fringe Pillow: Dress Up Boring Pillows on the Cheap via RainonaTinRoof.com

    YOU GUYS.

    I have so many more ideas for this duck tape fringe since it was ridiculously easy to make!

    Those Fiskars Duck Edition Scissors knocked this project out in record time – love ’em!

    Need more Duck Tape Project Ideas? I got yo’ back:

    20+ Duck Tape Crafts, Projects & Ideas – behold the awesomeness of the duck tape.

    Duck Tape Trimmed Curtains – take basic, blah curtains and turn them into anything but boring.

    Duck Tape Shower Cornice – easy project, big impact.

    And don’t miss these amazing home projects made using electrical tape!

    You know you don’t wanna miss any of this crazy.

    Sign up to get my posts delivered to your inbox here.

    Stalk Me Here:

    Pinterest / Facebook / Twitter / Instagram

    pin-this-post

    Seriously?! DUCK TAPE FRINGE! And its easy to make! Duck Tape Fringe Pillow: Dress Up Boring Pillows on the Cheap via RainonaTinRoof.com

    SaveSave

  • 17 Easy Crafts and DIY Projects for under $10

    17 Easy Crafts and DIY Projects for under $10

    What makes DIY projects and crafts even better?

    When they are EASY DIY Projects and EASY crafts and……..when they cost LESS THAN $10!

    Can I get an amen?!

    Easy Crafts and DIY Projects for the Home

    DIY Agate Slice Lamp Finials

    Your lamps will love you for these! So pretty and crazy easy to make! Tutorial for these beauties here!

    Step Stool Makeover

    Jazz up those blah and basic step stools with a little scrapbook paper and tassel love – super easy to do! Step stool makeover here!

    Golden Snake Bud Vase

    Would you believe that this snake was once just a rubber snake you bought at the Dollar Store? Yep! Now, it’s a golden beauty though! Here’s how I made it!

    Lamp Tassels

    I love a great tassel and I love them even more when they dress up lamps! I made these lamp tassels in under 5 minutes!

    Mohawk Lollipop Holder

    This one definitely isn’t everyone’s cup of tea, but it definitely starts a lot of conversations at my house! Find this project here.

    DIY Crystal Knobs

    I love making unique hardware for my furniture – these DIY crystal knobs are some of my favorites!

    Glittered Mason Jars

    The great thing about these glittered mason jars is that they are so versatile – they make great vases, lanterns and more!

    Faux Malachite Tray

    I love malachite, but not the heavy price tag attached to it. This malachite tray though comes at a cheap price!

    DIY Crystal Magnets

    These crystal magnets would make a great little gift for your girlfriends!

    Golden Snake Bowl

    Another snake home accessory that used to be residing in the Dollar Store aisle – here’s how I made this beauty!

    Crystal Lamp Finials

    Is it obvious that I can’t get enough crystals? Here’s how I made these crystal lamp finials!

    Duck Tape Fringe

    A little fringe always makes things better, right?! Make your own fringe on a budget using Duck Tape!

    DIY Sunglasses Holder

    We made this cute little sunglasses holder to display and hold all the Circus’ adorable shades.

    DIY Selenite Knobs

    Another great DIY knob! Selenite is one of my favorite stones and it was so easy to make these selenite knobs!

    DIY Headband Holder

    Would you believe that part of this headband holder is made with a paper towel roll?!

    DIY Stone Embellished Napkin Rings

    These napkin rings went from “ok” to little gems with this easy stone napkin ring tutorial!

    Crystal Embellished Vase

    Easily embellish any vase with pretty crystals using this tutorial.

    DIY Faux Jadeite

    faux-jadeite-sidebar

    DIY Faux Jadeite  – you WILL NOT believe how easy this one is!

    Knock-Off Kate Spade Photo Frame

    Kate Spade Knock-Off Photo Frame via RainonaTInRoof.com #katespade #knockoff #photo #diy #craft

    Kate Spade Knock-Off Photo Frame – create this Kate Spade Knock-Off for $5!

    DIY Lucite Trays

    DIY Lucite Trays {Under $5 in 15 minutes} via RainonaTinRoof.com

    DIY Lucite Trays – you will never believe what these trays are actually made from!

    Electrical Tape Embellished Lampshade

    Small Changes with Big Impact via RainonaTinRoof.com #homedecor

    Electrical Tape Lampshade – give a little black and white love to a lampshade!

    Duck Tape Trimmed Curtains

    Duck Tape Trim Curtains via RainonaTinRoof.com #ducktape #ikeacurtain #hack

    Duck Tape Trimmed Curtains – easily add bling to your curtains!

    DIY Animal Candleholders

    DIY Animal Candleholders via RainonaTinRoof.com

    DIY Animal Candleholders – make candle holders from toys!

    Sequined Coat Hangers

    Sequined Coat Hangers via RainonaTinRoof.com #lifequotes #sequins #coathanger

    Sequined Coathangers – hang your clothes in style!

    Faux Brass Furniture Feet

    Faux Brass Capped Feet via RainonaTinRoof.com

    Faux Brass Capped Feet – give the Midas touch to all your furniture feet!

    DIY Decorative Horse Accessories

    40+ Gold Projects {rainonatinroof.com} #gold #DIY #craft

    Decorative Horse Accessories – another home accessory you can make out of toys!

    Chic and Sassy Message Board

    Four Easy DIY Gift Ideas via RainonaTinRoof.com #diy #giftideas

    Sassy Fabric Covered Message Board – create a chic message board and get your sassy on with fun quotes!

    Easy Home Decor Crafts | Easy Home Decor DIY Projects | Easy DIY Home Decor | Easy Crafts to Make and Sell | Easy Crafts to Sell

    Still need more great craft and DIY ideas? 

    14 Painted Rug Hacks – who knew a rug could get so fancied up with paint?

    14 Classic Black and White DIY Projects – you can never go wrong with black and white!

    You know you don’t wanna miss any of this crazy.

    Sign up to get my posts delivered to your inbox here. 

    Stalk Me Here:

    Pinterest / Facebook / Twitter / Instagram

  • How to Glitter Mason Jars

    How to Glitter Mason Jars

    These glitter mason jars are easy to make and add a fun touch to your home’s decor or a party. They also make a great gift idea! Find out how to make glitter mason jars yourself below!

    Is there anyone else out there that just feels the need to add a little bling everywhere?

    A little gold here, a little glitter there?

    It just makes everything a little more fun and pretty.

    When I made over the porch recently, I realized that these mason jars didn’t quite fit with the fun, colorful vibe going on out there. I wanted to keep them though to use as lanterns for extra lighting at night.

    My solution: Bling ‘Em Out.

    Now, I have sparkly glitter mason jars.

    DIY Glitter Mason Jars - easy mason jar crafts - Rain on a Tin Roof

    This post contains affiliate links for your shopping convenience. Click here to read my full disclosure policy.

    If you’re a fan of mason jar crafts, this one’s for you!

    DIY Glitter Mason Jars

    This is a really simple and relatively fast craft project – you guys know I love the fast projects with instant gratification.

    Materials Needed: 

    How to Make Glitter Mason Jars using Mod Podge - Rain on a Tin Roof

    • Mason Jars or Glass Jars (Mine came from Kirkland’s about three years ago, but they still have them for a whopping $3 a pop!!! They are here.)
    • Glitter in Colors of Your Choice
    • Mod Podge
    • Foam Brush or Paint Brush
    • FrogTape

    Steps

    Step 1

    Before starting the glittering process, I spray painted the handles of my jars gold. The gold just worked better with the porch. Painting the handles is completely optional.

    Grab your FrogTape and wrap a strip of it across the jar diagonally.

    Glitter Dipped Mason Jars - tape across jars - Rain on a Tin Roof

    I didn’t really do any sort of measurements with the tape. I just wrapped it around the jar as you can see in the photos above. I did keep a straight edge on the side of the jar – that’s why the straight vertical piece of tape is there. You don’t have to do this. You can just keep wrapping the tape if you want to.

    Step 2

    Starting at the bottom of the jar where the glass is still visible, use your foam brush or paint brush and apply Mod Podge where you want the glitter.

    Mod Podge Mason Jars to Add Glitter - Rain on a Tin Roof

    You don’t need a really thick coat, just an even coverage over the glass. Don’t let the Mod Podge sit too long – this stuff can dry fast on glass. As soon as you have put your Mod Podge on the glass, sprinkle your glitter on the jar, gently tap the excess glitter off and let it sit for five minutes or so.

    Step 3

    Remove your tape carefully. If you just want one swirl of glitter – you are done! If you want two swirls (like I did), then you can repeat the first two steps and add another color of glitter.

    How to Glitter Mason Jars - apply glitter to jars - Rain on a Tin Roof

    You can also skip the tape on this one and run your Mod Podge just along the edge of your first glitter color and apply your other glitter there.

    Putting Glitter on Mason Jars - Rain on a Tin Roof

    I have these hanging on large cup hooks in the screened-in porch.

    Mason Jar Crafts - Glittered Mason Jars - Rain on a Tin Roof

    Gold glitter just gets me every time and the pink works perfectly on the porch. Who knew putting glitter on mason jars could be so fun?

    Any glitter dipped mason jars in your future?

    Looking for more great craft and DIY projects for the home?

    17+ Easy Crafts and DIY Projects Under $10 – you won’t believe what all is here!

    Looking to make a little money on your projects? Take a look at these 10 Easy Crafts to Make and Sell.

    Want to remember this project? Just pin the image below! 

    Glittering Mason Jars with Mod Podge - Rain on a Tin Roof

    You know you don’t wanna miss any of this crazy.

    Sign up to get my posts delivered to your inbox here. 

    Stalk Me Here:

    Pinterest / Facebook / Twitter / Instagram

    Easy Crafts - DIY Glittered Mason Jars - Rain on a Tin Roof

    SaveSave

  • Kate Spade Knock-Off Photo Frame for $5 in 15 minutes

    Kate Spade Knock-Off Photo Frame for $5 in 15 minutes

    You guys know I have a love for just about everything Kate Spade.

    It all started with this Kate Spade inspired lamp.

    And then Mama bought me this Kate Spade serving set for mother’s day and I nearly peed my pants.

    I saw this black and white Kate Spade photo frame around Christmas and almost put it on my wish list, but then I realized I could easily do a Kate Spade Knock-Off on this picture frame.

    DIY Kate Spade Photo Frame Knock-Off | Kate Spade Crafts | DIY Kate Spade Decor | DIY Kate Spade Office This post contains affiliate links for your shopping convenience. Click here to read my full disclosure policy.

    Kate Spade Knock-Off Frame

    This will take all of about 15 minutes of your time and cost you about $5.

    Boom.

    Materials Needed:

    -Acrylic Photo Frame (I used a 5×7 size. These are the same kind I used on my DIY Lucite Trays.)

    -White paint (optional if you have a white back already)

    -Electrical Tape

    -Scissors

    Steps

    Remove the cardboard backing of the frame. You can paint it white or if its already white, leave it. Just to be sure mine was a true white, I spray painted it white and let it dry for about an hour before proceeding.

    Kate Spade Knock-Off Photo Frame via RainonaTInRoof.com #katespade #knockoff #photo #diy #craft

    Step 1

    Put a strip of electrical tape across the top of the white cardboard backing.

    Step 2

    Put strips of electrical tape across the top and bottom of the cardboard backing.

    Step 3

    Use tape strips to measure the width between tape strips.

    Step 4

    Apply two more strips to the backing.

    Step 5

    Place a photo in your frame, then put the backing in with the black and white stripes facing out.

    Kate Spade Knock-Off Photo Frame via RainonaTInRoof.com #katespade #knockoff #photo #diy #craft

    Kate Spade Knock-Off Photo Frame via RainonaTInRoof.com #katespade #knockoff #photo #diy #craft

    Kate Spade Knock-Off Photo Frame via RainonaTInRoof.com #katespade #knockoff #photo #diy #craft

    DIY Kate Spade Photo Frame Knock-Off | Kate Spade Crafts | DIY Kate Spade Decor | DIY Kate Spade Office

    Easy, chic, and cheap.

    What’s not to love?

    Have you done a Kate Spade Knock-Off before?

    And if you are looking for more cheap craft ideas using tape, don’t miss these 7 Super Simple, Super Cute Electrical Tape Crafts or these 20+ Duck Tape Craft and Home Projects – oh, the power of tape! 

    You know you don’t wanna miss any of this crazy.

    Sign up to get my posts delivered to your inbox here. 

    Stalk Me Here:

    Pinterest / Facebook / Twitter / Instagram

    SaveSaveSaveSaveSaveSaveSaveSave

  • 20+ Duck Tape Crafts and Projects You’re Gonna Love

    20+ Duck Tape Crafts and Projects You’re Gonna Love

    You guys know I love me some quick and easy crafts and projects with Duct Tape – particularly gold duck tape. I have used it to embellish curtains, make DIY art, and to dress up a bookcase.

    Ya’ll, that’s just the tip of the iceberg, though. You aren’t going to believe some of these awesome Duct Tape Crafts and Projects that I’ve found. Get ready to be inspired!

    This post contains affiliate links for your shopping convenience. Click here to read my full disclosure policy.

    Duct Tape Crafts and Projects for the Home

    Get your fringe on!

    Seriously?! DUCK TAPE FRINGE! And its easy to make! Duck Tape Fringe Pillow: Dress Up Boring Pillows on the Cheap via RainonaTinRoof.com

    Embellish pillows, curtains, lampshades and more with fringe made from duck tape! Find out how easy it is to do here!

    Head for the bathroom.

    DIY Shower Cornice with Black & White Shower Curtains via RainonaTinRoof.com #diy

    Make a custom, but super simple, cornice for your shower and then embellish it with duck tape!

    Trim out your curtains.

    Duck Tape Trim Curtains via RainonaTinRoof.com #ducktape #ikeacurtain #hack

    Got boring curtains? Spice them up by trimming them out along the edges with duck tape!

    Make your own art.

    I made this DIY art with a gift bag, then spiced it up with a little gold duck tape!

    Get floral with it.

    Duct Tape Crafts and Projects via RainonaTinRoof.com #ducttape #ducktape #crafts #projects

    Seriously, who knew that duck tape flowers could be so stinkin’ cute? Four Generations One Roof knew. That’s who.

    Faux Gold-Leaf It Up.

    Duct Tape Crafts and Projects via RainonaTinRoof.com #ducttape #ducktape #crafts #projects

    Let me be honest. I have never attempted gold leaf. I think I could do this faux gold leaf from Shwin & Shwin though.

    Grace your mantel with garland.

    Duct Tape Crafts and Projects via RainonaTinRoof.com #ducttape #ducktape #crafts #projects

    Ok, as soon as I saw this easy breezy duct tape craft, I wanted one. Charming Zebra is full of great ideas and this garland is no exception.

    Give your refrigerator the Midas touch.

    Duct Tape Crafts and Projects via RainonaTinRoof.com #ducttape #ducktape #crafts #projects

    The Hunted Interior is also full of great ideas that are simple, but make a big impact – like this refrigerator.

    Go for stripes and polka dots.

    Duct Tape Crafts and Projects via RainonaTinRoof.com #ducttape #ducktape #crafts #projects

    One of my favorite blogs on the planet is Dimples and Tangles. She is just full of wonderful, beautiful ideas. She gave a wall and her ceiling the duck tape treatment.

    Make diamonds with it.

    Duct Tape Crafts and Projects

    Ok, we all know The Nester is brilliant and amazing. So brilliant and amazing that she made this accent wall out of duct tape.

    Add a houndstooth touch in seconds.

    Duct Tape Crafts and Projects via RainonaTinRoof.com #ducttape #ducktape #crafts #projects

    I am a huge houndstooth fan. Yes, I am an Alabama fan, but it is also a classic pattern that never dates. In My Own Style had the genius idea to cover a step stool with houndstooth duct tape.

    Make a wreath.

    Duct Tape Crafts and Projects via RainonaTinRoof.com #ducttape #ducktape #crafts #projects

    I am just dying over how adorable this duct tape flowers wreath is from The Country Chic Cottage.

    Adorn your candles with it.

    Duct Tape Crafts and Projects via RainonaTinRoof.com #ducttape #ducktape #crafts #projects

    How great are these metallic candles from Something Turquoise? I’m usually not a big candle fan,  but I love these.

    Add stripes to boring vases.

    Duct Tape Crafts and Projects via RainonaTinRoof.com #ducttape #ducktape #crafts #projects

    Hi Sugarplum is another absolute favorite blog of mine. See that fab vase? She made it with duct tape.

    Create art.

    Duct Tape Crafts and Projects via RainonaTinRoof.com #ducttape #ducktape #crafts #projects

    I love how simple, yet stunning this Duck Tape art is from Less Than Perfect Life of Bliss.

    Accessorize your outfit.

    Duct Tape Crafts and Projects via RainonaTinRoof.com #ducttape #ducktape #crafts #projects

    Typically, I would never consider Duck Tape for clutch. However, Ginger Snap Craftsmakes this one look cool.

    Make jewelry.

    Duct Tape Crafts and Projects via RainonaTinRoof.com #ducttape #ducktape #crafts #projects

    52 Mantels made this really cool color block jewelry using duck tape. I love those colors.

    Go for an easy IKEA hack.

    Duct Tape Crafts and Projects via RainonaTinRoof.com #ducttape #ducktape #crafts #projects

    I love this quick duct tape project from Amy Krist. Such an easy IKEA hack.

    Create a fun homework spot.

    Duct Tape Crafts and Projects via RainonaTinRoof.com #ducttape #ducktape #crafts #projects

    Artchoo! had the idea to cover a desk with duck tape – how fun would this be for a kid?

    A buck head for the win.

    Duct Tape Crafts and Projects via RainonaTinRoof.com #ducttape #ducktape #crafts #projects

    I love buck heads. Love ’em to pieces. This duck tape deer head from DIY Candy is amazeballs.

    Make a pouch.

    Duct Tape Crafts and Projects via RainonaTinRoof.com #ducttape #ducktape #crafts #projects

    Less Than Perfect Life of Bliss knows her duck tape, y’all. She also made this cool zippered pouch with it!

     And if you are looking for more cheap craft ideas using tape, don’t miss these 7 Super Simple, Super Cute Electrical Tape Crafts!

    pin-this-post
    Duct Tape Crafts | Duct Tape Crafts for Kids and Teens | DIY Duct Tape Crafts | DIY Duct Tape Projects | Duct Tape Ideas

    What home decor crafts with Duct Tape will you come up with?

    You know you don’t wanna miss any of this crazy.

    Sign up to get my posts delivered to your inbox here. 

    Stalk Me Here:

    Pinterest / Facebook / Twitter / Instagram

    SaveSaveSaveSave

    SaveSaveSaveSaveSaveSaveSaveSaveSaveSaveSaveSaveSaveSaveSaveSaveSaveSaveSaveSaveSaveSaveSaveSaveSaveSaveSaveSaveSaveSaveSaveSaveSaveSaveSaveSaveSaveSave