Tag: desk

  • DIY Wall Mounted Desk with Storage

    DIY Wall Mounted Desk with Storage

    Have a small space where you’d like to fit in a wall mounted desk? Need a little storage there too? You’re in the right place then! This DIY wall mounted desk is a simple build that folds down to reveal space for your computer or writing and hidden storage.

    This project has only been completed for a month or so and I can already confidently say that it is hands-down the Circus’ most favorite thing I’ve ever made her – a wall mounted drop down desk.

    DIY Wall Mounted Desk - with storage and writing space - Rain on a Tin Roof

    Y’all, she is at this desk everyday. In fact, before I could even get photos of it, I had to give it a good wipe down because she’d already gotten marker ink and glue on it from her various art projects.

    And from a mama’s point of view, it is so nice to have all her art supplies (sans paint because we ain’t letting her run wild with paint just yet) in one place. And to be able to just close it all up and hide the mess is the icing on the cake.

    DIY Fold Down Desk - folded up - Rain on a Tin Roof

    This DIY desk can easily be made to work for both kids and adults. For adults, you’ll just want to raise up the mounting height a bit and possibly increase the overall size of the desk. For me though, even as an adult the size is more than adequate.

    This post contains affiliate links for your shopping convenience. Click here to read my full disclosure policy.

    DIY Fold Down Desk

    Supplies and Tools Needed

    Cut List

    Make the following cuts using either a miter saw or circular saw.

    1. Cut the 1″ x 8″ x 8′ piece of wood into the following lengths:

    • Two pieces that are 28″ long
    • Two pieces that are 17 7/8″ long

    2. With the remaining 1″ x 8″ piece of wood that is left, cut four small squares. These don’t have to be perfect at all.

    3. Using a circular saw, cut the 3/4″ plywood project panel down to 28″ x 19 1/2″.

    4. Using a circular saw, cut the pegboard project panel down to 26 3/8″ x 17 7/8″.

    Steps

    Step 1

    Gather your measured and cut four 1″ x 8″ pieces, drill and longer wood screws.
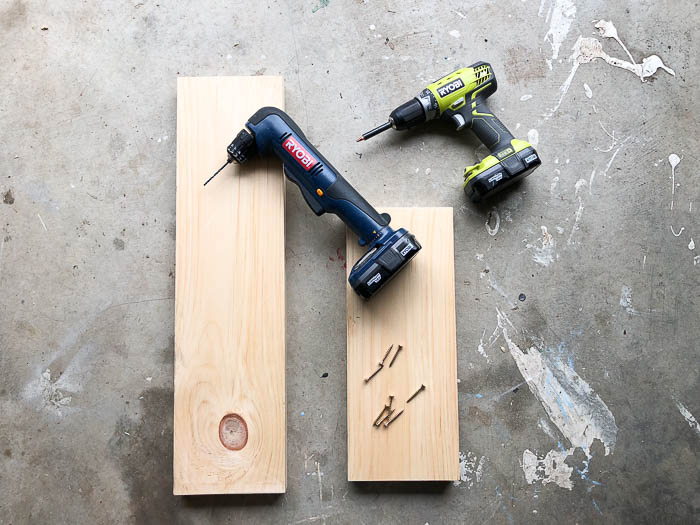
    Drop Down Desk Assembly - Rain on a Tin Roof

    Arrange the boards as shown below.

    Drop Down Wall Desk - putting together the frame - Rain on a Tin Roof

    Attach each longer 1″ x 8″ piece to each shorter 1″ x 8″ piece at the end of each board using two screws on each board. Drill a pilot hole first and then drill your screws in.

    To keep these pieces from ever coming apart, you can also apply wood glue along the edges of the boards before attaching together with screws if you wish. We did not do this, as I do think it’s strong enough as is, but if you’ve really got a rough and tumble kiddo, this could be a good idea.

    Step 2

    Lay your cut plywood panel on top of the 1″ x 8″ frame to make sure it fits properly. It should cover the entire frame.
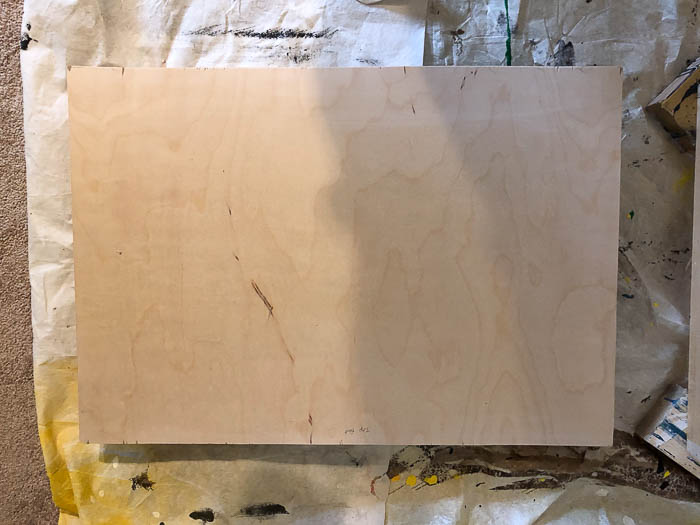
    Building a diy wall mounted desk with storage. Rain on a Tin Roof

    Adjust as needed.

    Step 3

    If you plan to paint your desk, go ahead and do so now. The Circus wanted two colors, so we painted the frame Tropical Sea and the drop down portion of the desk Yellow Groove.
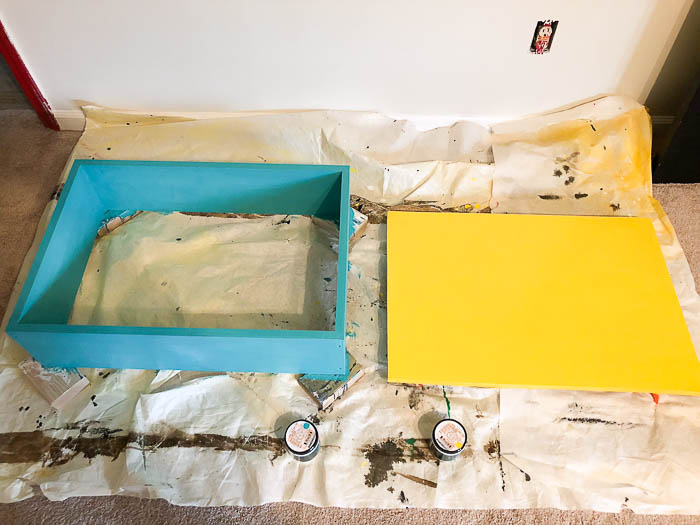
    How to Make a DIY Fold Down Desk - mounts to wall - Rain on a Tin Roof

    After the yellow was dry, she also made a design with tape to block off a few areas to paint the Tropical Sea on as well.

    Painting the DIY Wall Desk - Rain on a Tin Roof

    Step 4

    Get your cut piece of pegboard, the four small 1″ x 8″ square pieces you cut and the longer wood screws.

    Pegboard in back of drop down desk - Rain on a Tin Roof

    Place a square in each corner of the backside of the desk frame. Drill a pilot hole and then fasten the square wood piece to the desk frame with one of your longer screws.
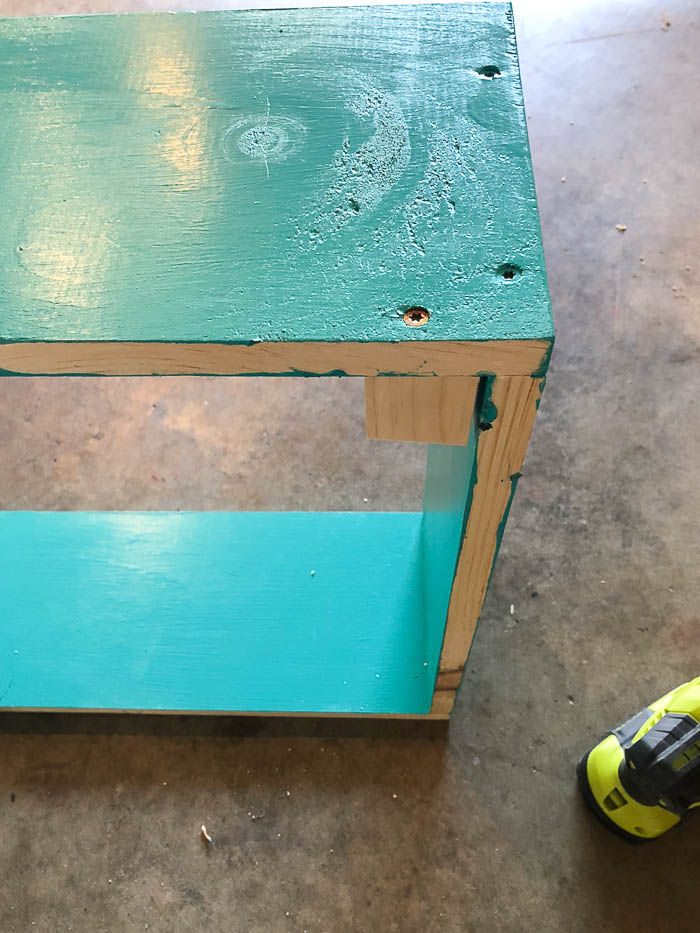
    Assembling the drop down wall desk - Rain on a Tin Roof

    After you’ve attached all four wood pieces, place your cut pegboard piece through the front of the desk frame and attach it to each wood square using a smaller wood screw.

    Wall Mounted Desk with Storage Building Plans

    Step 5

    Lay your drop down desk front on it’s face directly in front of the desk frame.

    Attach the frame and desk front together by using the 90 degree surface hinges.
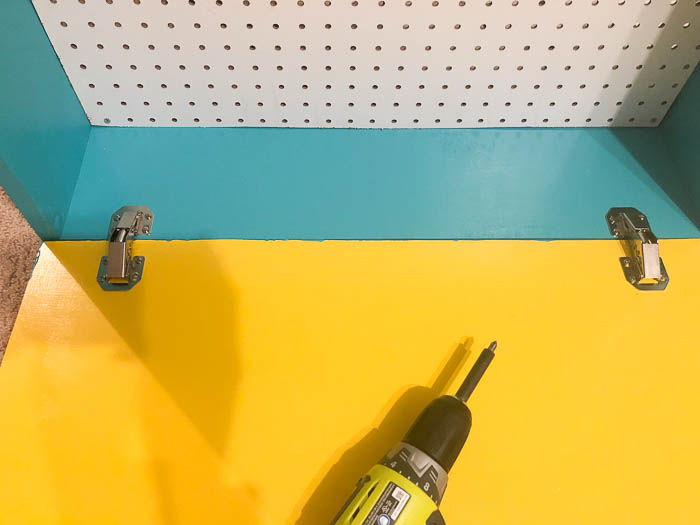
    DIY Desk plans for a wall mounted desk -  Rain on a Tin Roof

    Step 6

    Get both your left hand lid support hinges and your right hand lid support hinges. Attach each following the package directions.
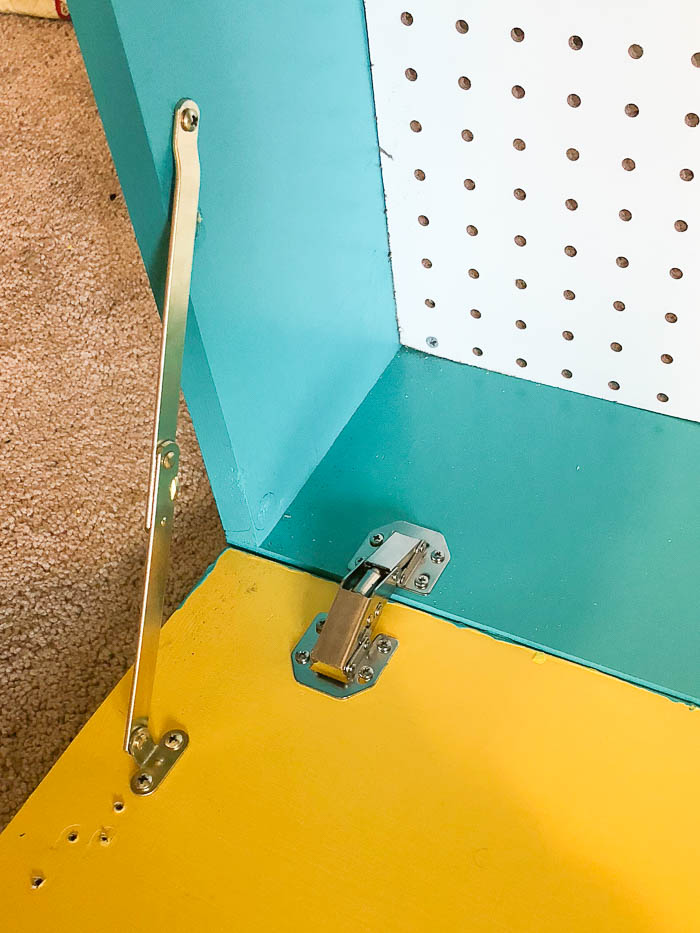
    Building Plans for a Wall Mounted Desk - Rain on a Tin Roof

    An important thing to note here is that you might have to play with these right and left hinges a bit. For me, the lower portion that goes on the drop down front needed to be scooted in a bit more than what the package directions said (as you can see from my holes above!). This could vary from different brands of hinges. If you do have to play around with it and end up with a few holes, just fill with wood filler, sand and paint over them.

    Step 7

    Attach the magnetic latches at the top of the drop-down desk frame and lid using the mounting instructions on the package.

    Tutorial for building a wall desk - Rain on a Tin Roof

    Step 8

    Attach whatever pretty knob you’ve decided to go with on the top front of your drop-down desk.

    Step 9

    Determine where you want to hang your new DIY drop down desk. To do this, I had the Circus sit on the seat I knew she would be using at the desk and then held the desk up to see where it would be best to hang it for her. Make a mark on the wall where you want it to hang.

    Grab a stud finder and mark all the studs in that area.

    On the back of the desk, measure the area between the top two wood squares you attached in the corners. Cut your 1″ x 2″ furring strip to that length or slightly less than.
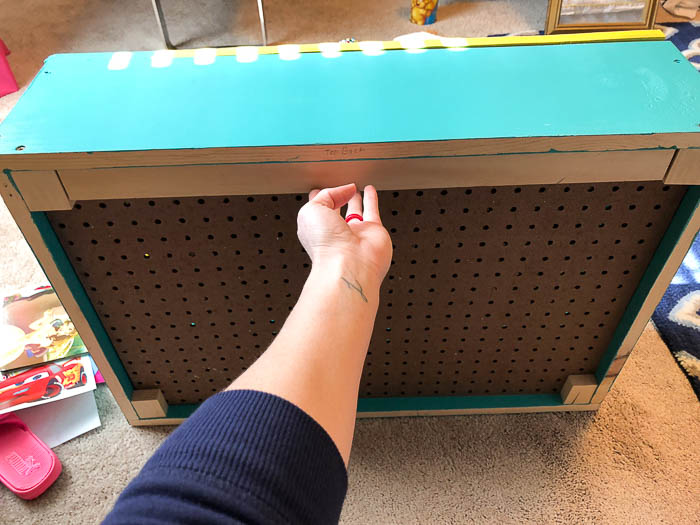
    Space Saving DIY Wall Mounted Flip Down Desk - Rain on a Tin Roof

    Place the furring strip on the wall and attach it to the wall where studs are using your drill and the longer wood screws.

    Attaching the Wall Mounted Desk to the Wall - Rain on a Tin Roof

    Use a level to check for levelness before placing the second screw into the furring strip and wall.

    Step 10

    Place the drop down desk on top of the furring strip. Using your longer wood screws, attach the desk to the furring strip you just attached to the wall. I put three screws along the back of our desk top as shown below.
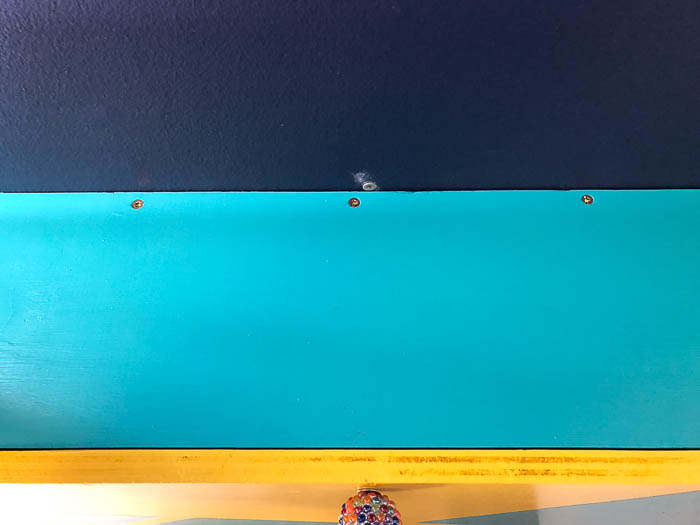
    Small Space DIY Wall Mounted Fold Down Desk - Rain on a Tin Roof

    Drop it down and enjoy!

    Fold Down Desk Plans - Rain on a Tin Roof

    She absolutely loves this thing.

    Wall Mounted Flip Down Desk Plans - Rain on a Tin Roof

    We used pegboard hooks to organize and hang most of her art supplies.

    Tutorial for a Space Saving Wall Mounted DIY Desk - Rain on a Tin Roof

    The two purple baskets are part of this set of pegboard baskets that we spray painted. The other baskets are from the Dollar Tree.
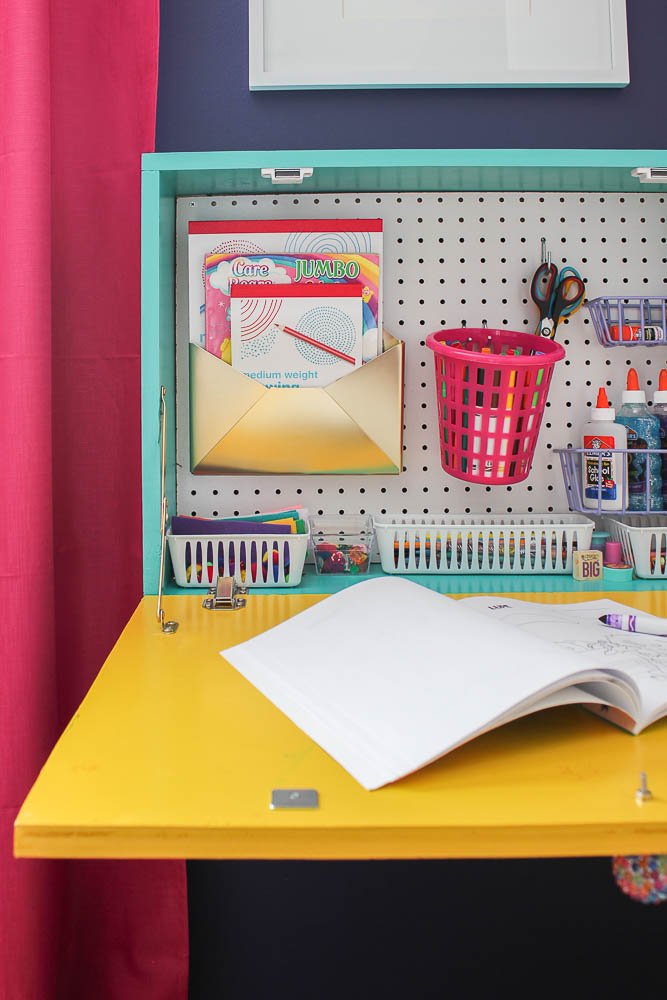
    DIY Wall Mounted Drop Down Desk with Storage - Rain on a Tin Roof

    We also placed a few other Dollar Tree baskets along the bottom to hold colored pencils, crayons and random other art supplies.

    Hands down, this space saving wall desk is the best thing I’ve built for the kid so far!

    Have you made a DIY wall desk before? Need one anywhere? 🙂

    Want more great ideas for your kids?

    DIY Dress Up Closet– so easy to make and they will love it!

    Easiest Ever DIY Lemonade Stand– great for those budding entrepreneurs!

    Easy DIY Children’s Stage with Hidden Dress-Up Clothes Storage– they will love you forever for making this one!

    If you’d like to save this diy desk build to refer back to later, pin the image below!

    Fold Down Wall Desk Plans - Rain on a Tin Roof
  • DIY Chippendale Desk

    DIY Chippendale Desk

    I almost gave up on this idea no less than 10 times.

    I mulled over tons of different options and ideas for how to build this chippendale desk for weeks.

    Nearly every idea I came up with seemed to eventually hold up a bright red STOP sign.

    I would go back to the drawing board. Sometimes, I would even go straight to my computer and start searching for a desk I could buy because I just didn’t think this idea was going to work out.

    But I kept coming back to it. I just couldn’t leave the vision I had in my head of this chippendale beauty behind.

    And then magically, it was like it all came together. It was more than a light-bulb moment.

    Actually, it was just a hell of a lot of back and forth in my head, troubleshooting, mulling over all the different ways it could possibly be done and then making Grunt be my sounding board for all the above.

    But I did it.

    Yes, I.

    I built this little baby all by myself.

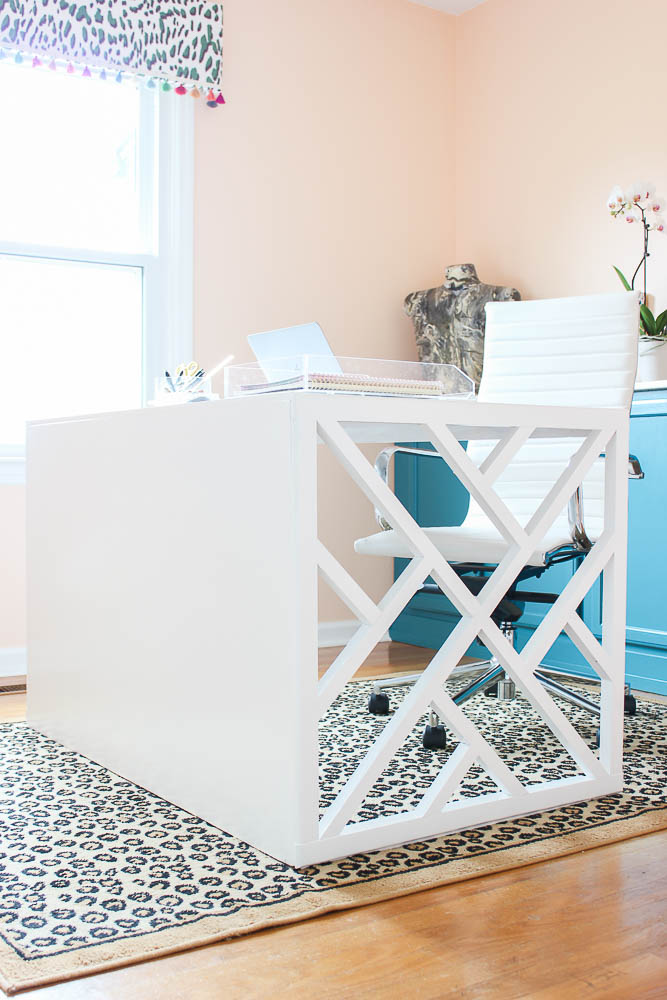
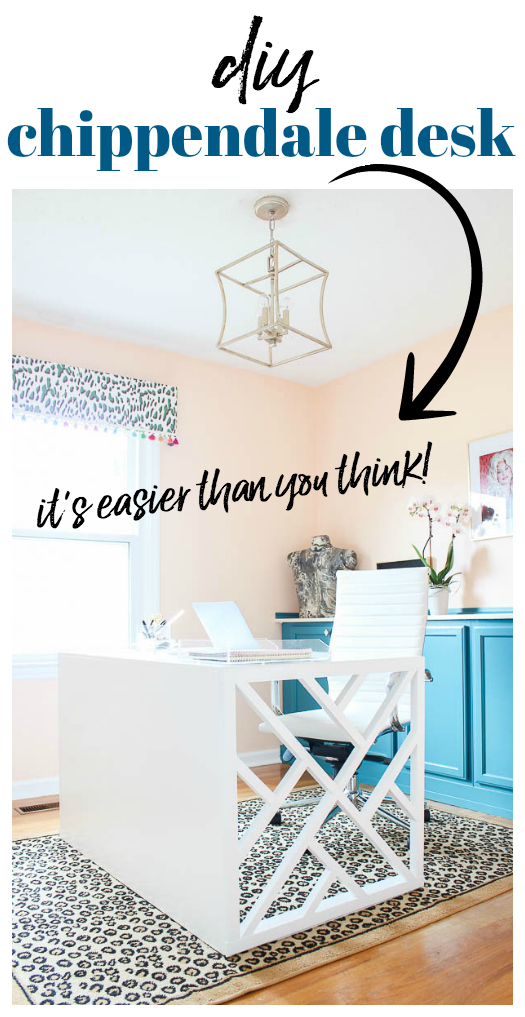
    DIY Chippendale Desk - an easy diy desk plan that has a high end look but costs less than $100 to make.

    At first glance, that might seem like a big deal, but I assure you if I can do this, anyone can.

    And don’t fret – you don’t have to make those chippendale panels yourself…

    DIY Chippendale Desk

    This post contains affiliate links for your shopping convenience. Click here to read my full disclosure policy.

    Supplies & Tools Needed

    Cut List

    • Using your circular saw, cut the sheet of plywood into two pieces:

    • 1 piece should be 29″ x 48″ – this is going to be the front panel of your desk.
    • 1 piece should be 29 7/8″ x 48″ – this is going to be the top of your desk.

    • Using either your circular saw or a miter saw, cut the 1″ x 4″ x 6′ into two pieces that each measure 28 3/4″ long.

    • Using either your circular saw or a miter saw, cut the 1″ x 2″ x 6′ down to 46 5/8″ long.

    If you don’t want to do the cutting yourself, then usually your local hardware store will cut them for you.

    Steps

    Step 1

    First, you’re going to need to reinforce your chippendale panels. When I first pulled my panels out of the wrapping, I quickly noticed that some of the fretwork wasn’t super secure. To keep all the fretwork in place, you want to put wood glue between all the joints.

    How to Make a Chippendale Desk from readymade chippendale panels - an easy desk plan idea.

    Just squeeze a little bit of glue where every joint is, as noted above, then rub your finger over the joint to push the glue into the joint. Once that side of the chippendale panel is dry, flip it over and do the same thing to the other side. It might not seem like this is going to make a huge difference, but it really does. Wood glue is serious stuff.

    Do this with both chippendale panels, front and back. Let the glue fully dry before proceeding to the next step.

    Step 2

    Now, you’re going to be attaching feet to the chippendale panels.

    Lay both chippendale pieces down with the inside facing up. You’ll also need both of your cut 1″ x 4″ pieces (the 28 3/4″ long pieces) now too.

    DIY Chippendale Desk - easy DIY desk build.

    Run wood glue along the inside edge of the chippendale panel that is 28 3/4″ long. Be sure you are gluing on the right edge – the chippendale panels are not perfect squares!.

    DIY Chippendale Desk - easy DIY desk build.

    Place your cut 1″ x 4″ pieces along where you just ran your glue and secure it with a finish nailer or with finish nails using a hammer.

    DIY Chippendale Desk - easy DIY desk build.

    Stand your panels up.

    Easy Desk Idea - build a chippendale desk from readymade chippendale panels.

    Let this dry completely before moving on to the next step.

    Step 3

    Now, you’re going to attach the front solid panel of the desk.

    Stand both chippendale panels up on their feet. Attach corner braces along the sides and foot of each panel as shown below.

    How to Make a Chippendale Desk from readymade chippendale panels - an easy desk plan idea.

    You’ll use single hole corner braces, the 3/4″ inch ones along the chippendale panel and one double hole corner brace, the 1 1/2″ ones, where the foot is.

    Place the 29″ x 48″ piece of 3/4″ plywood in front of the brackets, then attach the brackets to the plywood panel.

    An important thing to note – before attaching the brackets to the plywood panel, make sure the screws aren’t too long and won’t go through the front of the plywood. Some brackets come with longer or shorter screws than others. If your screws are going to be too long for the plywood panel, then just go to the hardware store and buy shorter screws that have about the same size screw head as the ones that came with your brackets.

    How to build a chippendale desk for less than $100.

    Step 4

    Now, you’re going to put on the desk top.

    Start by attaching four single hole braces (3/4″ braces) along the top edge (shown below) of the front panel of plywood you just attached.

    DIY Chippendale Desk

    Attach two more single hole braces (3/4″ braces) to each chippendale side panel along the top, as shown below.

    DIY Chippendale Desk

    Lay your 29 7/8″ x 48″ piece of plywood on top of the front panel of plywood and the side chippendale panels making sure everything is even and squared up how you want it, then just like you did with the front plywood panel, attach the top plywood panel to the corner braces you just installed.

    Easy Desk Ideas: How to build a chippendale desk from readymade chippendale panels.

    Step 5

    Now, for a little added support in the back of the desk, you are going to attach your cut 1″ x 2″ wood piece that you cut down to 46 5/8″ long just along the inside top at the back of your desk.

    DIY Desk Idea - Make a chippendale style desk easily.

    Place it so that it meets up with that inside frame of the chippendale panel.

    Easy DIY Chippendale Desk

    Attach the 1″ x 2″ to the desk using the 1 1/2″ double hole corner braces on each side as shown in the image above.

    Step 6

    Caulk any gaps in the desk to give it a nice clean finished look. I caulked all along the places where the plywood met the chippendale panels.

    Step 7

    Prime and paint the desk.

    I opted to prime my desk before painting it so the raw wood wouldn’t soak up too much of the paint. I was very glad I did because it allowed me to only need one coat of the oil-based paint, which we all know isn’t great fun to work with.

    DIY Chippendale desk - priming.

    That was after the primer coat.

    And the finished DIY Chippendale Desk….

    How to Build a Desk: Easy DIY Chippendale Desk Plan

    Desk Chair / Leopard Print Rug (similar) 

    Isn’t she a beaut? It is the perfect size for my smaller office with the perfect touch of interest.

    Easy DIY Desk Plan - How to Build a Chippendale Desk

    So – do you think you’ll give this easy desk plan a whirl?

    You might also want to see…

    How I DIYed those Built In Cabinets:

    DIY Built In Office Cabinets

    The Full Office Makeover:

    Home Office Makeover with Budget-Friendly DIY Projects: An Office Makeover on a Budget with lots of Office DIY Decor

    Budget-Friendly DIY Office Makeover

    Really great list of 12 Stylish and Comfortable Office Chairs - most are very affordable as well! Great desk chairs!

    12 Stylish and Comfortable Office Chairs

    If you want to come back to this project later, just pin the image below!

    DIY Chippendale Desk - an easy diy desk idea that looks high-end but is less than $100.

  • How to Build a Desk (Using Furniture You Already Have)

    How to Build a Desk (Using Furniture You Already Have)

    When I walked through the back door, I knew he would either be in his recliner or at the kitchen table.

    If he was in his recliner, there was a 50 / 50 chance he had fallen asleep with a cigarette in hand and either Bonanza or In the Heat of the Night blaring from the television.

    If he was expecting me and it was morning, he would most likely be at the kitchen table, facing me when I walked through the door, flipping through a magazine he had pulled from the stack that was a foot tall and rising.

    This kitchen table was more than a table to me.

    I sat on this table and ate my first birthday cake and drank milk from a mustard bottle.

    I sat at this table and watched my grannie make me milkshakes.

    I sat at this table and watched my pap try to make those same milkshakes after Grannie died.

    I sat at this table and said my first curse word as I stuck a fork into a potato.

    I sat at this table as he told me he would work on the tractor and I would mow the grass. I may hurt myself on the tractor.

    I sat at this table with every cookbook of my grannie’s open, looking for that one chicken spaghetti recipe that my pap wanted so much to make.

    I sit at this table now and write this post.

    This table has been around as long as I can remember. Its solid, its sturdy, and if there is one piece of furniture that I want to work at every day, its this one. Its got a good history.

    And we all know a piece of furniture with a good history is the best.

    How to Build a Desk (Using Furniture You Already Have) via RainonaTinRoof.com #desk #diy #furnituremakeover

    How to Build a Desk Using a Kitchen Table

    This post contains affiliate links for your shopping convenience. Click here to read my full disclosure policy.

    This table actually has two leaves that go with it. They fold down, but when they are folded down, they block your knees and its uncomfortable. Because of this, I just unscrewed them from the table.

    How to Build a Desk (Using Furniture You Already Have) via RainonaTinRoof.com #desk #diy #furnituremakeoverThe top part, the hutch, actually came with that dresser I paid $10 for at a yard sale and turned into my buffet. I didn’t really need the hutch on the buffet, so I just took it off, but knew I would end up having the perfect project for it one day.

    How to Build a Desk (Using Furniture You Already Have) via RainonaTinRoof.com #desk #diy #furnituremakeoverOnce the table was in place, we set the hutch on top of it, then Grunt Labor found a stud and secured the hutch to the wall with a screw.

    How to Build a Desk (Using Furniture You Already Have) via RainonaTinRoof.com #desk #diy #furnituremakeoverI painted it all glossy black to match the moldings and other black accents in the guest bedroom. Then, I “dipped” the feet with gold spray paint.

    How to Build a Desk (Using Furniture You Already Have) via RainonaTinRoof.com #desk #diy #furnituremakeover

    I kept my Jonathan Adler inspired chair in the room as my office chair.

    How to Build a Desk (Using Furniture You Already Have) via RainonaTinRoof.com #desk #diy #furnituremakeoverAnd added a fun pillow to keep me workin’ hard.

    How to Build a Desk (Using Furniture You Already Have) via RainonaTinRoof.com #desk #diy #furnituremakeoverAnd I love it. I seriously love working in this space every single day. I smile every time I look at my new office space.

    Its functional, its stylish, it was affordable, and most importantly, it has a history.

    My history.

    Loved this one? Be sure to see these projects too then…

    DIY Chippendale Desk – a gorgeous, easy to build desk with beautiful chippendale panels on the ends.

    DIY Kitchen Island – made using old porch posts and barn wood!

    DIY Ottoman Coffee Table – turn a coffee table into an ottoman or bench!

    A Dress-Up Station Made from a Bookshelf – perfect for kiddos and an easy project!

    How to Build a Desk (Using Furniture You Already Have) via RainonaTinRoof.com #desk #diy #furnituremakeover

    You know you don’t wanna miss any of this crazy.

    Sign up to get my posts delivered to your inbox here. 

    Stalk Me Here:

    Pinterest / Facebook / Twitter / Instagram

  • Black and Gold French Desk Makeover

    Black and Gold French Desk Makeover

    Remember that fabulous french country chair that got a simple makeover last month?

    This desk was its mate.

    Black and Gold French Desk Makeover {rainonatinroof.com} #makeover #homeright #french

    Disclosure: This is a sponsored post by HomeRight. But, y’all know how I roll, all opinions are 100% mine. This post contains affiliate links for your shopping convenience. Click here to read my full disclosure policy.

    Yep, I’m fully aware they do not match one another.
    From the time I got both pieces, I knew they wouldn’t stay together. No matter how badly I wanted to keep both. I kept the chair and planned on selling the desk.

    If you remember, both pieces had came from a yard sale. A dear friend found them for me. Here’s how this French desk makeover started out:

    Black and Gold French Desk Makeover {rainonatinroof.com} #makeover #homeright #french

    Black and Gold French Desk Makeover {rainonatinroof.com} #makeover #homeright #frenchThe desk was solid. It was just covered in some sort of sticky substance and a gross amount of cat hair.

    Eww.

    The inlay on top was pretty gross. There was no way that design would be staying.

    First, I gave the entire piece a coat of primer with my HomeRight FinishMax.

    Black and Gold French Desk Makeover {rainonatinroof.com} #makeover #homeright #frenchYes, I just referenced Carrie Bradshaw in that photo. If you know who/what she said it to, you are fabulous.

    Next, I pulled out the gold spray paint to define the top edge of the desk and add some interest. I just went right over the top edges with the spray paint. Once it was dry, I took plastic wrap and painters tape and wrapped up the top.Black and Gold French Desk Makeover {rainonatinroof.com} #makeover #homeright #frenchWhen the top was good and covered with plastic wrap, I loaded my FinishMax back up with black paint and went over the desk base and all the drawers. Then, I pulled off the plastic wrap and hand brushed and rolled the inlay black for some added contrast against the gold. Finally, the whole thing got a coat of polycrylic.

    A few readers have asked about how difficult it is to clean up the FinishMax sprayer. Trust me, I understand your concerns. If you remember from my toy chest makeover, I told you I had tried out two other sprayers that I detested before I found my FinishMax. Part of the detested-ness was the clean-up. Fortunately, this sprayer takes less than 10 minutes to clean up and is super easy. So easy, I made you a little graphic to show you how.

    Black and Gold French Desk Makeover {rainonatinroof.com} #makeover #homeright #frenchGo here to get the simple instructions and photos for cleaning the Finish Max.

    And now for the final reveal of the desk:

    Black and Gold French Desk Makeover {rainonatinroof.com} #makeover #homeright #french

    Black and Gold French Desk Makeover {rainonatinroof.com} #makeover #homeright #french

    Black and Gold French Desk Makeover {rainonatinroof.com} #makeover #homeright #french

    Black and Gold French Desk Makeover {rainonatinroof.com} #makeover #homeright #frenchThe classic contrast of the black and gold turned out better than I ever could have expected. The finish was professional and perfect, thanks to the FinishMax.

    Liked this one? You might want to check these out too…

    DIY Chippendale Desk  – a gorgeous DIY desk that isn’t that hard at all to build!

    How I Built a Desk from an Old Kitchen Table – it might be narrow, but it packs the storage!

    And you can see all my Furniture Makeovers Here.

    Sign up to get my posts delivered to your inbox here. 

    You know you don’t wanna miss any of this crazy.

    Stalk Me Here:

    Pinterest / Facebook / Twitter / Instagram

    SaveSave