
Looking for kids lemonade stand ideas for your little one? I’m willing to bet this is THE most simple to build DIY lemonade stand you’ll find! It’s also pretty darn cute! See below for how to build a lemonade stand your kiddo will love and use for years to come!
Sometimes life doesn’t hand you lemons.
Sometimes it hands you an adorable little girl with blonde curls full of personality who also tends to lean on the “hustler” side.
She comes by it honestly though, bless her heart.
And even when life doesn’t hand her lemons, she still likes to make lemonade – pink lemonade.
Exactly 12 hours before a yard sale we had in the spring, the little girl with blonde curls asked for a lemonade stand to sell lemonade at during the yard sale.
There was simply zero time to throw all that together in under 12 hours though and there wasn’t a lick of anything to make lemonade with in the house.
With a sad face, she settled for my promise to make her a lemonade stand for the next yard sale.
I didn’t let her down.
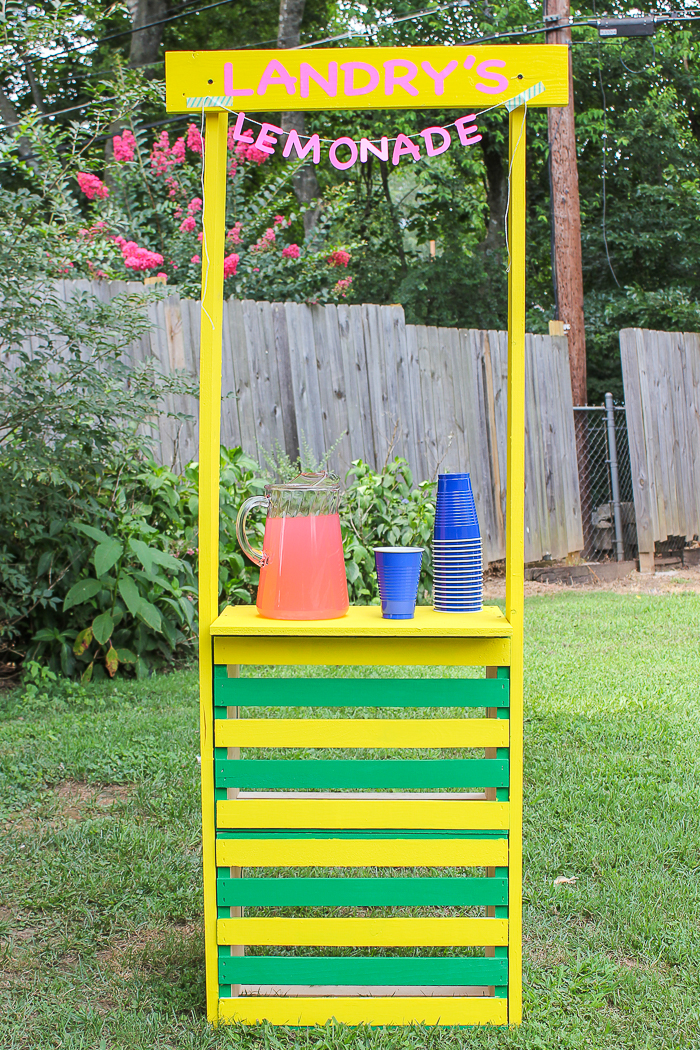
This was such a simple simple simple build, y’all. Honestly, it’s hardly a building project at all, you’re just putting a few pieces of wood together!
This post is sponsored by Velvet Finishes, however all opinions are 100% my own. This post contains affiliate links for your shopping convenience. Click here to read my full disclosure policy.
How to Make a Lemonade Stand
Tools & Supplies Needed:
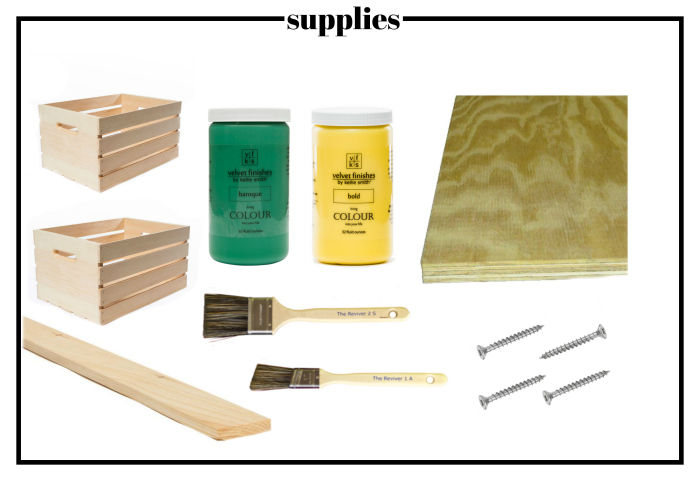
- Two Large Wood Crates
- 1″ x 4″ x 12′
- 1/2″ or 3/4″ thick plywood project panel (We used 1/2″.)
- Velvet Finishes Bold
- Velvet Finishes Baroque
- Good Paintbrushes
- Wood Screws
- Drill
- Circular Saw
Steps
Step 1.
Cut your wood to size.
The 1″ x 4″ x 12′ should be cut into three different pieces in the following sizes:
- 5 feet long
- 5 feet long
- 2 feet long
After you cut both your five feet long pieces, you should have your 2 feet piece. You can cut these pieces using a circular saw, miter saw or a chop saw. You can also have your local hardware store cut these pieces to size for you before you leave the store.
The plywood panel should be cut down to 11 5/8″ x 18″. You can cut this with a circular saw or table saw. You can also have your local hardware store cut it as noted above.
The crates will stay as is. The video below provides a visual of the cuts as well.
Step 2.
Time to paint!
You’re going to paint all the 1″ x 4″ pieces and the plywood panel in Velvet Finishes Bold. You’ll paint the sides of the crates in Velvet Finishes Baroque and alternate between that color and Bold on the slats. We used Reviver paint brushes for the painting. They are really great quality that minimize brush strokes and don’t lose their bristles on your pieces.
The video below will walk you through the cuts we noted above, the painting of the pieces and putting it all together. It also stars a pretty cute kid. 😉
[adthrive-in-post-video-player video-id=”GbGcoL9N” upload-date=”Thu Aug 03 2017 18:39:34 GMT+0000 (Coordinated Universal Time)” name=”Easy Diy Lemonade Stand” description=”Use this tutorial for an easy DIY lemonade stand to keep your kids entertained and making their own money!”]
Velvet Finishes paint doesn’t require a piece to be primed beforehand and it already has a topcoat built-in, so no need to worry with that. I had mentioned in the video that I might put on an additional topcoat on the counter, but in the end I didn’t worry with it and it weathered the first lemonade sale just fine.
Helpful Tips & Hints:
- It took two coats of Velvet Finishes Baroque and about 3-4 coats of the Velvet Finishes Bold. Yellows tend to take more time to get the color even, especially on raw wood, so give yourself a little extra time there. This paint dries really fast though, so it doesn’t take too terribly long to get the paint on.
- If you want to save on space after your kiddos have their lemonade sale, you can easily just unscrew everything and store it away. When you’re ready to use the stand again, just screw it back together using the holes you already made.
- I made the “Landry’s Lemonade” with my Silhouette. After cutting it out, I mod-podged on the “Landry’s,” then hot-glued the “Lemonade” to string and taped it up.

The lemonade stand was a big hit – the kid made $70!

She would ask nearly every person that walked up if they would like lemonade or a treat. And really, who could tell her no?!
Here’s to life not always handing you lemons so you can make your own pink lemonade and little hustlers in the making!
Share your cute lemonade stand ideas in the comments!
Want more great DIY ideas for your kiddos?
DIY Children’s Stage with Hidden Dress-Up Storage – this one provides loads and loads of entertainment!
DIY Dress-Up Closet from a Bookcase – great and easy way to store all those dress-up clothes!
How to Create an Object and Feature Wall for Your Little One – the perfect accent wall for a kid’s bedroom!
How to Build Wall to Wall Shelving Easily – we have these in my daughter’s playroom and they are a lifesaver when it comes to toy storage!
Want to save this post to look at later? Just pin the image below!



Leave a Reply