Tag: 70’s Landing Pad

  • Black, White and Brass Kitchen Remodel

    Black, White and Brass Kitchen Remodel

    Affiliate links included in this post. 

    I need to be clear on something.

    This remodel of The 70’s Landing Pad has not been a one man band. It has not been a two or a three or a four man band either. It’s more like a fix or six man band, made up of random friends and family pitching in to help out as needed, fueled by cheap beer and 80’s country music.

    This kitchen remodel showcases the specialities of each band member.

    Does any of that even make sense?  #FlyYourFreakFlag

    Maybe it will help to just start showing you pictures. When we first got this house, this is how the kitchen looked:

    The Kitchen Before

    The Kitchen Before

    Opposite that wall of cabinets was this:

    The Kitchen Before

    And opposite the pantry door was this:

    The Kitchen Before

    The kitchen was a really good size to start with, so we didn’t need more room, however the awful wallpaper, awkward vanity lights above the cabinets (WTF?), stained vinyl flooring, grimy cabinet hardware and much more needed to get the boot.

    Love a high-end kitchen, but have a low budget? Look at this black, white and brass kitchen remodel for ideas on how to get that kitchen of your dreams.

    We kept the original cabinets, with the exception of taking out the ones above the stove and sink, and I painted them black. These cabinets really aren’t in the best condition, but it just wasn’t in the budget for new cabinets. I’m hoping in a few years, we can maybe have new doors for the cabinets made.

    Love a high-end kitchen, but have a low budget? Look at this black, white and brass kitchen remodel for ideas on how to get that kitchen of your dreams.

    I switched out the knobs and hinges on all the doors and drawers. I tried quite a few different styles of knobs and pulls, but in the end I was surprised that these simple round concave brass knobs which are less than $1 per knob were perfect.

    Love a high-end kitchen, but have a low budget? Look at this black, white and brass kitchen remodel for ideas on how to get that kitchen of your dreams.

    Cabinet Knobs / Footed Brass Bucket (similar ones) / Leather Ice Bucket (similar ones)

    With all the brass and black, the kitchen had a more glam feel, which our previous kitchen did not. Our old canisters and counter decor just didn’t mesh with this kitchen as well as they did our last. I decided to think outside the box for counter storage (and also within our small budget) and raided my vintage ice bucket collection to find one to act as a canister for sweets and another to act as a cooking utensil holder. I pulled out a $1 office decor find from an antique store to be a recipe holder and the brass lion bucket was only $3 at an estate sale. It holds two smaller cookbooks that I use a good bit.

    Love a high-end kitchen, but have a low budget? Look at this black, white and brass kitchen remodel for ideas on how to get that kitchen of your dreams.

    Lemon Hand Towel (similar one) / Pantry Doorknob

    There wasn’t any guesswork when it came to the flooring, we knew we would carry the same flooring we used in the adjoining living and dining room into the kitchen as well. However, the white walls were a different story and probably caused me the most stress in this space. When I first started on the design plan for the kitchen, I decided on black cabinets and white walls. However, that combination became very stark against one another when it was all in place. And on one side of the kitchen, I had a lot more black with the cabinets than I did on the other side of the kitchen, which had no cabinets. I tested out no less than 15 paint colors to go on the wall from greens to grays to creams and more and none of them worked. Both Grunt and my friend Brittany were adamant that white was the color it should stay and I should have just listened to them from the beginning and saved myself the stress. Grunt was also the one who made the suggestion of putting up black crown molding to balance out all the black and was he ever right on that. When he told Mom and Dad about his idea, they offered to pay for the crown moulding (Thank you!), so we got that sooner than expected and it was a total game changer. It pulled everything together perfectly.

    Love a high-end kitchen, but have a low budget? Look at this black, white and brass kitchen remodel for ideas on how to get that kitchen of your dreams.

    Cane Runner / Lemon Hand Towel (similar one)

    The island was an addition as well and also one that I doubted in the beginning. I wanted an island in here, but I was very much overthinking it. The island is actually a cabinet that was in the school that Grunt Labor and I first met and worked together at. They tore down the building and we snagged that piece before they did so. He said from the beginning that it would make a great island, but I wasn’t sure. Then, Nicky’s dad, Wayne, came over and we were discussing building an island and he looked at that cabinet and said it would be the perfect island. At that point, I knew I was wrong and they were both right. Wayne took the cabinet home with him and modified it into an island for me.

    Love a high-end kitchen, but have a low budget? Look at this black, white and brass kitchen remodel for ideas on how to get that kitchen of your dreams.

    Barstools (similar ones) 

    The barstools were a vintage find at a resale store. There are similar ones here.

    Love a high-end kitchen, but have a low budget? Look at this black, white and brass kitchen remodel for ideas on how to get that kitchen of your dreams.

    The one thing I never swayed on in this space was the black subway tile backsplash in a herringbone pattern. It might actually be my most favorite part of this space. Grunt and Nicky usually do all our tile work, but they both refused to do this backsplash because I wanted the herringbone pattern. It is much more tedious and time consuming. I ended up going through Home Depot, using their in-home installation services for the backsplash. While it was more expensive than doing the tile ourselves, I knew the herringbone pattern would be a showstopper and well worth it. They did an impeccable job.

    Love a high-end kitchen, but have a low budget? Look at this black, white and brass kitchen remodel for ideas on how to get that kitchen of your dreams.

    Black Subway Tile / Brass Faucet

    The faucet is the same one we had in our old kitchen. My in-laws wanted something in brushed nickel at our old house, so I happily switched out the faucet for them and brought this one to the new kitchen for us.

    Love a high-end kitchen, but have a low budget? Look at this black, white and brass kitchen remodel for ideas on how to get that kitchen of your dreams.

    Cane Runner / Lemon Hand Towel (similar one)

    You might have noticed in the before photos, there was a stovetop on end of the kitchen and a wall oven on the other end of the kitchen. The old stovetop didn’t work correctly, so rather than replacing it with just another stovetop only, we opted to replace it with a double oven.

    Love a high-end kitchen, but have a low budget? Look at this black, white and brass kitchen remodel for ideas on how to get that kitchen of your dreams.

    Range Hood / Stirring The Pot Towel / Magnetic Knife Holder / Brass Ice Bucket (similar)

    We do a good bit of entertaining and hosting family holiday dinners at our place, so having three ovens makes those things so much easier. We also took out the cabinet above the stove and put in a more effective and prettier range hood as well.

    As I said earlier, I used a vintage ice bucket for a cooking utensils holder. We went with this magnetic knife holder to clear up more counter space and attached it with velcro to keep from having to drill into the tile. I have two of those runners, one on each side of the island, to add more color and pattern to the space. The hand towels also add a much needed dose of color.

    The open shelving to the left of the stove was also something that Wayne and Ron, another family friend, built for us – we are so lucky to have them!

    Love a high-end kitchen, but have a low budget? Look at this black, white and brass kitchen remodel for ideas on how to get that kitchen of your dreams.

    Brass Fruit Bowl (similar) / Barefoot Contessa Cookbooks / Acrylic Wine Rack

    That space used to be where a tiny cabinet and trash compactor were, both practically useless. We took those out and they built me this wonderful open shelving. It’s another favorite thing of mine in this space. This is also where I keep favorite cookbooks, our fruit bowl, wine rack and a few other knick-knacks.

    Love a high-end kitchen, but have a low budget? Look at this black, white and brass kitchen remodel for ideas on how to get that kitchen of your dreams.

    Lemon Hand Towel (similar one) / Brass Fruit Bowl (similar) / Acrylic Wine Rack

    The countertops are Quartz in Brown Fantasy. My friend Kellie gets a huge thank you for dealing with me when it comes to the countertops. I had no clue what to go with or what I even wanted and she held my hand the whole way with it. I never would have looked twice at that stone if it hadn’t been for her and I absolutely love it in here, as does Grunt.

    Love a high-end kitchen, but have a low budget? Look at this black, white and brass kitchen remodel for ideas on how to get that kitchen of your dreams.

    I removed the tall, skinny cabinets that were opposite the range and replaced them with the buffet that was in the living room at our old house.

    Love a high-end kitchen, but have a low budget? Look at this black, white and brass kitchen remodel for ideas on how to get that kitchen of your dreams.

    We also added a black chair rail and decorative wall molding here to bring more of the black over to this wall.

    Love a high-end kitchen, but have a low budget? Look at this black, white and brass kitchen remodel for ideas on how to get that kitchen of your dreams.

    Marble Slab / Brass Bamboo Tray (similar ones) / Profanties Coffee Mug

    I put my coffee station here as well as a couple of plants and other knick-knacks.

    Love a high-end kitchen, but have a low budget? Look at this black, white and brass kitchen remodel for ideas on how to get that kitchen of your dreams.

    DIY Lucite Frame + Free Gone With the Wind Printable

    And my daily answer to anything before the hour of 7am. 😉

    Finally, where the built-in corner cabinetry and desk once was is now our breakfast nook.

    Love a high-end kitchen, but have a low budget? Look at this black, white and brass kitchen remodel for ideas on how to get that kitchen of your dreams.

    Pendant Light

    Complete with Loretta, Conway, Johnny and June.

    Of course. 

    This banquette is all thanks to Grunt and Nicky.

    Love a high-end kitchen, but have a low budget? Look at this black, white and brass kitchen remodel for ideas on how to get that kitchen of your dreams.

    Palm Print Pillow / Tiger Stripe Pillow / Malachite Pillow

    You see, I had this wild idea that I could actually build it all by myself.

    I was full of shit. 

    They both swooped in, calmed me down and helped me finish it. That’s a whole other story which you can read about here. I also added more color to the kitchen here with the pillows, which was a whole other stressful ballgame that I can’t even think about right now.

    So in conclusion, thank you to all the band members who made this kitchen possible: Grunt, Nicky, Brittany, Wayne, Ron, Kellie, Mom and Dad.

    There will never be enough cheap beer in the world to pay you back. We are blessed to have you.

    Lord, I hope I didn’t leave anyone out. It takes a lot of people to deal with this crazy train.

    Shop the Kitchen:

    [show_shopthepost_widget id=”2489923″]

    You might also want to see…

    DIY Kitchen Banquette

    Types of Paint To Use on Cabinets - list of paints that are good for painting kitchen or bathroom cabinets.

    Types of Paint to Use on Cabinets 

    The 70's Landing Pad Living Room

    The 70’s Landing Pad Home Tour

    Love a high-end kitchen, but have a low budget? Look at this black, white and brass kitchen remodel for ideas on how to get that kitchen of your dreams.

    Disclosure: D. Lawless Hardware provided the cabinetry hardware for this remodel and Rug Studio provided the runners, however all opinions are 100% my own. 

    *Affiliate links may be contained in this post. That just means that if you click on one of those links and buy something, I may receive a small commission, but you won’t pay a dime more.


  • The 70’s Landing Pad: One Year Later

    The 70’s Landing Pad: One Year Later

    What a year.

    A year ago, we took possession of the 70’s Landing Pad. We haven’t stopped working on it since. #tired

    In May of this year, we finally moved into it, but of course there were still lots of things to do.

    And there are still lots of things to do. 

    While I am really ready to be done with all the big projects, I have to keep telling myself that Rome wasn’t built in a day and neither is our house. It does help though when I look at how far we have come…

    *This post contains affiliate links.

    Exterior Entry

    Think split-levels are too dated? Think again! This split-level renovation will show you just how great a split-level home can look! Full of DIY Projects!

    Full Entry Makeover /Lion (similar) / Rug (similar) / Garden Stool

    With the exception of Grunt Labor pulling out nearly every shrub in the front of the house, the only other changes to the exterior have been the front door entryway. I painted it to try and get a better idea of what would look good with that brick color. Y’all know I love me some green, but this shade of green that the previous owners painted every single door, shutter and trim on the house is just not jiving with me or the brick. Not sure what direction we’ll go for all that, but at least we do know that black works well with it for now. We also still need to replace the old zero-energy-efficient windows as well. You can see more of the exterior entry makeover here.

    Interior Entry

    Think split-levels are too dated? Think again! This split-level renovation will show you just how great a split-level home can look! Full of DIY Projects!

    Full Entryway Makeover / Chandelier (similar ones) / Eyes Art / Wall Color / Painting the Metal Handrail / Rug / Flooring / DIY Lucite Handrail

    The entryway is a true testament to the power of paint. We did switch out the flooring and light fixture, but painting the walls and metal hand railing made a huge difference. I do want to replace the metal hand railing at some point, but since it’s just a cosmetic issue at this point and a not a huge one at that, it’s getting pushed to the back burner. You can see more of the entryway makeover here.

    Living Room

    Think split-levels are too dated? Think again! This split-level renovation will show you just how great a split-level home can look! Full of DIY Projects!

    More of the Living Room Here / Wall Color / Palm Print Pillow / Leopard Print Pillow / Coffee Table (similar) / Brass Floor Lamp / Lion Print / Ghost Chair / Green Velvet Pillow

    The living room is one of my favorite rooms in the house. Since these photos were taken, I have actually added these red velvet curtains to the windows in here, I just haven’t had time to take new photos. I can’t wait for y’all to see how gorgeous they are in the room though. I’m planning to replace the ghost chairs with more formal, comfortable chairs and after waiting forever to find the perfect ones, I think I finally have. They are these in green velvet. However, they aren’t the cheapest chairs on the block, so it will probably be a little while before I can get my hands on them. You can see more of the living room in this summer home tour post.

    Dining Room

    Think split-levels are too dated? Think again! This split-level renovation will show you just how great a split-level home can look! Full of DIY Projects!

    More of the Dining Room Here / Rug / Cantilever Dining Chairs (similar) / Glass Table / Wall Art

    The dining room also got the same cherry red velvet curtains as the living room. I still need to reupholster the dining chairs. I do love the blue shade of them in that space, so I’m sure I’ll go with something similar. You can’t tell in these photos, but the upholstery isn’t in the best shape on them. I’ve also got some plans for some affordable, but high impact wall decor opposite the oversized art to balance that out. You can see more of the dining room in this summer home tour post.

    The Jungle Room

    Think split-levels are too dated? Think again! This split-level renovation will show you just how great a split-level home can look! Full of DIY Projects!

    More of The Jungle Room Here / Rug / Sofa / Malachite Table / Fur Throw / Palm Blvd Art Print

    Ahhh, The Jungle Room. This space is also a favorite. The man of questionable honor visited a few weeks back and upon entering this room he said it reminded him of Elvis’ Jungle Room. #goalachieved 

    Really, there isn’t much left to do in here. I need to paint those side tables red, but that’s about it. I wouldn’t mind layering on a cowhide or maybe a fur rug on top of the zebra print rug, but it’s not needed or anything. You can tour more of the Jungle Room here.

    Hall Bathroom

    Think split-levels are too dated? Think again! This split-level renovation will show you just how great a split-level home can look! Full of DIY Projects!

    More of the Hall Bathroom Here / Shower Curtain / Floor Tile / Wall Color / Vanity Color  / Bonkers Wall Art / Brass Rocking Horse (similar ones)

    The hall bathroom turned into a hot mess when it came to the renovation. In the end though, it turned out really great. I think it has the perfect amount of “fun” for the Circus and “pretty” for guests. Besides upgrading the fan in there, there’s nothing else to do here! See more of the hall bathroom here.

    The Circus’ Room

    Think split-levels are too dated? Think again! This split-level renovation will show you just how great a split-level home can look! Full of DIY Projects!

    More of the Circus’ Room Here / Wall Color / Bedding / Rug / Text & Object Feature Wall / Custom Silhouette Art / Tassel Pillow / Horse Sheets (similar) / Mirror (similar) / Faux Rhino Taxidermy (similar) / Faux Dog Taxidermy / Faux Horse Taxidermy (similar) / DIY Sunglasses Holder / DIY Headband Holder / Yellow Bookshelf

    I am in love with the Circus’ room. I truly hope she loves it just as much as I do. It turned into the perfect reflection of her little self’s big personality. I have added these bright raspberry curtains to her window, which were the perfect pop of color to the space. I still want to build her a stand for a horse saddle we have so that she can “wrangle” up the cows. See more of the Circus’ room in this home tour post. 

    Master Bedroom

    Think split-levels are too dated? Think again! This split-level renovation will show you just how great a split-level home can look! Full of DIY Projects!

    More of the Master Bedroom Here / Chandelier / Green Curtains / Palm Print Art / Bedding / Palm Print Pillow / Leopard Print Pillow / DIY Scalloped HeadboardThink split-levels are too dated? Think again! This split-level renovation will show you just how great a split-level home can look! Full of DIY Projects!

    More of the Master Bedroom Here / Mirror (I painted mine.) / Pink Lamp (similar) / Banana Leaves Art / Design Sponge Book Think split-levels are too dated? Think again! This split-level renovation will show you just how great a split-level home can look! Full of DIY Projects!

    More of the Master Bedroom Here / Accent Chair / Leopard Print Pillow / Bamboo Lamp (similar) / Closet Medallions / Carpet Covered Wall

    The master bedroom was actually the very first room completed. I still love our vintage, Hollywood, Palm Beach vibe we have going on in here. And yes, I still love the carpet covered wall too. It’s not everyone’s cup of tea, but it’s my shot of whiskey. There is a sitting area connected to the bedroom that we have yet to tackle. See more of the master bedroom here.

    Master Bathroom

    Think split-levels are too dated? Think again! This split-level renovation will show you just how great a split-level home can look! Full of DIY Projects!

    More of the Master Bathroom Here / Bathtub / Art Print / Brass Tub Faucet / Wall Color / Tile / Champagne Bronze Shower Faucet / Faucet

    The master bathroom turned out exactly how we wanted it too. In our previous house, Grunt Labor and I didn’t even share a bathroom because the master bath was just too small for both of us. I used the hall one and he had the master one. For that reason, the hall bath had pretty much been decorated however I wanted it – it wasn’t too masculine. In this bathroom, I tried really hard to blend both masculine and feminine together. And of course brass, always gotta have brass. 😉 See more of the master bathroom here.

    And yes, I have yet to show you any photos of what the kitchen is looking like now. There are just a few little things to be done in there, but I’m hoping I’ll have some pictures of that space for you by my Christmas home tours. The creepy 1/2 bath you saw in the initial tour of the house is actually finished too, I just have to find some time to get the photos taken of it as well. Bill’s room and bathroom is also inhabitable and he’s done his own thing down there in terms of decorating. Same thing, I just need to find time to get some pictures taken. Every time I think I’m getting ahead, something knocks me back on my ass and I’m behind again. #storyofmylife

    Long story short, please keep sending beer. We haven’t even started to tackle that filled-in pool, oh, I mean walking track, in the backyard. 😉

    What do you think of how far we’ve come?

    blog-signature-summer-15

    pin-this-post-2

    Think split-levels are too dated? Think again! This split-level renovation will show you just how great a split-level home can look! Full of DIY Projects!

    SaveSave

  • The Entryway Makeover

    The Entryway Makeover

    Once upon a time, I had an aversion to split foyer homes. They didn’t make sense to me. I hated the layout and overall, I just wasn’t a fan. I refused to ever live in one.

    Then one day we walked into a split foyer house and I kind of fell in love with all the potential.

    Fast forward eight months and a renovation later, here I sit typing this post in my split foyer home eating my words.

    I love our 70’s Landing Pad in all it’s split foyer glory, y’all. No, there isn’t a lot of room on the landing for a nice entry table or even for more than two people to stand, but overall this house is just damn near perfect for us – split foyer and all.

    So let’s take a look at how far our split foyer entryway has come….

    BEFORE:

    The Entryway BEFORE

    Just like the master bathroom, this is a hard space to photograph since it’s a split staircase, but here’s my best shot at it.

    The Entryway AFTER:

    Affiliate links may be contained in this post.

    If you love black walls and dramatic interior design, you have to see this entryway makeover! It's full of deep moody colors and breathtaking art! Dramatic Entryway Makeover | Black Walls | All White Door | Soul Seeing Art via Minted

    Wall Color / Door & Trim Color / Chandelier / Eyes Art

    Well that’s a dramatic difference, huh?

    Let’s talk about the (good) elephant in the room first, shall we? Those eyes…

    If you love black walls and dramatic interior design, you have to see this entryway makeover! It's full of deep moody colors and breathtaking art! Dramatic Entryway Makeover | Soul Seeking Art via Minted | Vintage Chandelier | Black Walls

    Eyes Art / Chandelier

    The floor space of the entryway itself doesn’t have much room for decorating, therefore I had to use my wall space on the stairwell efficiently. I knew I wanted to set the tone here for our whole house. As soon as I found this eyes watercolor artwork called Soul Seeing by Kelsey McNatt on Minted, I knew it was perfect. To me, it screamed The 70’s. And since we are calling this place the 70’s Landing Pad and also giving quite the nod to 70’s design, it was the perfect choice. I went for it in a copper frame to really pop off the wall.

    The chandelier was a vintage find from a local store. I actually bought it just a couple weeks after we first got the house knowing it would be perfect somewhere. You can find the same one on Etsy here, but you can also do a search for lucite chandeliers and find lots of gorgeous options.

    I have to pause here and give a huge thanks to my two husbands, Grunt Labor and Nicky, for hanging the chandy. I didn’t exactly pay attention to the hardware, or lack thereof, that came with the chandelier because I was just so damn excited about finding it, so it was somewhat of a challenge to get it hung. They have made me promise not to buy another vintage light fixture again. We’ll see how that goes.

    If you love black walls and dramatic interior design, you have to see this entryway makeover! It's full of deep moody colors and breathtaking art! Dramatic Entryway Makeover | Black Walls | All White Door | Dramatic Red Rug

     Rug

    I carried the black walls, Limousine Leather by Behr, from the living room throughout the entry and painted the trim and door white. The white is Bit of Sugar by Behr and it is a true 100% white – or to me at least. It isn’t cottage-y or beige-y, it’s bright white, which is what I wanted for this space.  At some point, I would love to update the door and sidelights, but they aren’t horrendous or anything, so it isn’t at the top of the list.

    I’ve also got plans to get rid of that metal railing when the budget permits and replace it with something much better. For now though, I just painted it black to make it blend in more and not takeaway from the entry.

    If you love black walls and dramatic interior design, you have to see this entryway makeover! It's full of deep moody colors and breathtaking art! Dramatic Entryway Makeover | Black Walls | Dramatic Red Rug

    The rug is called Momeni Vogue and is from Rug Studio, which is a new-to-me rug store. I have to say I was really impressed with just how many rugs they have (thousands) and how reasonable their prices were.

    We also installed the Cocoa Oak NuCore that we used throughout the main living area of the house on the stair landing as well.

    And let me show you what’s hiding on the other side of the stairwell, leading down to the den…

    If you love black walls and dramatic interior design, you have to see this entryway makeover! It's full of deep moody colors and breathtaking art! Dramatic Entryway Makeover | DIY Lucite Handrail| Black Walls | Dramatic Red Rug

    DIY Lucite Handrail

    A lucite hand rail.

    And we DIY’ed it ourselves.

    If you love black walls and dramatic interior design, you have to see this entryway makeover! It's full of deep moody colors and breathtaking art! Dramatic Entryway Makeover | DIY Lucite Handrail| Black Walls

    Isn’t it pretty?

    And it is so easy to make. The tutorial for it is here.

    And the best thing about the lucite hand rail?

    Every single older gentleman who comes in our house comments on how much they like it.

    I’m not even kidding. It’s fantastic.

    My dad loves it. My father-in-law loves it. Nick’s dad loves it.

    Out of all the things we’ve done during this renovation, I’ve at least earned the compliments from the men in my family for the lucite hand rail. #winning

    Spill your thoughts.

    What do you think about the split-foyer entry’s new found glam?

    Shop the Entryway…

    [show_shopthepost_widget id=”1850884″]

    Have you seen these yet?

    This bathroom remodel is gorgeous. It's a great combination of masculine and feminine design perfectly balanced. Black, Gray, and Brass Master Bathroom Remodel | Black Subway Tile Shower with Charcoal Grout | Brass Shower Faucet | Brass Stool for Shower | Masculine Bathroom

    Master Bathroom Remodel

    A STUNNING HOME! The 70's Landing Pad Home Tour: The Dining Room | Black and White Decor / Moody Interior Design / Vintage Interior Design / Glass Dining Table / Vintage Brass Chandelier / Vintage Round Cantilever Chairs

    The 70’s Landing Pad Home Tour

    blog-signature-summer-15

    pin-this-post-2

    Dramatic Split Level Entryway Makeover | Split Foyer Entry | Bi Level Entry | Entryway Makeover Ideas

    Disclosure: Minted supplied me with the art for the entry and Rug Studio supplied me with the rug. However, all opinions are 100% mine and they are things I would have bought anyway. 

    SaveSave

  • How to Find the Best Contractor for Your Renovation + Our Contractor Nightmare

    How to Find the Best Contractor for Your Renovation + Our Contractor Nightmare

    Disclosure: This post is sponsored by HomeAdvisor. However, all opinions and contractor nightmares are 100% mine. 

    If you have ever done a renovation, I think you will agree it is one of the most stressful things you will ever take on in your life. They are stressful, time consuming, messy and dirty. If you can make it through a renovation with your spouse, then chances are you must really love each other.

    Needless to say, the renovation at the 70’s Landing Pad was no walk in the park – not by a long shot. 

    There were many things we were able to take on ourselves. We installed a good portion of our flooring, did the hall bathroom remodel, of course we painted every wall, door and piece of trim, built a closet, painted the cabinets, etc. But then there were a few things we didn’t do ourselves – primarily drywall work and the master bathroom remodel. You know how much I despise drywall work, so I won’t go down that road again, but let’s talk about our master bathroom.

    When we bought the house, the master bathroom did not have a shower – only a jetted tub you had to climb to get into. The whole thing was just configured really oddly and it was not functional for us at all.

    The Bathroom Before - How to Choose the Right Contractor

    We wanted to get rid of that tub and replace it with a tiled shower, add a soaking tub elsewhere in the room, relocate the toilet, the doors, the vanity and a few other small things. All of that – specifically moving the plumbing, wiring, etc. was waaaaay outta our league. We knew we would have to hire someone to remodel the master bathroom. Since we hadn’t ran into this at the Beloved Foreclosure, almost everything there we had been able to do ourselves, we asked around for contractors that our friends had used.

    I called probably around 10 different contractors that came recommended by friends and their sources. I think I got calls back from maybe five of them and only four actually came out to look at the bathroom and then three only followed up with me on a price. One of those three only followed up with me on a price because I pestered the heck out of him. I just didn’t get it. If these people took the time to come out and look at it, then why in the world wouldn’t they call back with an estimate?! Was it a huge job? No. Was it a small job? No. This was a pretty good sized job that I thought someone would be interested in taking on.

    So when one of the contractors called me back with a price the next morning after he had been out that previous afternoon and it was a good price and he had came recommended by a friend, I figured he was my guy.

    We made the deal on December the 3rd. He said it would take roughly seven days to complete the job. Per the contract, he got a 1/4 of the payment up front, 1/4 of it when demo was done, 1/4 of it when tiling was complete and the rest when it was all finished.

    I scrambled around to make sure everything was here and ready for him to start as soon as he had finished demo. I picked out tile and fixtures and all that other stuff as quickly as I could. It was all here and ready to go.

    At the end of December, the bathroom looked like this:

    The Bathroom During - How to Choose the Right Contractor

    Ok, I thought, it’s December. It’s the holidays, people like to spend time with their families. He’ll get going after the new year.

    Wrong.

    This guy might come three days a week and work for 2-3 hours, four hours if I was lucky, when he was here. Now, we did ask him to do some other stuff around the house, but still he only worked for a couple hours a day, maybe a few days a week and never completed one single thing we asked him to do. He would start something, then move to something else. Mind you, he had already been paid for some of the work as well.

    This dragged on until the beginning of March. March, people! We had signed a contract at the beginning of December and he said he would be done in less than two weeks!

    And do you know what my bathroom looked like at the beginning of March?

    Exactly the same as that picture above with the exception of the toilet out and a few pieces of subfloor up and a little bit of drywall pulled off. None of the actual plumbing, electrical, not to mention tiling, etc. had taken place. At that point, we gave him a deadline (which, yes, we should have done long before) and said he had two weeks to finish everything or he was done. When we told him this, he decided he would work the following weekend. He came that Saturday, stayed for less than an hour and left. We fired him the same day.

    For someone who feels bad if she misses a deadline by 10 minutes and is constantly on the go doing something which is usually work related, this whole situation was just unbelievable to me.

    At that point, I turned to Bruce who I had found through HomeAdvisor to do some other work for me. He is the one who covered up and made new openings in the old master closet for the Circus’ playroom and also did lots of other drywall work for me around here. I told him the situation, asked if he wanted the job and if he could get me a price together. A day later he gave me the price and worked me into his schedule. (I was on a deadline because my master bedroom makeover with FrogTape had to be completed by the third week in April and I didn’t even have carpet in there yet because it couldn’t go in until the bathroom was finished.)

    Very valuable information - How to Find the Best Contractor for Your Renovation - Must read tips if you are considering a home renovation or remodel!

    Within days, he and his helper had the rest of the walls out and backer board installed and ready for tile.

    Very valuable information - How to Find the Best Contractor for Your Renovation - Must read tips if you are considering a home renovation or remodel!

    Two weeks later, he had the bathroom finished sans paint and trim, which we did to save a little money (or will do because I haven’t had a chance to finish it yet, thus why you haven’t seen the bathroom reveal yet). Had I went through HomeAdvisor and found Bruce first, this whole fiasco never would have happened.

    From all that, I learned quite a bit and here’s my take on finding a good contractor to actually get the job done:

    How to Find the Best Contractor for Your Renovation

    • Get multiple quotes.

    I used to work with a guy who I called Stan-the-Man. Stan-the-Man is a plethora of wisdom. Among other things, he told me “If it’s a $500 or less job, get three quotes. If it’s more than that, get five at least.” I think that’s pretty good advice when it comes to remodeling. You can use tools like HomeAdvisor’s True Cost Guide to find out the median price for home renovation and repair costs in your area. And also, if you have to pester a contractor to call you back with an estimate, he ain’t your guy. Call some others to come out. If you don’t have to be in a rush, then don’t be.

    • Get references. Read their reviews. Ask to see photos of their work.

    Yes, you should ask around to find out who your friends or family members have used, but don’t just trust that one reference. Use HomeAdvisor to find a local pro in your area and read their reviews from their customers. I’ve found most of the reviews to be a true reflection of the quality and dependability of the contractor. Ask them for references and ask to see photos of their work. Never be afraid to ask. You could even do all this over the phone before you have them come out to give you an estimate.

    • Just because it’s the lowest estimate doesn’t mean you should go with it.

    If you do use the True Cost Guide and someone comes in waaaaay under the median price, then there’s a good chance they won’t provide you with quality work or they may be desperate for money. Look more for bids right in the middle.

    • If the contractor is busy or booked up for a month, that probably means they are pretty good.

    My dad once took my brother and I around the entire state of Texas for vacation one year. (Yes, this does relate, just stick with me.) We had never been to Texas before so we had no idea what places were good to eat at and what wasn’t. So my dad said, “Look for the crowded places – that means they’re good.” Well just like with crowded restaurants being good, a busy contractor probably does quality work. It will most likely be worth your time to wait on them.

    • Do not pay any money up front.

    I still kick myself for ever paying that guy any money up front. I didn’t feel comfortable doing it, but I also hadn’t really worked with a contractor before so I thought that just might be how it was and I went with it. That being said, I do think that some contractors may ask for some money up front for materials if that is worked into their estimate. Once more, this is where you need to read their reviews and get references to know whether they are really going to use that money for materials or not. If you can, tell them to give you a list of what they need and you can go buy it. If you can’t transport it, most home improvement stores will deliver it for you for a fee. That fee might very well be worth it.

    • Determine a payment schedule.

    Once you pick your contractor, be sure to come up with a clear payment schedule. With Bruce, he doesn’t want any money until the job is done. Other contractors may not always be the same way though. I would say that if they are asking for a large portion of the payment up front, then they might be too shady for you.

    • Get it in writing.

    I do think that having your agreement written out with your contractor and signed is a good idea. Make sure it includes the payment schedule, the details of the project, estimated start and finish dates, proof of their insurance, and any materials you are responsible for purchasing for the job. For example, Bruce, our bathroom savior, included all the basic building materials in his quote – drywall, backer board, electrical wiring, etc. However, we were responsible for getting the tile, sinks, faucets, etc. which of course we already had on hand.

    • Check up on them during the work.

    If you’re living in the house where work is being completed this doesn’t really apply to you, but if you’re not, it does. Stop by the workplace at least 2-4 times a week. You don’t want to be in their way, but you do want them to know you’re around and keeping an eye on the work they are doing.

    • If they did good work, recommend them. Give honest reviews.

    After the job is done, give an honest review of the contractor’s work on HomeAdvisor. This will help others during their contractor hunt process and most likely, your contractor will see it and be grateful for the review – if they were good that is.

    Do you have any other tips to add for finding the best contractor for a renovation? Or perhaps horror stories to help me feel a little better about mine? 😉

    You might want to see this too…

    Three Things That Could Cut Your Electric Bill In Half

    Three Things That Could Cut Your Electric Bill In Half

    blog-signature-summer-15

    pin-this-post-2How to Find the Best Contractor | How to Work with a Contractor | Home Renovation Tips | Home Remodeling Tips, Tips for Finding a Contractor

    Disclosure: This post was sponsored by HomeAdvisor, however all opinions and contractor nightmares are 100% mine. 

  • Something Will Always Go Wrong: The Hall Bathroom Remodel

    Something Will Always Go Wrong: The Hall Bathroom Remodel

    Affiliate links may be contained in this post.

    As if the whole moving in process and everything breaking didn’t prove to you that the remodel at the 70’s Landing Pad was no piece of cake, then this bathroom remodel will. Wait, the master bathroom remodel will as well. So really, both bathroom remodels at the 70’s Landing Pad prove that during a renovation something will always go wrong. And it will most likely go wrong during the bathroom remodel.

    Because I’m not quite ready to relive the horror of our master bathroom remodel, and also because it’s not quite finished just yet, let’s just talk about the hall bathroom remodel. We started with this:

    The Hall Bathroom Remodel Before

    The Hall Bathroom Remodel Before

    This is where we ended up…

    Such an adorable bathroom for a kid, but also stylish for adults! The 70's Landing Pad Hall Bathroom Remodel | Gray Walls / Black and White Decor / Kid's Bathroom / Purple Bathroom Vanity / Gray Rectangle Floor Tiles

    Mind you, where we ended up is not where we meant to go. It’s not even close to the original design plan I whipped up with the exception of the shower curtain and that’s only because we already had that shower curtain and damn it if I was spending all this money on a renovation I was not going to spend another $20 on a shower curtain when I had a perfectly good one I could use.

    Sidenote: I’m still recovering from what I call the hemorrhaging of money due to the renovation. I’ll try to keep the rants at a minimum. Just know, the LaFevor family is in the full-on tightwad stage right now because Mama said the hemorrhaging must stop before all we have is a pretty house and nothing to eat in it. 

    If you remember from the original plans for this bathroom, we were going to have a black and white porcelain mosaic tile on the floor with black grout, a coral vanity and probably white walls. Well let me tell you one thing, never, let me reiterate the never part, attempt to do a white mosaic floor tile with black grout unless you are a professional or are paying a professional to do it. It will be next to impossible to keep your grout lines even and it will be so very obvious they aren’t even because of the black grout. So if you catch my drift, our tile floor looked awful. Like I saw the finished product and wanted to cry. Ok, maybe I even did.

    The good thing was that we had about $100 bucks in the floor. While I don’t toss around Ben Franklins like candy, in the grand scheme of the renovation, $100 was a small price to pay for a mistake. We talked to Nick’s dad about the floor (he’s like a renovating guru) and he said we could just go over our botched tile job with the new tile, so we picked out new tile and installed it right over the ugly tile.

    Hall Bath Retile

    And that just so happened to raise the floor level evenly with the hall, which kind of made it seem like we were supposed to make that mistake or something. So there’s that.

    It kind of sounds simple, but the actual task of picking out new tile after I had already designed a whole bathroom with one tile was very daunting. I essentially took up the entire tile aisle at the Home Depot one night laying out tiles and moving back and forth between the paint department to get paint chips to test against the tiles. Grunt Labor was so over me and my indecisiveness that night and I was just ready to crawl in a corner and say “I give up!”

    Such an adorable bathroom for a kid, but also stylish for adults! The 70's Landing Pad Hall Bathroom Remodel | Gray Walls / Black and White Decor / Kid's Bathroom / Purple Bathroom Vanity / Gray Rectangle Floor Tiles

    Floor Tile / Vanity Color / Wall Color

    Once I picked the gray floor tiles, we decided a purple vanity would work well with the tile. Since this is the Circus’ bathroom as well, we wanted it to be fun and colorful for her. I gave her three purple color choices and she chose the deep purple, Artistic License by Behr. With the bold purple vanity I knew the walls needed to be relatively neutral, so we opted for a medium toned gray, Iron Mountain by Behr.

    Such an adorable bathroom for a kid, but also stylish for adults! The 70's Landing Pad Hall Bathroom Remodel | Gray Walls / Kid's Bathroom / Purple Bathroom Vanity / Chrome Hardware

    Vanity Color / Beverly Knob / Beverly Pull

    The vanity is the original one that was in the bathroom. I just painted it and replaced the hardware and counter. I stuck with chrome hardware and fixtures throughout this bathroom for a classic, but polished feel. The cabinet knobs and pulls are from the Beverly collection and are part of the Beverly collection. They have a sleek, but touch of vintage feel to me and that goes perfectly with the bathroom and rest of the house. If you need cabinetry or furniture hardware, check D. Lawless first, they truly have a huge selection and the best prices online. They did provide me with the hardware for this cabinet, but honestly I would have bought from them anyway because their prices are so great.

    Such an adorable bathroom for a kid, but also stylish for adults! The 70's Landing Pad Hall Bathroom Remodel | Gray Walls / Black and White Decor / Kid's Bathroom / Purple Bathroom Vanity / Curvy Black Round Mirror / Retro Pendant Lights

    Yellow Hand Towel / Chrome Towel Holder / Soap Pump

    We replaced the vanity counter with white quartz. I was originally just going to get a new pre-fab counter from a big box store, but it was nearly $200 there and for $200 more, I could get quartz. Once more, in the grand scheme of things, that seemed like the right choice since it was prettier and even more durable. It’s also white, so it will stand the test of the Circus’ style changes. Yellow is also becoming one of the Circus’ favorite colors, so we popped in some of that with the hand towel.

    Such an adorable bathroom for a kid, but also stylish for adults! The 70's Landing Pad Hall Bathroom Remodel | Gray Walls / Black and White Decor / Kid's Bathroom / Delta Vero Chrome Faucet

    Faucet

    The faucet is also chrome and has a very modern feel. It’s simple for her to use with the one knob. A note on the faucet though – it does seem to splash more than other faucets. I think this is due to how the stream comes out. I’ve found that if you turn it only halfway on, you still have plenty of water pressure and less splashing.

    Such an adorable bathroom for a kid, but also stylish for adults! The 70's Landing Pad Hall Bathroom Remodel | Gray Walls / Black and White Decor / Kid's Bathroom / Curvy Black Round Mirror / Retro Pendant Lights

    The mirror and pendant light fixtures are two of my favorite pieces in the room. Both came from Lamps Plus. Seriously, how fun are those lights? The lights help to keep that 70’s vibe going in the bathroom that is throughout the rest of the house. One note of warning on these lights though – see how the globes are chrome about 2/3 of the way down? That means that the light is focused downward when you turn them on. That’s good for right around the mirror, but there isn’t as much light elsewhere from them in the bathroom, so make sure you have either a fan with an overhead light or just another overhead light as well. P.S. They are also one of the first light fixtures I’ve ever heard Grunt Labor say “I love those!”

    Such an adorable bathroom for a kid, but also stylish for adults! The 70's Landing Pad Hall Bathroom Remodel | Gray Walls / Black and White Decor / Kid's Bathroom / Curvy Black Round Mirror / Retro Pendant Lights

    I love the mirror because of it’s curvy edges. It adds just the right amount of texture and could easily change with the Circus’ style as she grows. It also comes in a slew of different colors. Lamps Plus did provide us with the pendants and mirror, but as with the hardware, I would have bought them anyway.

    Such an adorable bathroom for a kid, but also stylish for adults! The 70's Landing Pad Hall Bathroom Remodel | Gray Walls / Black and White Decor / Kid's Bathroom / Gray Rectangle Floor Tiles

    Shower Curtain

    Like I said, the shower curtain from our previous hall bath went to this one. It’s black and white and went perfectly in the space.

    Such an adorable bathroom for a kid, but also stylish for adults! The 70's Landing Pad Hall Bathroom Remodel | Gray Walls / Black and White Decor / Kid's Bathroom / Brass Rocking Horse

    Bonkers Art / Brass Rocking Horse

    I added a couple more “kid” touches for the Circus with the Bonkers print which I already had on hand, a brass rocking horse I found for $12 and a couple little Golden Books – because what child doesn’t need a slew of little golden books? 

    Even though the original plan for the bathroom didn’t pan out, I have to say, I think I like this outcome better. Some mistakes are just meant to be. 😉

    What do you think of the bathroom remodel?

    Shop the bathroom…

    [show_shopthepost_widget id=”1866939″]

    Tour more of the 70’s Landing Pad:

    The 70's Landing Pad Home Tour, Part 1

    Living Room, Dining Room & Office

    Bedrooms Tour

    The Circus’ Room and Master Bedroom

    blog-signature-summer-15

    pin-this-post-2

    70's House Bathroom Remodel | Gray Bathroom Remodel | Kid's Bathroom Ideas | DIY Bathroom Renovation | Bathroom Ideas

    Disclosure: Lamps Plus provided me with the lighting and mirror for this remodel and D. Lawless Hardware provided me with the cabinet knobs and pulls. However, all those products are ones I would have purchased anyway and all opinions in this post are 100% mine. 

    SaveSave

  • Summer Home Tours: The 70’s Landing Pad Home Tour, Part 2

    Summer Home Tours: The 70’s Landing Pad Home Tour, Part 2

    It’s official.

    I’m not Superwoman.

    Sometime last week though, I thought I was.

    You see, I thought that after showing you the first part of my home tour last week, I would be able to show you the rest of the house today. This would have entailed me finishing out all the trim painting in the master bathroom as well as staining the vanity, cleaning and decorating the den, same with the Circus’ room and then photographing it all.

    I have no idea what I was thinking, but around noon on Saturday as I was staining the vanity two hours before my daughter’s dance recital, it occurred to me that the doors wouldn’t be able to go back on for at least five days so the topcoat could fully cure. At that point, I decided that you would understand and that giving you a tour of our master bedroom and the Circus’ bedroom would be good enough because that’s the best I could do given that I didn’t wake up with those superpowers I’d been praying for.

    So if you are one of my regular freaks around here, I realize you’ve already seen our master and the only thing new will be the Circus’ room. But I know you understand. If you’re new here and hopping over from Marty at A Stroll Thru Life (our hostess with the mostest) or Alicia at Thrifty and Chic, then I hope you’ll enjoy the tour and come back for the rest of the room reveals later. You can also see the first part of my home tour – the living room, dining room, hall bathroom and my office – here. Also, be sure to visit the rest of the stops on the tour today at the bottom of this post!

    Affiliate links may be contained in this post.

    Master Bedroom

    This master bedroom makeover is a MUST-SEE! Who knew pink could look so good?! It's an eclectic vibe of old Hollywood glamour meets Palm Beach decorating styles! The 70's Landing Pad Home Tour, Part 2: The Master Bedroom | Palm Tree Art | DIY Scalloped Headboard

    Master Bedroom Details / Pink Wall Color / Black Trim Color

    I have to say, I fall a little more in love with our master bedroom everyday.

    This master bedroom makeover is a MUST-SEE! Who knew pink could look so good?! It's an eclectic vibe of old Hollywood glamour meets Palm Beach decorating styles! The 70's Landing Pad Home Tour, Part 2: The Master Bedroom | Palm Tree Art | DIY Scalloped Headboard

    Green Curtains / Bedding / Palm Print Pillow / Leopard Print Pillow

    It has quickly become our escape, which I know is extremely cliche to say, but we never had that before at our previous home.

    This master bedroom makeover is a MUST-SEE! Who knew pink could look so good?! It's an eclectic vibe of old Hollywood glamour meets Palm Beach decorating styles! The 70's Landing Pad Home Tour, Part 2: The Master Bedroom | Palm Tree Art | DIY Scalloped Headboard

    Chandelier / Green Curtains

    This room was actually the very first room to get completely redone at the 70’s Landing Pad. I call it the Well Traveled Master Bedroom.

    This master bedroom makeover is a MUST-SEE! Who knew pink could look so good?! It's an eclectic vibe of old Hollywood glamour meets Palm Beach decorating styles! The 70's Landing Pad Home Tour, Part 2: The Master Bedroom | Palm Tree Art

    Palm Print Art

    It’s a mix of Palm Beach meets Hollywood Glamour.

    This master bedroom makeover is a MUST-SEE! Who knew pink could look so good?! It's an eclectic vibe of old Hollywood glamour meets Palm Beach decorating styles! The 70's Landing Pad Home Tour, Part 2: The Master Bedroom | DIY Black and White Accent Wall | Mix of Modern and Vintage Design Styles

    And a dose of bold black and white.

    This master bedroom makeover is a MUST-SEE! Who knew pink could look so good?! It's an eclectic vibe of old Hollywood glamour meets Palm Beach decorating styles! The 70's Landing Pad Home Tour, Part 2: The Master Bedroom | DIY Black and White Accent Wall | Mix of Modern and Vintage Design Styles

    Mirror (I painted mine.) / Pink Lamp (similar) / Banana Leaves Art / Design Sponge Book 

    And where modern meets vintage.

    This master bedroom makeover is a MUST-SEE! Who knew pink could look so good?! It's an eclectic vibe of old Hollywood glamour meets Palm Beach decorating styles! The 70's Landing Pad Home Tour, Part 2: The Master Bedroom | DIY Carpet Covered Wall

    Also, a green carpet covered wall fits in just right as well.

    This master bedroom makeover is a MUST-SEE! Who knew pink could look so good?! It's an eclectic vibe of old Hollywood glamour meets Palm Beach decorating styles! The 70's Landing Pad Home Tour, Part 2: The Master Bedroom | DIY Carpet Covered Wall

    Bamboo Lamp (similar) / Closet Medallions 

    You can also see more of the master bedroom makeover including before and after shots here.

    The Circus’ Room

    Such a perfect kid's room - not too babyish, but not too grown up. Will grow well with the child! LOVE all the color! A must-see! The 70's Landing Pad Home Tour, Part 2: The Circus' Room | Kid's Bedroom Ideas | Love the mix of colors and patterns in this child's room.

    Wall Color / Bedding / Horse Sheets (similar) / Tassel Pillow

    If you’re new here, the Circus is my four-year-old daughter.

    Such a perfect kid's room - not too babyish, but not too grown up. Will grow well with the child! LOVE all the color! A must-see! The 70's Landing Pad Home Tour, Part 2: The Circus' Room | Kid's Bedroom Ideas | Vintage Brass Bed | Pops of Color in the Decor

    Rug

    We call her that because she could truly be a three-ring circus all by her little thirty-pound self.

    Such a perfect kid's room - not too babyish, but not too grown up. Will grow well with the child! LOVE all the color! A must-see! The 70's Landing Pad Home Tour, Part 2: The Circus' Room | Kid's Bedroom Ideas | Silhouette Art

    Custom Silhouette Art / Tassel Pillow

    When it was time to plan out her new room, I got her input on just about everything.

    Such a perfect kid's room - not too babyish, but not too grown up. Will grow well with the child! LOVE all the color! A must-see! The 70's Landing Pad Home Tour, Part 2: The Circus' Room | Kid's Bedroom Ideas

    Yellow Table Color / Cowgirl Lampshade

    It was clear that blue, horses and other animals were a must.

    Such a perfect kid's room - not too babyish, but not too grown up. Will grow well with the child! LOVE all the color! A must-see! The 70's Landing Pad Home Tour, Part 2: The Circus' Room | Kid's Bedroom Ideas | Vintage Cowboy Blanket paired with Modern Rug

    She also decided yellow was a pretty good idea as well and a touch of purple.

    Such a perfect kid's room - not too babyish, but not too grown up. Will grow well with the child! LOVE all the color! A must-see! The 70's Landing Pad Home Tour, Part 2: The Circus' Room | Kid's Bedroom Ideas

    White trim and accents helped to balance it all.

    Such a perfect kid's room - not too babyish, but not too grown up. Will grow well with the child! LOVE all the color! A must-see! The 70's Landing Pad Home Tour, Part 2: The Circus' Room | Kid's Bedroom Ideas

     Mirror (similar)

    Such a perfect kid's room - not too babyish, but not too grown up. Will grow well with the child! LOVE all the color! A must-see! The 70's Landing Pad Home Tour, Part 2: The Circus' Room | Kid's Bedroom Ideas | DIY Headband Holder | DIY Sunglasses Holder

    DIY Sunglasses Holder / DIY Headband Holder

    Such a perfect kid's room - not too babyish, but not too grown up. Will grow well with the child! LOVE all the color! A must-see! The 70's Landing Pad Home Tour, Part 2: The Circus' Room | Kid's Bedroom Ideas

    Rhino (similar) / Horse (similar) / Dog

    Such a perfect kid's room - not too babyish, but not too grown up. Will grow well with the child! LOVE all the color! A must-see! The 70's Landing Pad Home Tour, Part 2: The Circus' Room | Kid's Bedroom Ideas | Yellow Bookshelf

    Yellow Bookshelf Makeover

    And there’s a touch of brass and chrome here and there because as she said, “I like the shiny things, mama.”

    Such a perfect kid's room - not too babyish, but not too grown up. Will grow well with the child! LOVE all the color! A must-see! The 70's Landing Pad Home Tour, Part 2: The Circus' Room | Kid's Bedroom Ideas | Yellow Bookshelf

    It just further proved she was mine.

    Such a perfect kid's room - not too babyish, but not too grown up. Will grow well with the child! LOVE all the color! A must-see! The 70's Landing Pad Home Tour, Part 2: The Circus' Room | Kid's Bedroom Ideas | Donkey Art | Faux Cowhide Bench

    Donkey Art

    Such a perfect kid's room - not too babyish, but not too grown up. Will grow well with the child! LOVE all the color! A must-see! The 70's Landing Pad Home Tour, Part 2: The Circus' Room | Kid's Bedroom Ideas | Faux Cowhide Bench | Horse Pillow

    Horse Pillow

    She’s one cool cat.

    Such a perfect kid's room - not too babyish, but not too grown up. Will grow well with the child! LOVE all the color! A must-see! The 70's Landing Pad Home Tour, Part 2: The Circus' Room | Kid's Bedroom Ideas

    …and really loves her new room.

    You can tour the living room, dining room, hall bath and office here.

    Shop the home tour…

    [show_shopthepost_widget id=”1866967″]

    The 70's Landing Pad Home Tour, Part 1

    The 70’s Landing Pad Home Tour, Part 1

    The next stop on the summer home tours is Laura from Duke Manor Farm – it might be one of my favorite tours just because there’s a chicken on top of a donkey! I’m not kidding!

    SaveSave

  • Eclectic Home Tours: The 70’s Landing Pad Home Tour, Part 1

    Eclectic Home Tours: The 70’s Landing Pad Home Tour, Part 1

    I cannot believe I actually just typed that title, y’all.

    We just moved into the 70’s Landing Pad about three weeks ago. By no stretch is the house completed, but the fact that I can actually share a home tour with y’all that doesn’t include a three inch thick layer of dust on the floors is a huge accomplishment for me. There still aren’t curtains in the living room and dining room and things aren’t exactly the way I want them just yet, but that takes time and it is what it is. #reallife #itaintalwayspretty

    Today, I’ll share the living room, dining room, hall bathroom and my office as part of the Eclectic Home Tours. Next week, I’ll have the Circus’ bedroom, the master bath and the den for you, so stay tuned. I’ve already revealed the Well Traveled Master Bedroom and if you haven’t seen it yet, it’s here.  Don’t miss the rest of the tours in the Eclectic Home Tours either – links are at the end of this post – I promise you won’t be disappointed.

    I’m not going to do much talking in this one. Instead, I’ll come back over the next few weeks and share all the details of each space separately and what all we did to each room along with before shots of the rooms when we bought the house. Also there’s the fact that this post is supposed to be published along with everyone else’s on the tour today at 8am EST and I’m just now writing the post at 7:48 AM EST. #storyofmylife

    Without further ado, I present to you the semi-finished 70’s Landing Pad.

    Affiliate links may be contained in this post.

    Living Room

    JAW DROPPING! The 70's Landing Pad Living Room Tour: Full of vintage finds paired with modern pieces and pops of color. Living Room Design | Black and White Interior Decorating | Vintage Decor | Retro Decor

    Snakeskin Print Rug / Ghost Chairs / Lion Print / Brass Floor Lamp

    *Ignore the hideous chandelier behind the couch – that will be replaced soon!

    JAW DROPPING! The 70's Landing Pad Living Room Tour: Full of vintage finds paired with modern pieces and pops of color. Living Room Design | Black and White Interior Decorating | Vintage Decor | Retro Decor

    Leopard Print Pillow / Palm Print Pillow

    JAW DROPPING! The 70's Landing Pad Living Room Tour: Full of vintage finds paired with modern pieces and pops of color. Living Room Design | Black and White Interior Decorating | Vintage Decor | Retro Decor | Snakeskin Print Rug

    Gold Sphere / Snakeskin Rug / Acrylic Napkin Holder Coasters

    P.S. Notice the leg of my tripod in the photo above. #mybad

    JAW DROPPING! The 70's Landing Pad Living Room Tour: Full of vintage finds paired with modern pieces and pops of color. Living Room Design | Black and White Interior Decorating | Vintage Decor | Retro Decor | Ghost Chairs

    Lion Print / Ghost Chairs

    JAW DROPPING! The 70's Landing Pad Living Room Tour: Full of vintage finds paired with modern pieces and pops of color. Living Room Design | Black and White Interior Decorating | Vintage Decor | Retro Decor

    Brass Unicorn (similar ones)

    JAW DROPPING! The 70's Landing Pad Living Room Tour: Full of vintage finds paired with modern pieces and pops of color. Living Room Design | Black and White Interior Decorating | Vintage Decor | Retro Decor | Ghost Chairs

    Green Velvet Pillow / Ghost Chair / Acrylic Napkin Coasters

    JAW DROPPING! The 70's Landing Pad Living Room Tour: Full of vintage finds paired with modern pieces and pops of color. Living Room Design | Black and White Interior Decorating | Vintage Decor | Retro Decor

    JAW DROPPING! The 70's Landing Pad Living Room Tour: Full of vintage finds paired with modern pieces and pops of color. Living Room Design | Black and White Interior Decorating | Vintage Decor | Retro Decor

    To The Night Art Print

    JAW DROPPING! The 70's Landing Pad Living Room Tour: Full of vintage finds paired with modern pieces and pops of color. Living Room Design | Black and White Interior Decorating | Vintage Decor | Retro Decor

    Rolling Stone 70’s Book / Elvis Book

    JAW DROPPING! The 70's Landing Pad Living Room Tour: Full of vintage finds paired with modern pieces and pops of color. Living Room Design | Black and White Interior Decorating | Vintage Decor | Retro Decor

    Elvis Bust (similar ones)

    JAW DROPPING! The 70's Landing Pad Living Room Tour: Full of vintage finds paired with modern pieces and pops of color. Living Room Design | Black and White Interior Decorating | Vintage Decor | Retro Decor | WTF Pillow

    I know – isn’t that pillow epic?

    Dining Room

    A STUNNING HOME! The 70's Landing Pad Home Tour: The Dining Room | Black and White Decor / Moody Interior Design / Vintage Interior Design / Glass Dining Table / Vintage Brass Chandelier / Vintage Round Cantilever Chairs

    Rug / Glass Dining Table (similar) / Cantilever Chairs (similar) 

    A STUNNING HOME! The 70's Landing Pad Home Tour: The Dining Room | Black and White Decor / Moody Interior Design / Vintage Interior Design / Glass Dining Table / Vintage Brass Chandelier / Vintage Round Cantilever Chairs

    A STUNNING HOME! The 70's Landing Pad Home Tour: The Dining Room | Black and White Decor / Moody Interior Design / Vintage Interior Design / Minted Art Print, Ivy / Glass Dining Table

    Ivy Art Print

    Hall Bathroom

    Such an adorable bathroom for a kid, but also stylish for adults! The 70's Landing Pad Hall Bathroom | Gray Walls / Black and White Decor / Kid's Bathroom / Purple Bathroom Vanity / Gray Rectangle Floor Tiles

    Shower Curtain / Yellow Hand Towel

    Such an adorable bathroom for a kid, but also stylish for adults! The 70's Landing Pad Hall Bathroom | Gray Walls / Black and White Decor / Kid's Bathroom

    Bonkers Art

    Such an adorable bathroom for a kid, but also stylish for adults! The 70's Landing Pad Hall Bathroom | Gray Walls / Black and White Decor / Kid's Bathroom / Purple Bathroom Vanity / Gray Rectangle Floor Tiles

    Faucet / Cabinet Pulls / Cabinet Knobs

    Such an adorable bathroom for a kid, but also stylish for adults! The 70's Landing Pad Hall Bathroom | Gray Walls / Black and White Decor / Kid's Bathroom / Round Black Mirror / Vintage Style Globe Pendant Lights

    My Office

    Great ideas for incorporating family trinkets and treasures into your decor! The 70's Landing Pad Office Tour: Full of family treasures and trinkets, but decorated tastefully and with a touch of flair.

    Curtains

    Great ideas for incorporating family trinkets and treasures into your decor! The 70's Landing Pad Office Tour: Full of family treasures and trinkets, but decorated tastefully and with a touch of flair.

    Great ideas for incorporating family trinkets and treasures into your decor! The 70's Landing Pad Office Tour: Full of family treasures and trinkets, but decorated tastefully and with a touch of flair.

    Gemstones Print / Dream Big Hustle Hard Print

    Great ideas for incorporating family trinkets and treasures into your decor! The 70's Landing Pad Office Tour: Full of family treasures and trinkets, but decorated tastefully and with a touch of flair.

    Great ideas for incorporating family trinkets and treasures into your decor! The 70's Landing Pad Office Tour: Full of family treasures and trinkets, but decorated tastefully and with a touch of flair. | Black and White Painted Closet Doors

    DIY Painted Pattern Closet Doors

    Great ideas for incorporating family trinkets and treasures into your decor! The 70's Landing Pad Office Tour: Full of family treasures and trinkets, but decorated tastefully and with a touch of flair.

    Curtains

    Great ideas for incorporating family trinkets and treasures into your decor! The 70's Landing Pad Office Tour: Full of family treasures and trinkets, but decorated tastefully and with a touch of flair. | Malachite Credenza

    Malachite Credenza / Design Sponge Book / Sarah Richardson Style Book / Modern Mix Book 

    What do you think? How’s the 70’s Landing Pad coming along so far?

    Shop the Home Tour…

    [show_shopthepost_widget id=”1867007″]

    Don’t miss these other stops in the Eclectic Home Tours today…

    SaveSave

  • Why We Opted for NuCore Flooring and How It’s Holding Up

    Why We Opted for NuCore Flooring and How It’s Holding Up

    Let me just say that when I first wrote about the new flooring we would be installing in the main living area and kitchen at the 70’s Landing Pad, I was not ready for you. I thought I had done enough research on the flooring we chose, but you guys brought the questions and had me saying multiple times, “Why didn’t I think to ask that?” You brought your A-game.

    If you don’t remember, we went for NuCore flooring from Floor & Decor which is an engineered floor that has luxury vinyl on top of a waterproof core. It also has a cork backing which was supposed to give better noise resistance than traditional vinyl planks or wood laminates. There are more details on the flooring and how we installed it in this post. Floor & Decor did provide me with the NuCore flooring, however it was the top contender in the flooring department after we researched various types and we would have bought it for the renovation anyway. While they did provide me the flooring, all these opinions are mine.

    Why We Opted for NuCore Flooring: a luxury vinyl flooring that is waterproof and can be installed over many existing floors. It's also a flooring that is easily installed.

    There were a few reasons that NuCore stood out to us:

    • Installation

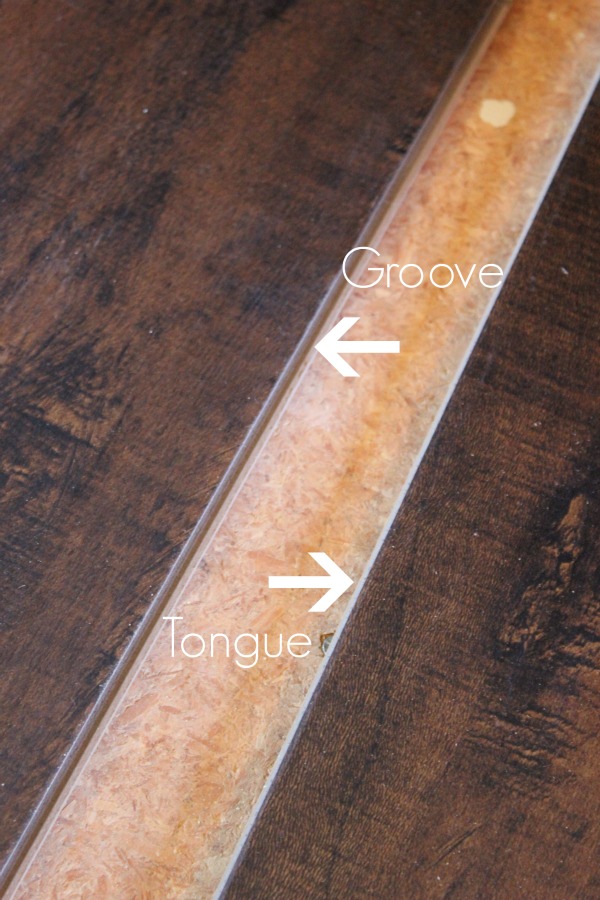
    We were able to install NuCore ourselves. It’s a tongue and groove installation that snaps together. We were on a budget and having someone else install the flooring wasn’t much of an option. Grunt Labor had installed our traditional hardwood at the Beloved Foreclosure, but literally every piece had to be nailed down and it was a back breaking task. He didn’t want to go through that again and I didn’t want him to either. Now of course, we did have to think things through a bit in the beginning,  but once we got going, it was relatively smooth sailing. The video below shows how to install the NuCore Flooring.

    [adthrive-in-post-video-player video-id=”EmAIvJzB” upload-date=”Wed Jun 29 2016 14:23:39 GMT+0000 (Coordinated Universal Time)” name=”Rain on a Tin Roof – How to Install NuCore Flooring” description=”How to Install NuCore Flooring by Rain on a Tin Roof”]

    You can read more about the installation here.

    • Waterproof

    NuCore is waterproof. We have a four year old and a dog. That in itself should be enough to warrant waterproof flooring for us. Honestly, until I started researching, I didn’t know there were any wood look waterproof floorings available that weren’t straight sheet vinyl. When I found out NuCore was, it was a game changer.

    • Look & Feel

    Of course, when you are putting new flooring in such a large space in your house, you want it to look good. We knew for the 70’s Landing Pad, we wanted wider planks and maybe even a little more texture to the flooring. We wanted to stick with a darker stain as well. The Cocoa Oak shade of NuCore fit the bill.

    Why We Opted for NuCore Flooring: a luxury vinyl flooring that is waterproof and can be installed over many existing floors. It's also a flooring that is easily installed.

    The photo above was taken just after I had cleaned the floors, thus the oily look, however it’s also the best way for me to show you in pictures the texture of the flooring. You can see the hand-scraped texture in each plank. The texture isn’t so much to where it’s hard to clean or bothers you when walking on it. It’s just enough to add a little depth.

    Why We Opted for NuCore Flooring: a luxury vinyl flooring that is waterproof and can be installed over many existing floors. It's also a flooring that is easily installed.

    This image best shows the color of the floor up close. It’s dark, but not too dark. To me, the color seems to somewhat have a 70’s vibe going on and that of course, fit perfectly for the house.

    We installed NuCore in January of this year, so we’ve had it for about five months. Since then, the following things have happened:

    • The flooring got covered in at least a 2 inch layer of dust.

    Okay, maybe not 2 inches, but pretty close. Either way, it was disgusting, but cleaned up perfectly well.

    • It also took it’s fair share of paint splatters and tile mortar splotches from us working on the house. 

    Once more, those also cleaned up just fine with the help of a regular kitchen sponge scrubber.

    • The dog has peed on it – multiple times. 

    And the pee just sat there. The flooring didn’t absorb it, there wasn’t a stain, and it wiped right up.

    • The dishwasher leaked.

    When I say the dishwasher leaked, I mean that water was pouring out of the sides like no tomorrow. The NuCore didn’t let it go anywhere though.

    • We moved in. 

    While I was certain that moving in would cause at least a few dents / dings /scratches on the flooring, I was wrong. Even the three piece cabinet unit that Grunt Labor and Nicky refer to as the three steel boxes I bought didn’t hurt the flooring. The only place where we got scratches on the floor was when the kitchen oven had to be moved in and out while we were working on the cabinetry. I think most of that was due to the fact that Grunt Labor was doing it alone and therefore couldn’t really lift it like it needed to be lifted to be moved.

    Like I said earlier, there were many questions you guys posed that I didn’t think to ask when I went with this flooring. I tried to get you the best answer I could by asking the people at Floor & Decor if I didn’t know and responding to your questions in the comments of the first post or email. There were also some questions I had asked, but forgot to include in the first post about the flooring, so I thought I would take this time to answer questions most frequently asked here:

    Q: This flooring has joints. How can it be waterproof? 

    I’m assuming since this is a tongue and groove flooring that when those snap together, they form a waterproof seal. Now, that isn’t to say that some tiny amount of water wouldn’t get in those joints, but I don’t think it would be enough to damage the flooring as long as it was installed properly.

    Q: Does it feel like vinyl? Does it feel cheap or plastic-y? 

    I am not a great one to ask this because my experience with wood look vinyl flooring is minimal. I had it in one other house and I can tell you that that flooring did feel cheap to me. That was also nearly 10 years ago and things in the vinyl department have greatly improved since then. I often associate vinyl flooring with being really shiny – like sheet vinyl we all used to have in our kitchens. This flooring doesn’t look or feel like that to me. It does feel different than traditional hardwood flooring because obviously it isn’t hardwood flooring and isn’t as thick or hard like hardwood. I’ll have to pay more attention to how my feet feel and sound on it when I’m walking and come back to this one again.

    Q: How long did it take to install? 

    Like I said earlier, once you get the hang of installing it, it goes pretty fast. Grunt Labor worked on the flooring for about 2-3 hours each day after work. He was probably able to complete one room every 2-3 days.

    Q: Did you lay down a barrier or put it straight on the floor? 

    No, we did not lay down a barrier. NuCore has a cork backing which helps as a sound barrier. NuCore can be installed over many existing floors. We went right over the old laminate flooring in the den area with NuCore. Of course, we pulled up the carpet in the living room and dining room before installing it there and put it on top of the subfloor. Most people would also be able to take it right over vinyl flooring in their kitchens, but we had some issues in our kitchen where previous owners had remodeled and the kitchen actually had two subfloors, so we had to rip some of that out first before installing NuCore in there.

    Q: Does it scratch easily? 

    Like I said above, the only problem we had with it scratching was right around the oven.

    Q: How do you install it on stairs? 

    They make stair noses that fit over the front edge of the steps and then you would do regular installation on the rest of the step.

    Q: We have 700+ square feet of tile in the kitchen, laundry room, bathroom, etc that’s gonna cost $7000 to demo and re-tile, so I’m trying to see if there’s a cheaper DIY alternative. I assume you can install this on top of existing tile? But how thin is it? The issue I see there is a dropoff when transitioning into other rooms.

    I do believe you could install it over existing tile if your tile is level for the most part. I’m pretty sure that each color of NuCore has various accessories in that same shade you can purchase. I know they have transitions you could use for the variation in floor levels. The flooring is thin, so it shouldn’t add too much height. We installed this on our landing which actually had tile previously. We could have went right over the tile, but the problem we ran into was that the tile was really thick and we would have had a really large transition which I didn’t feel too comfortable with. I was worried it would be so much that someone might trip over it.

    Q: This flooring is thin. I’m worried it won’t hold up and will snap. 

    Dude. This was my biggest concern when we were considering this flooring. The flooring is 6.5 mm thick. According to Google, that translates to 0.255906 inches. It’s tough though. One of the first things I did was get a piece out and try to bend it in half to break it. It didn’t crack at all. The only way to cut it is with of course with a saw or score it with a utility knife and then snap it while holding one half of the piece on a solid surface and bending the other half. I won’t lie – this thinness still freaks me out a little, but time will tell….

    Q) How does this stuff stay in place without gluing it down? My concern would be if there is a slightly uneven place in the floor then this could shift or not rest flush.

    The way I understand it, the tongue and groove locks it all together. Once it’s all locked together it’s pretty heavy enough that it stays in place. Most people will need to go back around the edges where the flooring meets the baseboard and add quarter round, which will hold it in place even more.

    If you’ve got any other questions, send ’em my way! I’ll do my best to answer them or get the answer for you.

    UPDATE: I did a review of our NuCore Flooring one year later. You can read about it here.

    You can also get more information about the install of NuCore including a video here. 

    blog-signature-summer-15
    pin-this-post-2
    NuCore Flooring Review | Luxury Vinyl Wood Flooring | Luxury Vinyl Flooring | Luxury Laminate Flooring | Luxury Vinyl Plank Flooring

    Disclosure: Floor and Decor provided me with NuCore flooring. However, all opinions and roughness that our family and this renovation gave our floors are 100% mine.

  • How to Install Nucore Flooring

    How to Install Nucore Flooring

    Want to save money and install your own luxury vinyl flooring? That’s exactly what we did. This Nucore flooring installation guide will walk you through the process step-by-step.

    YOU GUYS.

    The 70’s Landing Pad is actually starting to not look like a construction zone.

    Well, it’s starting to not look like a construction zone in the living room, dining room and hallway anyway.

    After getting paint on the walls week before last, we’ve been putting down the new flooring in the  hallway, living and dining rooms. This flooring will also go in the kitchen, stair landing and in the downstairs foyer as well, we just haven’t gotten that far yet. I’m finally moving past the point of “Oh my word, what have we gotten ourselves into?” to “Oh my word, it actually looks like a house and it’s pretty!” We still have quite a ways to go in the overall renovation, but there is a light at the end of the tunnel, y’all.

    This post is sponsored by Floor & Decor, however all opinions are 100% mine. Affiliate links may be contained in this post.

    The flooring we are using for the kitchen, dining room, living room, hallway and all those other places where there’s going to be a lot of foot traffic is NuCore from Floor & Decor.

    How to install NuCore Flooring - no nails or glue required, installs over most existing floors and it's completely waterproof.

    NuCore is an engineered floor that has a tough top layer of luxury vinyl adhered to a stable, rigid, and waterproof core. I’ll be the first to say there isn’t a thing about this flooring that looks cheap or even like vinyl – I’ll also admit I had my doubts in the beginning. I partnered with Floor & Decor on the flooring and after a slew of emails full of questions about NuCore between myself and Sarah from Floor & Decor, we finally opted to go with the NuCore Cocoa Oak Handscraped Planks.

    One of my doubts was how easy installation was supposed to be. Word on the street was that it snapped together (tongue and groove), no glue or nailing required and it could go over most any existing floor, with the exception of carpet.

    Word on the street was accurate.

    How to Install NuCore Flooring

    You’ll need:

    How to install NuCore Flooring - no nails or glue required, installs over most existing floors and it's completely waterproof.

    Step 1

    Unlike hardwood, NuCore does not have to acclimate to your home’s temperature before being installed. You can start as soon as you get it.

    You can install NuCore over most existing flooring. Carpet is an exception. If you want to put it where carpet currently is, you will need to remove the carpet first, which is what we had to do. Pull up any staples that are left from the carpet pad and remove any carpet tack strips.

    For your first row, you will simply snap the short edges of the flooring together, which easily lock into one another. After finishing the first row, place a few pieces of the flooring vertically along the baseboard of the room. Put your first row flush against these pieces. This will keep your first few rows of flooring from sliding in the beginning.

    How to install NuCore Flooring - no nails or glue required, installs over most existing floors and it's completely waterproof.

    Step 2

    For the second row of flooring, you will snap the tongue and groove into each other.

    How to install NuCore Flooring - no nails or glue required, installs over most existing floors and it's completely waterproof.

    Simply hold a piece of NuCore at a 45° angle and snap it into the piece in front of it.

    How to install NuCore Flooring - no nails or glue required, installs over most existing floors and it's completely waterproof.

    Step 3

    Use a rubber mallet to secure the joints.

    How to install NuCore Flooring - no nails or glue required, installs over most existing floors and it's completely waterproof.

    You do want to make sure you stagger your joints as shown below.

    How to install NuCore Flooring - no nails or glue required, installs over most existing floors and it's completely waterproof.

    You will have to cut pieces in order to do this sometimes and obviously you will have to cut pieces as you get to the end of rows. To cut NuCore, measure to determine what length you need, mark it on the plank, score it with a utility knife and snap it at the cut.

    How to install NuCore Flooring - no nails or glue required, installs over most existing floors and it's completely waterproof.

    Super simple.

    After installing all the flooring, you will want to trim out around the edges with quarter round molding to cover the small gap. If you have to go around door trim or jambs, you can cut the wood with a jigsaw. Mark where you need to cut, drill a small hole to get you started, then use the jigsaw to cut the flooring.

    Grunt Labor and I made a quick video to show you how to install NuCore.

    [adthrive-in-post-video-player video-id=”EmAIvJzB” upload-date=”Wed Jun 29 2016 14:23:39 GMT+0000 (Coordinated Universal Time)” name=”Rain on a Tin Roof – How to Install NuCore Flooring” description=”How to Install NuCore Flooring by Rain on a Tin Roof”]

    It is really as simple as it looks. And when it’s installed, it looks just like hardwood. It’s gorgeous. I’m also pretty pumped about the fact that it’s waterproof, so that when the Circus doesn’t tell me she spilled her juice hours later, it won’t be that big of a deal. 🙂

    UPDATE: I DID A REVIEW OF OUR NUCORE FLOORING ONE YEAR LATER. YOU CAN READ ABOUT IT HERE.

    Want to easily come back to this flooring installation guide later? Just pin the image below!

    How to Install NuCore Flooring | Luxury Vinyl Wood Flooring | Luxury Vinyl Flooring | Luxury Laminate Flooring | Luxury Vinyl Plank Flooring
    blog-signature-summer-15

    You know you don’t wanna miss any of this crazy.

    Stalk Me Here:

    Pinterest / Facebook / Twitter / Instagram

    SaveSaveSaveSaveSaveSave

  • In an unexpected twist…we bought a house. Meet the 70’s Landing Pad.

    In an unexpected twist…we bought a house. Meet the 70’s Landing Pad.

    You read that right. And no, its not April Fools Day or anywhere close to it.

    We bought a house.

    And it was completely unexpected. 

    If you’ve been around here for more than a minute, you know our love for our current home, The Beloved Foreclosure runs deep. We never really expected to leave it. We even put in a pool and new patio this summer, had plans to completely re-do the Circus’ room and were even considering adding on an addition – we love our house.

    Now, let’s switch gears for a minute. We’ve known for the past couple of years that my in-laws wanted to move down to Chattanooga after my father-in-law retired to be closer to the Circus – well closer to us too, but let’s face it, mostly they wanted to be closer to the Circus. When we found this out, we looked at lots to build a house on that would be big enough for both our families and we also looked at existing homes that would hold us all as well. I am one of the few who loves her in-laws and would happily have them in the same house as us. We actually found one, but couldn’t work a deal out with the sellers. Finally, we all decided that our best shot would be to find them a house in our neighborhood – we love our neighborhood and if we couldn’t find a great house for all of us, then we wanted to stay in the neighborhood. The problem with that is that there are few smaller, one story homes in our neighborhood that would work for them. We found one that we thought would work, but they couldn’t even get an offer in before the house was already under contract – good houses tend to move fast in our neighborhood. We also kept our eyes open for a house for us and if we found one, then my in-laws would take our house.

    We never really thought the latter would happen. We always expected to find a house for them – not us.

    We were wrong.

    A house came up for sale just up the street from us that was good for us. We looked at it, made an offer, and had a contract on it.

    And then one thing led to another, and things were progressing way too slowly and to us, it just seemed like a sign that this wasn’t the house for us. So, we backed out of the contract.

    And when we backed out of the contract, another house went up for sale in our neighborhood. And it was actually better for us and our needs than the other one. We took that as another sign. We had it under contract within a little over a week and just closed on it last Friday.

    We are calling our new home The 70’s Landing Pad.

    It is definitely rocking the 70’s vibe and it is our landing pad – we have no intentions of leaving, y’all.

    Here’s the tour of the new pad. Let’s all go ahead and put on our rose colored glasses for this one- that’s the only way I’m coping with all the work that has to be done.

    You think I’m joking. Just wait.

    The 70's Landing Pad: Before

    Welcome to the 70’s Landing Pad.

    As you can probably tell from the photo – it is a split foyer. I will say that I haven’t always been a big fan of split foyers, but I don’t detest this one.

    Entryway / Foyer

    The 70's Landing Pad: Before

    We will be updating the railings as well as all light fixtures, flooring and paint throughout the house.

    Living Room

    The 70's Landing Pad: Before

    The living room is just off the entryway. Totally diggin’ that blue carpet. #nope

    Dining Room

    The 70's Landing Pad: Before

    And the dining room is just off the living room and kitchen. The living room and dining room are fully open to one another.

    The Kitchen

    The 70's Landing Pad: Before

    And then there’s the kitchen. And all the wallpaper I have to remove. And cabinets I have to paint. And hardware I have to replace.

    #overwhelmed

    And why in the world are there vanity lights over the cabinets???

    The Hall Bathroom

    The 70's Landing Pad: Before

    Oh look. More wallpaper! YES! #winning #not

    Sorry – I don’t know why I’m using hashtags so frequently in this post. I think its just one of my favorite ways to be a smartass.

    My Office

    The 70's Landing Pad: Before

    Technically, this is a bedroom – but it is tiny for a bedroom. So, it’s going to become my office, which Bill is very happy about because I will no longer be invading his space at all.

    Also, I do realize we did just makeover Will’s entire room and my office space. When we started that, we had no idea we were going to be moving. If I would have known, trust me, I would have waited to do all that at the new house. The good news though is that everything we did to his room here will work perfectly at the new house too. So essentially, he’ll have the same room there as he did here, with the exception that my office won’t be in there.

    The Circus’ Bedroom

    The 70's Landing Pad: Before

    The Circus’ Bedroom is about the same size as it is here. However, we are going to be making it a little bigger – I’ll show you how in a minute.

    Also, there is hardwood in two rooms in the entire house – only TWO! Why, why, why couldn’t the builders have just kept that stuff going throughout??? What was the point of just putting it in two of the bedrooms?

    #SMH #WTF

    The Master Bedroom

    The 70's Landing Pad: Before

    And then there’s the master bedroom.

    That I have no idea what I’m going to do with. It has more space than we could ever need. There’s a sitting area, which will be nice, but honestly I could make another sitting area elsewhere in the room. Since this room is right beside the Circus’ room, we are actually going to take some of the space from it and give it to the Circus. We just really don’t need this much.

    The 70's Landing Pad: Before

    It’s nice to have so much space, but honestly, it’s one of those things where the additional space could have been used (and been more functional) elsewhere.

    The Master Bath

    The 70's Landing Pad: Before

    I’m also referring to this little gem as the tunnel. Because that’s what it is – one long tunnel. And it doesn’t make much sense. There is no shower in this bathroom – only a tub. #WTH This also goes back to my thoughts on how all that space in the master could have been more functionally used.

    I have no clue what to do in this space. #shelaughsinsanely

    Let’s move downstairs, shall we?

    The Den / Man Cave

    The 70's Landing Pad: Before

    This area will function as both the family room and man cave. As of right now, we aren’t going to put a TV in the living room, so this is where I’ll get my weekly dose of Shonda Rhimes. Once drywall is up, some painting and new carpet is down, I think it will be cozy.

    Grunt Labor’s Office

    The 70's Landing Pad: Before

    This bedroom, which will function as Grunt Labor’s office, is just off the den. I’m not quite sure how he got the larger office area since he doesn’t even work from home, but whatevs.

    I’m kidding. I had to say that so that when he reads this he’ll say something about me throwing him under the bus, which I do sometimes do on rare occasion just because I feel its my God given right to mess with him. #amiwrong #nope

    Really though, he gets the bigger office because he will eventually be getting his dad’s furniture from his office and all of it wouldn’t fit in the smaller office upstairs.

    #thethingsyoudoforlove

    Laundry Room

    The 70's Landing Pad: Before

    Grunt Labor is also very excited to have his own laundry room. You do know that he does our laundry, right? He calls it his “woman’s work.” He doesn’t mean it to be an anti-feminist remark. I’d give him a swift kick in the rear if he did. And also, he can call it whatever the hell he wants to as long as I don’t have to do the laundry.

    #insertevillaughhere

    The Half Bath

    The 70's Landing Pad: Before

    This bathroom kind of gives me the heebie-jeebies. It’s just off the den area. It’s T-90 (tiny and when I say it like T-90, I mean really tiny) and everything just looks so ugly and dirty, it freaks me out a bit. #slightgermophobe

    The Guest Room / Bill’s Room

    The 70's Landing Pad: Before

    This room is quite a bit larger than Bill’s room now. I think it was actually unfinished basement space at one time. It even has its own bathroom…

    The 70's Landing Pad: Before

    Once you get past the wallpaper, countertop and awful flooring, it isn’t half bad.

    The Backyard

    The 70's Landing Pad: Before

    And y’all – we have a pool.

    A real life in-the-ground pool.

    That was filled in a couple years ago because the owners just got tired of dealing with it. WHAT?! WHY WHY WHY?!

    #sheripsherhairout

    I seriously thought Grunt might just cry when he heard that was the only reason it was filled in. He thinks there might be hope for it yet though. Anyone got a backhoe?

    If you didn’t put your rose colored glasses on, you can tell there is a whole lotta work to be done. I won’t lie – I am overwhelmed. I am also excited because I know this house – at the risk of sounding cliche – is kinda perfect for us. I’m also very grateful that we found a house so we can get my in-laws down here and have them close by. They won’t be moving down for a while, so we are going to be able to stay in our Beloved Foreclosure while working on the 70’s Landing Pad.

    As we come up with plans for the house remodeling, I’ll be posting them and I fully expect you to give your opinions. A girl can’t do this kind of shit alone.

    Send prayers. Send happy thoughts. Send reinforcements. And most importantly – send booze.


    blog-signature-summer-15

    You know you don’t wanna miss any of this crazy.

    Sign up to get my posts delivered to your inbox here.

    Stalk Me Here:

    Bloglovin / Pinterest / Facebook / Twitter / Google+ / Instagram