Y’all, this might be the cutest dang thang I’ve ever made….
I know, right. I told ya. Cute.
I was first inspired by this bunny craft here and this one here.
Easter is one holiday that I was lacking decorations in. Not anymore. After this quick project, and a trip to the Goodwill (a “finds” post coming soon) I am set. It’s just a matter of getting all the decorations off my dining room table and actually using them to decorate around the house. Anyway, after seeing these two adorable bunny projects, I knew I had to have a bunny of my own.
To make my canvas glitter bunny I used:
-Canvas from Goodwill
-Scrapbook Paper
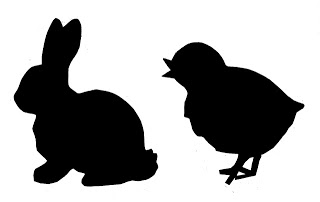
-Bunny Silhouette
-Spray Paint
-Modge Podge
-Glitter
First, I spray painted that old canvas with gray primer, then a blue color I had. This was the first time I had spray painted canvas and it worked perfectly!
I just opened it in word and made it pretty big. That chick comes with it too, but when I made the bunny bigger, it kicked the chick’s butt right off the page. But, yes, I know, that chick is too cute as well. Another easter project? Hmmmmm….
I taped the bunny silhouette on the scrapbook paper and cut it out, then mod podged it on the canvas.
At this point, I was just gonna add the white pom pom on its butt and call it a day, but then I saw my glitter and BAM, the glitter bunny was born. I just wiped mod podge all over the bunny silhouette with my finger and sprinkled glitter on.
For the bunting, I just used twine and some old scrapbook paper I had lying around. I also happened to have the white pom pom lying around. I just hot glued those bad boys on.
Have you done any Easter crafts lately? I’d love to see them!
Looking for another easy Easter decoration – take a look at these DIY Easter Bunny Vases then – they are SO cute!
If you have a few spare ornaments on your hands this holiday season, you should add this DIY ornament tree to your project list! It’s simple to make and adds a fun touch to any holiday decor!
This little Christmas tree has been one of my favorite holiday decorations for years now. The best part about it though? It was so easy to make!
Did I mention that it also just cost me $6 to make as well? Thank you thrift stores!
Don’t you just love great little decorations like these that are easy to make and become your favorites? Me too.
Make your own using the tutorial below!
This post contains affiliate links for your shopping convenience. Click here to read my full disclosure policy.
Vintage Ornament Tree Tutorial
Supplies Needed:
Ball Ornaments – vintage or store bought will work just fine!
Remove the hooks from your ornaments. Like I said, vintage ornaments or store bought ornaments will work just fine. You could even spray paint plastic ornaments to colors of your liking! I prefer the colorful glass ornaments just because of the extra shine they have.
Unwrap the styrofoam cone.
Step 2
Starting at the base of the cone with your largest size ornaments, stick an ornament halfway into the cone. Put a healthy dose of hot glue around the top of the ornament and where it will meet the styrofoam, then push it into the styrofoam cone the rest of the way.
If you are using breakable ornaments, do be careful not to push too hard on the ornaments and break them.
Step 3
Repeat Step 2 working your way up the cone, fully covering the cone as you go. As you move up the cone, use smaller ornaments.
Step 4
Once your cone is covered with ornaments, you can weave tinsel garland into visible holes the ornaments didn’t cover.
Step 5
Embellish with a tree topper if you wish!
I opted for a cute little elf I had on hand.
Of course, if you’d like your tree to be more neutral, you can also just go with 2-3 colors of ornaments. Where would the fun in that be though? 😉
Want more easy holiday crafts and decorating ideas?
How to Make Ornament Clusters – easily create gorgeous clusters of ornaments to spread throughout your home and add instant holiday cheer! These are beautiful!
Tinsel will forever be a holiday classic – in my book anyway! You can easily whip up this tinsel wreath in 30 minutes or less. It adds some fun vintage Christmas charm to holiday decor!
Anytime you want a cute, super easy holiday wreath to make, tinsel is the way to go.
I was recently inspired by one of my friends, Ashley, after she made the tinsel wreath you see below.
She purchased a wreath at Goodwill and re-worked it to make this beauty.
Retro Christmas Wreath
Luckily, Goodwill is overflowing with wreaths and tinsel at the moment! All I had to do was make a trip to my local Goodwill to find a very ugly, but still useful, wreath and a lot of tinsel.
It’s so circa 1990, right? But it was just $1. All I had to do was pull the rags out of the wreath. Some were held in with pins, others just shoved in there.
I was a little worried at first that some the straw might poke through. Luckily though, I was wrong.
Enter lots and lots of and lots of tinsel. Ashley had already warned me it would take more than I thought it would. She was right. All I did was hot glue one edge of tinsel to the wreath and start wrapping it around.
After I made it around the whole wreath, I filled in some not-so-fluffy spots with more tinsel, just hot-gluing it on.
So I’m going to admit I have this thing for vintage Santas. I love the small ones with velvet suits and round bellies. I have a few of these lying around that I’ve picked up at thrift stores, so I put one in the center of the wreath. I just dug out a little hole in the straw and hot glued that bad boy in.
I love the contrast of the red Santa suit against the silver tinsel. I may add some ornaments or some red ribbon to hang it with, but I also just really love it like this.
Want more easy Christmas crafts with a retro vibe?