If you’re looking for a durable, but beautiful floor that’s also an easy DIY install, this Select Surfaces Flooring might be your answer! This waterproof, vinyl plank flooring is not only easy to install, but can also go over most existing floors!
We’re doing things a little backwards here. Normally, I would like flooring to be one of the last things going in – like after all the painting is done and there isn’t a chance I’ll spill paint on it – we all know how those “best laid plans” go though, don’t we?
So no, the painting isn’t even close to being done and I’m still waiting on quite a few things to arrive, but flooring is going down.
This post contains affiliate links for your shopping convenience. Click here to read my full disclosure policy.

Grunt had yesterday off and as we all know – it’s best to take advantage of free grunt labor anytime you can. 😉
He isn’t completely done, but he’s put a dent in it and that’s mostly thanks to this Select Surfaces Flooring being a relatively easy DIY install. The best part is that this engineered vinyl plank flooring can go over many existing flooring surfaces. We were able to put it right over the old linoleum sheet flooring and the bare concrete that were both in this space.
On top of that, this flooring is waterproof, so it’s perfect for this room in the house where we have had a water leak before. Fingers crossed that doesn’t happen again, but just in case, our flooring will be ready.
I also love that this flooring has that natural look of hardwood, but with the low-maintenance that comes with vinyl plank flooring. As all busy mamas will agree, low-maintenance is our preferred way to go. 😉
How to Install Select Surfaces Vinyl Plank Flooring
Materials and Tools Needed:
- The Flooring of Course – Select Surfaces is sold via the Sam’s Club Flooring department and you can also check out the full Select Surfaces website as well. Our flooring is the Select Surfaces Engineered Vinyl Plank Flooring in Chocolate Oak.
- Power Saw – we used our miter saw.
- Rubber Mallet
- Pencil
- Tape Measure
- Oscillating Multi Tool – really helpful for cutting out the bottom of door trim.
Step 1
If you are removing any existing flooring currently in place, do so first. This vinyl plank flooring can go over most existing hard surface floor coverings as long as it is smooth or can be made smooth. As I said earlier, we went right over both concrete and old sheet flooring.
Step 2
Adjust door trim if needed. If you want to be able to easily slide the flooring right under door jambs and trim, place a plank of the flooring up against the door jamb and mark where the top of the plank hits. Use an oscillating multi tool to remove this part of the trim as shown below.

Step 3
Starting in the top left corner of the room, lay the first plank so that the head and side seam grooves are exposed.
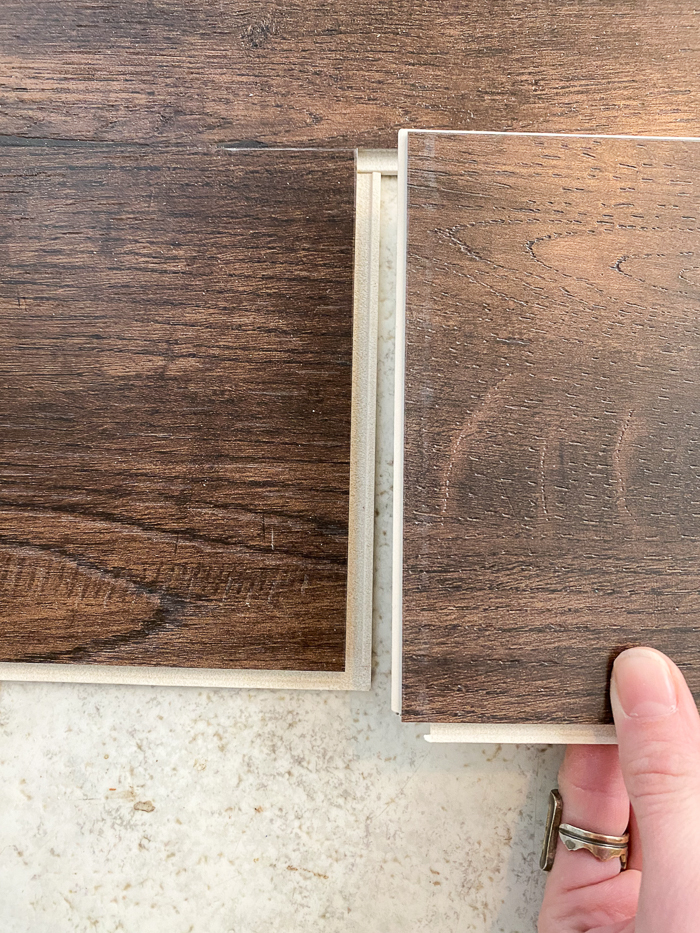
You always want those white parts you see to be on the outer edges so you can click more planks on.
Remember, this is a floating floor – no glueing or nailing needed. Just lay that first piece down.
Step 4
Click another plank into place beside the first plank you laid.
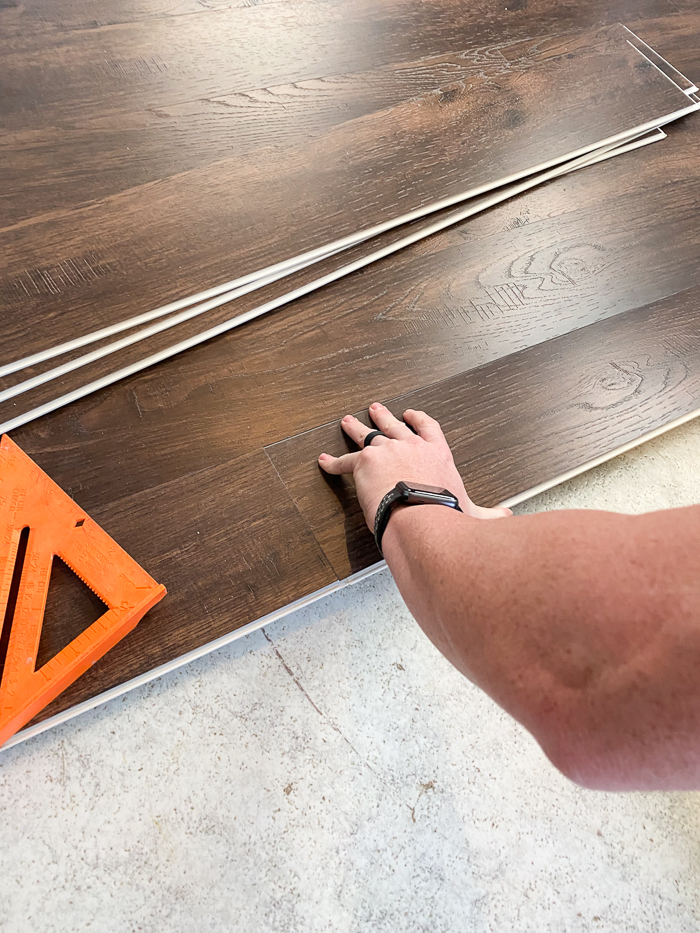
Place it at an angle over the exposed tongues and push down firmly.
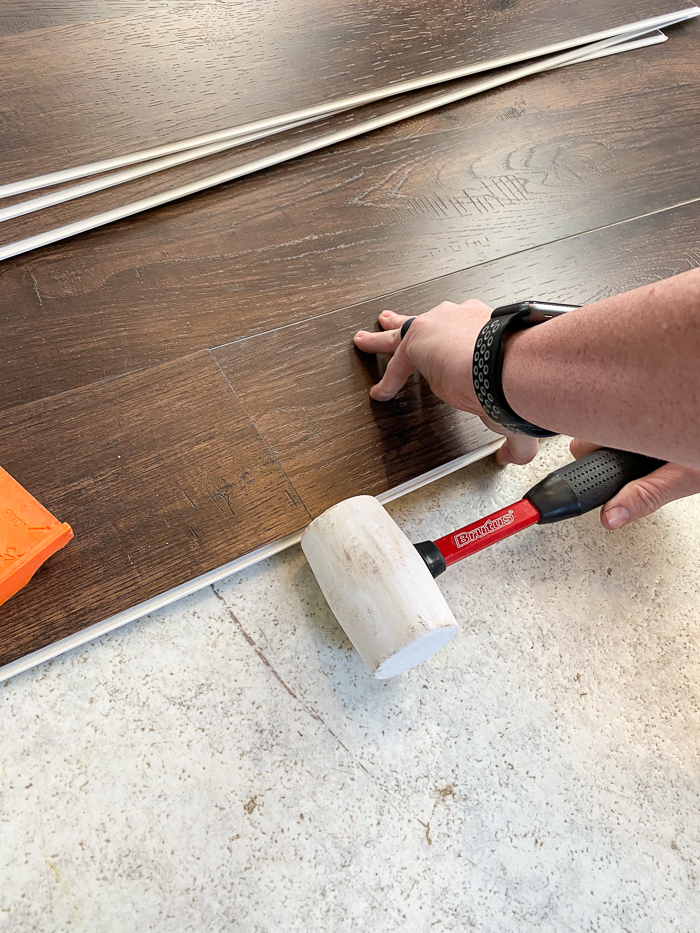
Use a rubber mallet and lightly tap all the seams tight.

Step 5
Repeat until the floor is fully covered with your new vinyl planks. When you need to cut planks to fit, simply measure, mark with a pencil and then cut with a power saw. We used our miter saw for cuts.
Step 6
Once the flooring is fully installed, you can install baseboard and quarter round around the edges of the flooring.
I’m super excited to have this incredibly beautiful and equally durable flooring in this space! This is one of the most high traffic areas in our house so it needs flooring to withstand it all!
If you’re new to this challenge, you can view the entire design and ideas HERE!
A big thank you to all our sponsors on this challenge:

Be sure to see what the other challenge participants are up to:

Casa Watkins Living // The Boho Abode // Delineate Your Dwelling // Haneen’s Haven // The Happy Housie // Homemade by Carmona // House by Hoff // Jeweled Interiors // Kaleidoscope Living // Our Fifth House // PMQ for Two // Rain on a Tin Roof // Southern State of Mind // Taryn Whiteaker // This is Our Bliss // Thou Swell // Up To Date Interiors
Keep up with it all on social media too!
Leave a Reply