If you’re looking for a piece of furniture to pull double duty outside, then this outdoor daybed is for you! Not only does it function as an outdoor bed, but it also makes a great outdoor sofa! Step-by-step instructions for making your own DIY Outdoor Daybed can be found below!
Remember how I made over my screened-in porch last year?
For the second year in a row?
Well, its gotten more changes this year too.
I never intended to change it any.
But we built a patio. And the patio got custody of the chaise lounge. And that meant I had no where to lay down and relax in the porch like I did before.
Even though that only happens a few times during the year.
When Furniture Medic challenged me to build an outdoor furniture project, I happily accepted and knew exactly what I wanted to build – an outside daybed.
If you aren’t familiar with Furniture Medic, they are literally a medic for furniture. They are one of the world’s largest wood and furniture repair & restoration companies. They can do on-site color touch-up and finish restoration, refinishing, polishing, and repairs.
See, they really are a medic for furniture.

I sketched out my drawings. I made a plan. Grunt Labor swooped in and figured out exactly what and how much lumber we would need, because otherwise I would have bought waaaayyyy too much or waaaayyy too little. Have I mentioned I’m terrible at guesstimating that kind of stuff?
I had fully intended on Grunt and I building this together, but the next thing I knew, I was running around the house trying to get the kid to use the potty and Nicky showed up to help Grunt make the daybed.
So Grunt and Nicky made it, but I had the idea and oversaw construction.
That counts for something, right?
DIY Outdoor Daybed
Disclosure: This post was a collaboration with Furniture Medic. However, all opinions and constant changing of my porch are 100% mine. This post contains affiliate links for your shopping convenience. Click here to read my full disclosure policy.
This cost us right around $200 to make. If you have an old twin mattress laying around, that will save you about $100.
Lumber, Supplies & Tools Needed:
- 2 – 4 in. x 4 in. x 8 ft. Pressure Treated Posts
- 1 sheet of 4′ x 8′ Pressure Treated Plywood
- 4 – 2 in. x 6 in. x 12 ft. Pressure Treated Lumber
- 1 – 2 in. x 6 in. x 8 ft. Pressure Treated Lumber
- 2 – 2 in. x 4 in. x 8 ft. Pressure Treated Lumber
- 4 – 1 in. x 6 in x 8ft. Pressure Treated Lumber
- 1 sheet of lattice
- Twin Size Mattress (We used something that my Dad found for me called a Bunkie from Cantrell’s. Its not quite as thick as a regular mattress. Either one will work. You could even use a large piece of foam too.)
- 3″ Exterior Wood Screws, 1 lb.
- Pocket Hole Jig
- Drill (We use this one.)
- Nail Gun (We use this one.)
- Saw (We used our miter saw for cutting the lumber and our circular saw for cutting the plywood and lattice.)
Before cutting anything, measure your mattress to make sure it is the same size as mine. Mine is 36″ x 72″. You may have to adjust your cuts a bit, but it shouldn’t be much.
Cut List:
- 4 – 4 in. x 4 in. posts, 36″ long
- 3 – 2 in. x 6 in. lumber, 81 5/8″ long
- 4 – 2 in. x 6 in. lumber, 30 7/8″ long
- 4 – 2 in. x 4 in. lumber, 37 3/4″ long
- 2 – 1 in. x 6 in. lumber, 39 5/8″ long
- 1 – 1 in. x 6 in. lumber, 74 1/2″ long
- 2 – 1 in. x 6 in. lumber, 30 7/8″ long
- 1 – 1 in. x 6 in. lumber, 74″ long
- Plywood – 74″ x 37 1/4″
- 2 Lattice Pieces – 30 7/8″ x 19 3/4″
- 1 Lattice Piece – 74″ x 19 3/4″
Steps
Step 1:
Attach the four 4 x 4 posts on the back and sides with one of the 81 5/8″ 2 x 6’s and two of the 30 7/8″ 2 x 6’s. The back 2 x 6 should go from outside edge to outside edge on the back of the 4 x 4 posts. The side 2 x 6’s should go on the inside of the 4 x 4’s, but on the outer edge. Each of the 2 x 6’s should be attached to the 4 x 4 posts at 18 inches high (the top of the 2 x 6’s should be at 18 inches on the 4 x 4’s).

For the back 2 x 6, we attached it using just a regular old drill and screws. For the sides, we used a pocket hole jig to hide the screws, but that isn’t necessary.

Step 2:
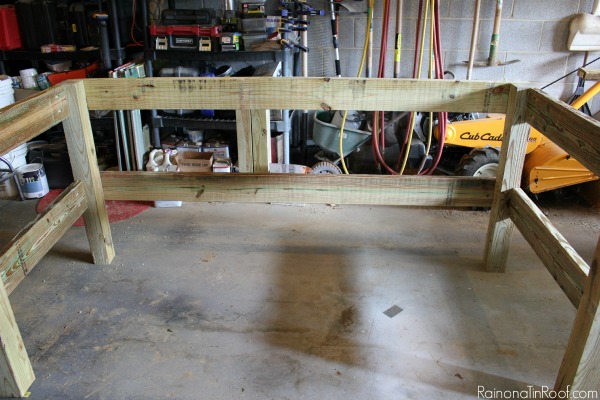
Attach another 81 5/8″ 2 x 6 at the top of the 4 x 4 posts in the back. Attach two more 30 7/8″ 2 x 6’s at the top of the 4 x4 posts on the sides.
Step 3:
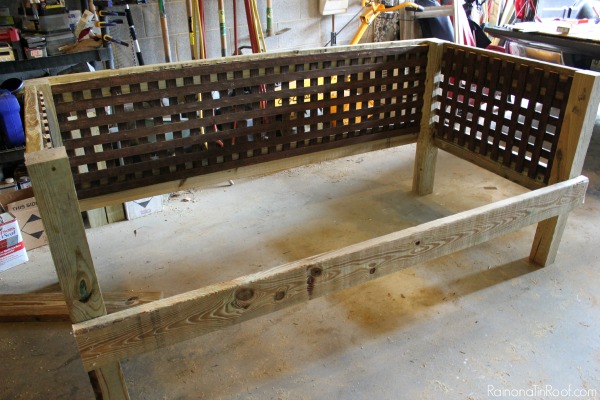
Attach the lattice panels to the sides and back of the daybed along the 2 x 6’s. We used a nail gun to do this.

The lattice panels will not cover the entire length of the 2 x 6’s – put them in the middle. (We had leftover lattice from another project, thus why they are already stained.)
Step 4:
Attach the last 81 5/8″ 2 x 6 along the front of the daybed.
Step 5:
Attach all four of the 37 3/4″ 2 x 4’s along the bottom of the daybed between the front and back 2 x 6’s. Attach with screws. Place two 2 x 4’s in the corners and two in the middle.

Step 6:
Screw the plywood sheet onto the 2 x 4’s that you just attached.

Step 7:
Attach the two 30 7/8″ 1 x 6’s along the inside sides of the daybed. Attach the 74″ 1 x 6 along the top back inside of the daybed.
Step 8:
Attach the two 39 5/8″ 1 x 6’s along the top sides of the daybed. Attach the 74 1/2″ 1 x 6 along the top back side of the daybed.
Cover the mattress with a fitted sheet, accessorize with pillows and enjoy!
My plan is to let all the pressure treated wood dry out and then paint the entire thing and move it into my screened-in porch. Now the question is, what color??

Is there a DIY outdoor bed in your future?
Looking for another great project for your outdoor space?
DIY Outdoor Sectional – Bonus: it has built-in drink coolers!
10+ Outdoor Furniture Makeovers – if you’ve got outdoor furniture that needs a pick-me-up, then don’t miss these!
How to Build a Picnic Table from an old Barn Door – the rustic outdoors at it’s finest!
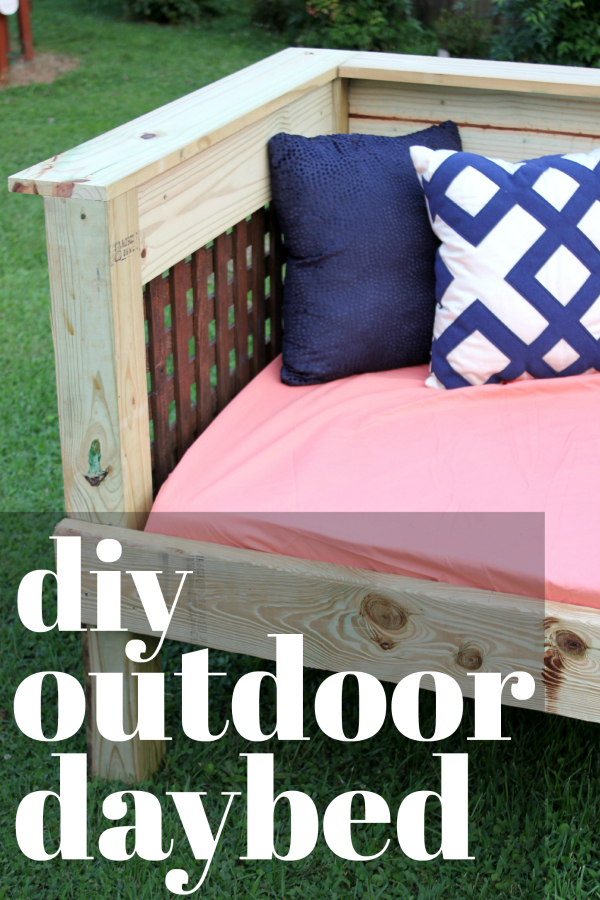
Want to come back for the how-to later? Just pin the image below!
You know you don’t wanna miss any of this crazy.
Sign up to get my posts delivered to your inbox here.
Stalk Me Here:
Pinterest / Facebook / Twitter / Instagram





