Tag: party decor

  • Simple DIY Party Decorations on a Budget

    Simple DIY Party Decorations on a Budget

    Throwing a birthday party, baby shower, graduation party or any other kind of event can get expensive quick! Your party decorations don’t have to be expensive though! Use these easy party decoration ideas to create beautiful DIY party decorations custom fit to your event!

    The Circus’ birthday is in May and the kid has been talking potential party themes since January. Nope, not kidding. I’m not surprised either though. She always gets into the party planning for her birthday and we do love to throw a good party around here. At the moment, she’s going between a dance party birthday and a dolphin birthday party. Yes, complete ends of the spectrum. She’s also considered, but upon further evaluation nixed a Power Ranger party and carnival themed party. Personally, I’m 100% on board for the dance party birthday. I’m seeing a red carpet flanked by “doormen”. You’ll of course have to be on the VIP list to get in. Inside, I’m seeing a dance floor complete with a disco ball. Upon further thought, maybe that should just be my birthday party. 😉

    The Circus’ birthdays have always been filled with lots of homemade party decorations that were cheap and easy to make. After six parties, I’ve come up with quite a few DIY party decorations that can work not only for birthday parties, but also for baby showers, graduation parties and more. Just take the general idea and modify it to fit your party’s theme or colors. 🙂

    This post contains affiliate links for your shopping convenience. Click here to read my full disclosure policy.

    Easy Party Decoration Ideas

    Custom DIY Party Invitations

    DIY Party Decorations

    Have’t made those party invitations yet? No worries! I’ve made all of the Circus’ party invitations using PicMonkey so that I can easily customize them to her and her party’s theme. Use this tutorial for a basic party invitation and this one for making the farm themed one you see above.

    DIY Party Backdrop

    Easy Party Decoration Ideas

    My most tried and true party decoration – a party backdrop made from plastic tablecloths. We’ve had one of these for four out of six of the Circus’ birthday parties and I’ve also made a couple of these for baby showers as well. These are the perfect focal point for your party. Place it behind your cake table, present table, or just leave it on an open wall to work as a photo backdrop too. If you’re using a banner, it’s the perfect backdrop for your party banner too. This thing is so easy to make – all you’ll need are a few plastic tablecloths, scissors and table. Full tutorial for this one HERE!

    Easy Party Banner

    Homemade Party Decorations

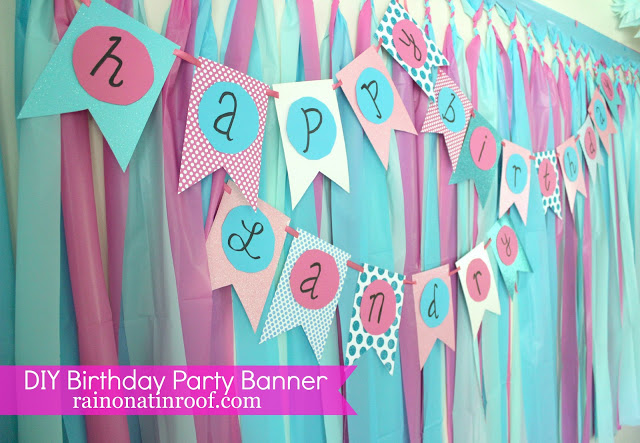
    Speaking of party banners, this one is easy peasy to make. No fancy Silhouette or Cricut required – just trace and cut. Find out how to make it here!

    If you want to be more elaborate with your party banner…

    DIY Party Decorations on a Budget

    I made this superhero style banner with Picmonkey. You can switch up the design to work with your party’s theme. See how to make your own HERE!

    Budget Flower Arrangements + Cheap Centerpieces

    Cheap and Easy Party Decoration Ideas

    For the Circus’ farm party, I wanted simple, but pretty flower arrangements on each table. Premade, ready to go arrangements aren’t cheap. To keep things wallet friendly, I bought three different bouquets of three different kinds of flowers, then mixed them all up in mason jars for the tables.

    If some kind of animal works with your party theme, raid your kid’s toys for little plastic animals, then adorn them with mini party hats. I borrowed farm animals from the Circus then topped each with mini party hats made from cupcake liners.

    DIY Cake Topper

    Budget Homemade Party Decorations

    Cake toppers can add so much to a cake and the party decorations and they can be super easy to make! I did the one above for the Circus’ first birthday using just scrapbook paper, stickers, ribbon and straws! You can easily customize it with colors, patterns and wordage for your party. I did a similar one before for a wedding shower and used the couples monogram on the topper. Find out how to make it HERE.

    DIY Cupcake Holders

    Simple DIY Party Decorations

    I made these cupcake holders using items from a thrift store and they added so much cuteness to the food table! I made mine white so that they can work with any party decor. The top has an inset that allows you to put a round piece of cardstock in, so that’s another place for you to add some color and decor! Find out how to make these cupcake pedestals HERE!

    Photos as Party Decorations

    Easy DIY Party Decorations on a Budget

    This is one of those party decorations that everyone will love to spend some time looking at – a picture collage. If you’re doing this for a birthday party, obviously doing it with the birthday number is a no-brainer. If you’re doing it for a wedding shower, use pictures of the couple both together and separate as they were growing up, then put the photos in the shape of what will be the initial of their last name. For graduation parties, select a picture or two from each year of the graduate’s school grades, then put them in the shape of their initial. More on how I did the one above is HERE!

    DIY Party Hat

    Simple Homemade Party Decorations

    This will always be my most favorite party hat. 🙂 I made this using good ole’ scrapbook paper and yarn pom poms. Super easy. Super adorable. See how to make your own party hat HERE!

    Semi-Homemade Party Decorations

    Easy and Affordable Party Decoration Ideas

    A great way to save time, but still have custom party decorations is to embellish store bought decorations. I like to call these semi-homemade party decorations. 😉 For the ones you see above, I bought plastic horses at the Dollar Tree then painted them in bright colors and glittered their manes. Then, I just glued them on the store bought party hats and wall decorations. See more about it HERE!

    DIY Party Decorations that will become keepsakes…

    Affordable Party Decoration Ideas

    To decorate some of the tables at the Circus’ farm party, I made some simple stencil art that was customized for her party theme. We hung onto these afterwards and now they are hanging in her bedroom! Obviously, farm animals and horseshoes aren’t going to work for every party. 🙂 For things like wedding showers, do art with the couples’ monogram, initials, future wedding date, etc. For baby showers, ask the parents-to-be how they are decorating the nursery and make the art match the nursery so they can use it in there afterwards!

    Personalized Table Decor

    DIY Party Decorations that are easy and cheap.

    Another great table decoration here – add height and personalization by making personalized cutouts relevant to your party theme. These were for the Circus’ birthday, so they have the birthday number on them and her initials. If you’re doing it for a wedding shower, make a bride and groom, rings or “I do!” cutouts. To make my cutouts, I bought a graphics file on Creative Market, then loaded them into my Silhouette to cut out.

    Any budget homemade party decorations you can add to this list?

    Pin This Post
    Simple DIY Party Decorations

    Join the Freak Show On:

    Facebook | Instagram | Pinterest | Twitter

  • Sparkly Horses Birthday Party

    Sparkly Horses Birthday Party

    Every year around the end of April, I feel the need to start drinking a tad bit more.

    Because a birthday party is on the horizon.

    And that means lots of planning.

    And organizing.

    And making.

    All in a specific timeframe.

    And I’ve never been good at any of that stuff all together at once.

    Thus, why the sparkly horse birthday party was two months ago and you are just now hearing about it.

    I needed time to recuperate.

    Sparkly Horses Birthday Party

    This post contains affiliate links. 

    Sparkly Horse Birthday Party / DIY Party Decorations / DIY Party Hats and More

    While many stuffed animals come and go around here, the horses never leave. The circus has an unwavering love for horses.

    It was obvious horses would be her 3rd birthday party theme.

    I actually did less in terms of decorations this year than the past two birthdays, which was nice. Here are a few of my favorite things from the party though.

    Horse Birthday Party / DIY Horse Wreath / DIY Party Decor / Horse Birthday Party Wreath

    I made a horse wreath to put on the front door. I started scouring thrift stores and yard sales for bigger sized horses a few months before the party and found that one for $0.25. I thought I would have to paint it, but it actually worked perfectly with the purple, pink and blue colors I used. The “3” came from the Target dollar spot. I just put gold glitter on it. I made a paper straw garland to drape across the wreath.

    Horse Birthday Party / Photo Number Collage / DIY Party Decorations

    There was also the annual number photo collage. Two and three have not been nearly as easy to make as “1” was. I picked up some vintage horse show ribbons at the Country Living Fair and draped it around the neck of one of the kid’s play horses and popped it beside the collage.

    DIY Party Background / DIY Party Decor / Horse Birthday Party / DIY Party Backdrop

    Inside, we had our also annual DIY party background. It’s just too easy and cheap not to make. I did opt not to make our own banner this year though and instead bought this one from Target. It worked pretty well with the rest of the decor and saved me some time. The black and white fans with horses were semi-DIY party decorations.

    DIY Birthday Party Hats / DIY Party Decor / Horse Birthday Party

    My favorite party decorations, excuse me, party attire, were the colorful and sparkly party hats. Once more, Target had the hats and we just added the horses after painting and glittering them up.

    Horse Birthday Party / DIY Party Decor / DIY Party Hats

    I spread out most of the hats on the buffet and tossed the horns in the clam shell.

    Also, I was a total slacker this year and did not make the birthday cupcakes.

    And it felt so good.  

    Instead, we had a horse birthday cake made and it was the most adorable (and scrumptious) thing I’ve ever seen or eaten. Local Chattanooga people – it was from the Irresistible Sweet Shoppe.

    The absolute best thing about the party though was the petting zoo. We hired Bagby’s Critter Corral to come out for an hour during the party and it was just awesome. They brought ponies, goats, sheep, pigs, rabbits, an alpaca and all other kinds of creatures. All the kids (and lots of the parents) had a ball.

    And the birthday girl got to ride a pony, which totally made her day.

    Need more DIY Party Ideas?

    Then, you’ll probably want to see this…

    DIY Party Decor Ideas

    pin-this-post-2

    Sparkly Horse Birthday Party / DIY Party Decorations / DIY Party Hats and More

    You know you don’t wanna miss any of this crazy.

    Sign up to get my posts delivered to your inbox here.

    Stalk Me Here:
    Bloglovin / Pinterest / Facebook / Twitter / Google+ / Instagram

    blog-signature-summer-15

    SaveSave

  • 1st Birthday Photo Collage (A Personal DIY Party Decoration)

    1st Birthday Photo Collage (A Personal DIY Party Decoration)

    Today, I have another DIY party decoration from the blue and pink 1st birthday party to share with you! This one is a big more personal and everyone loved seeing it at the party.
    I created a birthday photo collage with photos of the kid from her first year.
    Birthday Photo Collage

    Birthday Number Photo Collage

    For baby girl’s 1st birthday, I wanted to have something special to welcome everyone to the celebration. This birthday collage was perfect propped on the front porch. Naturally, there were many oooohhhhsss and ahhhhhhhsssss. I mean, I did it, so, it was fabulous. Oh, and the kid is pretty cute too.
    I started out with lots of pictures, an old barn door from the family farm, and painter’s tape. Seriously high tech stuff, y’all.
    Making a Birthday Number Photo Collage
    Before I started taping photos to the door, I laid them out in a “1” first to make sure I had enough photos and to decide exact placement.
    How to Make a Birthday Number Photo Collage
    After I had it mapped out on the floor, I started from the bottom and worked my way up.
    DIY Birthday Number Photo Collage
    I used a couple pieces of painter’s tape on the back of each photo.
    When I was finished with the “1” I decided to add a little bunting with card stock at the top of the door for some pops of color, and to incorporate the blue & pink theme.
    1st Birthday Picture Collage
    Birthday Number Photo Collage
    The birthday collage really was a big hit and another simple DIY party decoration. Everyone loved seeing how Landry has changed in the past year. The neighbors loved the door as well. They really had no choice since it sat on our porch for days after the party while I was lazy still recovering from the celebration. Now, the neighbors really adore the barn door with just the cute bunting at the top. I finally took the pictures off, but, the door has not yet moved. They may call the neighborhood association on me soon. Can someone bail me out?

    Have you done a photo collage for special occasions?

    Need more great party decoration ideas? Here you go…

    DIY Birthday Party Hat – so cute and only takes about 5 minutes to make!
    DIY Bunting Cake Topper – you’ll just need scrapbook paper, stickers and scissors!
    DIY Cupcake Pedestals – made from thrift store finds and you can use them over and over again!
    DIY Tablecloth Party Backdrop – THE absolute easiest and cheapest party backdrop!
    And you can always find my entire gallery of DIY party ideas here.
     You know you don’t wanna miss any of this crazy.

    Sign up to get my posts delivered to your inbox here. 

    Stalk Me Here:

    Pinterest / Facebook / Twitter / Instagram

  • Make This Adorable DIY Cupcake Holder for $5 or Less

    Make This Adorable DIY Cupcake Holder for $5 or Less

    You won’t believe how easy it is to make this DIY cupcake holder! Not only are these cupcake holders adorable, but they are also super easy to make, can be easily customized to fit your party decor and you can make them with items you find at the thrift store! Here’s how to make a cupcake stand that will wow your party crowd…

    Yes, me again. Back with more DIY party decorations from the blue and pink birthday party extravaganza. This time, I’m super excited to share these DIY cupcake stands with you. I think they are just adorable and I made them using items I found at thrift stores!

    DIY cupcake holder from thrift store items

    This post contains affiliate links for your shopping convenience. Click here to read my full disclosure policy.

    DIY Cupcake Stand

    Materials and Supplies Needed:

    • Candlestick Holders – doesn’t have to be a certain size or color, although I wouldn’t go too terribly tall with them. Can be wood, metal or whatever else.
    • Old Baking Pans with Pretty Edges – old tart pans work great for this, or just about any round or square pan with fluted or pretty edges. I found mine at Goodwill.
    • Liquid Nails or E6000 Glue or ProBond Glue (A glue that will adhere metal to wood. I used Liquid Nails.)
    • Spray Paint Color of Your Choice – I opted for white so that I would have white cupcake stands that could work with lots of different party themes.
    • Scrapbook Paper that coordinates with your party’s theme or colors

    Steps

    Step 1

    Be sure that the candlesticks and baking pans are clean. Attach the old baking pans to the candlesticks using whichever glue you opted to go with. For me, my pans looked best flipped upside down on the candlestick with the fluted edges pointing down. It’s up to you, though!

    Let the glue fully cure overnight.

    Step 2

    Spray paint the cupcake stands with the color of spray paint you opted for. Let dry completely. You could also opt to spray paint the candlesticks and pans different colors before gluing if you wanted to go for a really colorful or contrasting look.

    how to make a cupcake stand - blue and white cupcake stand

    Step 3

    After the cupcake holders are completely dry, cut a circle or square out of your coordinating scrapbook paper that is roughly the size of the top of your cupcake stand tops.

    diy cupcake stand - blue and pink cupcakes on white cupcake stand

    Place the paper on the top of the stand to add a little more pizzaz to the stands. You don’t have to glue it on, it should just sit on top of the stands. Then, for your next party, you can switch up the paper to work for that party’s theme.

    easy blue and white diy cupcake holders

    Aren’t these just adorable little cupcake display ideas? And so easy and cheap to make!

    The cost of this project:
    • Baking Dishes: $1.50 each = $3 total
    • Candlestick Holders: Free (my aunt was going to throw them away. hello?! Give them to the hoarder, please!)
    • Spray paint and liquid nails were all on hand already!
    $3 TOTAL!

    Bam! That’s what I call a deal!

    Other great ideas you could do with these:

    • Use as a cake stand or cake plate for smaller cakes.

    • Make the stands using various sized baking pans and candleholders, then glue one on top of another to create a tiered cupcake stand or cupcake tower.

    Have you made your own cupcake stands before?

    Looking for more great DIY party decor ideas?

    DIY Party Decorations on a Budget – my best party decor that doesn’t break the bank, but still leaves guests oohing and ahhing.

    How to Make a Party Hat – completely (and easily!) customizable for any event!

    DIY Plastic Tablecloth Party Backdrop – don’t worry, you’re going to make those cheap tablecloths look so pretty!

    Want to remember these little cupcake stands for later? Just pin the image below!

    Get more creative ideas on social media!

    Facebook | Instagram | Pinterest | Twitter

  • Party Background Tutorial with tablecloths for $5 (Video)

    Party Background Tutorial with tablecloths for $5 (Video)

    Looking for an easy party backdrop for an upcoming event? This one is your answer! This party background is super easy to make and costs just around $5 in supplies!

    This is the easiest and cheapest party background. In the history of ever.

    Really, I promise.

    Would I lie to you?

    Why absolutely not!

    This is one of the many DIY party decorations I made for my daughter’s 1st birthday party and it was also probably the easiest, but yet the largest scale one!

    Go figure, right?!

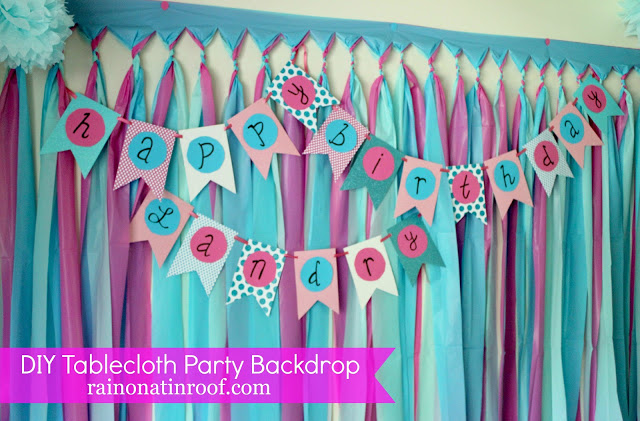
    DIY Party Backdrop made with Plastic Tablecloths - pink and blue - Rain on a Tin Roof

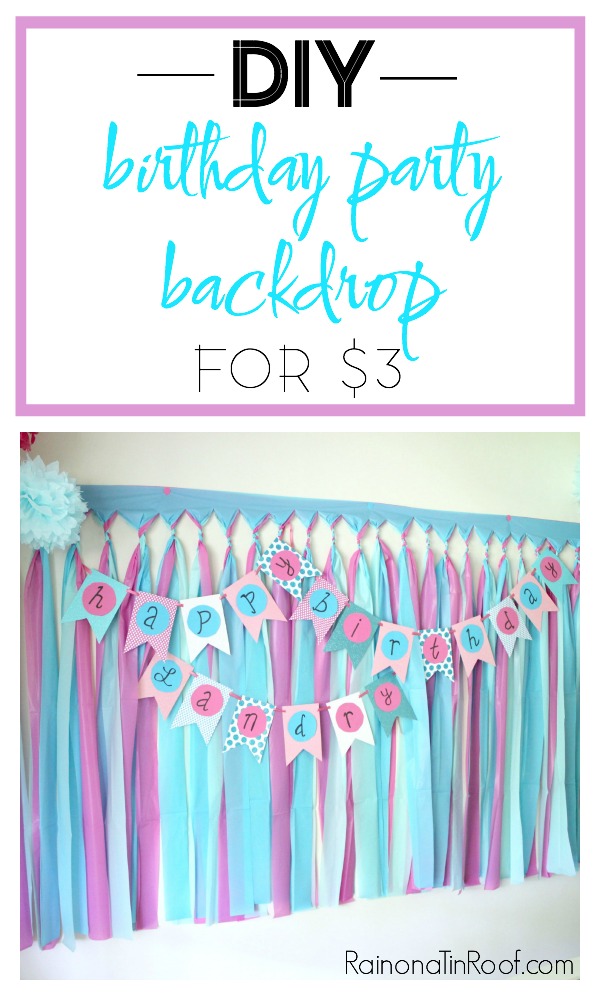
    This party backdrop costs about $3 – $6 to make depending on how much you spend on your plastic tablecloths. You can buy the $1 tablecloths for it at the Dollar Tree or you could splurge a little and buy ones that are about $2 or $3 at Party City. It’s totally your choice and it’s totally customizable – you can choose whatever colors you want to for it. Personally, I got my tablecloths from Party City because they have a huge variety of colors.

    To make this, you’ll need about an hour or so, but it’s an easy hour!

    Party Background

    This post contains affiliate links for your shopping convenience. Click here to read my full disclosure policy.

    Materials Needed:

    Steps

    The video below will show you exactly how to make the party backdrop step-by-step. I’ve also included written instructions below the video as well.

    [adthrive-in-post-video-player video-id=”yhS6773x” upload-date=”2016-08-16T14:38:10.000Z” name=”Rain on a Tin Roof – DIY Party Backdrop” description=”Make this less than $5 and very simple diy party backdrop to spruce up any party! All it takes is a little time and three plastic tablecloths.”]

    Step 1

    Determine if you want your background to hang horizontally or vertically. The one shown in this post you are reading now is hung horizontally because it worked better that way for the space I was hanging it on. I have made these and hung them vertically though as well. You can see a vertically hung party backdrop I did for the sparkly horses birthday party here.

    Step 2

    Once you decide which direction to hang it, open up one of your tablecloths and put it on the wall with thumbtacks. For mine hanging horizontally, it took 6 thumbtacks. Just start in one corner and tack it up as you go. Once you have the first tablecloth up, step back and decide if it needs to be leveled out in any places and adjust as needed. You can put the tablecloths in any order when it comes to color. In the end, all the colors basically mix together. If you’re really particular about one color showing more than the others, then put the one you want to show more as the last layer on top of the other tablecloths. There will be a little sliver of it that will show more at the very top.

    Step 3

    After the first tablecloth is up, open up another one and layer it on top of the first one. I did this by removing one tack at a time, and then putting it back through both tablecloths. Repeat with the third and final tablecloth.

    Step 4

    Next, take a pair of regular scissors and cut strips up to about 3-4 inches from the top of the tablecloths. You are going to cut all three tablecloths at once when you cut a strip. I didn’t even measure the width of my strips, I just eyeballed it. They were each probably around 3-4 inches wide.

    Step 5

    Once all your strips are cut, you are going to braid each set of strips together. Start on one side of the backdrop, take your first set of strips (one of each color that you cut at the same time), and braid them together from the top down. You only want to braid down far enough to hold the strips together. You don’t have to start with a certain color and end with another one. Just braid each set together – once more, all the colors will blend together in the end. Here is how mine looked when I braided it after I had cut all the strips.

    Party Backdrop

    Once you have braided all your strips, you’re done!

    Birthday Party Backdrop

    Told you it was super simple!

    The white thumbtacks were driving me crazy at the top, so I punched out balloon shapes from pink & blue card stock and put them over the tacks with square photo mounts.

    DIY Party Backdrop: Helpful Tips, Tricks, and Questions Answered

    Can I make this ahead of time and then take it to the party location and hang it up there? 

    Yes. What I would suggest doing is lay all the tablecloths on the ground, if you don’t want to put them on your wall. Put some heavy books or something similar along the top to keep them in place, then cut the strips and braid them as stated above. Once braided, you should just be able to pick it up and take it with you.

    Could I do this with more than three colors? 

    You bet! I did this same backdrop with six colors right here!

    Could I staple this together and then attach it to a wall with tape? The place the party is located at doesn’t allow thumbtacks in their walls.

    I definitely think you could staple it together along the top. As for the tape, I would recommend using a wide width FrogTape. It’s strong, but shouldn’t take the paint off the walls.

    Have you ever made a DIY party background before?

    See how I put a spin on this backdrop for the kid’s 2nd birthday by layering in more colors here!

    Looking for more easy DIY party decorations?

    Birthday Photo Collage – perfect for birthday parties, graduations, anniversaries and more!

    DIY Party Banner – no fancy cutting machines required! You’ll just need scrapbook paper and scissors!

    DIY Bunting Cake Topper – another one where you’ll just need some scrapbook paper!

    DIY Cupcake Pedestals – so cute, yet made from thrift store finds!

    DIY Party Hat – if you’ve got five minutes, you can make this adorable party hat!

    Want to come back to this birthday party backdrop idea later? Just pin the image below!

    DIY Party Backdrop with Plastic Tablecloths | DIY Party Background | DIY Party Decorations | DIY Party Decor | Party Backdrop DIY Ideas

    Hang out with us on social media!

    Facebook | Instagram | Pinterest | Twitter

    SaveSaveSaveSave

  • A Stylish Blue and Pink Birthday Party

    A Stylish Blue and Pink Birthday Party

    We made it through year one. No serious injuries, no serious sickness, only busted her lip a few times, fell off the couch and bed a couple times, multiple bruises, and I only let her eat a clump of dirt once. We. Survived. It. Hallelujah.

    To celebrate the big day, we threw a blue and pink birthday party. As much as I may or may not love the Care Bears and Strawberry Shortcake theme ideas, we went for a more stylish approach to the party: Blue & Pink.
    Pink and Blue Birthday Party
    With the exception of running out of gas for the grill and setting off the smoke alarm (luckily Grandma rigged it with a plastic bag), the party went great! But hey, at least we can tell her a funny story about her 1st birthday.
    This post contains affiliate links for your shopping convenience. Click here to read my full disclosure policy.
    Pink and Blue Birthday Party
    If you remember my birthday party inspiration board, you know I used a lot of ideas from Jamie at Better with Age and April at House by Hoff.
    Blue and Pink Birthday Party Ideas
    I loved Jamie’s cake for her little girl with all the sprinkles. I ended up not using the recipe she did, but still going for the sprinkle effect on top. I read that recipe and totally knew I was not a good enough baker to pull it off.  She also put really cute sprinkles around the bottom of her cake, but once more, I am not very good at icing (Thank God my amazing mother-in-law was here to salvage the cake), so I opted to not attempt the sprinkles around the bottom.
    To top the cake off, I made the happy birthday banner for it.
    Blue and Pink Birthday Party Ideas
    The kid got her very own cake served on a silver platter. Spoiled much? Grunt Labor iced it because at that point in the day, I was done icing cakes and cupcakes and in desperate need of alcohol. These birthday parties are BEASTS! My hat is off to all you folks with multiple kids!
    Blue and Pink Birthday Party Ideas
    Blue and Pink Birthday Party
    We also served cupcakes. I did use the same recipe Jamie did for her cupcakes, which can be found here.
    The white cupcake pedestals were thrifted finds I put together for less than $3 each. I’ll show you how to do those here.
    I completely stole the idea for the balloon cupcake toppers from April. She made flowers for her cupcake toppers and shows you how to make them here. I made the tissue paper flowers, similar to the ones April also made. They were very easy to make, a lot like my tissue paper pom-poms, just on a smaller scale.
    Blue and Pink Birthday Party
    We served pink lemonade and had some blue and pink striped straws for extra flair and decor.
    Blue and Pink Birthday Party
    The backdrop is made from tablecloths – super easy, I’ll show you how to make it here – and I made the banner out of scrapbook paper – I’ll show you how to do that here! I threw together some of the tissue paper pom-poms to hang from the ceiling.
    1st Birthday Chalkboard
    1st Birthday Chalkboard Wall
    I decorated both chalkboards with birthday themes and the best chalkboard writing skills I could muster.
    Blue and Pink Birthday Party
    While scouring through the attic a couple months back, I found this Happy Birthday musical thing-a-ma-bob that was my Dad’s. I thought it fit perfectly with the theme, so I set it out as a little vintage touch. Sorry, Dad, I’m sure the “vintage” description makes you feel old.
    1st Birthday Party Ideas
    I took an old barn door from my great grandfather’s farm and made a picture collage in the shape of a 1 to greet guests as they entered. See the full barn door tutorial here.
    Remember the super cute DIY party hat I made? That is how that turned out…
    See all my DIY party decorations and ideas here.
    You know you don’t wanna miss any of this crazy.

    Sign up to get my posts delivered to your inbox here. 

    Stalk Me Here:

    Pinterest / Facebook / Twitter / Instagram

  • DIY Birthday Banner: Simple and Affordable

    DIY Birthday Banner: Simple and Affordable

    Looking for a simple to make, yet adorable DIY birthday banner? Look no further! This DIY banner is easily made with a printable template, card stock, scissors and markers. You can fully customize it to match your party’s decor! 
    This DIY Birthday Banner is one of the many homemade DIY party decorations I made for my daughter’s 1st birthday party.
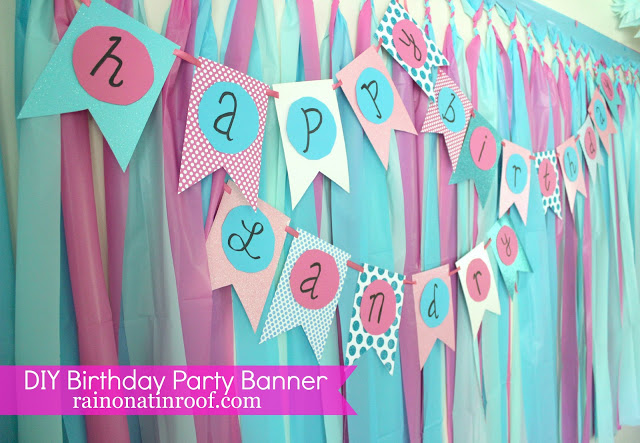
    DIY Birthday Banner - made with cardstock and markers -  Rain on a Tin Roof

     It was a blue and pink themed party with LOTS of DIY party decorations (did you really expect me to pay lots of $$ for it all considering how cheap I am?)!

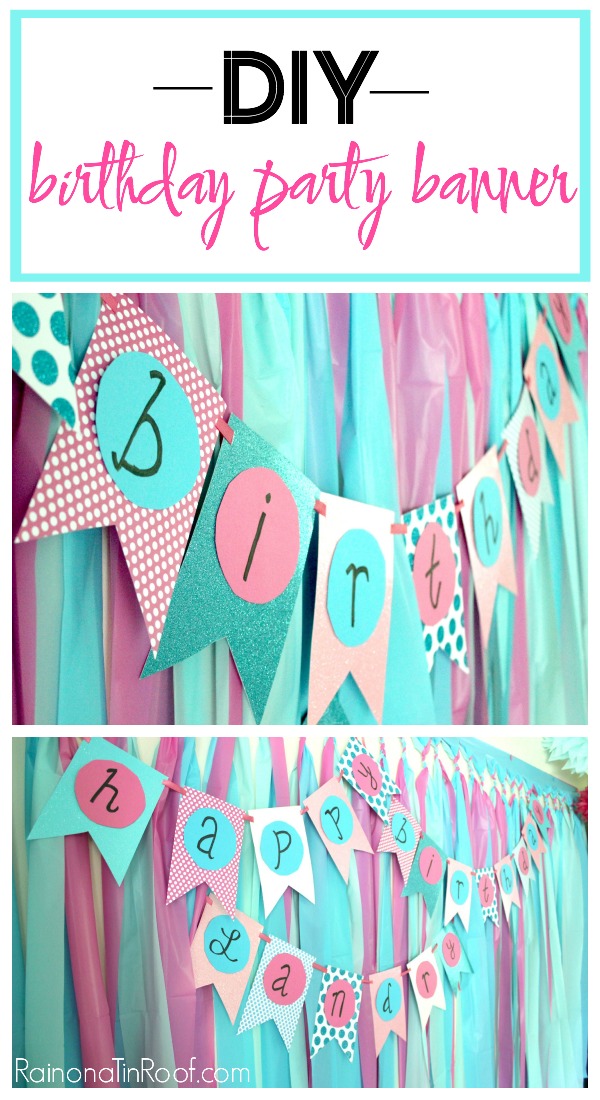
    This DIY party banner hung on top of the DIY party backdrop. The banner was super simple to make and turned out really cute! Really, it can be a DIY banner for any kind of celebration – customize it to your own liking!

    This post contains affiliate links for your shopping convenience. Click here to read my full disclosure policy.

    Happy Birthday Banner DIY Project

    Materials Needed:

    • Scrapbook Paper or Cardstock (I got about two “flags” out of a 12×12 piece of scrapbook paper. I got all my paper at Hobby Lobby.)
    • DIY Birthday Banner Template (found here)
    • Adhesive Mounts of some sort (I used these)
    • X-Acto Knife or Hole Punch
    • Ribbon (I used this kind)
    • Sharpie
    • Scissors

    I know I took pictures of this process, but it appears, I have deleted those photos! I am so sorry, but I promise, this is so easy you really don’t need photos.

    Steps

    Step 1:

    Print out the banner template noted in the supply list from Miss Lovie Creations. She did a great job of making her DIY birthday banner and I did mine similar to hers.

    Happy Birthday Banner DIY - DIY Birthday Banner Template Printable -  Rain on a Tin Roof
    Source

    Step 2:

    Cut out the template. I used regular scissors for this.

    Step 3:
    Place the banner template over the back of your scrapbook paper or card stock and trace it with a pencil. Trace as many banners and circles as you will need. To spell out just “Happy Birthday,” you’ll need 13 banners.

    Step 4:

    Cut out the traced pieces. I used scissors for this as well, but you could use the X-Acto knife.

    Step 5:

    Place the circle template over scrapbook paper or card stock. Trace as many circles as letters you need. Again, you’ll need 13 to spell out “Happy Birthday.” I chose to use just blue and pink solid card stock for this so that my letters didn’t disappear on patterned paper.

    Step 6:

    Cut out circles.

    Step 7:

    Write your letters on the circles. I used a pencil to sketch the letters out and then just went over them with a sharpie.

    Step 8:

    Use the adhesive mounts or some other adhesive to attach the circles to the flags. Hot glue would probably work fine as well.

    Step 9:

    Use the X-Acto knife to cut small slits in each upper corner of the flags. If you don’t want to use the X-Acto knife for this, you could also use the hole punch.

    Step 10:

    Weave your ribbon in and out of the flags to string them together, then hang with thumbtacks.

    All done! Easy peasy!

    How to Make a Birthday Banner - Homemade birthday banner on party backdrop -  Rain on a Tin Roof

    I put my thumbtacks behind the backdrop to keep them hidden.
    DIY Banner - How to Make Homemade Banners using Cardstock -  Rain on a Tin Roof

    Now aren’t you glad you learned how to make a birthday banner?

    Told you it was super easy!
    Need more DIY party decoration ideas? I totally have you covered!
    DIY Birthday Party Hat – so cute and takes about 5 minutes to make with scrapbook paper!
    DIY Bunting Cake Topper – another easy scrapbook paper and sticker project!
    DIY Cupcake Pedestals – made with thrift store items and you can use them over and over again!
    DIY Tablecloth Party Backdrop – the easiest and cheapest party backdrop EVER! It’s made from plastic tablecloths!
    And you can always find all my DIY party decorations HERE!
    Want to come back here later? Just pin the image below!
    How to Make Homemade Banners for Parties -  Rain on a Tin Roof

    Sign up to get my posts delivered to your inbox here. 

    You know you don’t wanna miss any of this crazy.

    Stalk Me Here:

    Pinterest / Facebook / Twitter / Instagram

    How to Make a Happy Birthday Banner - customizable for any party -  Rain on a Tin Roof

  • DIY Birthday Hat for less than $5 in 15 minutes

    DIY Birthday Hat for less than $5 in 15 minutes

    Can’t find the perfect party hat for the big bash? Don’t fret! Make your own DIY birthday hat in no time using this tutorial for how to make a party hat out of paper! It’s super easy using the provided party hat template!

    As you all probably know by now, there is a big birthday party to be had. Baby girl is turning one. Of course, she must have a party hat. I would not settle for your typical birthday hat you can buy at a party store. Those are fine and dandy, but no, no, no. I wanted something that she would really hate me for later in life. That’s how I roll. So, along with all the other DIY party decorations, I made this birthday party hat for her.

    DIY Birthday Hat using Party Hat Template - Rain on a Tin Roof

    Yes, this should do. This birthday hat was surprisingly VERY simple to make. Here’s how to do it…

    How to Make a Birthday Hat

    This post contains affiliate links for your shopping convenience. Click here to read my full disclosure policy.

    Materials Needed:
    • Birthday Hat Template (can be found here)
    • Scissors
    • Cardstock Paper in Color / Patterns of Your Choice
    • X-Acto Knife
    • Hot Glue Gun
    • Items for decorating the hat (optional) – I used a pom pom maker to make pom poms for embellishing the hat.
    • Ribbon or Elastic String

    Steps

    Step 1

    Print the party hat template noted above, then cut out the template.

    Party Hat Template - Rain on a Tin Roof

    Step 2

    Place the template over the paper you are making your party hat out of.

    How to Make a Party Hat Out of Paper - Rain on a Tin Roof
    I found this super cute blue glitter dots scrapbook paper at Hobby Lobby.
    Trace around the template onto your party hat paper, then cut it out.
    DIY Party Hats using a Birthday Hat Template - Rain on a Tin Roof
    Use the X-Acto knife to make slits on the cardstock paper where the template notes.
    Step 3
    Wrap the scrapbook paper into a cone shaped hat and stick the tab in the slot. I did have to make my slot a bit longer than the template had. I also hot glued under the tab to secure it once it was in the slot.
    Step 4
    If you want to embellish your birthday hat further, then do so now.
    I used my Pom-Pom maker to make pom poms to add to the hat.
    How to Make a Birthday Hat - embellishing with pom poms - Rain on a Tin Roof
    Some people make these with forks, but I have always used my makers. I used the large green one for the pom-pom on top of the hat. I also made 6 small poms with the pink one to place around the bottom edges of the party hat. I just hot-glued those bad boys right on the hat.
    Step 5
    For our straps, I bought some pink ribbon and made a small slit on each side of the party hat. I tied a knot on the inside of the hat to secure the ribbon.
    How to Make a Paper Party Hat - Rain on a Tin Roof
    You could also hot glue the ribbon or elastic string to the inside bottom edge  to secure the hat onto the party guy or gal.
    Make a party hat using cardstock - Rain on a Tin Roof
    And of course, we had to give the first birthday hat a test run…
    Yep, you can already see the disbelief and resentment in her face. Score.

    Any DIY Party Hats in your future?

    See another version of this party hat here and loads more party ideas are here. Make sure you don’t miss this easiest ever and cheapest ever DIY party backdrop using plastic tablecloths either!
    Want to come back here later? Just pin the image below!
    Birthday Party Hat DIY - Rain on a Tin Roof
    You know you don’t wanna miss any of this crazy.

    Sign up to get my posts delivered to your inbox here. 

    Stalk Me Here:

    Pinterest / Facebook / Twitter / Instagram

    SaveSave