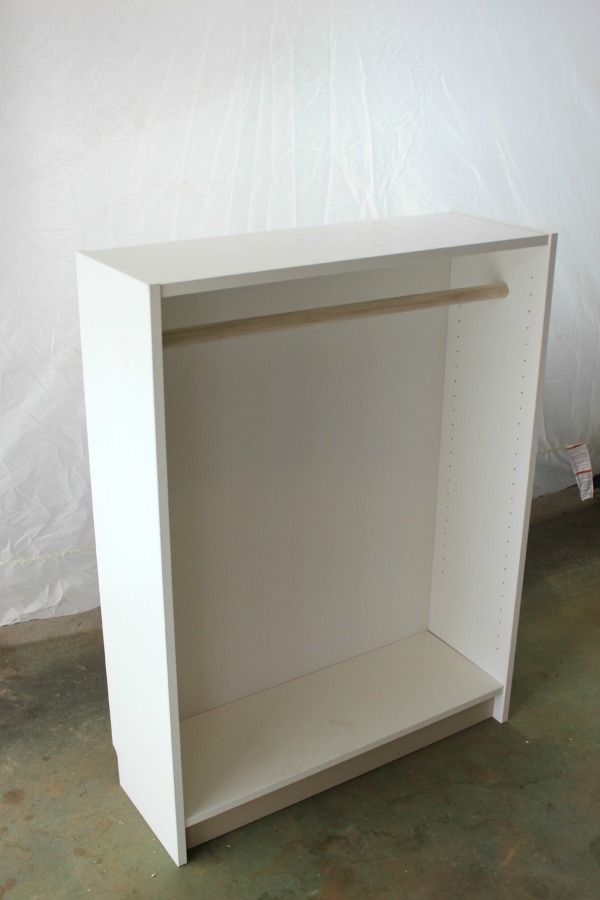
Tag: dress up

  • DIY Headband Holder for $5

    DIY Headband Holder for $5

    Swimming in a sea of headbands for your little girl and not sure how to store and organize them? Then, learn how to make a headband holder below! This DIY headband holder is a perfect (and easy!) solution for headband storage.

    Remember our Aunt Rochelle?

    The aunt that you wanted for yourself?

    The one who sends the circus ensembles complete with matching shirts, pants, dresses, cardigans and even sunglasses.

    Well, that amazing Aunt Rochelle, she also sends hair accessories to match every single outfit she’s ever bought for the circus – mostly of the headband variety.

    She’s pretty much any little fashionista’s dream. 

    She is 100% the reason why the kid wins best dressed at preschool every year.

    Well, there really isn’t an award for that, but if there was, she’d have it in the bag. 

    While the circus will wear, and love, every shirt, shorts, dress, sunglasses and everything else Aunt Rochelle sends, she isn’t always a fan of the headbands.

    So I had a brilliant idea when I made her dress-up station.

    I would also make a headband holder so the circus would easily spot her headbands and in theory, want to wear them.

    DIY Headband Holder

    Headband Holder - easy diy project - Rain on a Tin Roof

    This post contains affiliate links for your shopping convenience. Click here to read my full disclosure policy.

    By the time I got to this addition of the dress-up station, funds were low, so I was scrounging around for cheap materials for this. I managed to make it for about $5 total – and you’re never going to believe what I used for the actual headband holder part…

    Materials Needed: 

    DIY Headband Holder - Supplies - Rain on a Tin Roof

    *Ignore the Mod Podge in the image – I ended up not needing it. 

    • Paper Towel Roll, preferably about 1/2 – 3/4 used. (yep, not kidding.)
    • Wood Base / Plaque (mine came from Michael’s – don’t forget to use a coupon!)
    • 5/8″ dowel – cut down to about 8 inches or so. You can easily make it shorter or taller if you wish, just cut the dowel accordingly.
    • Wood Glue
    • Drill and Drill Bits
    • Gold Spray Paint or another color of your choice
    • Fabric – about a 24″ inch square or so. You’ve probably got scrap laying around you can use.
    • Hot Glue Gun
    • X-Acto Knife
    • Scissors

    Step 1:

    Mark the center of your wooden plaque. Attach a drill bit that is the same size as the wooden dowel and drill a hole through the wooden plaque where you marked the center.

    How to Make a Headband Holder - drill hole in wood plaque - Rain on a Tin Roof

    Step 2: 

    After you have cut your dowel down to your desired size, place a little wood glue around the bottom of the dowel and insert it into the hole that you just made.

    Headband organizer - put wooden dowel in wood plaque - Rain on a Tin Roof

    Wipe away any excess glue from around the edges and let it dry for about 30 minutes.

     Step 3: 

    While the glue is drying, cut a hole in the center of the paper towel roll using the X-Acto Knife. You want to go through one side of all the paper towels and the cardboard roll in the middle, but not all the way through the roll.
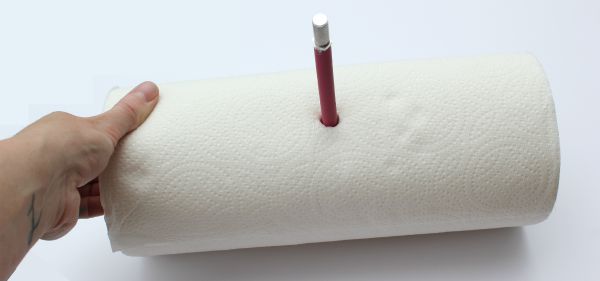
    Headband Storage - put hole in center of paper towel roll - Rain on a Tin Roof

    I found it easiest to punch a hole through the roll with the knife first and then kind of carve out the circle.

    Step 4: 

    Spray paint the wooden base and dowel.

    Step 5: 

    While the base and dowel are drying, wrap your fabric around the paper towel roll. Start by hot gluing an edge onto the paper towels where you made the hole and then wrapping around the other edge. Put a small line of hot glue along the edge that will be seen and fold it over so you have a clean edge, then hot glue that onto the paper towel roll just covering your first edge.

    headband storage organizer - cover with fabric - Rain on a Tin Roof

    Use scissors to cut a small hole in the fabric where the hole in your paper towel roll is. For the ends of the fabric, put a little hot glue inside the paper towel roll edges, then just shove the material into the edges.

    Step 6: 

    After the base and dowel is dry, slide the covered paper towel roll onto the dowel.

    Headband Storage Ideas - paper towel roll covered in fabric - Rain on a Tin Roof

    And now you have an adorable way to store and organize all those headbands!

    And ya know what, even though the kid now has this adorable little headband organizer, she still doesn’t wear all her cute headbands.

    Nope.

    She wants me to wear them instead. 

    Most days, you can find me sporting a huge pink bow on my head.

    Update: Just in case you were wondering, it’s now been nearly four years since we made this headband holder and we’re still using it! Paper towel rolls are pretty sturdy when they need to be!

    Will you be making a headband organizer?

    Looking for more great accessory storage ideas for your kiddos?

    This DIY sunglasses holder is a fun way to display all the kid’s shades.

    They will adore having their own dress-up closet! Psst….it’s easy to make too!

    And be sure to see these six pretend play stations for kids – they’ll even learn while they’re playing at the stations!

    Want to come back to this headband holder later? Just pin the image below!
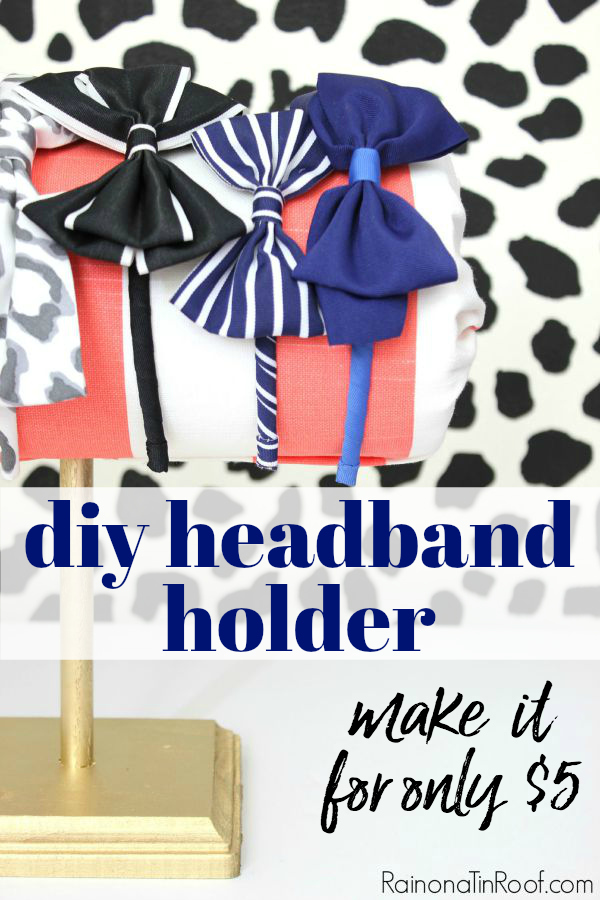
    Headband Organizer DIY - hair accessories storage for little girls - Rain on a Tin Roof

    And Stalk Me Here…

    Pinterest / Facebook / Twitter / Instagram

    blog-signature-summer-15
    headband organizer diy - headband storage for little girls - Rain on a Tin Roof

    SaveSave

  • Dress Up Closet: Easy DIY Dress Up Storage from a Bookcase

    Dress Up Closet: Easy DIY Dress Up Storage from a Bookcase

    Coming up with great storage solutions for your kids’ toys and paraphernalia can often be hard – not this one though! If dress up clothes are taking over your life then make this DIY dress up closet now! A bookcase is all you’ll need to get started and create dress up storage to save your sanity and a dress up station your little one will love!

    The circus has discovered princesses.

    Specifically Belle and Cinderella.

    She’s also discovered ballerinas and cowgirls and doctors.

    And she wants to be all those things.

    Numerous times throughout the day.

    Luckily, she hasn’t morphed into a total girly girl. Let’s be honest – I don’t know if I could handle that.

    Its more like tutu one minute and mud the next.

    I’ll take that any day over constant tea parties and tiaras. 

    I thought I had the dress-up department confined to one box.

    And then her birthday happened.

    Suddenly, it was as if all of Broadway’s costume department threw up in her room.

    There were meltdowns over not being able to find Ariel’s shoes to wear with Sophia’s dress – not to mention all the other princess dresses that were lost to the hurricane that went through her room.

    It was around that time that a great idea finally hit me as to what I would do for the IKEA Billy Bookcase Hack that HomeRight asked me to participate in – it would become a super cute kids dress up closet.

    DIY Dress Up Closet using a Bookcase - Rain on a Tin Roof

    Disclosure: This post was a collaboration with HomeRight. However, all opinions and love of easy hacks that prevent meltdowns are 100% mine. This post contains affiliate links for your shopping convenience. Click here to read my full disclosure policy.

    I can’t begin to tell you how much the kid loves her new dress up storage. I’ve only heard that many “wows” from her once or twice before.

    And more importantly, mama hasn’t had to go on a mad search into a pile of never-ending dress up clothes for a missing Belle shoe.

    I almost feel bad calling this a “hack” because it was so easy, but technically its not what its meant to be, so that is a hack, right? And the easier the hack the better. 

    P.S. The bookcase is only $40. If you have paint and a mirror lying around to use, there’s a pretty good chance you can get out of this thing for $50.

    That’s a small price to pay to end meltdowns and keep your sanity.

    Also, it doesn’t have to be an IKEA bookcase – any mid-size bookcase will do!

    DIY Dress Up Station

    Materials and Supplies Needed: 

    Steps

    Step 1: 

    First off, you just want to assemble the bookcase as the directions say. The only thing you don’t need to worry about is putting in the shelves.

    Step 2: 

    Cut the dowel rod down to the width of the bookcase opening. Place the dowel where you would like it and use a nail gun to secure the dowel in place on either side of the bookcase.

    Bookcase Before Becoming a Dress Up Station - Adding the hanging bar - Rain on a Tin Roof

    You can also do this with a drill and a couple of screws if you prefer. I opted for the nail gun because it was easier. It also helps to have someone hold the dowel in place and make sure its level as you attach it to the bookcase. Not that mine wasn’t level the first go-round or anything.

    If you have another kind of hanging bar lying around, you could use that too as long as it fits within your bookcase and is sturdy enough for hanging clothes on.

    Painting the Kids Dress Up Closet

    Step 3: 

    Paint the bookcase and shelves.

    For this hack, I got to use one of my favorite toys and a new toy that is quickly becoming a favorite.

    Painting the DIY Dress Up Closet using the HomeRight Spray Shelter - Rain on a Tin Roof

    HomeRight just introduced their Spray Shelter. It is the best thing ever for painting in a garage or similar enclosed area. It keeps any paint overspray contained and takes less than 10 minutes to set up.

    My husband only wishes they had made it sooner so that his beloved tiller wasn’t speckled with black, kelly green, and navy dots. 🙂

    Using a paint sprayer to paint a kids dress up closet - Rain on a Tin Roof

    To paint the bookcase, I used my HomeRight Finish Max paint sprayer. This sprayer is by far the easiest paint sprayer I’ve ever used and gives a perfect fine finish. The best part is that no air tank is required – you just plug it in and go.

    Painting an upcycled bookcase with a HomeRight Paint Sprayer - Rain on a Tin Roof

    Since this piece is solely for the circus, I asked her what color she wanted it painted. She said blue. I had some Boheme by Velvet Finishes on hand, so that was what we went for. I thinned the paint with water before spraying it on.

    Shelves for the DIY Dress Up Storage - Rain on a Tin Roof

    To paint the shelves, I just laid them out on 2 x 4’s across sawhorses.

    Step 4: 

    After the paint was good and dry, I gave the bookcase a good topcoat of Polycrylic, then cleaned the paint sprayer.

    HomeRight has another new toy that makes cleaning the sprayer a breeze.

    Cleaning a HomeRight Finish Max Paint Sprayer - Rain on a Tin Roof

    Its called the Rapid Clean. You hook one end up to a water hose, the other up to your paint sprayer, turn on the water and pull the trigger.

    How to Clean a Paint Sprayer - Rain on a Tin Roof

    You’re all done with cleaning in a matter of minutes.

    Step 5:

    Once the topcoat was dry, I placed the shelves toward the bottom of the bookcase and took it up to the kid’s room.

    Dress Up Storage made from a Bookcase - Rain on a Tin Roof

    Mama saved the day with a mirror that she had hung onto from her childhood home. To make sure the mirror was secure, I found a stud in the wall behind where the bookcase would be, then marked that spot on the bookcase and cut out a small hole. There, I drilled a screw into the stud that I then hung the mirror on.

    The lower shelves hold shoes and hats.

    Dress Up Closet for Toddlers - Shoe Storage on Bottom - Rain on a Tin Roof

    I also made some DIY animal jewelry holders for the side of the dress up center.

    Dress Up Storage IKEA Bookcase - jewelry holders - Rain on a Tin Roof
    DIY Dress Up Station for Kids from a Bookshelf - Rain on a Tin Roof

    I topped it off with quote art (which pretty much sums the circus up) in a DIY lucite frame as well as a DIY sunglasses holder.

    DIY Sunglasses Holder - Rain on a Tin Roof

    And a DIY headband holder.

    DIY Headband Holder - Rain on a Tin Roof

    Well, what do ya think?

    Not too shabby for an easy $50 IKEA Billy Bookcase Hack, eh?

    Looking for more great projects to bring a smile to your kid’s face?

    This DIY Children’s Stage with Hidden Dress-Up Storage has brought our little girls countless hours of fun!

    Easiest Ever DIY Lemonade Stand – perfect for those little budding entrepreneurs in your life!

    How to Create an Object and Text Feature Wall for Your Little One – the perfect way to add a punch of their own special personality to their room.

    This diy wall-mounted drop down art desk has kept my little girl occupied for hours.

    DIY Kids’ Play Table with Storage – she loves playing farm on this table! It’s great for all kinds of things!

    Want to save this tutorial for later? Just pin the image below!

    How to Make a Dress Up Center - Rain on a Tin Roof

    You know you don’t wanna miss any of this crazy.

    Stalk Me Here:

    Pinterest / Facebook / Twitter / Instagram

    Storage Solutions for Kids - Dress Up Closet - Rain on a Tin Roof

    SaveSave