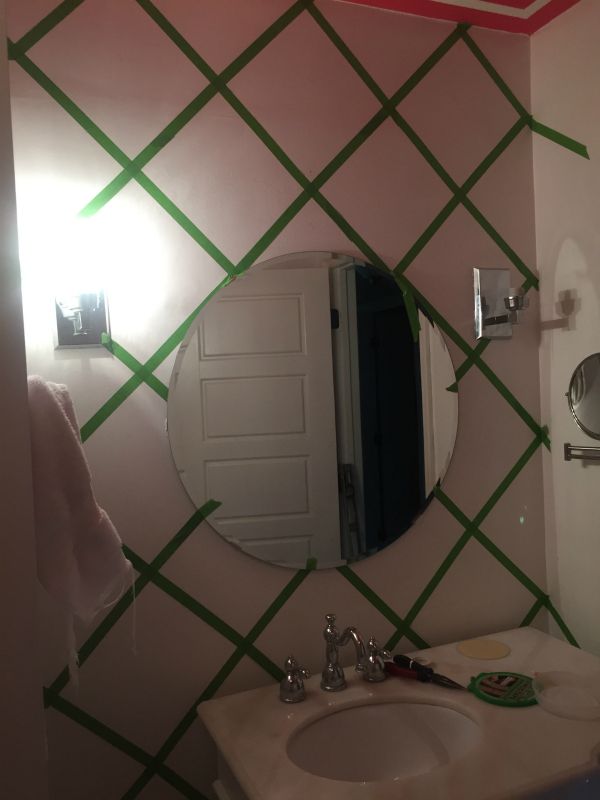
Tag: bathroom

  • Tackling a Bathroom Remodel on a Budget: Nine Ideas

    Tackling a Bathroom Remodel on a Budget: Nine Ideas

    Tile, vanity, hardware, plumbing fixtures. It all adds up and it all adds up fast! These nine bathroom remodel ideas on a budget will help you save some serious dough! The best part? No compromising on style!

    Bathrooms and kitchens. The two rooms that will make or break your house when it comes selling time and that also tend to cost the most when it comes to renovations.

    If you’ve got the budget for an out-of-this-world bathroom renovation, then go for it! There isn’t a doubt in my mind, you’ll enjoy that bathroom for years and years to come.

    If, however, your bathroom remodel budget is closer to non-existent than anything else, no worries! I’ve got nine different ideas for you here that can help you save some serious dough on your bathroom remodel, without compromising style.

    Local Chattanooga folks – I’ll be teaching a workshop about remodeling your bathroom on a budget in November – more details here!

    Bathroom Remodel on a Budget

    Have your bathtub/shower painted instead of replacing it.

    Bathroom Remodel Ideas on a Budget

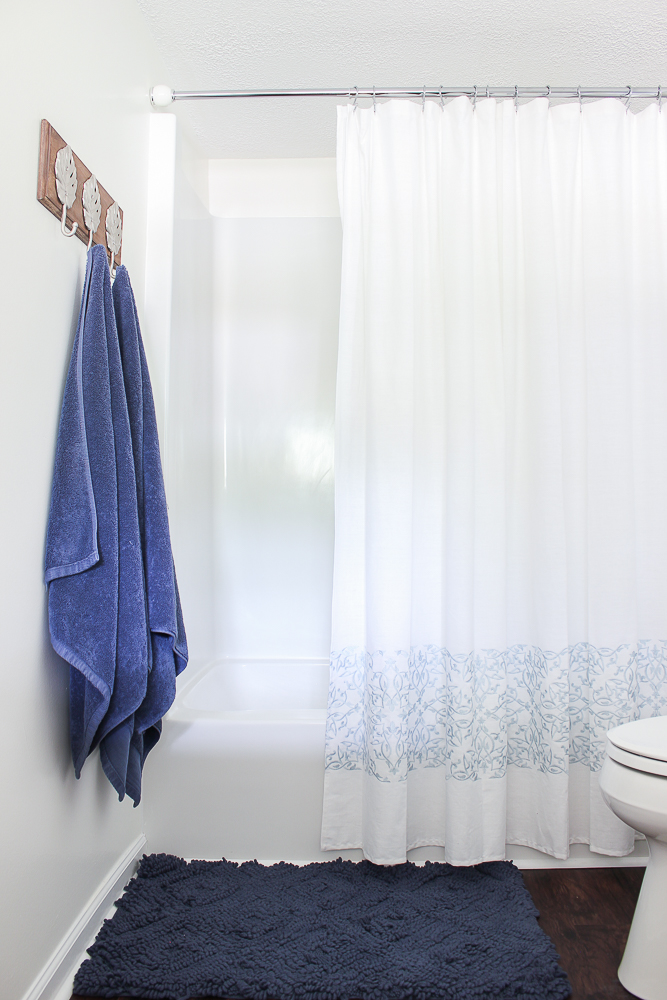
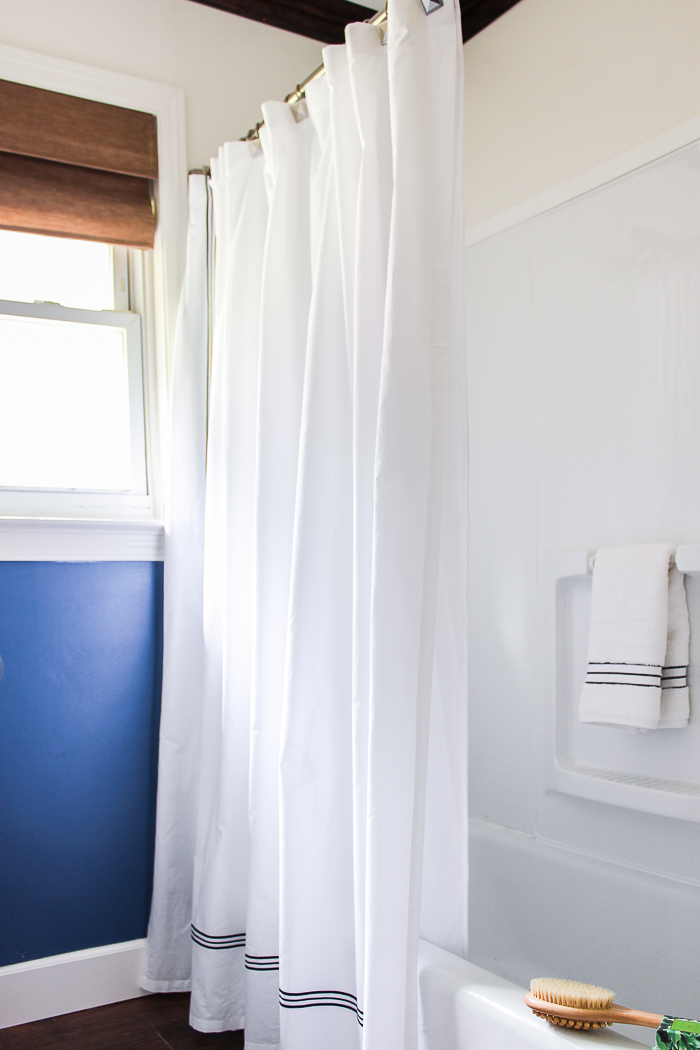
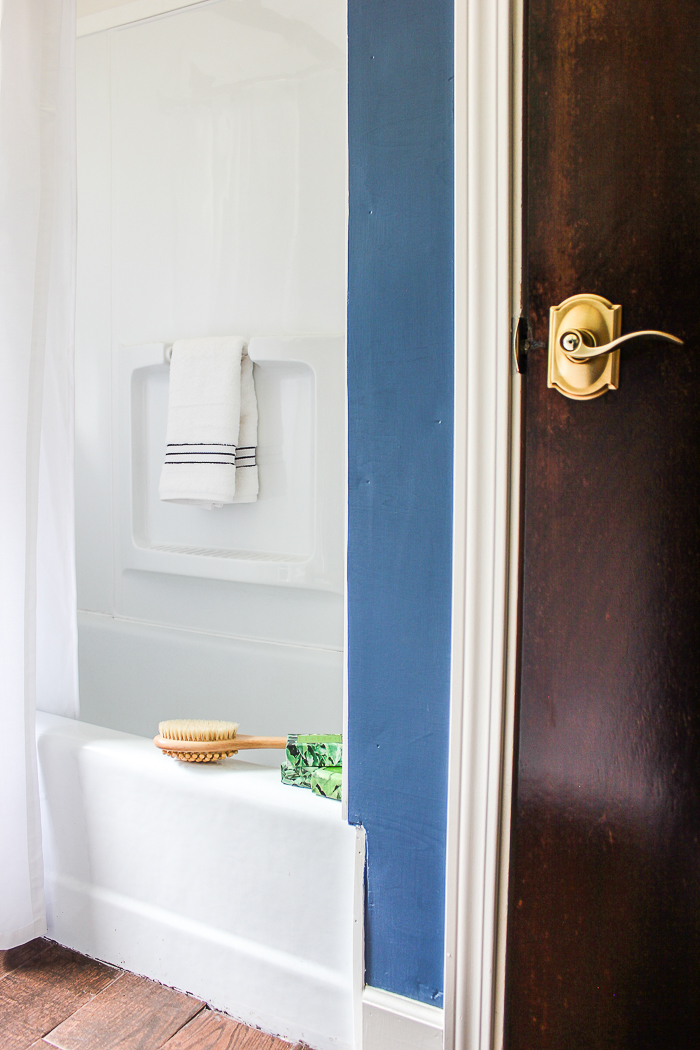
    When we redid the guest bathroom, we were on both a tight budget and a tight timeframe, however the shower needed some cosmetic help for sure. The door needed to go and that beige color was awful. We didn’t want to rip out the entire unit because it wasn’t in bad condition and this was the guest bathroom – we don’t have guests every weekend. And of course, because $$$. After some research, I discovered you could have your bathtub unit professionally painted. I called around and got some estimates and it only ended up being around $500 to have our unit painted. The finish is very similar to what they use in the factory. Our guy even removed the doors, filled those holes and you can’t even tell where the shower door was! He even custom matched the white to the white on the toilet so that the two whites didn’t stand out against one another! Huge savings on not ripping out the old unit and we didn’t have to deal with the mess from ripping it out!

    Ask for remnants or “scratch n’ dent” countertops.

    Bathroom Remodel on a Budget

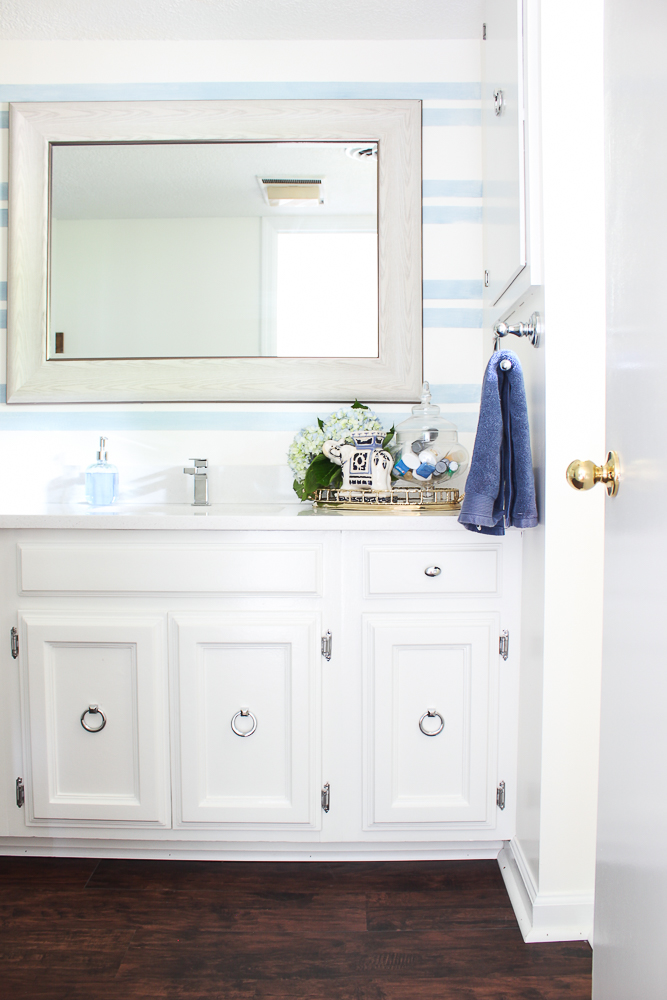
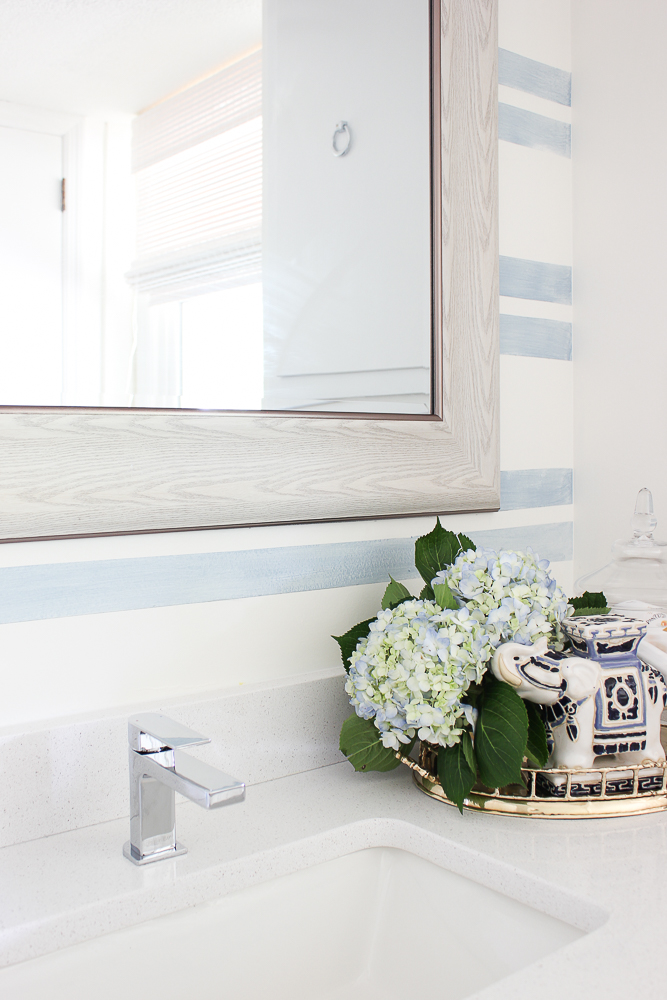
    The vanity in the guest bathroom needed a paint job, but other than that and the hideous countertop, it was still a pretty solid vanity. The countertop was awful though. We visited a local countertop store and asked to see remnant pieces of countertop options left over from bigger jobs so we wouldn’t be paying as much. We found one that worked, but as it turned out there was a scratch on the countertop. But, it didn’t affect the stability of the counter and it was in the corner. Since I had planned to put a tray on the countertop anyway in that spot, it didn’t bother me a bit. We were able to get an extra $100 knocked off the cost of the counter because of the scratch. On top of all that, the scratch isn’t really even noticeable when the tray isn’t there, you really have to hunt for it. Top the new countertop off with a shiny new sink faucet and it will only look like you spent a million bucks. 🙂

    Instead of tile on the walls, go with a custom painted wall treatment.

    Ideas for a Bathroom Remodel on a Budget

    When I started planning the guest bathroom makeover, I found an image of a bathroom online that had this beautiful tile on the wall in horizontal narrow rows. Again though, this was the guest bathroom – not the master or any other bathroom that gets a lot of traffic, so I wasn’t going to spend hundreds of dollars on tile for the wall. I mimicked the tile look with paint though and I love how it turned out! And can you believe all I used to create the washed-out blue stripes was a roll of Frogtape and just a sample pot of paint?! See how I did this wall HERE!

    If you prefer to make a bigger statement in the room, go with a bolder pattern and color…

    Bathroom Remodel Ideas on a Low Budget

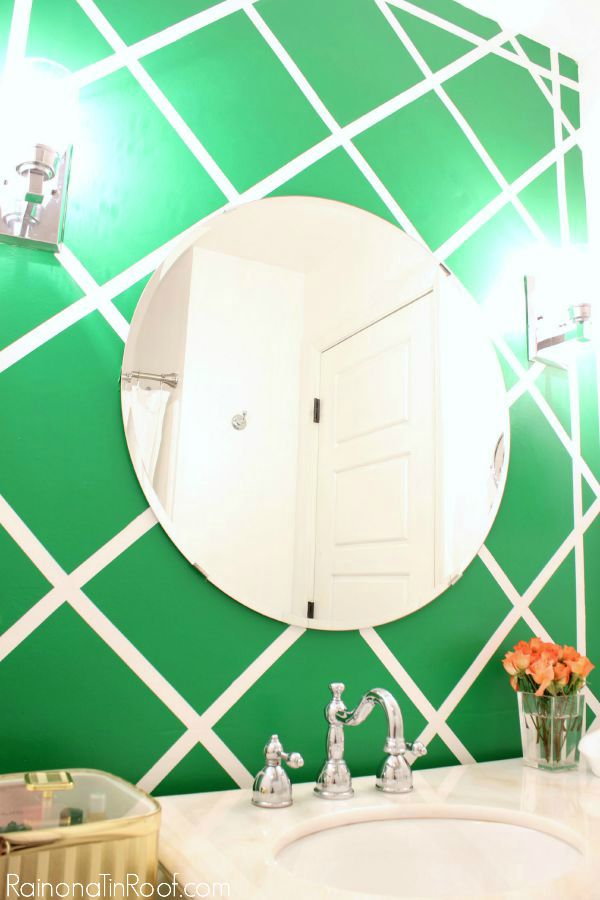
    This is an accent wall I did in one of the bathrooms at our previous house. I wanted a bold pop of color in here and a pattern that mimicked cane like you would see on the back of a chair. All it took was a little time to tape off the pattern and then a couple coats of paint. See how I did this cane inspired wall HERE!

    Put snap together flooring over your old tile flooring.

    Low Budget Bathroom Remodel Ideas

    Apparently, the guest bathroom is like the poster child for quick fixes on a budget. This space had to be turned around fast and ripping up the tile and putting down new wasn’t an option. Instead, we installed this snap together laminate flooring directly over the old tile. I love how it looks like wood flooring, but it’s not! There are loads of gorgeous vinyl flooring options out there these days! You can see how this space looked before HERE!

    Stalk discount stores for mirrors.

    Bathroom Remodeling Ideas on a Budget

    I’m not a big fan of the matchy-matchy mirrors that come with vanities from big box stores these days. I’m also not a fan of the plain Jane frameless mirrors that many bathrooms sport. I’d rather have something with a little more character that adds to the space instead of just being there to take up space. So, I always check out places like Home Goods, TJ Maxx, Marshall’s and Ross for mirrors that would be great above vanities. The mirror you see above was only $30 at Home Goods!

    Damaged walls? Cover with luan or beadboard.
    Bathroom Remodel on a Budget - Nine Ideas

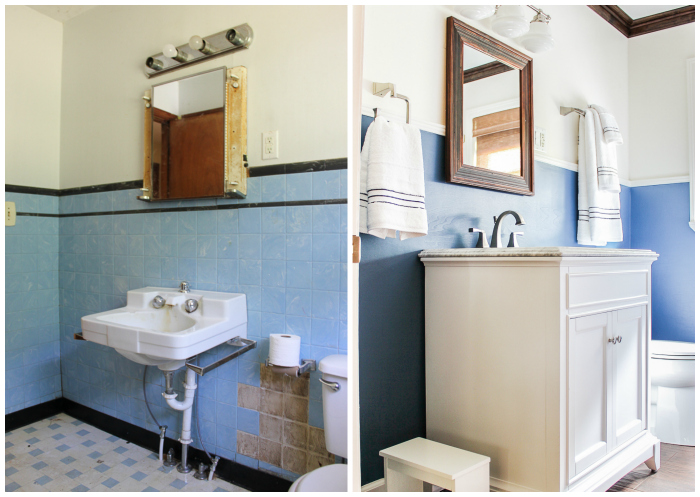
    When we started working on the farmhouse, it was obvious something was going to have to be done about about the walls in the bathroom. The whole bathroom actually had to be nearly gutted. The tile on the walls were actually plastic tiles and lots of them were falling off. Again, no budget for retiling walls here! We pulled all the tile off, but the walls were still damaged underneath where the tile had been glued. For a fast and budget friendly fix, we covered the walls where the tile had been with luan panels and topped it with a chair rail. If you would prefer more detail, you could do this with beadboard panels instead.

    Go for timeless finishes that tend to cost less.

    Nine Ideas for Remodeling a Bathroom on a Budget

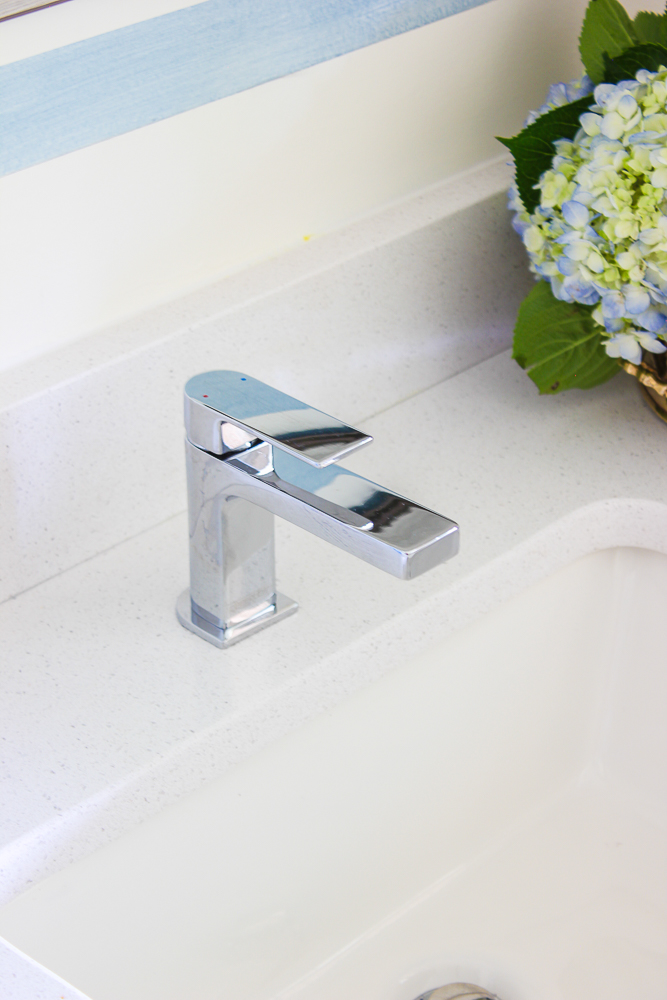
    Trendier finishes on faucets and hardware are usually going to cost more. If you want to save some money and keep your bathroom from dating too easily, go for finishes that will stand the test of time – like chrome. Chrome will always be in style and it tends to be cheaper.

    That being said, if you absolutely love whatever the latest finish trend may be, then go for it. I have Champagne Bronze in my master bathroom and I still adore the finish just as much as I did when we first put it in there.

    Paint the existing vanity and replace the hardware.

    Ways to Remodel a Bathroom on a Budget

    I’m sure you’ve heard this one a few times – paint your vanity instead of replacing it. As long as your vanity is in pretty good shape, go for it! If it’s falling apart though or has water damage for some reason, I’d seriously look at replacing it. The vanity in our guest bathroom was solid and had good classic lines, so I just gave it a couple coats of oil-based paint and new hardware – it made a world of difference!

    Add in wall-to-wall shelving for extra storage and decor space.

    How to Remodel a Bathroom on a Budget

    If you’re tight on storage space in your bathroom, build you some shelves! The photo you see above is about the 3rd time I’ve built shelves like these – they are so easy! Find out how to HERE!

    Any budget bathroom remodeling ideas you can share with us?

    Want more budget DIY and decorating ideas?

    20 High Style – Low Budget Knock Off Decor Projects – who knew knock-offs could be so pretty?!

    14 Real Life Bedroom Ideas – beautiful bedrooms that are actually attainable!

    20+ Living Room Ideas – loads of decorating ideas for every style!

    Want to come back to these bathroom ideas later? Just pin the image below!

    Bathroom Remodel on a Budget

    Join the Freak Show On…

    Facebook | Instagram | Pinterest | Twitter

  • The Circus’ Colorful Bathroom Makeover Reveal

    The Circus’ Colorful Bathroom Makeover Reveal

    Never in this life would anyone have expected me to have dog wallpaper in my house.

    I’m just not a dog person. I never really have been. I was never the kid who wanted to cuddle with a dog. I hate when dogs jump on me. A dog lick disgusts me. I can’t stand the feeling.

    That being said, I did come to love Grunt’s dogs that came with him as part of the “package” and got attached. After Zoe died though, I decided that was it for me. We have another dog, but as both my husband and daughter will tell you – it’s their dog, not mine.

    So, when my child came out of the womb and subsequently fell in love with just about every dog that came her way and laid on the dog’s bed right there in the middle of them, you can imagine how many times I cringed.

    The Circus loves dogs. Loves all animals really. And it’s all good, I think that’s great – she won’t get the side eye like the lot of ya’ll are all probably giving me right now since I’ve now said I’m not a dog person.

    Needless to say when she picked out the fancy pug dog wallpaper for her bathroom, it was most definitely not the direction I would have went in. But alas, here we are.

    While photographing the bathroom on Monday, this non-dog lover even decided if the Circus didn’t like her new bathroom, then I would happily take it – pug dogs and all.

    She liked it though. 🙂

    If you haven’t been following this whole bathroom makeover series, here’s what we started with…

    Total 180, right? Here’s everything we did…

    This post contains affiliate links for your shopping convenience. Click here to read my full disclosure policy.

    Moldings + Wallpaper

    Curvy Wall Moldings / Pug Dog Wallpaper / Tile Flooring

    The lower 2/3s or so of the bathroom walls got beautiful new moldings all around. I didn’t want to cover all the wall space with the wallpaper as this isn’t a huge bathroom so I didn’t want it to take over the space. Installing the moldings and painting it all white really opened up the space and added some gorgeous architectural interest. I used these prefab moldings all along the walls, then installed a chair rail and thicker baseboard.

    After the trim, I hung the pug dog wallpaper. It’s traditional pre-pasted wallpaper, which I find much easier to hang than the temporary sticker-type wallpaper. The only snag I ran into here was realizing I was going to run out about halfway through and then discovering the wallpaper was out of stock when I went to order a new roll. #leaveittome Luckily though, I was able to piece together some strips in a couple of inconspicuous spots.

    The tile didn’t change. We had just replaced that a few years back and it worked well with everything in the space.

    The Vanity

    Vanity

    The old vanity got replaced with a slightly smaller one from Signature Hardware with both good hidden storage and good open storage on the bottom.

    The vanity is the Everett Console Vanity in Elderberry from Signature Hardware and it gave this space so much more of an open feel. It’s extremely well made and even comes with soft close doors and drawers. We went with the solid white quartz countertop for the vanity. It was the safe bet for not clashing with the floors and other elements of the space. And isn’t that purple color fun? I love the extra color it brought into the space.

    The white and yellow oversized vase is a thrift store find! I hauled it back from my thrifting adventures while we were at the beach. $7 for it and I love how perfectly it fit in here. I filled it with some faux tropical leaves and birds of paradise flowers for an extra punch of color and texture.

    Brass Faucet + Fixtures

    Devonshire Single Handle Faucet

    Throughout the bathroom, we went with brass in terms of the faucet and fixtures. This was the Circus’ choice, although I am very glad she wanted gold. She is her mama’s child in some ways. 🙂 We used the Kohler Devonshire line from Build.com for the faucet, towel hooks, toilet paper holder, toothbrush holder, etc.

    Hand Towel Ring / Monogrammed Hand Towel (similar)

    The fixtures have classic curves that work well with the trim throughout the space.

    Since she is a southern girl and loves a good monogram just as much as I do, I had a monogrammed hand towel made for the space as well. Isn’t it pretty?

    Mirror + Lighting

    Mirror / Pendant Lights

    Continuing with the feminine curves in this space, we went with a curvy mirror and pendant lights.

    Hands down, this mirror from Build.com is one of the best mirrors I’ve ever had. Obviously, it’s a beauty, but y’all, this mirror came with a paper hanging template that makes hanging the mirror a breeze. And if that isn’t enough, the hardware that it comes with for hanging is easily adjustable in case you need to level out the mirror any once it’s up!

    Mirror / Pendant Lights

    The pendant lights have an “I Dream of Jeannie” kind of feel to me. They let plenty of light through without being completely clear, which I like b because then you can’t really tell when the globes have fingerprints all over them! ha!

    They are also real beauties when they’re all lit up.

    Mirror / Pendant Lights

    The Toilet

    Toilet / Toilet Lever / Toilet Paper Holder

    When we first started talking about this makeover, I hadn’t planned on switching out the toilet in here, but the more the design came together, I realized just how great a curvy, pretty toilet would look in here. This toilet is also from the Devonshire collection by Kohler at Build.com and we absolutely love it. It was also pretty simple to install. We topped it off with the coordinating brass toilet lever.

    Did you catch the vertical toilet paper holder? When I went to install it, it wasn’t going to fit very well over the wall moldings, so I tried it vertically and it worked perfect. I love the different look it gives too.

    Shower Curtain, Rod and Hooks

    Shower Curtain / Gold Tassel Trim (similar) / Brass Shower Curtain Rod

    I’m sure you already spied this beauty in the mirror reflection. I can’t tell you how much in love both myself and the Circus are with this shower curtain! It’s the Gingko shower curtain from Signature Hardware and the colors in it are gorgeous. To really bring out the yellows in the curtain and throughout the room, I had a gold tassel trim sewn around the edges.

    We also seriously upped our shower rod game with this brass beauty and coordinating brass shower curtain rings from Signature Hardware.

    Accessories

    Rug / DIY Step Stool Makeover

    The Circus has been a little jealous of my palm step stool I made for our master closet ever since I made it. In fact, she’s tried to jack it a time or two. I told her I would make her a custom step stool for her bathroom and so she picked out the paper for this step stool – she’s having a moment with pineapples. This is a super simple DIY project and completely transforms basic step stools into gorgeous and still useful decorative items. Here’s how to makeover your own step stool.

    The colorful rug brought together every single color (and then some!) in the space and also added some much needed color to the floor. 🙂

    Y’all know I’m a big fan of adding a more personal piece of art to a space when I can. The Circus loves music from Mamma Mia (therefore she loves ABBA – winning!) and Super Trouper is one of her favorite songs, so I whipped up this little piece of art for her bathroom.

    I had another piece of art to go in here too, but once the wallpaper was up and all the fixtures in place, there really wasn’t a place for it. I don’t think this bathroom is lacking though.

    Neither does the kid. 🙂

    What do you think?

    Now go see what all the other Primp and Pamper gals did with their bathrooms! Y’all are going to be filled with loads of bathroom makeover inspiration after you see all this!

    Jeweled Interiors | PMQ for Two | House Homemade | Effortless Style | Haneen’s Haven | Kaleidoscope Living

  • Primp and Pamper Bathroom Update: Week 3

    Primp and Pamper Bathroom Update: Week 3

    Another week of the bathroom makeover and another week of me not getting as much done as I’d planned on. 😜

    But…

    We do have fully painted trim and walls and……wallpaper!

    Wall Trim / Flooring / Wallpaper / Vanity

    I spent part of Sunday and all of Labor Day hanging wallpaper. I forgot how much of a chore it can be.

    I also realized that I was going to run short about halfway through. I hopped on my computer to order another roll and of course, it’s out of stock. Leave it to me.

    So, I did some very strategic wallpaper hanging and managed to get everything covered, albeit there are a couple of places where the design doesn’t exactly meet up, but they are in inconspicuous places.

    Wall Trim / Flooring / Wallpaper / Vanity

    I think the moldings have turned out beautifully since it’s all painted now. The vanity is set and the countertop is on – just have to put up that backsplash piece. Today is my first full day of actually being able to work without interruption this week, so I’m hoping I can get the new mirror and new pendant lights hung by the end of the day!

    Tomorrow, I’m going to be dropping off some art to get re-matted for the space.

    I found this at Goodwill for a whopping $3 and knew it was perfect for the space. The purple in the flower will tie in nicely with the vanity. It just needs a new frame and mats!

    I’m also working on some custom art for the space as well. I’m channeling my inner Super Trouper and creating some ABBA inspired art for the Circus since they are one of her favorite bands.

    If you want to see the full design plan, read this post!

    TO-DO LIST UPDATE

    • Remove old vanity and toilet. 

    • Install chair rail, wall moldings, etc. 

    • Paint from chair rail down – in progress!

    • Hang wallpaper above chair rail.

    • Switch out pendant lights.

    • Install new vanity, faucet, toilet, etc.

    • Hang new mirror.

    • Add trim to shower curtain – hopefully picking up tomorrow!

    • Install new shower curtain rod and hang new shower curtain.

    • Gussy Up the Step Stool

    • Revamp, Create and Hang Art

    Still a lot to do, but it HAS to be finished by next Thursday, so let’s see how well I work under pressure. 😜

    Be sure to see what all the other gals are up to this week!

    Jeweled Interiors | PMQ for Two | House Homemade | Effortless Style | Haneen’s Haven | Kaleidoscope Living

    Find me on social media!

    Facebook | Instagram | Pinterest | Twitter

  • Bathroom Primp & Pamper: The Circus’ Bathroom Before Pics and Plans

    Bathroom Primp & Pamper: The Circus’ Bathroom Before Pics and Plans

    When we bought the 70’s Landing Pad, we were very much focused on getting it remodeled as quickly as possible and getting in.

    While waiting to close, I remember having grand design plans for nearly every space in the house, but when we finally closed and as we worked on replacing flooring, gutting bathrooms, etc., those designs kind of dwindled down to the basics and not the full vision I had seen in my mind.

    Budget can also have a way of dwindling those plans and we spent far more on the house in that initial remodeling phase than we had planned on doing – and we spent it far faster too.

    After months of working on the house, we were tired and ready to get in the house and have a break.

    And so, things got “done enough.” Rooms were “complete” but, in my opinion, some were just a little “ok.”

    My daughter’s bathroom was one of those just “ok” rooms.

    I’m happy to say though, that I’ll be re-doing this “ok” room over the next few weeks along with some other fantastic gals who are making over their own bathrooms.

    The Before

    As I said, this is my daughter’s bathroom, who I refer to as “The Circus.” As many of you who have been around here for a while know, that nickname fits her well.

    What does not fit her well is her current bathroom situation.

    Sure, there’s a colorful vanity but there’s not much else in here that reflects her personality.

    I mean, this is the kid who requested “shiny red shoes like Dolly Parton’s” for Christmas. She insisted on leaving Santa a margarita. Her little plastic animal bull lives in the fairy house. When I showed her matching Mom + daughter leopard print swimsuits the other day, her exact words to me were, “Order them. You can never go wrong with leopard print.” And that’s just the tip of the iceberg, y’all.

    So yea, her bathroom is lacking. A lot.

    This post contains affiliate links for your shopping convenience. Click here to read my full disclosure policy.

    The Vision

    Toilet / Brass Hardware / Wall Trim / Flooring / Wallpaper / Vanity / Faucet / Mirror / Pendant Lights

    I included the Circus in every decision of this bathroom design. Now that being said, there were some things where I gave her two options rather than endless ones. I mean, I’d like to have this thing done in the allotted timeframe and not in 10 years.

    Also, the one stipulation of this makeover was that the tile floor stay. I do like the tile and we had just retiled this room a few years ago when we moved in. If it ain’t broke – and in this case, if it still looks good – don’t fix it.

    The jumping off point was the wallpaper. The first thing I asked her was what she wanted in her bathroom and she said dogs. So I pulled up loads of different dog wallpaper and let her choose one.

    From there, I would pull things I thought would work well in the space and then let her make the decision on which color, design, product, finish, etc. to go with.

    The Source List

    A big thanks to our official sponsors of the Primp and Pamper Bathroom Makeover, Build.com and Signature Hardware.

    Just about everything for this bathroom came from Build.com or Signature Hardware. I was thrilled to find so many great (and colorful!) options from both places.

    Bellevue Natural Brass Pendants – the Circus was insistent about using gold/brass tones throughout the space. She might be her Mama’s child after all. 😂

    Manor Born Wallpaper – fancy dogs are going on the wall, y’all.

    Quoizel Gold Monarch Mirror – when this mirror got here, I opened it up to make sure it had shipped ok, and y’all, it comes with a template for hanging it on the wall. How come all mirrors don’t come with that?

    Kohler Devonshire Single Handle Faucet & Coordinating Devonshire Hardware Accessories – more gold, shiny gold.

    VitaElegante Tile – this is the tile we installed a few years back. It’s a good neutral tile that has a bit of a modern feel.

    Ginkgo Leaf Shower Curtain – this shower curtain is even more gorgeous in person. The bits of yellow you see are much more noticeable and bright when you get your hands on it.

    Ashford Wall Moldings – I didn’t want to go floor to ceiling with the wallpaper in here for a few reasons. 1. It’s a small space and I didn’t want to overwhelm it all with wallpaper. 2. My kid is rough and tumble so I didn’t want to risk papering the lower half of the walls and then she somehow ripping or tearing it at some point. So I’ll be adding moldings to the lower 2/3s or so of the bathroom.

    Kohler Devonshire Toilet – yep, she’s getting a fancy toilet.

    Surya Tessera Rug – this will add some more color to the floor.

    Signature Hardware Everett Console Sink in Elderberry – another star of the show here. We love this vanity for both it’s great organized storage and of course, it’s playful color. I’m so happy to see Signature Hardware stepping up to the plate with gorgeous color on their very well made vanities!

    The To-Do List

    If you follow me on Instagram and watched my stories, you might have seen that I’ve already gotten a bit of a start on the bathroom.

    • Remove old vanity and toilet.

    • Install chair rail, wall moldings, etc.

    • Paint from chair rail down – can’t decide if I just go solid white here, y’all or paint it this Dandelion Wish color that is the same mustardy yellow in the wallpaper. What do y’all think?

    • Hang wallpaper above chair rail.

    • Switch out pendant lights.

    • Install new vanity, faucet, toilet, etc.

    • Hang new mirror.

    • Add trim to shower curtain – adding a fun tassel trim to the shower curtain.

    • Install new shower curtain rod and hang new shower curtain.

    • Gussy Up the Step Stool – The Circus wants a fun step stool like the one I did for our closet, so she’s picked out a design for it.

    • Revamp and Hang art – I’ve found some great secondhand art pieces for this space; just have to switch out some mats and paint some frames.

    Heaven help, I’m tired just typing all that. Ok, I have to get to work, so y’all go see what plans these other talented ladies have and be sure to check back next week for our progress!

    Jeweled Interiors | PMQ for Two | House Homemade | Effortless Style | Haneen’s Haven | Kaleidoscope Living

    Keep up with the makeover on social media!

    Facebook | Instagram | Pinterest | Twitter

  • How to Cover Damaged Bathroom Walls on a Budget

    How to Cover Damaged Bathroom Walls on a Budget

    Looking for a simple and super affordable way to cover damaged bathroom walls left behind by old wall tile? We’ve been there too. We had little budget and lots of damaged wall in one of our bathrooms. Our solution cost us less than $100 – and it looks great!

    It seems I’m becoming quite productive since my crew has returned to school. Case in point: this blog post. This was a project we completed over two years ago, alas I never actually got around to sitting down and writing the post.

    Back in June, I taught a local workshop on remodeling your bathroom on a budget. I included this project in it and as I was writing up the presentation, it was then I realized I had never actually posted about it. Go me!

    So, if you’re looking for a super affordable, easy to accomplish solution for bathroom walls (or potentially any walls) damaged from tile or that may have huge gaping holes in them for other reasons, here ya go.

    Cover Damaged Bathroom Walls

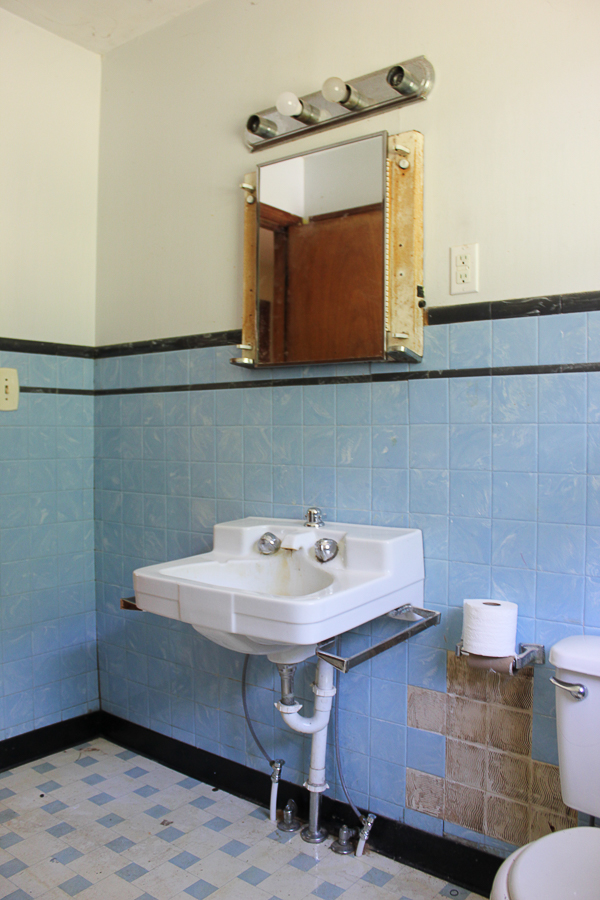
    When we got the farmhouse, the bathroom looked like this:

    How to Cover Old Wall Tile

    I knew that before even laying eyes on it, the bathroom was going to need to be updated. It hadn’t been in that great of condition when my grandfather passed nearly 20 years ago. As you can see, the tiles were coming off the wall – and in multiple places, not just in that one place you see there.

    While I would have loved to retile the walls, that simply wasn’t in the budget. However, something still had to be done about those damaged walls left from the full removal of the tiles.

    This post contains affiliate links for your shopping convenience. Click here to read my full disclosure policy.

    Budget Friendly DIY Fix for Damaged Walls

    Materials & Tools Needed

    Project Notes

    • You’ll need enough luan, baseboard and lip molding to cover your damaged walls.
    • For us, the luan panels had to sit on top of the baseboard in order to reach far enough up the wall to cover all the damaged areas. This meant we had to buy a little wider baseboard as well. This can vary from space to space. Measure your space before buying and cutting. You may even be able to install your luan panels first, then your baseboard in front of the panel if you have a shorter area of damaged walls.
    • If you are installing new flooring in the space, you’ll want to install the flooring first, then do this project.

    Steps

    Step 1

    If you haven’t done so already, remove all the old tile and any trim or baseboard from your walls.

    Easy Fix for Bathroom Walls with Old Wall Tile

    I don’t have a photo of the space after I removed all the tile, but you can get an idea from above just how rough everything was once I started digging in.

    Step 2

    Using a stud finder, locate and mark all the studs along the walls.

    Step 3

    Using a miter saw, cut your baseboard to size and install it around your space.

    Step 4

    Using a circular saw, cut the luan panels down to the length of your walls.

    Apply construction adhesive to the back of the panels.

    Attach the panels to the walls where studs are located using finish nails and a hammer or a nail gun.

    Push firmly along areas where there are no studs and just the construction adhesive.

    How to Fix Damaged Bathroom Walls

    Step 5

    Cut your top molding down to size and install it over the top of the luan panels so that it lips over the panels a bit.

    Step 6

    If you have an area where two pieces of luan had to be used on one span of wall, use a small piece of wall trim to cover the seam. You could use a simple piece of lattice molding for this. This wasn’t the case for us as it was a small bathroom and we didn’t have any walls longer than 8 ft.

    Step 7

    Caulk all the corner seams where the panels meet. Caulk along where the baseboard and luan panels meet. Caulk along where the top piece of trim meets the wall.

    Fill any nail holes and sand smooth.

    Step 8

    Prime everything and then paint!

    Small Bathroom Budget Remodel

    Light Fixture / Mirror / Vanity / Faucet / Towel Hook / White Towels with Blue Stripes

    We painted the top half of the walls a creamy white and then the luan panel portion of the walls in Shipyard.

    Covering Old Wall Tile in a Bathroom

    Light Fixture / Mirror / Vanity / Faucet / Towel Set

    We spent a little less than $100 for all the materials to cover the damaged portion of the bathroom walls – waaaaayyyy cheaper than replacing the tile!

    For all of you wondering how it’s held up: Since I’m just now getting around to writing this post two years after we did it, I can say it’s held up really well. Everything is still in place just as it was. To clean the luan paneled portion of the walls, I just wipe it down with a wet washcloth – my kid is notorious for banging her toothbrush multiple times against the sink edge after brushing her teeth resulting in little white dots everywhere.

    What do you think of this solution for covering damaged walls?

    You can also see where we did a similar version of this project, but stained the panels here!

    Looking for more budget friendly fixes for your home?

    Here are more bathroom remodeling ideas on a budget.

    Here are nine DIY countertop makeovers.

    Here’s an easy $25 solution for covering those ugly dated louvers on doors.

    And here’s another budget bathroom remodel you might get some ideas from!

    Want to come back to this project later? Just pin the image below!

    Covering Up Bathroom Wall Tiles

    Are you following on social media?

    Facebook | Instagram | Pinterest | Twitter

  • DIY Bathtub Tray with Book Holder

    DIY Bathtub Tray with Book Holder

    Need a place to rest your book and your wine glass during bath time? This DIY bathtub tray is the perfect perch for just that! You can make this bath tray with a book holder using basic DIY skills and for about $20.

    If you read my Caftans and Cocktails post, then you may remember I talked about how I wanted to share more simple DIY projects this year – doable, non-expensive projects that require simple materials, basic DIY skills and maybe power tools occasionally – but no fancy ones.

    Good, simple DIY.

    As promised, I’ve rounded up a few of my favorite blogger friends and we are going to share with you a simple DIY project every other month throughout the year. We are all really excited to “get back to our roots” so to speak.

    If you’re coming over from Laura’s blog, The Turquoise Home, welcome! She is giving a great tutorial today on how to patch holes in drywall, so if you haven’t been there yet, be sure to after you leave here. There are also links at the end of this post to all the other bloggers getting back to the basics today as well.

    My project today is actually the brainchild of the Circus…

    DIY Bathtub Tray with Book Holder

    A DIY Bathtub Tray

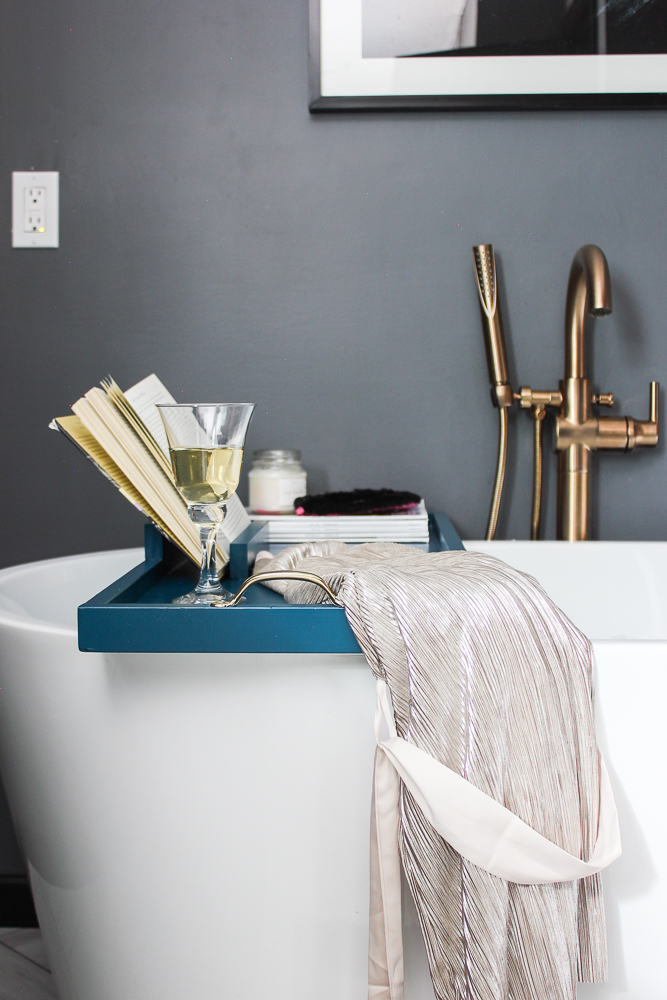
    Right around the first of the year, she proclaimed that she needed a tray in the tub so that she could sip on her drink and read a book while bathing. And while she was a touch dramatic about it, I did think it was a pretty damn good idea. Since she insists on using my bathtub, I might as well make something that’s going to benefit not only her, but me too in the process.

    We wanted a bathtub tray that had a book rest, as well as a rim to help keep things from getting bumped and easily falling overboard. We were able to make this one for about $20, a little wood glue and some (very easy and simple) cuts.

    This post contains affiliate links for your shopping convenience. Click here to read my full disclosure policy.

    DIY Bathtub Tray with Book Holder

    Obviously, bathtub sizes differ. Our tray was made to fit a bathtub that is 31 1/2″ wide, outside edge to outside edge. You can easily adjust the measurements with this tray to fit any size bathtub. 🙂

    Supplies and Tools Needed:

    • 1 – 12″ x 3′ Pine Board or another similar board of your choice. I went with this one because it was the cheapest good piece of wood I could find in the length I needed. This bad boy was only $7 y’all. It’s my new go-to wood for projects.
    • 1 – 1″ x 2″ x 8′
    • 1 – 1″ x 2″ x 4′
    • Wood Glue
    • Long Bar Clamps or Hammer and Finish Nails or Nail Gun (I used just clamps, but if you don’t have those, you can use one of the other options to keep the boards in place as the glue dries.)
    • Circular Saw or Chop Saw or Miter Saw (you are only having to make straight cuts, so any one of those will do)
    • Handles – I used these screen door handles because they were the cheapest and still looked good.
    • Spray Paint in Color of Your Choice – mine is Krylon Peacock Blue
    • Drill

    Step 1

    Cut your big board, the 12″ x 3′ pine board, down to 33 1/4″. If your bathtub is not as wide as mine, then I suggest cutting the board down to where you have about a 1 1/2″ overhang on each side.

    Step 2

    Cut two pieces of the 1″ x 2″ x 8′ down to the length of the long sides of your tray base, the board you just cut. If you’re following my same dimensions, this should be 33 1/4″ as well.

    DIY Bath Tray with Book Holder

    Step 3

    Run wood glue along each long side of the tray base.

    DIY Bathtub Tray

    Place each of the 1″ x 2″s you cut along the edges of the tray base where you applied the glue and clamp together.

    DIY Bath Tray

    Be sure that the bottom of the 1″ x 2″ pieces are flush with the bottom edges of the tray base as shown below.

    Simple Bathtub Tray

    Let the pieces stay clamped together for a few hours or so.

    Step 4

    Cut two more pieces of 1″ x 2″ from the same 8′ long strip you already cut down to the width of the tray. If you’re following my exact measurements, this should be 13 9/16″.

    Simple DIY Bathtub Tray

    Apply wood glue to the short edges of the tray base, just as you did on the long edges. Put the 1″ x 2″ pieces you just cut along the edges and clamp together.

    Easy DIY Bath Tray

    Let the pieces stay clamped together for a few hours.

    Step 5

    *Note: This step creates wood blocks to go on the underside of the try to prevent it from getting knocked over the edge of the tub. If you aren’t concerned with this, you can skip this step. I however have a crazy six year old – we need them. 😉

    Take the uncut 1″ x 2″ x 4′ and cut two 6″ long pieces from it.

    Simple DIY Bath Tray with Book Holder
    I used scrap wood here, so disregard how it looks different than regular 1″ x 2″.

    Flip the tray over and using wood glue, attach each of these pieces 3 1/2″ inside from the short outside edge of the tray.

    Easy DIY Bathtub Tray with Book Holder

    Carefully flip the tray back over on a level surface and then place heavy objects on the tray and let it sit for a few hours.

    How to Make a Bathtub Tray

    Step 6

    Sand the tray smooth as needed.

    How to Make a Bathtub Tray with a Book Holder

    Caulk around the inside edges of the tray.

    Bathtub Tray with a Book Holder

    Step 7

    With the remaining 1″ x 2″ x 4′, cut two pieces that are each 10 1/2″ long.

    Apply wood glue to the “skinny side” of one of these pieces and place it in the center of one of the long edges of the tray, atop the edge as shown below.

    DIY Bath Tray

    Use clamps to hold it in place for a few hours.

    Step 8

    Take the remaining cut 10 1/2″ long 1″ x 2 piece, apply wood glue to the skinny side and place it in front of of the 1″ x 2″ you just attached to the tray edge. I placed mine 3 1/2″ out from the tray back so it could accommodate thicker books. You can play around with it before gluing it to decide where your piece would best fit.

    Place something heavy on top of this piece after gluing it to keep it set in place as it drys.

    DIY Bathtub Tray

    I didn’t have clamps that would fit around the back of the tray and over to this piece, so we got creative.

    Step 9

    Spray paint your tray – I did about three coats.

    Step 10

    Attach your handles to the short sides of the tray. I do suggest drilling a pilot hole first so you don’t crack the wood with the hardware screws.

    DIY Bathtub Tray with Book Holder

    Bathtub / Tub Faucet / Art Above Tub

    DIY Bath Tray with Book Holder

    We love how our tray turned out and have already put it to use! The only complaint from the Circus was that she didn’t get her bright turquoise paint on it.

    DIY Bathtub Tray

    I told her if she was going to always hijack my tub, then she was going to have to compromise on the paint color. 😉

    DIY Bath Tray

    Here’s to simple DIY projects that also prove themselves to be quite functional. Be sure to head over to Making Home Base and see how simple it is to frame a canvas! Don’t miss the other Back to the Basics DIY Projects below as well:

    Back to the Basics DIY Projects

    DIY Framed Canvas at Making Home Base | Settee Makeover at So Much Better with Age | How to Patch Drywall at The Turquoise Home

    Pin This Post
    DIY Bathtub Tray with Book Holder

    Join the Freak Show on: 

    Facebook | Instagram | Pinterest | Twitter

  • Washed Out Stripes Bathroom Accent Wall

    Washed Out Stripes Bathroom Accent Wall

    This isn’t your typical striped accent wall. Instead of bold, solid stripes, these are toned down, washed out stripes to create a gorgeous blue accent wall. You can easily recreate this look with any colors of your choosing and have your own gorgeous bathroom accent wall in a day’s time. 

    As you guys well know, if I see a pattern/design/look, etc. that I fall in love, I’m usually going to try my best to mimic that design with paint and Frogtape. There have been countless times where I’ve scared Grunt Labor to death jumping out of bed to pause the television so I could snap a picture of it because I saw a design I knew I could pull off with Frogtape.

    There have also been times when I come to an abrupt halt on the sidewalk to snap a photo of the same kind of thing.

    I’ve also slammed on my breaks for the same thing.

    I think one reason why I’m so drawn to pulling off these patterns and designs with paint and Frogtape is because it’s such a huge bang for your buck. Huge. Often times, those designs I see are completely made out of wood mouldings. Don’t get me wrong, I love a room full of beautiful mouldings (and have some plans for that in my own dining room), but that gets pricey quick, plus there’s a lot of work that goes into installing moulding. A great striped accent wall, or any kind of painted and patterned accent wall for that matter, though might set you back $50 at most. Bang for your buck.

    When I was looking around for inspiration and ideas for the guest bathroom, I stumbled upon this image. I fell in love with the shiny finishes and the blue stripes on the walls. I loved how they weren’t completely solid. From what you just read above, I’m sure that you can figure out what my first thought was – “I can do that with Frogtape.”

    And so I did.

    bathroom accent wall

    I did opt to do two smaller stripes per section, rather than larger ones as I wanted these stripes to mesh really well with the rest of the space and not take over the show. I also opted for a lighter shade of blue as well. This bathroom accent wall turned out to be perfect for this space because it brought just the right amount of color and pattern into the room.

    The actual painting of the stripes takes no time at all, it’s the measuring and taping that does take some time, but it’s worth it. All in all, these were started and finished in the same day.

    DIY Washed Out Striped Walls

    This post is sponsored by Frogtape, however all opinions are 100% my own. Affiliate links included in this post.

    Materials and Supplies Needed: 

    • Frogtape – 1″ and 1.5″ sizes
    • Measuring Tape
    • Level (the longer the better)
    • Pencil
    • Plastic Putty Knife, Credit Card or something to smooth down edges of tape
    • Paint Color of Your Choice – My striped walls have Sleek White as the base color in a satin finish and the stripes are Peaceful Blue in satin. I only needed a sample size pot of the blue for this.
    • Paint Brush
    • Scrap Piece of Cardboard

    Step 1

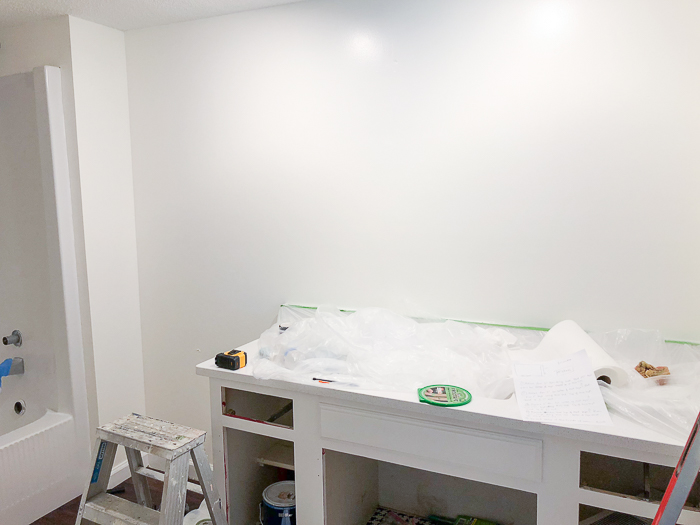
    The first thing you’ll need to consider is the base color for your striped walls. I had already painted this bathroom in a slightly off-white color called Sleek White.

    Striped Accent Wall

    If you’ve already got a paint color on your walls that will work well with your stripe color, then proceed to step 2. If you want to switch out that base color though, do so first. Wait at least three days after painting before taping off the walls for the stripes, so that the paint on the walls have enough time to cure.

    Step 2

    Time to start measuring and taping off the walls! For reference, my walls from floor to ceiling in this space were 82.” Even if your walls are a little taller or shorter than mine, I think you should still be ok using the measurements I’ll give you, as I measured down some before even starting the pattern.

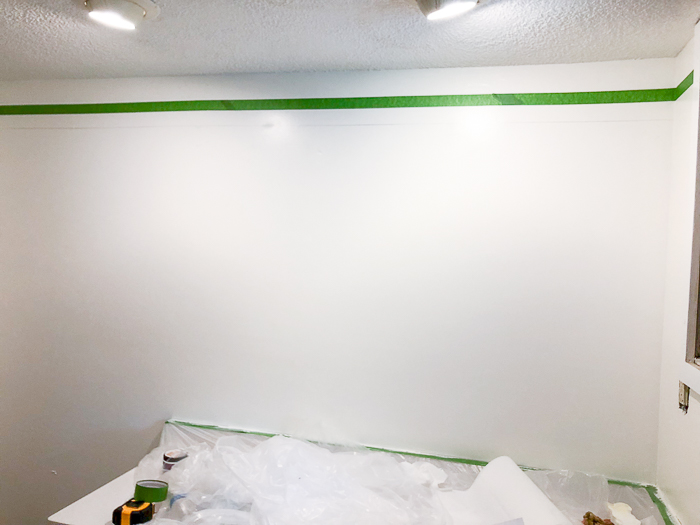
    Measure down 5″ from the ceiling and mark it. Do this several times along the length of your wall.

    Place your level on the wall along the marks you made. Make sure you’re level, adjust if needed, then draw a line along the level over the entire wall.

    Striped Walls

    If you look closely, you can see my line in the photo above. The line doesn’t have to be dark or heavy, just enough for you to see it.

    Run 1.5″ Frogtape along this line. The bottom of the tape should be on this line – therefore the tape is in part of that 5″ down measurement and not below it. Make sense?

    Painting Stripes on Walls

    Step 3

    Measure 2″ down from the bottom of the tape you just applied to the wall and mark it. Do this several times along the length of the wall.

    Place the level along your marks. Make sure it’s level, adjust as needed, then draw a line along the level just as you did before.

    Apply the 1″ Frogtape along this line over the entire length of the wall. The top of this tape should be at the 2″ mark.

    Blue Accent Wall

    If you placed your tape correctly, you should have about 2″ between both strips of tape.

    Step 4

    Measure 2″ down from the bottom of the piece of tape you just applied to the wall and mark it with your pencil. Do this several times along the entire length of the wall.

    Place the level along the marks, get it level, then draw a line with your pencil along the level.

    Bathroom Accent Wall

    Apply 1.5″ Frogtape along this line. The top of this tape should be along the line you just drew.

    Again, the measurement between the pieces of tape here should be about 2″.

    Step 5

    Measure 6″ down from the top of the piece of tape you just applied and mark it. Do this several times along the length of the wall.

    Place your level along the marks, level it, and draw a line along the level.

    Apply 1.5″ Frogtape along this line. The bottom of the tape should be along this line.

    Striped Accent Wall

    Step 6

    Repeat steps 3-5 working your way down the wall.

    Striped Walls

    I know it sounds a little tedious and complicated, but it’s really not all that bad. Once you get those first couple of rows completed, then you should have the hang of it pretty well.

    Painting Stripes on Walls

    Step 7

    Once you have all the tape applied to the wall, place a piece of tape on each of the thicker stripes. You will not paint these areas.

    Blue Accent Wall

    Also, remember to run some of the 1.5″ Frogtape along the corners of the walls to keep the blue from getting on the connecting walls.

    Step 8

    Use a plastic putty knife or credit card and firmly press along all edges of the tape to completely seal it.

    Bathroom Accent Wall with Washed Out Stripes

    Painting Stripes on Walls

    Step 9

    Grab the paint for the stripes, a paintbrush and a piece of cardboard you can use to wipe paint on.

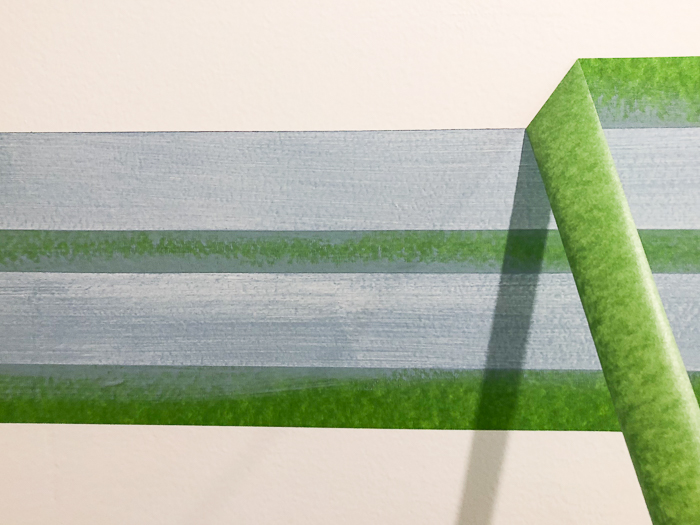
    To paint the stripes on the wall, you are going to use a dry brush technique.

    Striped Accent Wall using Dry Brush Technique

    Dip the paintbrush into the paint. Wipe the brush on both sides along the edges of the paint jar/can as you bring it back out, then brush the excess paint off on the piece of cardboard. Just do a few swipes on the cardboard until you see that the color isn’t as “solid” as it was when you first swiped it on the cardboard.

    Brush your paint onto the outlined stripes on the wall.

    Striped Walls in the Bathroom

    The beautiful thing about this way of painting stripes on walls is that you don’t do multiple coats and you don’t have to worry about brush strokes. It’s perfectly fine if the paint is heavier in some places and lighter in others – that’s how it’s supposed to look! On top of that, if you didn’t get your stripes perfectly level, you really don’t notice because the paint isn’t super bold.

    If you decide you want it darker in some places, add more paint. If you put the brush on the wall and it’s too much paint for your liking, then have a wet cloth on standby and just wipe it right off.

    Step 10

    Immediately, after painting the stripes, remove the Frogtape from the wall.

    Painting Stripes on Bathroom Walls

    You will probably have some pencil marks along the wall. Lightly take a Magic Eraser to those and they will come right off. Just don’t rub too hard, because those things will take off paint. If it takes off a little paint, that will be fine as you won’t even notice since these are washed out stripes anyway.

    Blue Accent Wall in the Bathroom

    Chrome Ring Pulls / Oval Knobs / Faucet / Mirror, Similar Here and Here

    The blue accent wall is the perfect compliment to the white cabinetry, shiny fixtures and hardware.

    Bathroom Accent Wall with Washed Out Blue Stripes

    I especially love how it worked so well as the backdrop for the mirror.

    Striped Accent Wall with Washed Out Blue Stripes

    Faucet / Mirror, Similar Here and Here

    The blue really helped to bring out the color and pattern in the mirror frame.

    Striped Walls with Washed Out Blue Stripes

    Ginger Jar + Fern Art Print / Frame

    I didn’t want to get too much going on in here against the wall, so I opted for a small art print in a frame that compliments the mirror frame nicely. And every room needs some touch of green too, right?

    Do you see a bathroom accent wall with washed out stripes in your future?

    You might also want to see…

    Blue and White Bathroom with Washed Out Stripes

    The Complete Blue and White Bathroom Remodel

    Accent Wall Ideas

    Wall Painting Ideas and Paint Designs Anyone Can Do

    Pin This Post

    Painting Stripes on Walls with a Washed Out Effect


  • The Guest Bathroom: Peerless Faucet

    The Guest Bathroom: Peerless Faucet

    Switching out the bathroom faucet and shower head in our guest bathroom with Peerless Faucets not only helped to update the look of the space but made cleaning up even easier!

    This post is sponsored by Peerless, however, all opinions are my own.

    As you’ve already seen from the guest bathroom makeover reveal, we switched out both the sink faucet and the showerhead in here.

    Peerless Faucets

    The entire vanity/countertop/sink/faucet was well past due for an update. If you don’t remember, this is how it looked before…

    The Bathroom Before

    Well past it’s prime…Am I right or am I right?

    The vanity itself got a new paint job, the countertop and sink got replaced and a new faucet was installed.

    Peerless Bathroom Sink Faucet

    Peerless Faucet Bathroom Faucet

    We put in a quartz countertop paired with an under mount sink. To whoever created the under mount sink, I bow down in your presence. Any of you gals out there who’ve ever had to clean up after a guy trimming their bread can attest to how much easier it is to just wipe all those whiskers into an under mount sink as opposed to a traditional drop-in one. ?

    Peerless Faucet Xander Single Handle Bathroom Faucet

    For the faucet and all the other hardware in the bathroom, we opted to go with a chrome finish. Personally, I feel like polished chrome finishes never date. They are always classic and can work with just about any decor style. Also, chrome finishes tend to be less pricey and more timeless than some of the other finish options. ?

    Our faucet is the Xander Single Handle Bathroom Faucet from Peerless. I love single handle faucets because, again, how easy it is to clean up around a single handle faucet rather than a two handled one. There’s only one thing to work around on the countertop as opposed to two handles to scrub between. In addition to the ease of use and cleaning, the Xander Faucet is sleek and modern, and serves as a nice focal point for the room.

    Xander Single Handle Peerless Faucet

    The Xander has a clean, modern feel, but with rounded edges to soften it a bit. It was a good option for something to contrast nicely against the rest of the classic style bathroom. The Xander faucet can also work with a three hole faucet installation if that’s what you currently have. It comes with an escutcheon you can use to cover up those other two holes.

    Peerless SideKick Shower System

    The shower/tub combo also got quite the makeover. As with the vanity, the before was very dated…

    The Shower Before

    We removed the doors and had the entire tub unit professionally sprayed with a new finish.

    Peerless Faucet Sidekick Shower System

    Bye, bye beige, hello clean white. We also upgraded the shower head with the Peerless SideKick Shower System.

    Peerless Faucets Sidekick Shower System

    This shower system is truly a sidekick. Obviously, you can use it as a traditional shower head, but the detachable spray wand is a three-in-one little gem.

    The spray wand has a traditional spray pattern that is great for cleaning off dirty hands and feet that have just been digging in the dirt. When I come in from gardening, I always head for the bathtub to scrub my hands and arms because keeping all the mud and dirt contained in a bathtub is much easier than in a small bathroom sink.

    Sidekick Shower System

    The spray wand also has a waterfall function that mimics water being poured out of a cup, which is perfect for bath time for babies and kids.

    Last, but definitely not least, the SideKick Shower System also comes with a cleaning pad attachment.

    Peerless Faucet Sidekick Shower System Cleaning Pad

    Now this is where this shower system sealed the deal for me. Yes, my friends, no more grody bathtub brushes. Just spray on some bathtub cleaner, attach the cleaning pad, turn on your water and go to town. Cleaning a bathtub is so much easier with this thing. The guest bathroom is the only full bathroom downstairs so we often use it for cleaning up after working in the yard instead of tracking dirt through the whole house. This bathtub might not get used a whole lot, but when it does, it gets some pretty dirty people in it. ? That cleaning pad makes clean up a breeze.

    If you have pets, there is also a pet attachment that can go right on top of the spray wand.

    Peerless Faucet Sidekick Shower System Pet Cleaning Attachment

    This attachment has finger-like scrubbers that get into your pet’s fur easier than just a regular spray would, making them cleaner than ever.

    When the spray wand isn’t in use, you can opt to dock it with the shower head as you saw above, or you can place it elsewhere on the tub with the included suction holder for easy access.

    Sidekick Shower System by Peerless Faucet

    And if you’re worried about installation, don’t be. Installing the SideKick Shower System is pretty easy – you install it just like you would any other showerhead.

    It’s so nice to have a guest bathroom that is both beautiful and welcoming for guests, but also functional for us!

    What do you think about the Peerless SideKick Shower System?

    Pin This Post

    Peerless Faucets Sidekick Shower System with Pet Cleaner and Cleaning Attachment

    You might also want to see…

    Blue and White Bathroom Remodel

    Gift Ideas Signature

  • Blue and White Bathroom Remodel

    Blue and White Bathroom Remodel

    I think blue and white is a timeless decorating combination that doesn’t easily date. This blue and white bathroom makeover is full of budget remodeling and decorating ideas for your own bathroom. 

    Three months ago, this bathroom wasn’t even on my makeover radar. I knew it needed to be remodeled (knew it since we bought the house nearly three years ago ?) but it was definitely at the bottom of the list. However, just like I’ve said about the guest bedroom, when I showed guests where their bedroom and bathroom was, it was quickly followed by apologies for how bad each space looked. Granted, they were clean, but neither was pretty.

    I was finally spurred into action to makeover both the guest bedroom and bathroom when I found a piece of art that was the perfect jumping off point for the bedroom. I figured, “Jenna, you really can’t have a great looking bedroom and then crap for a bathroom.”

    The Bathroom Before:

    Blue and White Bathroom Before

    Blue and White Bathroom Before

    Told you it was bad.

    And the bathroom now…

    Blue and White Bathroom Decorating Ideas

    Blue and White Bathroom Decor

    I love this space now. I think it’s pretty and timeless and would be welcoming to any guests.

    Affiliate links included in this post.

    Blue and White Bathroom Decorating Ideas

    The guest bedroom sports a blue and white color scheme, so I decided to carry that over to the guest bathroom as well, but with lighter tones of blue. When it comes to timeless, classic, never-fail color schemes, I don’t think you can go wrong with blue and white.

    Blue and White Bathroom Remodel

    Chrome Ring Pulls / Oval Knobs / Faucet / Mirror, Similar Here and Here

    It’s also probably not exactly what you might expect from me. You might expect something like this at the farmhouse, but not the 70’s Landing Pad. The thing is that I really wanted whoever was staying here to feel comfortable and enjoy staying in the space. So, I opted for a more classic, neutral type design that just about anyone could relax in. You’ll see the same approach in the guest bedroom.

    And I really do love this space, y’all. It’s nothing like our master bathroom, but I just love the classic feel it has.

    Blue and White Bathroom Decorating

    So what all did we do? Well, we did quite a few things in here to really change the look of the entire space but without any big budget-busting changes.

    Starting from the bottom up, we put down new flooring. We went with vinyl hardwood look planks that snapped together and installed over the old tile floor.

    We kept the old vanity. I painted the entire thing and switched out the hardware though.

    Blue and White Bathroom Decor Ideas

    Chrome Ring Pulls / Oval Knobs

    As soon as I found those gorgeous ring pulls, I knew they were the ones. They were such a steal too – only $25 for five of them. They make a big impact for not a lot of money. For the drawers, I went with simple oval chrome knobs. These complimented the ring pulls well but without taking away from them.

    We got a new quartz countertop for the vanity as well as an under mount sink and new faucet.

    Blue and White Bathroom

    The old countertop was just well past its prime. I tried to think of ways that I could incorporate it into the bathroom’s new design, but there just wasn’t much of a way to work with it. On top of that, the old sink/faucet that had been there also had five holes – three for the actual faucet, one for a sprayer and one for a soap dispenser. Trying to find a replacement faucet to work with all that was not something I wanted to deal with.

    Blue and White Bathroom Decorating Ideas

    Faucet / More Details on Our Faucet and Shower Fixtures

    We did a single handle chrome faucet for in here. I’m all about the single handle because they are so much easier to clean around. I love chrome too because I always feel like it adds a touch of shine and dresses up a space nicely. I don’t think it dates easily either.

    Blue and White Bathroom Decor

    Mirror, Similar Here and Here

    The mirror was a Home Goods find – only $30! It’s light gray wood finish is a nice compliment to all the white and blue on the wall.

    Blue and White Bathroom

    Just about anytime I see one of these brass bamboo trays at a thrift store, I buy it and stash it away until I find a place for it somewhere. These are so gorgeous when they’re cleaned up and compliment just about any decor. This one worked perfectly on one side of the counter nestling together some hydrangeas, a thrift store elephant and a glass canister holding travel sized toiletries for guests if they need any.

    Blue and White Bathroom Decorating Ideas

    Bamboo Roman Shade

    One of the best deals I found for this bathroom was this white bamboo roman shade for only $20! They have other sizes and colors too and they are all on sale.

    Blue and White Bathroom Decor Ideas

    Hand Towel Holder / Ring Pull

    I continued the chrome fixtures with the hand towel holder as well. The large cabinet door just above it is actually the access to our electrical panel. To blend it in, I gave it a fresh coat of white paint like the vanity and also put one of the ring pulls on it as well.

    The walls got a fresh coat of paint and a washed-out stripe treatment on one wall.

    Blue and White Bathroom Makeover

    I wanted to create stripes that were pearl-like and sort of washed out. I love how they turned out and I think they add just the right amount of blue and interest to this wall. I’ll have a tutorial up on it soon.

    Blue and White Bathroom

    Ginger Jar + Fern Art Print / Frame

    I do kind of feel like every space needs a little touch of green somewhere – doesn’t necessarily have to be a real plant. ? I opted for this Ginger Jar + Fern Art Print. It kept with the blue and white theme and I think it has that classic, timeless feel like much of the bathroom does.

    Blue and White Bathroom Decorating

    I went with navy for the towels and bathmat to keep with the blue and white, but to add a little more interest. We also had the bathtub professionally coated with a new finish to get rid of that yucky beige color it had been sporting.

    Blue and White Bathroom Decor

    Shower Curtain

    The shower curtain has a pretty embroidered pattern on it that matches well with the blue on the accent wall.

    Blue and White Bathroom

    Towel Hook Holder, Here or Here

    I went with this towel holder because it had a touch of silver and the leaves were a fun addition to the space. The wood also went nicely with the mirror frame and frame the art is in. I don’t think it necessarily is a towel holder, but it worked perfectly for this space for just that.

    So what do you think? Do you like my take on blue and white bathroom decor? 

    Looking for more budget diy and decorating ideas? You might also want to see…

    Bathroom Remodeling on a Budget – Nine Ideas for High Style-Low Budget Bathroom Makeovers

    Nautical Traditional Bathroom Makeover – classic colors you can never go wrong with!

     Navy and White Kitchen Makeover – I’ve never met a good navy and white kitchen I didn’t like.

    Want to come back to this bathroom makeover later? Just pin the image below!

    Blue and White Bathroom

    Gift Ideas Signature

  • Traditional Nautical Farmhouse Bathroom Renovation

    Traditional Nautical Farmhouse Bathroom Renovation

    I partnered with Hayneedle on this bathroom project, however all opinions are 100% mine.

    My grandparent’s bathroom never changed while I was growing up. It always sported the same blue and black wall tile, the wall-mounted sink from the 50’s and a once-white-yellowed with time laundry hamper.

    The Bathroom Before

    Above that laundry hamper was a picture of a ship on the ocean with big white sails. I looked at that picture when my Grannie gave me a bath as a kid. I looked at that picture every time I dried my hands at the sink. That picture always got my attention no matter how many times I saw it.

    I don’t know whatever happened to that picture, but I’d sure like to see it again.

    That picture, along with the blue and black tile of the old bathroom was part of the inspiration for that same bathroom’s new look.

    A traditional nautical farmhouse bathroom renovation that has a touch of farmhouse style mixed with a traditional and nautical feel.

    Light Fixture / Mirror / Vanity / Faucet / Towels / Towel Ring

    While I wish the bathroom could have stayed forever the way my childhood’s eye still sees it, most of it was beyond repair. The wall tile was falling off and cracking in multiple locations, the medicine cabinet had become a rusty mess, the sink was leaking and couldn’t be fixed and the floor had water damage. Here’s our easy fix for coving the damaged bathroom walls. 

    A traditional nautical farmhouse bathroom renovation that has a touch of farmhouse style mixed with a traditional and nautical feel.

    Shower Curtain / Roman Shade / Towel

    But to channel a little bit of that bathroom from my memory, I set out to give the bathroom a bit of a nautical vibe reminiscent of that ship that once hung on the wall and also a traditional feel that would weather well over time and go with the rest of the house’s style.

    A traditional nautical farmhouse bathroom renovation that has a touch of farmhouse style mixed with a traditional and nautical feel.

    We also added in wood tones with the doors, flooring and crown that can be seen throughout the rest of the house and also reminds me so much of my Pap.

    You can see the full bathroom remodel on Hayneedle’s blog today and see all the products I used in the renovation here. Please hop over there and tell me what you think!


    Pin This Post

    A small farmhouse bathroom remodel that has a touch of farmhouse style mixed with traditional.

    SaveSaveSaveSave

    SaveSave

  • DIY Wood Panel Wainscoting

    DIY Wood Panel Wainscoting

    One of my favorite things in our recent half-bath remodel are the walls – the glorious black and wood stained paneled walls.

    Looking for an wood wall treatment that's easy on your pocketbook? This DIY Wood Panel Wainscoting is something even a beginning DIYer can do!

    Grunt Labor and I came up with this idea when we first started brainstorming ideas for the bathroom and they turned out even better than we thought.

    If you have never done any sort of wainscoting on a wall before, but you really want to, then this wood paneled wainscoting is a great place to start. It’s really simple, but has a big impact – and best of all, it’s easy on your pocketbook!

    DIY Wood Panel Wainscoting

    Affiliate links may be contained in this post.

    Tools & Supplies

    Steps

    Step 1.

    Measure all the walls you’ll be covering with the panels. Mark the measurements on your panels and cut the panels with the circular saw.

    Looking for an wood wall treatment that's easy on your pocketbook? This DIY Wood Panel Wainscoting is something even a beginning DIYer can do!

    If you have any places where there are electrical outlets, pipes or water lines, mark where these are on the boards and use a jigsaw or a drill with a drill bit that makes a large hole to cut out these spots.

    Looking for an wood wall treatment that's easy on your pocketbook? This DIY Wood Panel Wainscoting is something even a beginning DIYer can do!

    Put all the panels in place to make sure they fit.

    Looking for an wood wall treatment that's easy on your pocketbook? This DIY Wood Panel Wainscoting is something even a beginning DIYer can do!

    Step 2. 

    At this point, I opted to go ahead and stain everything before actually attaching it to the wall. I stained the panels, the chair rail and the corner pieces at this time. I painted the baseboard. I gave everything two coats of stain. I did not apply polyurethane at this point though.

    Step 3.

    After the stain is fully dry, you can attach everything to the wall using a nail gun or hammer and finish nails.

    The image below shows the order in which to attach everything. First, attach the luan boards to the wall.

    Looking for an wood wall treatment that's easy on your pocketbook? This DIY Wood Panel Wainscoting is something even a beginning DIYer can do!

    Next, cut the chair rail to the needed length at 45 degree angles on each end and attach to the wall.

    Repeat with the baseboard at the bottom of the panels at the same angle on each end.

    Finally, measure the distance between the bottom of the chair rail and the top of the baseboard in the corners and cut the inside corner pieces to that size, then attach to the wall.

    Step 4. 

    After everything is in place, fill any nail holes with nail filler and touch up the stain as needed. Give all the stained woodwork two coats of polyurethane and then let it fully dry.

    Looking for an wood wall treatment that's easy on your pocketbook? This DIY Wood Panel Wainscoting is something even a beginning DIYer can do!

    See! Pretty easy – even a beginning DIYer can do this!

    You might also want to see…

    Low Budget Half-Bath Remodel | DIY Wood Walls

    The Complete Half-Bath Remodel

    Criss-Cross Accent Wall for $30 or Less via RainonaTinRoof.com #diy

    Criss-Cross Accent Wall

    What a great idea! The carpet brings a whole other element to the space! Easy and cheap to do as well! DIY Green Carpet Covered Wall | Palm Beach Design Style | Palm Springs Design Style | Astroturf Covered Wall

    DIY Carpet Covered Wall

    Looking for an wood wall treatment that's easy on your pocketbook? This DIY Wood Panel Wainscoting is something even a beginning DIYer can do!

    SaveSave

  • The Half-Bath Remodel

    The Half-Bath Remodel

    Hey guys! I missed your (virtual) faces! 😉 I hope you all had a great Christmas and a fantastic start to the New Year! I was sick during most all of the holidays and have had the hardest time kicking whatever I had. After two doctor visits, various over the counter meds, three different prescription cough meds and one antibiotic, I am finally back to normal. I hope you guys fared better the last few weeks!

    I wanted to kick off the new year with something good, so I’ve been saving this half-bath remodel in my back pocket for the last couple of months. If you follow me on Instagram, you may have already seen a sneak preview of this space.

    This bathroom was the one space that completely grossed me out when we first bought the 70’s Landing Pad.

    Low Budget Half-Bath Remodel: The Before

    Ewwwwwww.

    I still shudder a little when I look at that before photo. This bathroom is just so tiny and everything in it was gross. It gave me the heebie jeebies.

    The heebie jeebies have now been banished though.

    The Half-Bath Remodel

    This post contains affiliate links for your shopping convenience. Click here to read my full disclosure policy.

    DIY Half Bath Remodel on a Budget - full of great half bathroom ideas, especially for small bathrooms.

    Pedestal Sink / Faucet / Light Fixture

    *You’ll have to excuse the not-so-fantastic photos. There is zero natural light in this area of the house. 

    Everything needed to come out of this space. The toilet didn’t work, the sink wasn’t great, the laminate flooring was disgusting and 1995 had called to get back their oak cabinet and accessories (which I happily obliged). I really wanted to be able to do this remodel for no more than $1000. Honestly, I would have preferred to be able to do it for $500, but I knew that was unrealistic since we did have to replace the toilet, sink, flooring, etc. Those things took up a huge chunk of the budget. All of the decorative things like the mirror, art, etc. had to be cheap. Luckily for those things, my thrift stores came through for me! We ended up coming in at $906 for the whole shebang and I’m pleased with that, given the complete overhaul the space needed.

    DIY Half Bath Remodel on a Budget - full of great half bathroom ideas, especially for small bathrooms.

    Pedestal Sink / Toilet / Toilet Paper Holder

    I handed over the reigns to Grunt Labor decide for the general style and elements in this bathroom. He picked out the flooring and came up with the idea for the wood wainscoting on the walls and I think both of those things really just make the space. 

    We both wanted a pedestal sink for in here and had to find the tiniest one we could so that it would fit in here. I was very excited when I found this one because it was petite, still had great lines and was less than $150! Same thing with the toilet – we had to find the smallest one we could to fit in the space and this one fit the bill at $100. Because of the space issue, I found a toilet paper holder that could be mounted vertically and then also put it farther up and away from the toilet than usual so people’s knees wouldn’t hit it. We already had the framed art.

    DIY Half Bath Remodel on a Budget - full of great half bathroom ideas, especially for small bathrooms.

    When we packed up some things at my in-laws before their move, I found these old wrestling figures of Grunt’s. They were headed for the trash, but I just couldn’t let them go. #packrat For his birthday, I made this simple display case for them and surprised him with it. I mean, who wouldn’t want to do their business while Sting is cheering them on? 

    DIY Half Bath Remodel on a Budget - full of great half bathroom ideas, especially for small bathrooms.

    Pedestal Sink / Faucet / Light Fixture

    We went with a black nickel faucet to tie in with the black walls. This was the first time I had even looked at a black nickel finish and I have to say that I really love it!

    DIY Half Bath Remodel on a Budget - full of great half bathroom ideas, especially for small bathrooms.

    Pedestal Sink / Faucet / Light Fixture

    The mirror was a $7 thrift store find that I painted. The red animal head decor pieces were also thrift store finds – I got both of them for $1 – and then spray painted them a bright red. I’m not 100% sure that the towel holder is actually a towel holder, but that’s what I’m making it. I found it at an antique store for $3. It’s basically two open rings held together by a piece of leather. I just nailed it to the wall and added a bright red hand towel to tie in with those animal heads.

    DIY Half Bath Remodel on a Budget - full of great half bathroom ideas, especially for small bathrooms.

    Light Fixture 

    The light fixture was a bit of a splurge. Grunt Labor didn’t know exactly what he wanted, so I gathered some ideas and this fixture was one of them. Like I said earlier, this space has zero natural light, so we needed something that would really light up the space. This fixture is usually around $300, but I found an open box of it at Lamps Plus Open Box store and saved a little over $50 on it that way.

    We did all the labor on this space ourselves. Grunt installed the tile, the sink and the wood wainscoting, he and Nicky set the toilet, and I did all the painting and staining, so we saved some money that way too.

    I really love how the bathroom turned out and I think it ties in nicely with the Jungle Room, which is just outside of the bathroom.

    What do you think?

    You might also want to see…

    DIY Wood Paneled Waiscoting | Simple Wall Treatment | Simple Wainscoting

    DIY Wood Panel Wainscoting

    This bathroom remodel is gorgeous. It's a great combination of masculine and feminine design perfectly balanced. Black, Gray, and Brass Master Bathroom Remodel | Black Subway Tile Shower | Dark Gray Walls | Brass Faucets | Art above Bathtub

    Black, Gray, and Brass Master Bathroom Remodel 

    Budget Bathroom Remodel

    Hall Bathroom Remodel

    DIY Half Bath Remodel on a Budget - full of great half bathroom ideas, especially for small bathrooms.

    SaveSave

  • Delta Champagne Bronze Fixtures in the Master Bathroom

    Delta Champagne Bronze Fixtures in the Master Bathroom

    Trying to decide if Delta Champagne Bronze faucets and fixtures are right for your home? For our master bathroom remodel, they were the perfect choice! The timeless gold finish adds a modern touch, but will stand the test of time. 

    I think bathrooms are one of the hardest spaces to remodel. There’s so much you have to consider – tile, what pattern to lay it in, what grout color to use, what color for the vanity, what kind of vanity, what about the countertop, it needs to coordinate well with the tile, lighting, should we go sconces or not, and on and on it goes.

    While I can say, hands-down, that this master bathroom remodel has stressed me out more than any other remodel I’ve ever done, I can also say it’s one of the best remodels I’ve done. Even though nailing down the design was trying, I knew two things from the beginning: I wanted black subway tile and brass toned fixtures and faucets.

    Disclosure: Delta Faucet provided me with product for the bathroom remodel. However, all opinions are mine. This post contains affiliate links for your shopping convenience. Click here to read my full disclosure policy.

    Delta Champagne Bronze Faucets and Fixtures in the Master Bathroom - Rain on a Tin Roof

    It wasn’t hard to pick the faucets out. Besides wanting a brass type finish, I also wanted the faucets to have a modern feel. Delta’s Vero collection in Champagne Bronze was my perfect match for this bathroom.

    Delta Champagne Bronze Shower Head

    Delta Champagne Bronze Shower Head in Walk In Shower - Rain on a Tin Roof

    In the shower we went with the Vero Monitor 17 Series Shower Trim. With the shower so big, we wanted the shower head to come out over the middle of the shower as much as possible. This shower head did just that. It provides plenty of water along with a sleek design that just pops beautifully against that black subway tile.

    Delta Champagne Bronze Vero Shower Trim - Rain on a Tin Roof

    The shower handle also sports the Champagne Bronze finish and is simple to use.

    Delta Trinsic Champagne Bronze Tub Filler

    Delta Trinsic Champagne Bronze Tub Filler in the Master Bathroom - Rain on a Tin Roof

    The Delta Vero Collection doesn’t include a floor mount tub filler, which I needed for the bathtub. However, the Trinsic collection does and also comes in the Champagne Bronze finish, so we opted for that floor mount tub filler.

    Champagne Bronze Tub Filler for Master Bathroom Remodel - Rain on a Tin Roof

    The tub filler has softer edges, which lends a slightly more feminine touch to the bathtub area. It also came with a spray wand which is great for giving the Circus a bath. I think she’s taken a bath in my tub more than her own bathroom since we moved in.

    Delta Champagne Bronze Faucet

    Delta Champagne Bronze Faucet from Vero Collection - Rain on a Tin Roof

    For our vanity sink, we opted for the single handle Vero faucet. This is the first time I have had a single handle faucet like this in a bathroom and I have to say I love it – cleaning the counter with just one handle to work around is much easier than the usual three things you have to go around.

    Vero Faucet in Champagne Bronze on Black Granite - Rain on a Tin Roof

    This champagne bronze bathroom faucet also works well here against the black granite.

    Delta Vero Towel Holder - Rain on a Tin Roof

    I opted to hang our Vero towel ring to the side of the vanity almost level with the top of it. We also went with black towels throughout the bathroom to bring a little more of the black that I love onto the walls.

    Delta Vero Tank Lever in Champagne Bronze - Rain on a Tin Roof

    Last but not least, we topped off the toilet with a coordinating Vero tank lever in Champagne Bronze. Gotta add a little bling wherever I can. 😉

    What do you think of the Midas Champagne Bronze touch in the bathroom? 

    Have you seen the full before and after master bathroom remodel? Don’t miss it!

    Looking for more bathroom remodeling ideas? 

    Here is our budget, but classic, blue and white bathroom remodel.

    And find out how to easily add storage to your bathroom with these DIY Built-In Bathroom shelves.

    blog-signature-summer-15

  • Black, Gray and Brass Master Bathroom Remodel

    Black, Gray and Brass Master Bathroom Remodel

    Oh. My. Goodness. I can’t believe I am finally able to write this post.

    This bathroom seems like it has taken forever to finish. FOR-EV-ER. (Like that kid says in The Sandlot.)

    As if the bathroom project itself wasn’t hard enough to pin down a design for, this space just so happened to also be the victim of our contractor nightmare. And then when we finally did find a good contractor to complete the space, we came up six pieces of trim tile short. And that tile was out of stock for at least two months. And then finally the company made some more tile and I had to figure out how to get those extra six pieces of tile and not have to pay an $80 shipping fee for a $25 dollar order. Lord bless my mother-in-law who went on an adventure to locate the tile warehouse to pick up the tile so we didn’t have to pay that shipping fee. 

    So then I finally go to take photos of the bathroom – only to discover it is the hardest room in the world to take good photographs of. The window in there is my worst enemy.

    So these photos, in my opinion, don’t do the bathroom justice. But it is what it is and I think you’ll be able to see just how far the space has come. Here’s what the bathroom looked like BEFORE:

    The 70's Landing Pad: Before

    There was no shower in this bathroom before – only a jetted tub. The toilet was behind that half-wall you see there. Now, we have a shower, tub, and water closet. There was some major re-configuring that had to be done though to make it happen.

    Here’s the bathroom now…

    Affiliate links may be contained in this post.

    This bathroom remodel is gorgeous. It's a great combination of masculine and feminine design perfectly balanced. Black, Gray, and Brass Master Bathroom Remodel | Dark Gray Walls | Art above Bathtub | Brass Fixtures | Brass Bathtub Faucet | Oval Freestanding Bathtub

    Bathtub / Art Print / Brass Faucet / Wall Color / Tile

    The old doorway was sealed up (which was the angle from where those before pictures were taken), and we put a freestanding bathtub against that wall. A new door was put just to the right of the bathtub. I was a nervous wreck picking out a bathtub. There weren’t any affordable options around where I live that I could actually go and look at, so I had to go with buying it online. I ended up going with the Eden Freestanding Tub from Signature Hardware. They seemed to have the best prices paired with great reviews and that made me feel better about the purchase. Luckily, this tub was the way to go and I have zero complaints about it!  We did brass fixtures and faucets throughout the bathroom, light gray tile in a herringbone pattern for the floors, and dark gray walls (Dark Ash by Behr) paired with black trim (Limousine Leather by Behr).

    This bathroom remodel is gorgeous. It's a great combination of masculine and feminine design perfectly balanced. Black, Gray, and Brass Master Bathroom Remodel | Dark Gray Walls | Art above Bathtub | Brass Fixtures | Brass Bathtub Faucet | Oval Freestanding Bathtub

    Faucet / Art Print

    I had wanted to put a tile surround around the bathtub, but the budget just didn’t allow for it. I may go back and have it done eventually. Once everything was installed and the walls were painted, that wall above the bathtub was very still very bare though. I solved that problem by hanging a piece of art above the bathtub, Wild and Free by Simona Cavallaro from Minted. Not only did it help with the bare wall, but it also brought in a touch of color with the peach in the art and added a feminine touch to an otherwise very masculine bathroom.

    On the opposite end of the bathroom, where the jetted tub used to be, is the shower.

    This bathroom remodel is gorgeous. It's a great combination of masculine and feminine design perfectly balanced. Black, Gray, and Brass Master Bathroom Remodel | Black Subway Tile Shower with Charcoal Grout | Brass Shower Faucet | Brass Stool for Shower | Masculine Bathroom

    Champagne Bronze Shower Faucet / Gold Ceramic Stool

    This picture really doesn’t do this shower justice. Just to the right of the shower is that window which is my worst enemy when it comes to photographing this room. Anyway, the shower is all glossy black subway tile in a brick pattern with charcoal grout. There’s no door – it’s just a walk-right-in kind of deal. The shower is big enough so that no water really gets out even though there isn’t a door. The champagne bronze faucet pops perfectly off the black subway tile. I found the ceramic stool to put in the shower for sitting down if you just need to let the water run over you for a bit and relax and also for shaving my legs. It was a pain to try and shave my legs without something to prop a leg up on. (Too much information? Sorry.)

    This bathroom remodel is gorgeous. It's a great combination of masculine and feminine design perfectly balanced. Black, Gray, and Brass Master Bathroom Remodel | Dark Gray Walls | Black Trim | Stained Vanity | Brass Faucet | Black Granite Counter | Brass Sconces

    The new vanity is in the general location of where the old vanity used to be, it’s just not near as long. Once more, I was super picky about finding a vanity. I really wanted to have a stained one because I love a good black and stained combo, but couldn’t find one already stained I liked that didn’t also cost a fortune. I ended up going to a local “seconds” store and buying an unfinished one and staining it myself. I still have to find some hardware for the doors. Right now, I have a mirror which actually goes with the Circus’ dresser above the vanity, but I’m not 100% sold on it. The stains on the vanity and mirror are two different ones. I don’t know if a solid black framed mirror wouldn’t look better? Thoughts?

    This bathroom remodel is gorgeous. It's a great combination of masculine and feminine design perfectly balanced. Black, Gray, and Brass Master Bathroom Remodel | Dark Gray Walls | Black Trim | Stained Vanity | Brass Faucet | Black Granite Counter | Brass Sconces

    Faucet / Sconce / Wood Soap Dispenser

    The countertop is black granite and the faucet is also champagne bronze like the rest of the fixtures. The sconces are one of my favorite things in the space. They can go horizontally above a mirror or vertically, so I opted to turn them vertically and place one on each side of the mirror.

    Across from the vanity is the water closet.

    This bathroom remodel is gorgeous. It's a great combination of masculine and feminine design perfectly balanced. Black, Gray, and Brass Master Bathroom Remodel | Water Closet | Dark Gray Walls | Black Trim | Brass Fixtures

    Toilet / Toilet Tank Lever / Brass Toilet Paper Tower Storage / Brass Toilet Paper Holder / Lips Art

    We were able to take out an old linen closet that was in the bedroom, but on the other side of the bathroom wall and then carve out a bit more space from the bathroom to make the water closet happen. We got a new toilet and even the champagne bronze lever that matches the rest of the fixtures for it. Eventually, we plan to add some shelves above the toilet, but for now the Lips art works well. The brass toilet paper tower storage and the brass toilet paper holder are part of CB2’s brushed brass bathroom collection and they by far have the best prices on that kind of stuff that I’ve found.

    So what do you think? Did we do alright on this master bathroom remodel?

    Shop the Master Bathroom…

    [show_shopthepost_widget id=”1850891″]

    You’re probably going to want to see this too….

    Master Bathroom Remodel | Delta Trinsic Floor Mount Tub Filler in Champagne Bronze

    Master Bathroom: Champagne Bronze Fixtures and Faucets Details

    JAW DROPPING! The 70's Landing Pad Living Room Tour: Full of vintage finds paired with modern pieces and pops of color. Living Room Design | Black and White Interior Decorating | Vintage Decor | Retro Decor

    70’s Landing Pad Home Tour

    gray-purple-black-white-bathroom-makeover-7

    Hall Bathroom Remodel

    blog-signature-summer-15

    pin-this-post-2

    Black, Gray, and Brass Master Bathroom Remodel | Black Bathroom Ideas | Gray Bathroom Ideas | Bathroom Remodel | Master Bathroom Ideas

    Disclosure: Minted provided me with the art above the bathtub and Delta provided me with the faucets and towel holders. However, all opinions are 100% mine.

    SaveSave

  • Something Will Always Go Wrong: The Hall Bathroom Remodel

    Something Will Always Go Wrong: The Hall Bathroom Remodel

    Affiliate links may be contained in this post.

    As if the whole moving in process and everything breaking didn’t prove to you that the remodel at the 70’s Landing Pad was no piece of cake, then this bathroom remodel will. Wait, the master bathroom remodel will as well. So really, both bathroom remodels at the 70’s Landing Pad prove that during a renovation something will always go wrong. And it will most likely go wrong during the bathroom remodel.

    Because I’m not quite ready to relive the horror of our master bathroom remodel, and also because it’s not quite finished just yet, let’s just talk about the hall bathroom remodel. We started with this:

    The Hall Bathroom Remodel Before

    The Hall Bathroom Remodel Before

    This is where we ended up…

    Such an adorable bathroom for a kid, but also stylish for adults! The 70's Landing Pad Hall Bathroom Remodel | Gray Walls / Black and White Decor / Kid's Bathroom / Purple Bathroom Vanity / Gray Rectangle Floor Tiles

    Mind you, where we ended up is not where we meant to go. It’s not even close to the original design plan I whipped up with the exception of the shower curtain and that’s only because we already had that shower curtain and damn it if I was spending all this money on a renovation I was not going to spend another $20 on a shower curtain when I had a perfectly good one I could use.

    Sidenote: I’m still recovering from what I call the hemorrhaging of money due to the renovation. I’ll try to keep the rants at a minimum. Just know, the LaFevor family is in the full-on tightwad stage right now because Mama said the hemorrhaging must stop before all we have is a pretty house and nothing to eat in it. 

    If you remember from the original plans for this bathroom, we were going to have a black and white porcelain mosaic tile on the floor with black grout, a coral vanity and probably white walls. Well let me tell you one thing, never, let me reiterate the never part, attempt to do a white mosaic floor tile with black grout unless you are a professional or are paying a professional to do it. It will be next to impossible to keep your grout lines even and it will be so very obvious they aren’t even because of the black grout. So if you catch my drift, our tile floor looked awful. Like I saw the finished product and wanted to cry. Ok, maybe I even did.

    The good thing was that we had about $100 bucks in the floor. While I don’t toss around Ben Franklins like candy, in the grand scheme of the renovation, $100 was a small price to pay for a mistake. We talked to Nick’s dad about the floor (he’s like a renovating guru) and he said we could just go over our botched tile job with the new tile, so we picked out new tile and installed it right over the ugly tile.

    Hall Bath Retile

    And that just so happened to raise the floor level evenly with the hall, which kind of made it seem like we were supposed to make that mistake or something. So there’s that.

    It kind of sounds simple, but the actual task of picking out new tile after I had already designed a whole bathroom with one tile was very daunting. I essentially took up the entire tile aisle at the Home Depot one night laying out tiles and moving back and forth between the paint department to get paint chips to test against the tiles. Grunt Labor was so over me and my indecisiveness that night and I was just ready to crawl in a corner and say “I give up!”

    Such an adorable bathroom for a kid, but also stylish for adults! The 70's Landing Pad Hall Bathroom Remodel | Gray Walls / Black and White Decor / Kid's Bathroom / Purple Bathroom Vanity / Gray Rectangle Floor Tiles

    Floor Tile / Vanity Color / Wall Color

    Once I picked the gray floor tiles, we decided a purple vanity would work well with the tile. Since this is the Circus’ bathroom as well, we wanted it to be fun and colorful for her. I gave her three purple color choices and she chose the deep purple, Artistic License by Behr. With the bold purple vanity I knew the walls needed to be relatively neutral, so we opted for a medium toned gray, Iron Mountain by Behr.

    Such an adorable bathroom for a kid, but also stylish for adults! The 70's Landing Pad Hall Bathroom Remodel | Gray Walls / Kid's Bathroom / Purple Bathroom Vanity / Chrome Hardware

    Vanity Color / Beverly Knob / Beverly Pull

    The vanity is the original one that was in the bathroom. I just painted it and replaced the hardware and counter. I stuck with chrome hardware and fixtures throughout this bathroom for a classic, but polished feel. The cabinet knobs and pulls are from the Beverly collection and are part of the Beverly collection. They have a sleek, but touch of vintage feel to me and that goes perfectly with the bathroom and rest of the house. If you need cabinetry or furniture hardware, check D. Lawless first, they truly have a huge selection and the best prices online. They did provide me with the hardware for this cabinet, but honestly I would have bought from them anyway because their prices are so great.

    Such an adorable bathroom for a kid, but also stylish for adults! The 70's Landing Pad Hall Bathroom Remodel | Gray Walls / Black and White Decor / Kid's Bathroom / Purple Bathroom Vanity / Curvy Black Round Mirror / Retro Pendant Lights

    Yellow Hand Towel / Chrome Towel Holder / Soap Pump

    We replaced the vanity counter with white quartz. I was originally just going to get a new pre-fab counter from a big box store, but it was nearly $200 there and for $200 more, I could get quartz. Once more, in the grand scheme of things, that seemed like the right choice since it was prettier and even more durable. It’s also white, so it will stand the test of the Circus’ style changes. Yellow is also becoming one of the Circus’ favorite colors, so we popped in some of that with the hand towel.

    Such an adorable bathroom for a kid, but also stylish for adults! The 70's Landing Pad Hall Bathroom Remodel | Gray Walls / Black and White Decor / Kid's Bathroom / Delta Vero Chrome Faucet

    Faucet

    The faucet is also chrome and has a very modern feel. It’s simple for her to use with the one knob. A note on the faucet though – it does seem to splash more than other faucets. I think this is due to how the stream comes out. I’ve found that if you turn it only halfway on, you still have plenty of water pressure and less splashing.

    Such an adorable bathroom for a kid, but also stylish for adults! The 70's Landing Pad Hall Bathroom Remodel | Gray Walls / Black and White Decor / Kid's Bathroom / Curvy Black Round Mirror / Retro Pendant Lights

    The mirror and pendant light fixtures are two of my favorite pieces in the room. Both came from Lamps Plus. Seriously, how fun are those lights? The lights help to keep that 70’s vibe going in the bathroom that is throughout the rest of the house. One note of warning on these lights though – see how the globes are chrome about 2/3 of the way down? That means that the light is focused downward when you turn them on. That’s good for right around the mirror, but there isn’t as much light elsewhere from them in the bathroom, so make sure you have either a fan with an overhead light or just another overhead light as well. P.S. They are also one of the first light fixtures I’ve ever heard Grunt Labor say “I love those!”

    Such an adorable bathroom for a kid, but also stylish for adults! The 70's Landing Pad Hall Bathroom Remodel | Gray Walls / Black and White Decor / Kid's Bathroom / Curvy Black Round Mirror / Retro Pendant Lights

    I love the mirror because of it’s curvy edges. It adds just the right amount of texture and could easily change with the Circus’ style as she grows. It also comes in a slew of different colors. Lamps Plus did provide us with the pendants and mirror, but as with the hardware, I would have bought them anyway.

    Such an adorable bathroom for a kid, but also stylish for adults! The 70's Landing Pad Hall Bathroom Remodel | Gray Walls / Black and White Decor / Kid's Bathroom / Gray Rectangle Floor Tiles

    Shower Curtain

    Like I said, the shower curtain from our previous hall bath went to this one. It’s black and white and went perfectly in the space.

    Such an adorable bathroom for a kid, but also stylish for adults! The 70's Landing Pad Hall Bathroom Remodel | Gray Walls / Black and White Decor / Kid's Bathroom / Brass Rocking Horse

    Bonkers Art / Brass Rocking Horse

    I added a couple more “kid” touches for the Circus with the Bonkers print which I already had on hand, a brass rocking horse I found for $12 and a couple little Golden Books – because what child doesn’t need a slew of little golden books? 

    Even though the original plan for the bathroom didn’t pan out, I have to say, I think I like this outcome better. Some mistakes are just meant to be. 😉

    What do you think of the bathroom remodel?

    Shop the bathroom…

    [show_shopthepost_widget id=”1866939″]

    Tour more of the 70’s Landing Pad:

    The 70's Landing Pad Home Tour, Part 1

    Living Room, Dining Room & Office

    Bedrooms Tour

    The Circus’ Room and Master Bedroom

    blog-signature-summer-15

    pin-this-post-2

    70's House Bathroom Remodel | Gray Bathroom Remodel | Kid's Bathroom Ideas | DIY Bathroom Renovation | Bathroom Ideas

    Disclosure: Lamps Plus provided me with the lighting and mirror for this remodel and D. Lawless Hardware provided me with the cabinet knobs and pulls. However, all those products are ones I would have purchased anyway and all opinions in this post are 100% mine. 

    SaveSave

  • Eclectic Home Tours: The 70’s Landing Pad Home Tour, Part 1

    Eclectic Home Tours: The 70’s Landing Pad Home Tour, Part 1

    I cannot believe I actually just typed that title, y’all.

    We just moved into the 70’s Landing Pad about three weeks ago. By no stretch is the house completed, but the fact that I can actually share a home tour with y’all that doesn’t include a three inch thick layer of dust on the floors is a huge accomplishment for me. There still aren’t curtains in the living room and dining room and things aren’t exactly the way I want them just yet, but that takes time and it is what it is. #reallife #itaintalwayspretty

    Today, I’ll share the living room, dining room, hall bathroom and my office as part of the Eclectic Home Tours. Next week, I’ll have the Circus’ bedroom, the master bath and the den for you, so stay tuned. I’ve already revealed the Well Traveled Master Bedroom and if you haven’t seen it yet, it’s here.  Don’t miss the rest of the tours in the Eclectic Home Tours either – links are at the end of this post – I promise you won’t be disappointed.

    I’m not going to do much talking in this one. Instead, I’ll come back over the next few weeks and share all the details of each space separately and what all we did to each room along with before shots of the rooms when we bought the house. Also there’s the fact that this post is supposed to be published along with everyone else’s on the tour today at 8am EST and I’m just now writing the post at 7:48 AM EST. #storyofmylife

    Without further ado, I present to you the semi-finished 70’s Landing Pad.

    Affiliate links may be contained in this post.

    Living Room

    JAW DROPPING! The 70's Landing Pad Living Room Tour: Full of vintage finds paired with modern pieces and pops of color. Living Room Design | Black and White Interior Decorating | Vintage Decor | Retro Decor

    Snakeskin Print Rug / Ghost Chairs / Lion Print / Brass Floor Lamp

    *Ignore the hideous chandelier behind the couch – that will be replaced soon!

    JAW DROPPING! The 70's Landing Pad Living Room Tour: Full of vintage finds paired with modern pieces and pops of color. Living Room Design | Black and White Interior Decorating | Vintage Decor | Retro Decor

    Leopard Print Pillow / Palm Print Pillow

    JAW DROPPING! The 70's Landing Pad Living Room Tour: Full of vintage finds paired with modern pieces and pops of color. Living Room Design | Black and White Interior Decorating | Vintage Decor | Retro Decor | Snakeskin Print Rug

    Gold Sphere / Snakeskin Rug / Acrylic Napkin Holder Coasters

    P.S. Notice the leg of my tripod in the photo above. #mybad

    JAW DROPPING! The 70's Landing Pad Living Room Tour: Full of vintage finds paired with modern pieces and pops of color. Living Room Design | Black and White Interior Decorating | Vintage Decor | Retro Decor | Ghost Chairs

    Lion Print / Ghost Chairs

    JAW DROPPING! The 70's Landing Pad Living Room Tour: Full of vintage finds paired with modern pieces and pops of color. Living Room Design | Black and White Interior Decorating | Vintage Decor | Retro Decor

    Brass Unicorn (similar ones)

    JAW DROPPING! The 70's Landing Pad Living Room Tour: Full of vintage finds paired with modern pieces and pops of color. Living Room Design | Black and White Interior Decorating | Vintage Decor | Retro Decor | Ghost Chairs

    Green Velvet Pillow / Ghost Chair / Acrylic Napkin Coasters

    JAW DROPPING! The 70's Landing Pad Living Room Tour: Full of vintage finds paired with modern pieces and pops of color. Living Room Design | Black and White Interior Decorating | Vintage Decor | Retro Decor

    JAW DROPPING! The 70's Landing Pad Living Room Tour: Full of vintage finds paired with modern pieces and pops of color. Living Room Design | Black and White Interior Decorating | Vintage Decor | Retro Decor

    To The Night Art Print

    JAW DROPPING! The 70's Landing Pad Living Room Tour: Full of vintage finds paired with modern pieces and pops of color. Living Room Design | Black and White Interior Decorating | Vintage Decor | Retro Decor

    Rolling Stone 70’s Book / Elvis Book

    JAW DROPPING! The 70's Landing Pad Living Room Tour: Full of vintage finds paired with modern pieces and pops of color. Living Room Design | Black and White Interior Decorating | Vintage Decor | Retro Decor

    Elvis Bust (similar ones)

    JAW DROPPING! The 70's Landing Pad Living Room Tour: Full of vintage finds paired with modern pieces and pops of color. Living Room Design | Black and White Interior Decorating | Vintage Decor | Retro Decor | WTF Pillow

    I know – isn’t that pillow epic?

    Dining Room

    A STUNNING HOME! The 70's Landing Pad Home Tour: The Dining Room | Black and White Decor / Moody Interior Design / Vintage Interior Design / Glass Dining Table / Vintage Brass Chandelier / Vintage Round Cantilever Chairs

    Rug / Glass Dining Table (similar) / Cantilever Chairs (similar) 

    A STUNNING HOME! The 70's Landing Pad Home Tour: The Dining Room | Black and White Decor / Moody Interior Design / Vintage Interior Design / Glass Dining Table / Vintage Brass Chandelier / Vintage Round Cantilever Chairs

    A STUNNING HOME! The 70's Landing Pad Home Tour: The Dining Room | Black and White Decor / Moody Interior Design / Vintage Interior Design / Minted Art Print, Ivy / Glass Dining Table

    Ivy Art Print

    Hall Bathroom

    Such an adorable bathroom for a kid, but also stylish for adults! The 70's Landing Pad Hall Bathroom | Gray Walls / Black and White Decor / Kid's Bathroom / Purple Bathroom Vanity / Gray Rectangle Floor Tiles

    Shower Curtain / Yellow Hand Towel

    Such an adorable bathroom for a kid, but also stylish for adults! The 70's Landing Pad Hall Bathroom | Gray Walls / Black and White Decor / Kid's Bathroom

    Bonkers Art

    Such an adorable bathroom for a kid, but also stylish for adults! The 70's Landing Pad Hall Bathroom | Gray Walls / Black and White Decor / Kid's Bathroom / Purple Bathroom Vanity / Gray Rectangle Floor Tiles

    Faucet / Cabinet Pulls / Cabinet Knobs

    Such an adorable bathroom for a kid, but also stylish for adults! The 70's Landing Pad Hall Bathroom | Gray Walls / Black and White Decor / Kid's Bathroom / Round Black Mirror / Vintage Style Globe Pendant Lights

    My Office

    Great ideas for incorporating family trinkets and treasures into your decor! The 70's Landing Pad Office Tour: Full of family treasures and trinkets, but decorated tastefully and with a touch of flair.

    Curtains

    Great ideas for incorporating family trinkets and treasures into your decor! The 70's Landing Pad Office Tour: Full of family treasures and trinkets, but decorated tastefully and with a touch of flair.

    Great ideas for incorporating family trinkets and treasures into your decor! The 70's Landing Pad Office Tour: Full of family treasures and trinkets, but decorated tastefully and with a touch of flair.

    Gemstones Print / Dream Big Hustle Hard Print

    Great ideas for incorporating family trinkets and treasures into your decor! The 70's Landing Pad Office Tour: Full of family treasures and trinkets, but decorated tastefully and with a touch of flair.

    Great ideas for incorporating family trinkets and treasures into your decor! The 70's Landing Pad Office Tour: Full of family treasures and trinkets, but decorated tastefully and with a touch of flair. | Black and White Painted Closet Doors

    DIY Painted Pattern Closet Doors

    Great ideas for incorporating family trinkets and treasures into your decor! The 70's Landing Pad Office Tour: Full of family treasures and trinkets, but decorated tastefully and with a touch of flair.

    Curtains

    Great ideas for incorporating family trinkets and treasures into your decor! The 70's Landing Pad Office Tour: Full of family treasures and trinkets, but decorated tastefully and with a touch of flair. | Malachite Credenza

    Malachite Credenza / Design Sponge Book / Sarah Richardson Style Book / Modern Mix Book 

    What do you think? How’s the 70’s Landing Pad coming along so far?

    Shop the Home Tour…

    [show_shopthepost_widget id=”1867007″]

    Don’t miss these other stops in the Eclectic Home Tours today…

    SaveSave

  • Fall Home Tour: Cowboys and Elvis

    Fall Home Tour: Cowboys and Elvis

    This fall tour is not at all about pumpkins.

    Sorry if you were ready for pumpkins.

    Instead its about some of my favorite fall-ish things…cowboy hats and boots…red plaid blankets…and Elvis.

    Ok, Elvis isn’t really fall-ish, but its my house and I’ll do what I want to.

    If you want pumpkins and leaves and all that jazz, check back in a few weeks when I’ve actually had time to remember where I stored all that decor from last year.

    #storyofmylife

    A huge thanks to Marty at A Stroll Thru Life for organizing this Fall Tour of Homes. She is so on top of her game – don’t miss her tour. If you are new here from A Thoughtful Place or another blog on the tour, welcome! Fair warning that I’m not near as talented as all those other ladies and also don’t speak as eloquently as they do. I’m also just weird. And random. You’ve been warned.

    So, let me tell you something.

    I love country music. 

    You may have already figured that out.

    But in the fall, I love it a little bit more. 

    Which I didn’t even know was possible.

    I don’t even know why I love it a little more in the fall besides the fact that I drink a bit more Jack in the fall and what pairs better with Jack than country music?

    Nothing I tell you. Nothing.

    Fall Home Tour / The Entryway / Kelly Green, Black and White accents / Cowboy Accents

    So in the fall, instead of leaving my grandfather’s cowboy hat tucked safely away with the vintage cowboy blanket, I pull them both out.

    And decorate with them.

    Because what’s better than a kelly green pillow paired with a modern black and white one and cowboy paraphernalia all against a confetti wall?

    Random? Yes. But it makes me smile.  

    Fall Home Tour / The Living Room / Cowgirl DIY Lampshade

    And I might play a little bit of musical lamps.

    And put the cowgirl lampshade in the living room.

    Just because.

    Fall Home Tour / The Living Room / Kelly Green Accents

    And mix in a little red and gray plaid with another green velvet pillow.

    Because you can’t have enough comfy green velvet pillows.

    And to top it all off…

    Fall Home Tour / The Stairwell / Easy Abstract Circles Accent Wall / Elvis Bust / Lips Watercolor Art

    We’ll put Elvis against a random abstract circle wall beside red watercolor lips.

    Because every home needs a little Elvis in their lives – whether its fall-ish or not.

    Am I right or am I right?

    P.S. That abstract circle wall is the stairwell! I finally figured out what to do with it – it only took me five months – more on it soon!

    What are your favorite fall-ish decorating pieces? Besides pumpkins!

    The next tour stop is Style Your Senses – I promise Mallory won’t let you down!

  • $50 Bathroom Makeover

    $50 Bathroom Makeover

    I’ve said it before and I’ll say it again.

    Sometimes the best room makeovers are the ones that are unplanned. 

    Totally random, flying by the seat of your pants, out of the blue unplanned.

    It happened in my living room.

    It started with a black and white gallery wall, which led to a new rug, which led to new curtains.

    And suddenly, I finally had a living room I loved.

    And now its happened with the bathroom.

    But the best part is that this random, little out of the blue makeover cost me just $50.

    All that was needed was a little paint, a shower curtain, and some rearranging.

    So. As my former students would say, “What had happened was….”

    $50 Bathroom Makeover - A little paint and a new shower curtain can go a long way!

    This green cane inspired accent wall.

    $50 Bathroom Makeover - A little paint and a new shower curtain can go a long way!

    And that prompted me to paint the pink ceiling white because it was clashing too much with the green.

    And then I switched out the fabric under the sink that hides the pipes.

    And then that black and white goodness led to this black and white shower curtain from Target.

    $50 Bathroom Makeover - A little paint and a new shower curtain can go a long way!

    And I nixed the shower cornice to keep it all light, bright and airy.

    $50 Bathroom Makeover - A little paint and a new shower curtain can go a long way!

    P.S. – That shower curtain is on sale for less than $20 at Target® right now! 

    And then I did a bit of editing and rearranging on the built-in shelves above the throne.

    $50 Bathroom Makeover - A little paint and a new shower curtain can go a long way!

    I added my little neon man…

    $50 Bathroom Makeover - A little paint and a new shower curtain can go a long way!

    I mean really, isn’t he just darling?

    And finally, I topped off my toilet paper supply with Quilted Northern® from Target® – stylish, but forgettable toilet paper.

    Because who wants to remember their toilet paper experiences?

    P.S. You can get a coupon for $3 off Quilted Northern® at Target® here. Go on. You know you want to run and get that shower curtain too.

    pin-this-post-2

    $50 Bathroom Makeover - A little paint and a new shower curtain can go a long way!

    Do you have any tips for a budget friendly bathroom makeover? 

    The makers of Quilted Northern® use our 100 years of experience to craft a toilet paper that works so well you can forget your bathroom experience. Because the best bathroom trips are the ones you don’t remember.

    This is a sponsored conversation written by me on behalf of Quilted Northern®. The opinions and text are all mine.

  • Cane Inspired Accent Wall for $25

    Cane Inspired Accent Wall for $25

    This post is sponsored by FrogTape, however all opinions are 100% mine. This post contains affiliate links. 

    Sometimes I try to make things more complicated than they really are.

    Not on purpose of course.

    I just don’t think sometimes. Its like my mind sometimes turns off its “common sense” mode.

    That’s also when I end up saying things I shouldn’t to people. 

    Whoops. 

    That common sense mode of my brain shut down when I started to do this accent wall.

    You see I love caned pieces. Caned chairs, caned tables, caned light fixtures. I’m crazy over the pattern.

    And I have a pillow with a caned pattern on it.

    And I was determined to get that pattern on my wall. I knew I could. It was just straight lines strategically placed.

    But I was overthinking it.

    And it took Grunt Labor coming up to me, turning the pillow diagonally and saying, “Its just squares, Jenna,” for me to figure it out.

    He was right.

    But I didn’t say that because I’m not too keen on how saying he’s right tastes.

    Like vinegar, I tell ya.

    And once this revelation was made, I figured out how to make my own cane inspired accent wall.

    DIY Cane Inspired Accent Wall

    DIY Cane Inspired Accent Wall done for around $25. Gorgeous kelly green wall treatment in this bathroom.

    It might look complex, but it really wasn’t.

    After I used common sense and all.

    Here’s what you’ll need:

    Step 1:

    My wall was already painted white which was what I wanted to use for one of my colors. However, if you want to use a different color than what your wall is already painted, you will need to paint the entire wall first. Keep in mind this will be the color that will be the pattern (lines) on your wall in the end.

    Step 2: 

    Find the center of your wall at the very top and mark it. Place one corner of your 12 x 12 piece of cardboard or cardstock (I used cardstock) on the mark. Trace the piece of cardstock on all four edges. Next, move the cardstock to either side of the diamond you just traced, match up the edges and trace again. Continue doing this until you have worked your way all the way across and down the wall.

    How to make a cane inspired accent wall.

    Step 3:

    Using the smaller width FrogTape, run the tape all along the inside edges of each square you traced. Your wall should look like this when you are finished:

    How to make a cane inspired accent wall with paint and FrogTape.

    Step 4:

    At this point, I was going to do two horizontal lines across the top and bottom of each square, just like a caned pattern. However, as I started to run the tape across the wall, I realized that I had some very uneven and shoddy drywall work at the top of the wall and it was throwing off the pattern. So, I opted to forgo those lines.

    I still wanted a little extra pop though, so I “framed” in the pattern along the edges. Do this by coming 2 1/2″ in from the wall edges on all sides.

    How to make a cane inspired accent wall.

    Run tick marks along the edges at the correct measurement and then run more of the smaller width FrogTape along the tick marks. This is what it should look like when you are finished:

    How to make a cane inspired accent wall with paint and FrogTape.

    Step 5:

    Use the larger width FrogTape along the edges of any walls that butt up to your accent wall, ceiling, and any other fixtures.

    How to make a cane inspired accent wall with paint and FrogTape.

    Step 6:

    To ensure crisp, clean paint lines, run your fingernail or a credit card along the edges of all the tape that you have applied to the wall.

    Step 7:

    Roll and brush on a paint color of your choice. It took about three coats of this bold green hue for me.

    Step 8: 

    Remove the FrogTape as soon as you have applied the final coat of paint while it is still wet.

    DIY Cane Inspired Accent Wall done for around $25. Gorgeous kelly green wall treatment in this bathroom.

    And commence the swooning.

    DIY Cane Inspired Accent Wall done for around $25. Gorgeous kelly green wall treatment in this bathroom.

    If you only need a quart of paint, you’ll end up having about $25 or less in the wall. Not too shabby, eh?

    Are you an accent wall fiend?

    You might also like these then...

    Super easy to make and fun! Easy Confetti Accent Wall

    9 Accent Walls for $30 or Less via RainonaTinRoof.com #homedecor

    pin-this-post-2

    DIY Cane Pattern Accent Wall | Patterned Accent Wall DIY | Accent Wall Ideas | Accent Wall Bathroom | Feature Wall Ideas

    I did end up painting the pink ceiling in the bathroom white. It was just clashing way too much with the green.

    You know you don't wanna miss any of this crazy.

    Sign up to get my posts delivered to your inbox here.

    Stalk Me Here:

    Bloglovin / Pinterest / Facebook / Twitter / Google+ / Instagram

    blog-signature-summer-15

    frogtape-disclosure

    SaveSave

  • 13 Stunning Home Ideas I Found in One Place

    13 Stunning Home Ideas I Found in One Place

    Last Wednesday they let me into the Nashville Symphony Show House.

    Nashville Symphony House

    Builder, Castle Homes; Architect, Wade Weissman

    I know. Its gorgeous. Go ahead and take a minute to close your gaping mouth.

    I’m quite certain the powers that be must have never read my blog before to know that this gal is borderline redneck and hadn’t set foot in such a fancy house before – otherwise they may have thought twice before sending my invitation.

    I walked out of that house scolding myself for using inappropriate language in front of people who never met me before, but brimming over with DIY and decorating ideas.

    I quickly got over the inappropriate language scolding. I feel overall they became better people for having met me.

    The ideas though – my head is still spinning. Here’s 14 stunning home ideas that I took away from the Nashville Symphony Show House – and really, there were waaaay more than 14, but I felt I should cut it off somewhere instead of keeping you stuck here reading all day.

    1. Create an entryway nook to your bedroom.

    Have an entryway to your bedroom.

    Design by Julie Couch Interiors

    Obviously, we won’t all have the space for this, but I fell in love with this little entry of sorts that was carved out of the master bedroom.

    2. Always, always, always go for lots of windows in the bathroom.

    Opt for lots of windows in the bathroom.

    Design by Julie Couch Interiors

    Now, if you live in a neighborhood where you can open a window and toss a muffin to your next door neighbor, you’ll also want to invest in some window shades, as your neighbor doesn’t want to see your rear end.

    3. And hang your mirrors from the ceiling.

    Hang your mirrors from the ceiling instead of the wall.

    Design by Julie Couch Interiors

    I had never ever ever seen this idea before, but I thought it was genius – hang your mirrors from the ceiling!

    4. Go for a window in the shower too.

    Add a window in the shower.

    Design by Julie Couch Interiors

    Its much easier to wake up with a pretty view as you shower.

    5. Add “drooping” greenery to your floral arrangements. 

    Leafy Greens and Pink Flowers

    Design by Julie Couch Interiors

    I don’t know about you, but it seems I’m always wanting the leaves on my flowers to stand up right alongside the actual flower. I was smitten with this arrangement though that has “drooping” greenery.

    6. Clad a bookshelf – front, back, and sides – in barn wood.

    Cover a bookshelf in barn wood or pallet wood.

    Design by Julie Couch Interiors

    These bookshelves were built-ins, but I think you could easily re-create the look with regular bookshelves by just gluing on barn wood or pallet wood.

    7. Turn a vintage dough bowl into a succulent garden. 

    Plant a succulent garden in a dough bowl.

    Design by Castle Homes

    I’m not 100% sure that is a vintage dough bowl, in fact I don’t think it is, but it very much looks like one. Just make sure your bowl is lined very well to prevent water damage.

    8. Feathers are always right. 

    Feather Pillow

    Design by Rozanne Jackson Interiors for The Iron Gate

    There’s a good chance I left drool on this pillow. I’m already plotting out my own DIY version.

    9. Opt for the really tall lamp.

    Opt for the really tall lamp.

    Design by Rozanne Jackson Interiors for The Iron Gate

    I love the sophisticated lamp paired with the rustic-industrial nightstand.

    10. Always have at least one old piece in every room.
    Have something old in every room, like an antique mirror.

    Design by Rozanne Jackson Interiors for The Iron Gate

    Like this mirror. Just gorgeous.

    11. Use a vintage showcase as bedroom storage. 

    Use a vintage showcase in a bedroom for storage.

    Design by Rozanne Jackson Interiors for The Iron Gate

    This could very well be my favorite idea from the house. In one bedroom, there was an old showcase from a store that held records and such. I am crazy over this idea. 

    12. Go for the chimney that touches the sky.

    Go for the chimney that touches the sky.

    Design by Mark Simmons Interiors

    One day, when I save enough money from buying cheap beer, I’ll have a chimney that touches the sky.

    13. Remember the 3 T’s when it comes to container gardens. 

    Carmen Johnston Container Gardening

    Container Gardens by Carmen Johnston Gardens

    Something tall, something thick, and something trailing – all planted in a triangle.

    See what I mean? Stellar home ideas.

    Looking for more great home decor ideas…

    20+ Living Room Ideas – gorgeous, livable spaces!

    How to Coordinate Paint Colors in Your House – one little tip that will save your sanity!

    14 Real Life Bedroom Ideas – ideas that are both functional and pretty.

    You know you don’t wanna miss any of this crazy.

    Sign up to get my posts delivered to your inbox here.

    Stalk Me Here:

    Pinterest / Facebook / Twitter / Instagram

    pin-this-post

    Drop. Dead. Gorgeous! Stunning Home Ideas!

  • 9+ Must Read Cleaning Tips

    9+ Must Read Cleaning Tips

    If we’re being honest, and since I’m always honest with you, my house is not clean right now.

    Its not clean at all. 

    May is a whirlwind of events for us and cleaning is not one of those events that tends to take place during the month.

    Until there is a mad dash next Friday to clean right before the kid’s birthday party so that our guests don’t turn and run screaming out the door…

    I can hear the circus talking to her therapist in ten years, “Everyone showed up for my birthday party that year, but then made a beeline for the door when they saw dust an inch thick and dried crusty milk on the floor. They took all their presents with them. I’ve never been the same since.”

     Therapy is going to cost me a fortune. 

    So next week, to hopefully cut down on therapy costs, these are my best cleaning tips that I will actually do…well at least everywhere that guests will be… 😉

    Must Read Cleaning Tips and Cleaning Ideas for the Home | Cleaning Hacks | DIY Cleaning Hacks | Bathroom Cleaning Tips | Cleaning Tricks

    Disclosure: This post was a collaboration with HomeRight. However, all opinions and dirty, dirty houses are 100% mine. This post contains affiliate links for your shopping convenience. Click here to read my full disclosure policy.

    Indoor and Outdoor Cleaning Tips

    First off, let’s de-clutter.

    This is an awesome printable - perfect for decluttering your home! 9 MUST READ Cleaning Tips!

    Shockingly, I did this last night when I found out the in-laws were coming down for the night. Lord knows, I can’t let them sleep on a bed where they may or may not end up being poked by plastic horses and measuring tapes – both of which were all over the guest bed last night. This de-cluttering printable covers every room, closet, nook and cranny.

    I should probably work on the bathrooms next…

    What??? I have to try this method for cleaning my shower! 9 MUST READ Cleaning Tips!

    I finally did take out the overflowing trash can in my bathroom last night. Once more, because my in-laws are coming down. Thanks for helping me get my butt in gear, Mama and Dad. I will be doing some deep cleaning in the showers though with my HomeRight Steam Machine. Honestly, never in a million years did I think I would love something that cleans so much. I guess age does that to you. Or maybe its the fact that it cuts down on so much time that I can have that cheap beer sooner? 😉

    Of course, the kitchen is gross too…and has a variety of craft items all over the counters that are supposed to be making some party decorations for the kid’s party. Still working on that one.

    I HAVE to get one of these - its the easiest way to clean your kitchen by far! 9 MUST READ Cleaning Tips!

    I also use my steam machine to clean my entire kitchen. Yep. The whole room. Counters, backsplash, sink, stove, refrigerator, all the stainless steel. You name it. I clean it with my steamer. See why I like it so much?

    My favorite thing to do, ok wait its not my favorite because it involves dog accidents, but maybe the best thing about my steam machine plus, is that it can easily clean up pet stains and odors.

    Wish I would have known this a long time ago!! How to clean pet stains and get the odor out of your carpet! 9 MUST READ Cleaning Tips!

    I am not a dog person. Go ahead. Throw the tomatoes at me. Sorry, y’all, they just aren’t my cup of tea. The thought of cuddling up with a furry creature is just gross to me. Alas, Grunt Labor and the circus adore the dogs, therefore I tolerate them. Ok, they are just a tad bit cute. Just a tad though. Their accidents are not cute. At all. Here’s how I clean up their stains and odors easily – yep, even on carpets.

    I steam clean just about every floor in my house actually.

    Use a steam mop to clean just about ANYTHING! 9 MUST READ Cleaning Tips!

    And trust me, never in a million years did I think I would be cleaning chemical-free. I grew up in the country where old ladies load their Cadillacs down with ammonia every spring for cleaning. I had fully intended on being one of those old ladies. The Cadillac will definitely happen – the ammonia, not so much.

    That being said, I do still use store-bought cleaners for some things.

    5 Ways to Use a Mr. Clean Magic Eraser you didn't know about | Cleaning Tips

    I am also a fan of using my magic eraser on a lot of things around the house.

    Instead of spray painting your hardware, here's a way to clean it! Isn't that crazy?! 9 MUST READ Cleaning Tips!

    One of those things being to clean my hardware. Its much cheaper than replacing it.

    How to waterproof fabric and protect upholstery against stains! Great to know! 9 MUST READ Cleaning Tips!

    I also use a spray to protect my upholstery from stains and to waterproof it.

    See, I’m not 100% hippie.

    I literally just laughed out loud at the thought of even being considered a hippie. 

    And since the birthday entourage will obviously see the outside of my house, I’d better make that look a little more presentable too..

    Easy way to clean up your concrete landscape blocks. 9 MUST READ Cleaning Tips!

    There will be some cleaning of concrete landscaping blocks.

    And the sidewalk could use a quick little cleaning refresh…

    Isn't that difference crazy?! How to Clean A Sidewalk. 9 MUST READ Cleaning Tips!

    Yea, I just cringed too at that before picture. I still have no idea what was growing on the sidewalk before I cleaned it.

    How to remove rust. You WILL NOT believe this!

    If you’ve got rust on anything, I’ve got a killer way to remove it.

    How to Clean Copper and Restore It using water, one product, and a little elbow grease will make your copper look new in no time. A MUST TRY! Great cleaning tip!

    I thought this little cookie jar was way past it’s prime, until I figured out how to clean copper!

    I love vintage brass, but I despise cleaning it up! Here’s the easiest way I’ve found to clean it.

    What are your best cleaning tips? 

    Do any of you have a magic genie in a bottle that can just do all the cleaning, the party decorations and make all the food for me before next Saturday?

    Anyone? Anyone?

    Looking for more useful cleaning and organization tips?

    Be sure to see these five simple storage and organization ideas that are truly life-changing!

    You know you don’t wanna miss any of this crazy.

    Sign up to get my posts delivered to your inbox here.

    Stalk Me Here:

    Pinterest / Facebook / Twitter / Instagram

    pin-this-post

    Must Read Cleaning Tips and Cleaning Ideas for the Home | Cleaning Hacks | DIY Cleaning Hacks | Bathroom Cleaning Tips | Cleaning Tricks

    SaveSave

  • Clean that Disgustingly Gross Shower with One Single Tool

    Clean that Disgustingly Gross Shower with One Single Tool

    Apparently, I have no shame.

    None. At. All.

    Because first I showed you just how dusty, dirty, and messy my house was and now I’m showing you just how disgusting Grunt Labor’s shower is was.

    A really great idea for cleaning a shower and you only need one thing! Shower Cleaner DIY | Shower Cleaning Tips

    Disclosure: This post was sponsored by HomeRight. However, all opinions and disgustingly gross showers are 100% mine. This post contains affiliate links for your shopping convenience. Click here to read my full disclosure policy.

    To be honest, we had both lost all hope for this shower. Since we moved into the beloved foreclosure, its always been in pretty rough shape. I have scrubbed it with every cleaner and scrub brush known to man and it would remove the surface gunk, but not much else. I thought it was just permanently gross.

    I was wrong.  

    It took one single tool to clean this disgusting shower up.

    GROSS, but very interesting! Clean that Disgustingly Gross Shower with One Single Tool via RainonaTinRoof.com

    The HomeRight Steam Machine.

    No chemical cleaners, nothing else, just good old fashioned steam.

    Just so you know how gross this shower was:

    GROSS, but very interesting! Clean that Disgustingly Gross Shower with One Single Tool via RainonaTinRoof.com

    GROSS, but now I want one! Clean that Disgustingly Gross Shower with One Single Tool via RainonaTinRoof.com

    Told ya.

    And its mainly just on the right side of the shower – the other side hasn’t ever been as bad. Weird.

    I started by filling the steam machine up with water.

    GROSS, but very interesting! Clean that Disgustingly Gross Shower with One Single Tool via RainonaTinRoof.com

    I let it heat up for a little while.

    And then I went to scrubbing.

    A really great idea for cleaning a shower and you only need one thing! Shower Cleaner DIY | Shower Cleaning Tips

    I was pretty surprised at how easily it just cleaned up the shower pan. The gunk kind of just melted off.

    There are two brushes, both came with the steam machine, that I used on the shower. I started with the small regular nylon brush (two nylon brushes come with it).

    A really great idea for cleaning a shower and you only need one thing! Shower Cleaner DIY | Shower Cleaning Tips

    The nylon brush took off most of the gunk. When I got to some tougher spots, I put on the brass brush.

    A really great idea for cleaning a shower and you only need one thing! Shower Cleaner DIY | Shower Cleaning Tips

    As you clean your shower, be sure to stop every once and a while and rinse away all the grossness that is collecting – you don’t want it to dry back onto the shower.

    A really great idea for cleaning a shower and you only need one thing! Shower Cleaner DIY | Shower Cleaning Tips

    Yep, that’s the stuff you want to rinse away. Ewwwww.

    I wasn’t really keeping track of the time, but I’m thinking it took me 20 – 30 minutes to really get the shower pan cleaned up good with the steam machine.

    Here’s the after of that same area:

    A really great idea for cleaning a shower and you only need one thing! Shower Cleaner DIY | Shower Cleaning Tips

    And a side by side so your mouth can really hit the floor:

    A really great idea for cleaning a shower and you only need one thing! Shower Cleaner DIY | Shower Cleaning Tips

    I did not use the steam cleaner on the tile surround in this shower for one reason – its painted.

    When we moved into the beloved foreclosure, we painted both my shower tile and Grunt Labor’s. I was a little worried the steam may make some of the paint peel off in his shower, considering some of it already has. However, I have used my HomeRight Steam Mop on the marble tile in my bathroom floor and it has been awesome for cleaning grout.

    There was one spot in the shower pan that seems to be permanently stained.

    A really great idea for cleaning a shower and you only need one thing! Shower Cleaner DIY | Shower Cleaning Tips

    See right there in the bottom right corner? That’s the only place I couldn’t really get it clean. I’m totally cool with that though considering how bad it was before. Grunt Labor and I thought we would be replacing his entire shower pan and tile surround sometime soon. Now, we are thinking that we may be able to just replace his tile surround since the shower pan wasn’t as bad as we thought! Save that money!

    Have you used a steam cleaner in your bathroom before? Any tips to share?

    Need more cleaning tips? 

    9+ Must Read Cleaning Tips – for all around your house!

    5 Ways to Use a Mr. Clean Magic Eraser You Didn’t Know About – these are little gems for cleaning so many things!

    How to Get Pet Stains & Odors Out of Your Carpet Without Chemicals – easy!

    How I Clean My Entire Kitchen with one single thing – makes cleaning so much easier!

    You know you don’t wanna miss any of this crazy.

    Sign up to get my posts delivered to your inbox here.

    Stalk Me Here:

    Pinterest / Facebook / Twitter / Instagram

    pin-this-post

    A really great idea for cleaning a shower and you only need one thing! Shower Cleaner DIY | Shower Cleaning Tips

    SaveSave

  • Free Banana Leaves Watercolor Printables

    Free Banana Leaves Watercolor Printables

    When the bathroom makeover turned into a bathroom makeover – ya know – when I removed the popcorn ceiling and that turned into a pink ceiling and that turned into needing new wall paint and then it just all turned into a full on makeover?

    Well anyway, what I really really really wanted in the space was some of the Beverly Hills Hotel banana leaf / palm wallpaper.

    I didn’t want it over all the walls – just like one.

    But even that was outta my league – too pricey.

    I really wanted to bring some of that green into my bathroom though. Let’s be honest, I love green. We all know this. There are hints of it in the living room and kitchen, and I wanted to keep that going in the bathroom.

    So I searched. I searched high and low, far and wide, for some type of banana leaf / palm leaf / whatever art print.

    And everything was out of my price range.

    ‘Cause let’s face it – I’m cheap.

    And then one day I was sitting on the couch and thought to myself, “Self, you should just download that Waterlogue app that was all the rage a few months back and make your own art.”

    Self responded, “YES.”

    So self bought the app – she thinks it was $3 or so.

    Then self went outside and took photos of her own banana tree leaves that she scored at the Haven Conference.

    And then she ran them through the app.

    And she had beautiful banana leaves watercolors that she used in her bathroom and is sharing with you. 

    These would be GORGEOUS framed - and so much cheaper than other art! They are FREE! Instant Art: Banana Leaves Watercolor Printables via RainonaTinRoof.comThere are four here for you to enjoy and use however you so desire.

    (Find out how to download the art at the end of the post.)

    These would be GORGEOUS framed - and so much cheaper than other art! They are FREE! Instant Art: Banana Leaves Watercolor Printables via RainonaTinRoof.com

    I ended up only using one. I framed it and hung it above the towel rack in my bathroom. There simply wasn’t room for more in the space. Don’t worry though – I’m sure they will show up in other rooms soon.

    These would be GORGEOUS framed - and so much cheaper than other art! They are FREE! Instant Art: Banana Leaves Watercolor Printables via RainonaTinRoof.comI suggest printing them out in a matte finish – it will help keep that watercolor look.

    These would be GORGEOUS framed - and so much cheaper than other art! They are FREE! Instant Art: Banana Leaves Watercolor Printables via RainonaTinRoof.com

    You can totally just print them out on your printer, but I opted to print them out via a photo service. I think I used Snapfish. These would be GORGEOUS framed - and so much cheaper than other art! They are FREE! Instant Art: Banana Leaves Watercolor Printables via RainonaTinRoof.com

    Free Banana Leaves Art Printables

    Want more (FREE!) printable art?

    Free Printable Horse Art – beautiful color, black and white and watercolor horse art to adorn your walls.

    This Kitchen is for Dancing Printable – perfect for those of us with kitchens where more dancing is done than cooking.

    Here’s Your One Chance Fancy Printable – don’t let me down by not taking advantage of free Reba McEntire inspired art.

    You know you don’t wanna miss any of this crazy.

    Sign up to get my posts delivered to your inbox here.

    Stalk Me Here:

    Pinterest / Facebook / Twitter / Instagram

    pin-this-post

    These would be GORGEOUS framed - and so much cheaper than other art! They are FREE! Instant Art: Banana Leaves Watercolor Printables via RainonaTinRoof.com

  • DIY Shower Cornice with Black & White Shower Curtains A.K.A. That Time I thought I Could Carve Something

    DIY Shower Cornice with Black & White Shower Curtains A.K.A. That Time I thought I Could Carve Something

    As the Preppy meets Hollywood Regency Bathroom Makeover (that wasn’t supposed to happen) progressed, I had a brilliant idea.

    I would make a shower cornice. I had always wanted one, so now was the perfect time.

    This would not be just any cornice though.

    No, no, no.

    It would be a Greek Key Carved Shower Cornice.

    I spent hours actually using a ruler and level (instead of eyeballing it) drawing the perfect greek key pattern on my new cornice.

    And then I went to carve it out.

    Who the hell was I kidding?

    After about 15 minutes of trying to follow those lines, I realized it was going to look already looked like sh*t.

    Instead of tossing it into the trash though, I flipped the board over and whipped up a little Trash to Treasure Shower Cornice.

    DIY Shower Cornice with Black & White Shower Curtains via RainonaTinRoof.com #diy

    The great thing about this project is that you don’t have to screw up and waste countless hours like I did.

    Or maybe you are a master carver and could totally carve a greek key into a piece of wood like nobody’s business. If so, please help a sister out.

    DIY Shower Cornice & Curtains

    This post contains affiliate links for your shopping convenience. Click here to read my full disclosure policy.

    Materials and Tools Needed for Cornice:

    • 1″ x 10″ x 6′ Pine Board
    • Saw (or have the folks at the hardware store cut your board for you)
    • Paint color of your choice, preferably a Semi-Gloss or Gloss
    • Paint Brush / Roller
    • Gold Duck Tape
    • 4  Corner Braces & Screws
    • Ruler
    • Pencil
    • Scissors
    • Drill
    • X-Acto Knife

    Steps

    Step 1

    Cut the board down to the width of your shower. Mine was about 59″. Test it out to make sure it fits above your shower. Cut more as needed. I cut it with our miter saw, but a circular saw will do fine. You can even have the fellas at the hardware store cut it for you! Paint both sides of the board a color of your choice. I suggest a semi-gloss or gloss. It holds up better in a bathroom and will help to keep moisture out of the board better.

    Step 2

    After the paint is dry, take your ruler and make small tick marks 1/2″ all around the board.

    DIY Shower Cornice with Black & White Shower Curtains via RainonaTinRoof.com #diy

    Step 3

    Run the outside edge of your duck tape horizontally and then vertically along your tick marks.

    DIY Shower Cornice with Black & White Shower Curtains via RainonaTinRoof.com #diy

    Step 4

    Take an X-Acto knife and ruler and trim up where the edges of the duck tape meet.

    DIY Shower Cornice with Black & White Shower Curtains via RainonaTinRoof.com #diy

    Step 5

    How freakin’ easy was that? Your cornice is done and now you just need to hang it. You guys know I’m the queen of easy projects, thus once more, why the heck did I think I could carve a cornice? Seriously?

    Ok, sorry for digressing….take your four corner braces and attach one in each corner of your board. After attaching them to your board, recruit help.

    No seriously, I mean it. This part is much easier with someone holding the board and someone else drilling.

    Place your cornice where you want it to be above your shower and screw it into the wall through the other side of the brackets.

    DIY Shower Cornice with Black & White Shower Curtains via RainonaTinRoof.com #diy

    Most likely, you are going to have a stud in the area where you attach the braces to the wall. However, if you don’t, I would recommend using an anchor when screwing them to the wall. The photo above also shows how I hid the shower curtain rods behind the cornice. I used a cheap tension rod and curtain rod rings to hang the black and white shower curtains. I kept my old shower curtain rod and shower curtain and just slid it to one side of the shower and hid it behind the black and white curtains.

    If you want to make the shower curtains as well, they are super easy. You just need four yards of fabric (or more if you want to make them longer). I used this fabric. And a side note on the fabric: You may want to go with an outdoor fabric for this. It will hold up better in a bathroom. However, I went with a regular upholstery fabric and then waterproofed it and stain repelled it myself. You can totally do that too and find out how to here.

    Lay out your fabric, cut it to the length you want it. I made mine 78″ long.

    DIY Shower Cornice with Black & White Shower Curtains via RainonaTinRoof.com #diy

    Fold your fabric in half and cut it down the middle.

    DIY Shower Cornice with Black & White Shower Curtains via RainonaTinRoof.com #diy

    When my curtains are closed, there is about an inch on each side where you can still see through to the shower. That doesn’t bother me, because they aren’t meant to be closed. My old shower curtain still functions as the actual shower curtain we use when showering. If you do want to close these, you will need to buy more fabric.

    After cutting your panels out, pin all your edges down and then sew.

    That’s my easy, breezy, (and ok, a little lazy) curtain hack. I’ve done it for every single curtain I’ve ever sewed. I just hang them with clip-on curtain rings.

    DIY Shower Cornice with Black & White Shower Curtains via RainonaTinRoof.com #diy

    Nothing more classic that a good black and white stripe.

    And a salvaged DIY distaster.

    DIY Shower Cornice with Black & White Shower Curtains via RainonaTinRoof.com #diy

    Have you made your own cornice before?

    I’m sure you did and I’m sure yours was amazing from the beginning….unlike mine.

    See more of the Preppy meets Hollywood Regency Bathroom Makeover here!

    Want another great duck tape window treatment hack? Then see these duck tape trimmed curtains and don’t miss this post with 20+ Duck Tape Crafts and Projects!

    There’s more Trash to Treasure goodness to see!

    aka design trash to treasure sept 2014

    AKA Design: Grapevine & Berry Wreath

    Update Old Artwork

    So Much Better With Age: Update Old Artwork

    Make a Pillow from a Reusable Shopping Bag

    Thistlewood Farms: Make a Pillow from a Reusable Shopping Bag

    You know you don’t wanna miss any of this crazy.

    Sign up to get my posts delivered to your inbox here. 

    Stalk Me Here:

    Pinterest / Facebook / Twitter / Instagram

    SaveSave